Welcome to Moda Fabrics!
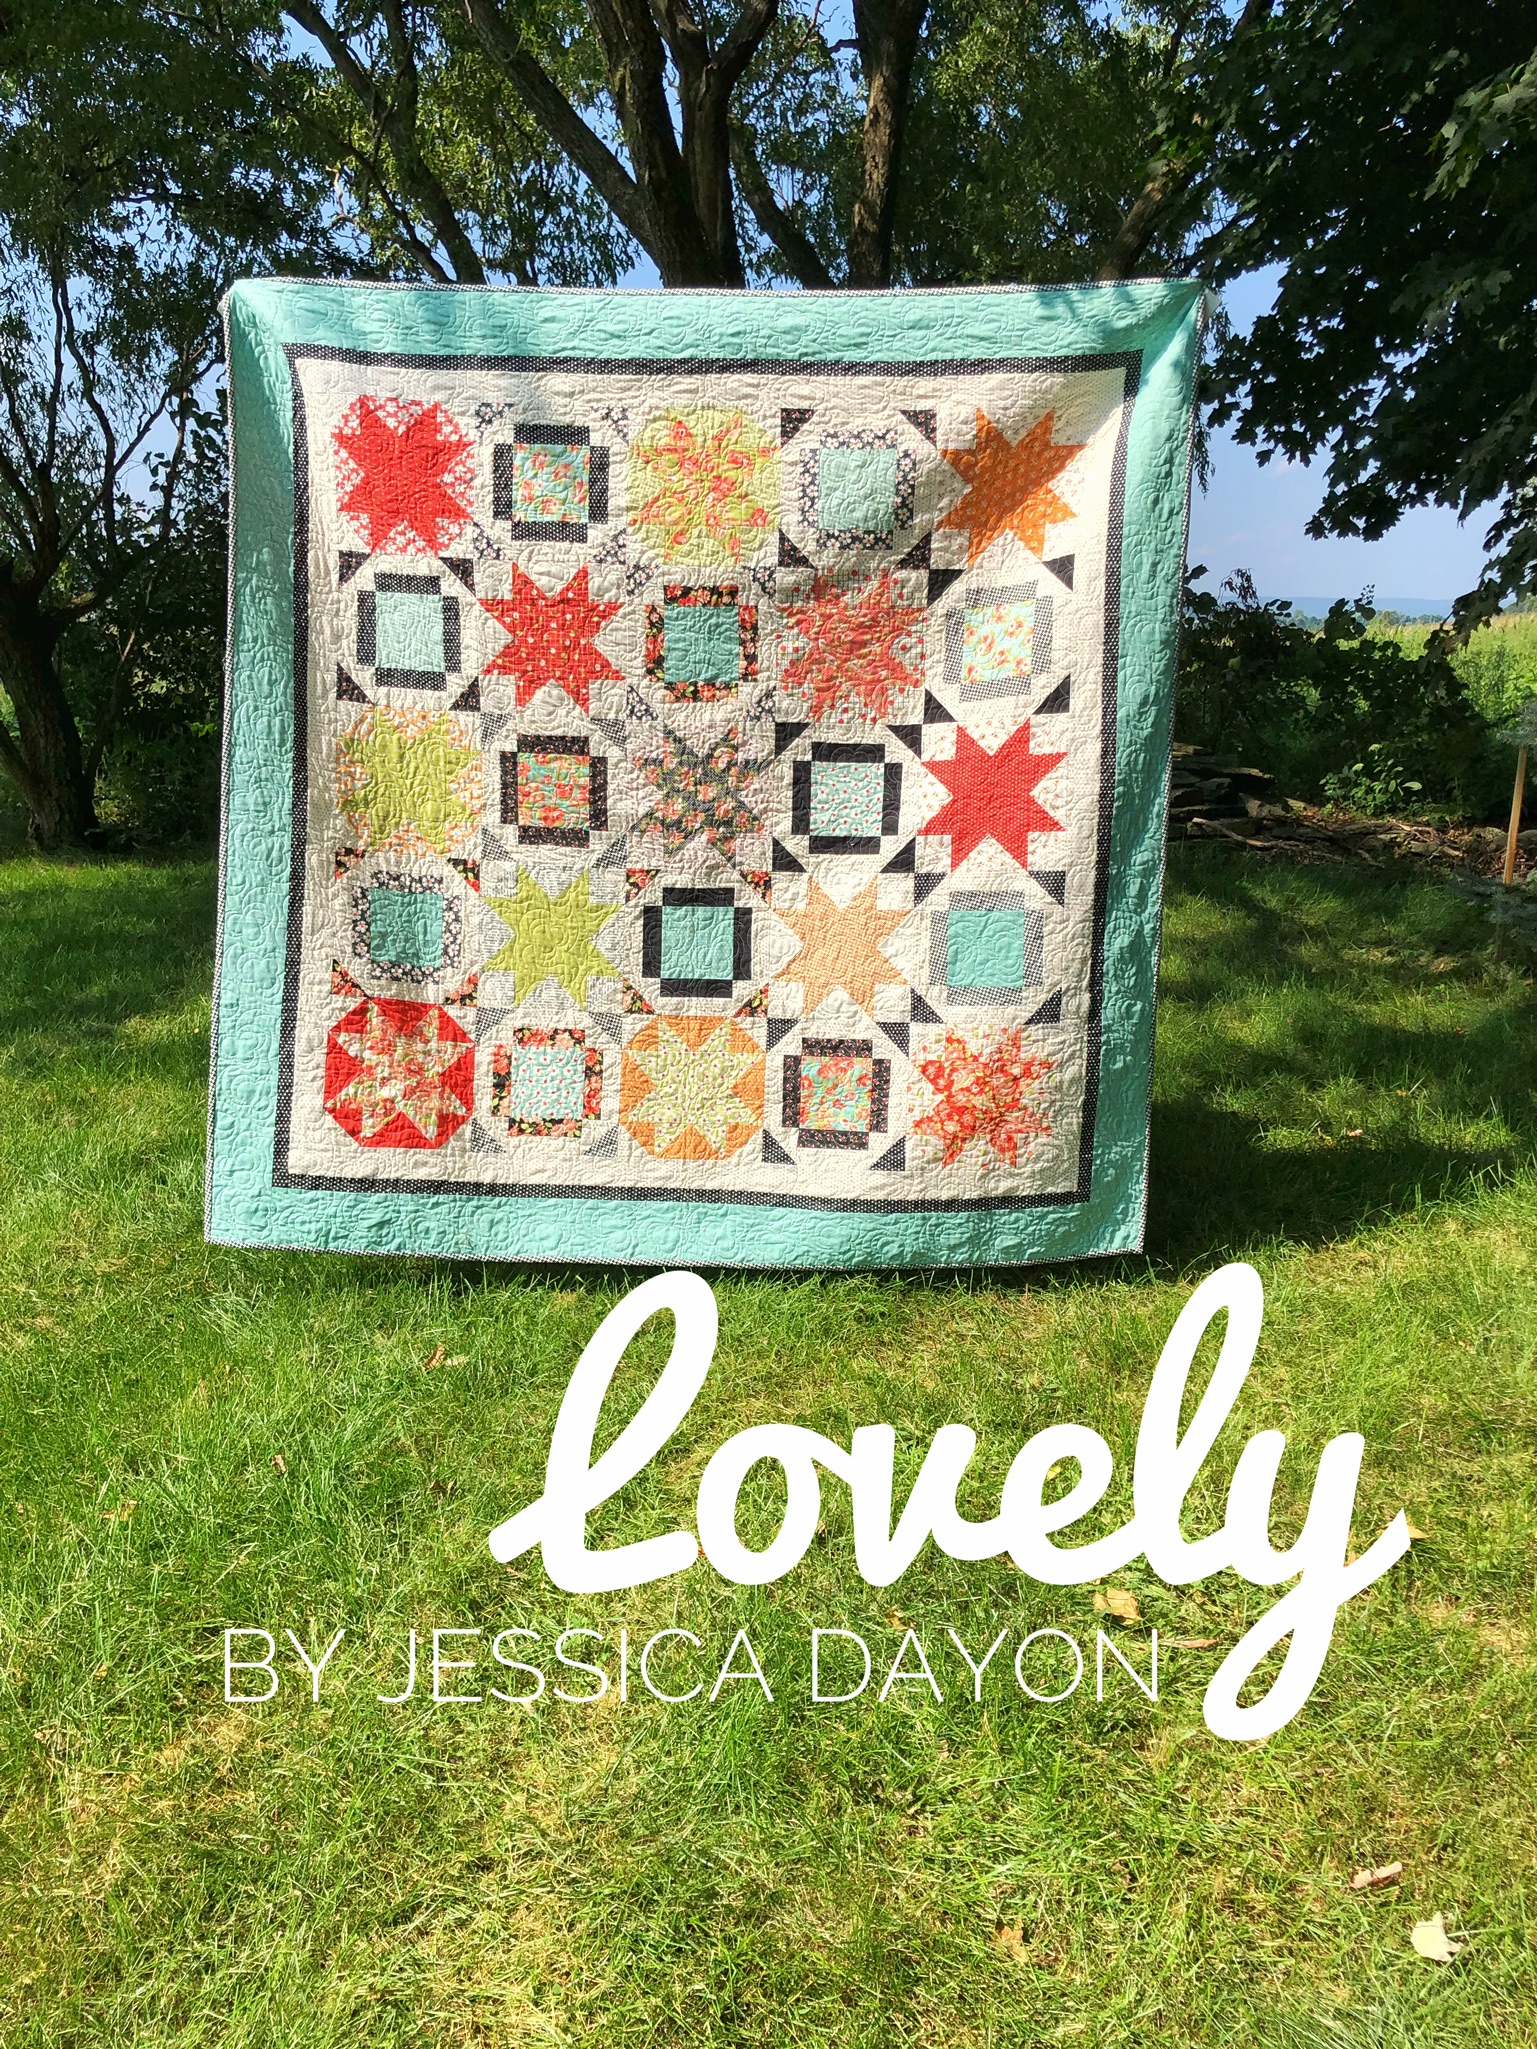
Lovely Quilt
Lovely Quilt
Published:
Sep 30 2018 - 23:00
![]()
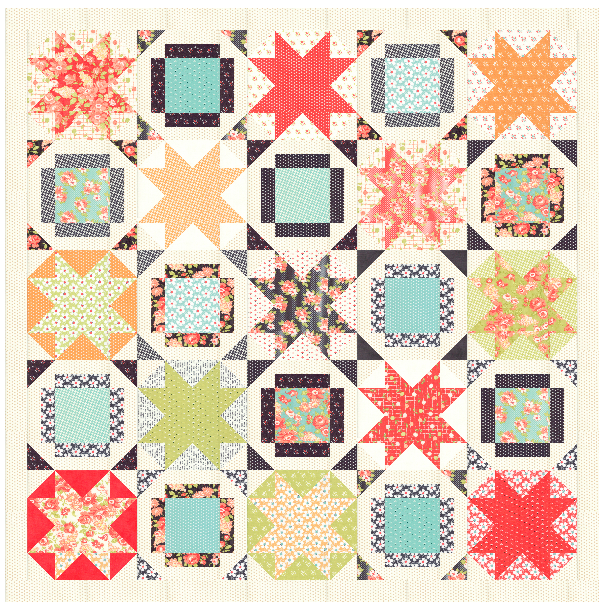
Hi, Everyone! I'm Jessica (@jessicadayon) and I'm here to take you through my newest tutorial today on Moda Bake Shop. This quilt is called Lovely. I designed it with Farmhouse II by Joanna Figueroa of Fig Tree Quilts. I was so inspired by all of the pretty prints in this line and I just adore how they look together and how this quilt came out! Let's get started!
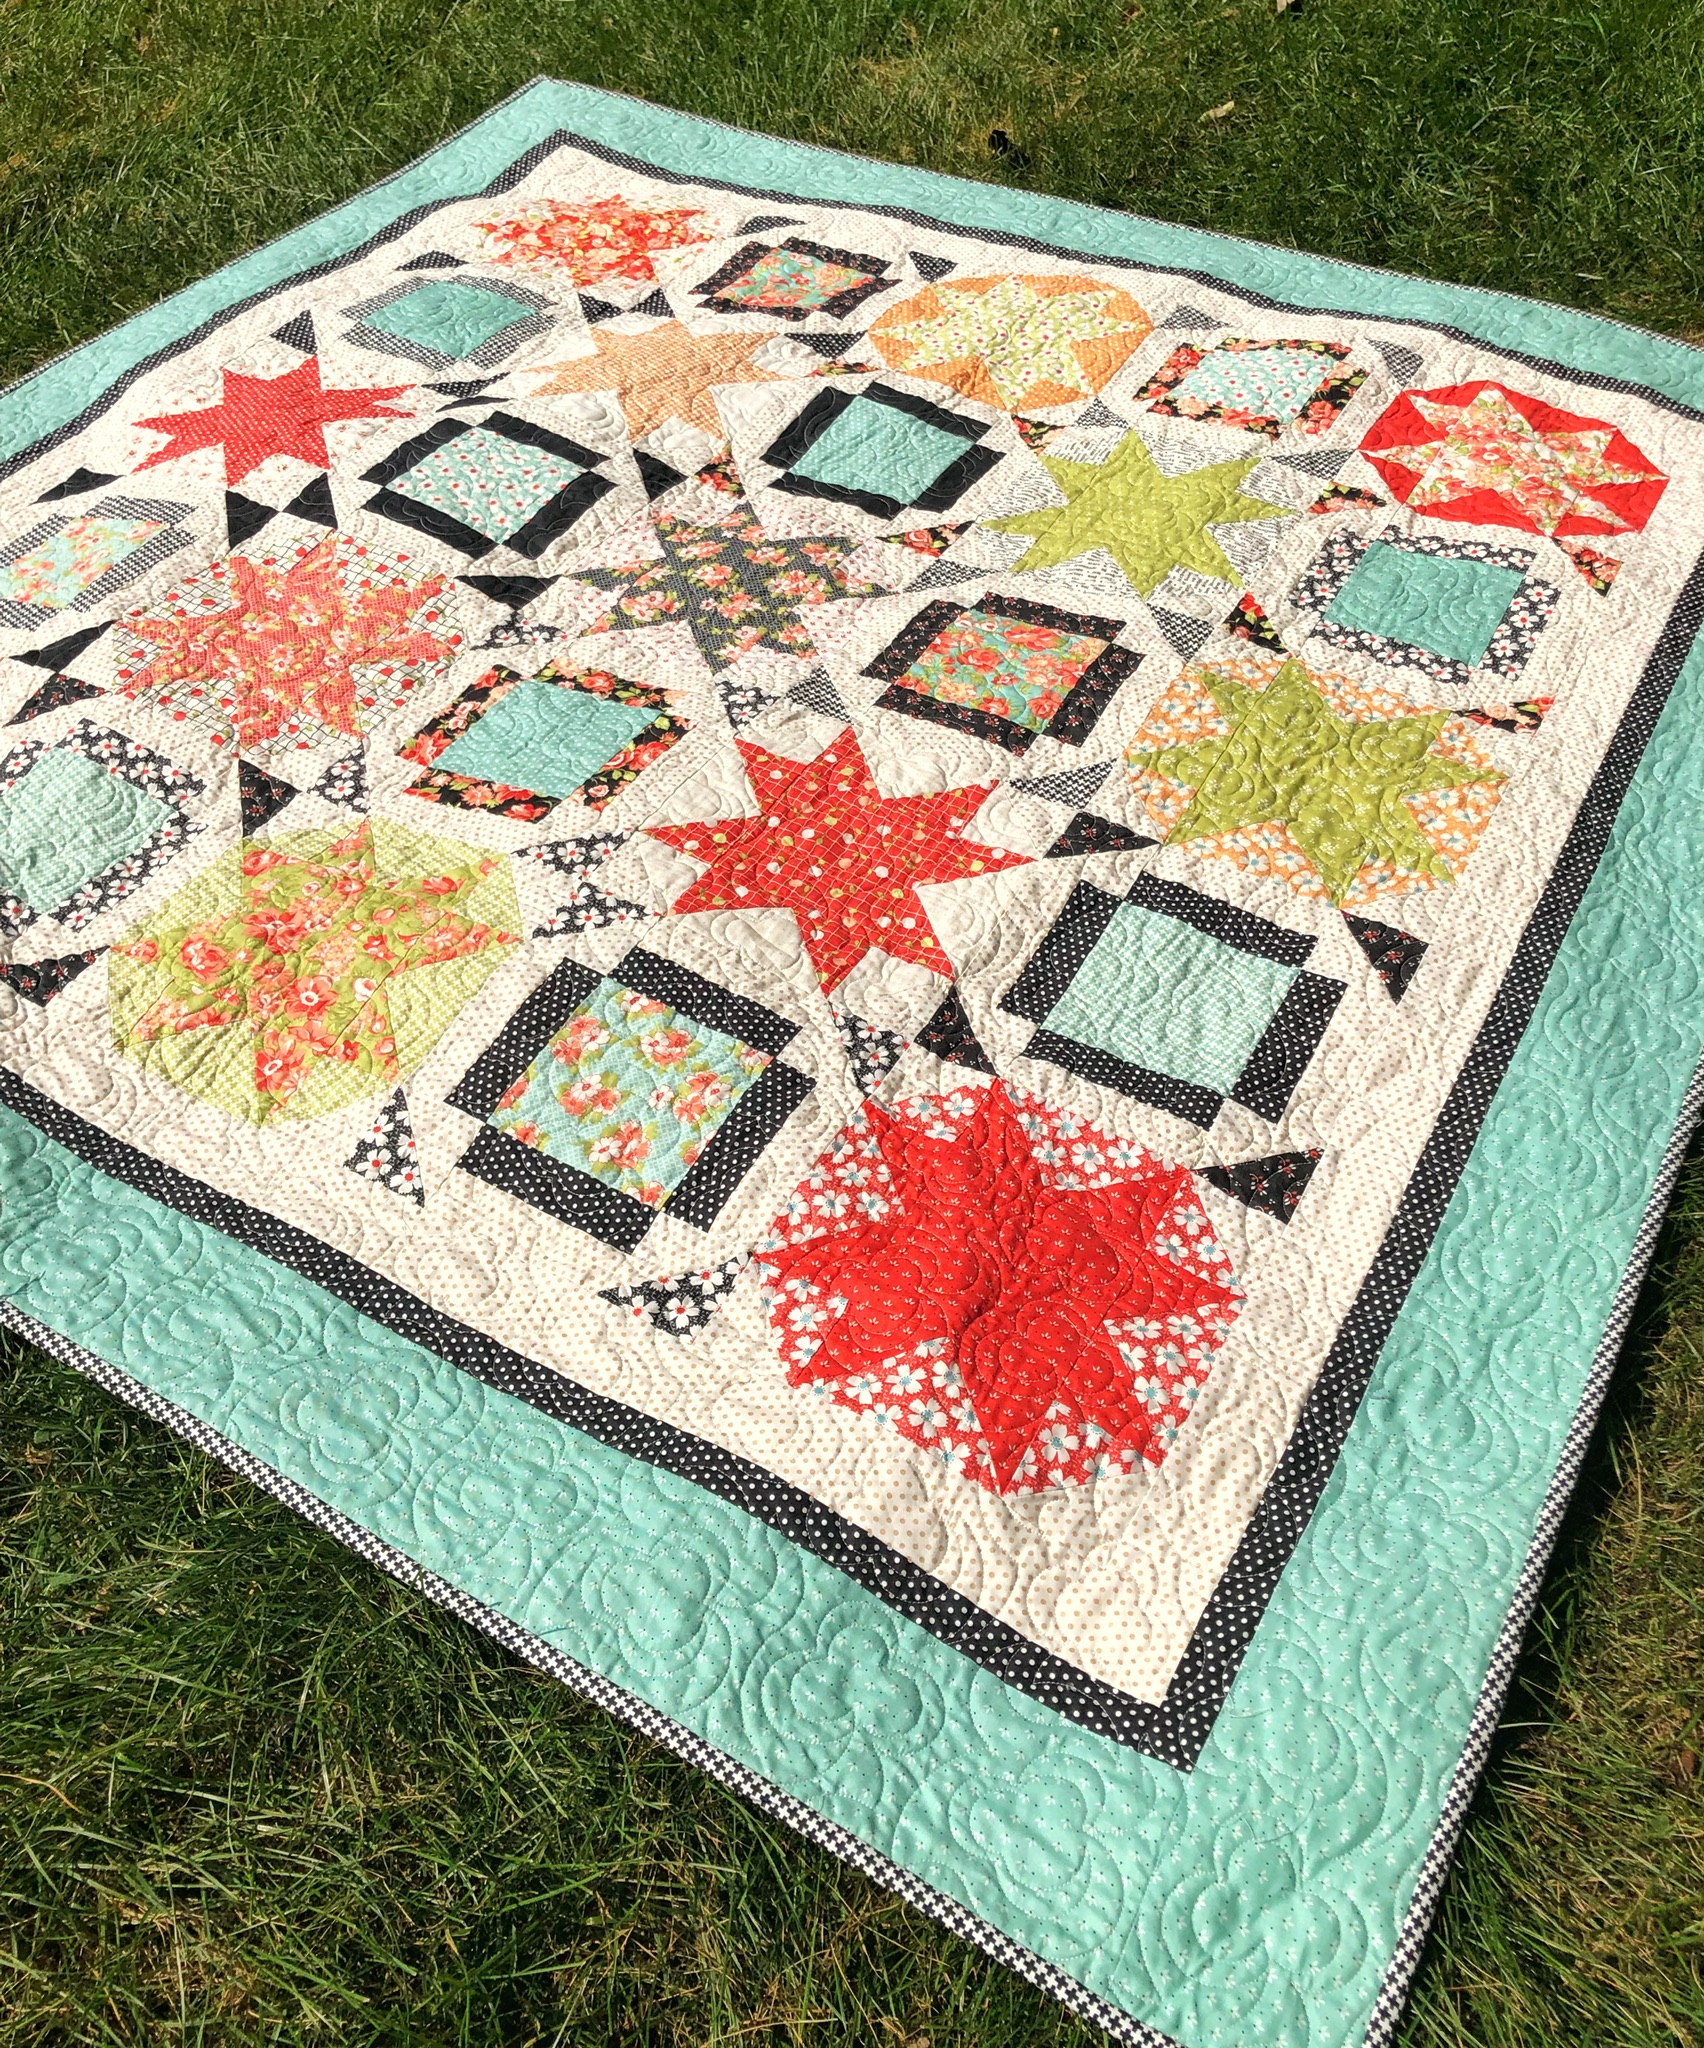
This quilt finishes at 64" x 64".
![]()
1 Fat Eighth Bundle of Farmhouse II by Joanna Figueroa of Fig Tree Quilts {SKU 20320F8}
1 1/4 yards background fabric {SKU 20322 15}
1/4 yard Black polka dot fabric- used for Border 2 {SKU 20322 18}
1 yard Aqua fabric- used for Border 3 {SKU number 20328 14}
4 yards White Apple Picnic print- used for Backing fabric {SKU 20324 15}
1/2 yard Black Criss Cross- used for Binding fabric {SKU 20325 18}
![]()
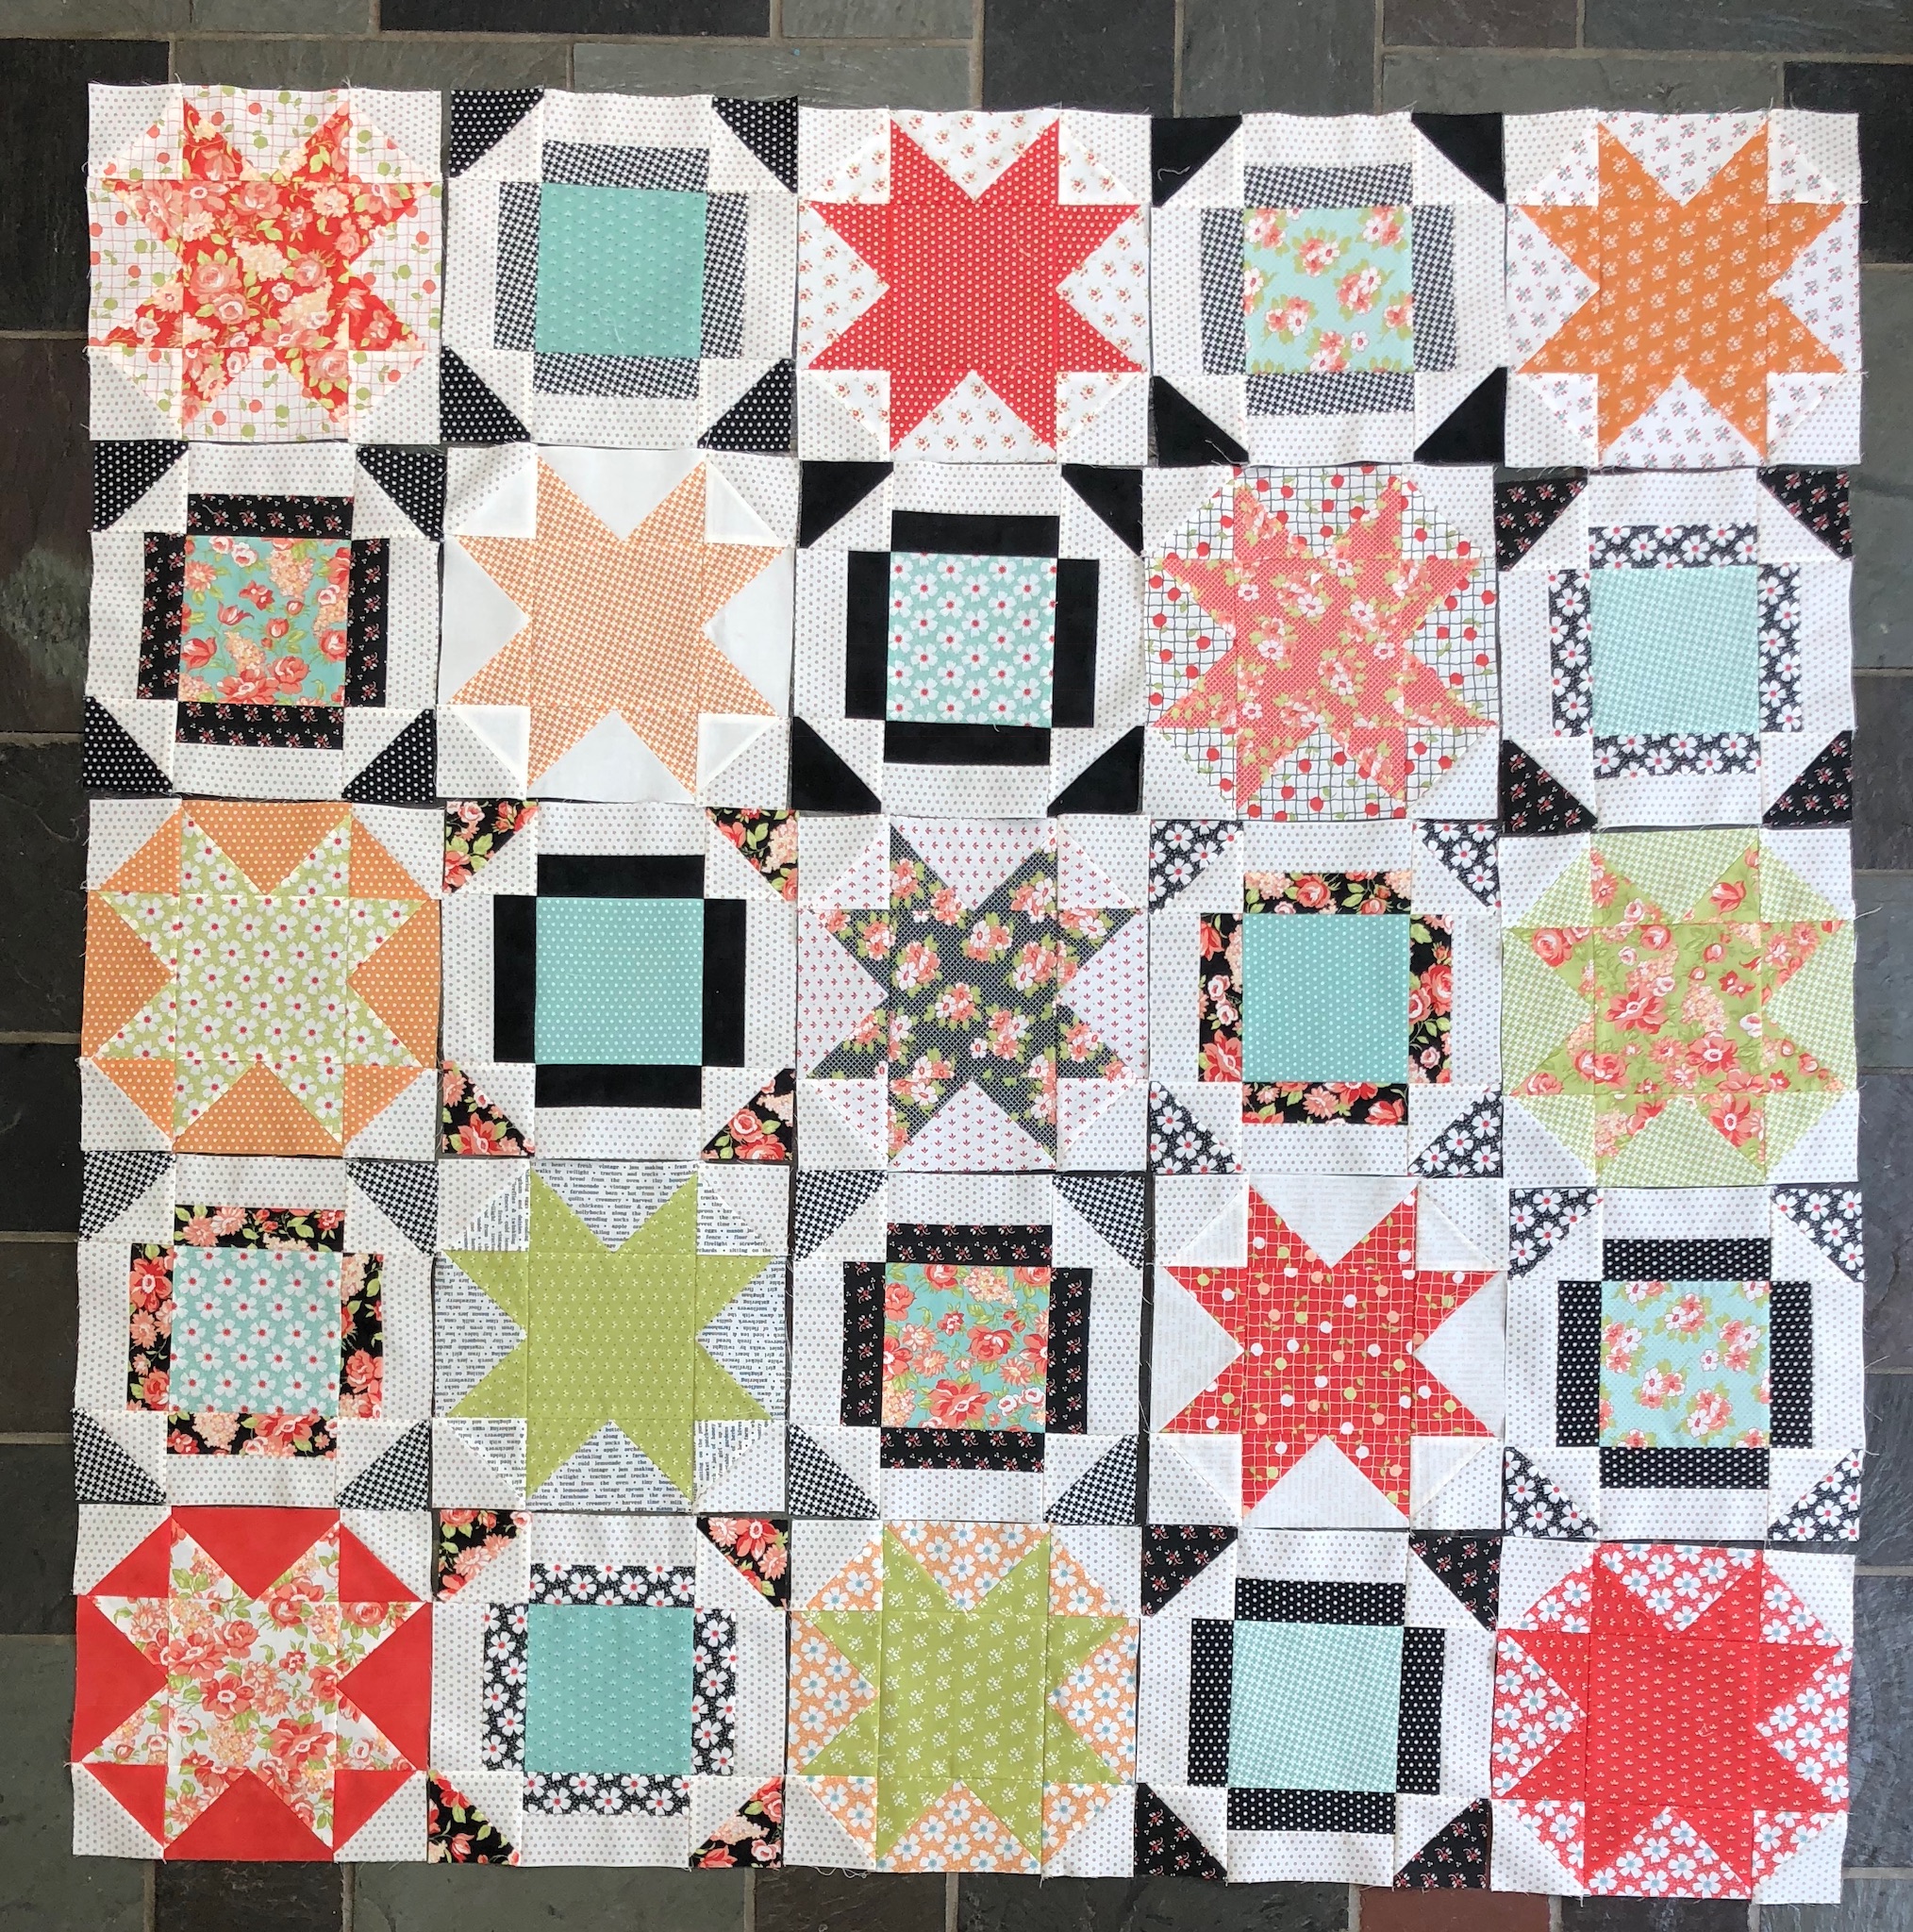
This quilt is made up of two blocks: Sawtooth Stars with Half Square Triangle corners and Greek squares. You will need 13 sawtooth stars and 12 Greek squares.
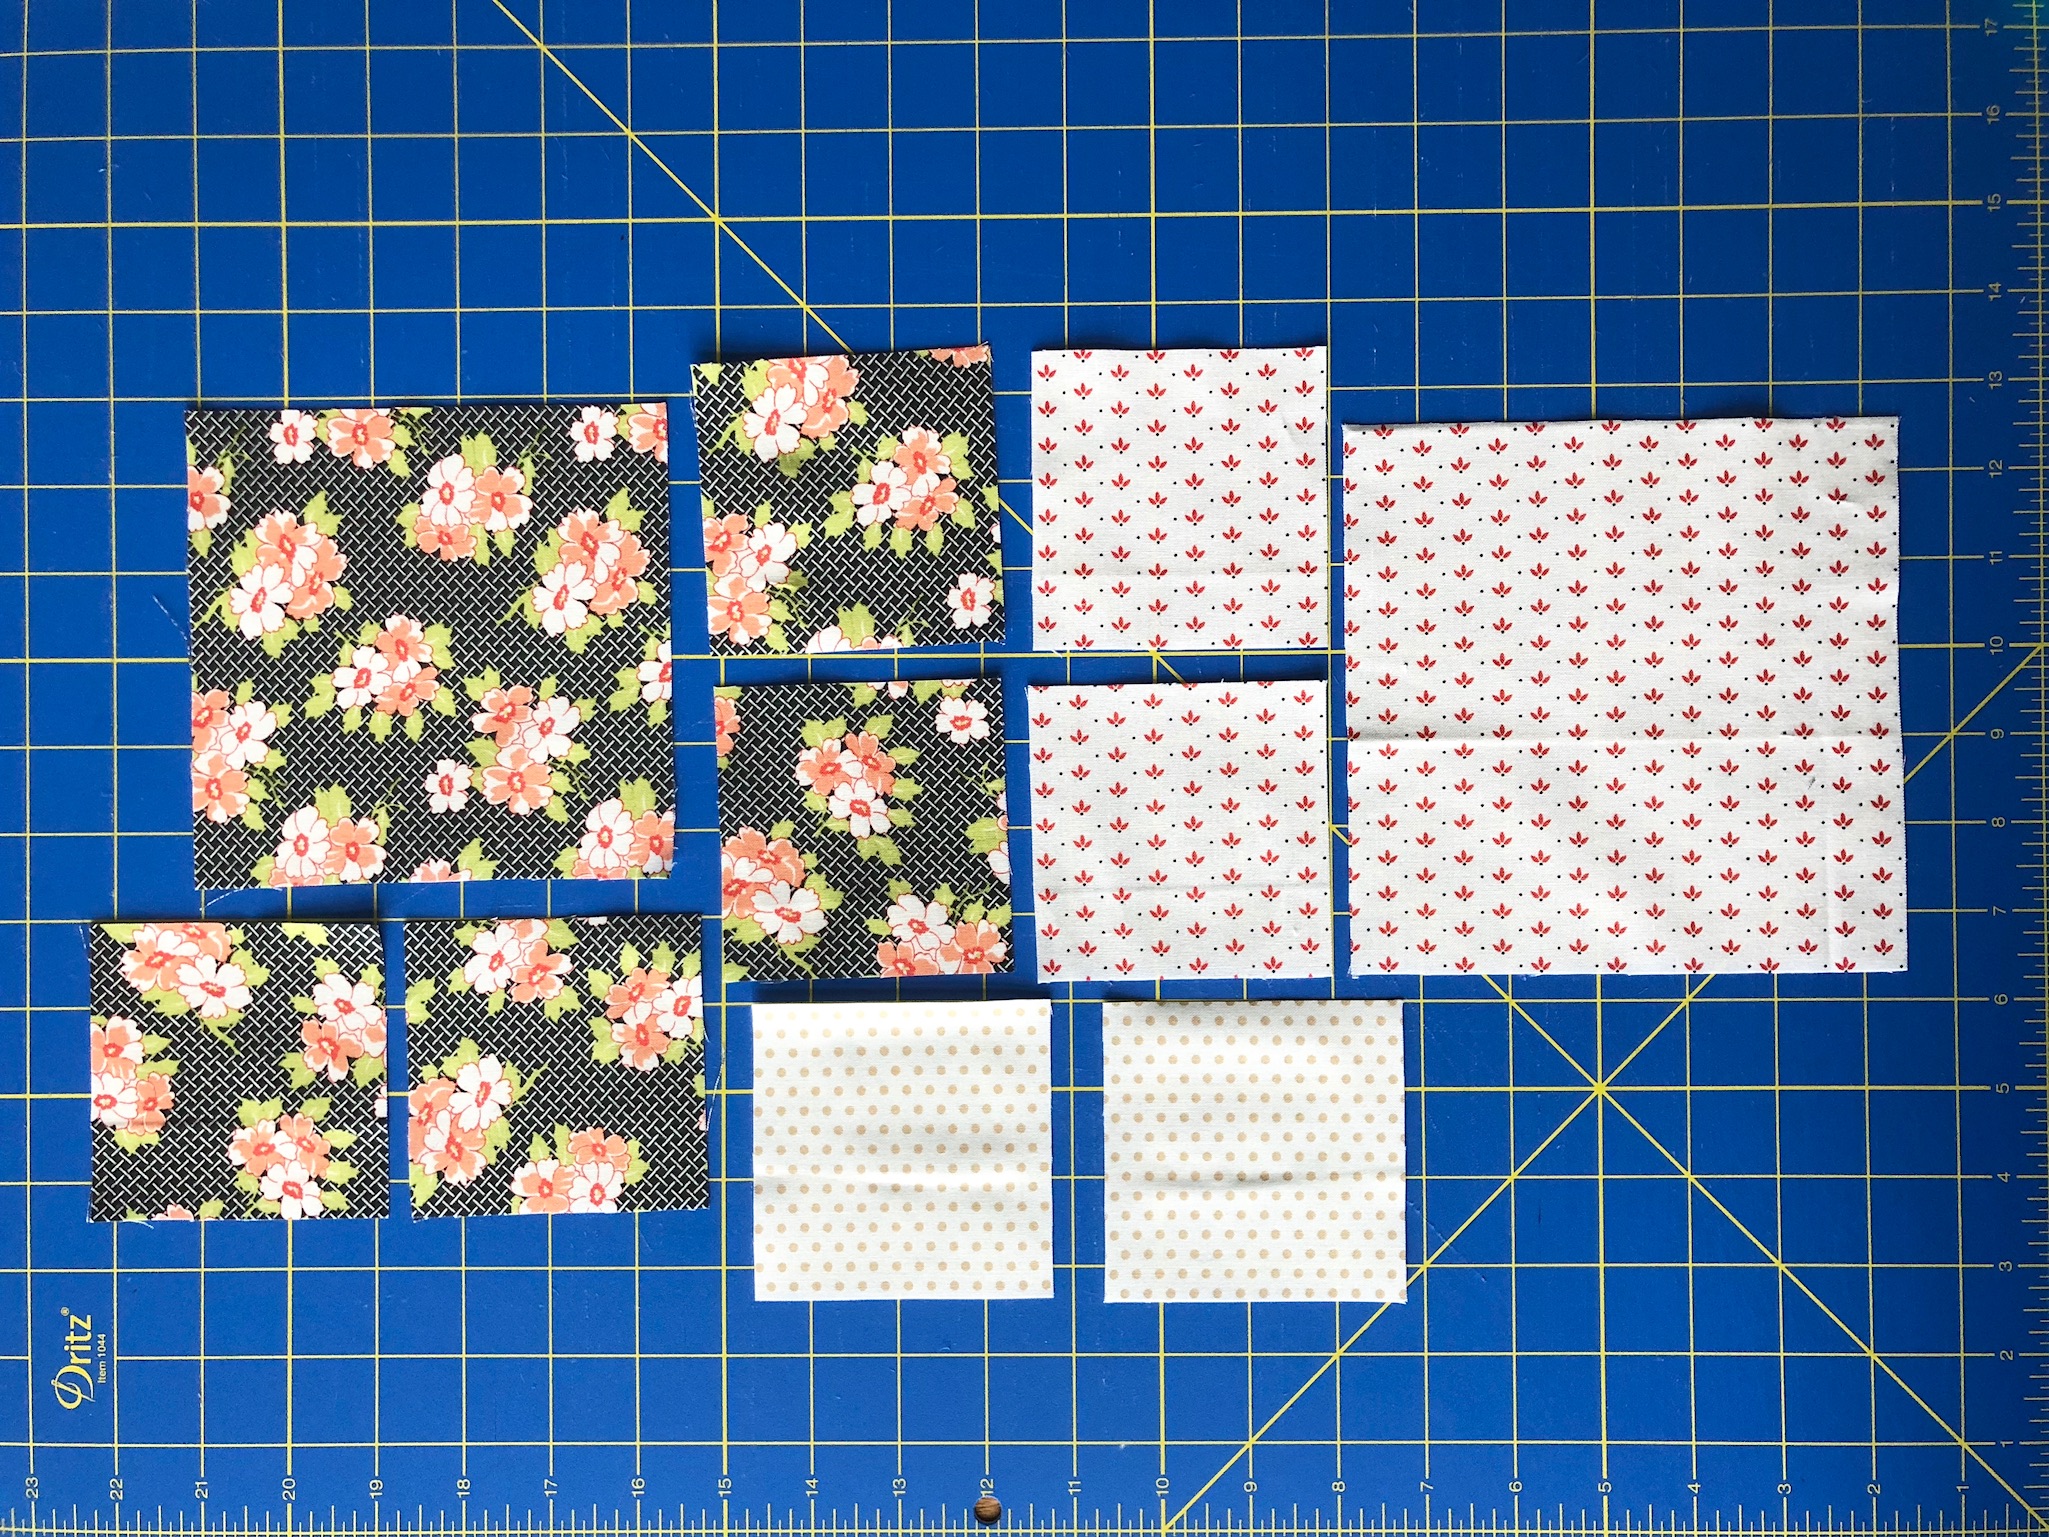
Let's start with the sawtooth squares. First, I chose my colors. I used 13 fat eighths that would make up the actual stars (on the right in below picture, I am going to call this inner star fabric) and 13 fat eighths that would make the background directly behind the stars (on the left in the below picture, I am going to call this outer star fabric). You will also use background fabric to construct this block.

Then I chose my fabric for the Greek squares. I chose the 6 aqua fat eighths and 6 black fat eighths from this line. You will also use background fabric when constructing this block.

CUTTING
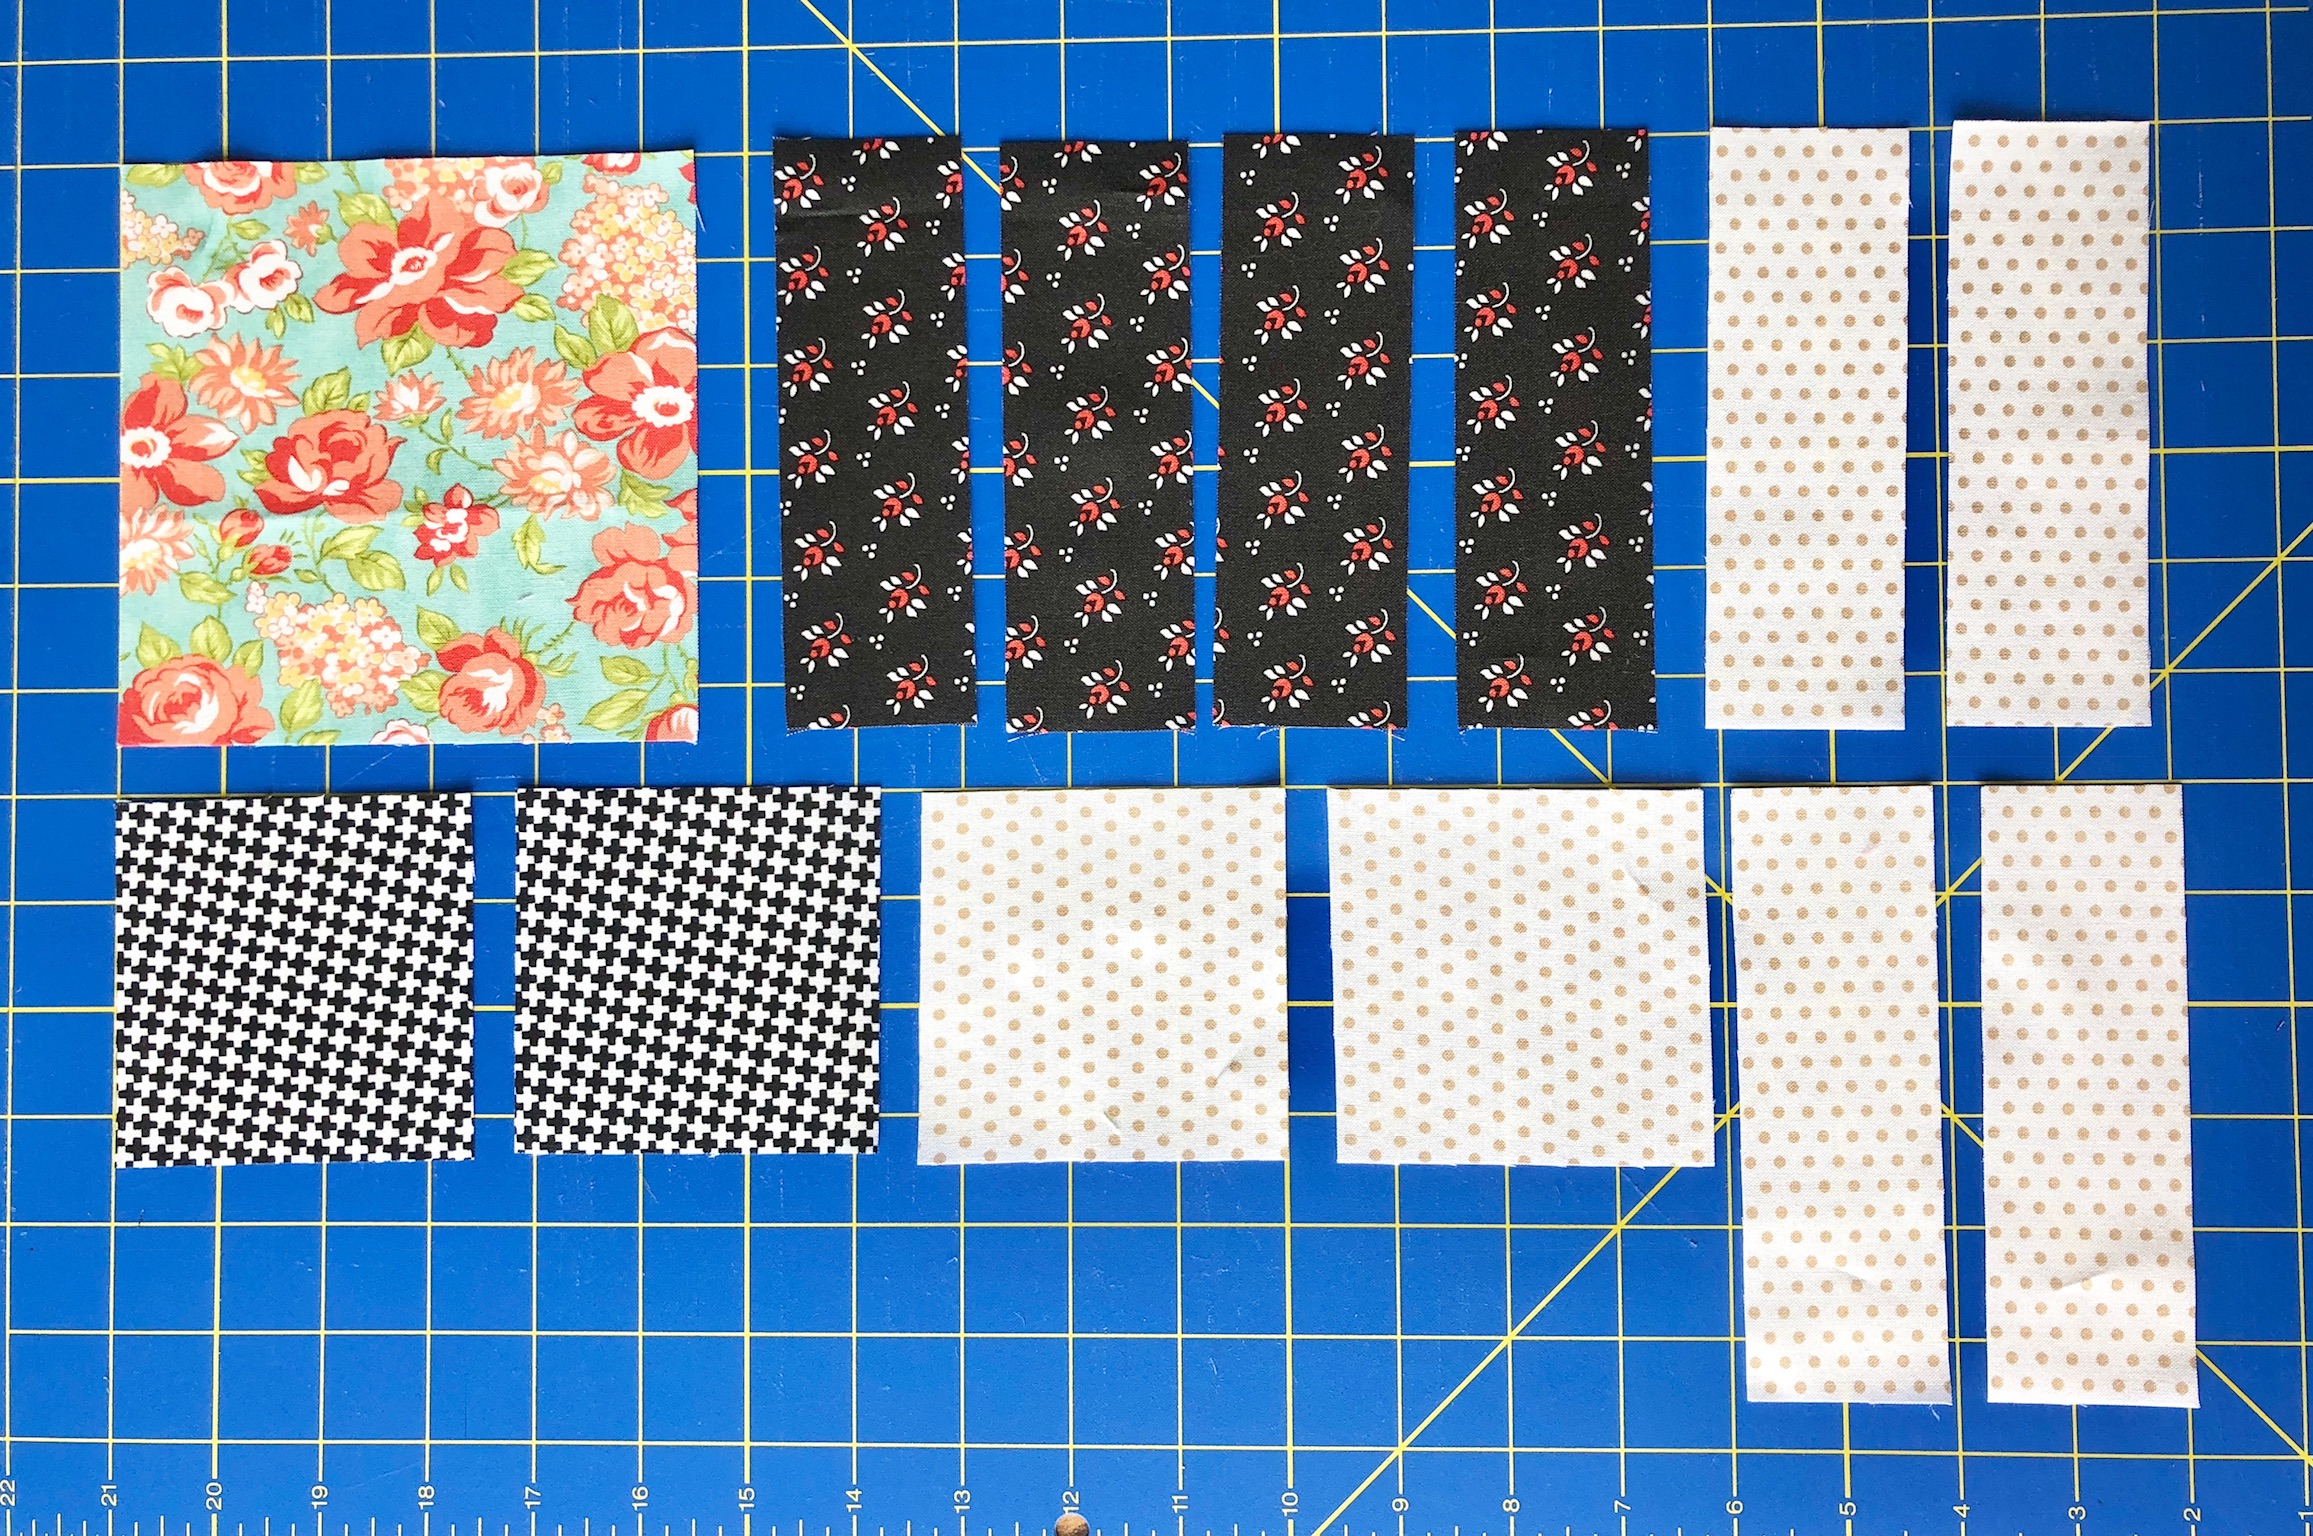
From each of the 13 fat eighths of inner star fabric, cut:
-1- 5 1/2" square
-4- 3 3/8" squares
From each of the 13 fat eighths of outer star fabric, cut:
-1- 6 1/4" square
-2- 3 3/8" squares
From each of the 6 aqua fat eighths, cut:
-1- 5 1/2" square
From each of the 6 black fat eighths, cut:
-4- 1 3/4" x 5 1/2" rectangles
-2- 3 3/8" squares
From the Background fabric, cut:
-5- 3 3/8" x WOF strips; subcut into 50- 3 3/8" squares
-2- 5 1/2" x WOF strips; subcut into 48- 1 3/4" x 5 1/2" rectangles
-6- 2.5" x WOF strips (set aside for Border 1)
From the black polka dot fabric, cut:
-6- 1.5" x WOF strips (set aside for Border 2)
From the aqua fabric, cut:
-8- 4.5" x WOF strips (set aside for Border 3)
BLOCK ASSEMBLY
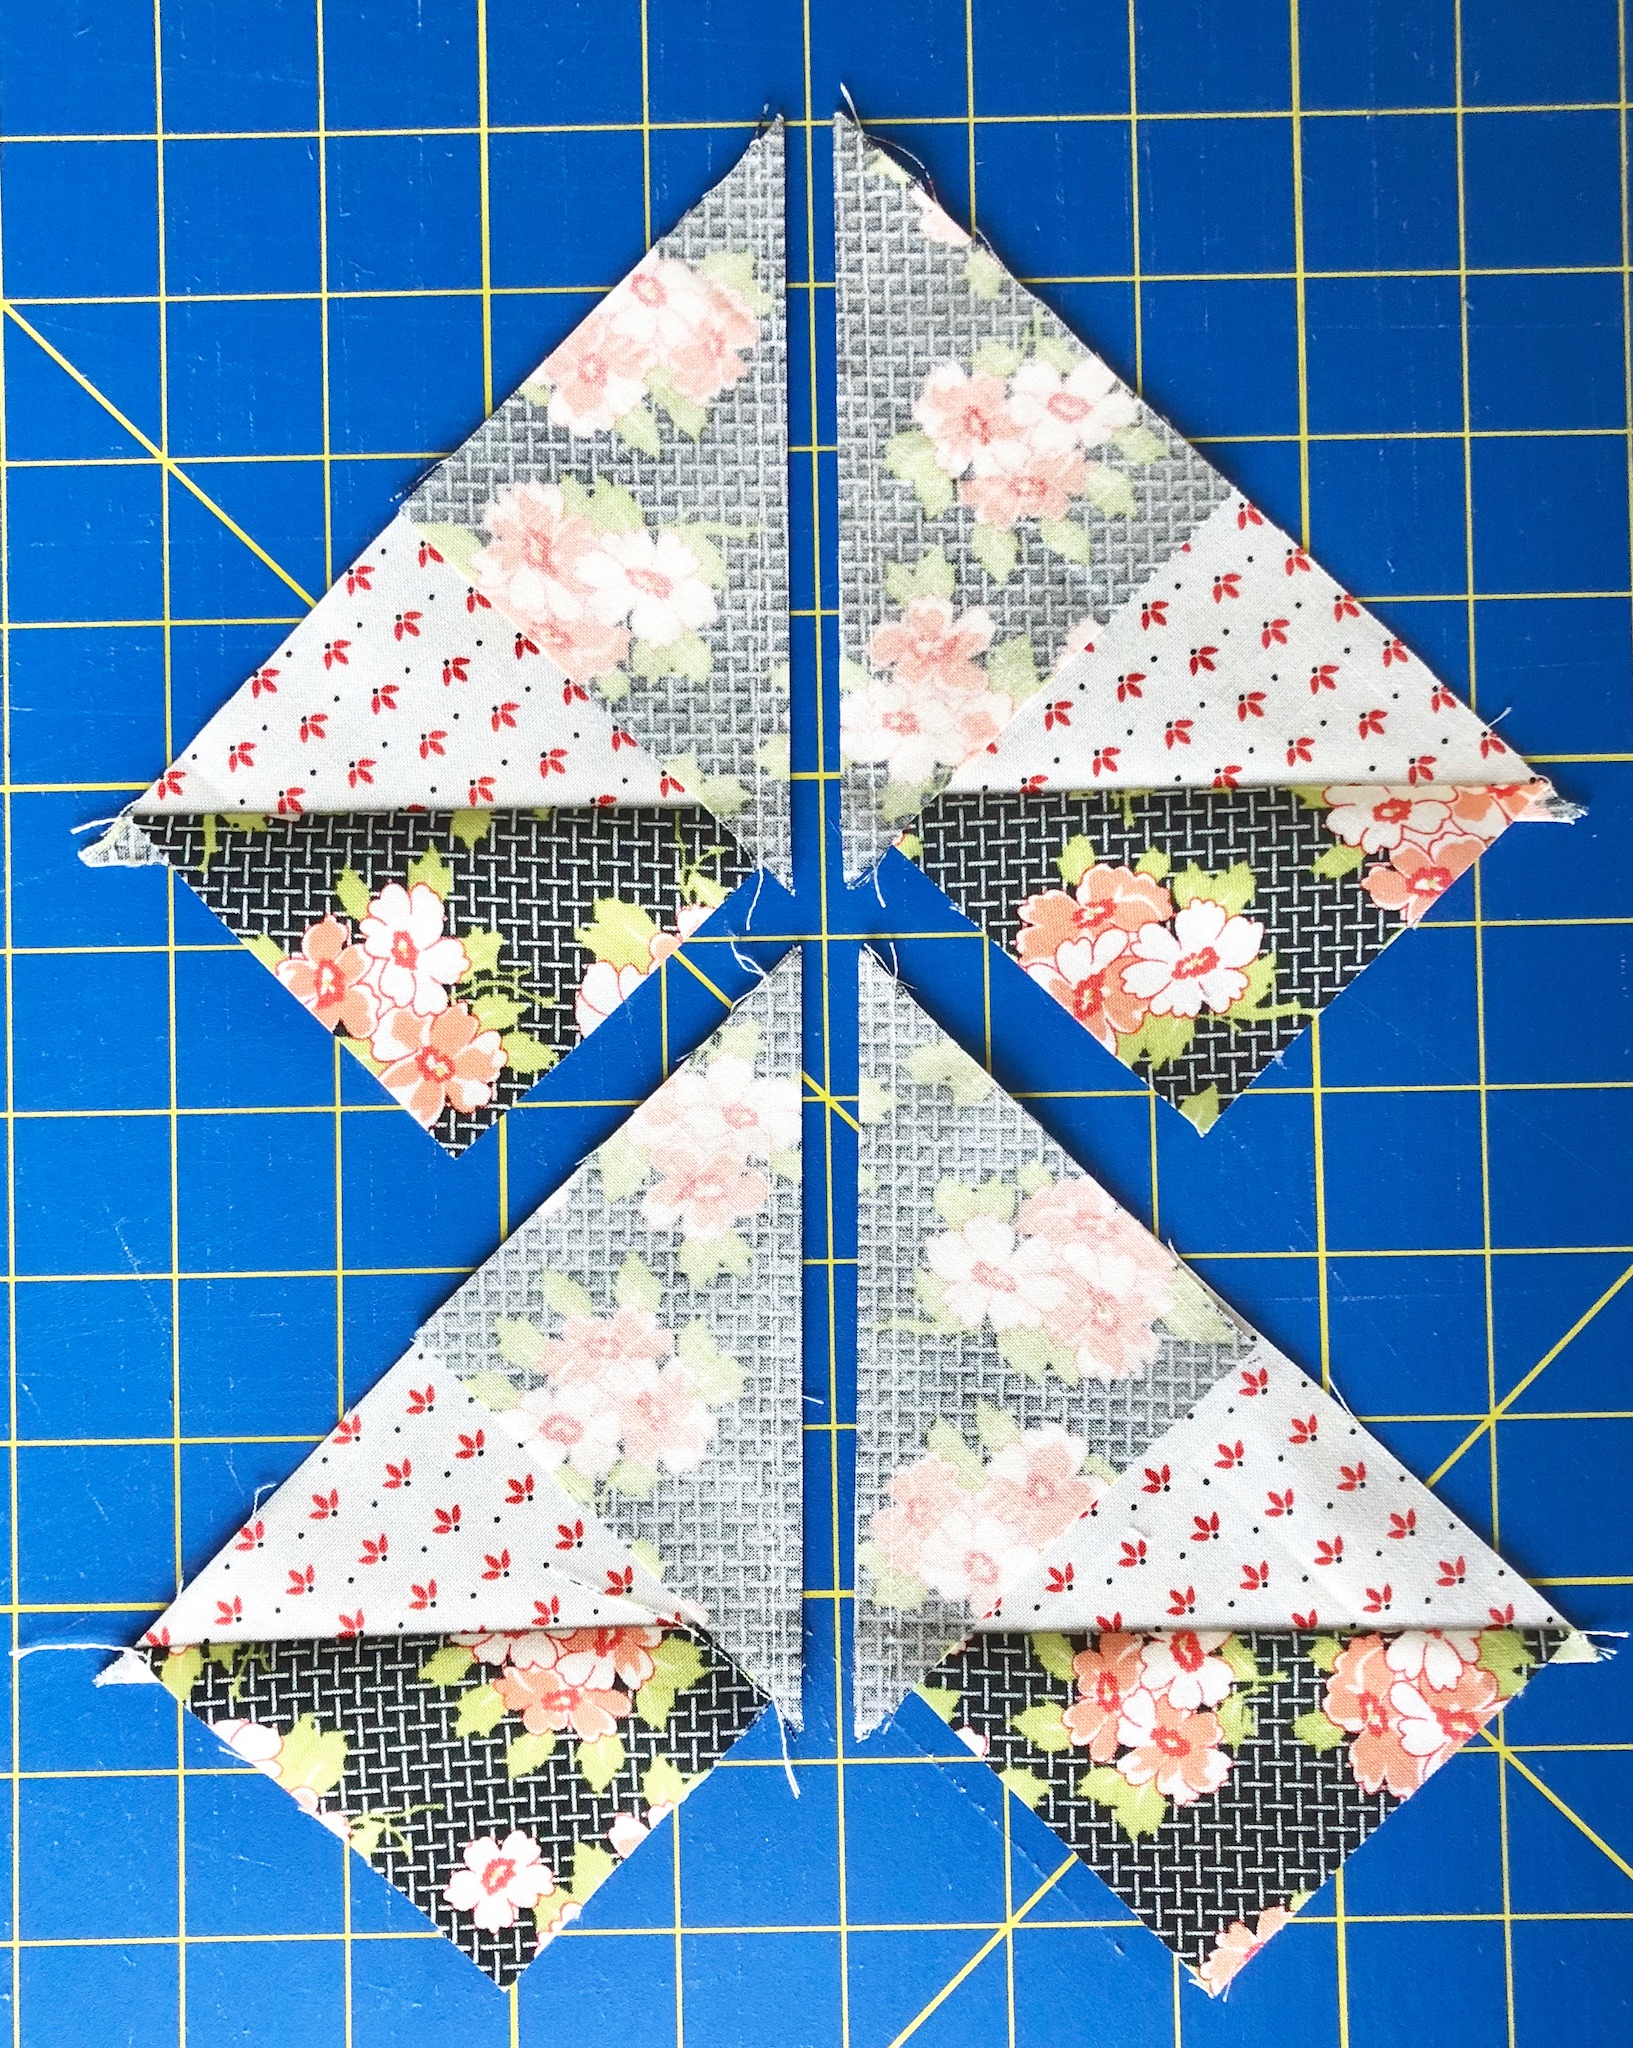
To make the Sawtooth Star blocks, gather the inner star fabrics, the outer star fabrics, and the 3 3/8" background squares.
First we will make the HST (half square triangles) for this block. We need 4 per block and we will be using the 2 at a time method. Take a 3 3/8" background square and draw a line from corner to corner. Now, take a 3 3/8" outer star square. Line them up on top of each other right sides together. Repeat with the other background square and outer star square.
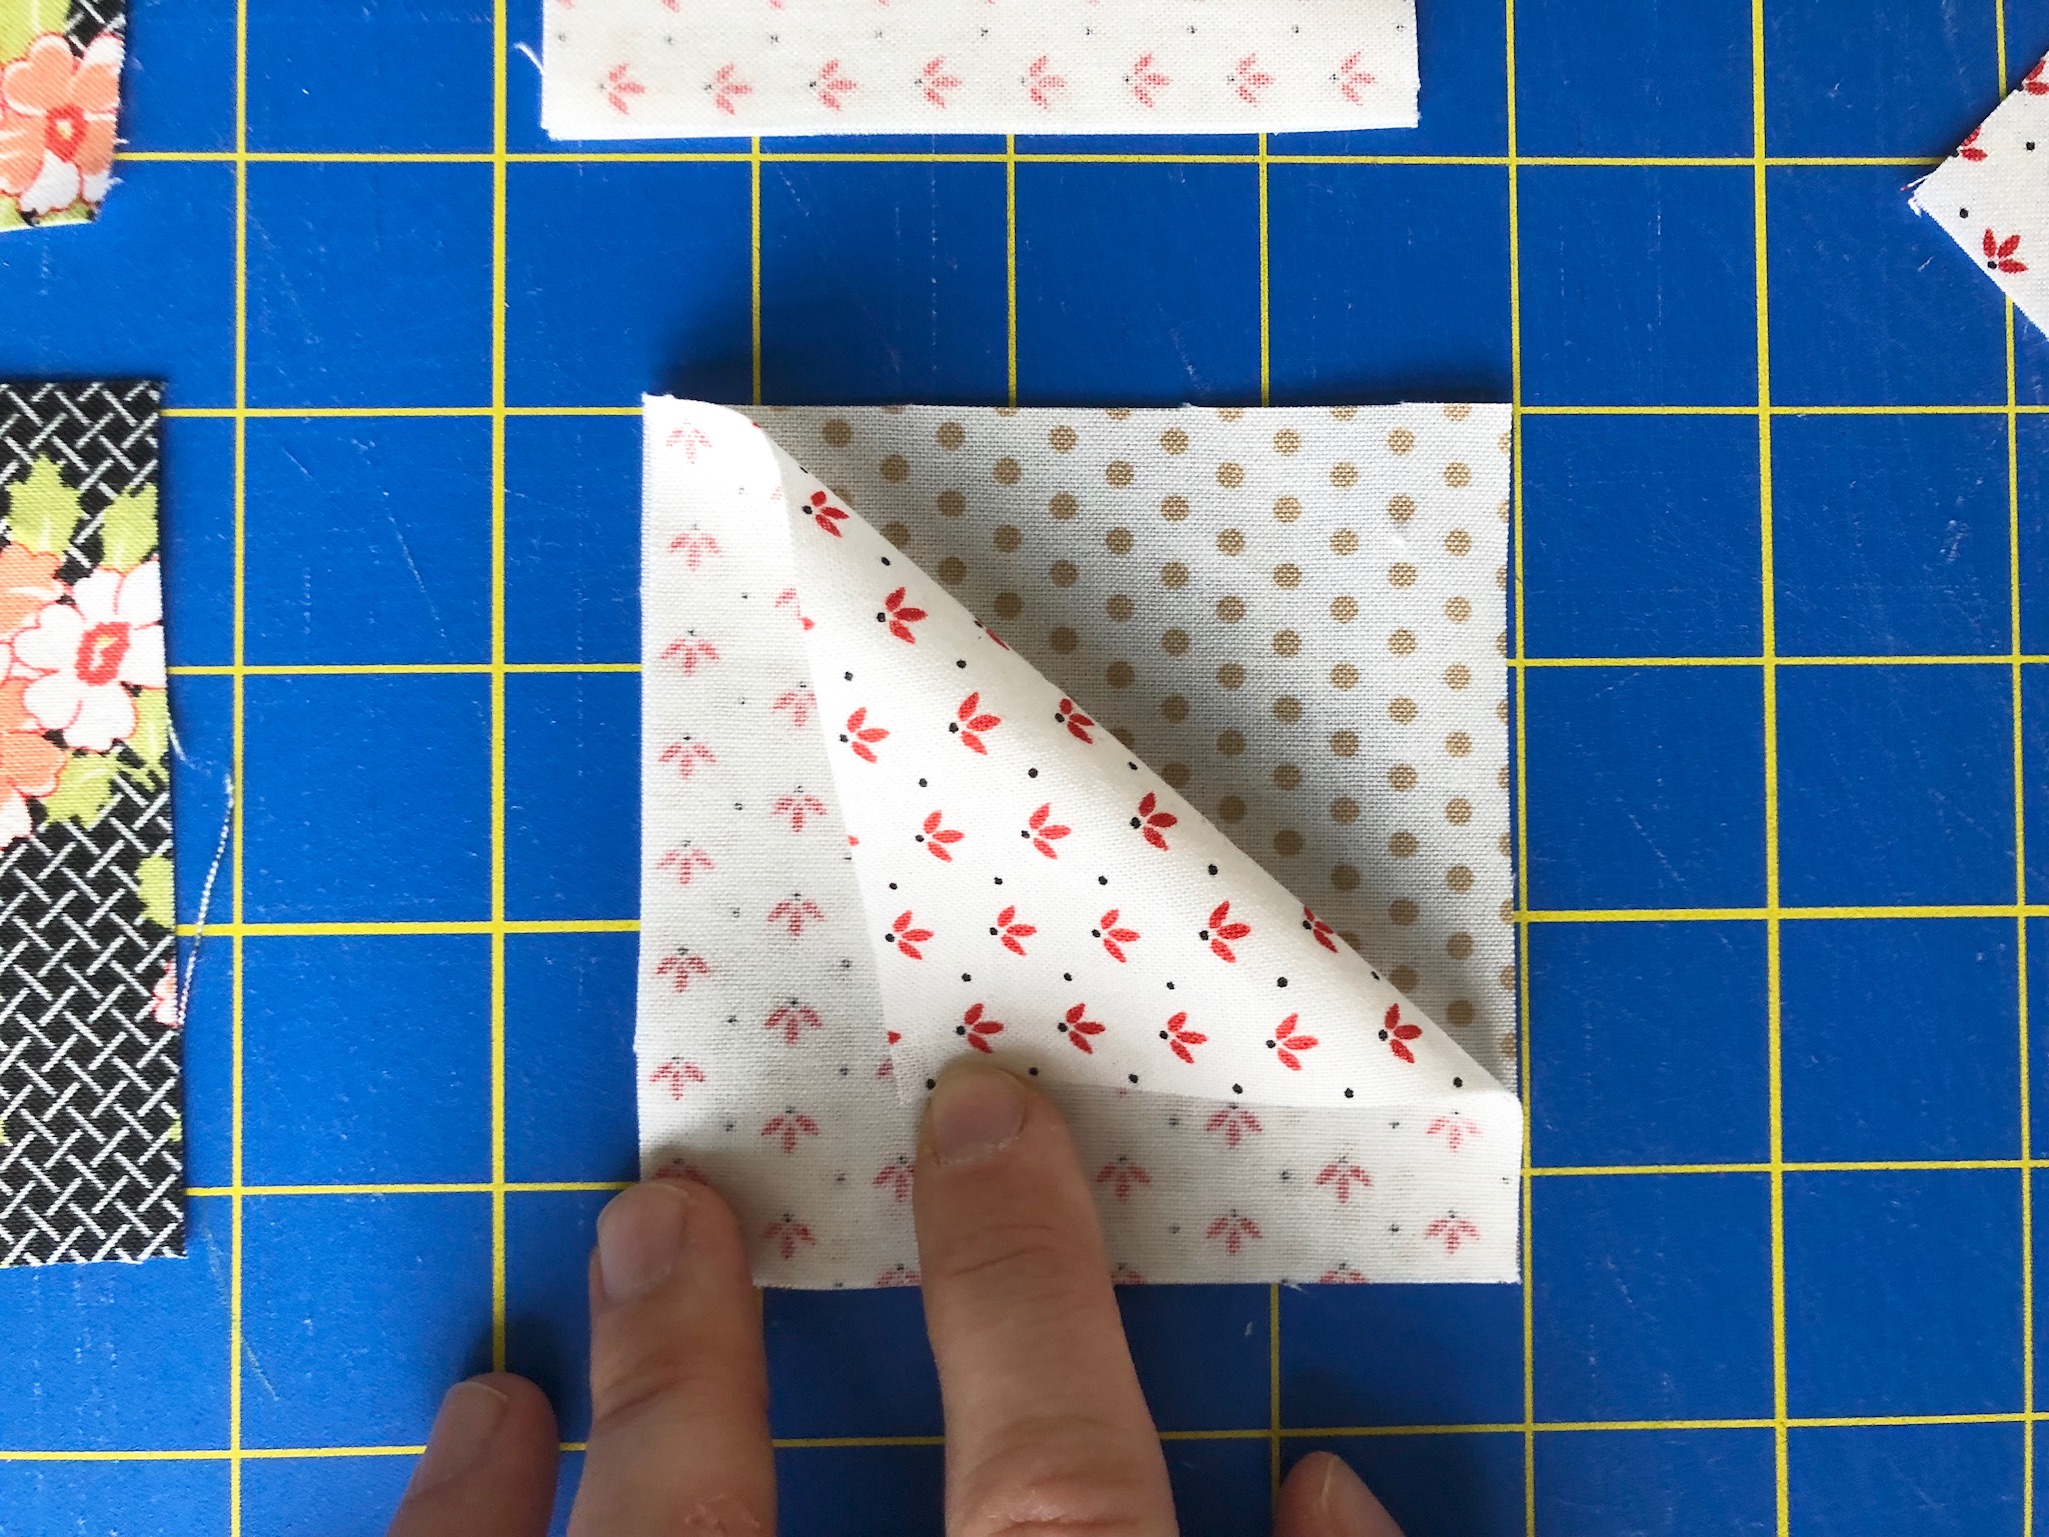
Sew ¼” away from the line on one side and then ¼” away from the line on the other side. Cut on the line you drew.
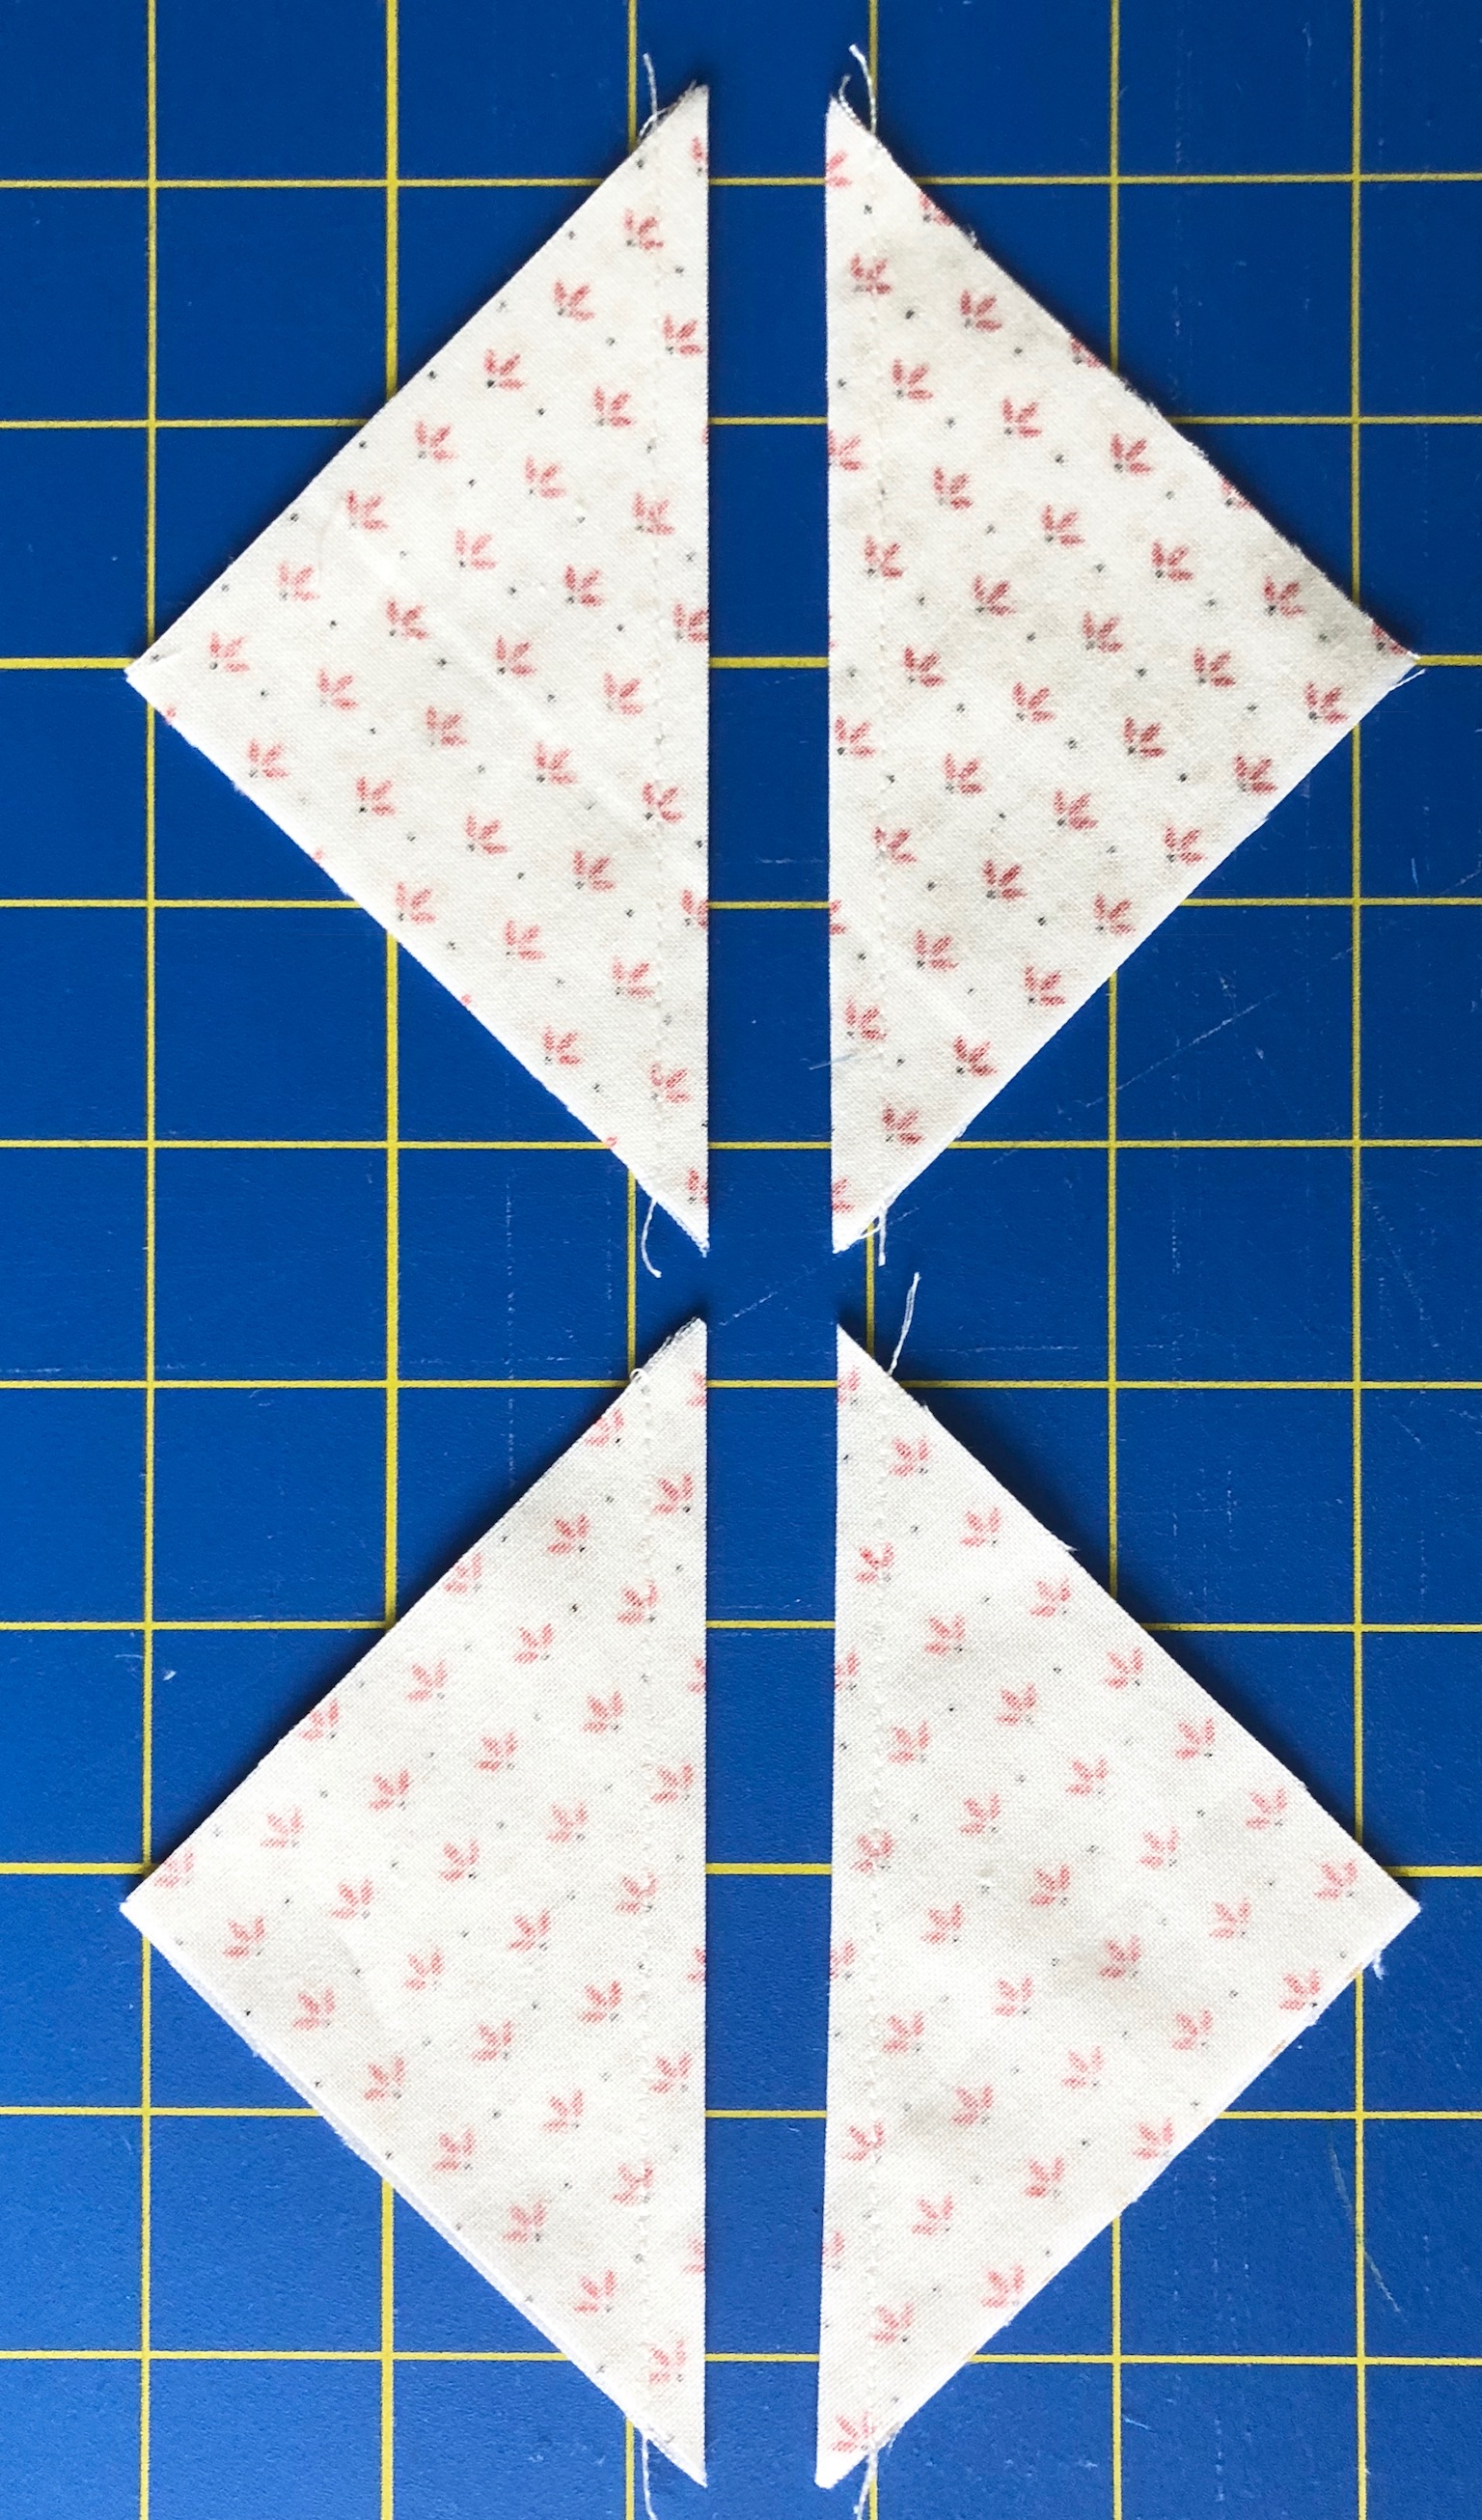
Press the HST.

Trim each of the HST to exactly 3".
To make the flying geese in the Sawtooth Star, we will use the 4 at a time, no waste method. Gather the 6¼” outer star square and the 4- 3 3/8" inner star squares.
Begin by drawing a diagonal line on the back of all of the inner star squares. Line up two inner star squares along the diagonal of a larger square RST (the middles will overlap).
Sew ¼” away from the center line on both sides. Cut on the center line.
Press the units, pressing the seam allowance toward the inner star fabric. Take care here not to distort the fabric when pressing.

Next, line a inner star square up with the corner as shown. Sew ¼” away from the center line on both sides.
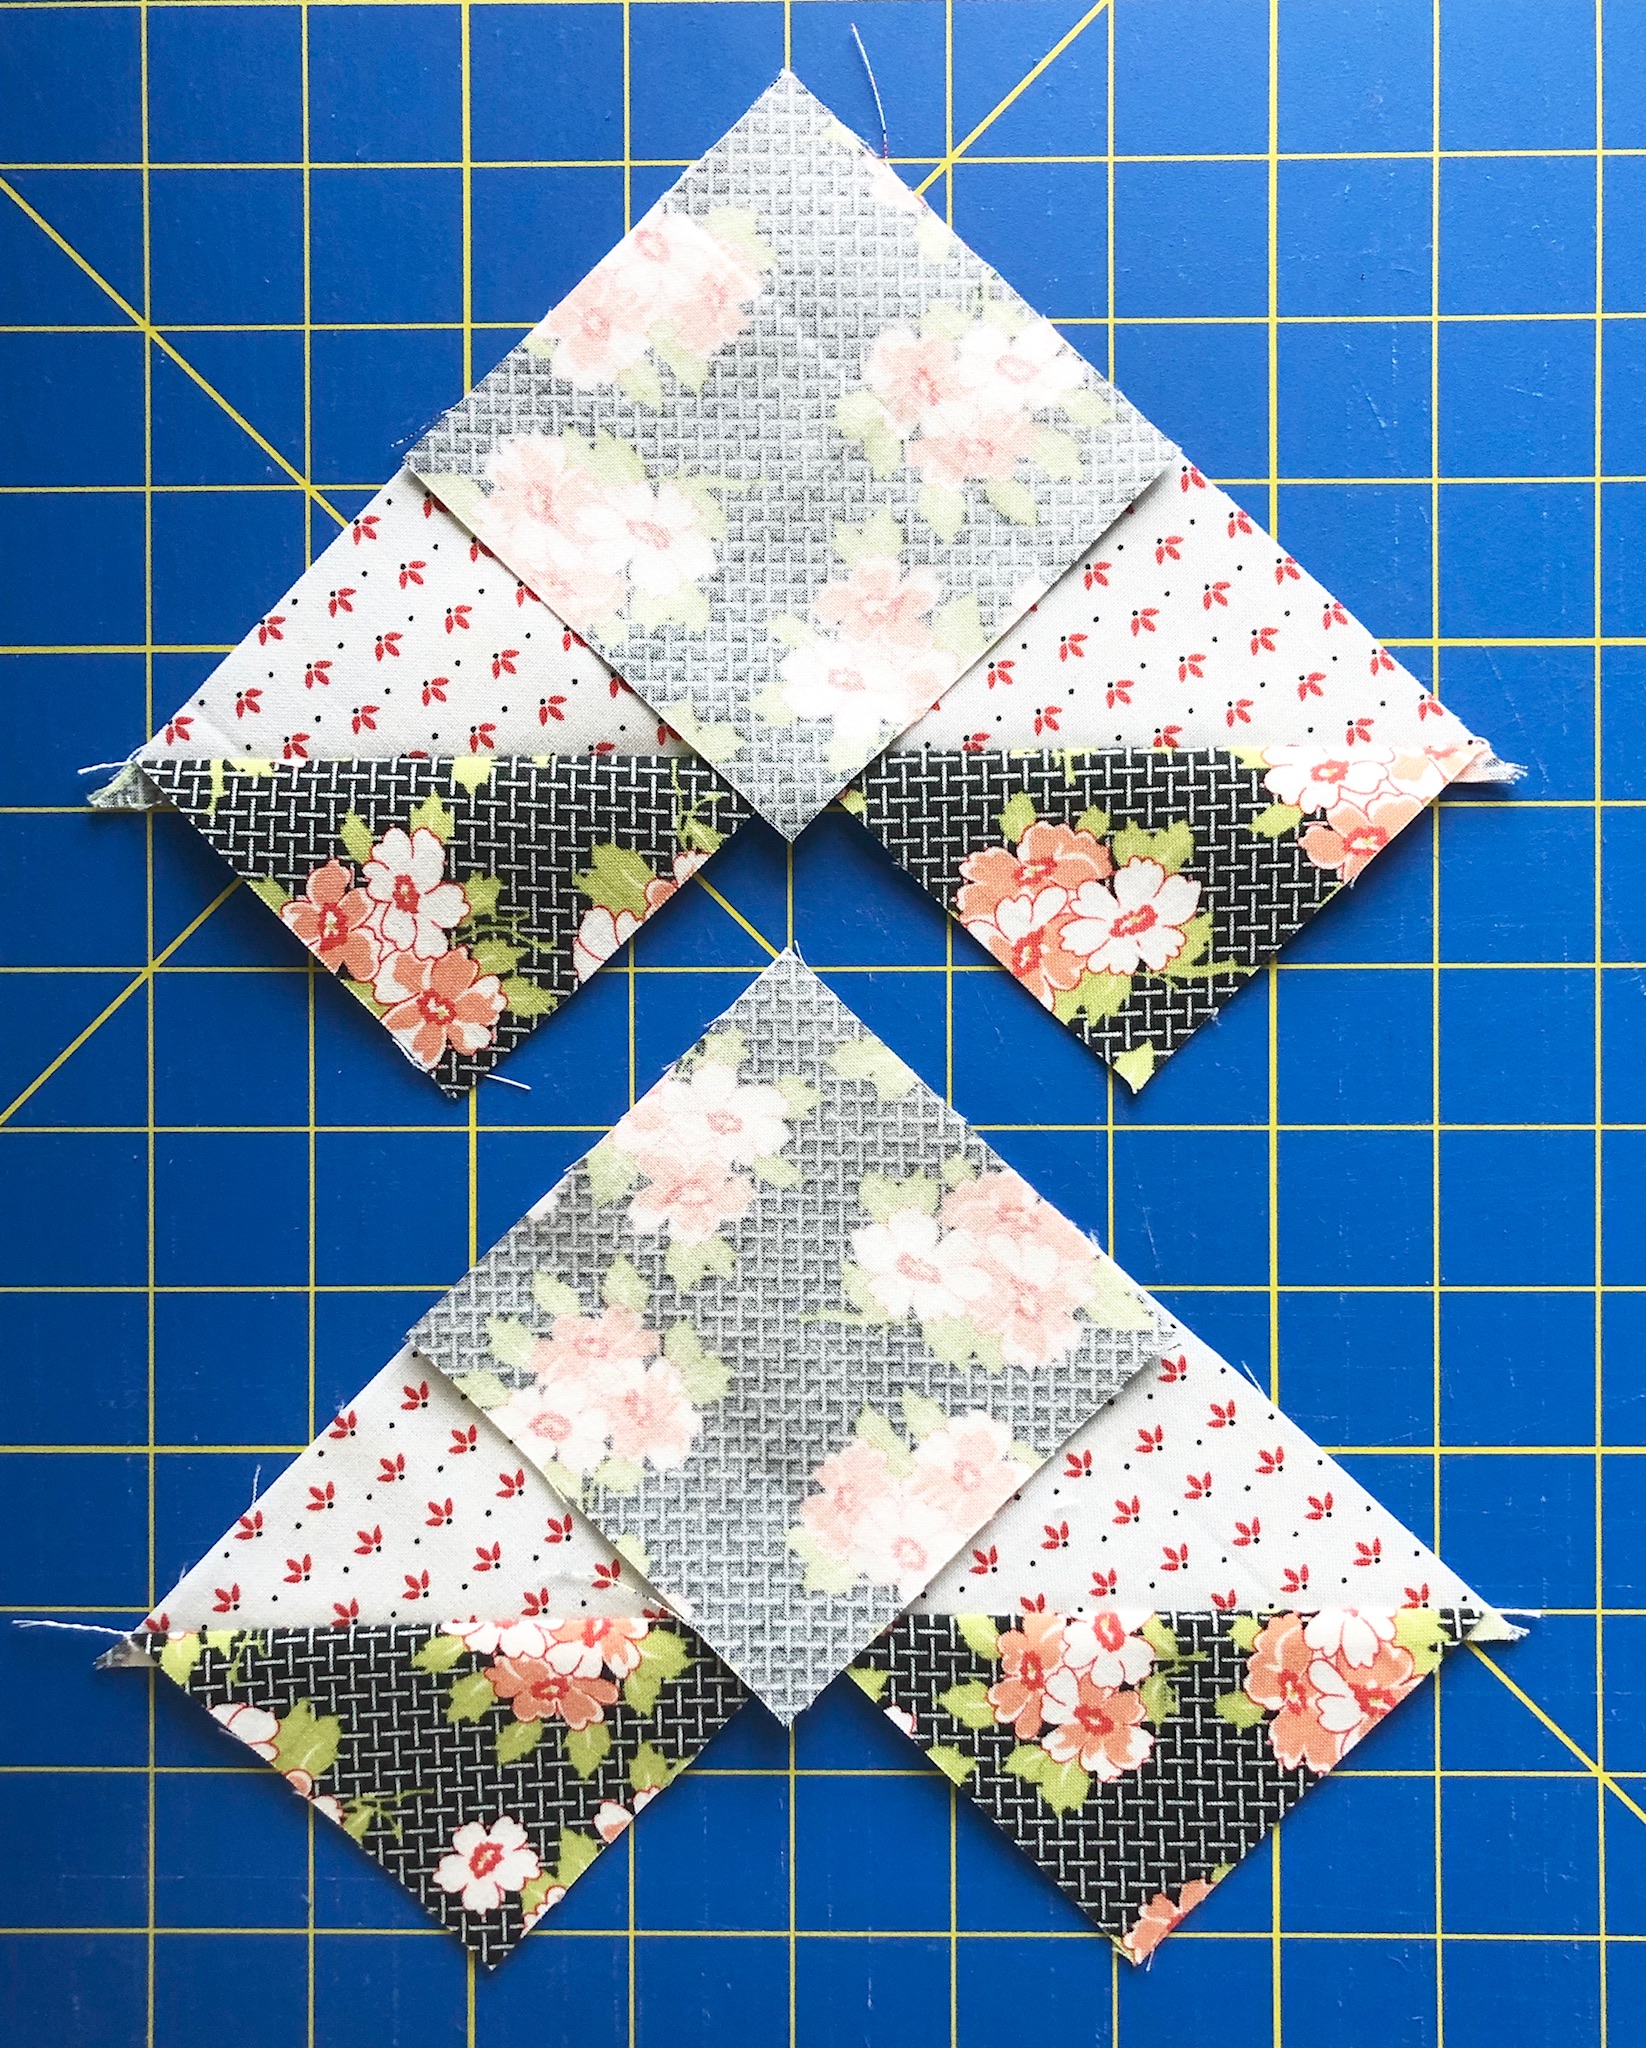
Cut on the center line.
Press the units, pressing the seam allowance toward the inner star fabric. Again, take care here not to distort the fabric when pressing.

Trim the dog-ears. Each unit should measure 3” by 5.5” unfinished.

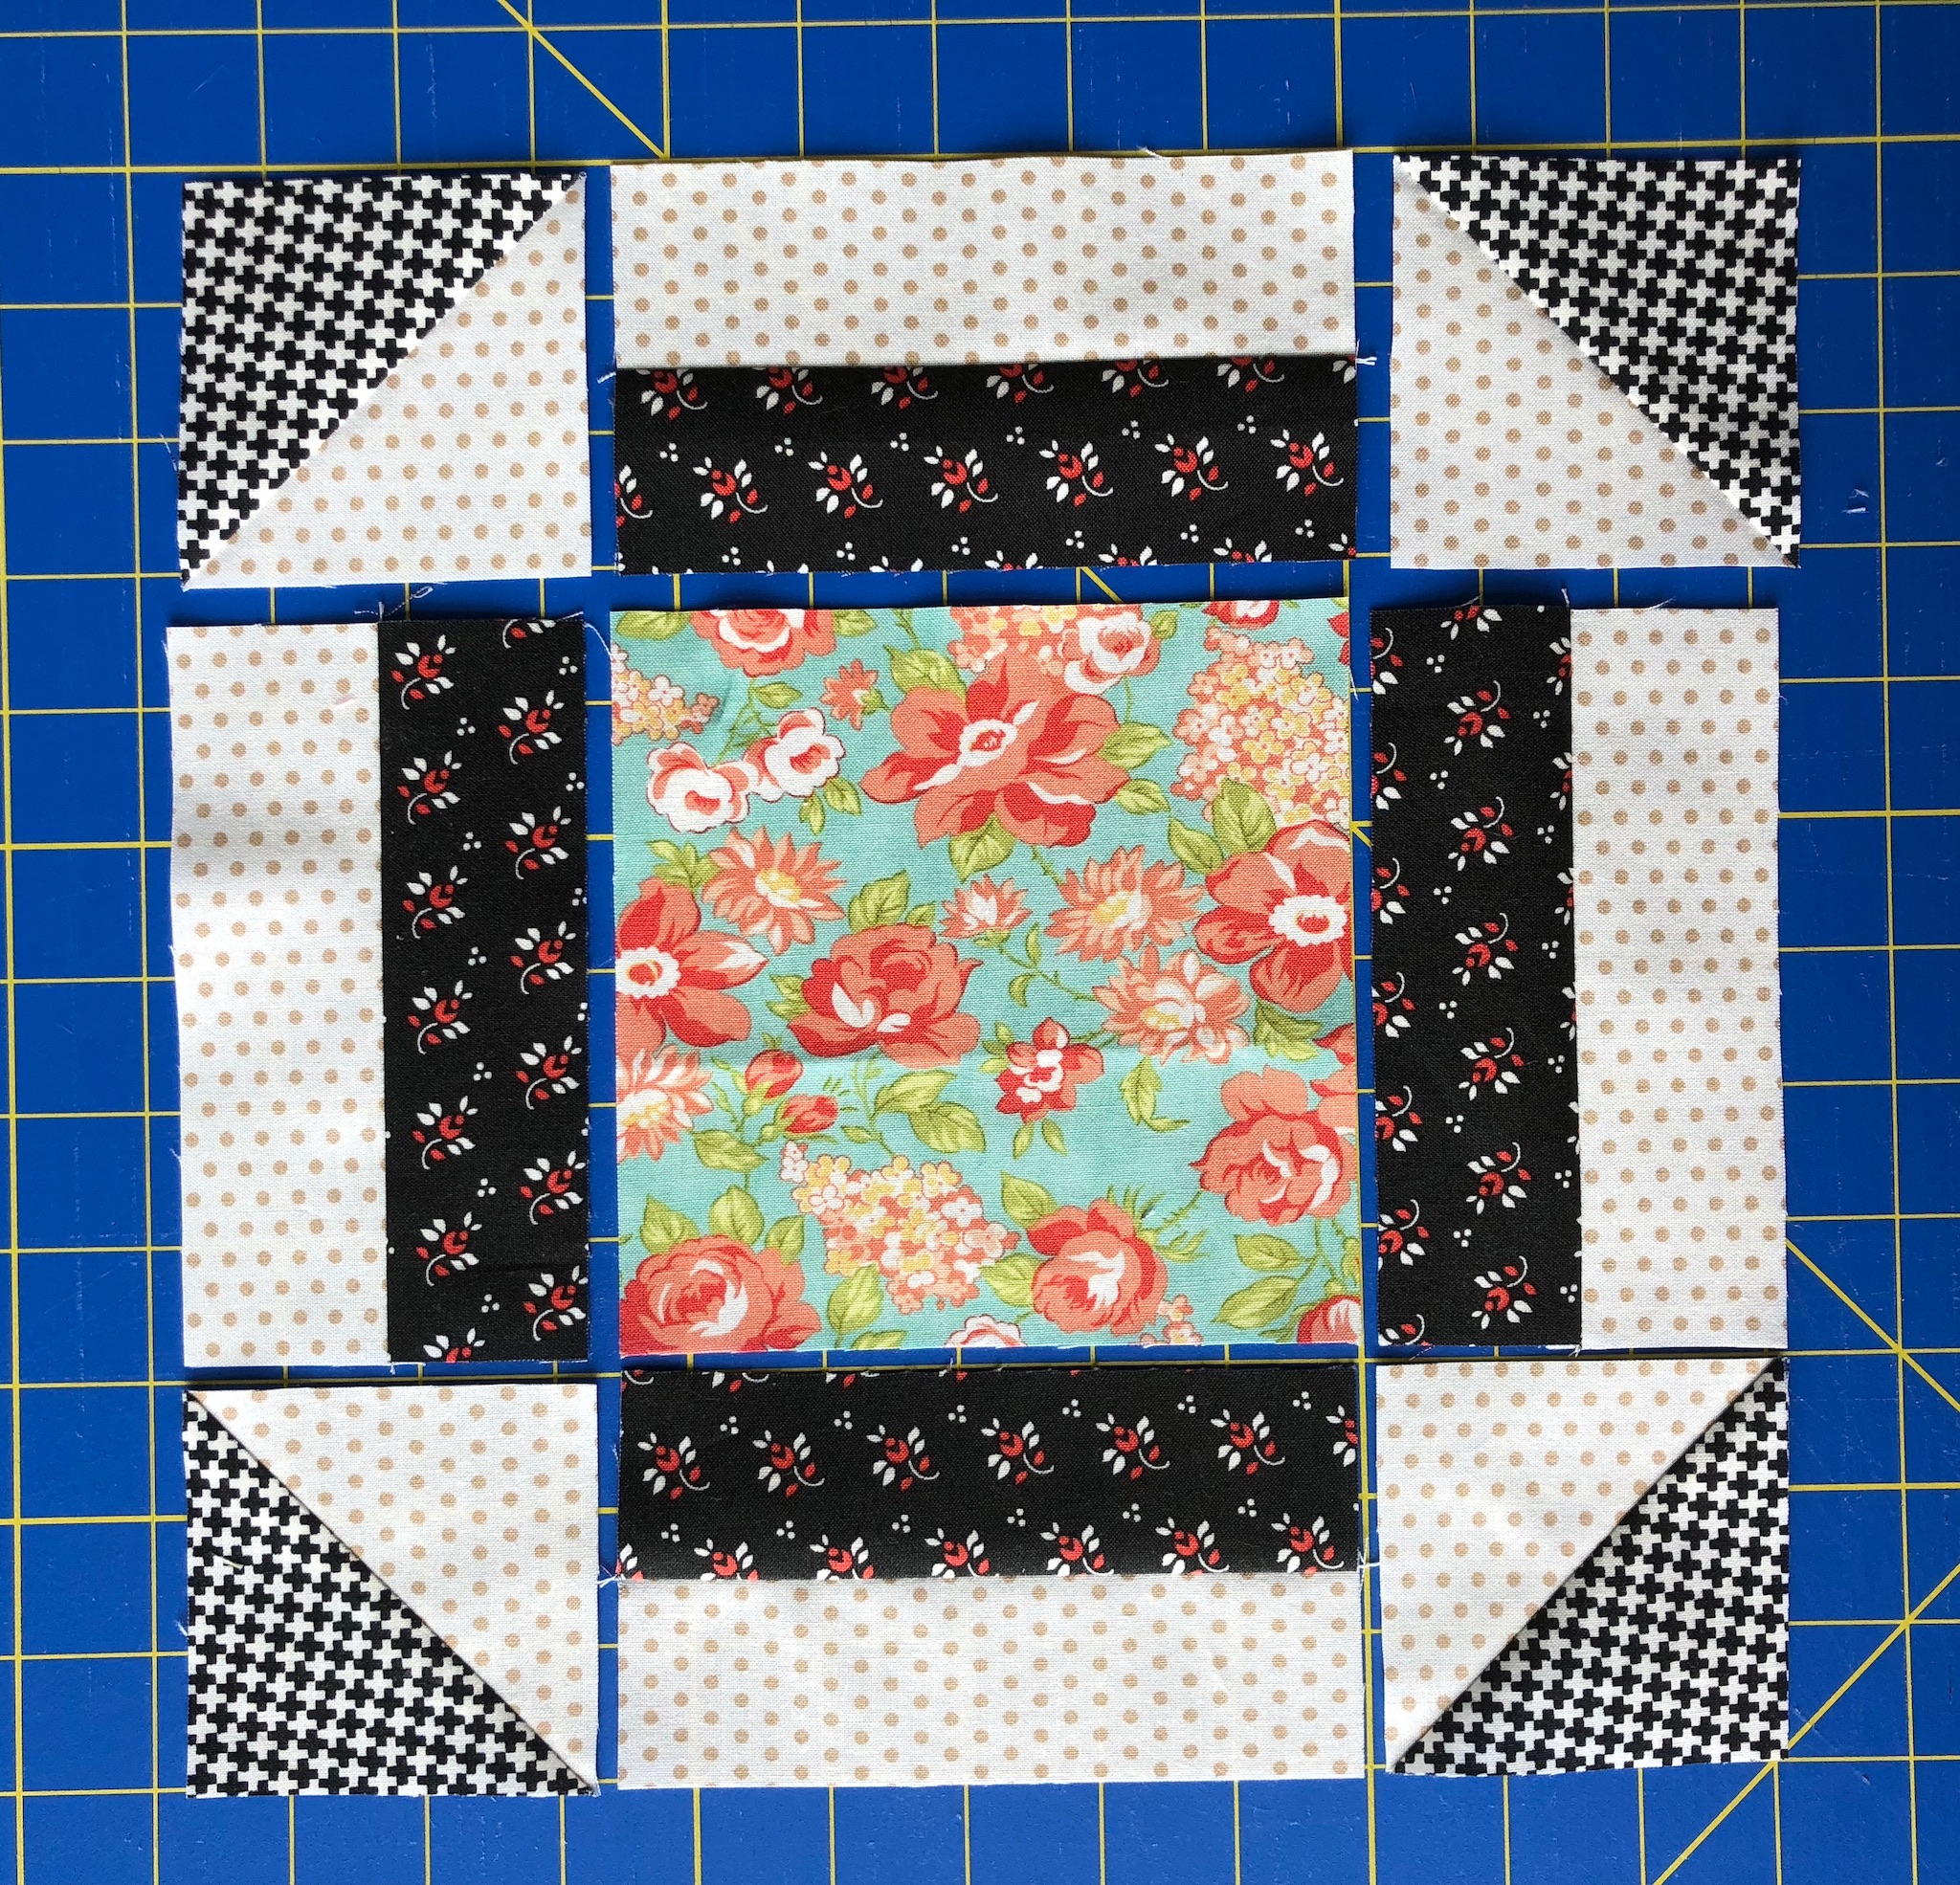
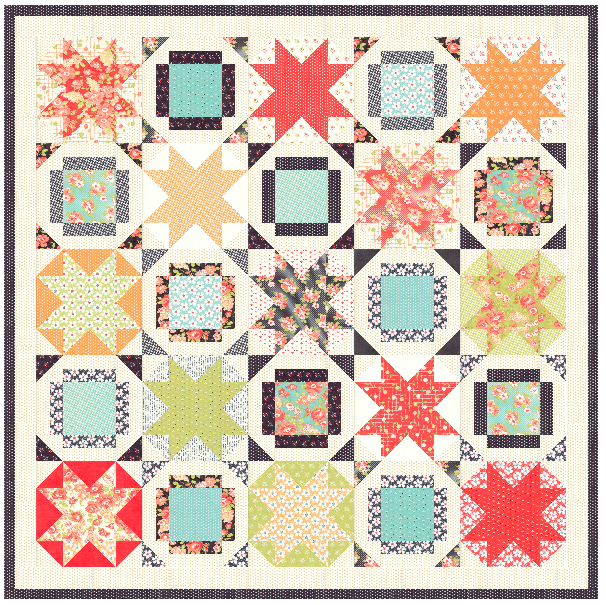
Gather the 4 HST, the 4 geese, and the 5 1/2" inner star square. The block layout is shown below.
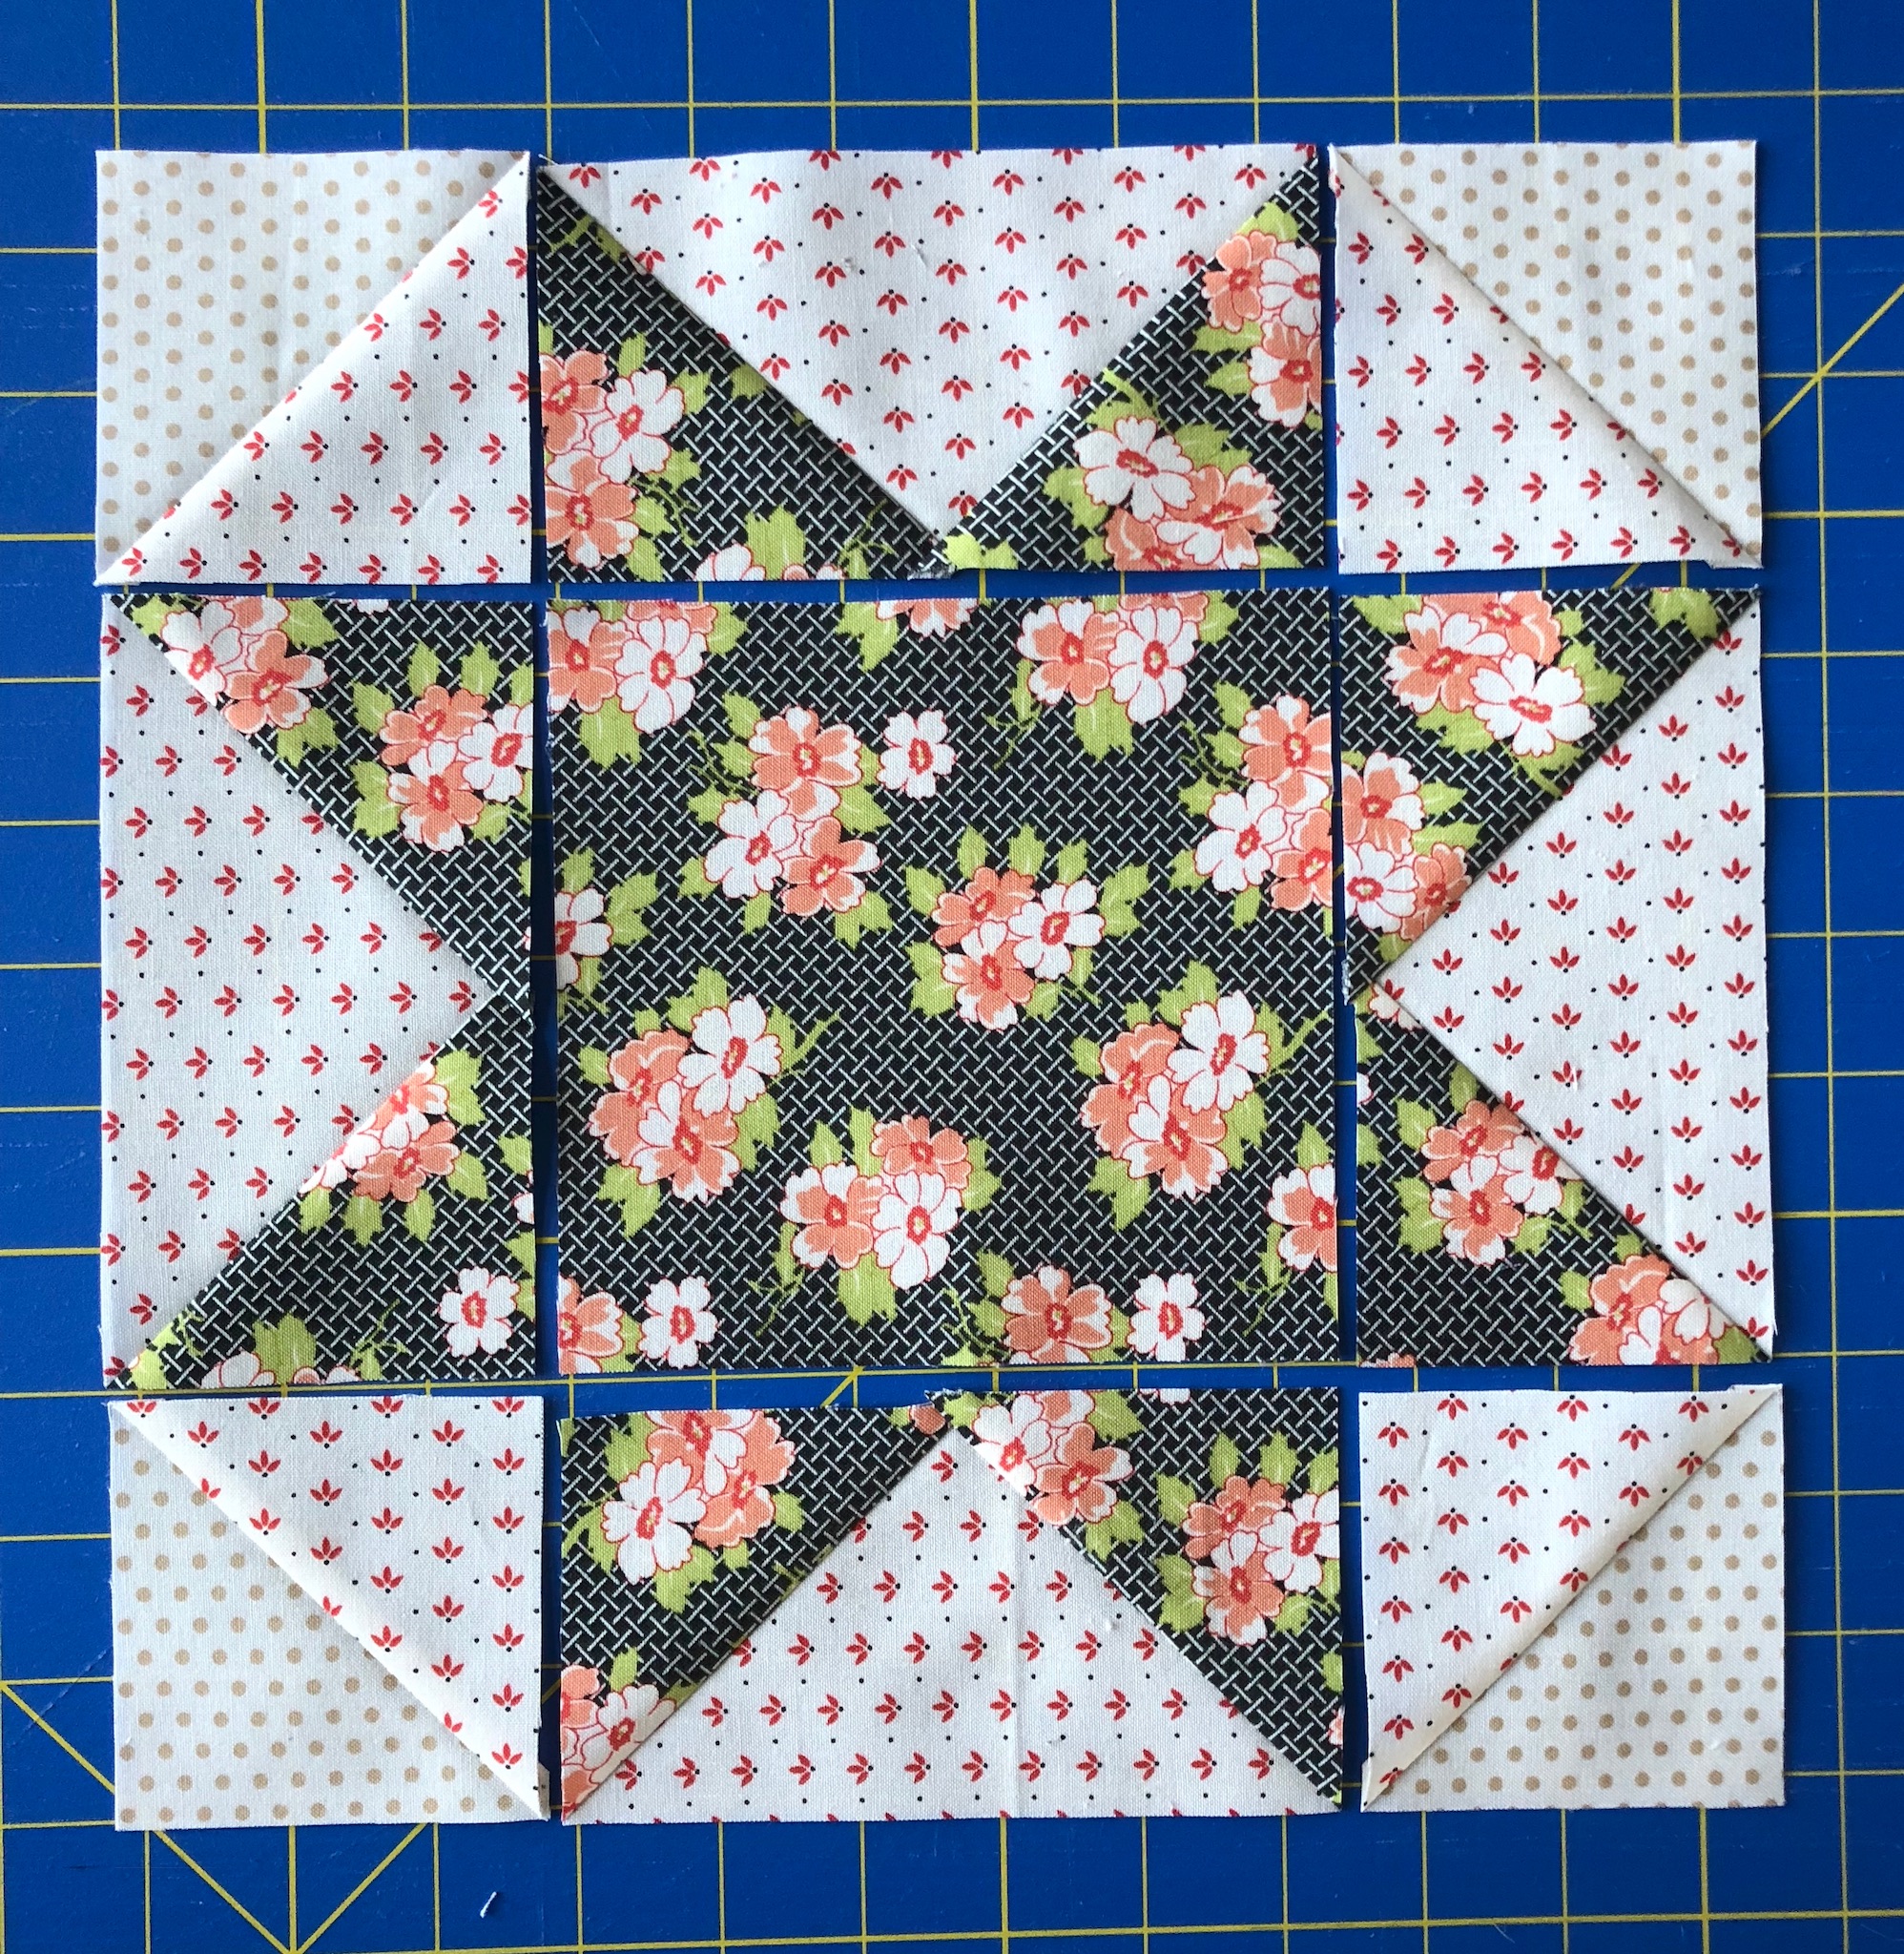
Sew the block into rows. Press seams of the two outer rows toward the HST. Press the seams of the inner row toward the center square.
Sew the rows together to make the block.
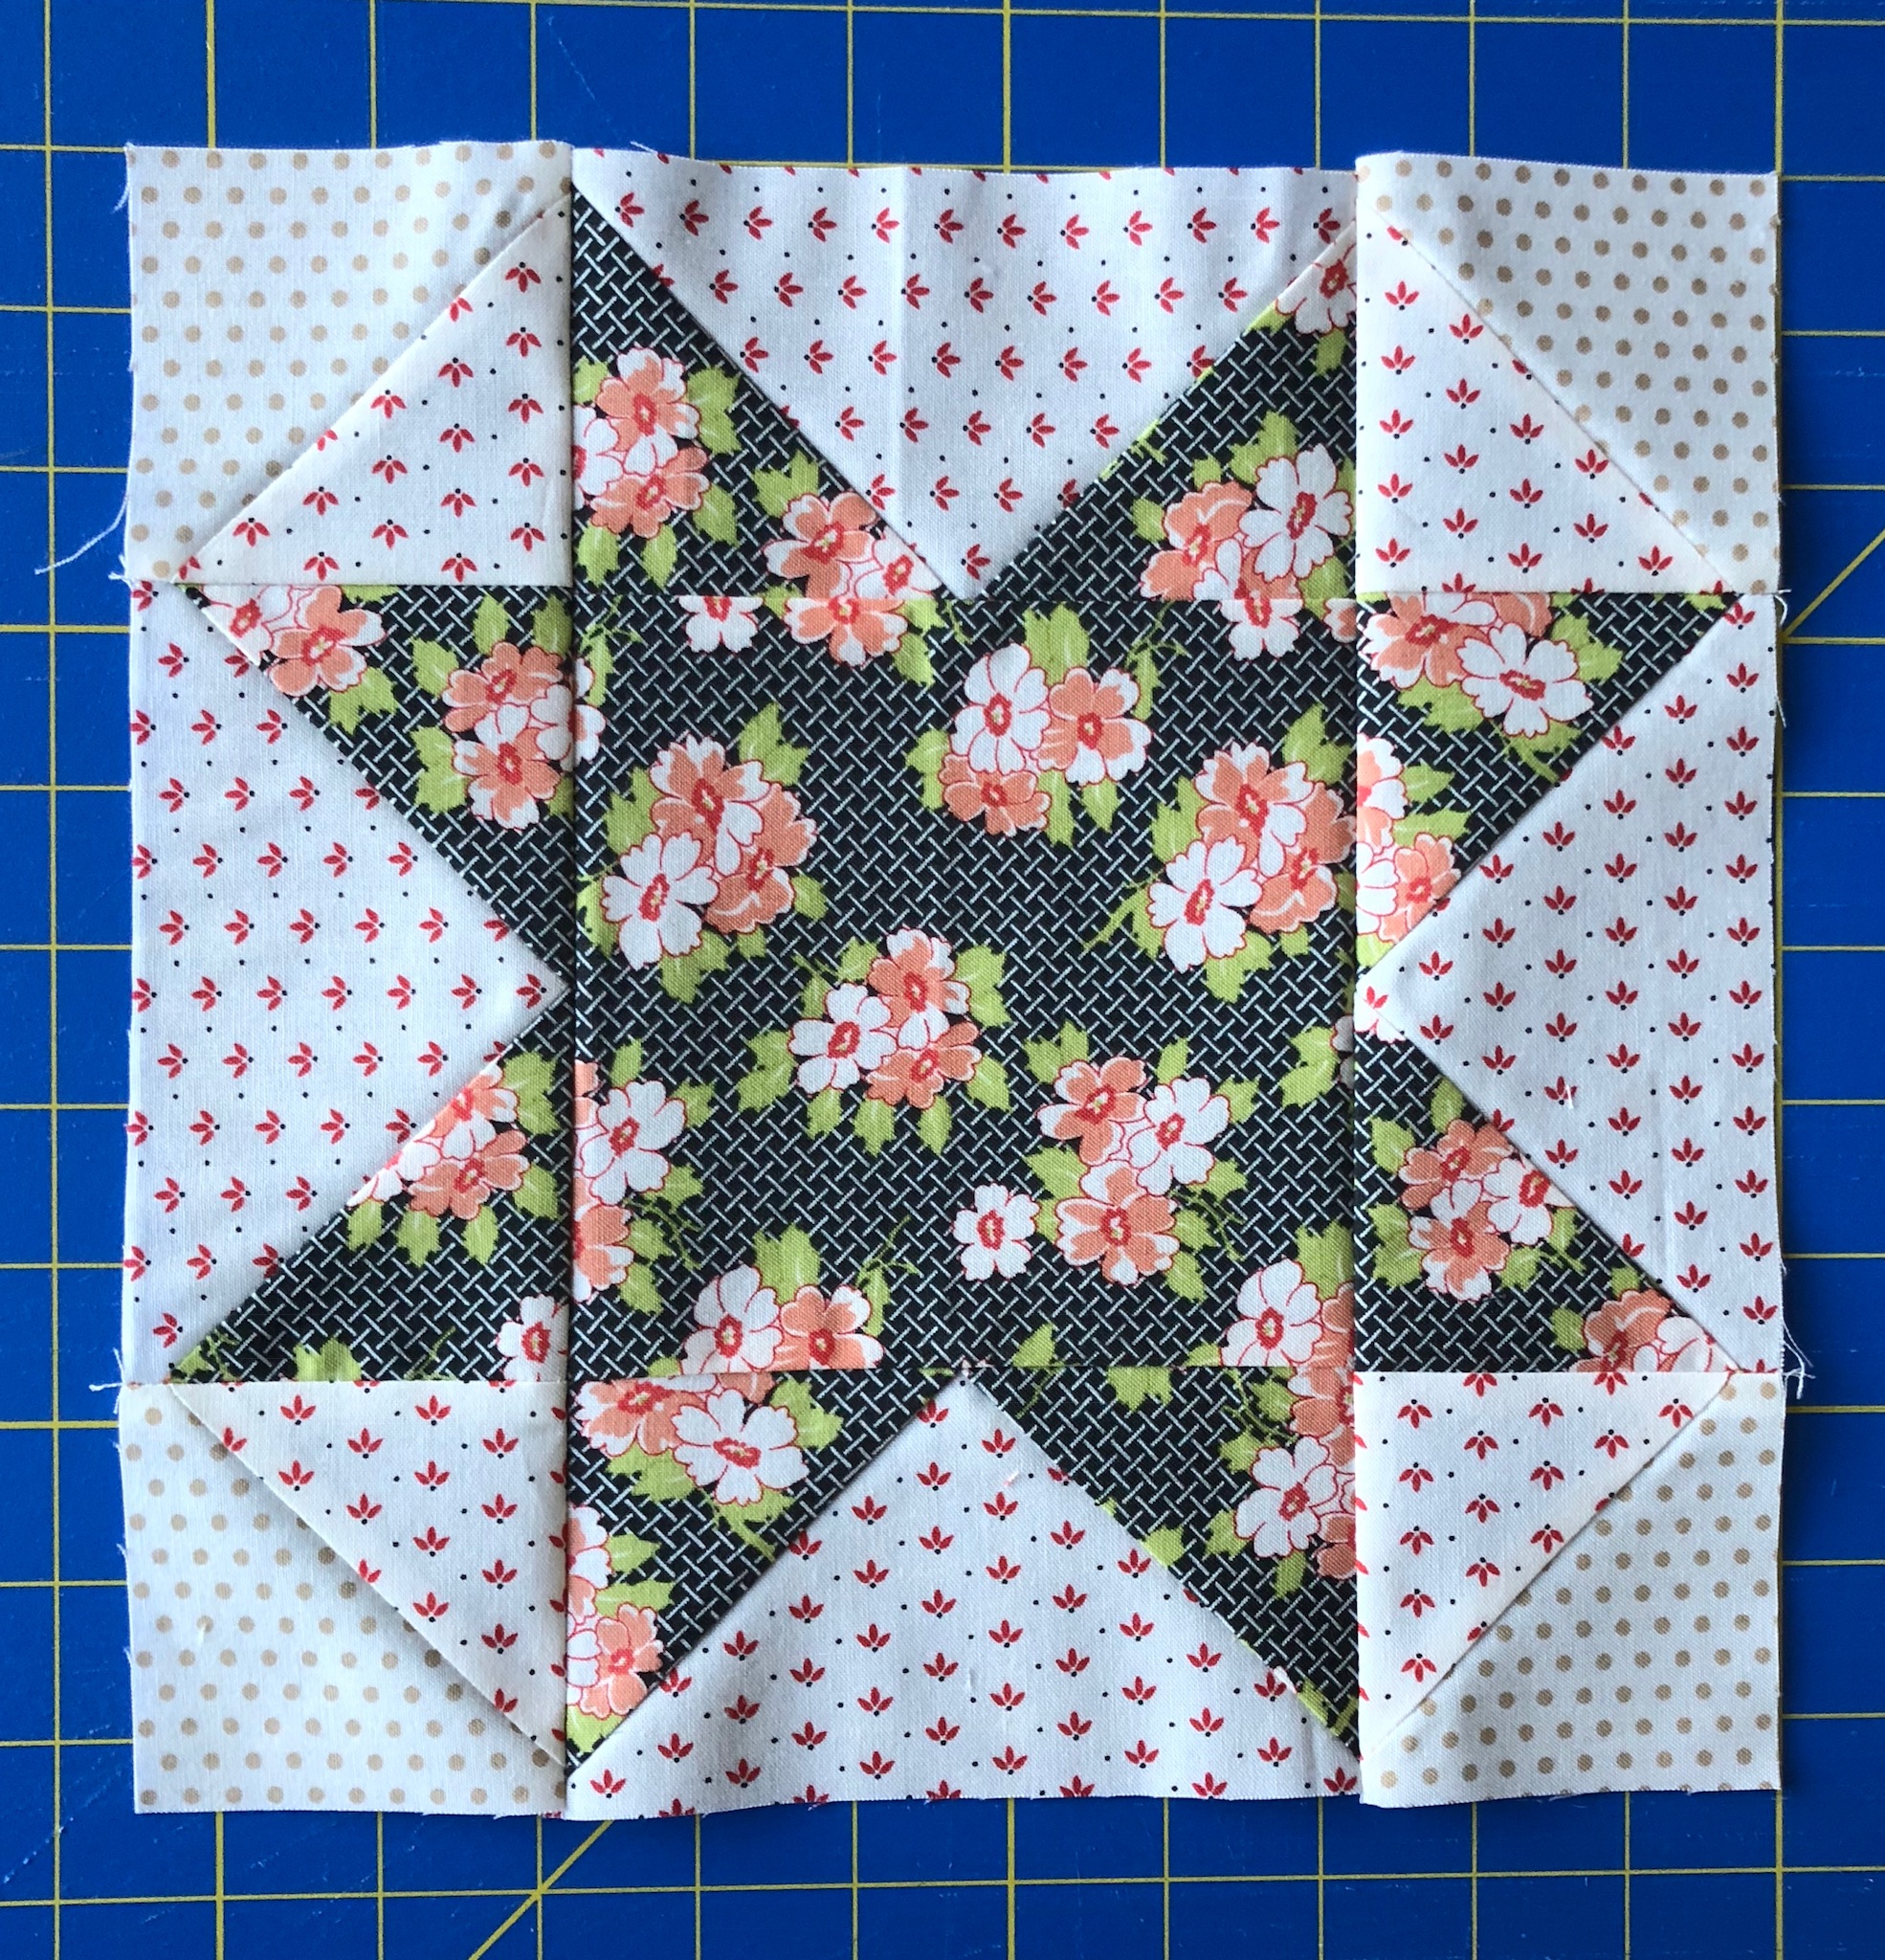
Repeat these directions to make 13 blocks total. The blocks measure 10.5" unfinished.
-----------------------------------------------------------------------------------------------------------------------------------------
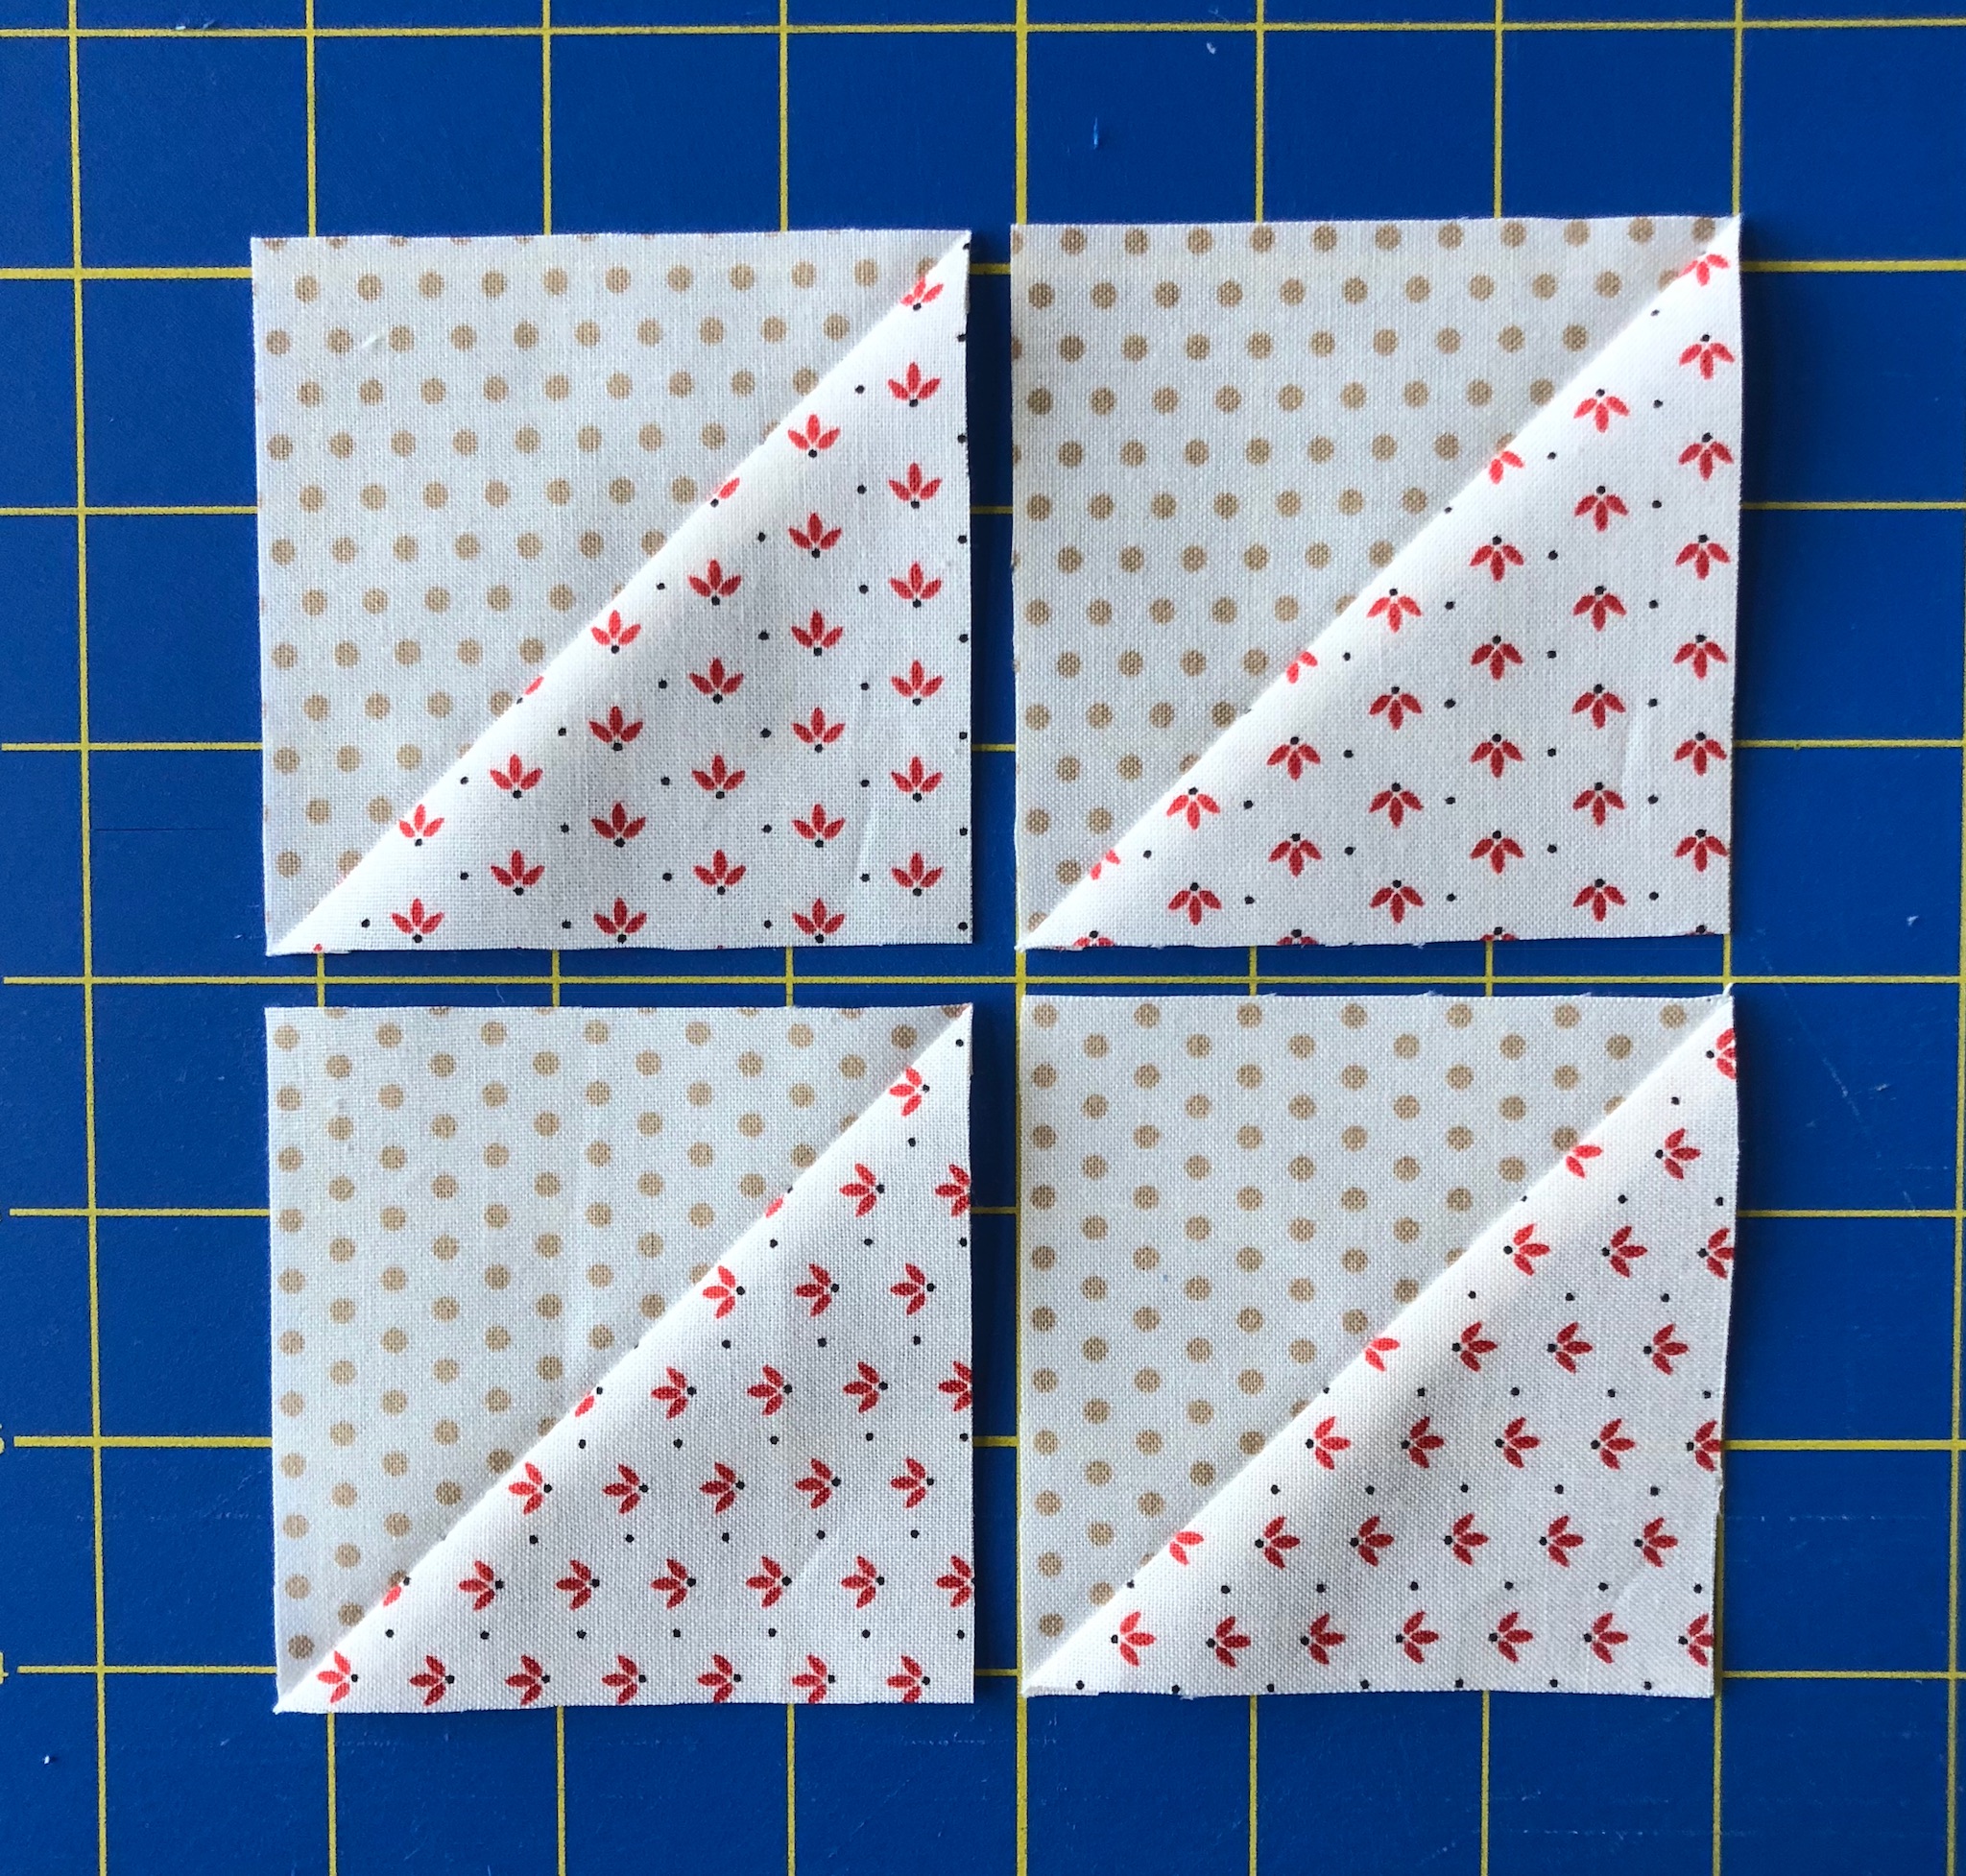
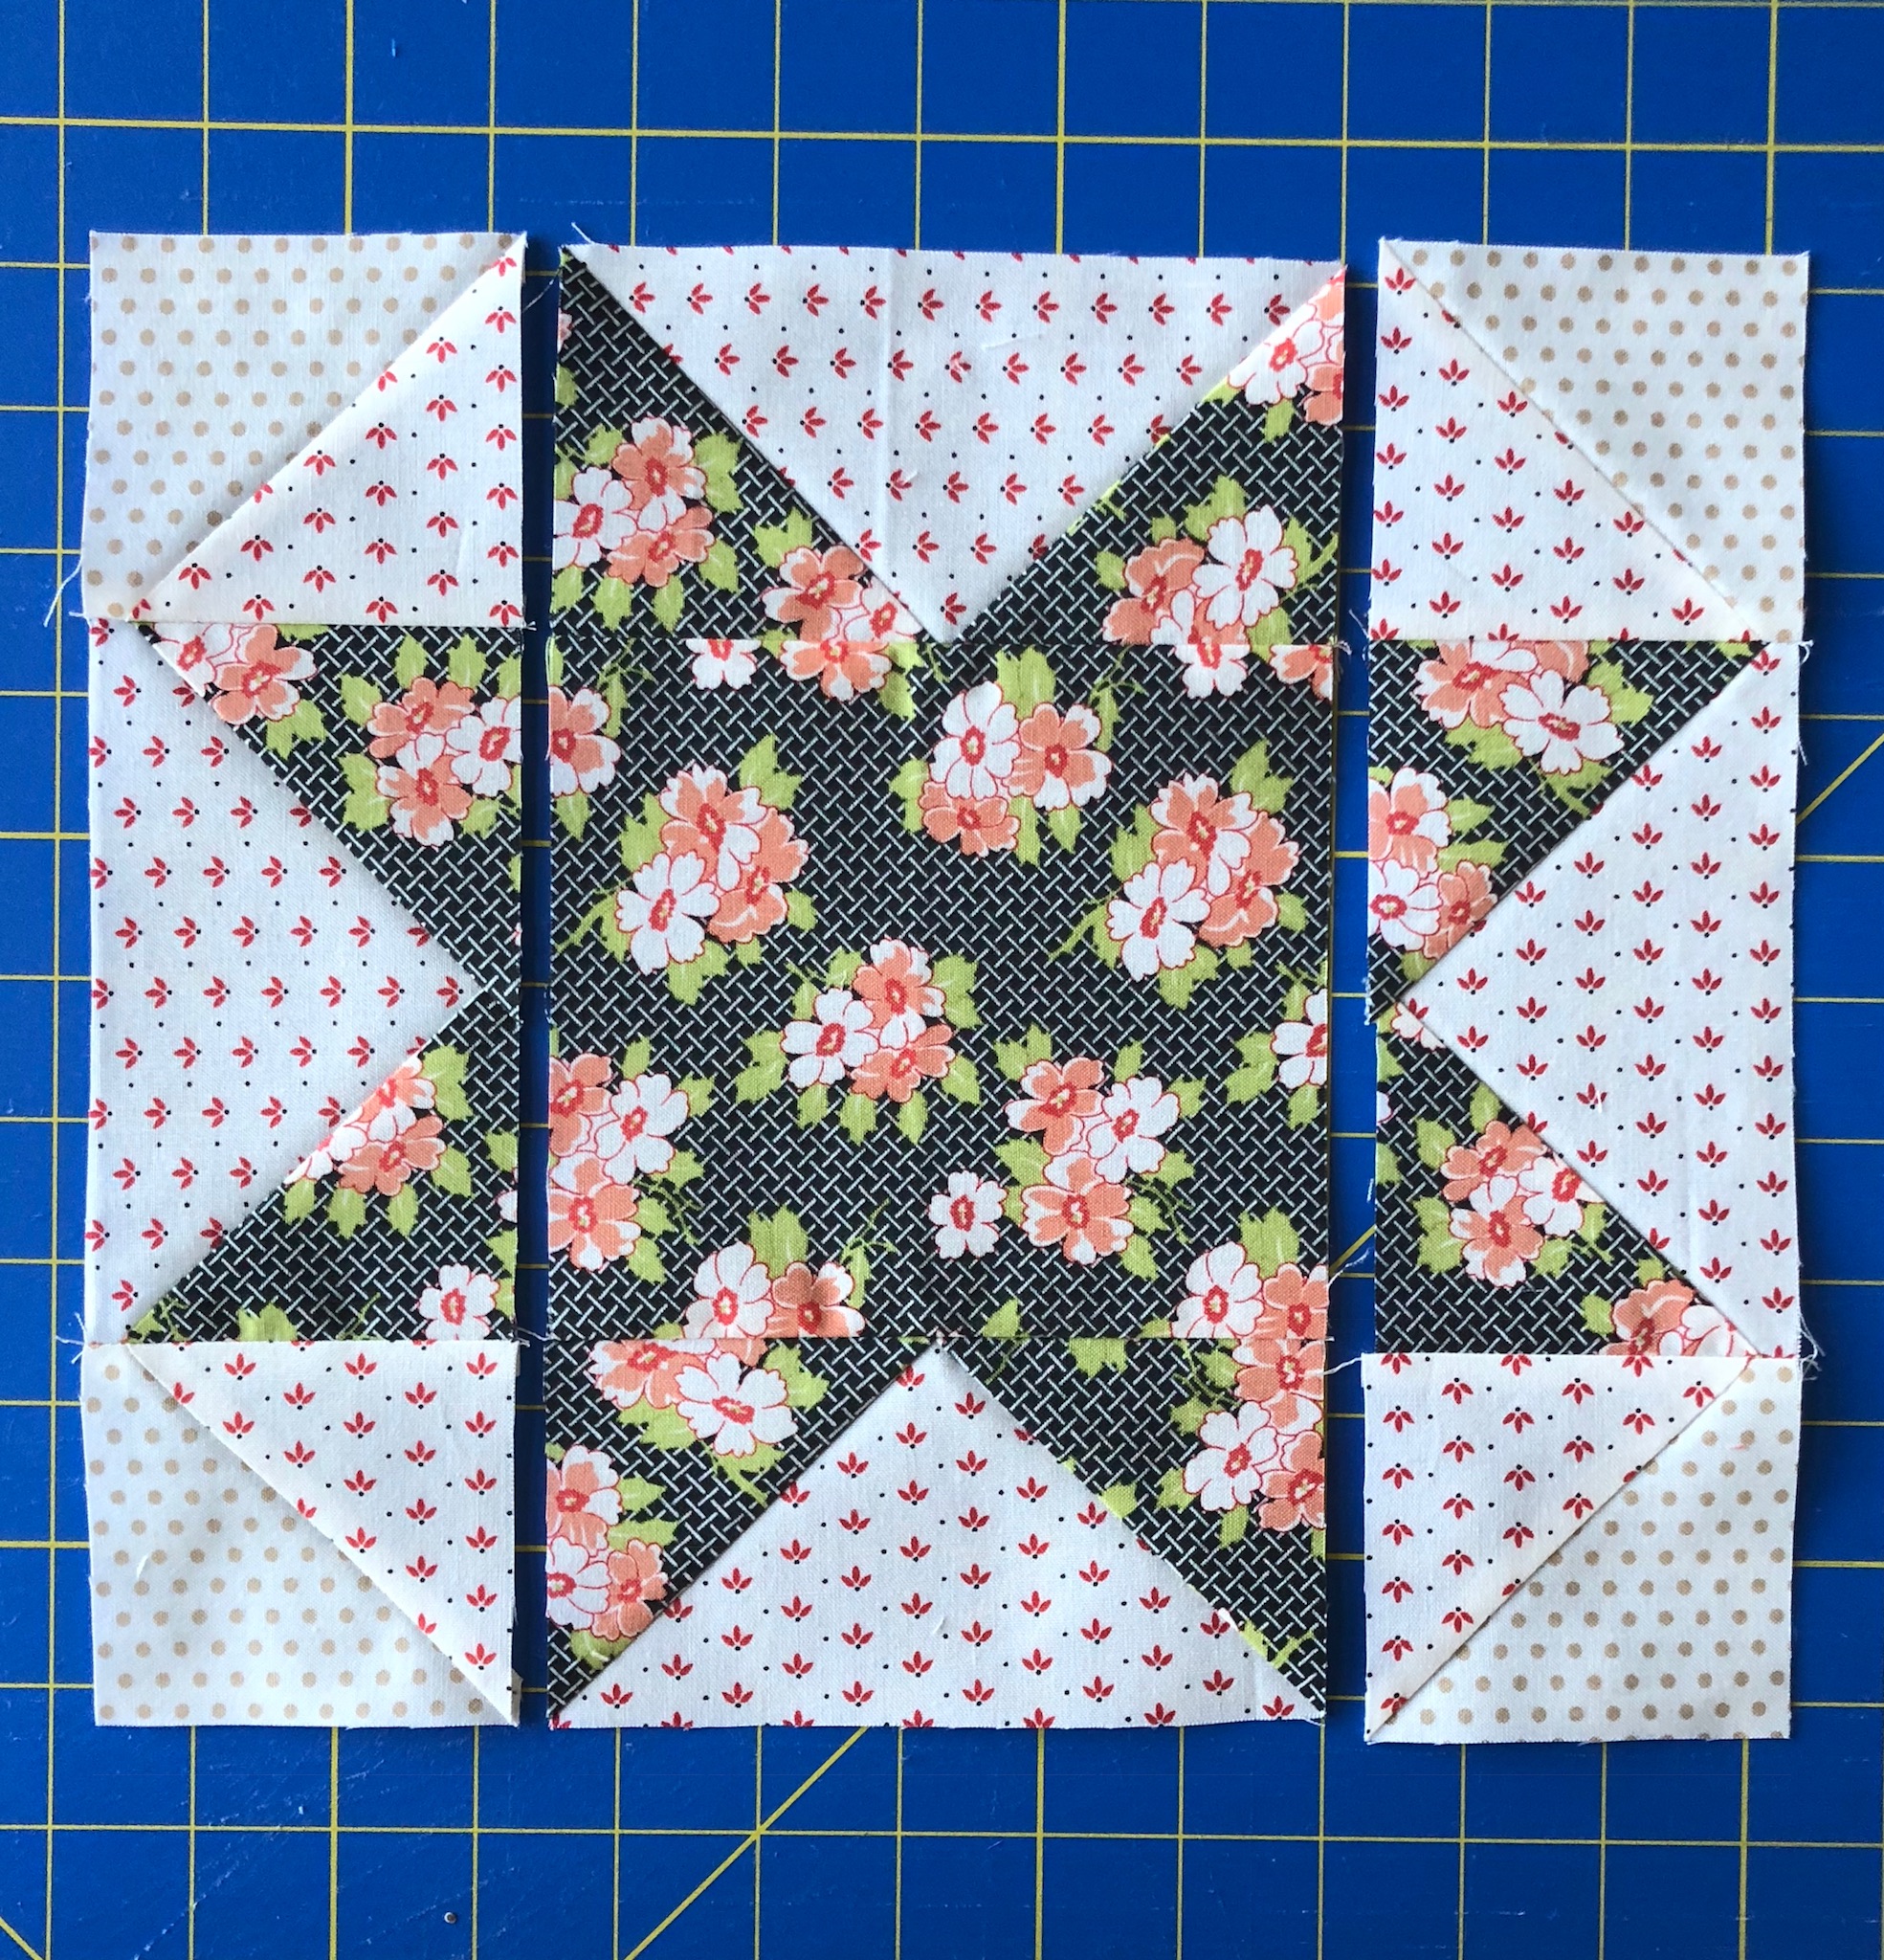
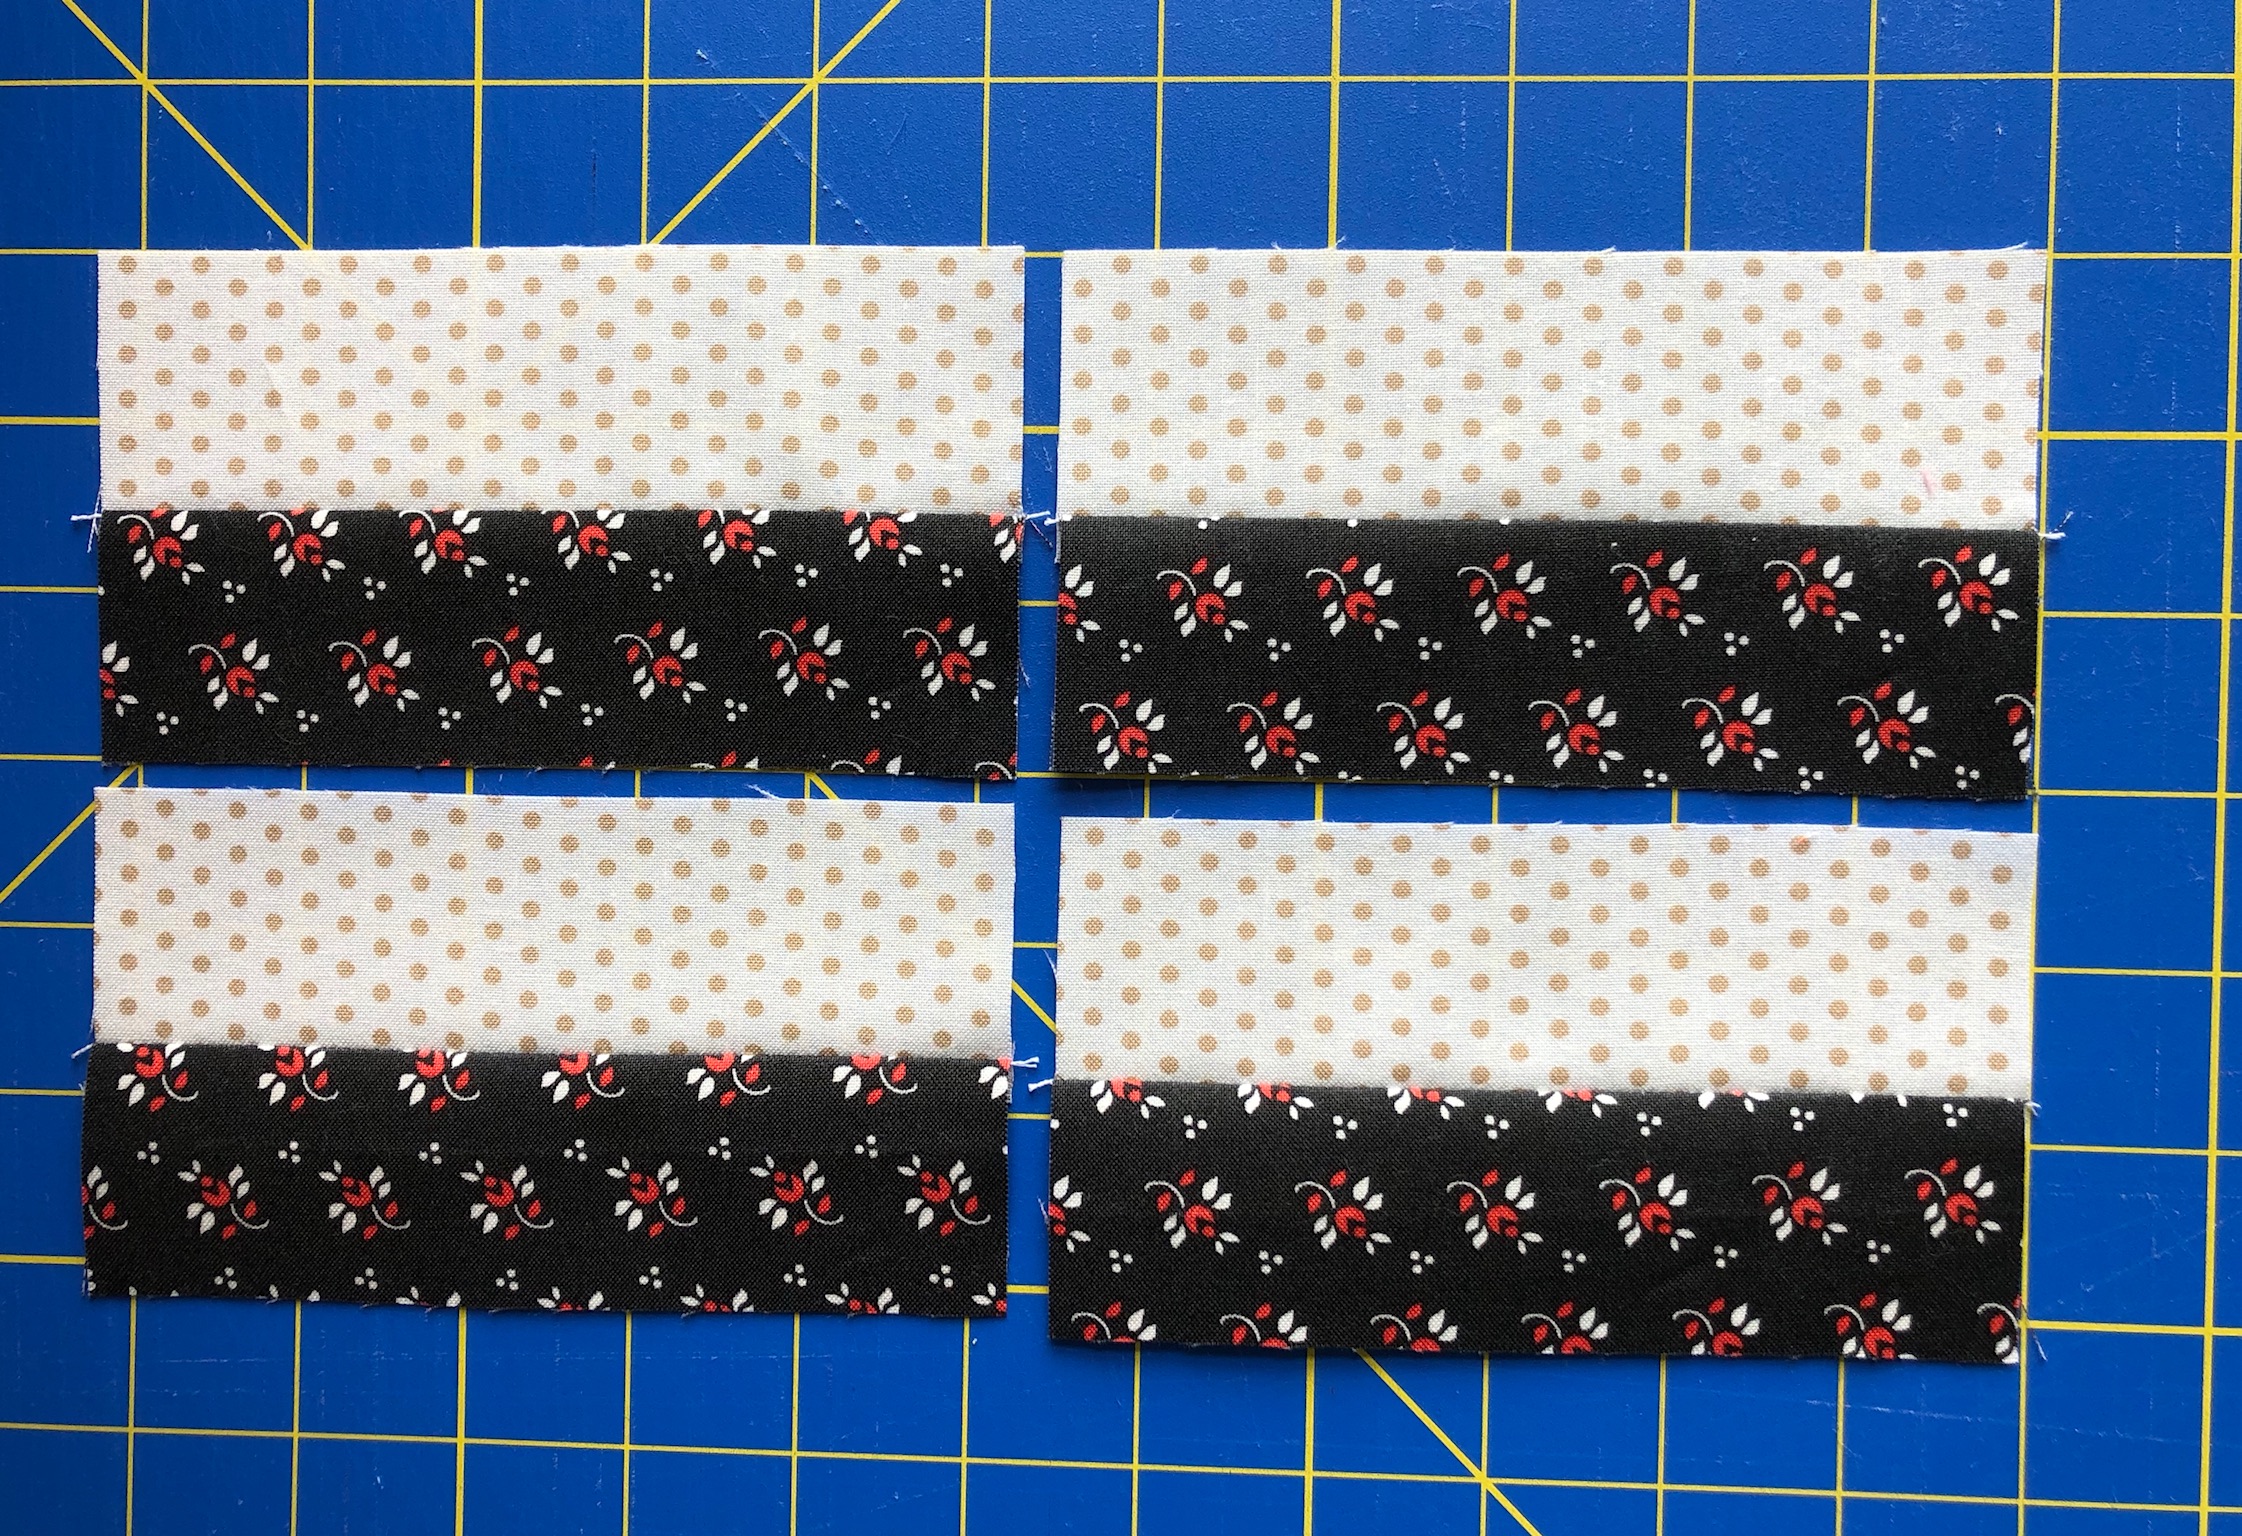
To make the Greek Square blocks, gather 1 3/4" x 5 1/2" rectangles (4 black and 4 background per block), 3 3/8" squares (2 black and 2 background per block), 5 1/2" center square (aqua)
Line up the black 1 3/4" x 5 1/2" rectangle on top of the background 1 3/4" x 5 1/2" rectangle, RST. Sew along the 5 1/2" side.
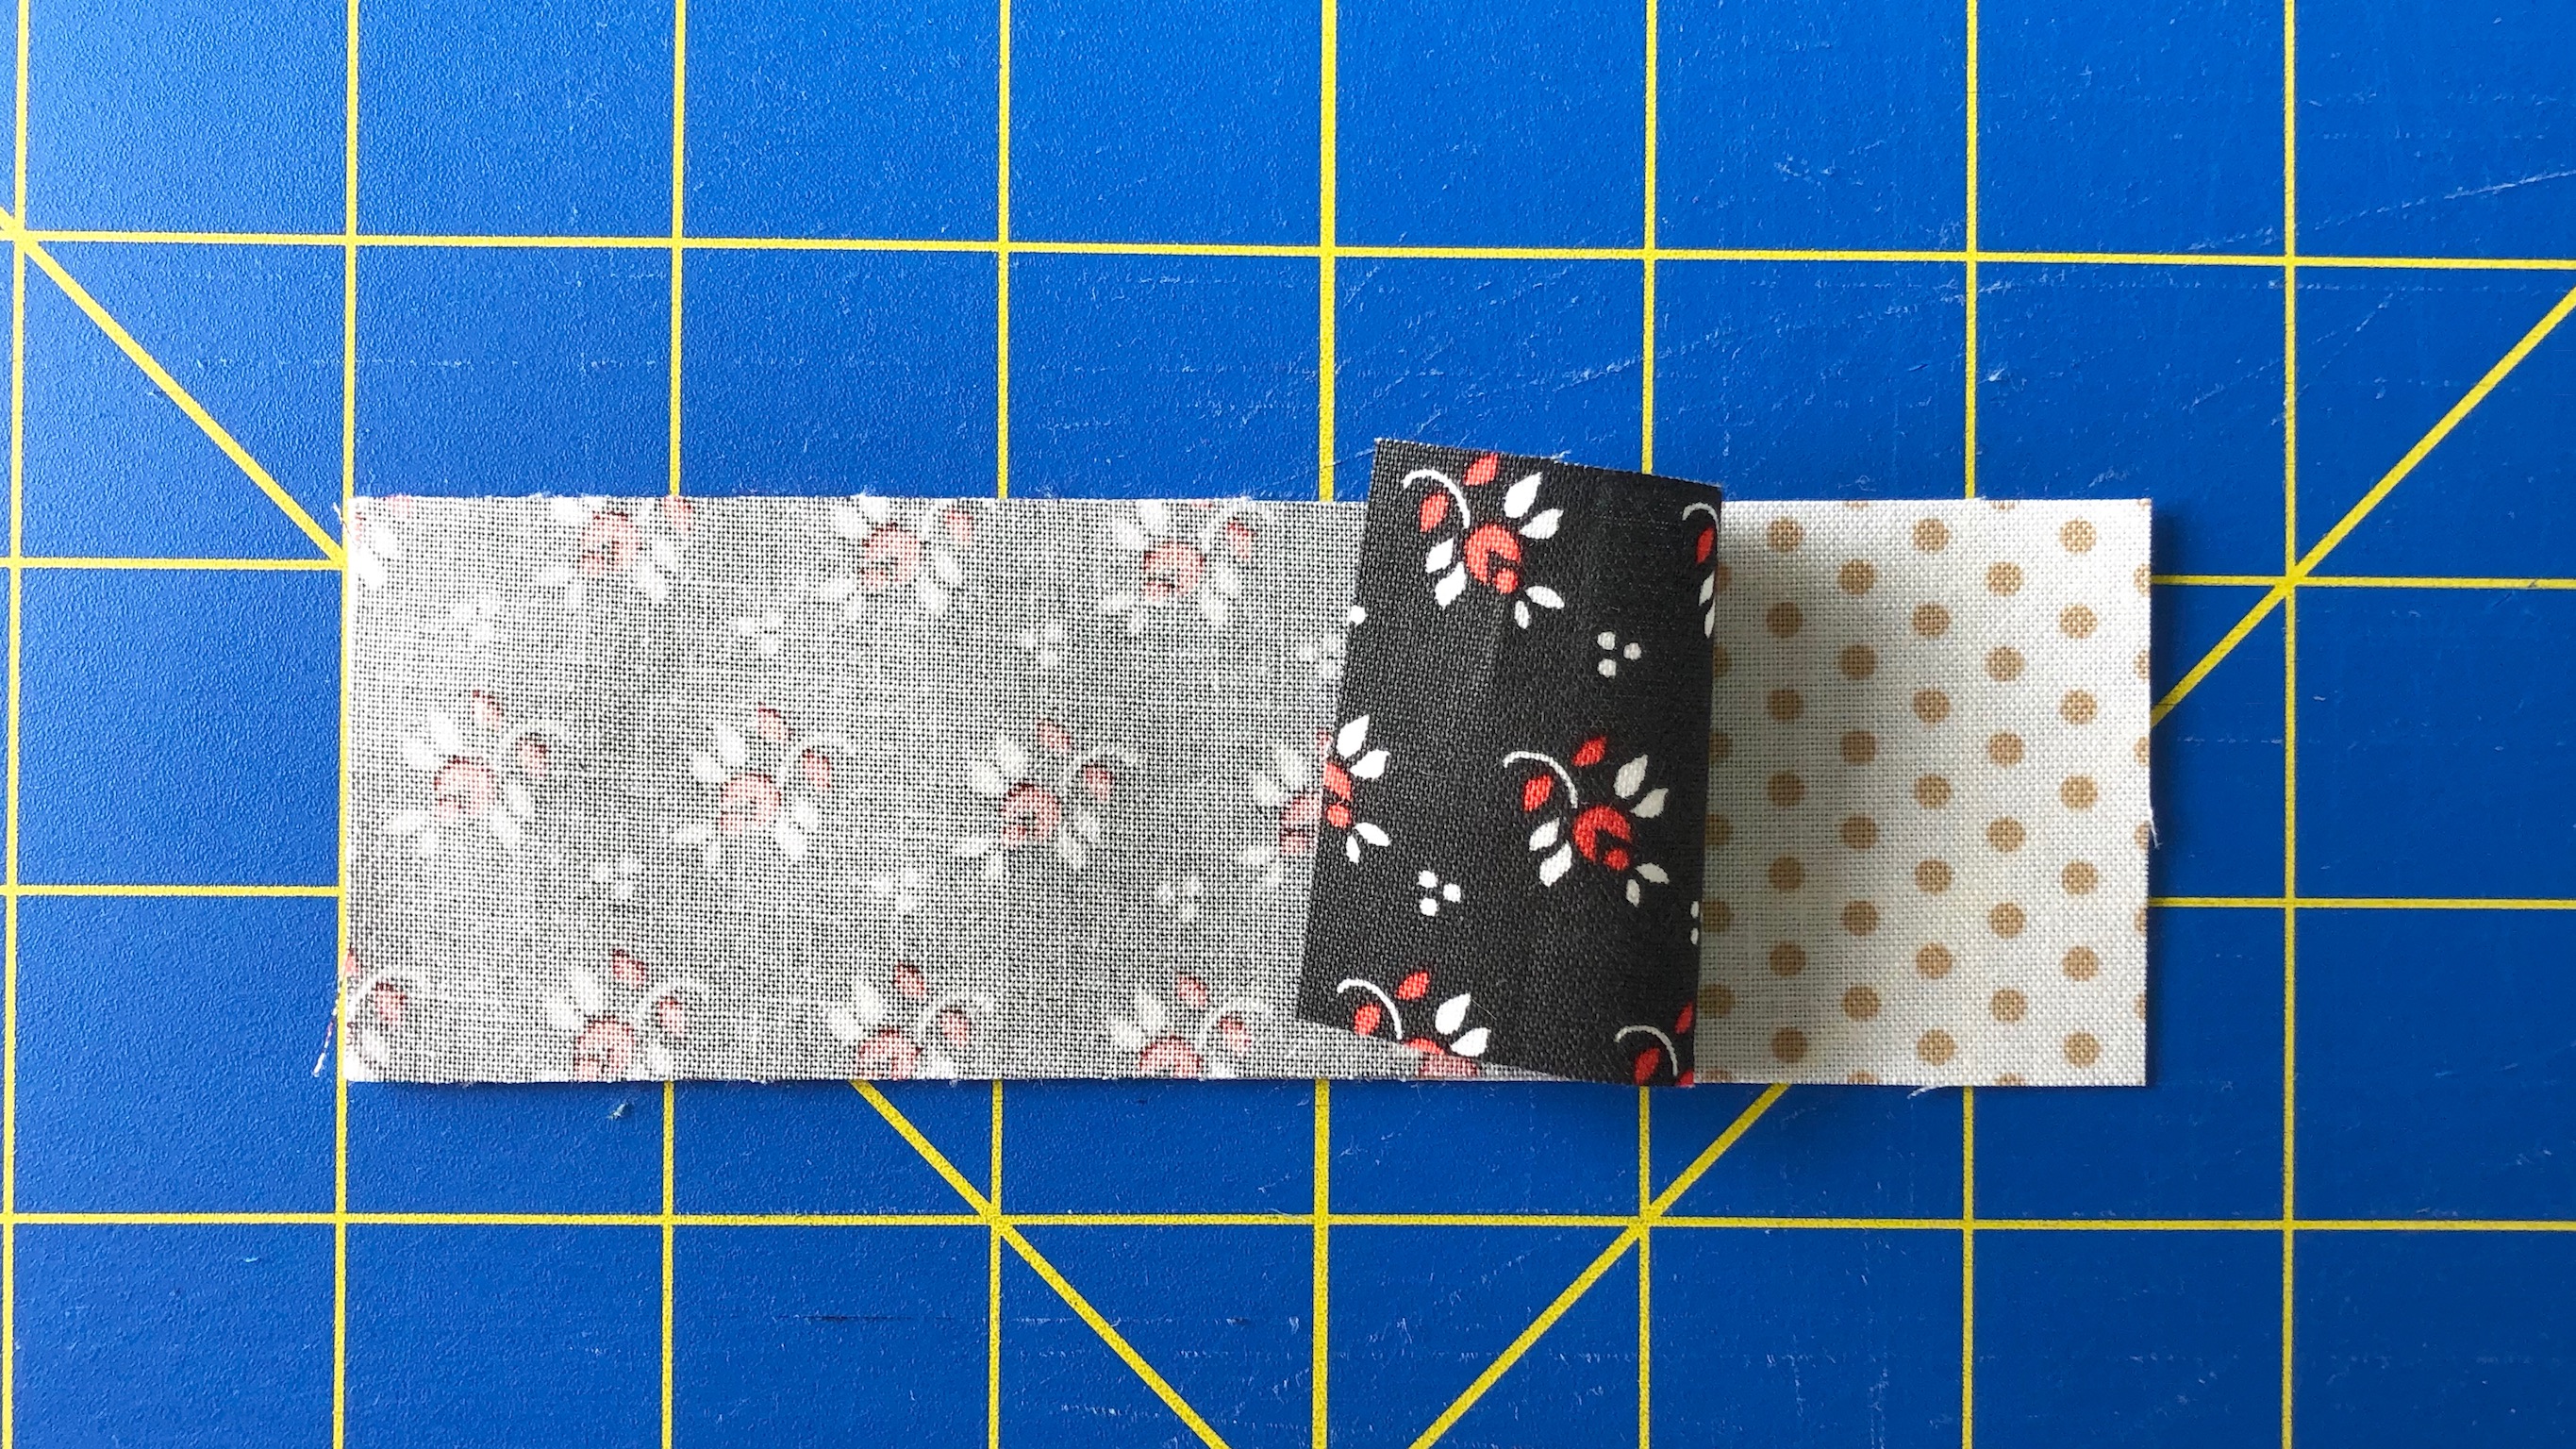
Repeat three more times (for a total of 4 rectangles). Press open, seam allowance to the black.
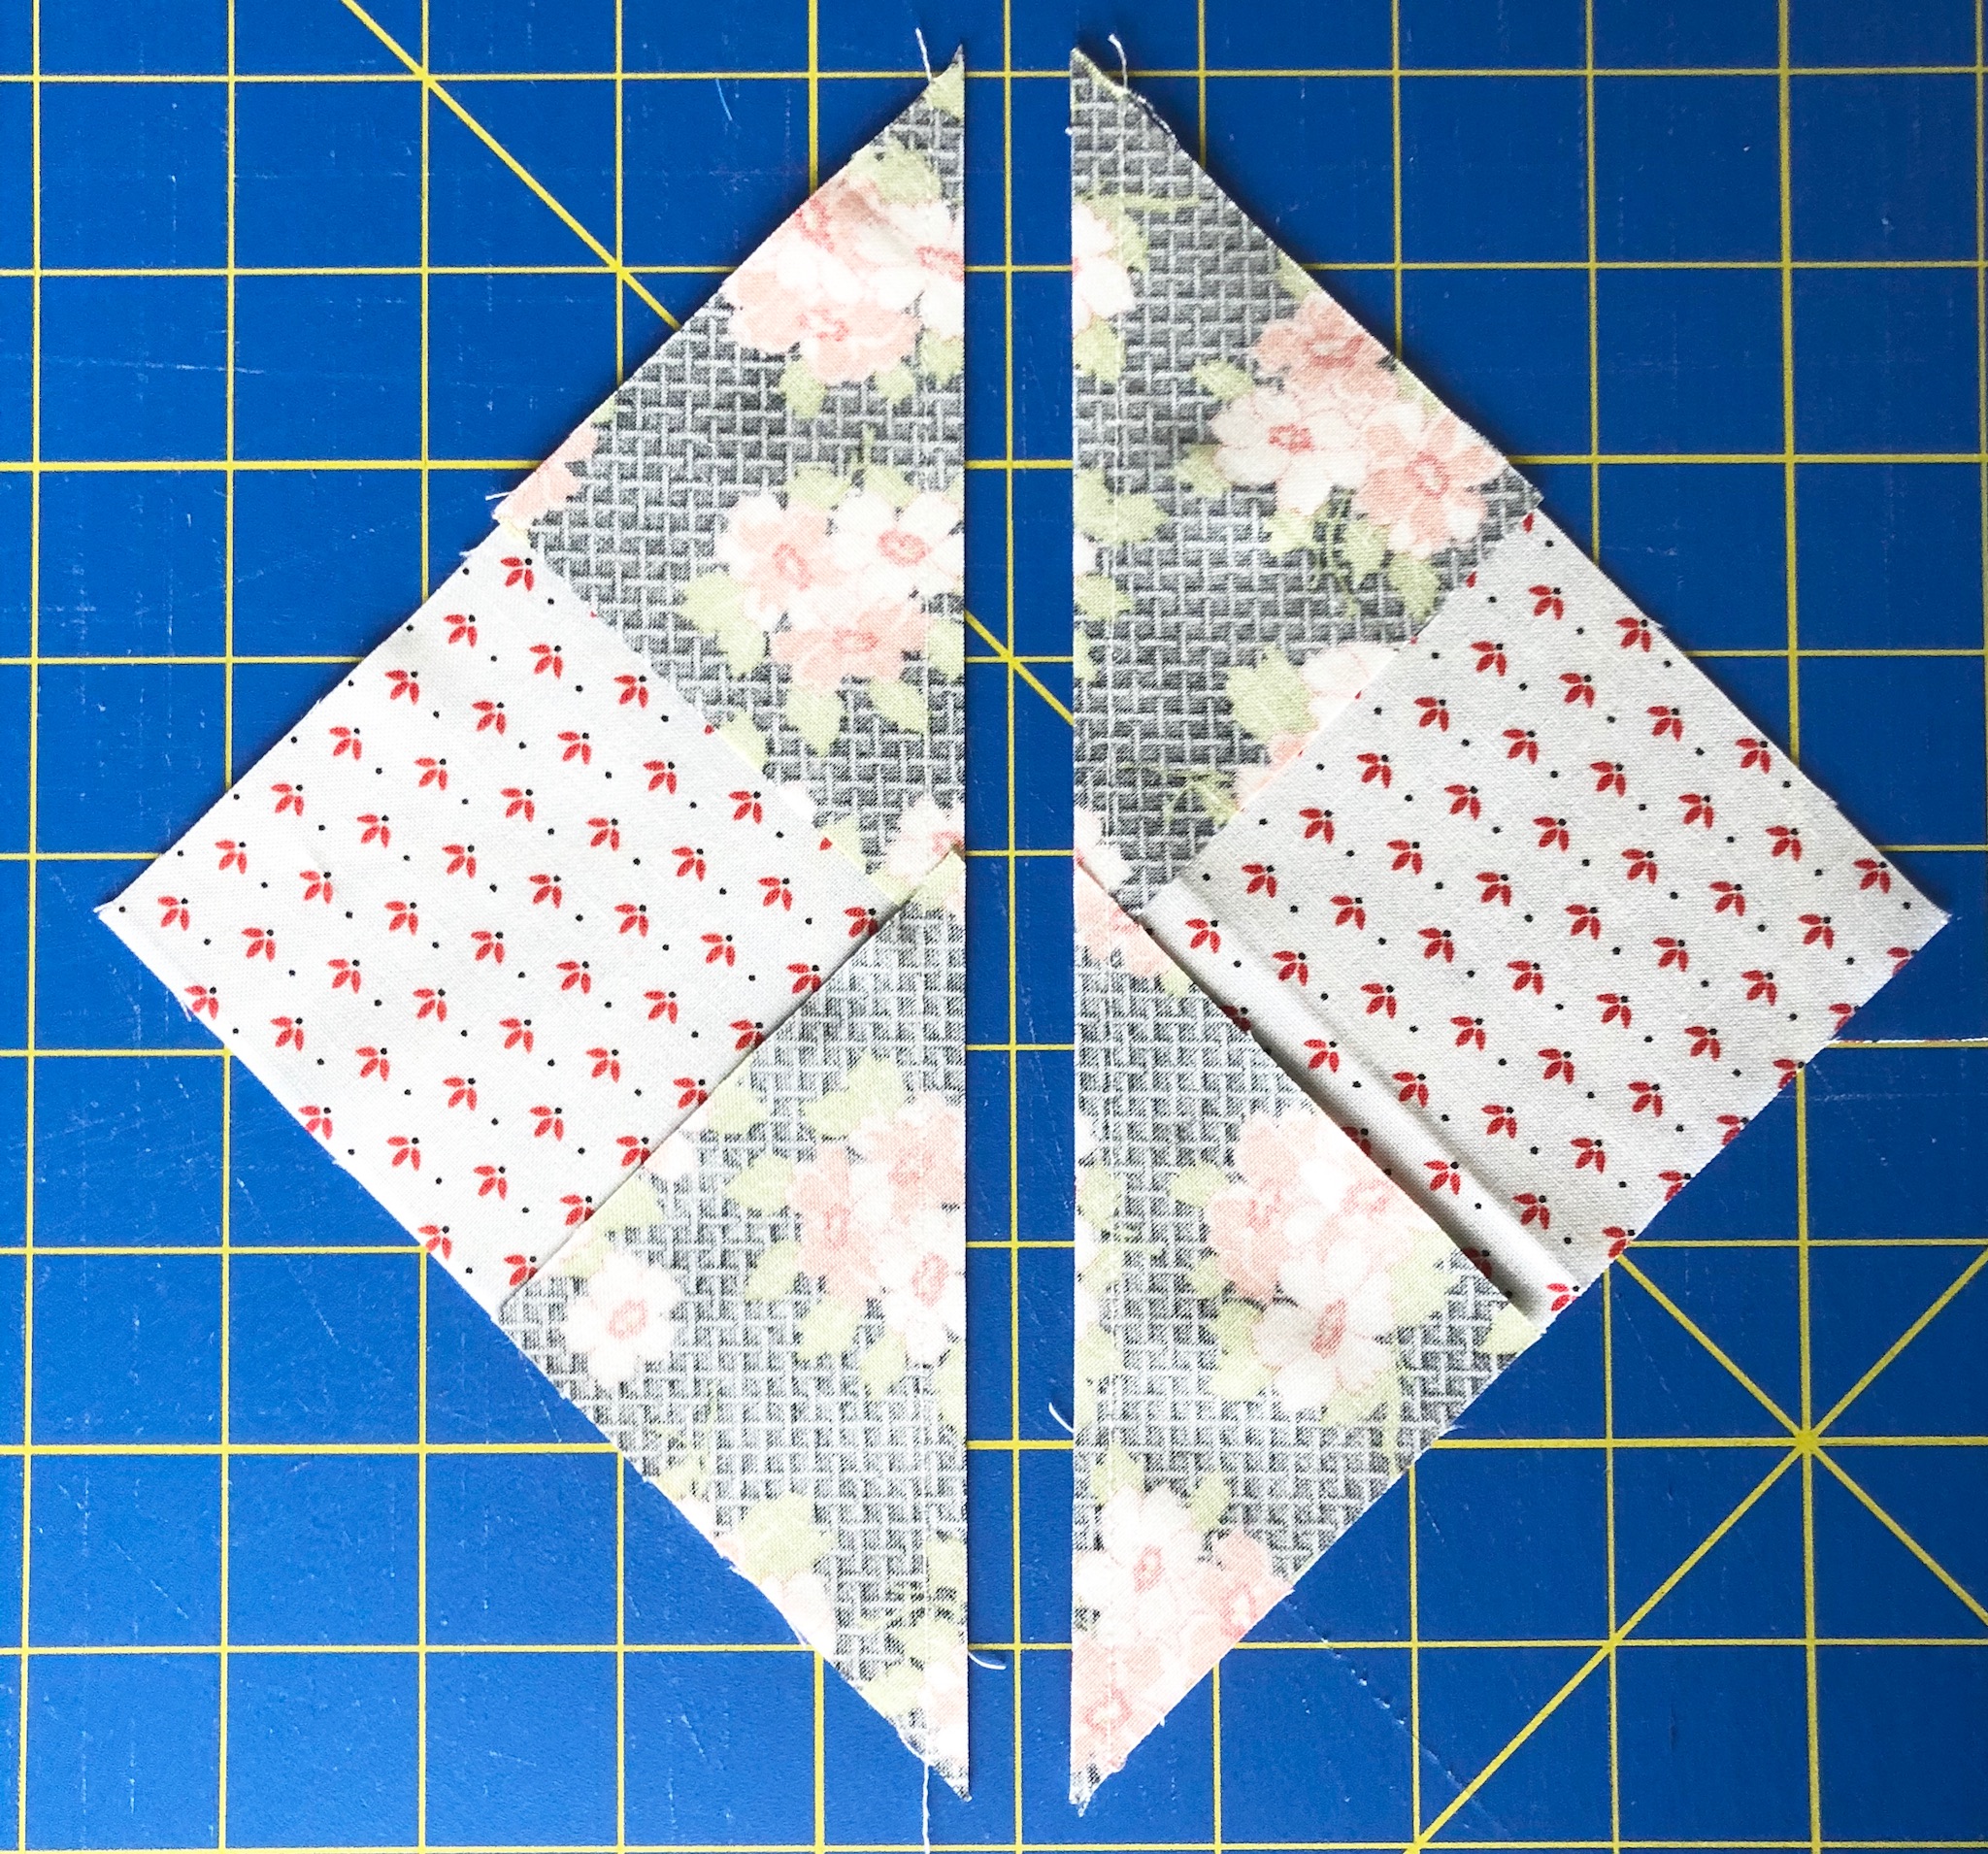
Make HST as shown above in the Sawtooth Star blocks but use the black 3 3/8" squares and the background 3 3/8" squares.
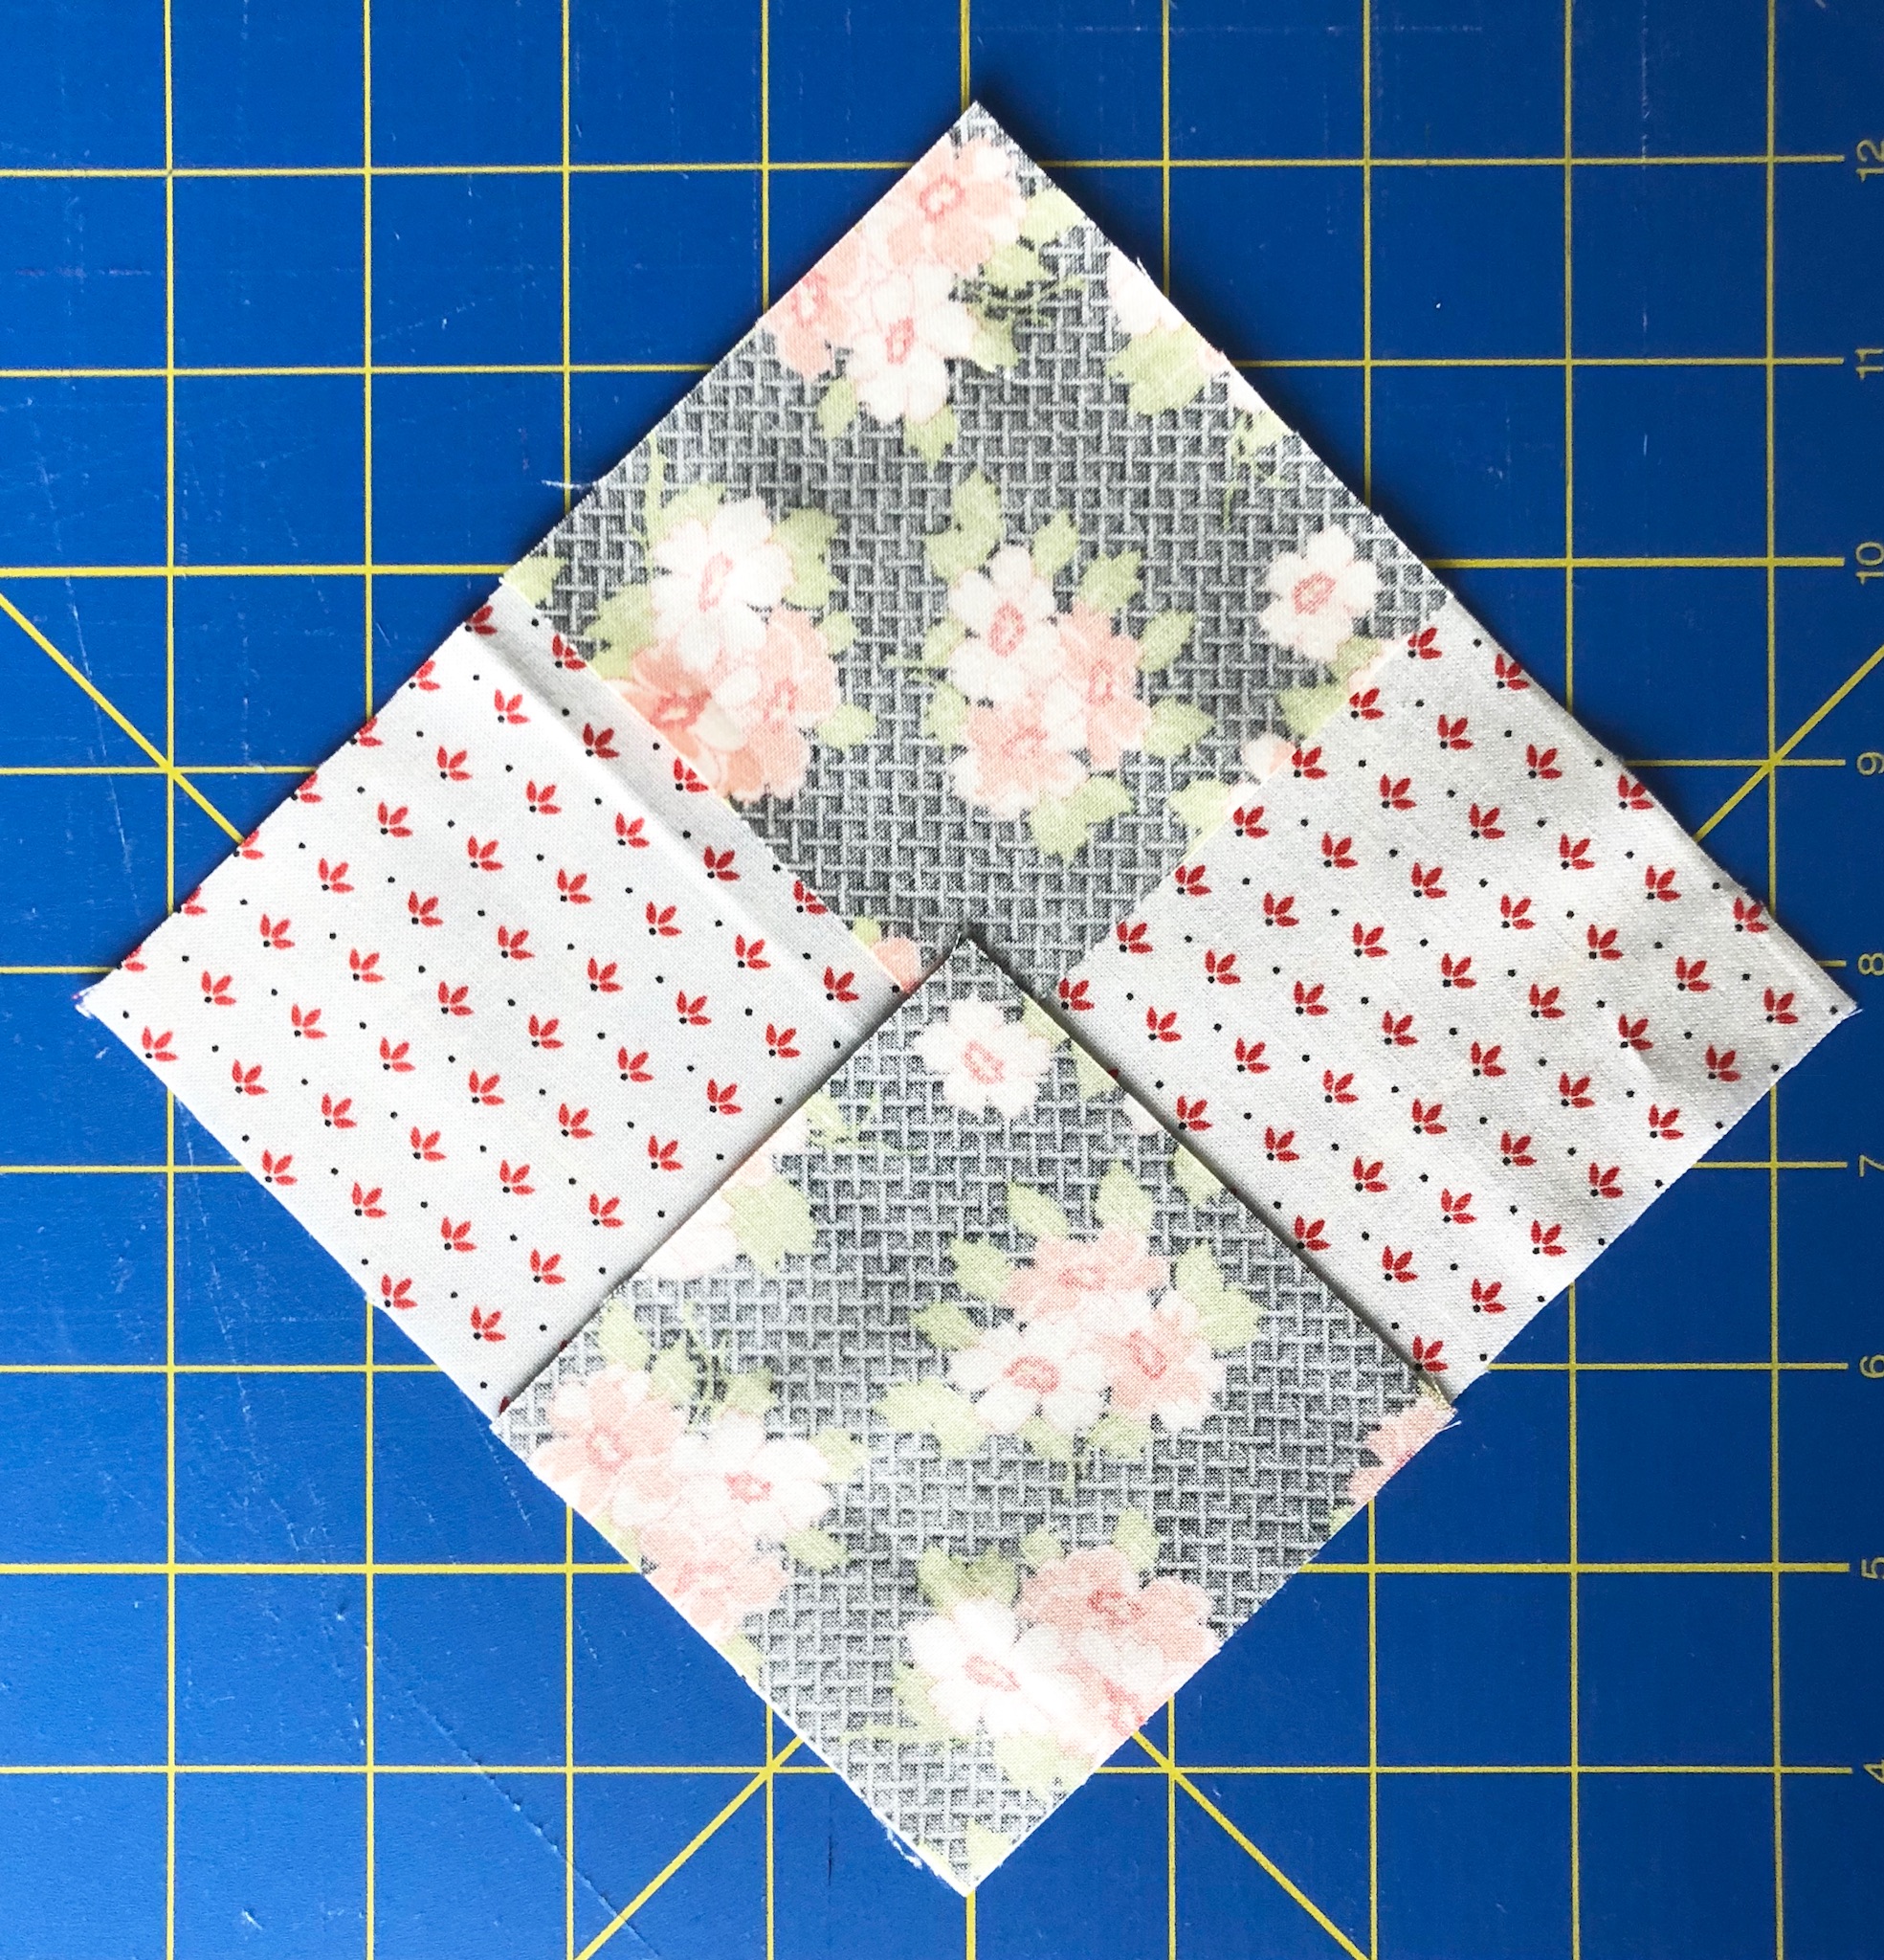
Gather the 4 black/background rectangles, the 4 HST, and the 5 1/2" inner aqua square. The block layout is shown below.
Sew the block into rows. Press seams of the two outer rows toward the HST. Press the seams of the inner row toward the center square.
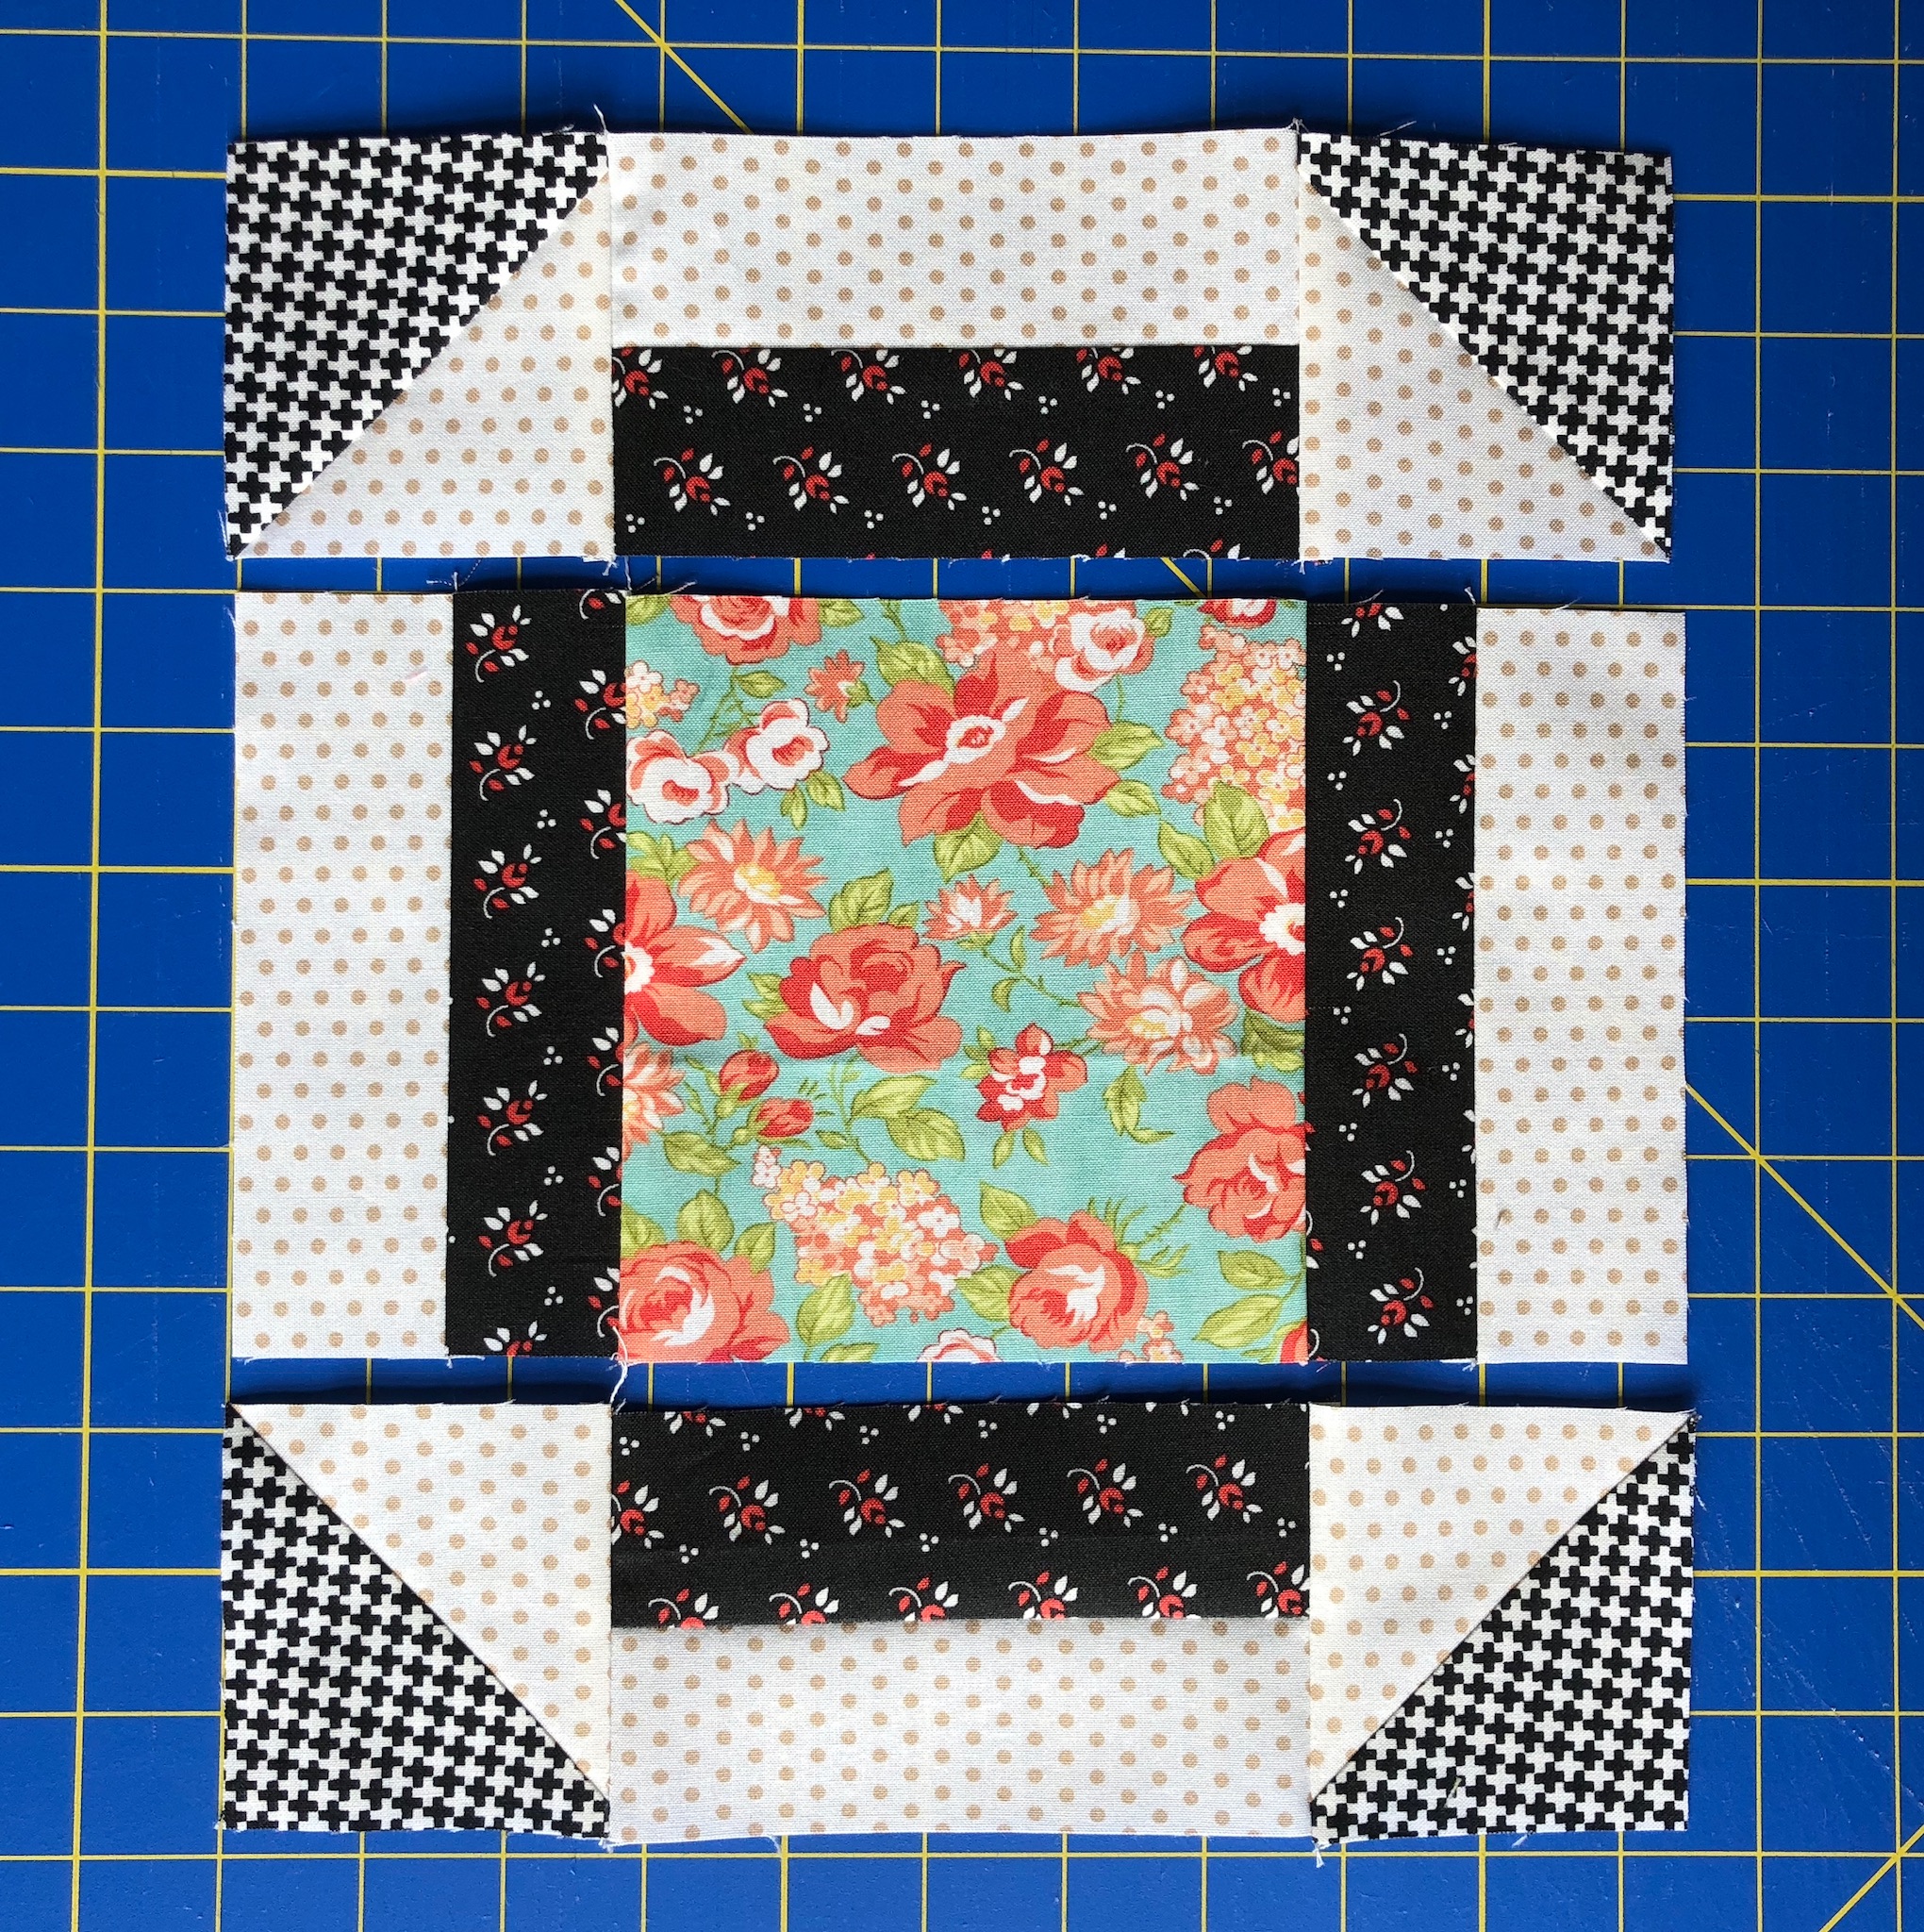
Sew the rows together to make the block.
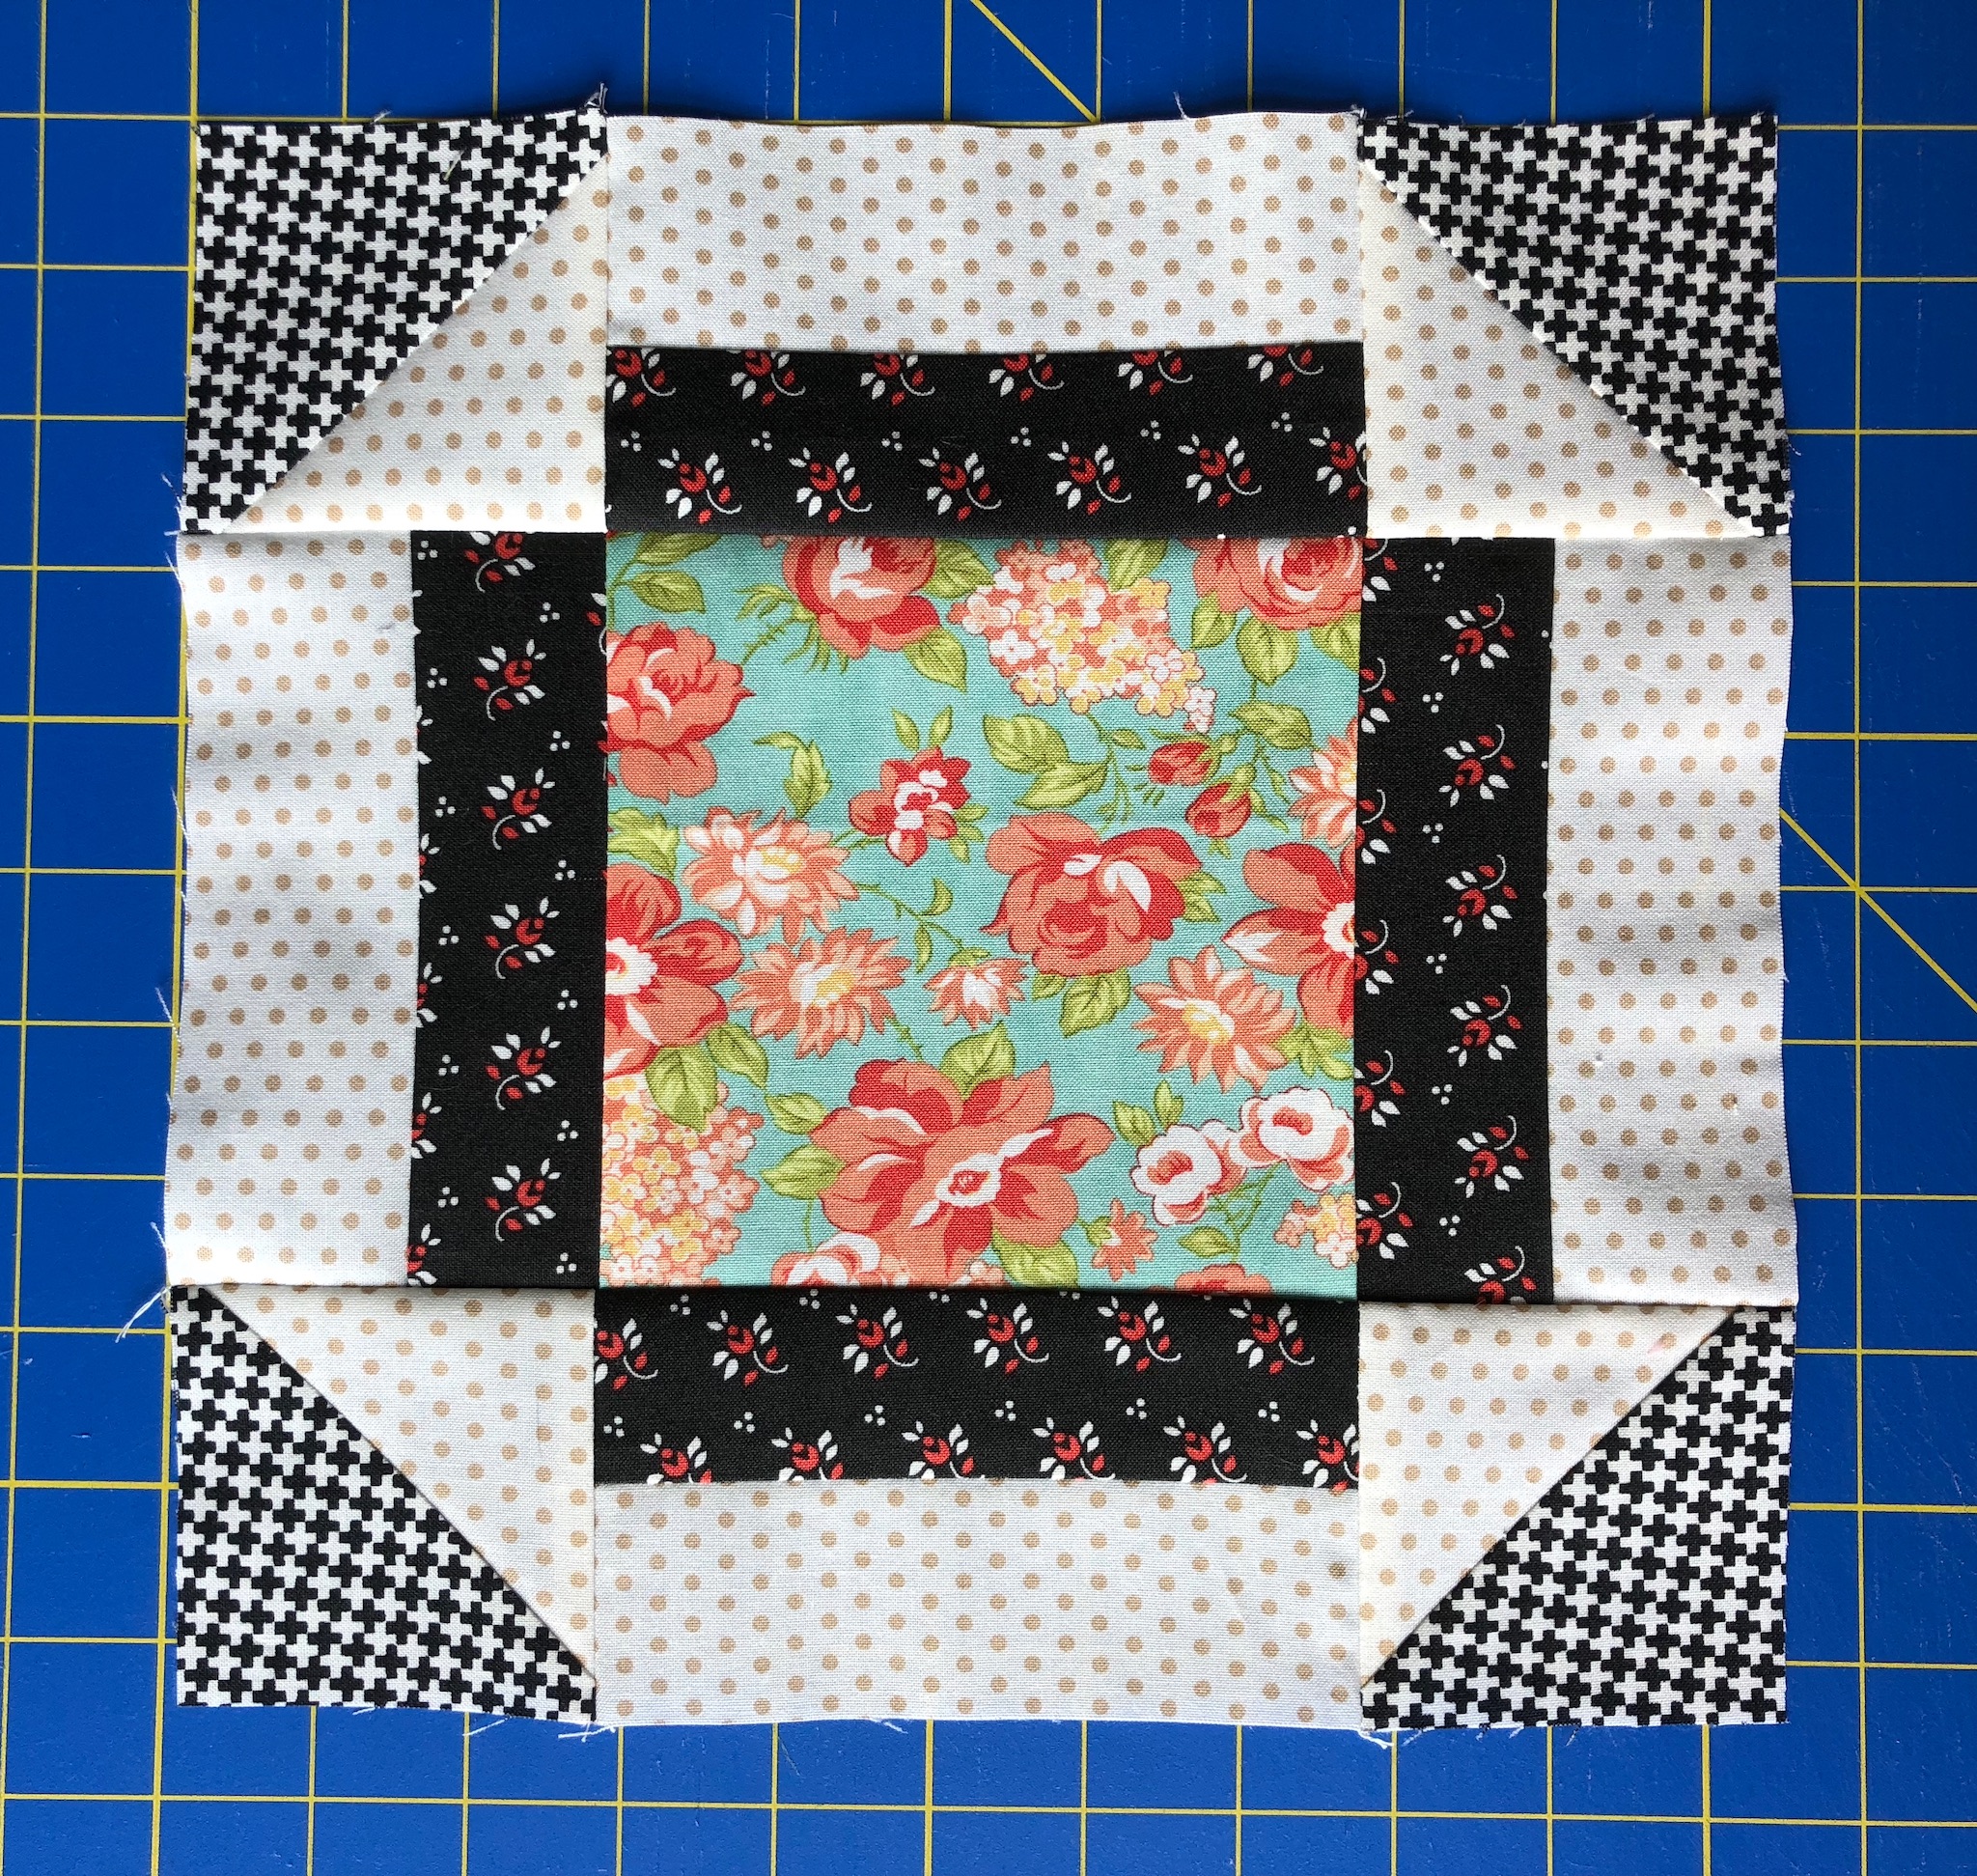
Repeat these directions to make 12 blocks total. The blocks measure 10.5" unfinished.
QUILT TOP ASSEMBLY
Once your blocks are made, lay them out as shown below. Sew the blocks together in 5 rows of 5. Sew the rows together.
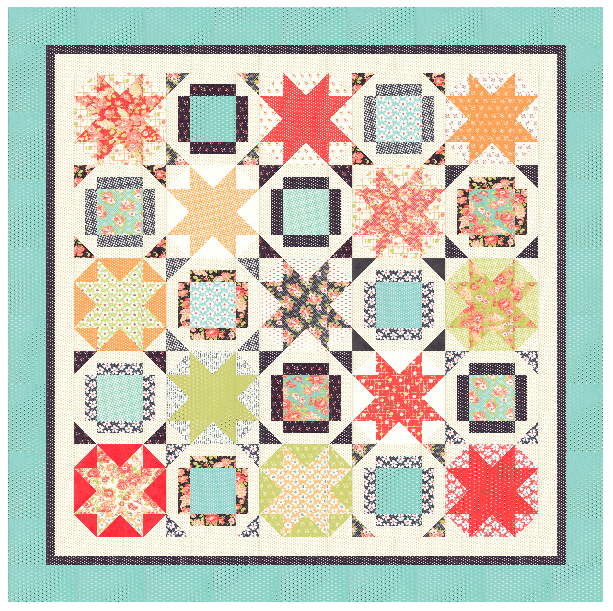
BORDER 1- Background Fabric Border
Gather the (6) 2.5" x WOF strips of background fabric. Piece WOF strips together end-to-end. Press and cut into (2) 2½” x 50½” strips and (2) 1½” x 54½” strips. Attach shorter pieces to sides and longer pieces to top and bottom. Press.
BORDER 2- Black Polka Dot Border
Gather the (6) 1½" x WOF strips of block polka dot fabric. Piece WOF strips together end-to-end. Press and cut into (2) 2½” x 54½” strips and (2) 1½” x 56½” strip. Attach shorter pieces to sides and longer pieces to top and bottom. Press.
BORDER 3 - Aqua Border
Gather the(8) 4½" x WOF strips of block polka dot fabric. Piece WOF strips together end-to-end. Press and cut into
(2) 4½” x 56½” strips and (2) 4½” x 64½” strips. Attach shorter pieces to sides and longer pieces to top and bottom. Press.
FINISHING THE QUILT
Baste, quilt, and bind the quilt using your preferred methods.
Note: For the binding, I cut the 1/2 yard of binding fabric into 7- 2.5" x WOF strips (cut straight of grain).

![]()
This quilt finishes at 64" x 64".
I hope you enjoyed this tutorial and found to easy to follow! Please let me know if you have any questions. I'd be happy to help :) Come and follow me on Instagram- @jessicadayon- where I share my latest projects, patterns, and all of the crafty things that I'm working on. Hope to talk to you there!
Jessica Dayon
{blog: jessicadayon.blogspot.com}
{instagram: @jessicadayon}
{shop: Pattern Shop}
![]()
Posted in:
Comments