Welcome to Moda Fabrics!
Shades Table Runner
Shades Table Runner
Published:
Jul 5 2017 - 23:00

Table Runner Size: 17" x 42"
Block Size (unfinished): 6½"
Skill Level: Confident Beginner, Intermediate
![]()
1 Charm Pack {(36) five-inch squares*} for wedges
1 yard background and border
20” x 45” backing fabric
15° Triangle ruler
*Each five-inch charm/square will yield (3) wedges (but, only (2) are used in this pattern).
![]()
CUTTING
Wedges
From each charm:
- Align the bottom (narrow end) of the 15° ruler with the bottom of the charm.
- The 5" line of the ruler is on top of the charm.
- Cut along both sides of the ruler for the first wedge.
After the first wedge is cut, turn the ruler 180 degrees.
- Align the 5" line of the ruler with the bottom of the charm, and the bottom (narrow end) of the ruler with the top of the charm. Cut.
- Continue to twist and turn the ruler until (2) wedges of each color are cut, for total of (72) wedges.
Background
Cut (3) strips 3¼" by WOF.
Cut (2) strips 5¼" by WOF.
Cut (3) strips 3" by WOF (set aside for borders).
From 3¼" strips:
- Place a ruler with the 4¾" line on the bottom of the 3¼" strip.
- Align the 8" line of the ruler with the top of the strip.
- Cut along both sides of the ruler.
After the first piece is cut, turn the ruler 180 degrees.
- Align the 4¾" line of the ruler with the top of the strip, and the 8" line of the ruler with the bottom of the strip. Cut.
- Continue to twist and turn the ruler until (48) 3¼" pieces are cut.
From 5¼" strips:
- Place the ruler with the 4¾" line on the bottom of the 5¼" strip.
- Align the 10" line of the ruler with the top of the strip.
- Cut along both sides of the ruler.
After the first piece is cut, turn the ruler 180 degrees.
- Align the 4¾" line of the ruler with the top of the strip, and the 10" line with the bottom of the strip. Cut.
- Continue to twist and turn the ruler until (24) 5¼" pieces are cut.
Block Assembly
Each 6½" block will consist of:
(6) 5" background wedges,
(4) 3¼" background pieces,
(2) 5¼" background pieces.
Place (2) 5¼" background pieces on the (2) center wedges. See Diagram A.
Place (4) 3¼" background pieces on the remaining wedges. See Diagram A.
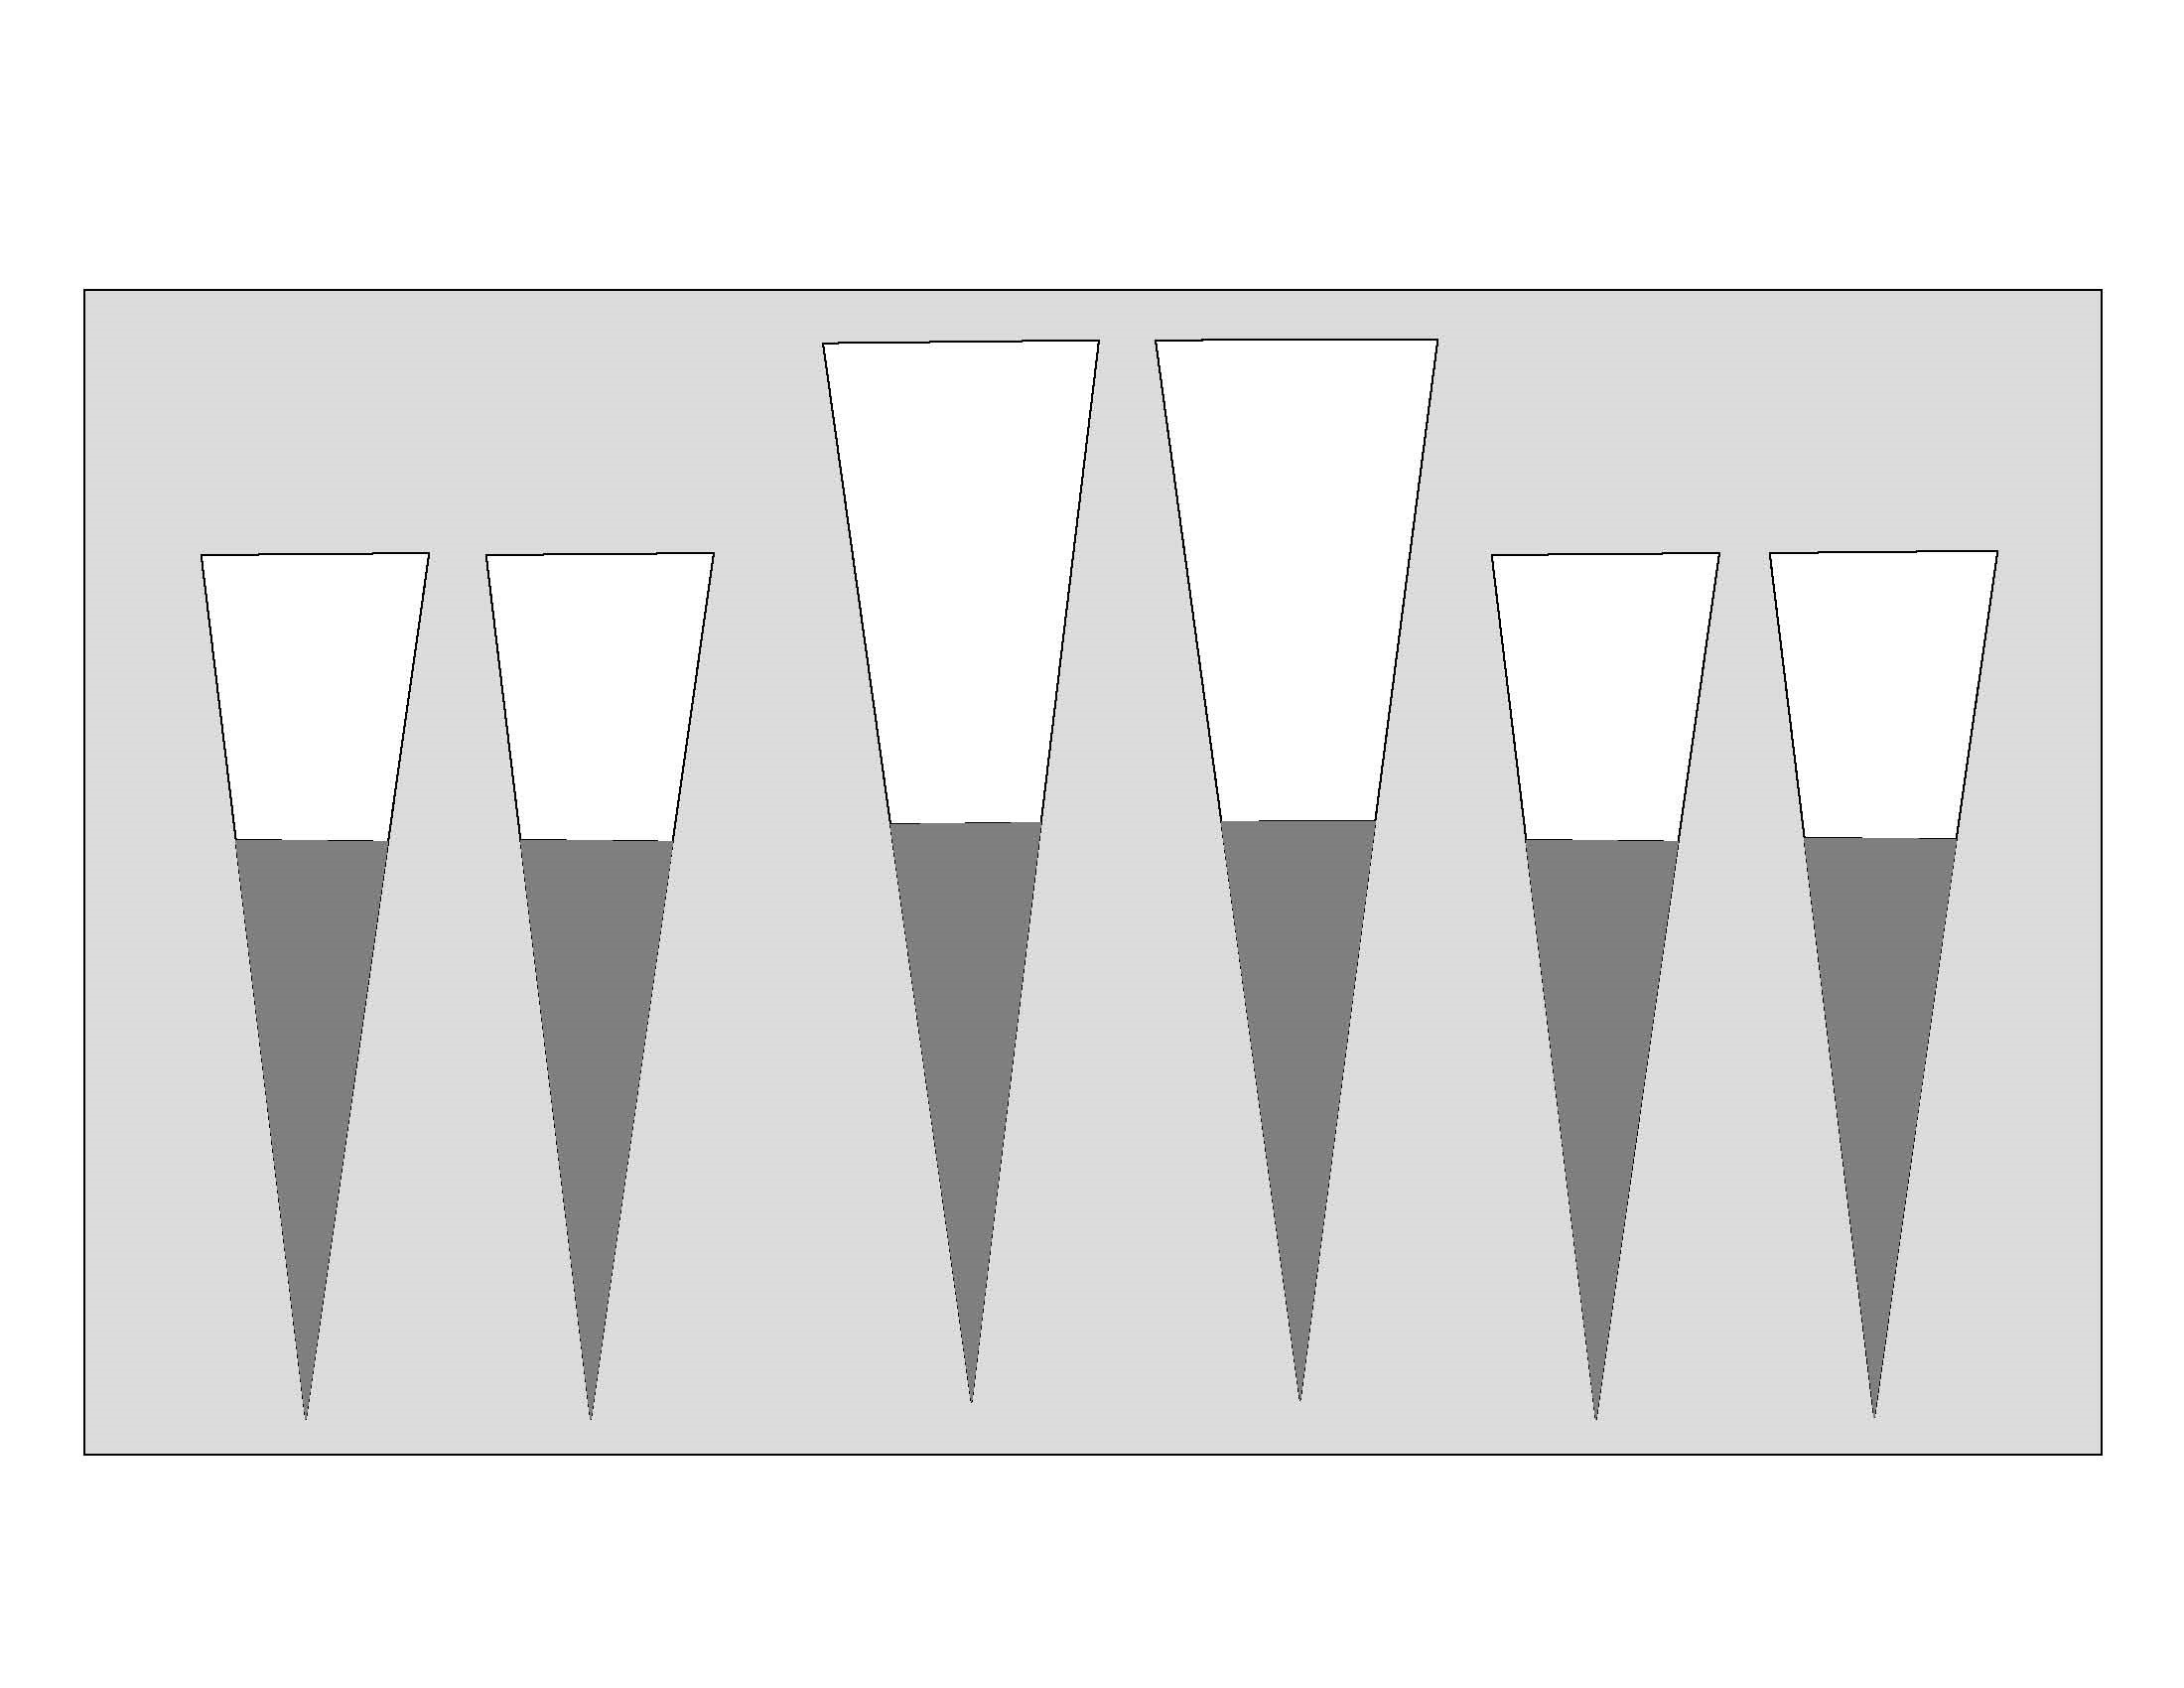
Diagram A
Sew the background to the wedges, right sides together.
Once the background is sewn to the wedges, sew the pieces together in pairs.
Make sure to keep wedges in order. See Diagram B.

Diagram B
Sew the pairs together. Refer to Diagram C.
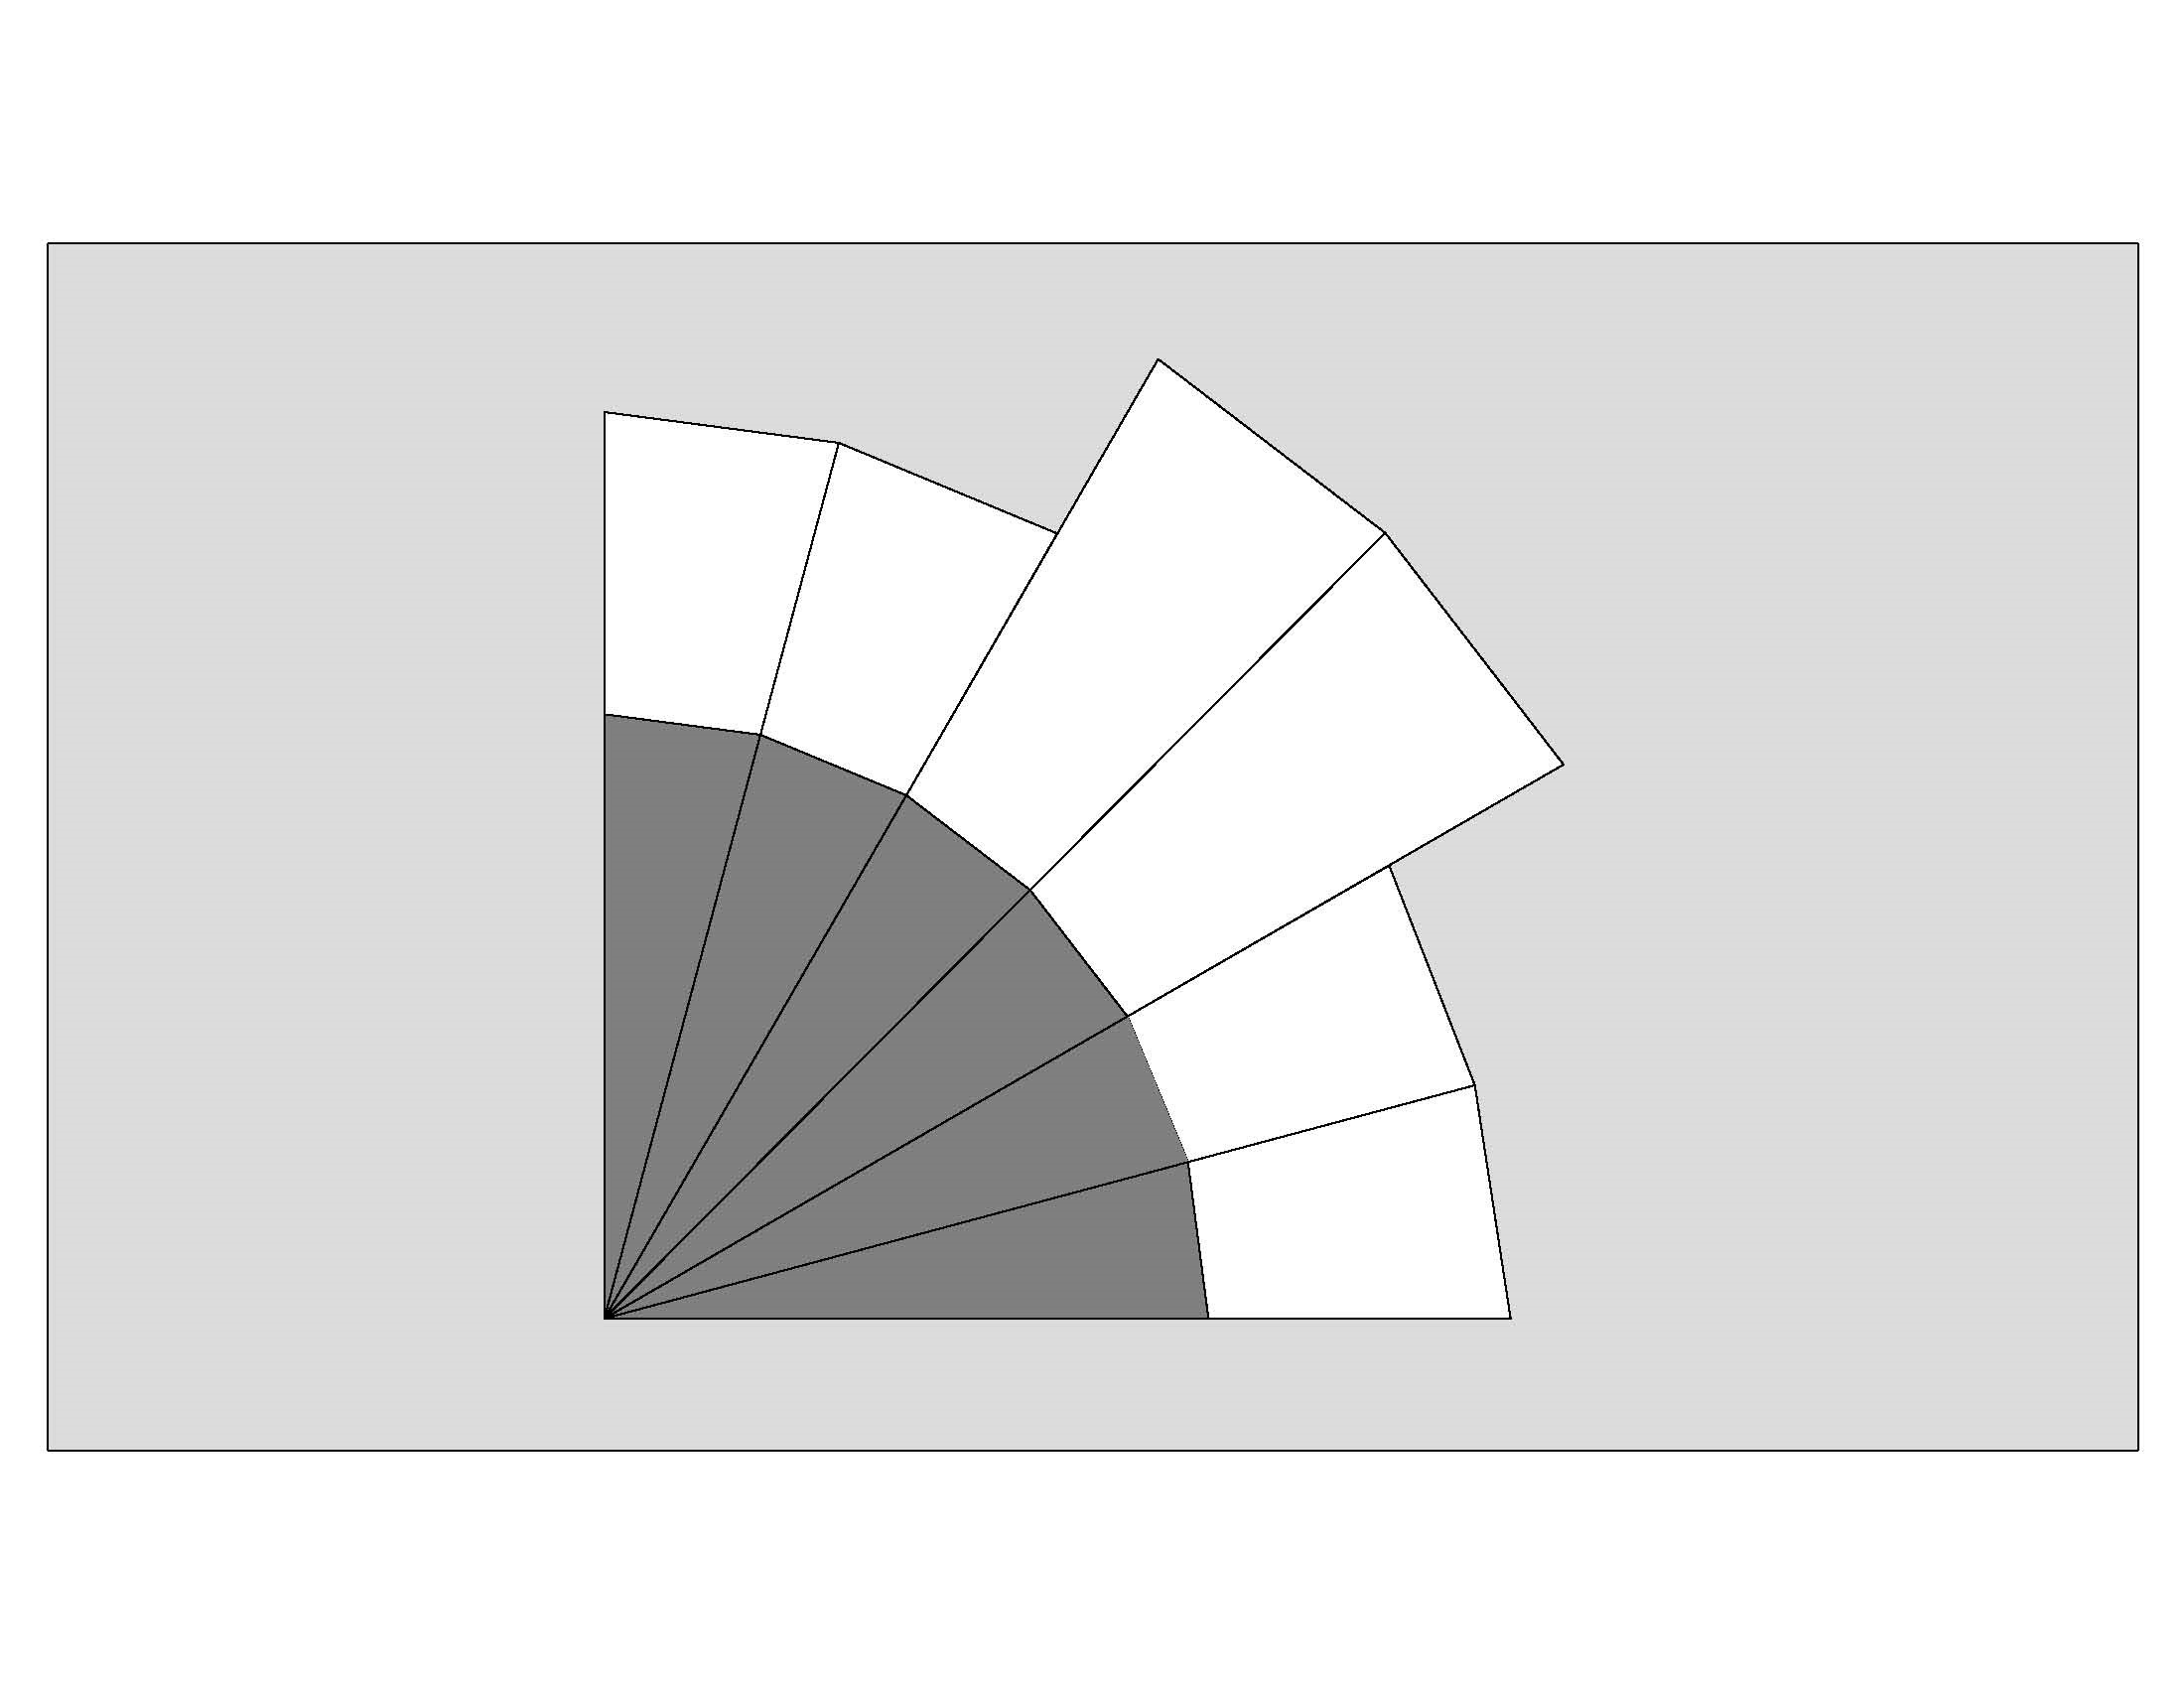
Diagram C
The fan block is now ready to be trimmed.
Squaring the Block
- Place the block on the cutting mat
- Place a square ruler on the block, fitting the 6½“ lines inside the block.
- Following the 6" line from the top and right side of the ruler (yes, six-inch line), measure 1¾" down from the top and 1¾" in from the right side.
- The 1¾" line on both 6" lines should intersect the seam line on the arc of wedges. These are the MAGIC #s (1¾″ on the 6″).
- Make sure the 6½" lines of the ruler are still within the edges of the fabric AND the 1¾" lines are on the arc seam line.
- Trim the top and the right side of your block.
- Turn the block 180 degrees and finish squaring the block to 6½″
- Continue until all (12) blocks are trimmed.
TABLE RUNNER LAYOUT
After all the blocks are completed, set according to Illustration A.

Illustration A
After the table runner is square, sew on the borders. Quilt as desired
![]()
This table runner finishes at 17" x 42".

Pamela Lee
![]()
Posted in:
Comments