Welcome to Moda Fabrics!
Scrapbook of Quilts ~ Week 5
Scrapbook of Quilts ~ Week 5
Published:
Jul 20 2021 - 09:40
Singer Sewing classes. When I was nine. Maybe ten.

My Mom sewed, and when I started playing with fabric to make "things", she was determined that I not learn her bad habits. I was to develop those entirely on my own. (Though it must be said that we both sewed over pins.)
But first - this week is Pirouette! Lots and lots of half-triangle squares.
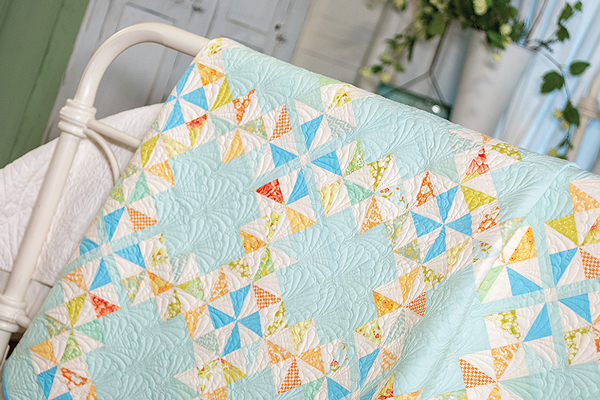
This is Joanna's quilt - she described it as looking like "beach glass", and it definitely does. This is a light, breath of fresh air.
One of my favorite things about the book is the exchange of ideas about everything from color and mixing prints, to pinning and using starch. It's not that we're right - though really, we are! - it's that so much of sewing, making quilts, and doing any kind of creative work is figuring out what works for you. Reading different perspectives is how we learn. It was funny how many things we agreed on. Including Joanna's famous - infamous? - 80/20 rule.
To read Joanna's thoughts about Pirouette and pillow closures - Scrapbook of Quilts Pillow-Along Week #5.
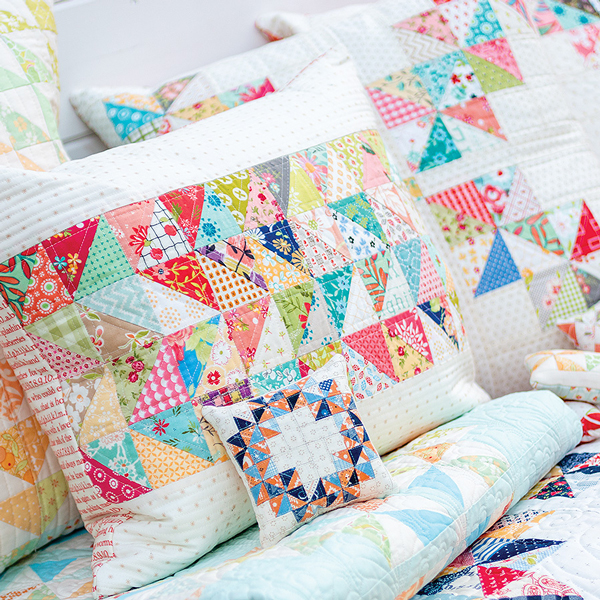
Pirouette pillows - these are the pillows in the book. The one I made this week is the rectangle in the center, though I might have made enough HTSs to make Joanna's version of the Pirouette pillow just behind it.
This week's topic is pillow closures, and for me, that means a zipper.
I don't remember now if the Singer Sewing classes lasted six weeks, or eight, but my mom drove me to the sewing shop twice a week so I could learn all sorts of nifty things. Because the focus was on making clothes, I learned how to make buttonholes, and a few different techniques for putting in a zipper. Over time, other classes and tutorials added to my zipper-installation repertoire.
Until four or five years ago, I used a zipper technique borrowed from garment-making, with a slight adaptation that made it work for a pillow. It is similar to this Invisible Zipper Pillow Tutorial shared by Jera Brandvig of Quilting in the Rain in 2013.
Then I wanted to try using a metal zipper for a different look, one that would show. So a different technique was required. Since I had been making zipper bags using exposed metal zippers, I decided to try that technique on a pillow.
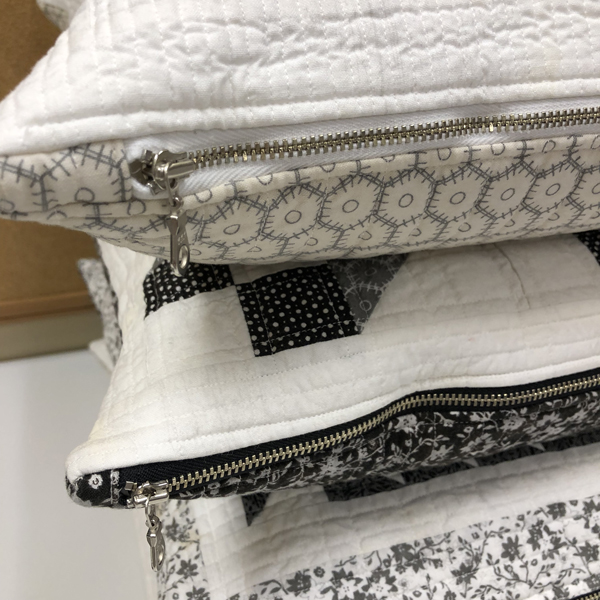
It worked, I loved the look of it, so I might have bought a supply of metal zippers. A year or so later, I made this set of pillows - Spring Market 2018, Metropolis by BasicGrey, four new Cake Mixes.
The technique quickly became my go-to for zippers because it meant I could buy zippers in one size - Atkinson 22" - and make it work for any size pillow. It was also easier, and faster, than the other method I'd been using.
So this is my process.
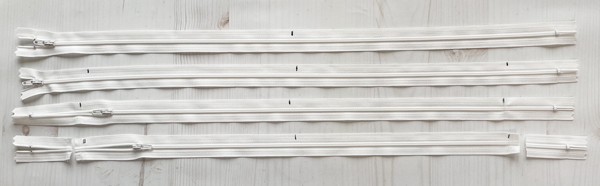
- Fold the zipper in half to find the center and mark it with a permanent pen.
- Measure from the center 8¾" and mark with a permanent pen. Do this on both sides.
- Stitch across the nylon coils to secure the zipper as the ends will be trimmed off. On the end with the zipper pull - open the zipper past the mark before stitching. (Hold the two ends together while stitching.) Go slowly on the stitching - while the coil is nylon, if the needle hits it just right, the needle can break.
- Trim the zipper tape approx. ½" from mark.
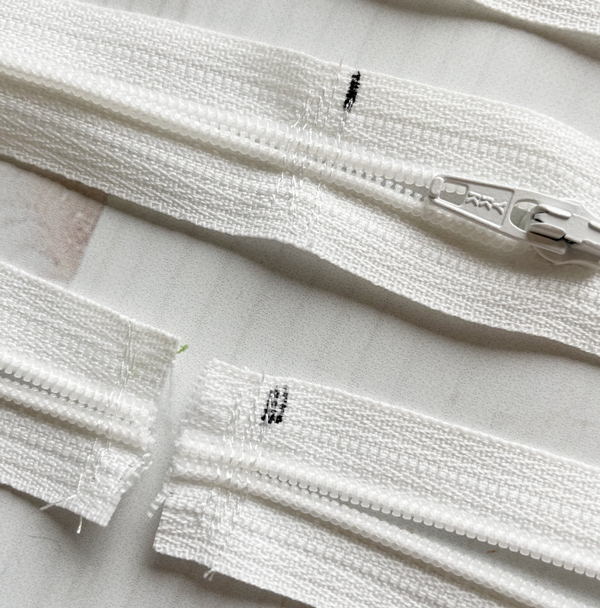
The purpose of this is to keep the zipper together while the tabs are attached.
Note: The 8¾" measurement is what I use for a pillow that will finish at 20" wide. For a larger pillow, use half the width of the pillow, minus 1¼" to 1½". E.g., for a 24" finished pillow cover, I will measure 10¾" from the center. To avoid the metal tabs, I would measure 10½".
One more thing to mention, if you have a smaller zipper, or a larger pillow, the tabs can be attached to the zipper tape ends. Secure them with a couple of stitches.
Now to attach the tabs. I usually use the same fabric as the backing, but anything works.
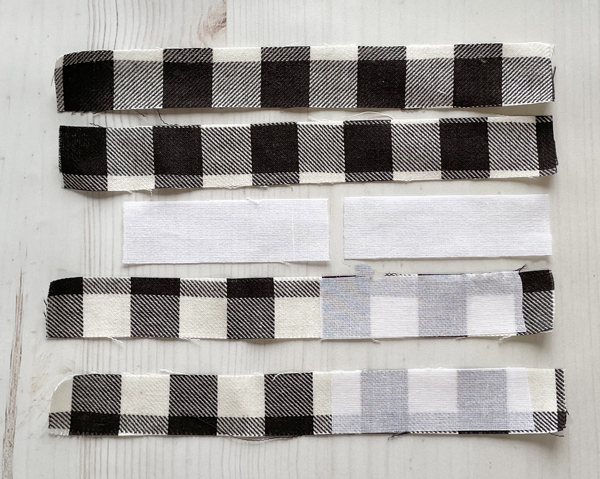
To prepare the tabs, cut the following:
- Cut 2 strips of fabric - 1" x 8". These strips don't need to be quite that long, but I'd rather have to trim excess than come up a bit short.
- Cut 2 strips of SF101 Woven Fusible Interfacing by Pellon - 1" x 3". The interfacing is optional but I like the way it looks when it's finished, and I think it provides a bit more stability.
Fuse the SF101 to one end of each fabric strip, leaving approx. ½" at the end.
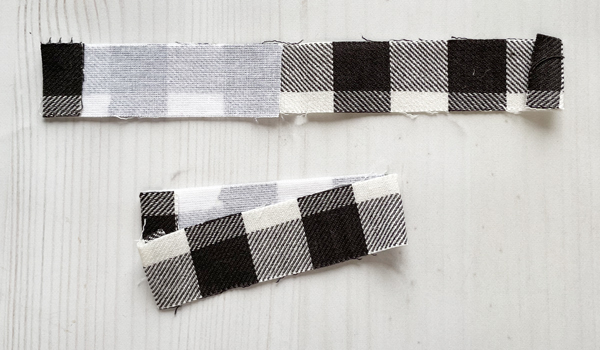
Press the two ends in approx. ½", or fold and secure with a swipe from a glue stick.
Fold the strip in half, matching the two folded ends.
With the side with interfacing on top, attach the tabs to the two ends of the zipper.
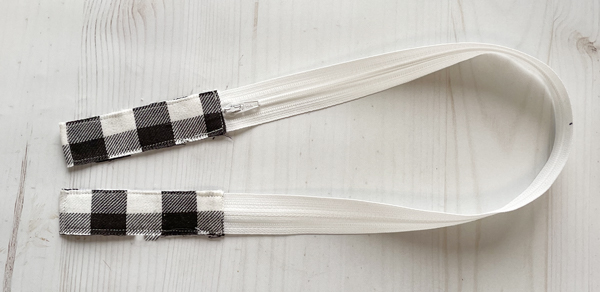
This can be pinned for stitching, or use your handy glue stick to swipe a bit of glue on the ends of the tab to secure it to the zipper. Stitch across the ends.
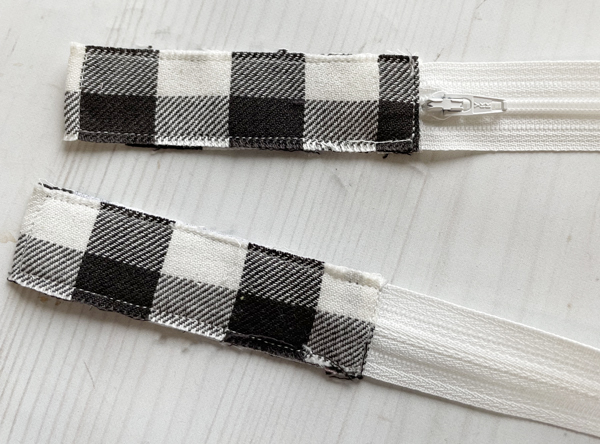
I also stitch around the three sides to secure the tab. The only purpose is to make the tab a bit easier to handle while it's being attached to the front and back of the pillow.
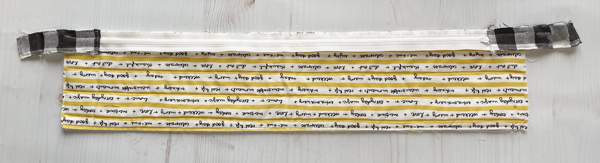
Fold the edge of the pillow to find the center - mark it with a pin. With right sides together, align the center mark of the zipper with the center of the pillow. Pin or clip the zipper to hold it in place while stitching.
Stitching all the way from one side of the pillow to the other, attach the zipper to the front of the pillow.
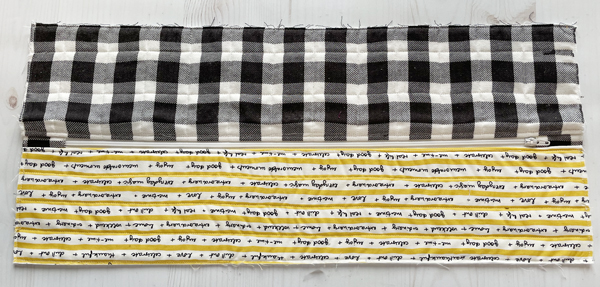
Note: Which side does the zipper pull go on? I always attach the zipper so that the pull is on the left when the zipper is closed, and I am looking at the front of the pillow. Why? I don't know. It's simply my habit. So when I am attaching the zipper, the zipper pull is on the right side of the picture above.
This next step is optional.
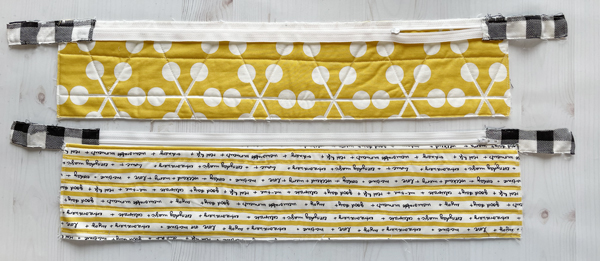
I over-cast the raw edge using the "overcast foot" on my sewing machine and a shorter zigzag stitch. (Over-casting is a seam finish that uses a zigzag stitch to enclose the multiple layers of the edge.) It uses a bit of thread, but I like the way it minimizes fraying when the pillow cover is washed.
Then I top-stitch the edge of the pillow a very scant ¼" from the edge, securing the zipper tape on the underside. I like the way it looks on the outside, the finish on the inside is a bit neater, and it also keeps the pillow neat during washing. At this point - trim the tabs even with the front of the pillow.
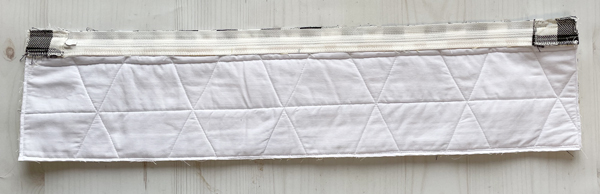
Repeat the steps to attach the back of the pillow to the remaining side of the zipper.
Over-cast and top-stitch if desired.
To see a video of this process - be kind. First video.
The Pillow-Along! This week's block is Pirouette, and the theme is Classic Autumn. For me, that means vibrant gold, red, orange, plum and a bit of green.
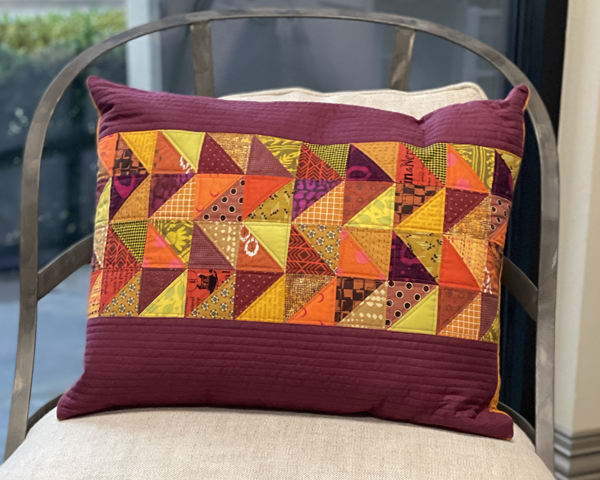
I will confess to having gotten an assist on this pillow. I knew what I wanted for color... and I knew I didn't have that in my stash, at least not that I'd be able to find with moves, etc. So I reached out to a friend with a spectacular sense of color, and a gift for mixing prints and styles of fabric. She also has a quilt shop... in Australia. This is what Jen Kingwell sent.
The solid is a Ruby Star Society cross weave.
If you're looking closely, there are Reproductions, batiks, "modern prints", ombrés, blender-type prints. A little bit of everything. It's about the color, and the interplay of prints.
Be sure to read what Joanna is sharing today - Scrapbook of Quilts Pillow-Along Week 5.
The other blog posts related to the pillow-along can be found here:
- Moda Cutting Table - Scrapbook of Quilts PAL Week 4
- Moda Cutting Table - Scrapbook of Quilts PAL Week 3
- Moda Cutting Table - Scrapbook of Quilts PAL
- Fresh Figs - Scrapbook of Quilts Pillow-Along Week 4
- Fresh Figs - Scrapbook of Quilts Pillow-Along Week 3
- Fresh Figs - Scrapbook of Quilts Pillow-Along Week 2
- Fresh Figs - Scrapbook of Quilts Pillow-Along Week 1
- Kimberly and her crew - Join Us For A Scrapbook of Quilts Pillow-Along!
If you're on Instagram, be sure to check out #scrapbookofquilts and #pillowalong.
And don't miss Joanna - @figtreeandco / Kimberly - @itssewemma - / and this week's friend, Chelsi Stratton - @chelsistratton.
Next week's pillow is Cathedral Windows, and thoughts about embellishments and other finishes.
That's it for today!
For a PDF of this post - Scrapbook of Quilts ~ Zippers.
Posted in: