Welcome to Moda Fabrics!
Winter Dreams Quilt
Winter Dreams Quilt
Published:
Jan 9 2019 - 23:00
![]()
Is it snowing where you live? Here in Dallas, Texas we rarely get snow - it's been in the 60s all week here! That doesn't stop Oda May from dreaming of snow. Today she is sharing a wintry vision of one of last year's most downloaded quilts by Allison Jensen of Woodberry Way.
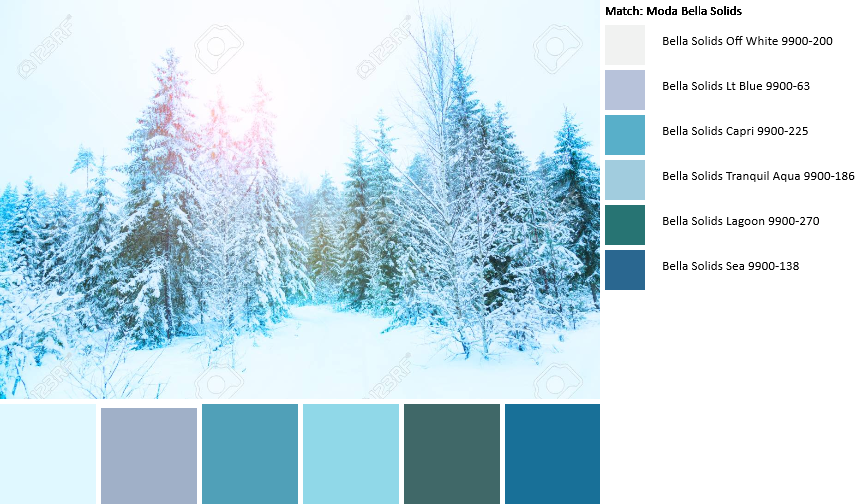
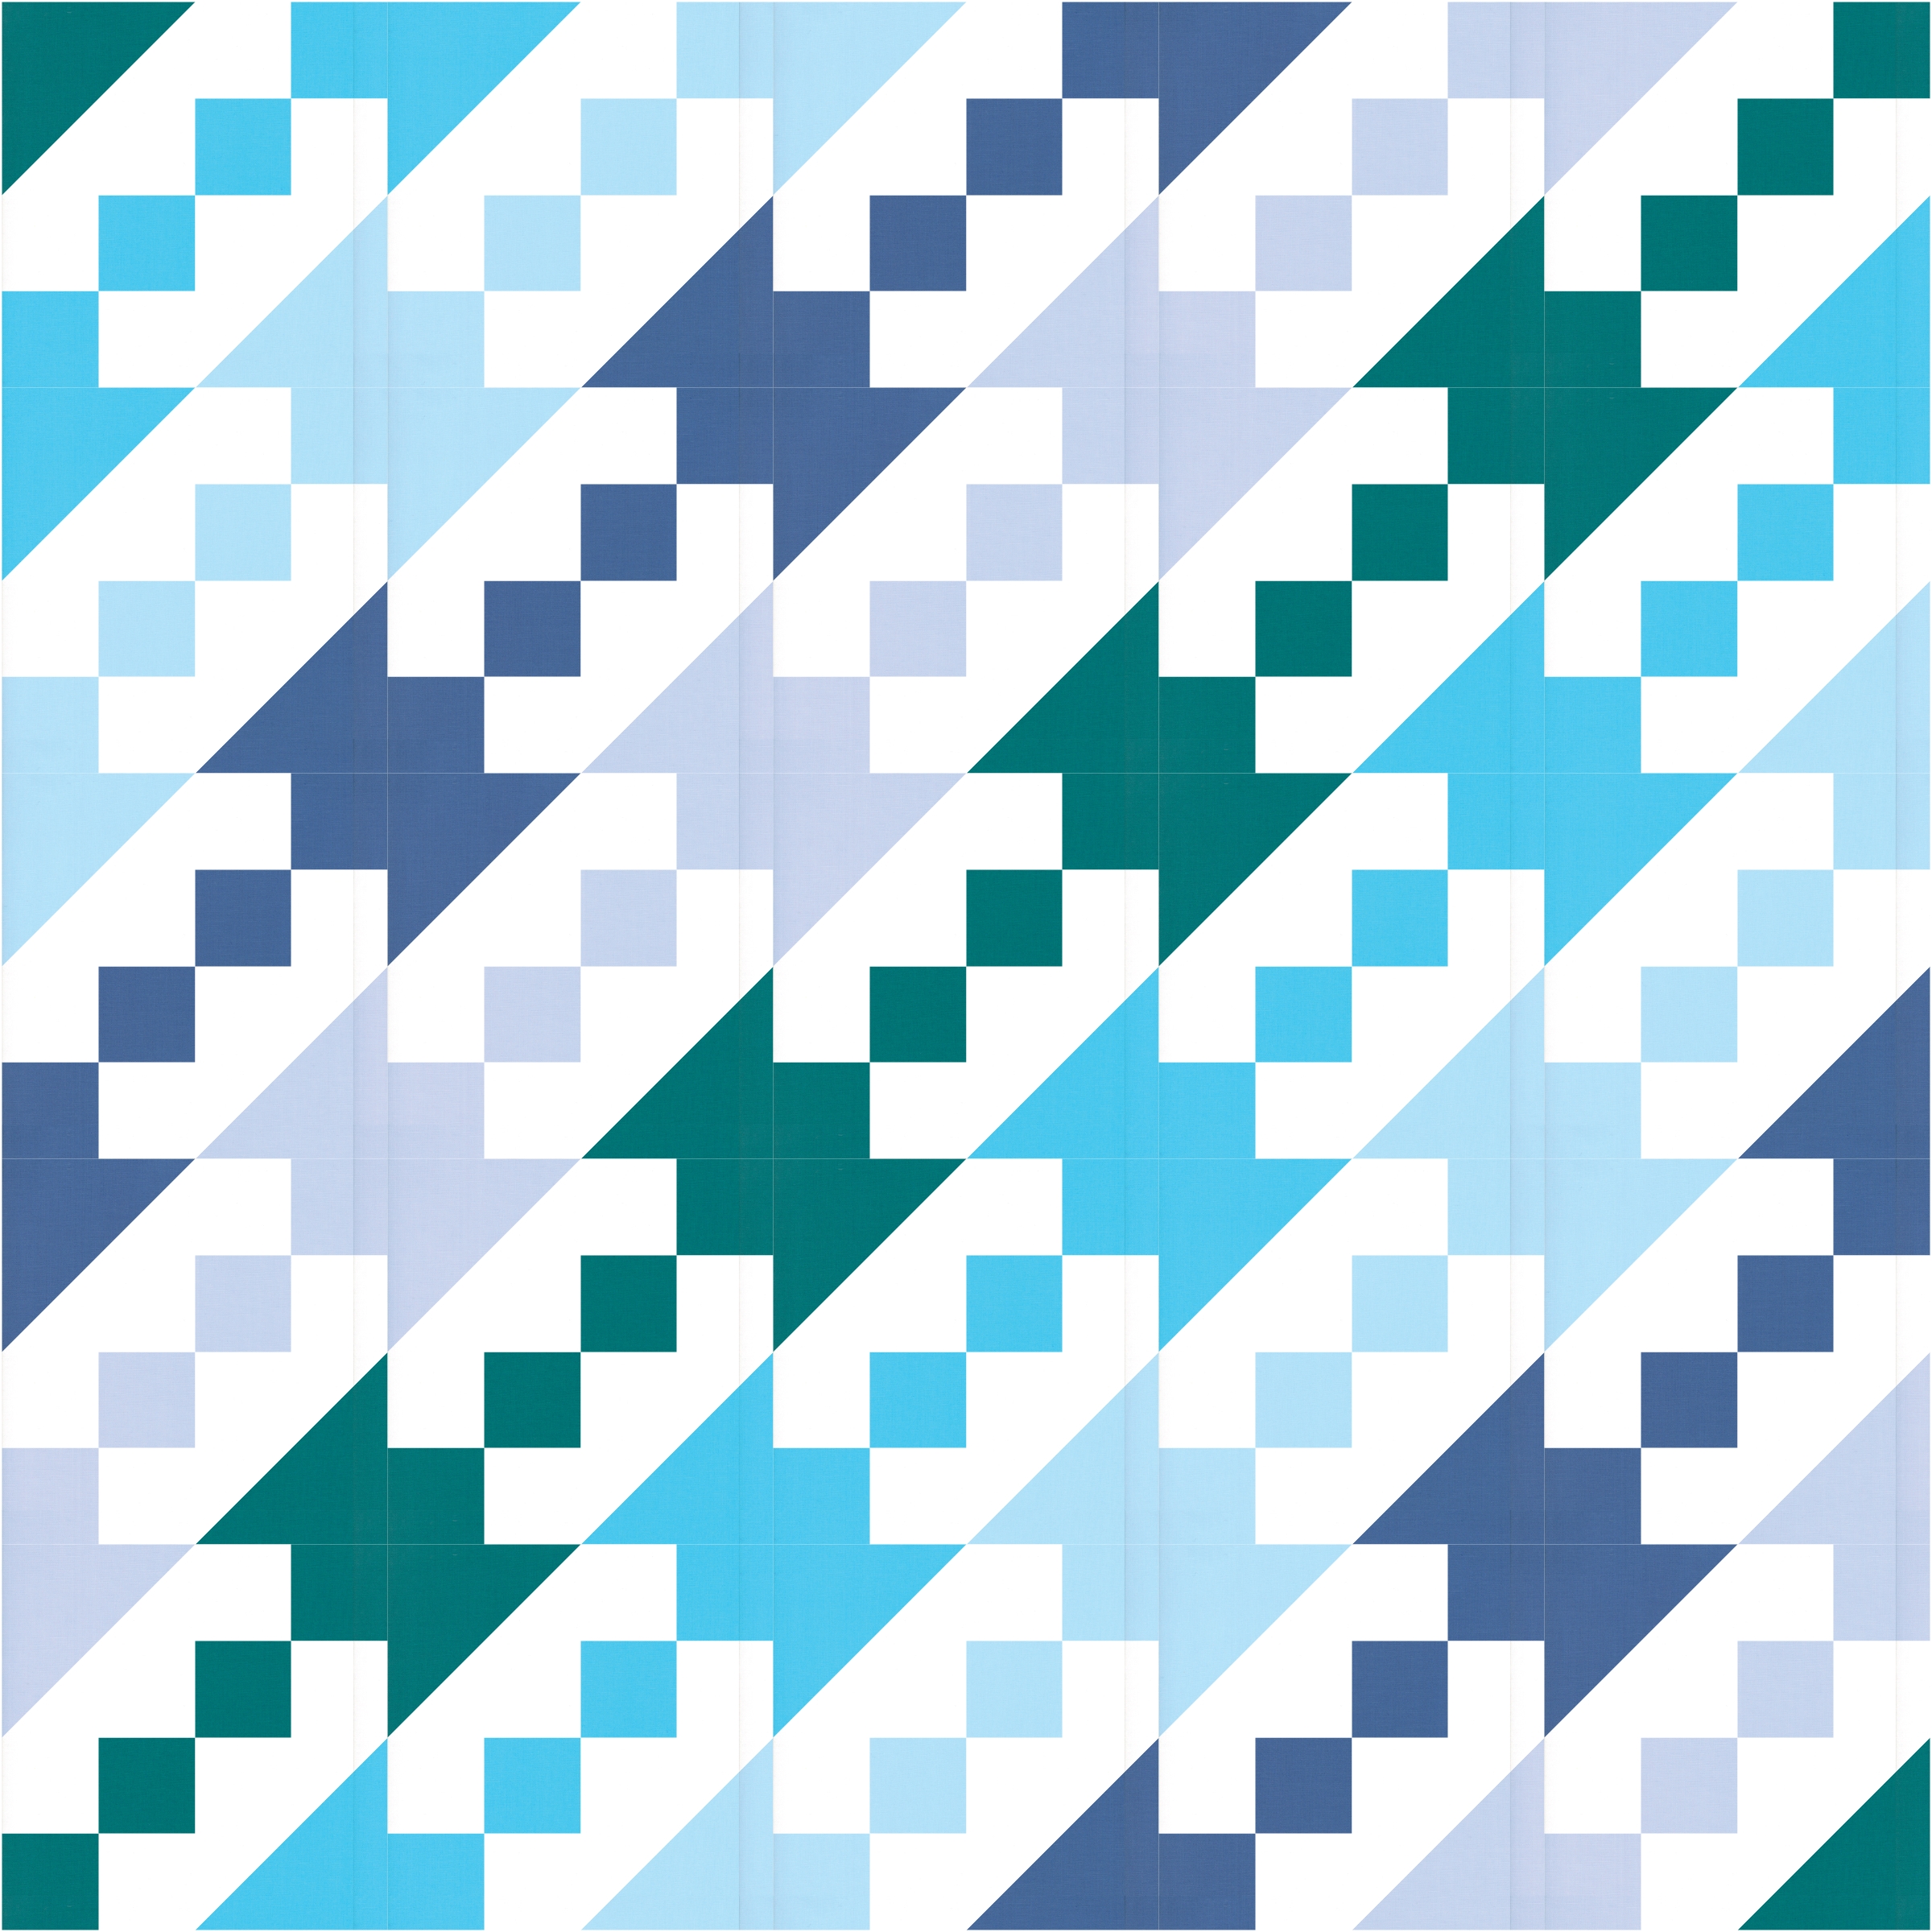
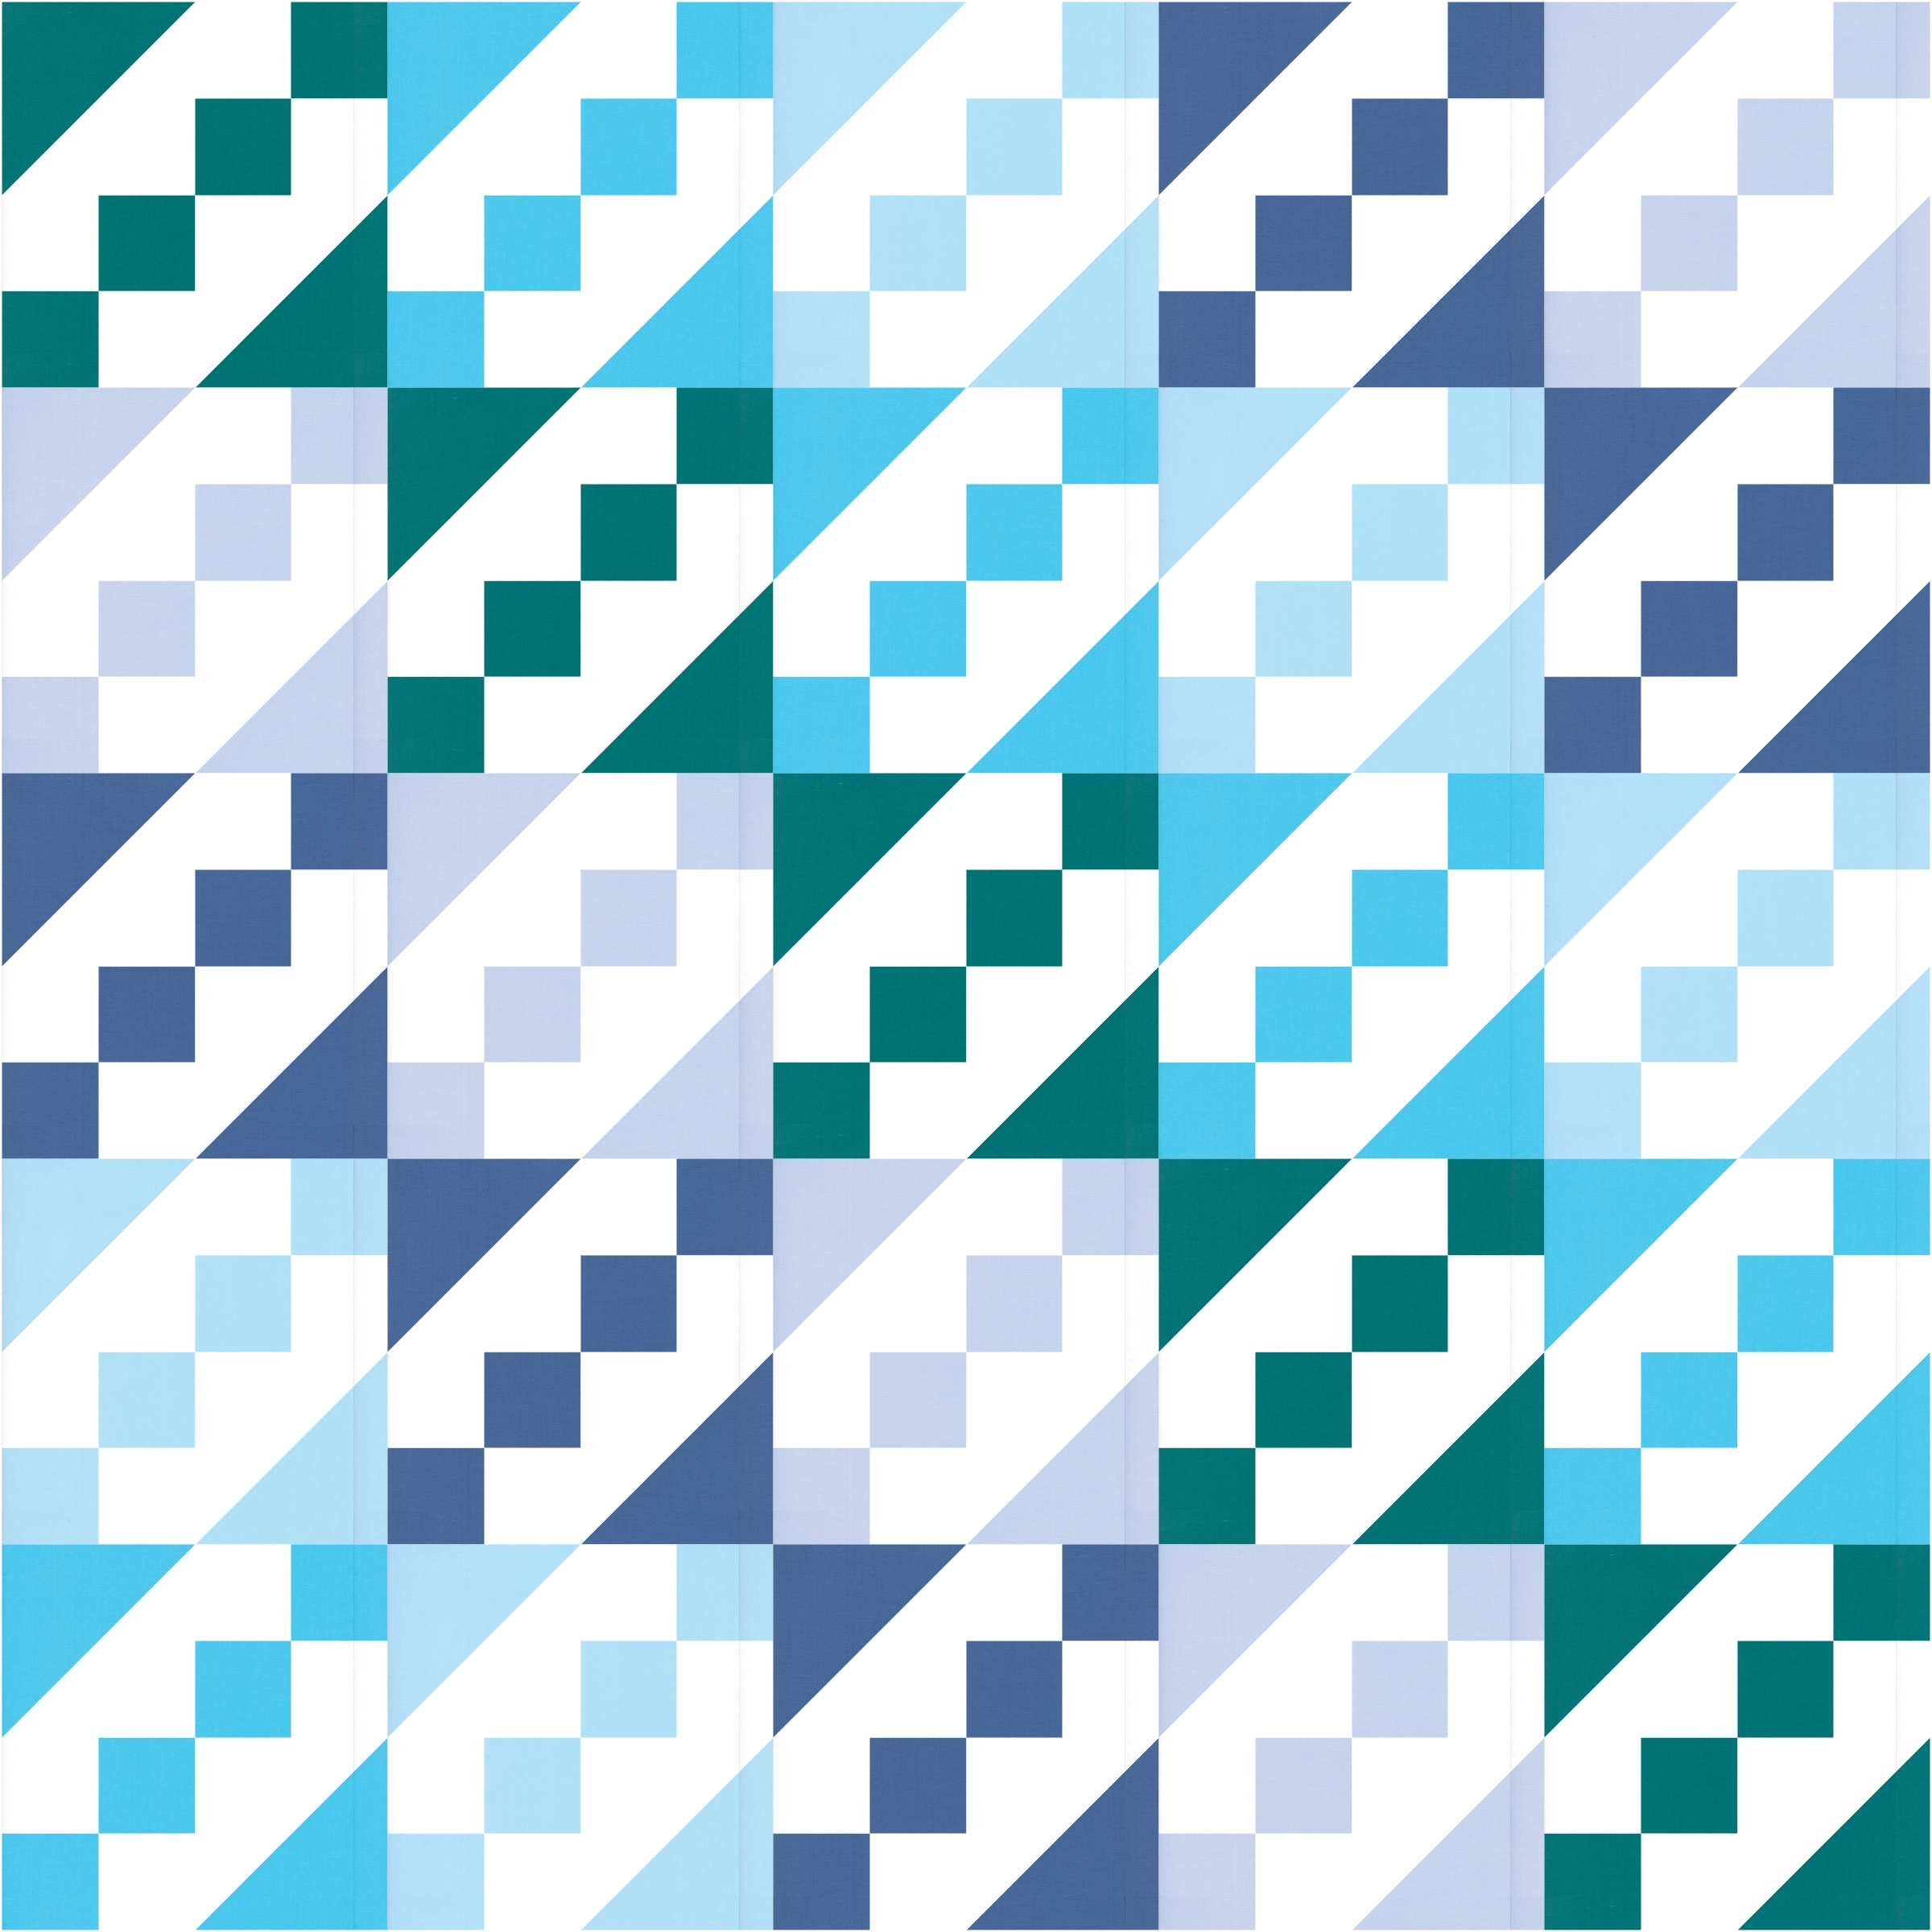
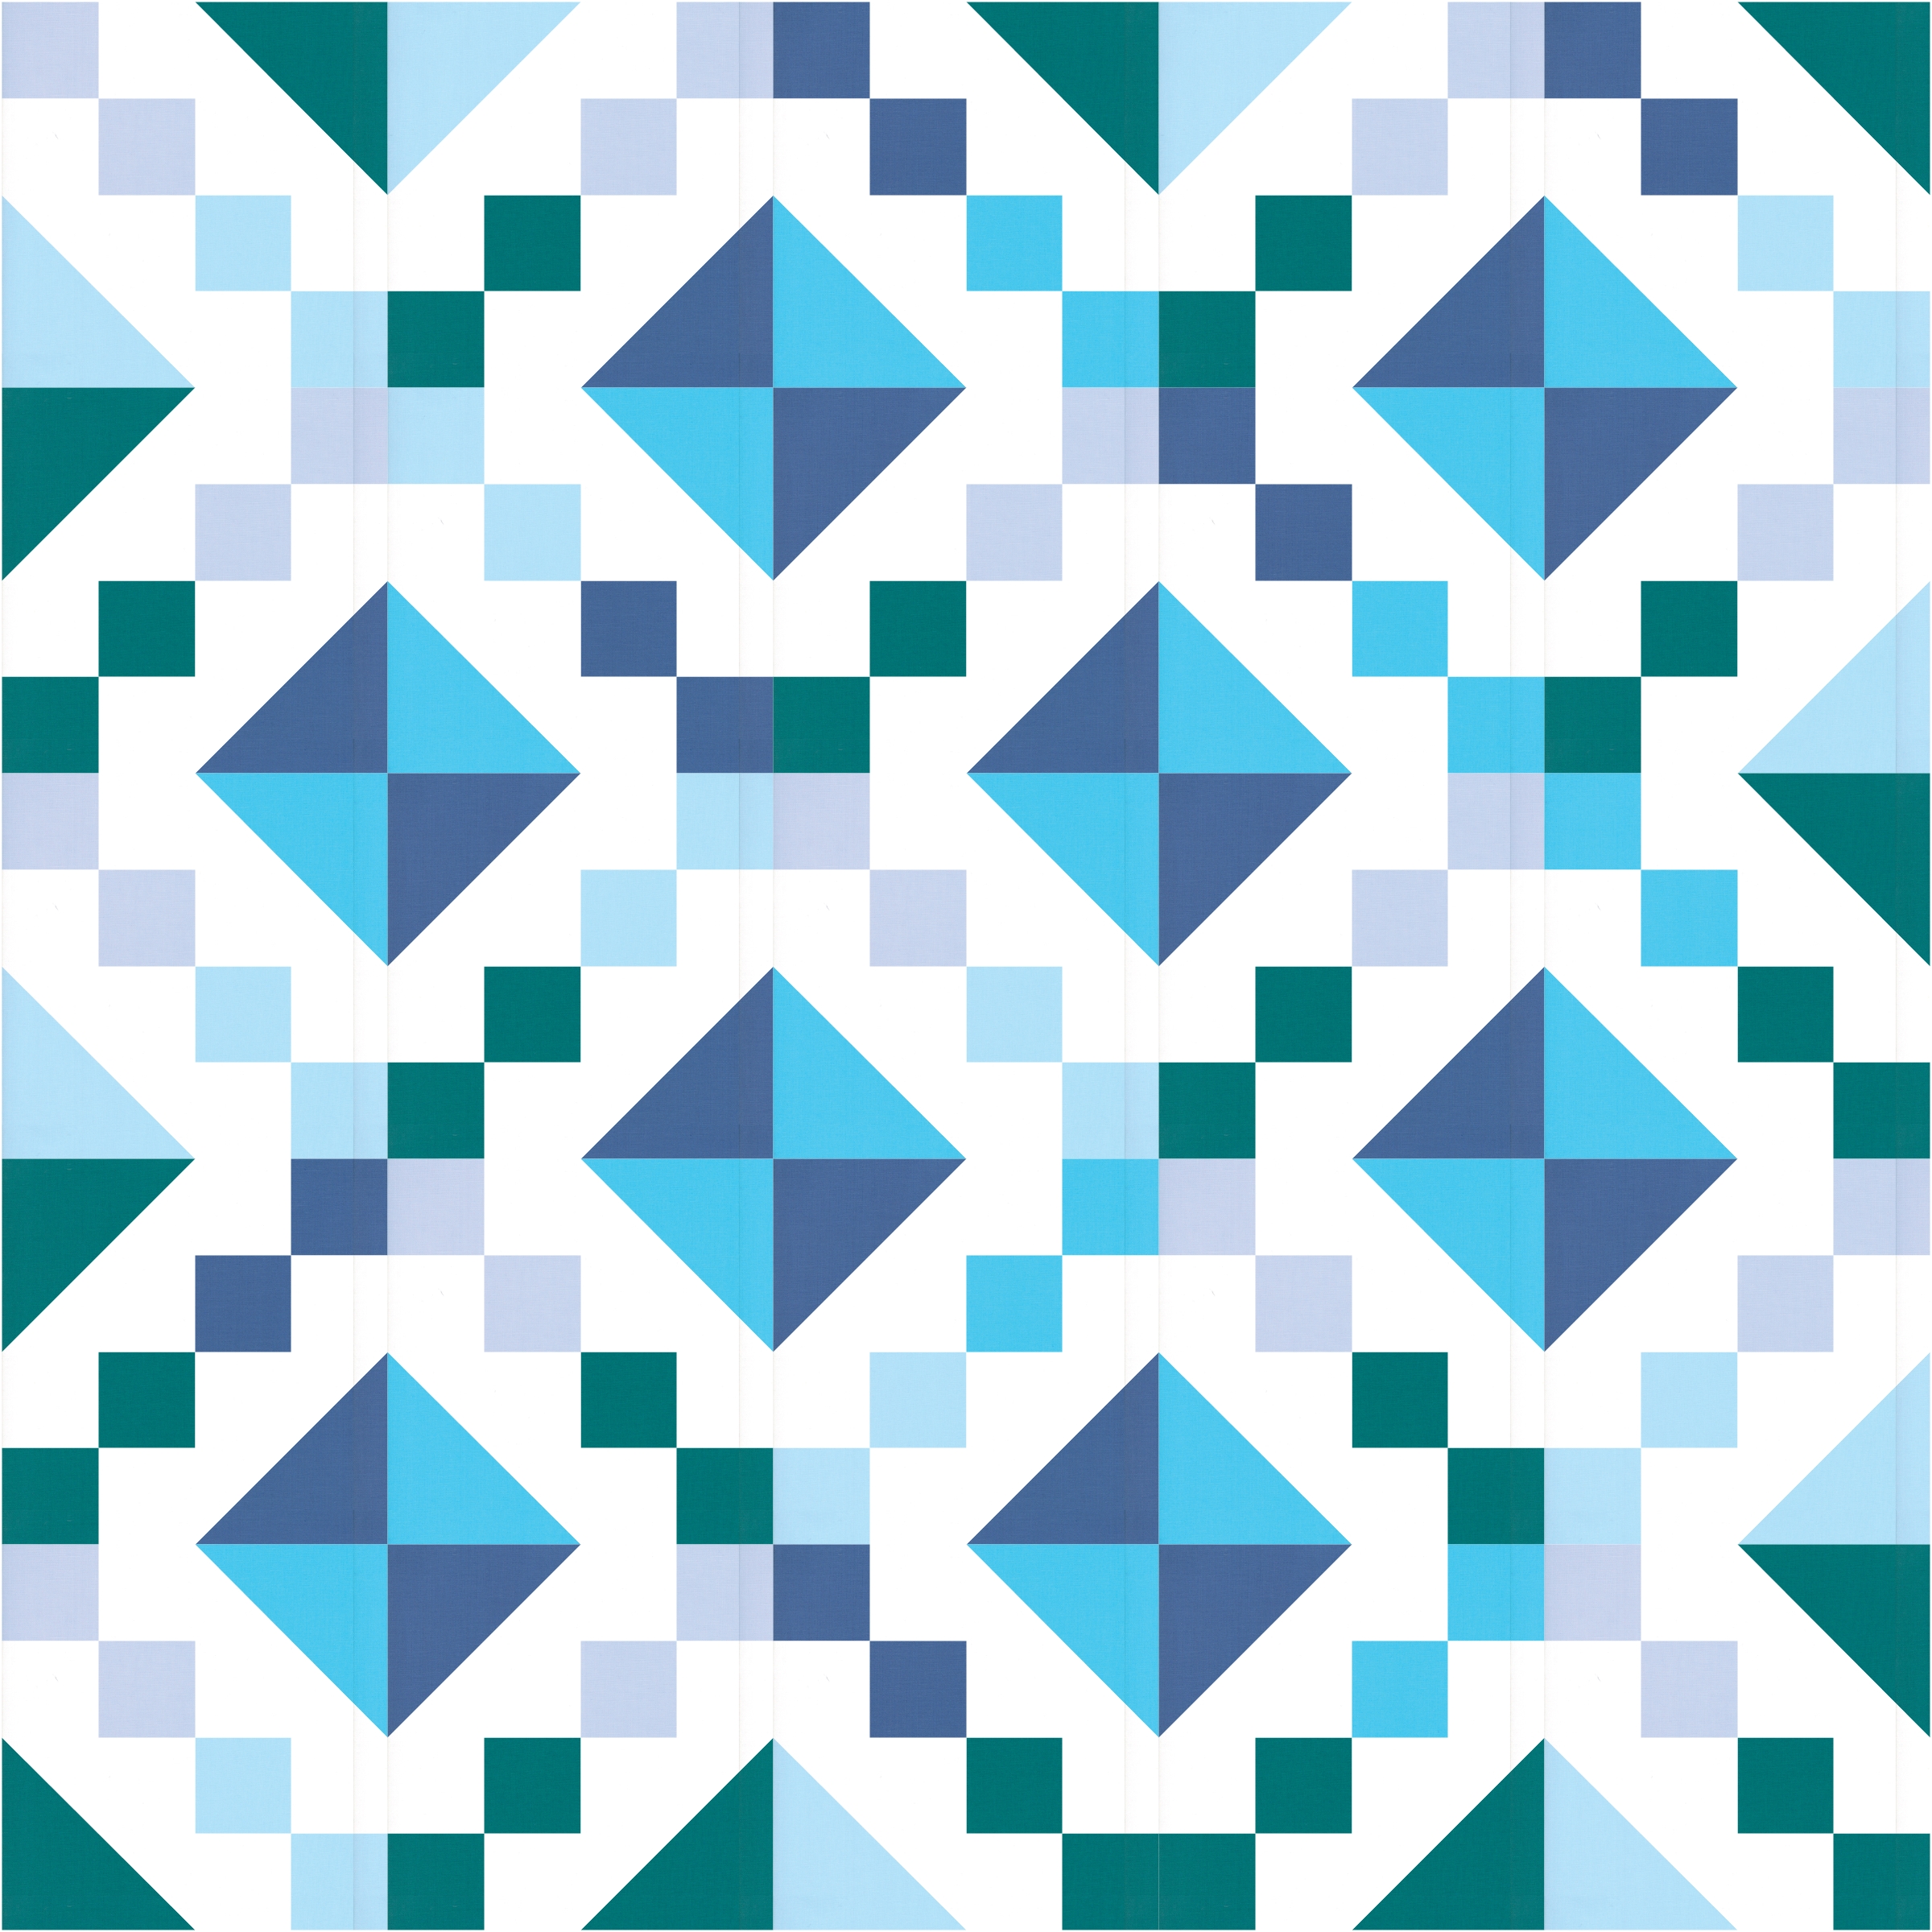
Have you used Moda's Palette Builder? It's a super fun tool that lets you upload an image and it gives you a matching palette of Bella Solids! I absolutely love sewing with solids so the Palette Matcher tool is one of my favorite ways to turn inspiration into reality. Today's recoloring was inspired by beautiful snow covered trees. The exciting thing about working with solids is how you can really play with the pattern and make different aspects pop. Check out these three different versions of the quilt - each one uses the same palette. The only difference is fabric placement! (except for the last one which has some blocks rotated - isn't it fun to play with a design?!)

Now let's get to sewing! If you want to emphasize a particular color, you will need to do a bit of math to see how much of each color you will need.
![]()
NOTE: Alison's quilt uses charms, but if you use solids you will need to substitute for the fat quarters shown in brackets.
Crib Size (48" x 56")
2 Charm Packs [5 fat quarters cut into (84) 5" squares]
2 Charm Packs background fabric
3 yards backing fabric
1/2 yards binding fabric
Throw Size (64" x 80")
1 Layer Cake print fabric [10 fat quarters cut into (160) 5" squares]
1 Layer Cake background fabric
5 yards backing fabric
5/8 yards binding fabric
![]()
Crib Size (48” x 56”)
Step 1: Using 1 print Charm Pack, and 1 background Charm Pack, create HSTs. Place 1 print square RST with 1 background square. Mark a line diagonally on the back side, and sew a scant 1/4” away from the line on each side. Cut along the line and press open. Trim to 4.5”. Make 84 HSTs, 2 from each of the 42 prints.

Step 2: Using 1 print Charm Pack and 1 background Charm Pack, create four-patches. Place 1 print square RST with 1 background square. Sew along two opposite edges of the squares with a 1/4” seam. Then cut the piece in half both directions (at the 2.5” mark). Press all pieces toward the print, and sew together with an alternating piece, creating a 4.5” 4-patch. Press center seam open, or whichever direction you'd like, it won’t matter here. Make 84 four-patches, 2 from each of the 42 prints.
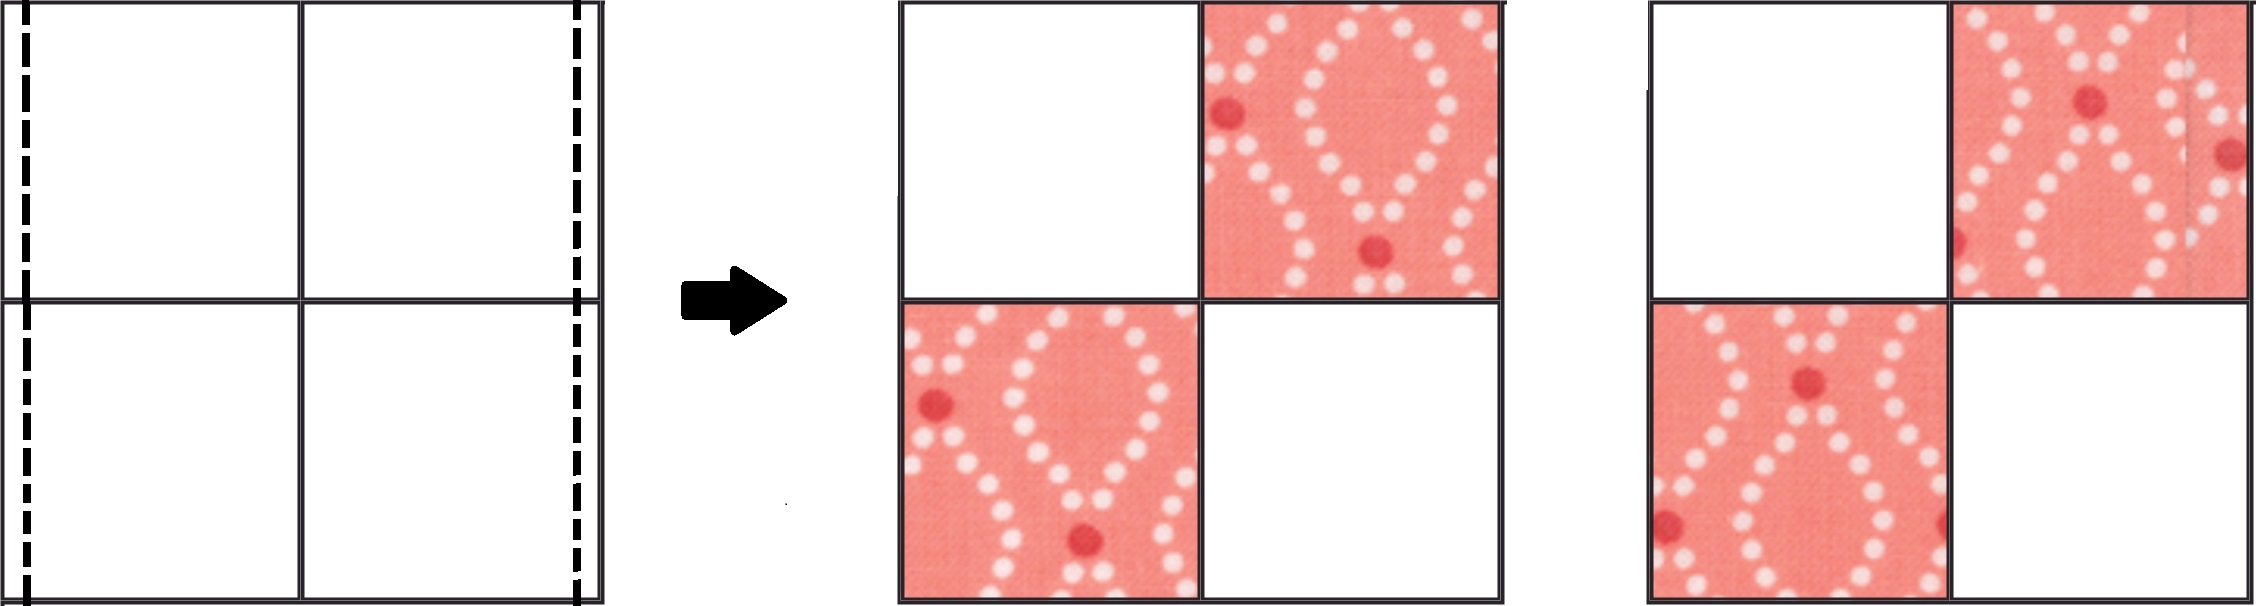
NOTE: If you are particular about directional prints, as I usually am, you will need to decide beforehand which of your prints are going to be “A” blocks, and which are going to be “B”, as the four-patches will be oriented in opposite directions.For the HSTs, make sure you're sewing an upward line from left to right. I laid my HSTs out on the design board first in my desired color arrangement, and then when I got to a print that was directional (usually very few of them), I looked at that print on the design board to determine which way the four-patch needed to be oriented before sewing them together. If directional prints cause you no distress, carry on and disregard this portion!
Step 3: Match all the HSTs and four-patches together with their corresponding prints. Each block will need 2 HSTs and 2 four patches, all of the same print.
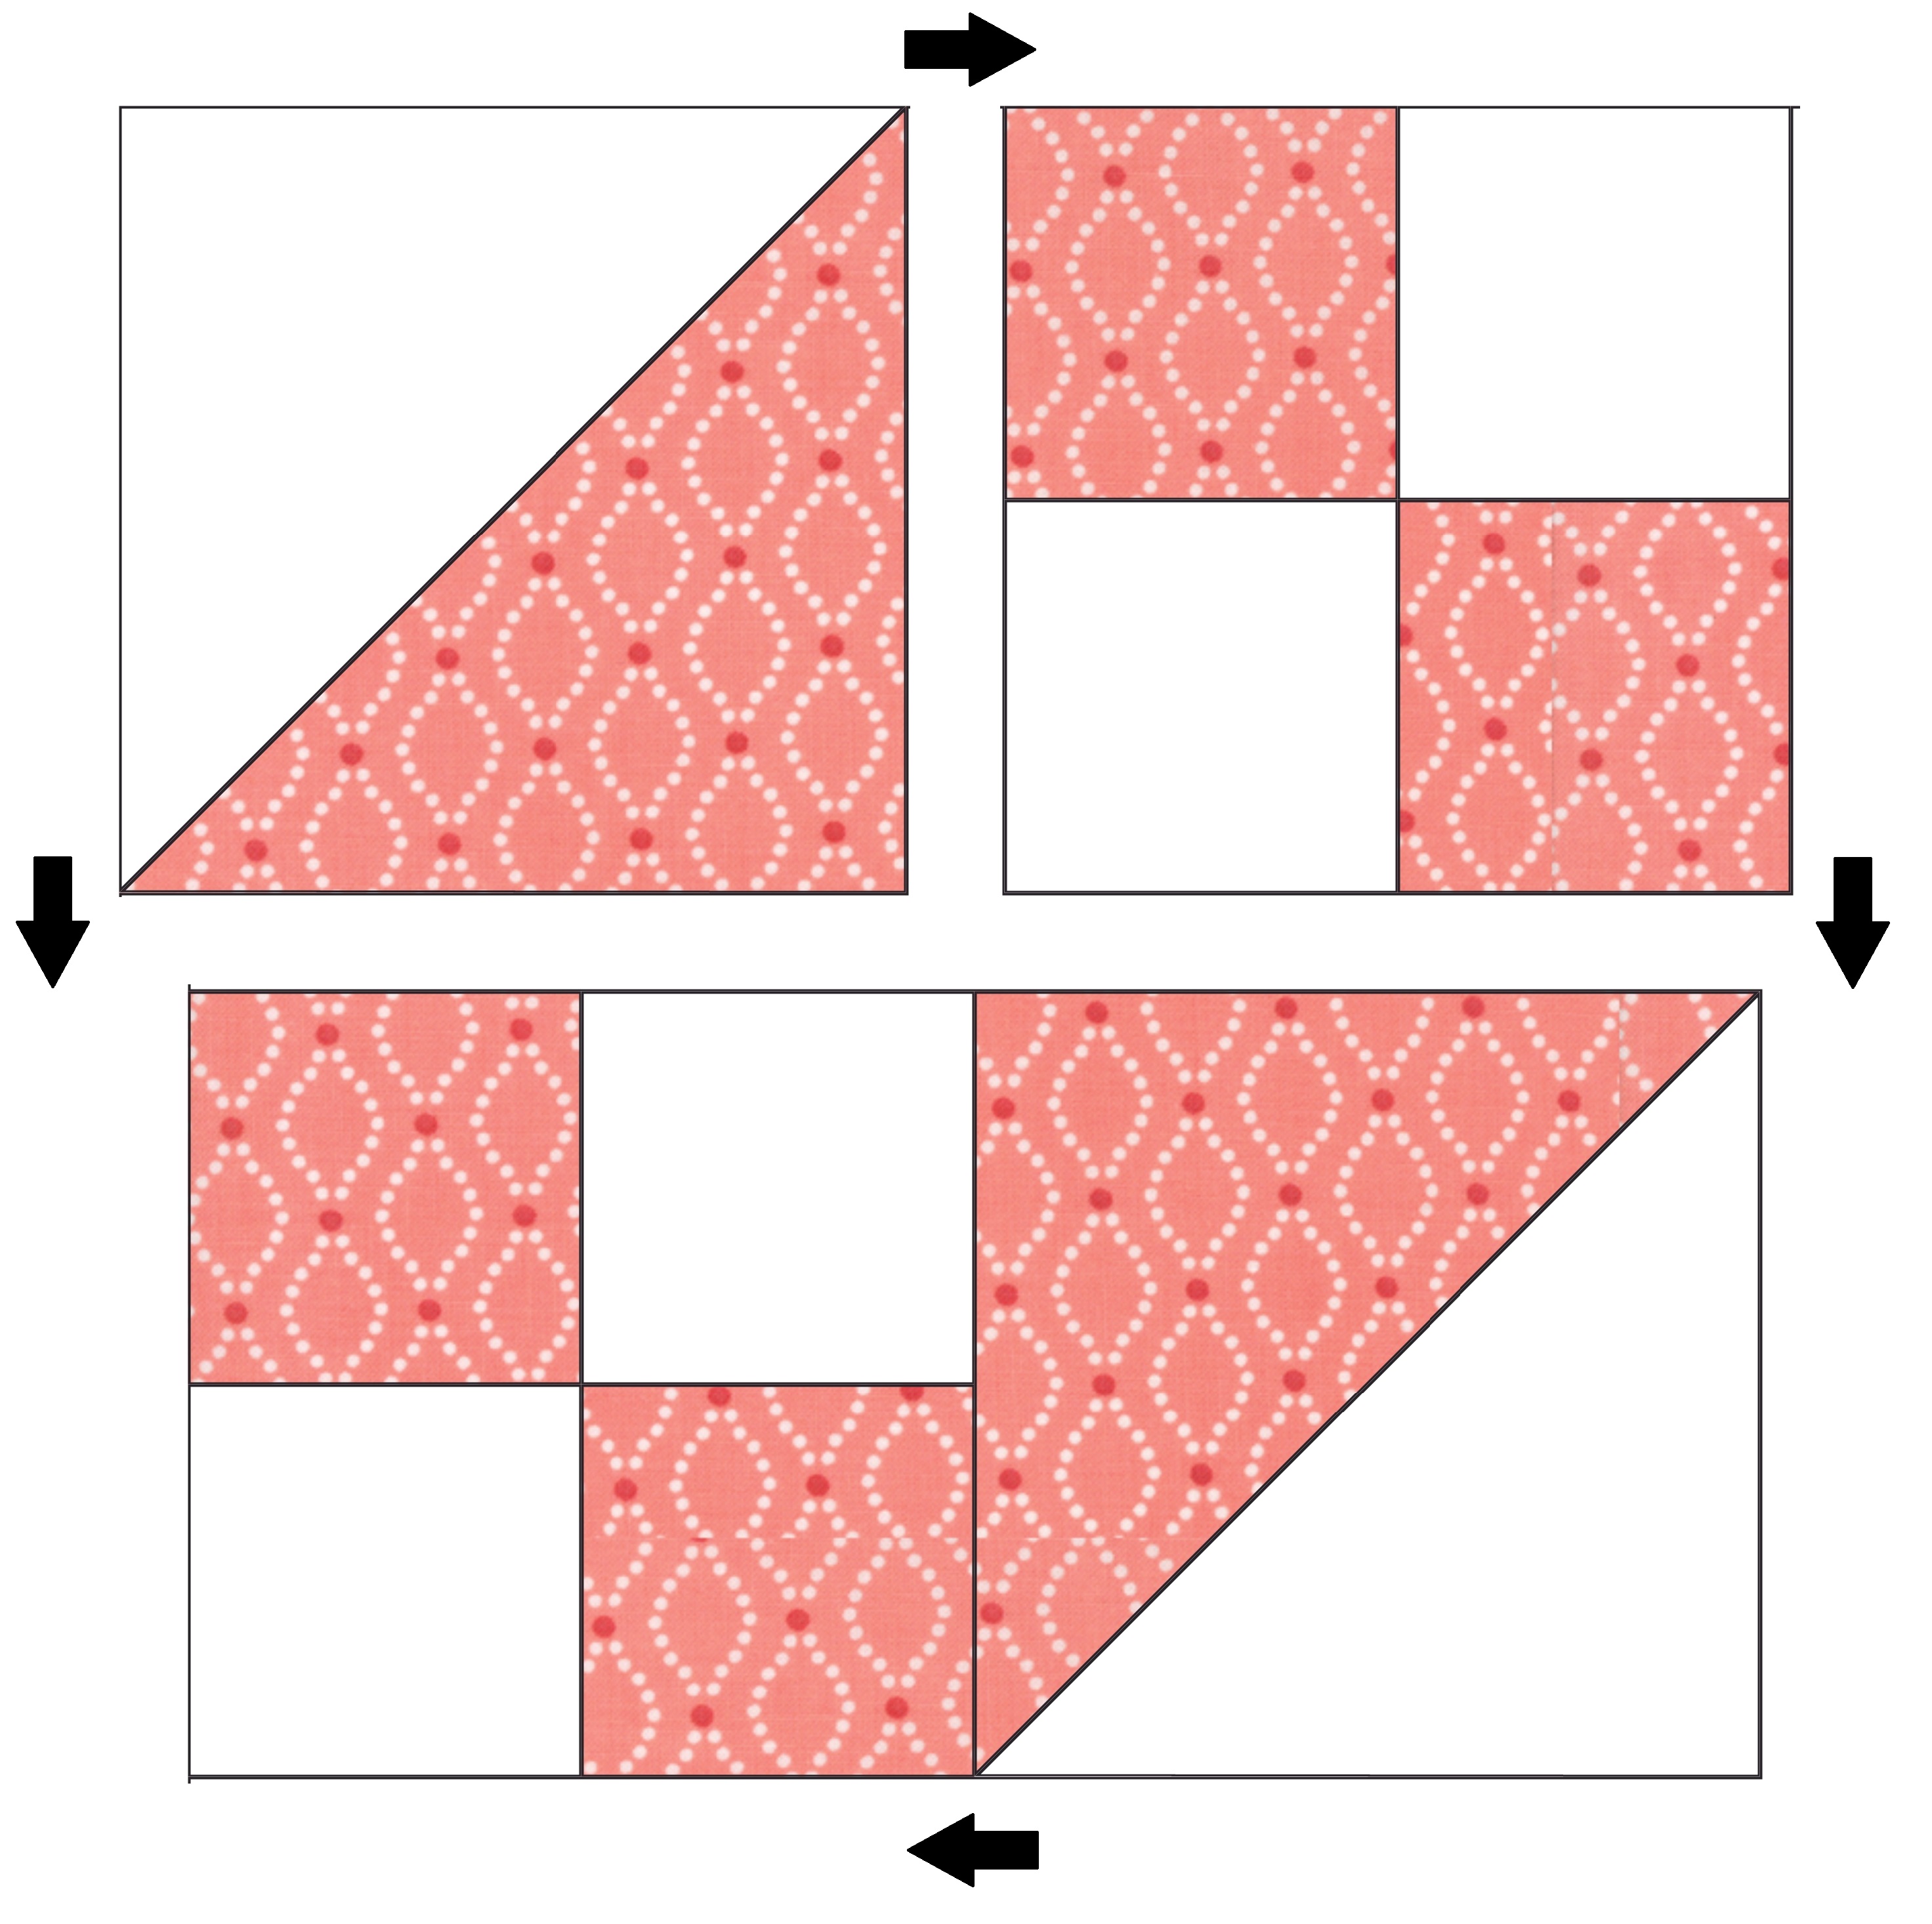
Divide the prints in half and make 21 “A” blocks and 21 “B” blocks as shown below. The HSTs and four patches are oriented oppositely for A and B blocks. For each block, first sew the top and bottom portions together, and press in direction of the arrows. Then sew the two rows together, and press the center seam in the direction of those arrows. Following the arrows will ensure nicely nesting seams and matching points.
Block A-

Block B-
Step 4: Sew the A blocks and B blocks alternately in a 6 by 7 grid. Press rows alternating directions.
Row 1- A, B, A, B, A, B
Row 2- B, A, B, A, B, A
Row 3- A, B, A, B, A, B
Etc., for 7 rows. Press rows and voila! You have a beautiful, fast, easy quilt top. Back, baste, quilt and bind as desired.

Throw Size Directions (64” x 80”)-
Cut Layer Cakes into (4) 5" squares each.
Step 1: Using 2 print 5" squares, and 2 background 5" squares, create HSTs. Place 1 print square RST with 1 background square. Mark a line diagonally on the back side, and sew a scant 1/4” away from the line on each side. Cut along the line and press open. Trim to 4.5”. Make 160 HSTs, 4 from each of the 40 prints. (You will be omitting 2 prints from the quilt.)
Step 2: Using 2 print 5" squares, and 2 background 5" squares, create four-patches. Place 1 print square RST with 1 background square. Sew along two opposite edges of the squares with a 1/4” seam. Then cut the piece in half both directions (at the 2.5” mark). Press all pieces toward the print, and sew together with an alternating piece, creating a 4.5” 4-patch. Press center seam open, or whichever direction you'd like, it won’t matter here. Make 160 four-patches, 4 from each of the 40 prints.
NOTE: If you are particular about directional prints, as I usually am, you will need to decide beforehand which of your prints are going to be “A” blocks, and which are going to be “B”, as the four-patches will be oriented in opposite directions. I laid my HSTs out on the design board first in my desired colored arrangement, and then when I got to a print that was directional (usually very few of them), I looked at that print on the design board to determine which way the four-patch needed to be oriented before sewing it together. If directional prints cause you no distress, carry on and disregard this portion!
Step 3: Match all the HSTs and four-patches together with their corresponding prints. Each block will need 2 HSTs and 2 four patches, all of the same print. For this size, you will be able to make 2 blocks from each print.
Divide the prints in half and make 40 “A” blocks and 40 “B” blocks as shown below. The HSTs and four patches are oriented oppositely for A and B blocks. For each block, first sew the top and bottom portions together, and press in direction of the arrows. Then sew the two rows together, and press the center seam in the direction of those arrows. Following the arrows will ensure nicely nesting seams and matching points.
Block A-
Block B-
Step 4: Sew the A block and B blocks alternately in an 8 by 10 grid. Press rows alternating directions.
Row 1- A, B, A, B, A, B, A, B
Row 2- B, A, B, A, B, A, B, A
Row 3- A, B, A, B, A, B, A, B
Etc., for 10 rows. Press rows and voila! Back, baste, quilt and bind as desired.
![]()
The crib quilt finishes at 48" x 56", and the throw would be 64" x 80".
Happy winter dreams to you!

Don't forget to visit Allison at her blog Woodberry Way!
![]()
Posted in:
Comments