Welcome to Moda Fabrics!
Mary's Go Round Quilt
Mary's Go Round Quilt
Published:
Oct 16 2018 - 09:00

![]()
Happy Fall! I am Barbara Esposito, The Quilted B, and it is so good to be back at the Moda Bake Shop. This quilt block was inspired by my mom, Mary. She was an amazing seamstress, initially out of need, but as time went on out of pure love for the craft. She won many Blue Ribbons at our state fair over the years, and no Christmas went by without matching party dresses and PJ’s for my nieces and their dolls.
I would love to tell you that my sewing experience with my mom was all butterflies and hearts, and we spent hours in sewing bliss together. However, in actuality, I couldn’t go near her machine (which I happen to have in my sewing room now) without it jamming up, no matter how many times she patiently tried to teach me. The last time I tried to use her machine I was in my early 20’s and it went something like this: “Where are you going with those pants?” “Oh, these? They need to be hemmed. I’m going to the sewing room.” “Oh no you’re not! Please Barbara, just give them to me and spare me and my machine another breakdown. PLEASE!”
It was many years later that I found my niche in quilting. I still attribute my love for crafting and sewing to the remarkable example she set. My mom also loved flowers and gardening and this beautiful Garden Variety fabric by Lella Boutique would have been right up her alley.
This Mary’s Go Round quilt was brilliantly custom quilted by Amy Burkett, @herding_cats_quilting. I love how she incorporated the pebbles in the quilting, as if you are walking down a garden path.
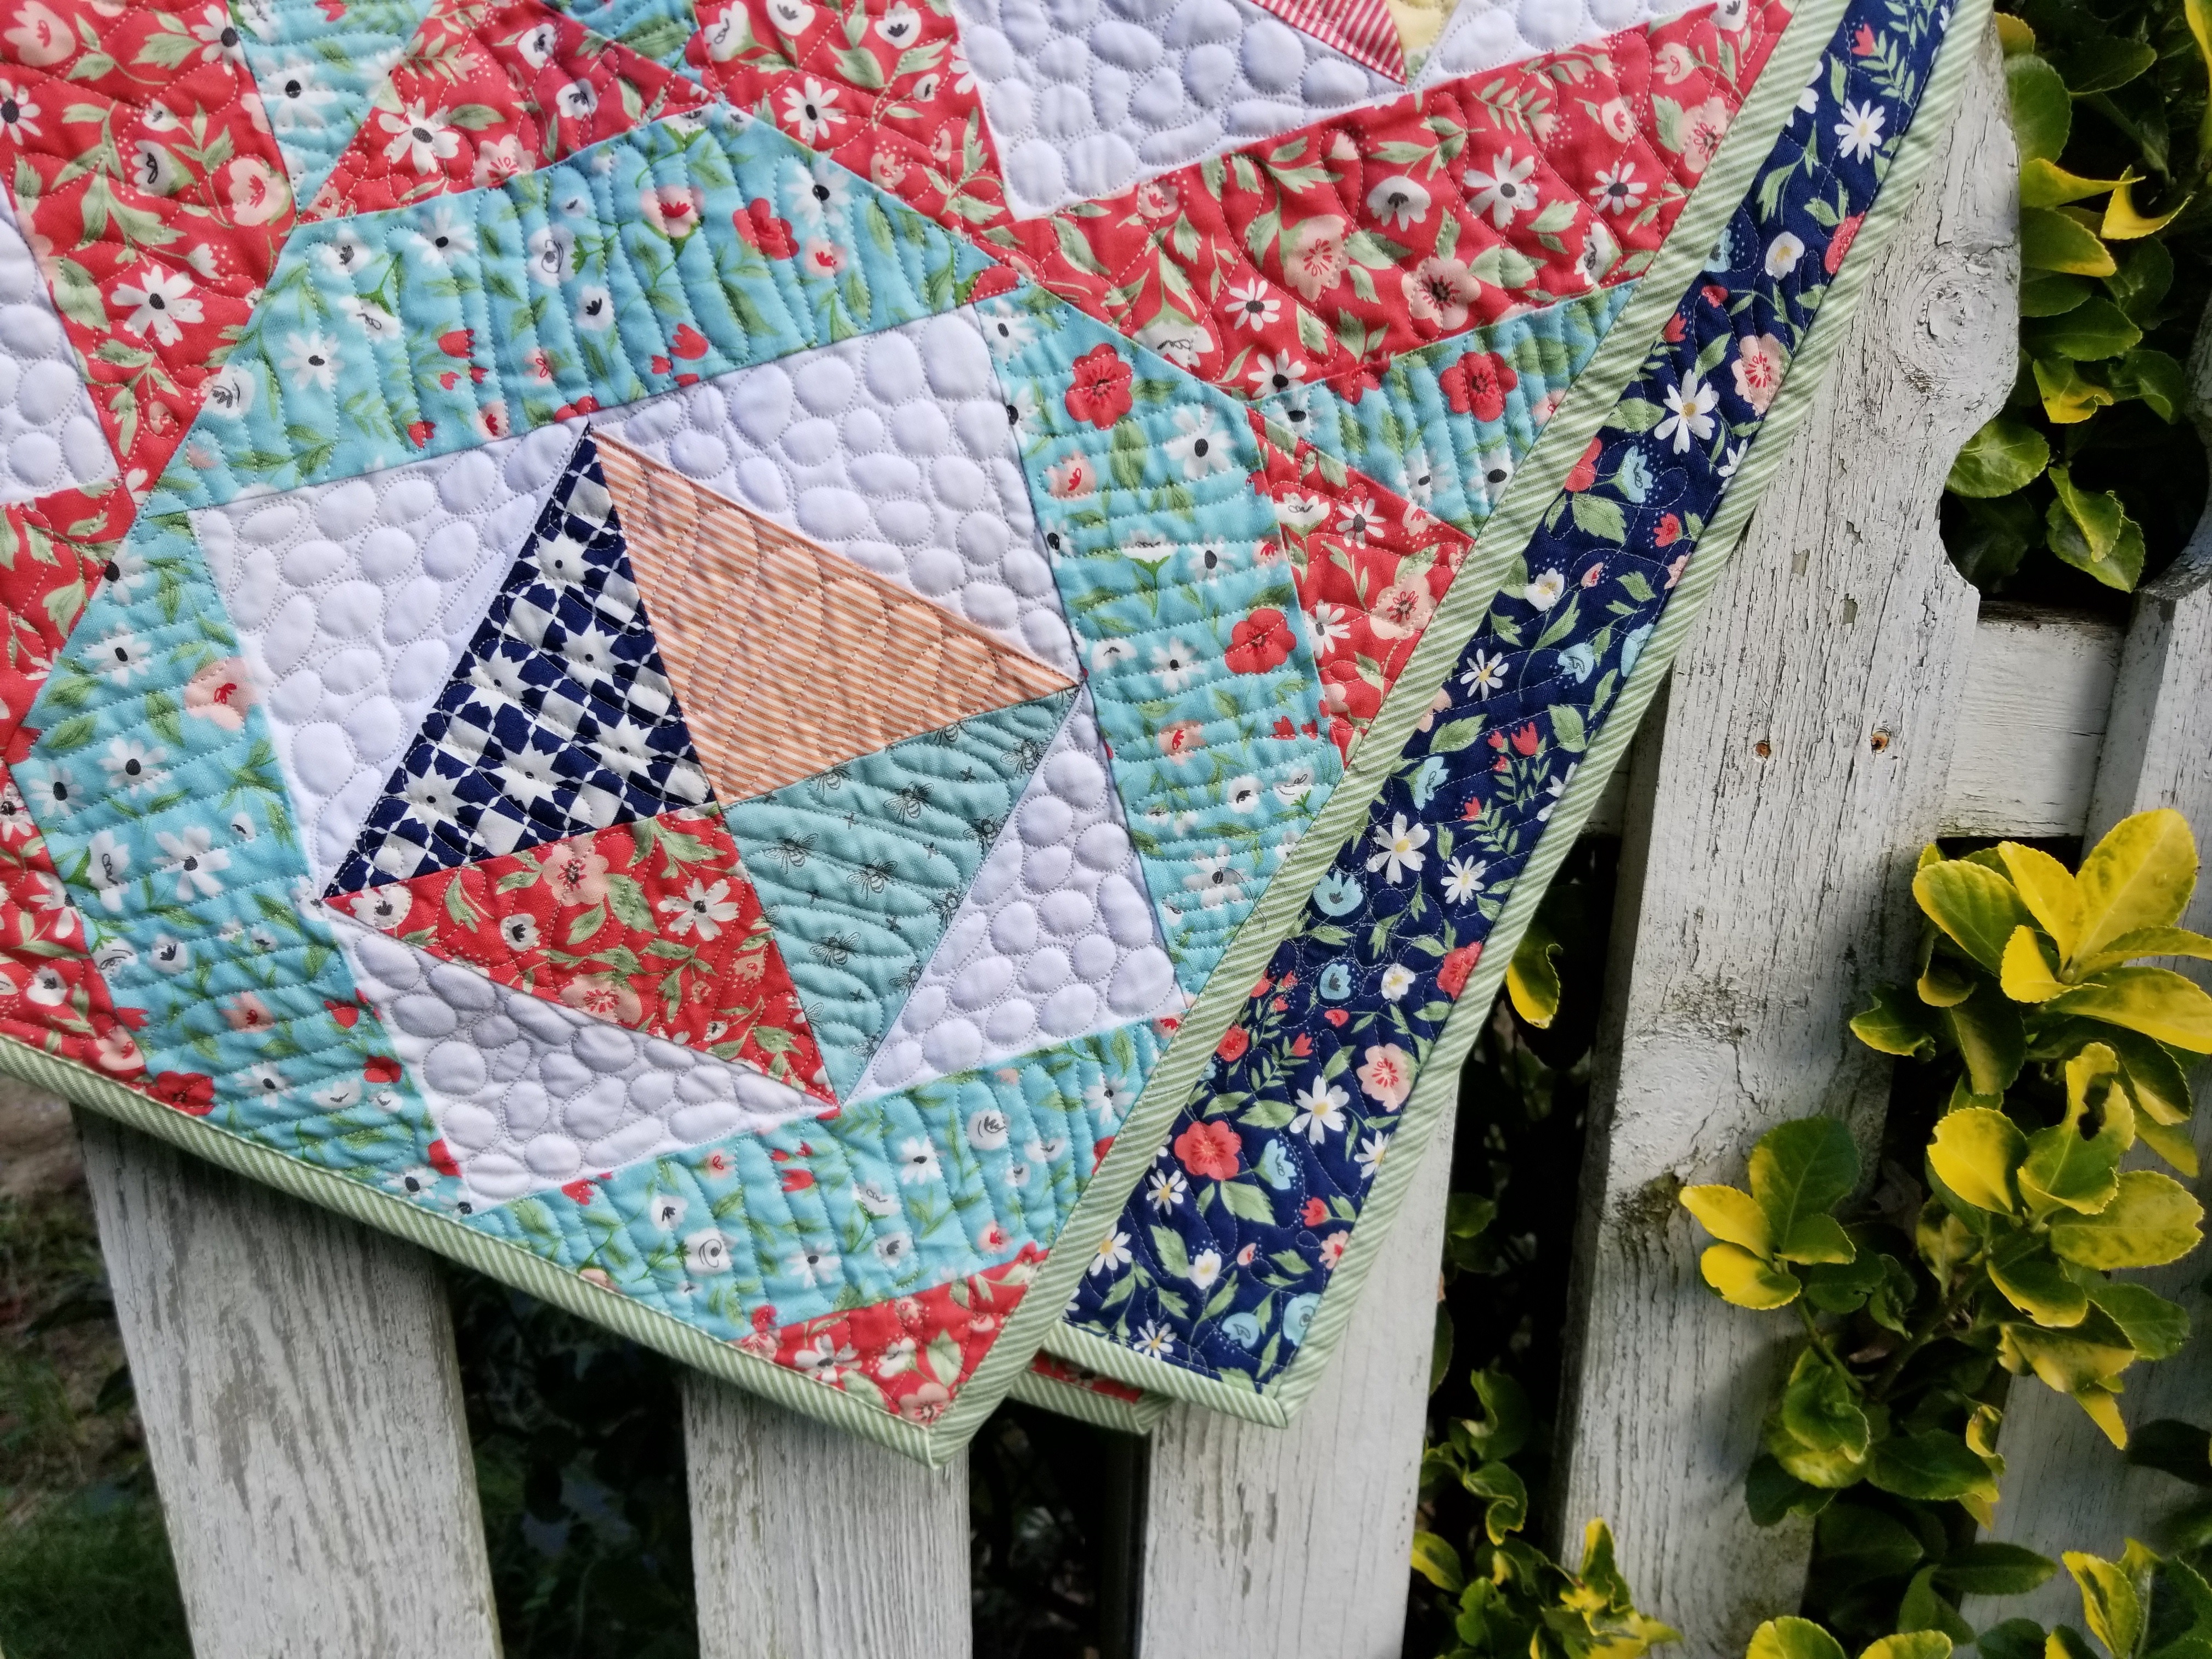
So without further ado, here is the block and quilt pattern I call “Mary’s Go Round”. Here’s to you Mom!
![]()

Garden Variety by Lella Botique
One Layer Cake 507LC
Two Charm Packs 9000PP-98 White
1 ¼ Yards 507 13 Blue Sky
1 ¼ Yards 50716 Berry
½ Yard 5075 14 Grass Stripe for binding
4 Yards 5070 12 Navy for backing
Note: This pattern could be done with two Charm Packs of Garden Variety (5070PP) but I love the versatility and options that a Layer Cake offers.
![]()
Very helpful, a 12 ½ inch square ruler. If you do not have one, scroll down to the bottom for instructions for using a standard ruler that has a 45º angle line.
Also very helpful but not necessary is a large rotating cutting mat for squaring up the blocks.
![]()
Before you start:
- All seams are a SCANT quarter inch
- Fabrics were spray starched before cutting
- Pressing was done with a dry iron
- Seams on the HST (Half Square Triangle) units were pressed open to reduce bulk
- I may have use a hammer to whack bulky seams into submission
- WOF = Width of Fabric
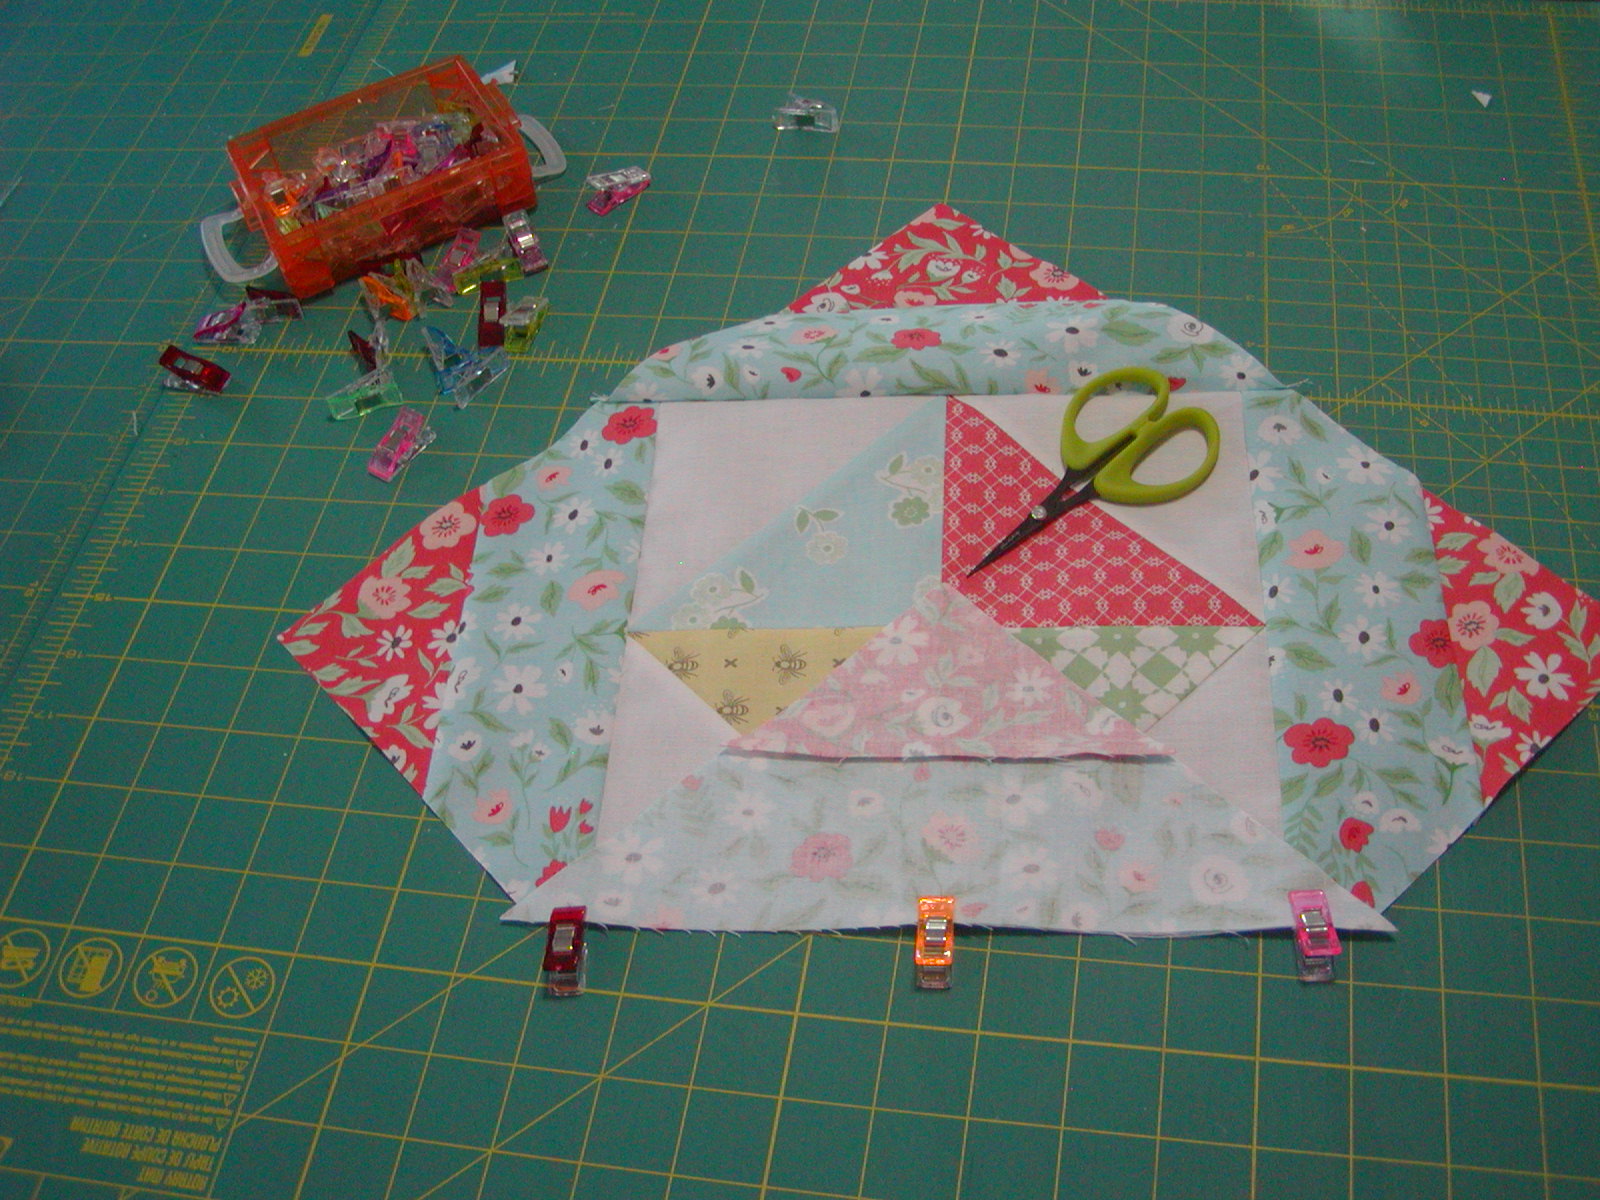
Start with 52 of the white Charm Squares, and mark center diagonal lines.

Choose 26 of the Layer Cake pieces and cut them in half

From the Berry and Blue Sky yardage, cut Fifteen strips 2 ¾ inches by WOF from each color for a total of 30 strips.
Assembling the blocks:
Place two Charm Squares on one of the half Layer Cake pieces.

Sew a scant quarter-inch on both sides of the diagonal lines you marked on the white Charm Squares

Continue with the remaining 25 half Layer Cakes and 50 remaining Charm Squares
Cut the HST (Half Square Triangles) apart , square up them to 4 ½ inches, and press the units open.


Now is the time to snip off those dog ears (or bunny ears as they are called by my UK friend Naomi Clarke).
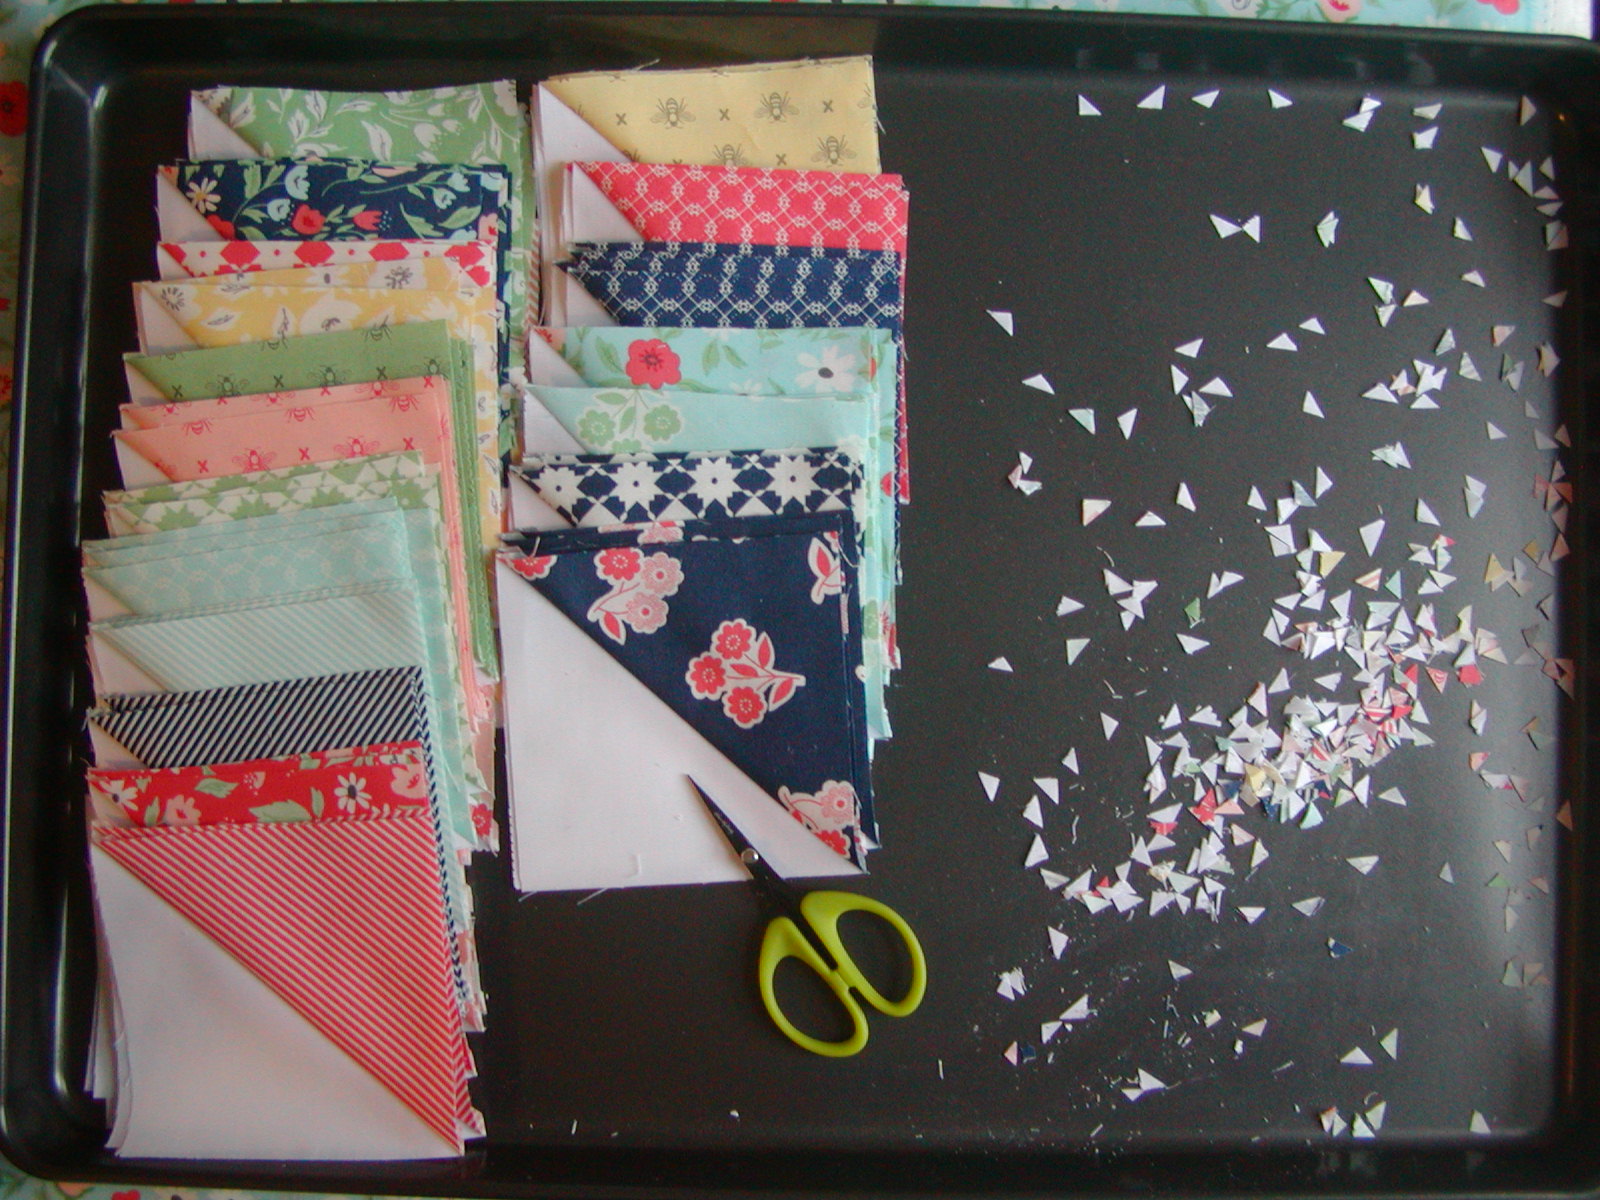 I trim the blocks in a large cookie sheet to keep the dog ears from "decorating" my floor!
Put the HST units in groups of four, colors all to the center, and sew two together, then sew those units of two together.

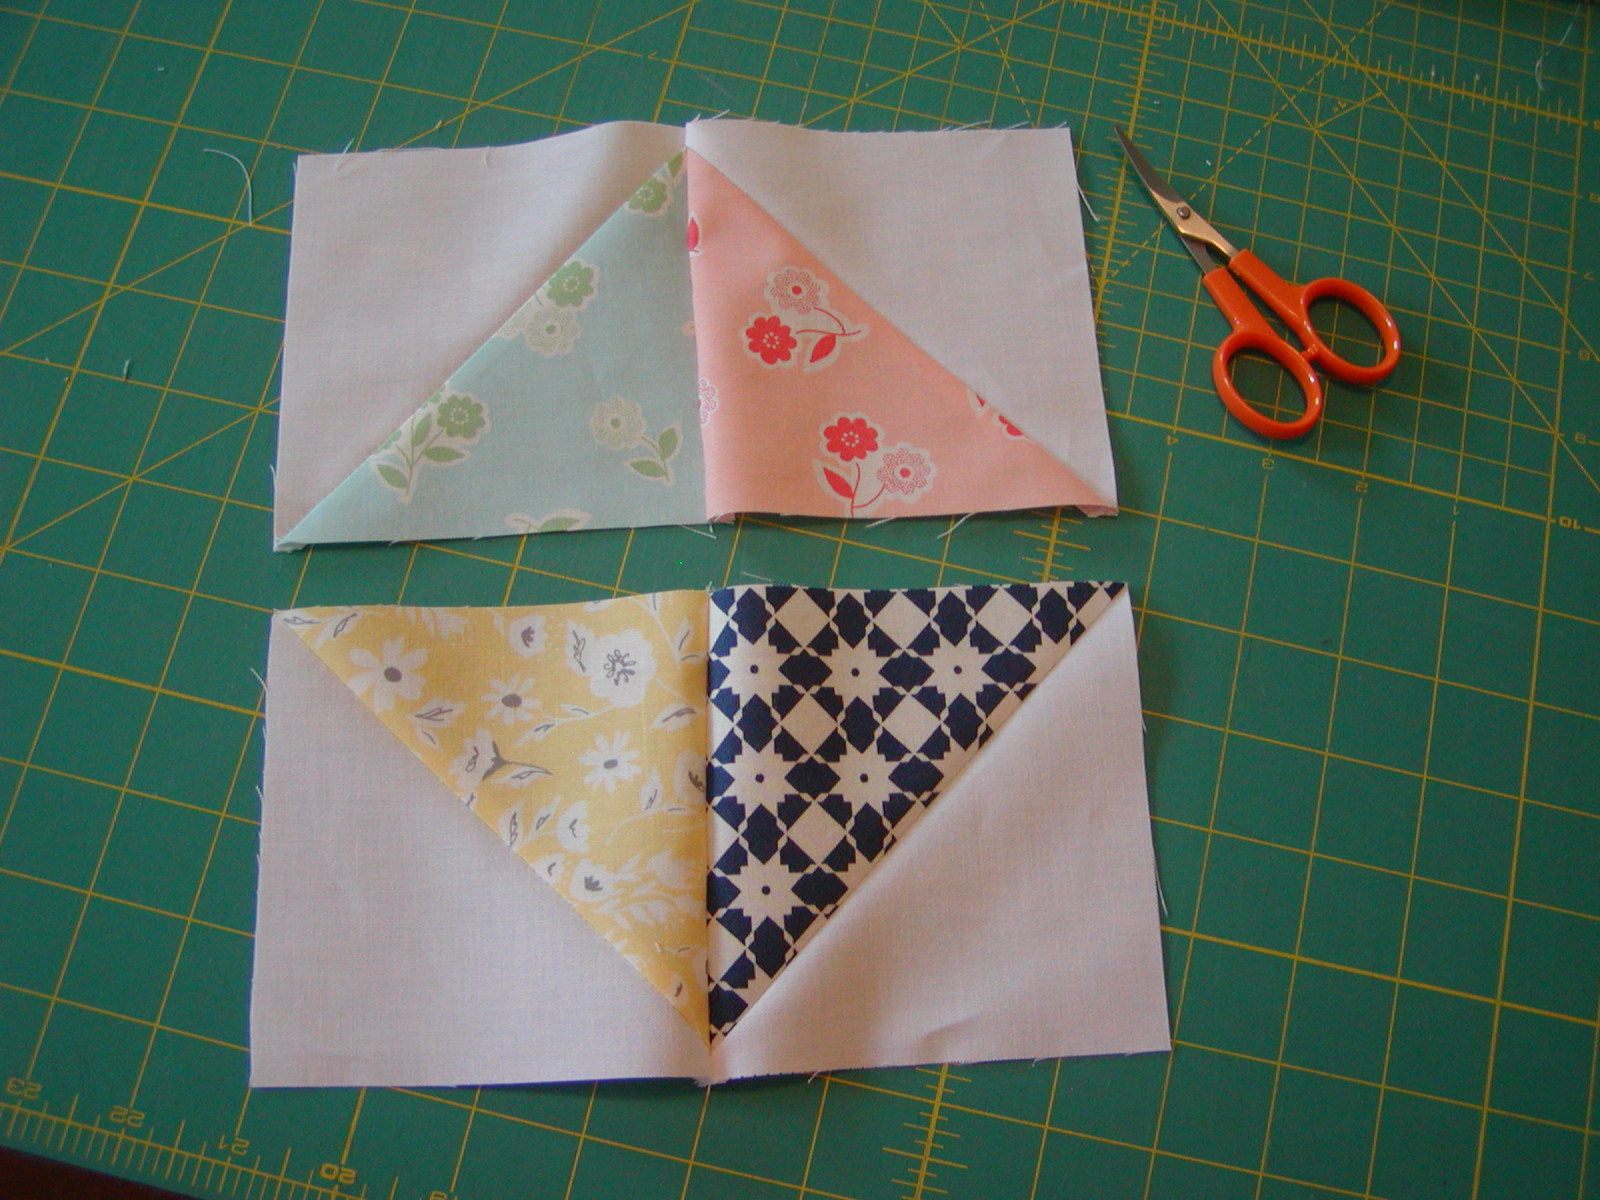

You will end up with 26 units, which leaves you with one Bonus unit (the quilt is set in five rows of 5 blocks).
Set these units aside.
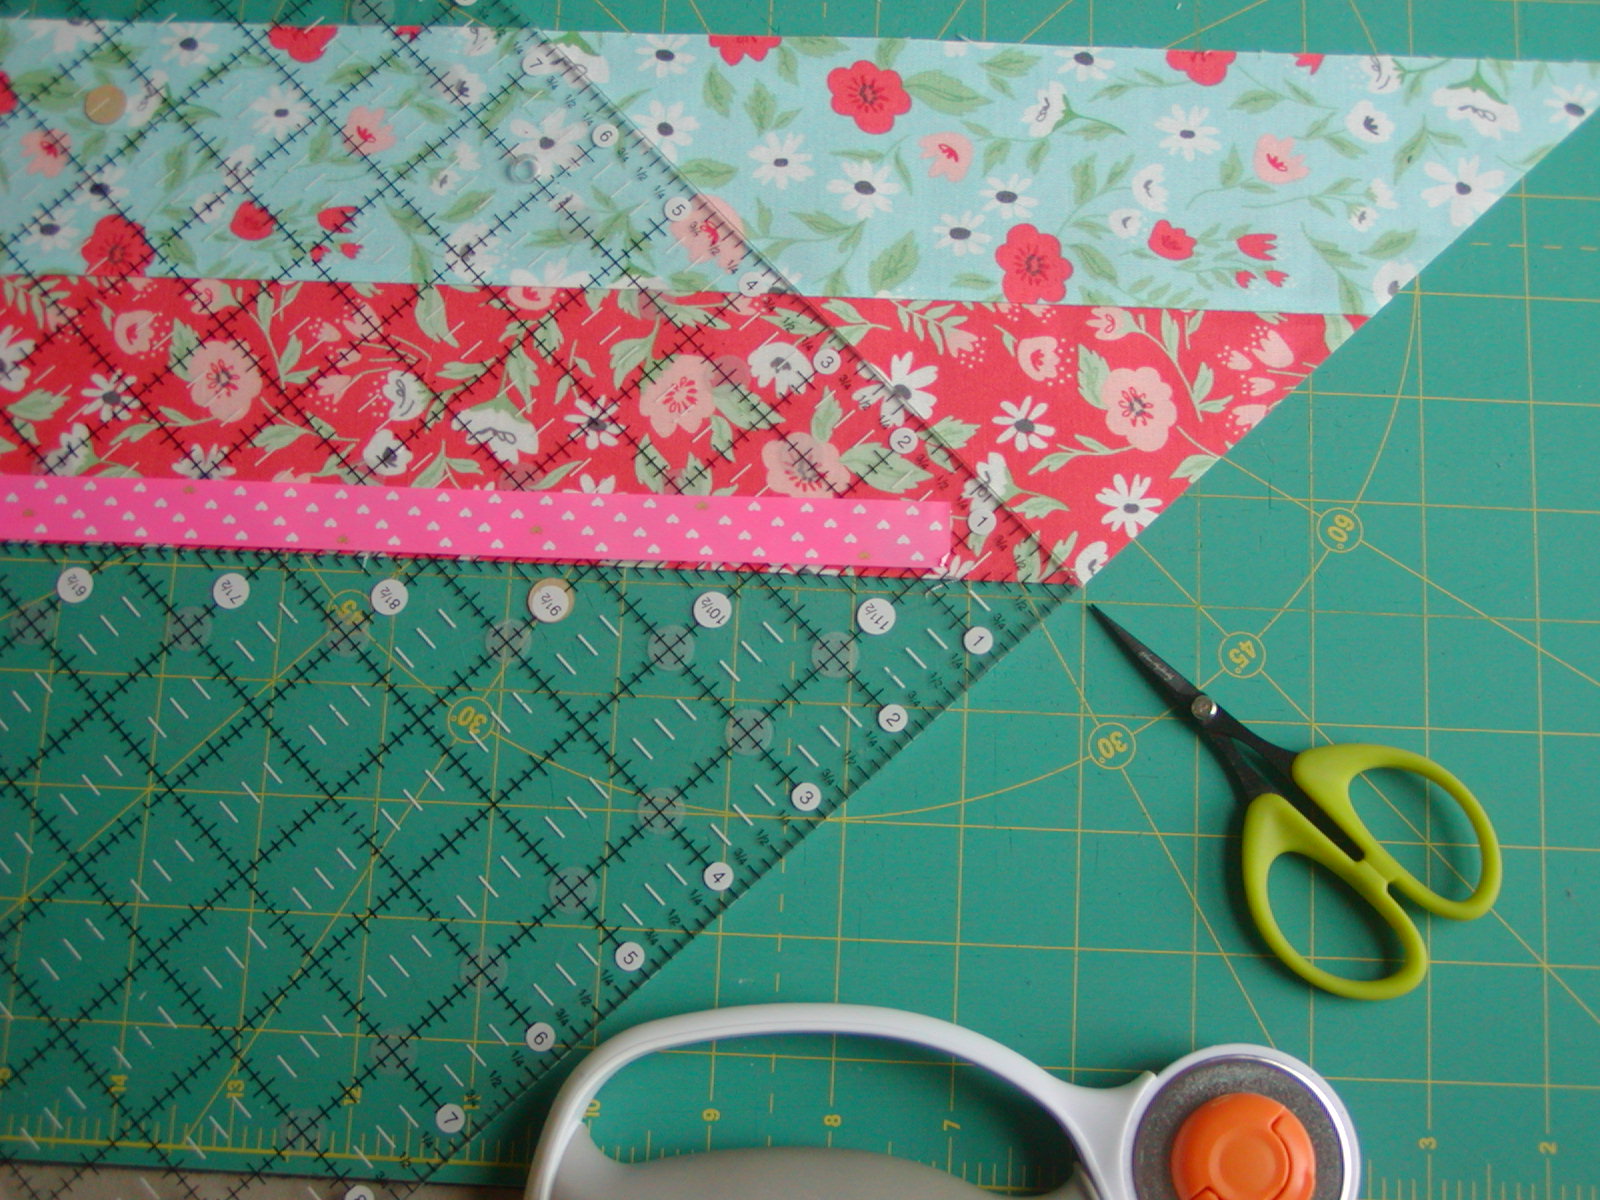
Using a scant 1/4" seam, sew the Berry and Blue Sky strips together in sets of two strips, one Berry and one Blue Sky, for a total of 15 strip sets.
Press all seams in the same direction.
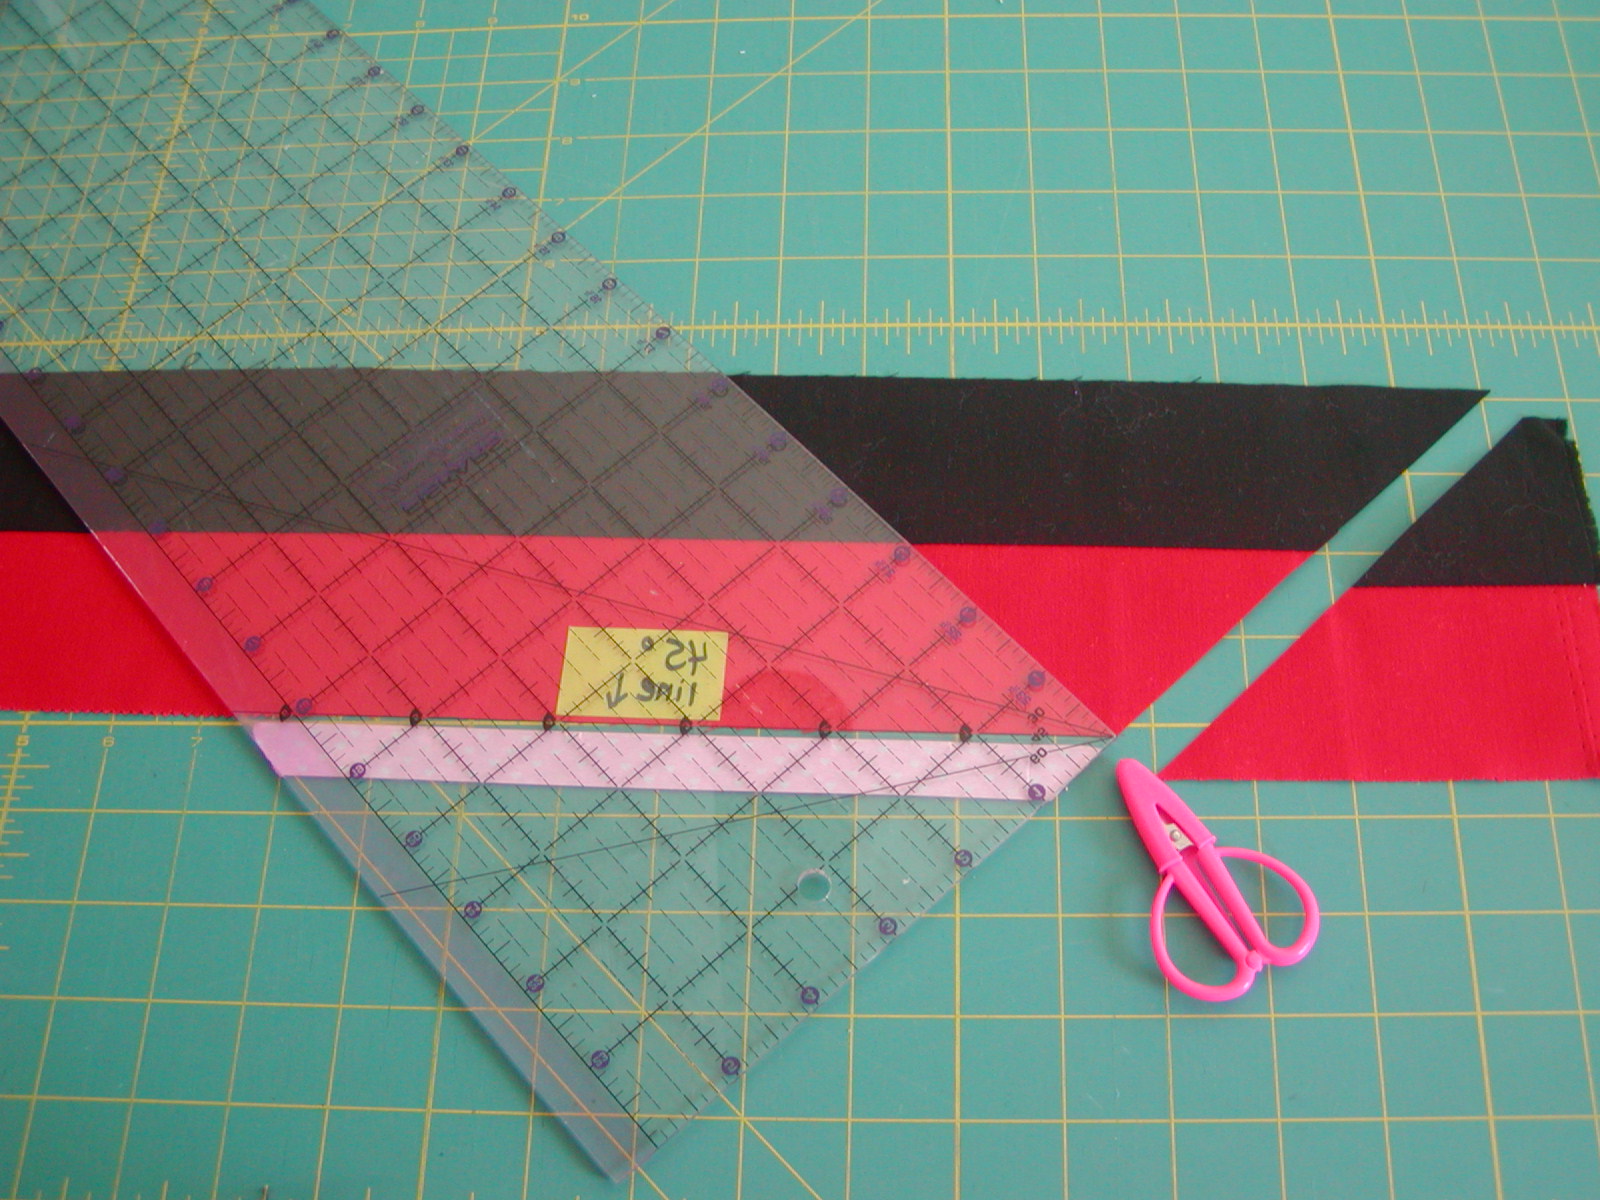
Cutting the 45 degree triangles:
If you are using a 12-1/2" ruler, cutting the triangles is as easy as sliding the diagonal line on the ruler to the bottom and then to the top of the strip set. If you do not have a 12-1/2" square ruler see the cutting instructions at the end of the post.
Each strip set will yield seven triangles. Cut eight of the strip sets with the Berry at the bottom, and 7 of the strip sets with the Blue Sky at the bottom.
 Flipping the strip sets yields enough of each triangle.
Making the cuts:
Start at the far right end of the fabric strip, diagonal line lining up with the TOP of your strip set.
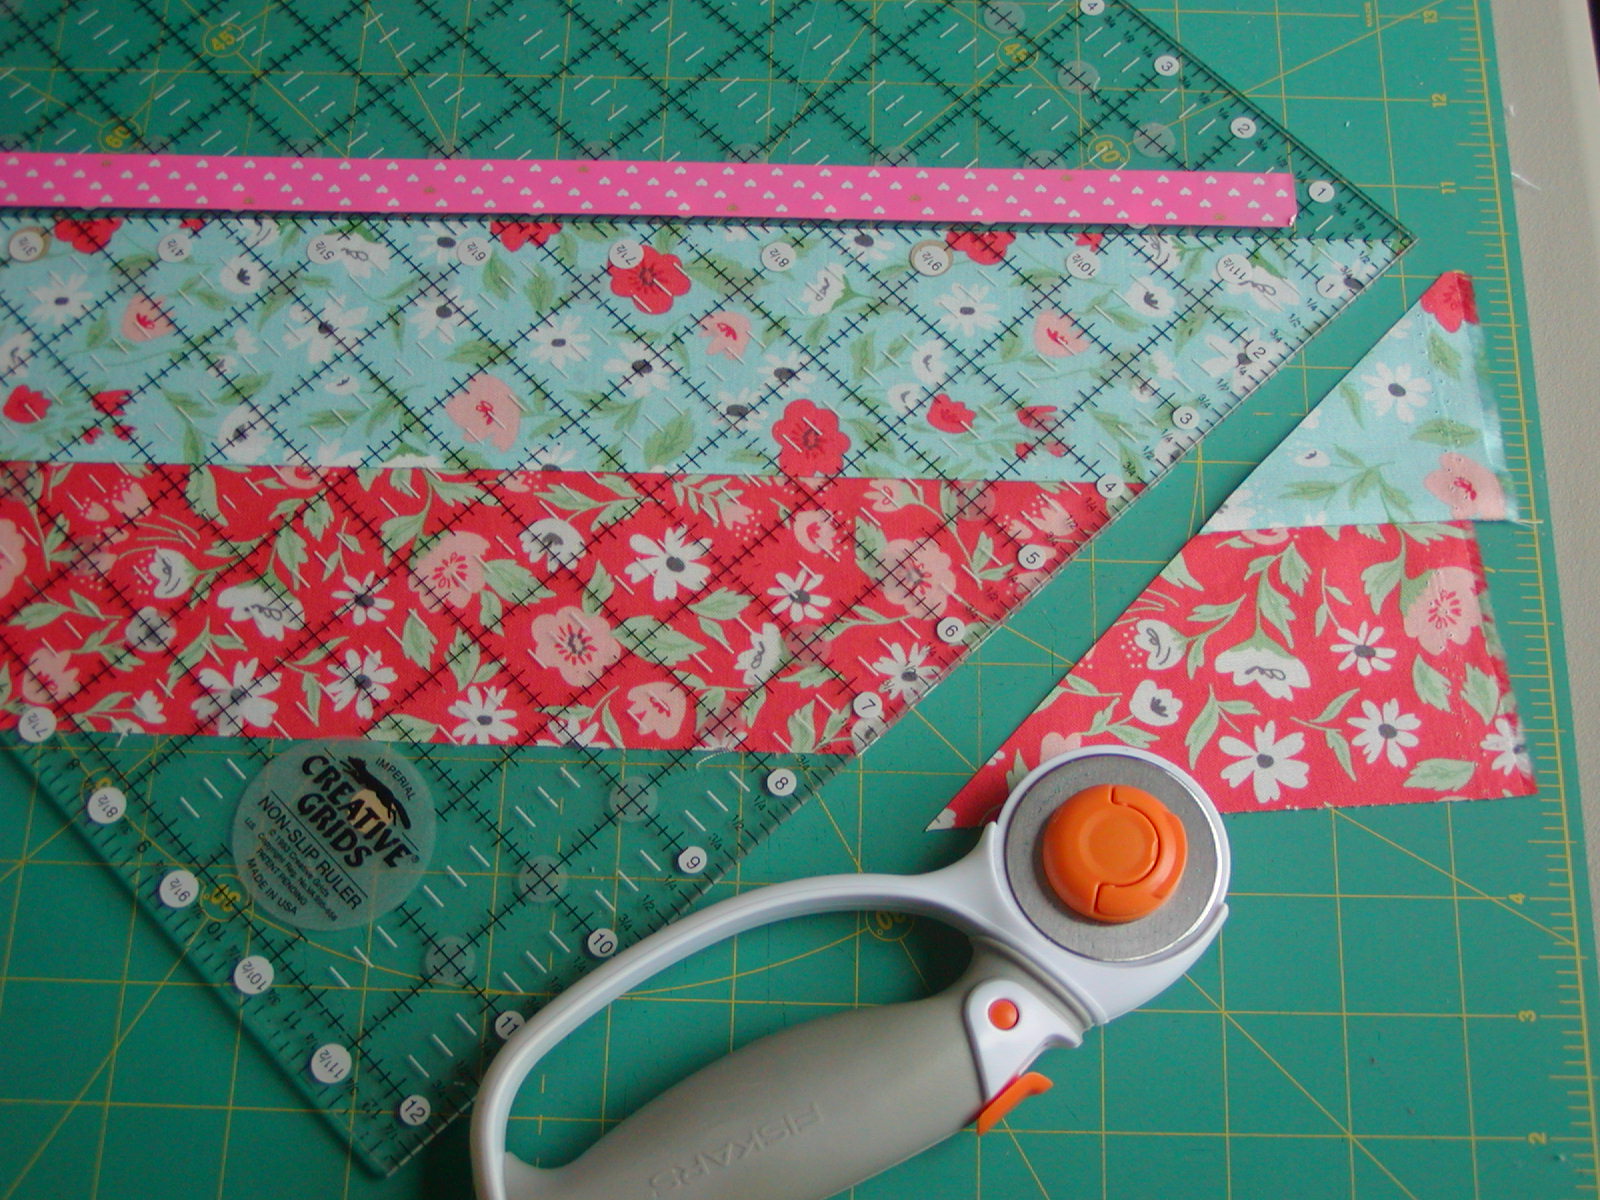
 Slide the ruler DOWN and line up the diagonal line with the BOTTOM of the strip set. Line up the point of the ruler with the top tip of the next triangle.

 Slide the ruler UP and line up the diagonal line with the TOP of the strip set, lining up the point of the ruler with the top tip of the next triangle.
Continue to the end of the strip. Each strip set should yield seven triangles for a total of 105 triangles, half with Berry on the bottom, half with Sky Blue on the bottom.
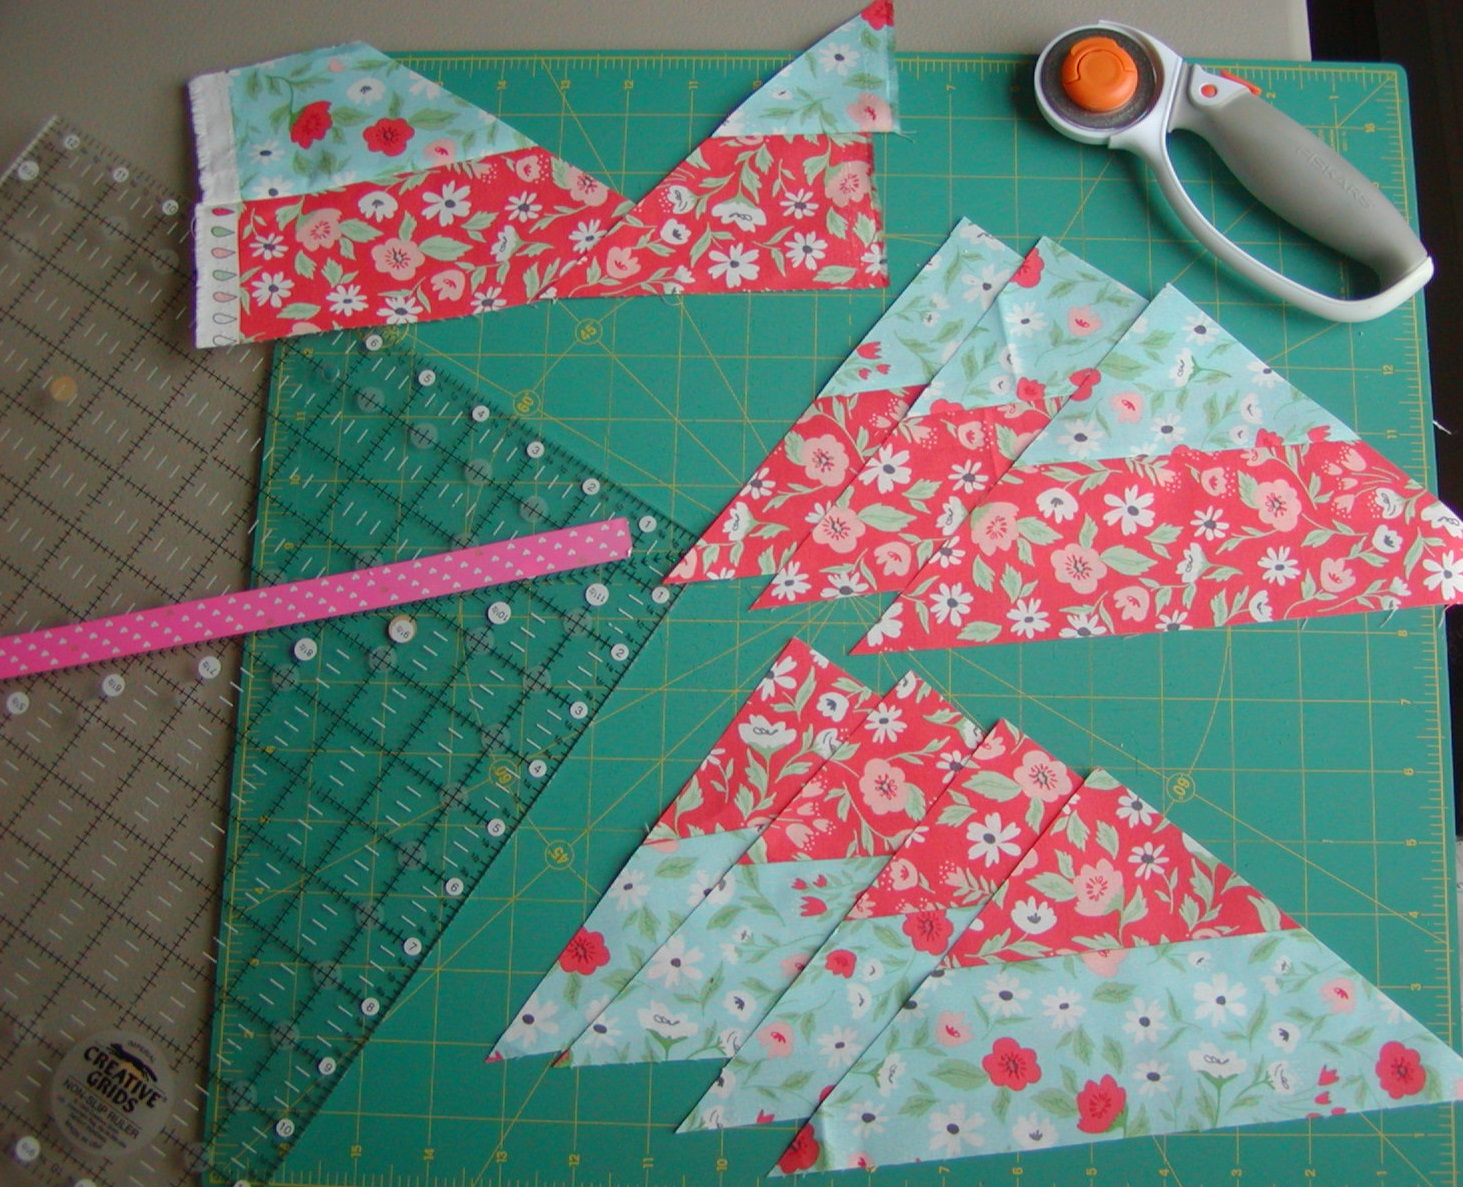
Gather the triangles into groups of four with the Berry on the bottom (block A), and groups of four with the Sky Blue on the bottom (Block B). These will be sewn to the HST units as shown below.
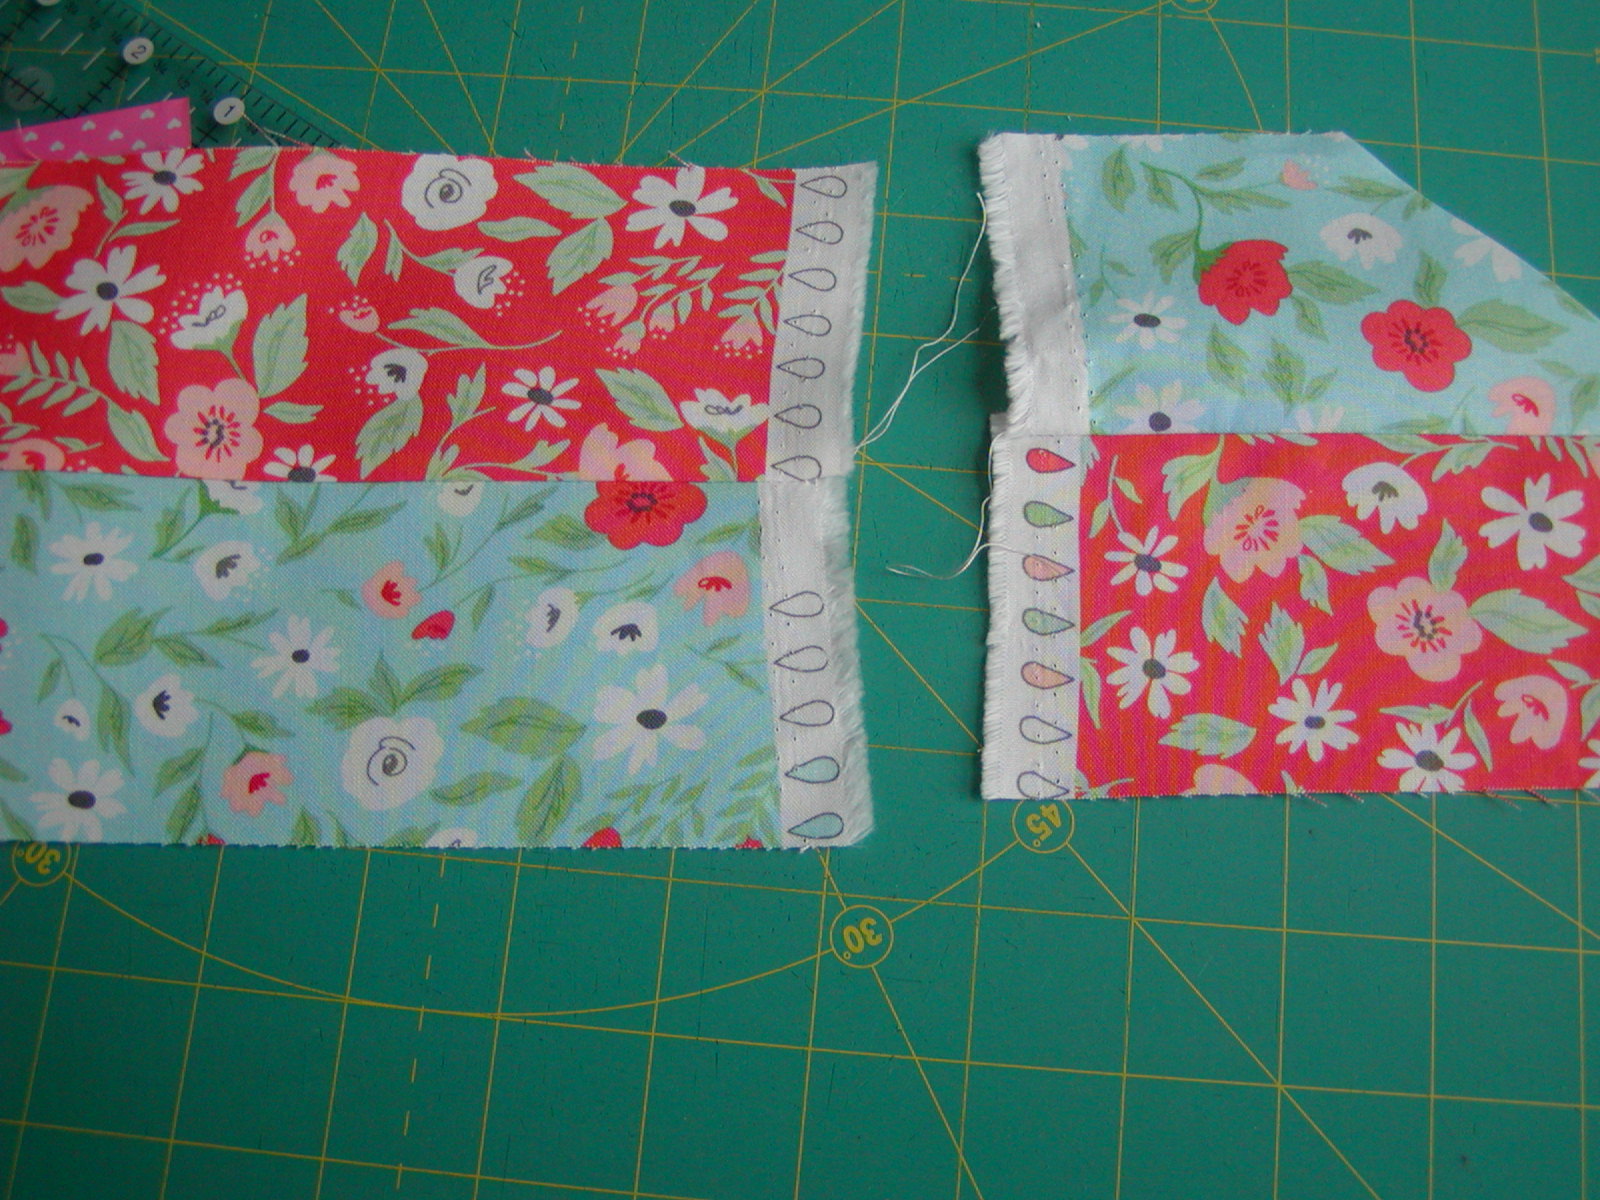
Add a triangle unit to the left and then right side of the HST unit, press open, and trim off the dog ears.
 Tip: Line up the tip of the triangle with the line on the HST unit for easy placement.
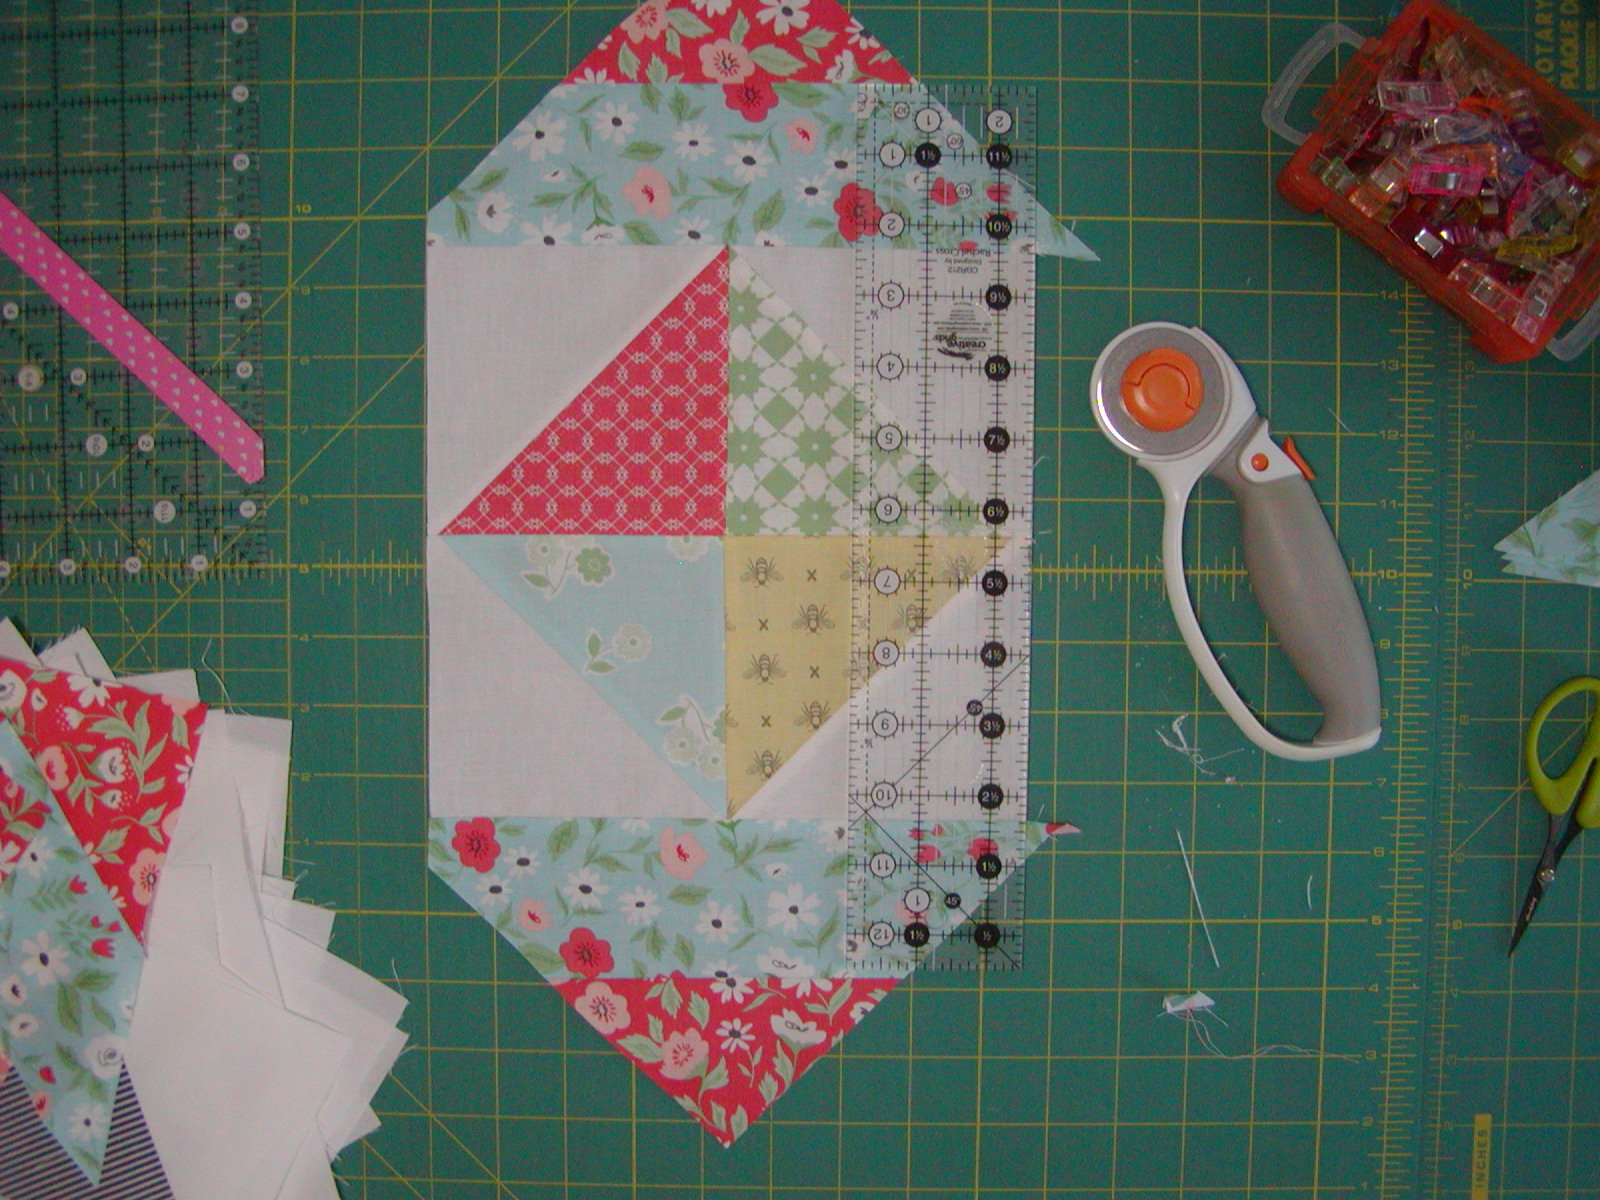
Add triangle units to the remaining two sides of the HST unit, press open, and square up to 12-1/2" blocks.
Using a scant 1/4" seam, sew the finished blocks together into five rows of 5 blocks, alternating blocks A and B.
Press seams in each row in opposite directions.
Sew rows together, nesting seams.
Sandwich, quilt, and bind as desired.
The Bonus Block!

To Cut Triangles Using a Different Ruler:
Mark the 45 degree line on your ruler. As above, place this line on the bottom of your strip set.

Make the cut and then flip the ruler over, right to left so you are looking at the back of the ruler.
With this method you always line up the 45 degree line with the BOTTOM of the strip set.
Again, make the cut and then flip the ruler back, left to right so you are looking at the correct side of the ruler.
Line up the 45 degree line with the BOTTOM of the strip set.
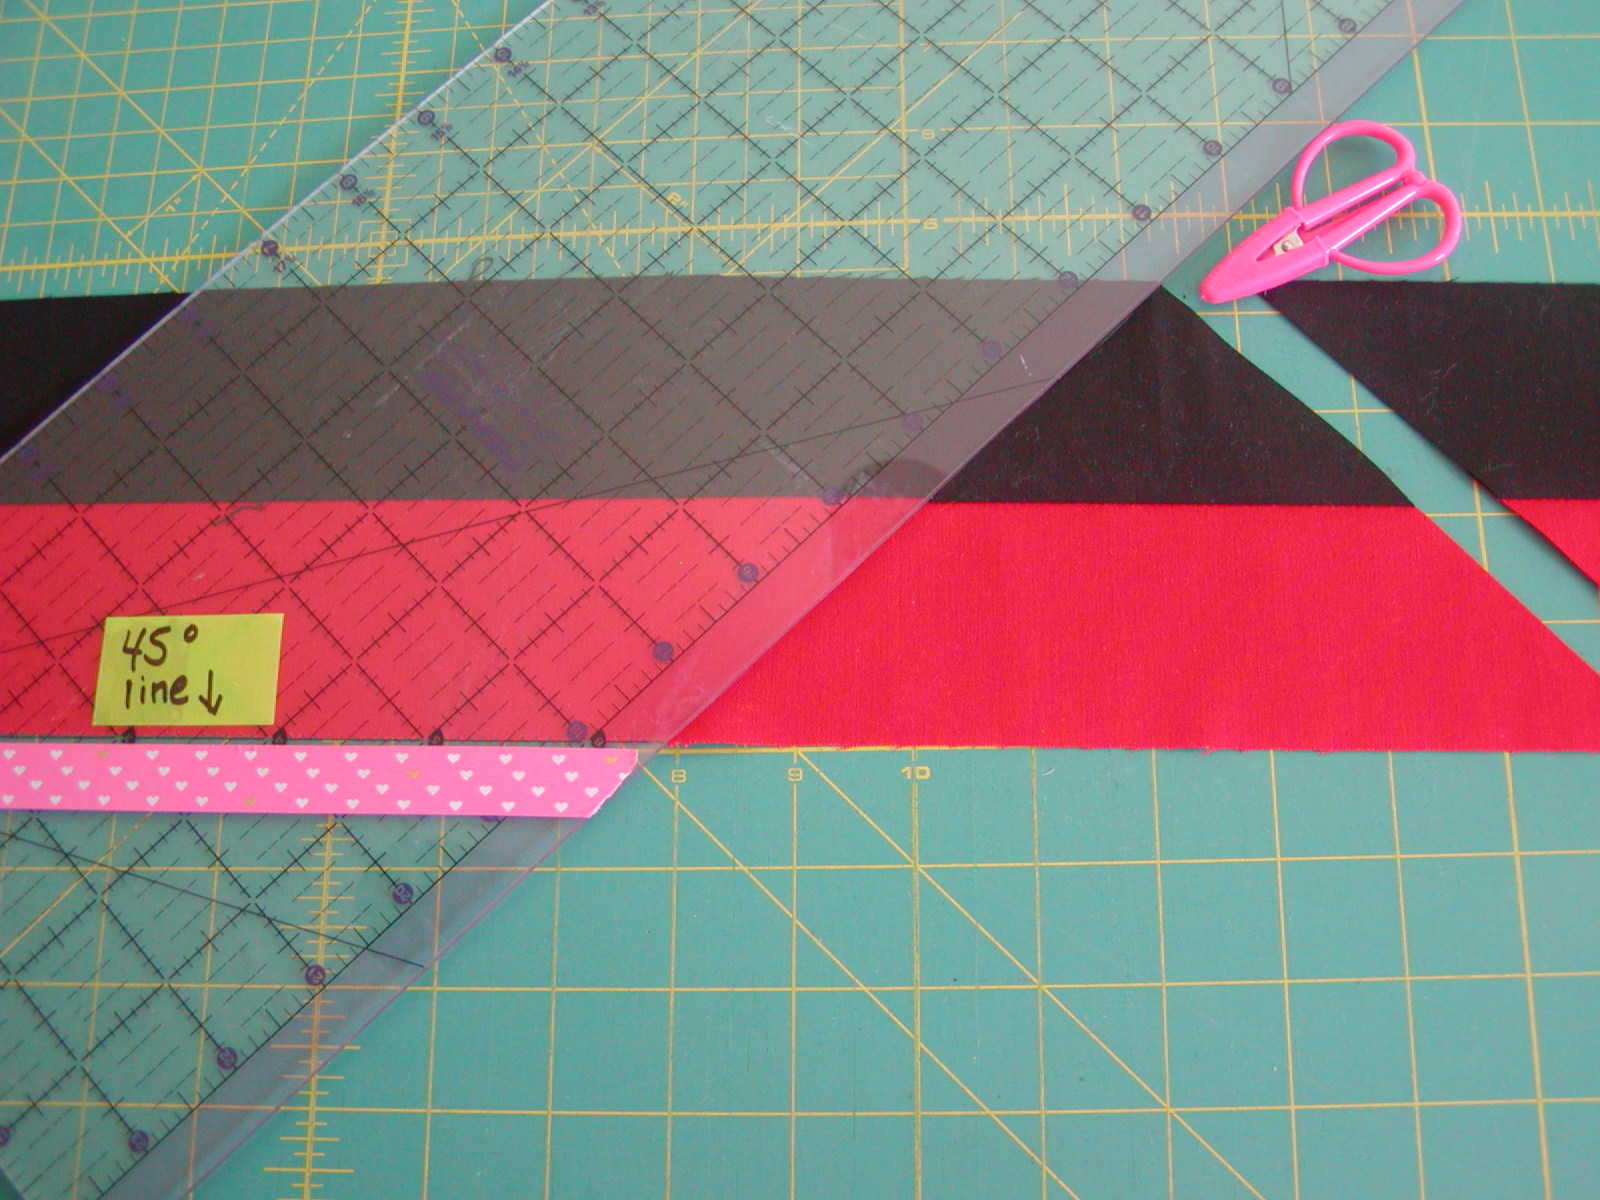
Continue this process to the end of the strip set. A bit more work than the 12-1/2" square ruler but the end result is the same!
![]()
This quilt finishes at approximately 60" by 60" but can easily be made bigger by adding more rows .
My Mom had many talents, and she did her best to pass her love for crafting on to her daughters. Knitting, crocheting, crafting, cooking, baking, sewing...she helped us try our hand at them all. She was patient with me (the 4th girl of six children), despite my assaults on her sewing machine. That speaks volumes to who she was. I try to live by her example, and I do my best to pass these skills on to others, especially to young people. I think my Mom would have enjoyed this quilt. I know she would have been please that sewing makes me as happy as it made her. I hope you give this quilt pattern a go, perhaps even consider sewing it with your daughter, granddaughter, son, nephew... Be sure to tag me @thequiltedb when you do. I adore seeing your takes on my makes!
Barbara Esposito
{instagram: @TheQuiltedB}
![]()
Posted in:
Comments