Welcome to Moda Fabrics!
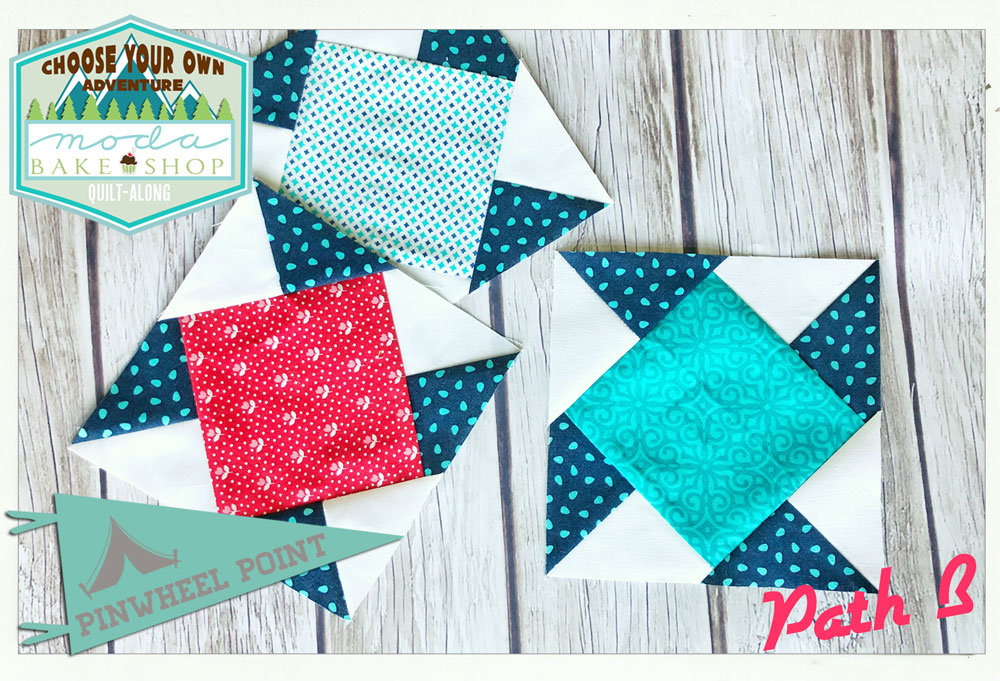
Path B: Pinwheel Point
Path B: Pinwheel Point
Published:
Jul 10 2018 - 23:00
 Hi, Everyone! It's Jessica Dayon (@jessicadayon) here. Today we are heading to Pinwheel Point! I'm so excited to take this journey with you. Let's go! NOTE: This is one post in a series of quilt-along posts. Start from the beginning with the first post {here}.
![]() 14 layer cake squares (12 if using cornerstone blocks) OR 5 fat quarters from the main fabric AND 1/2 yard of background fabric
14 layer cake squares (12 if using cornerstone blocks) OR 5 fat quarters from the main fabric AND 1/2 yard of background fabric ![]() These blocks will measure 6.5" unfinished (6" finished). NOTE ON CORNERSTONES: Later this week you will find out about cornerstone options for this round. If you choose to NOT use cornerstones, you will need 24 finished Pinwheel Point blocks. If you decide you want to include cornerstones, you will only need 20 finished Pinwheel Point blocks. The fabric requirements and directions are for all 24 blocks. CUTTING INSTRUCTIONS From your background fabric (for both layer cakes and fat quarters), cut 3- 4.25" x WOF strips; subcut into 24- 4.25” squares. Subcut on both diagonals to yield 4 triangles. From your main fabrics, cut 24- 4.25” squares (this will form the background pinwheel with the background fabric*). Subcut on both diagonals to yield 4 triangles. From your main fabrics, cut 24- 4.75” squares (this will be for the center square in the middle of the pinwheel*). *You can choose to do all one color/one shade for the pinwheel and cut all of the squares from that color/shade or you can choose to cut from a few to make it scrappy-looking.
These blocks will measure 6.5" unfinished (6" finished). NOTE ON CORNERSTONES: Later this week you will find out about cornerstone options for this round. If you choose to NOT use cornerstones, you will need 24 finished Pinwheel Point blocks. If you decide you want to include cornerstones, you will only need 20 finished Pinwheel Point blocks. The fabric requirements and directions are for all 24 blocks. CUTTING INSTRUCTIONS From your background fabric (for both layer cakes and fat quarters), cut 3- 4.25" x WOF strips; subcut into 24- 4.25” squares. Subcut on both diagonals to yield 4 triangles. From your main fabrics, cut 24- 4.25” squares (this will form the background pinwheel with the background fabric*). Subcut on both diagonals to yield 4 triangles. From your main fabrics, cut 24- 4.75” squares (this will be for the center square in the middle of the pinwheel*). *You can choose to do all one color/one shade for the pinwheel and cut all of the squares from that color/shade or you can choose to cut from a few to make it scrappy-looking. 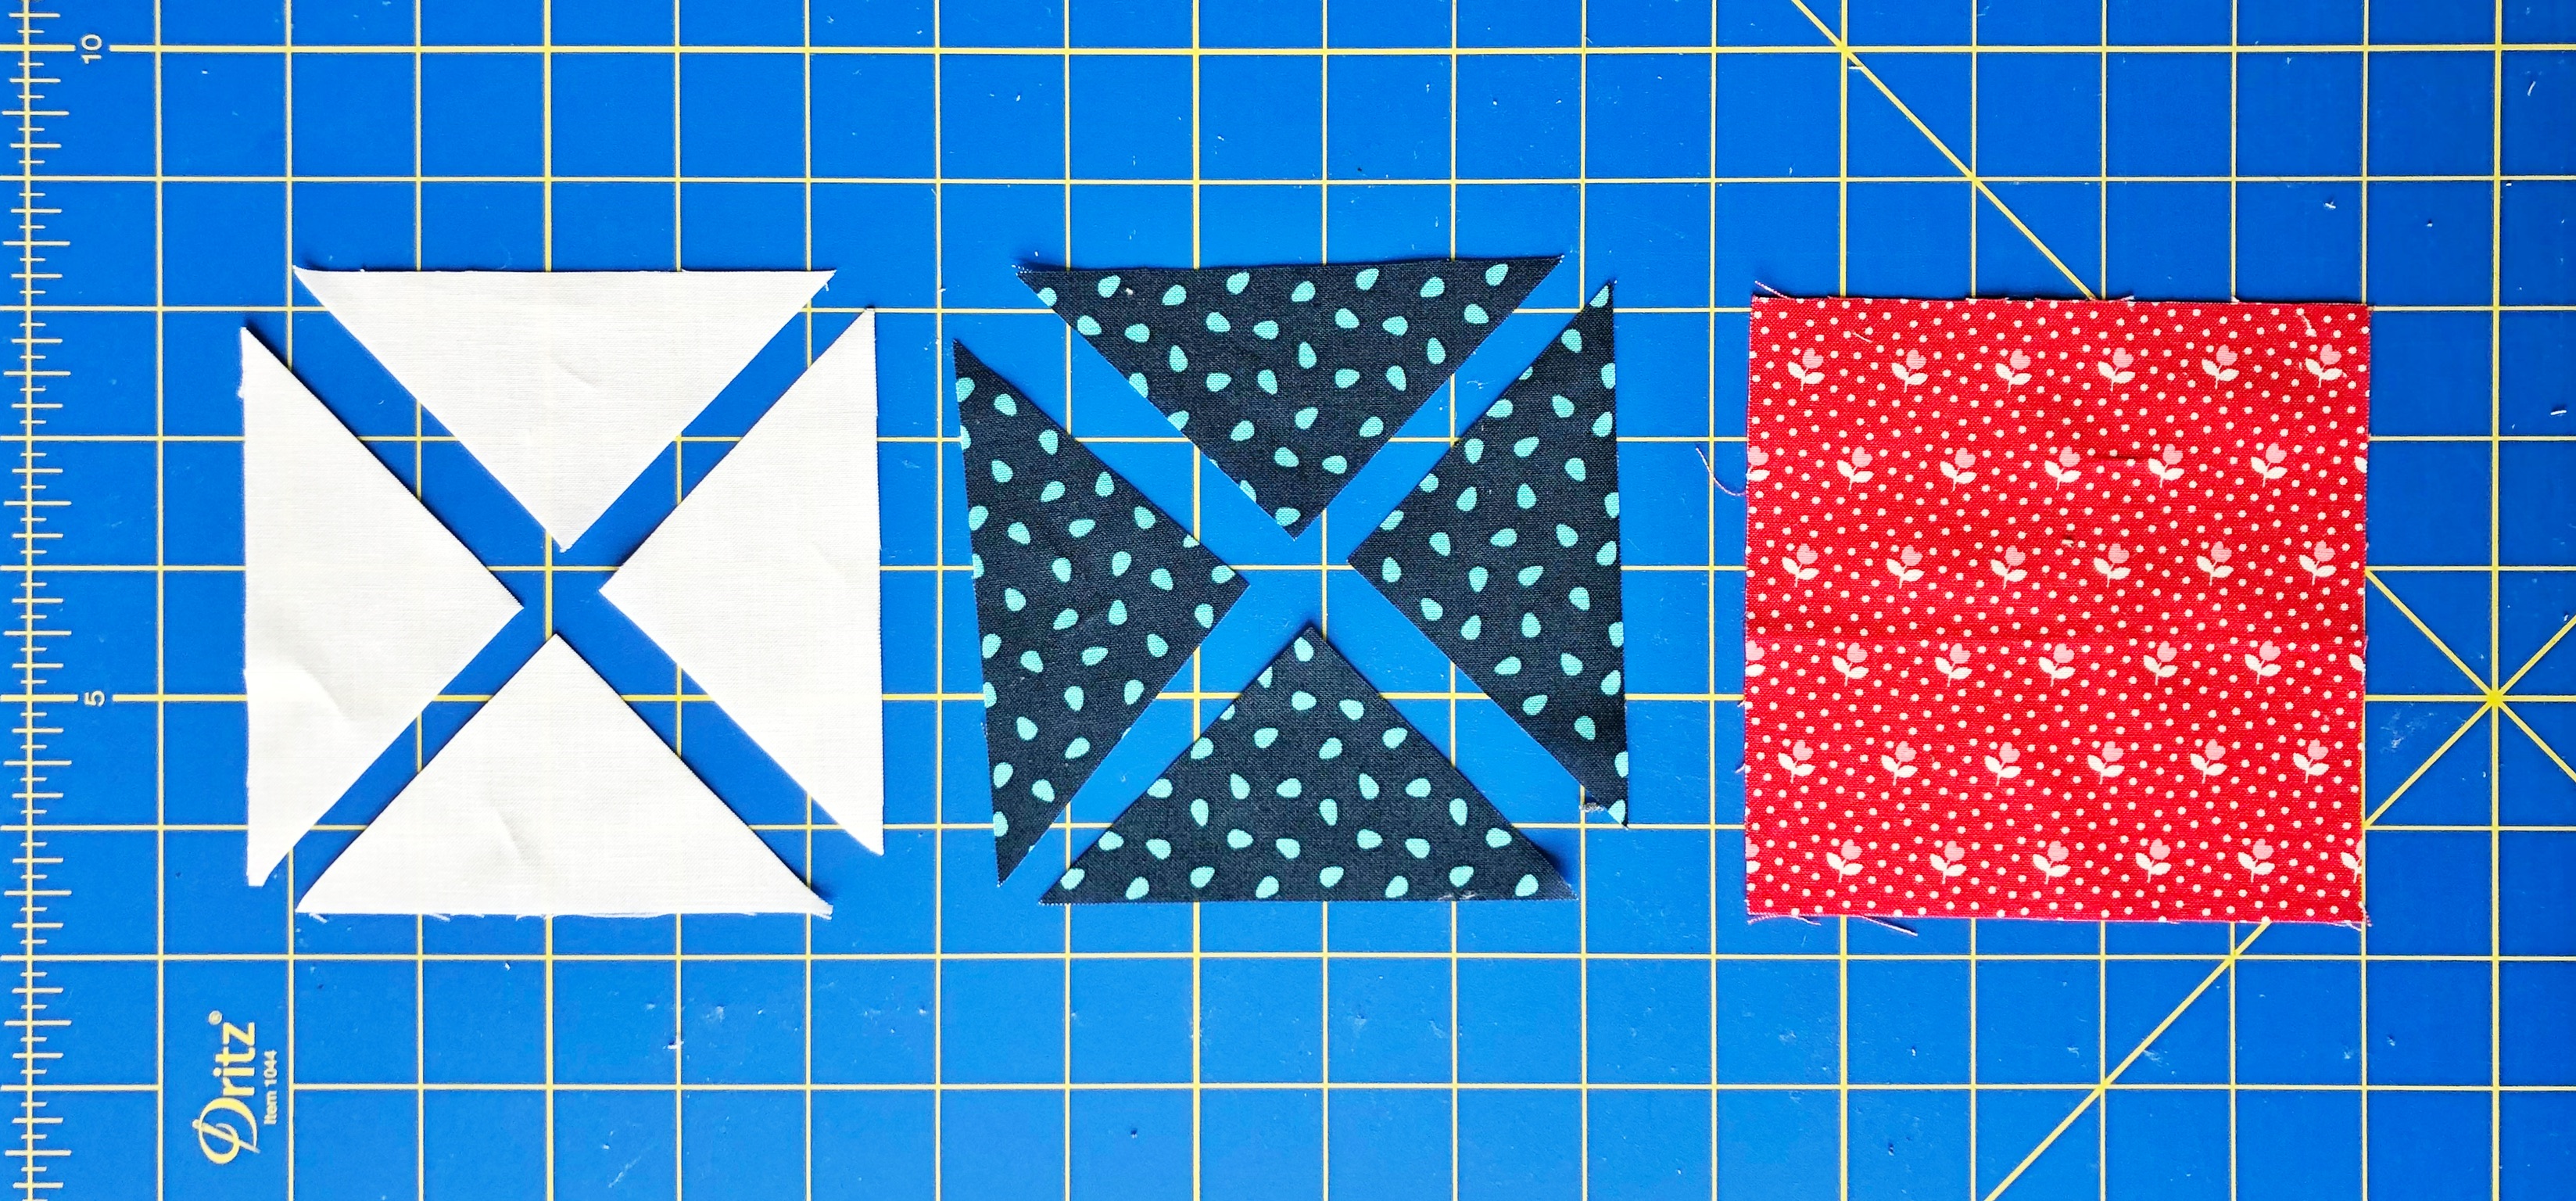 The block layout is as shown below.
 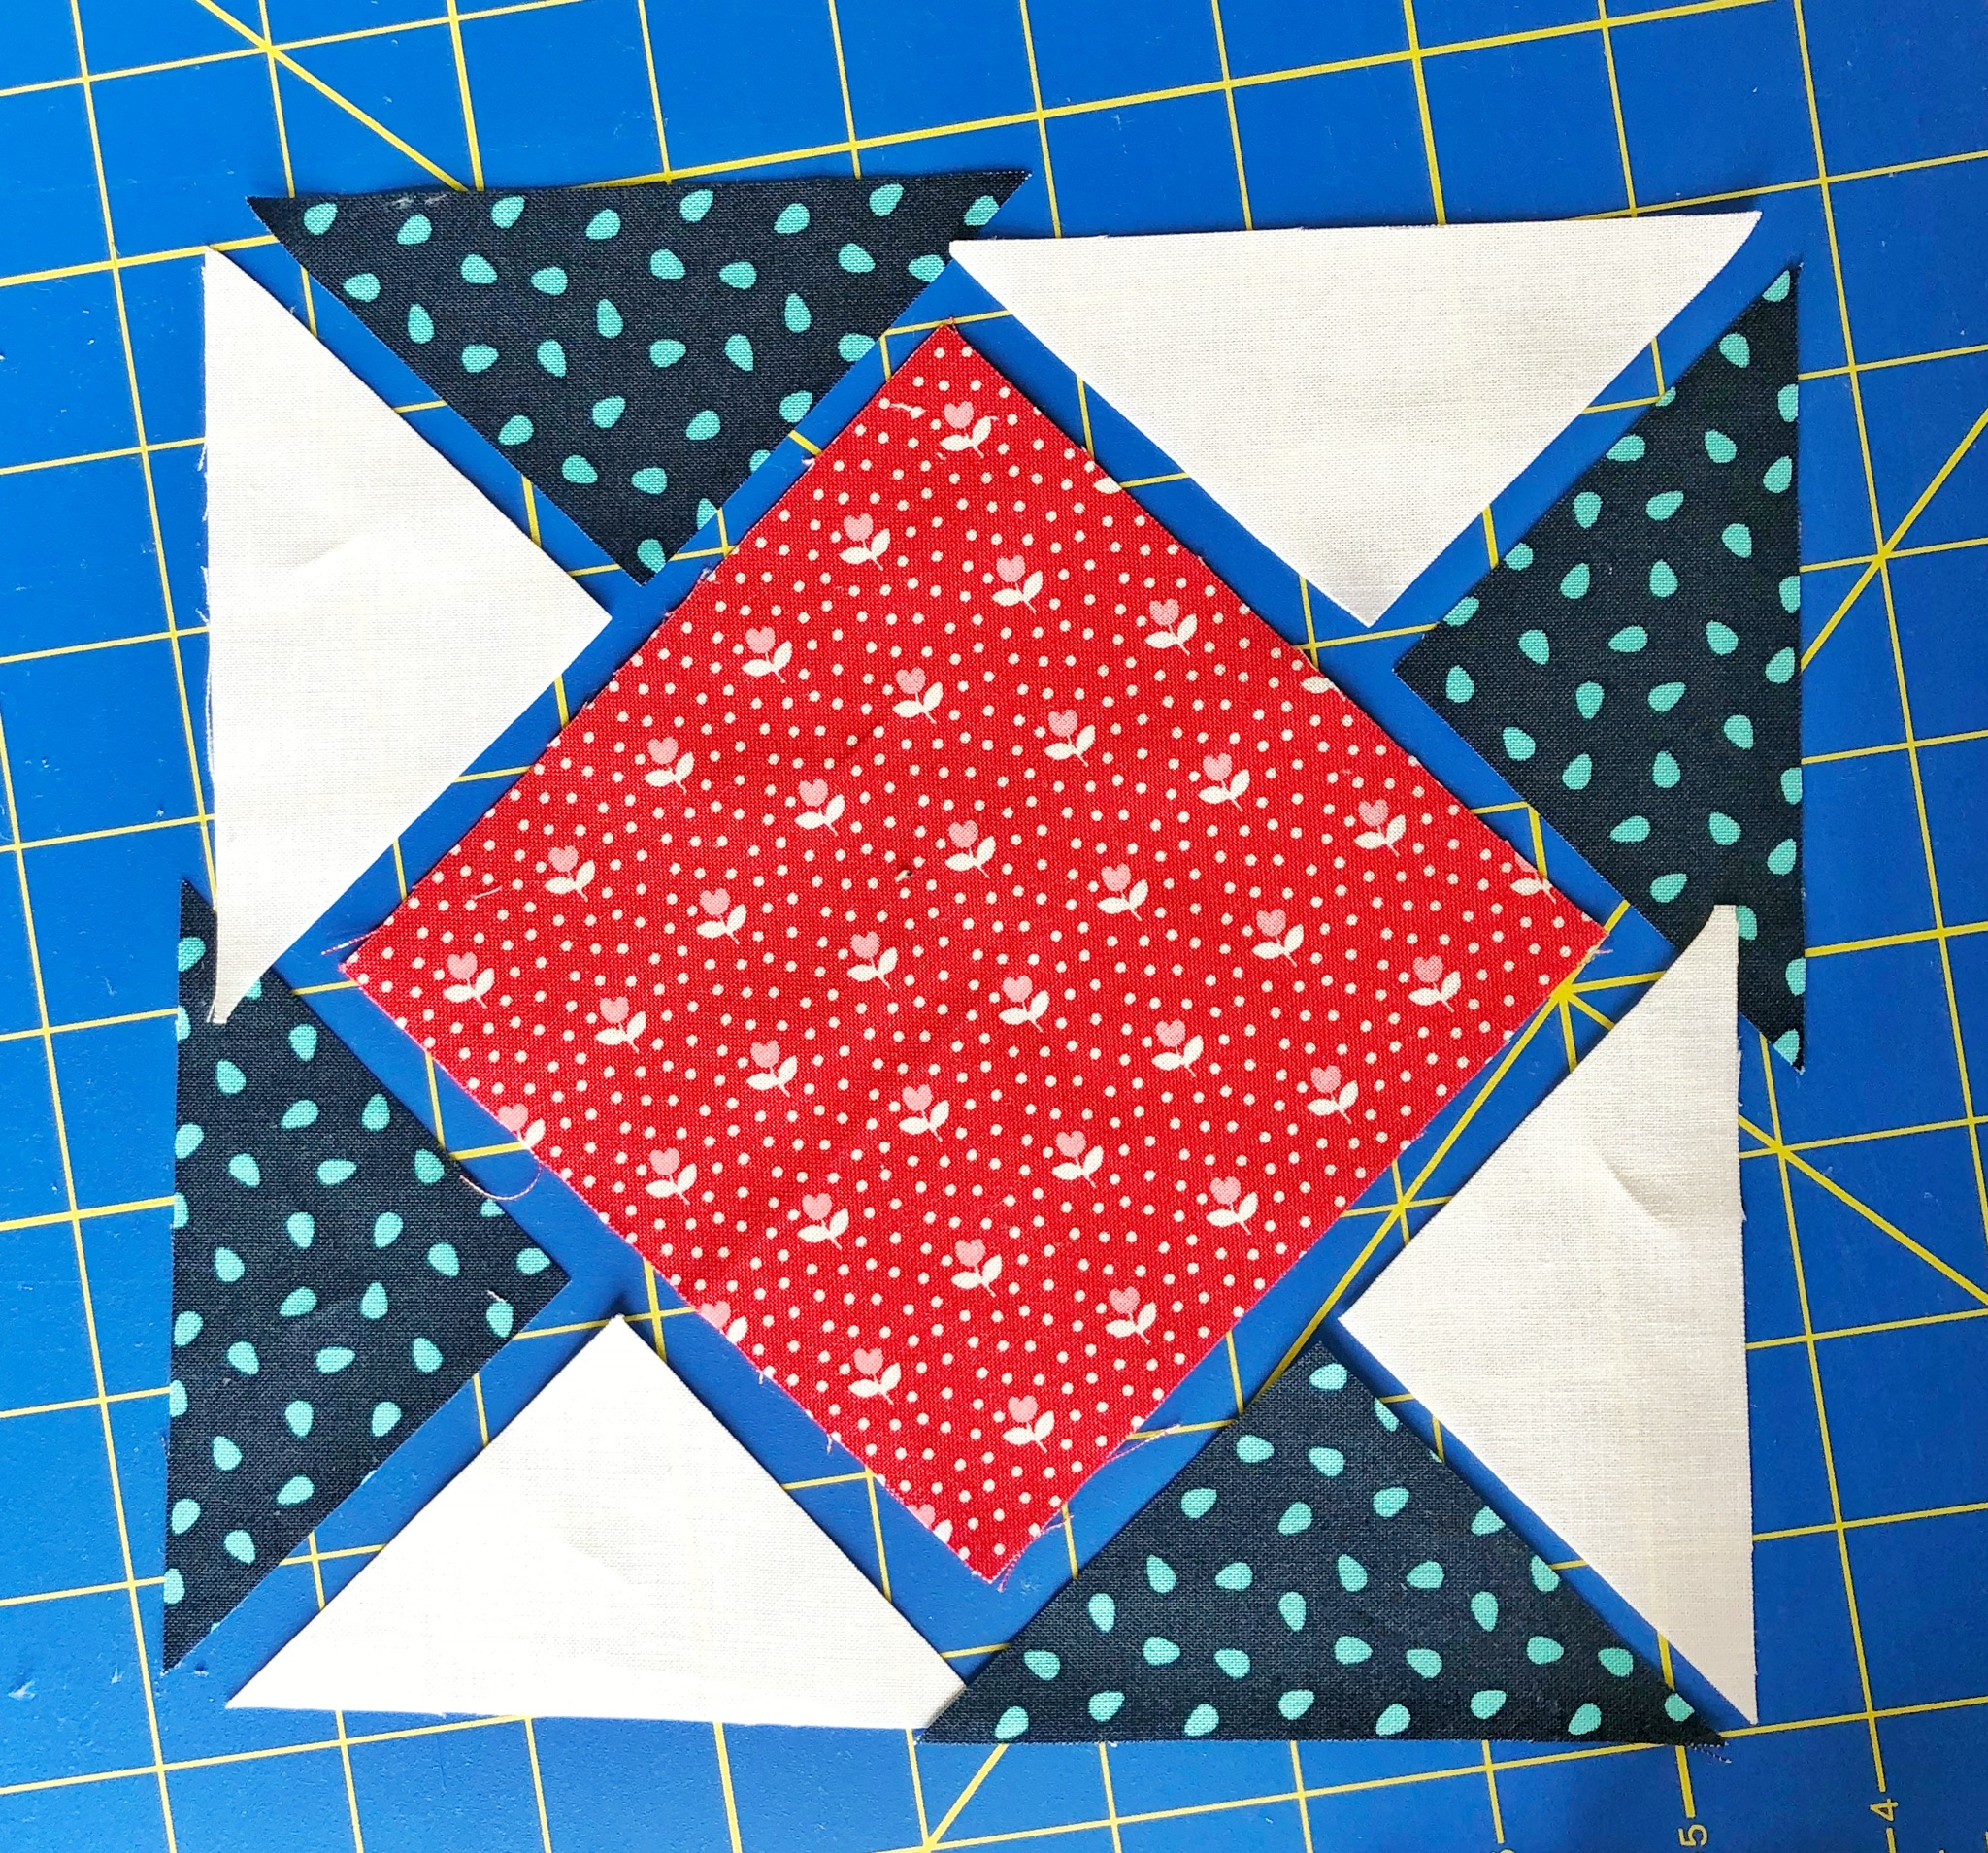 Sew the background triangles and the main triangles together as shown (along one of the short sides with the background fabric on the left and the main fabric on the right. Repeat for all 4. Press the seam allowance to the darker fabric.
  Fold your middle square in half and finger press each middle point. Open and fold the other way, finger press each middle point. This will make it so that you can easily see the middle point of each side.
  Line up the seam and the finger pressed middle point on one side. Sew together. Then, directly across the the side you just sewed, line up the seam and the finger pressed middle point on one side. Sew together. Press the seam allowance toward the middle square.
  Trim off the dog ears.
  Sew on the two remaining sides using the same technique. Press the seam allowance away from the center square.
 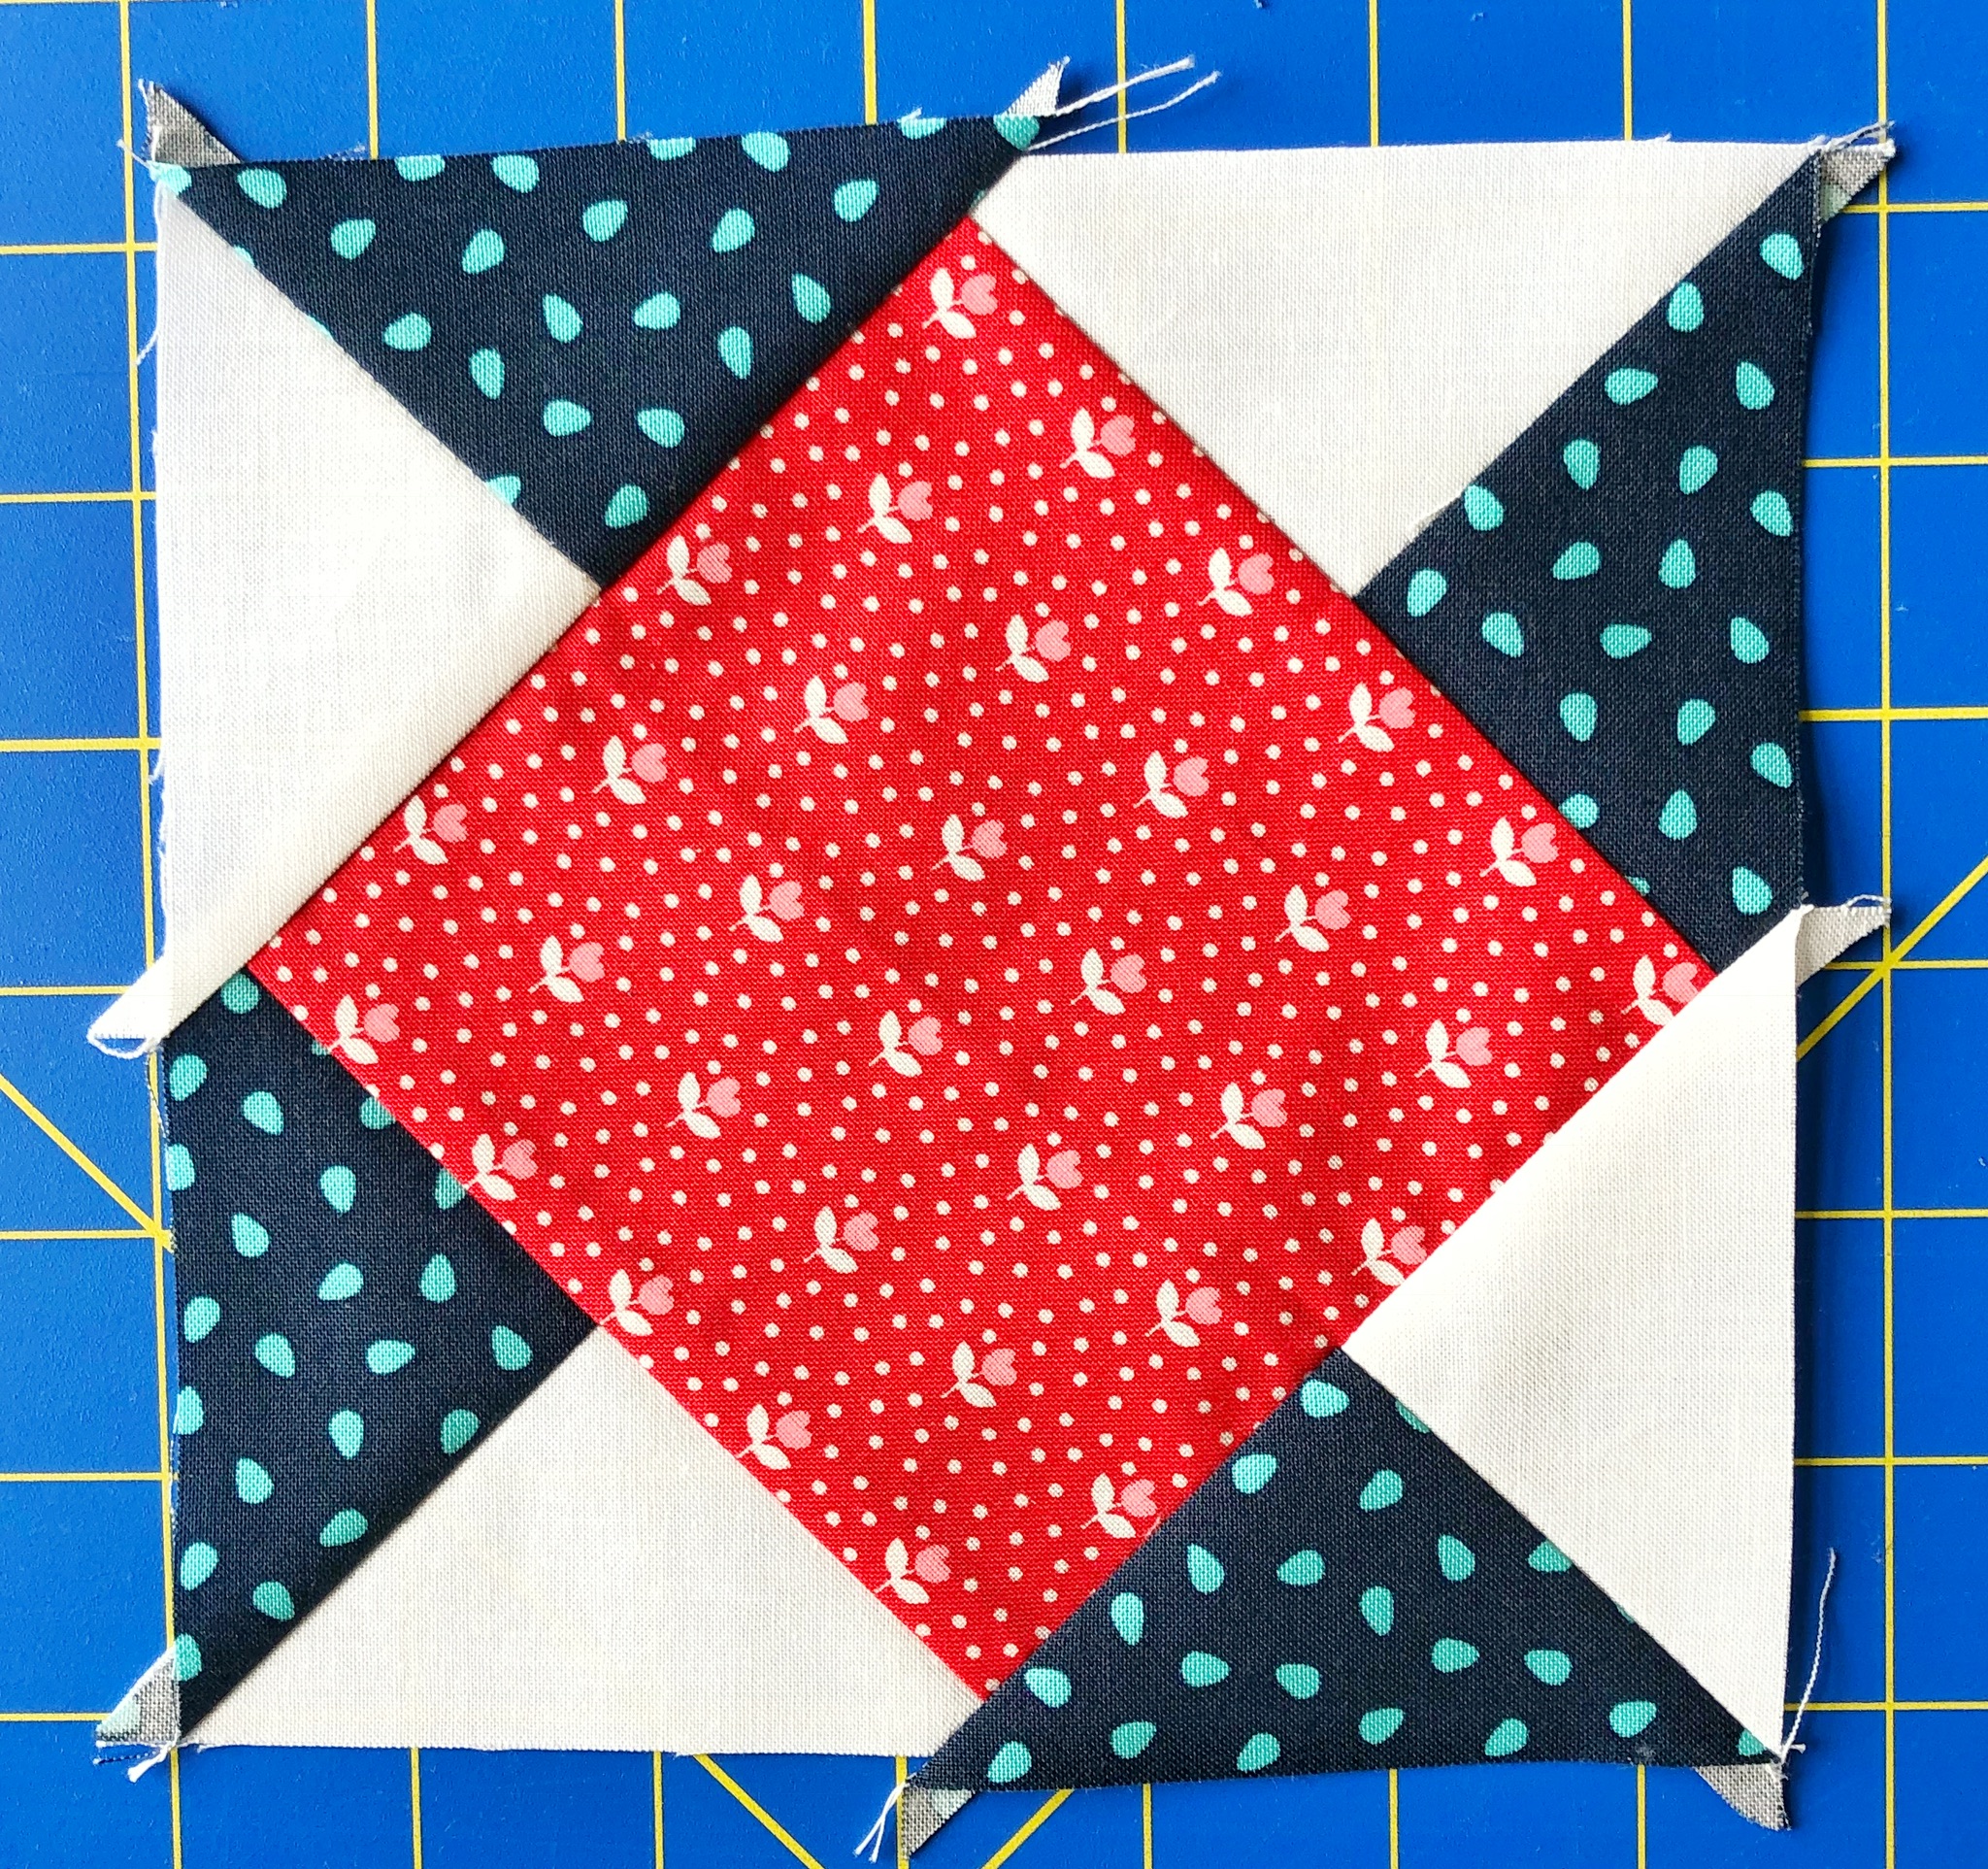 Trim the square to 6.5”.
  One block is finished! Repeat to make 24 total blocks.
  ASSEMBLY If you are NOT doing cornerstones, sew 2 sets of 7 blocks each and 2 sets of 5 blocks each. Sew the 5 block sets to the left and right of the medallion. Then sew the 7 block sets to the top and bottom of the medallion. If you are going to use the cornerstones that will be given later this week, sew 4 sets of 5 blocks each. Sew a 5 block set to the left and right of the medallion. Wait of the cornerstone directions before adding the top and the bottom set.
 ![]()
 Jessica Dayon [blog: Jessica Dayon] [instagram: @jessicadayon]
 ![]()
Comments