Welcome to Moda Fabrics!
Path A: Four Points
Path A: Four Points
Published:
Jul 1 2018 - 23:00

![]()
Hi all! This is Camp Counselor Mona Phelps here from Kentucky Whittaker Creations. I hope that you’ve enjoyed your time at Camp Oda May so far!
NOTE: This is one post in a series of quilt-along posts. Start from the beginning with the first post {here}.
 I am loving the “Choose your own adventure” trip that we’re taking and seeing everyone’s progress in the Moda Bake Shop Bakers Facebook group and on Instagram with #chooseyourownadventureqal. We’ve been to Dresden Peak and visited Star Valley. Now it’s time to travel to a new area of Camp Oda May. Join me as we venture up Path A to Four Points – make sure you pack your water bottles and trail mix!
Individual blocks finish at 3” (unfinished 3 ½”).
Please READ all instructions before you begin cutting and sewing.
![]()
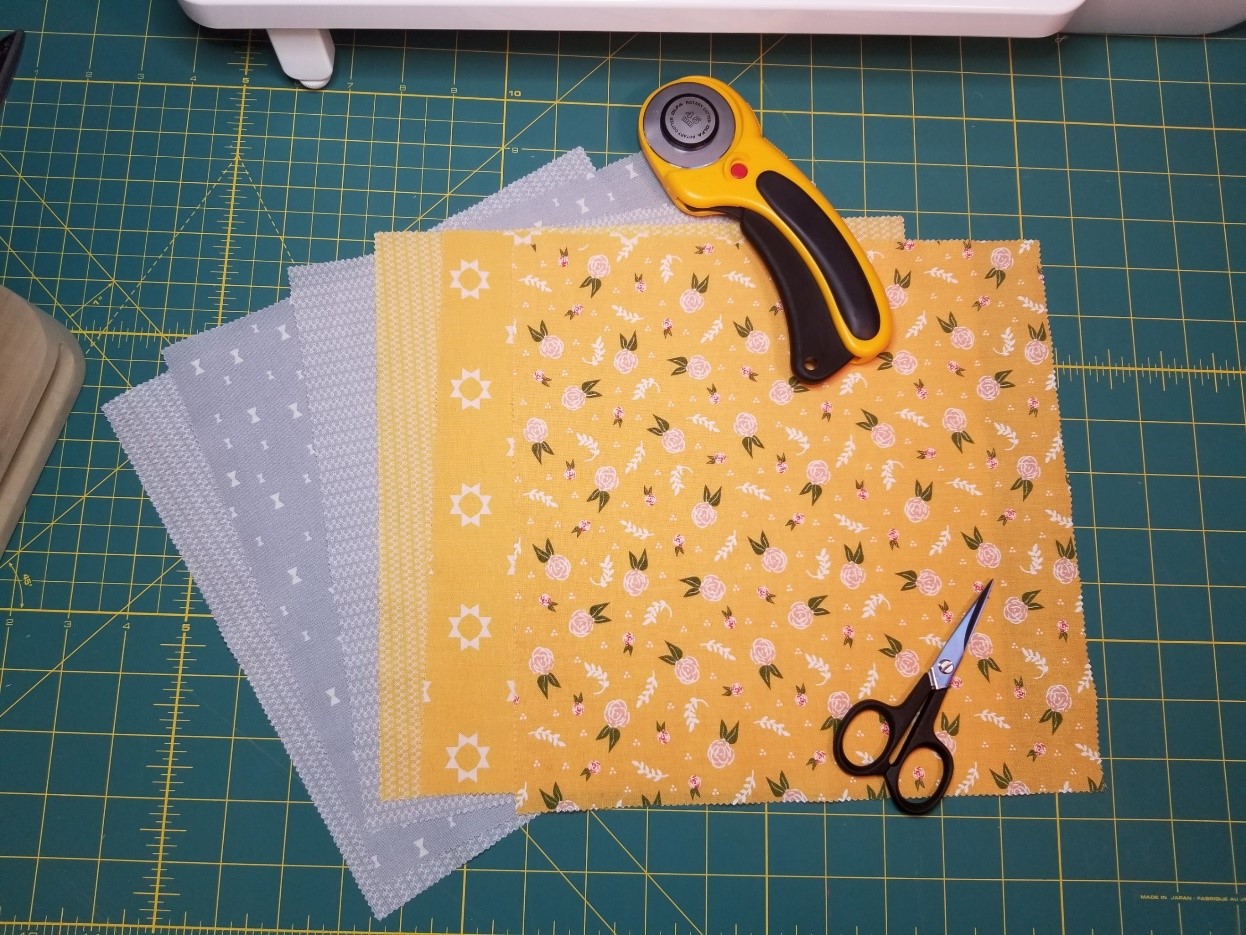
- 2 fat quarters OR 6 layer cakes
Special notes:
Fabric choices: you will need two complementary colorways. If you are using fat quarters, choose 2 different colorways. If you are using layer cakes, it can be difficult to have 3 layer cake pieces that are identical; therefore, you can choose 3 of one colorway (Color A) and 3 of another (Color B). For example, you can see that I chose 3 gray and 3 peach. While the fabric patterns aren’t identical, they are in the same color family. (You are also free to go completely scrappy on this round!)
Cornerstones: Later this week you will find out about cornerstone options (quilt blocks that “anchor” a particular border). If you choose to NOT use cornerstones, you will need 32 finished Four Points blocks. If you decide you want to include cornerstones, you will only need 28 finished Four Points blocks. The fabric requirements and directions are for all 32 blocks.
![]()
Before beginning:
- Read through the entire instructions
- Seams are all scant 1/4"
- Width of Fabric is abbreviated as WOF and is assumed to be 42".
- Right sides together is abbreviated as RST
The Four Points block is a traditional four patch block. There are many ways that you can assemble these blocks. One is cutting your fabric into individual 2” square pieces and assembling the block. However, I am going to share with you a strip piecing method.
Cutting Instructions
- From Layer cakes: cut (13) 2” strips for both Color A and Color B (a total of (26) 2” x 10” strips)
- From Fat Quarters: on the long side of the fabric (22” length), cut 6 2” strips of Color A and Color B (a total of 12 2” x 22” strips)
Assembling the Block

- Pair a strip of Color A with Color B right sides together
- Sew on the long side with a scant ¼” seam.
- Trim strip units into 2” segments.
- Sew together (2) 2" segments, flipping one so the light and dark fabrics are opposite.
Chain piecing makes this process fast!

Press and trim to 3½” square. Repeat to make the number of required blocks.
Assemble in rows to attach to the center of your quilt. You will make 2 rows of 7 blocks each and 2 rows of 9 blocks each.

Attach the shorter rows to the right and left sides of your center block. Then, attach the longer rows to the top and bottom of your center block.
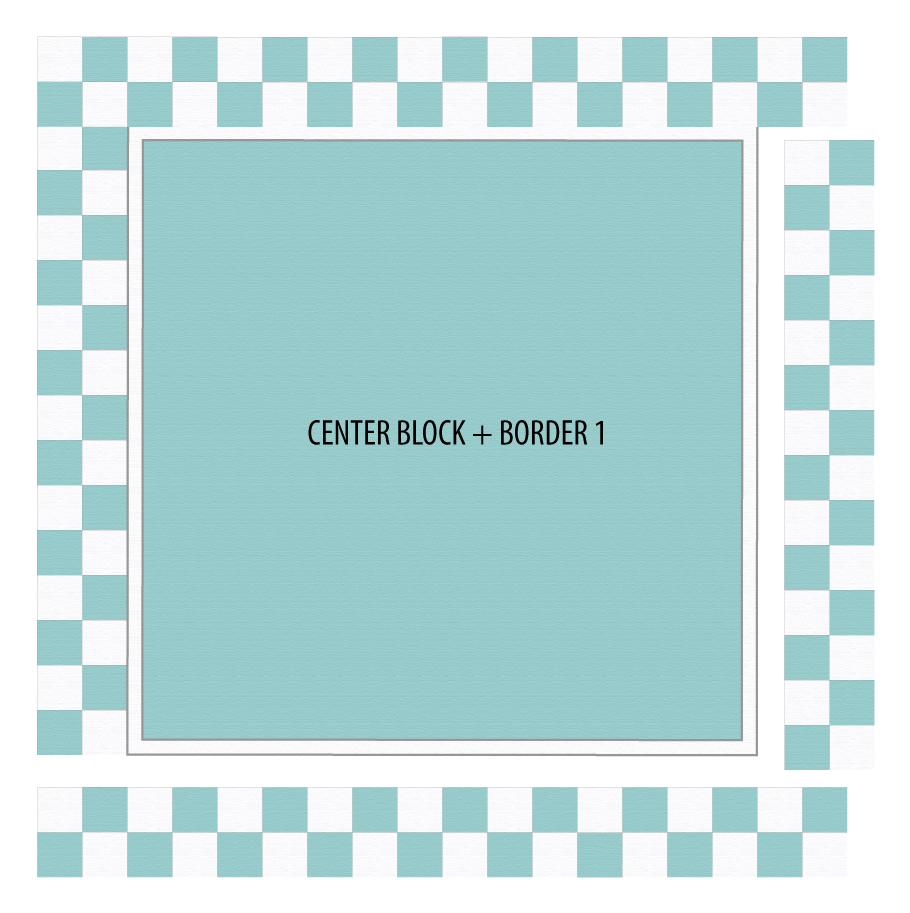
If you are using cornerstones, you will make 4 rows of 7 blocks each. Attach 1 row to the left and right sides of your quilt. (You will need to wait until Friday to get the details on the cornerstones and complete assembly).

After this, your block should be 27 ½” square. If it’s a little larger, you should square it up now. If it’s a little smaller, you can add little fabric to your next border.
Don’t forget – Path B will be available on Wednesday and you may decide you prefer that campground.
Thank you for joining me on this trip to Four Points. I hope that you’re enjoying camp.
![]()

Mona Phelps
[blog: Kentucky Whittaker Creations]
[instagram: @mona.phelps]
[facebook: facebook.com/ky.whittaker.creations]
![]()
Posted in:
Comments