Welcome to Moda Fabrics!
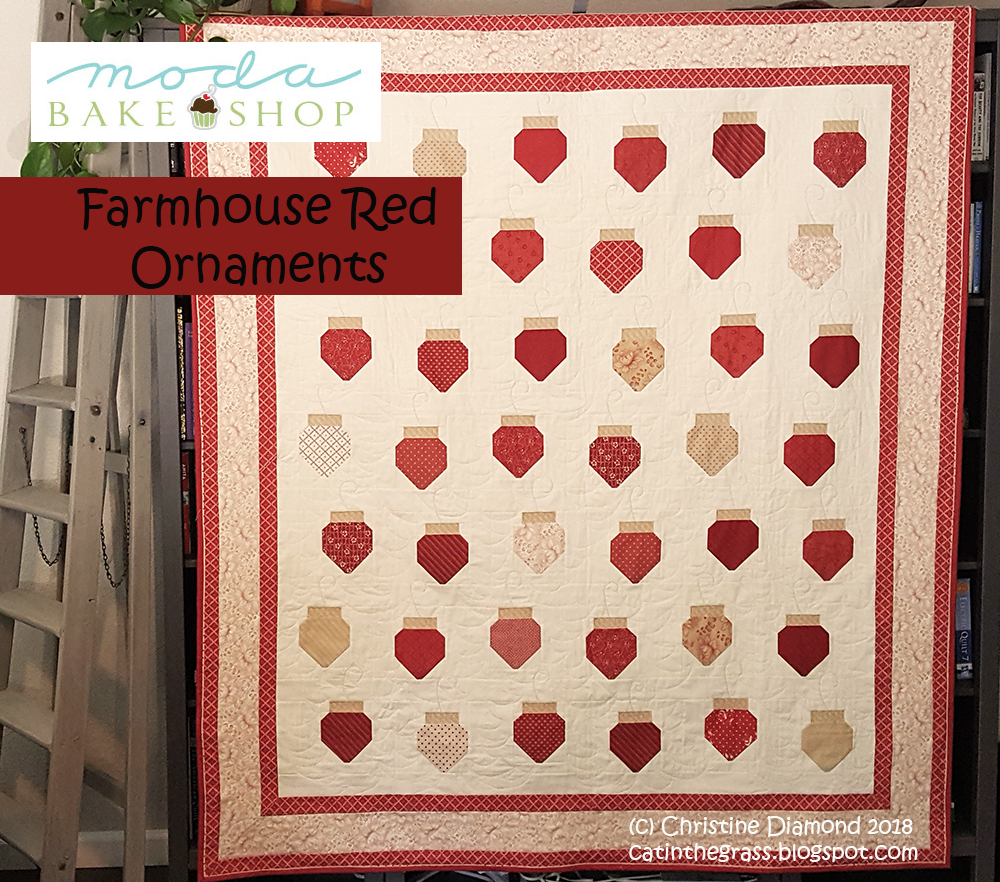
Farmhouse Red Ornaments Quilt
Farmhouse Red Ornaments Quilt
Published:
Jan 5 2018 - 23:00
![]()
Hello, my name is Christine and I am your average crafter over at catinthegrass where I dabble in all sorts of fun stuff, but really show my obsession for all things quilting!
At my house, Christmas lasts almost all year long! I love Christmastime; from the decorations to the songs to the celebrations and of course the gifts! So even though the new year has just started, in my book it's never too soon to be thinking of Christmas gifts. I designed this pattern as a challenge to myself to use only one Charm Pack, a gift I received from my local quiltshop...and that one charm pack plus some background fabric became my favorite quilt of 2017! So here I am making it again, but this time in the gorgeous Farmhouse Red fabrics by Minick & Simpson.
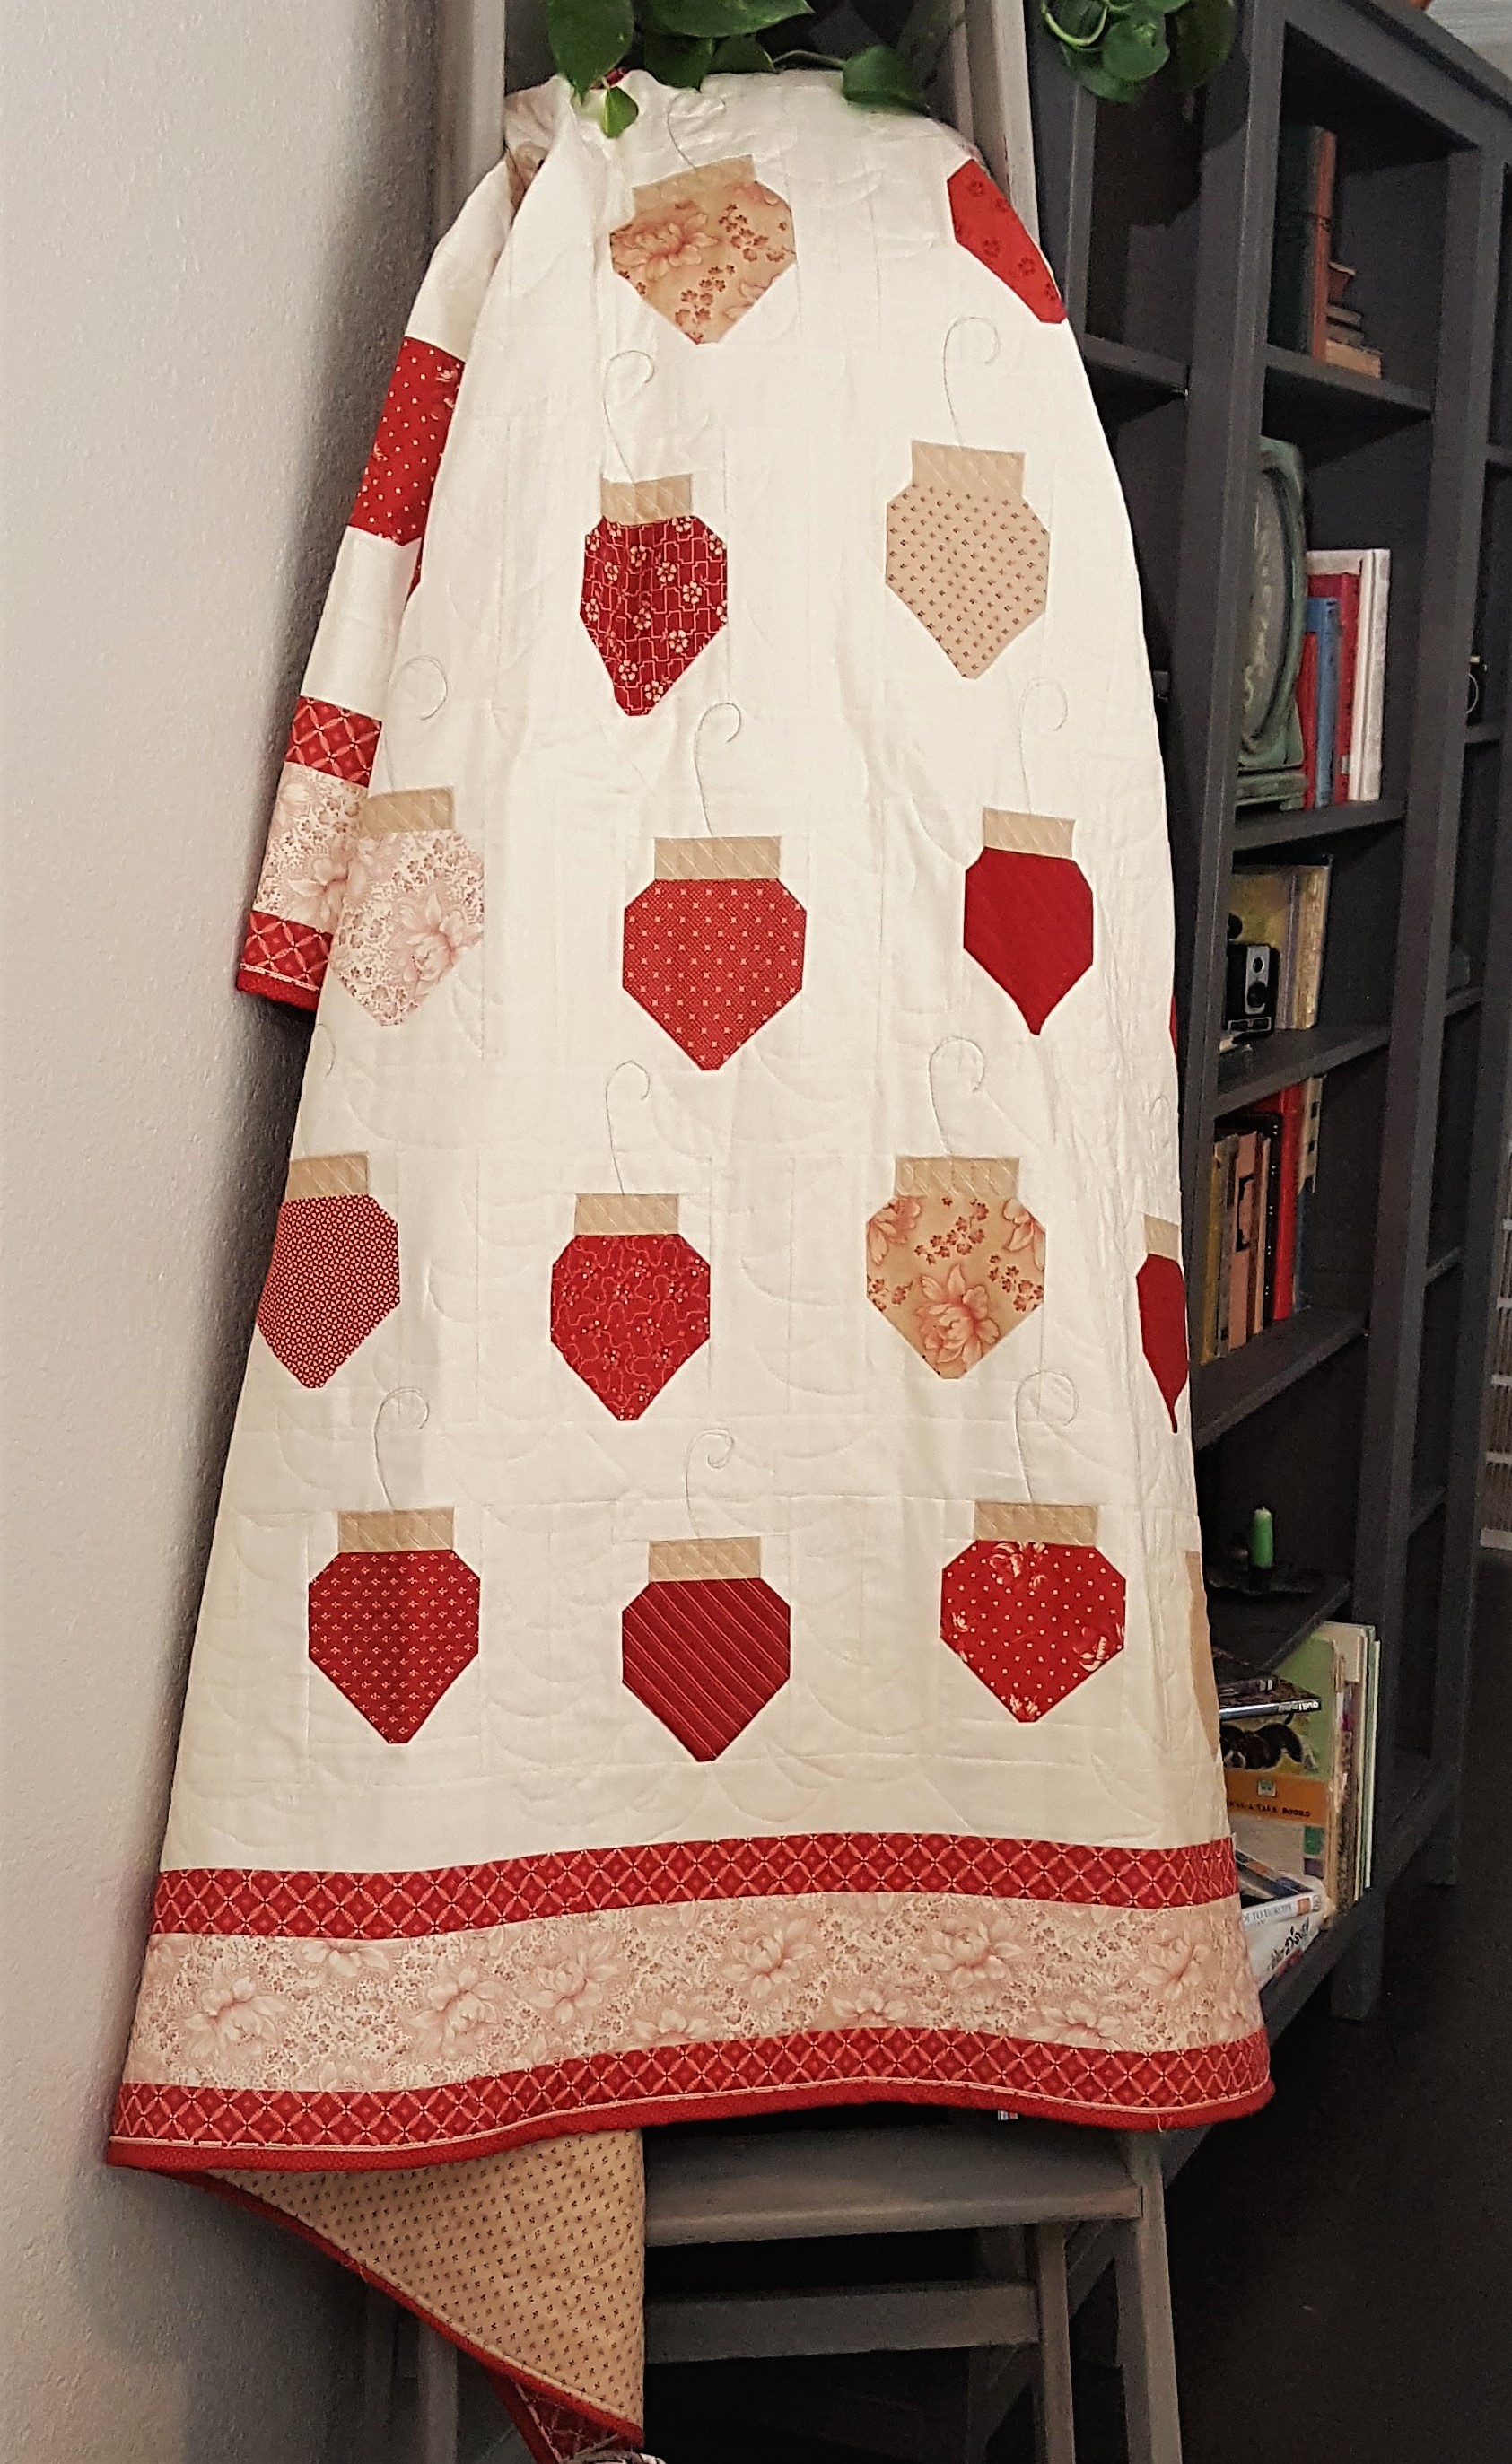
This quilt/project finishes at 68" x 75".
![]()
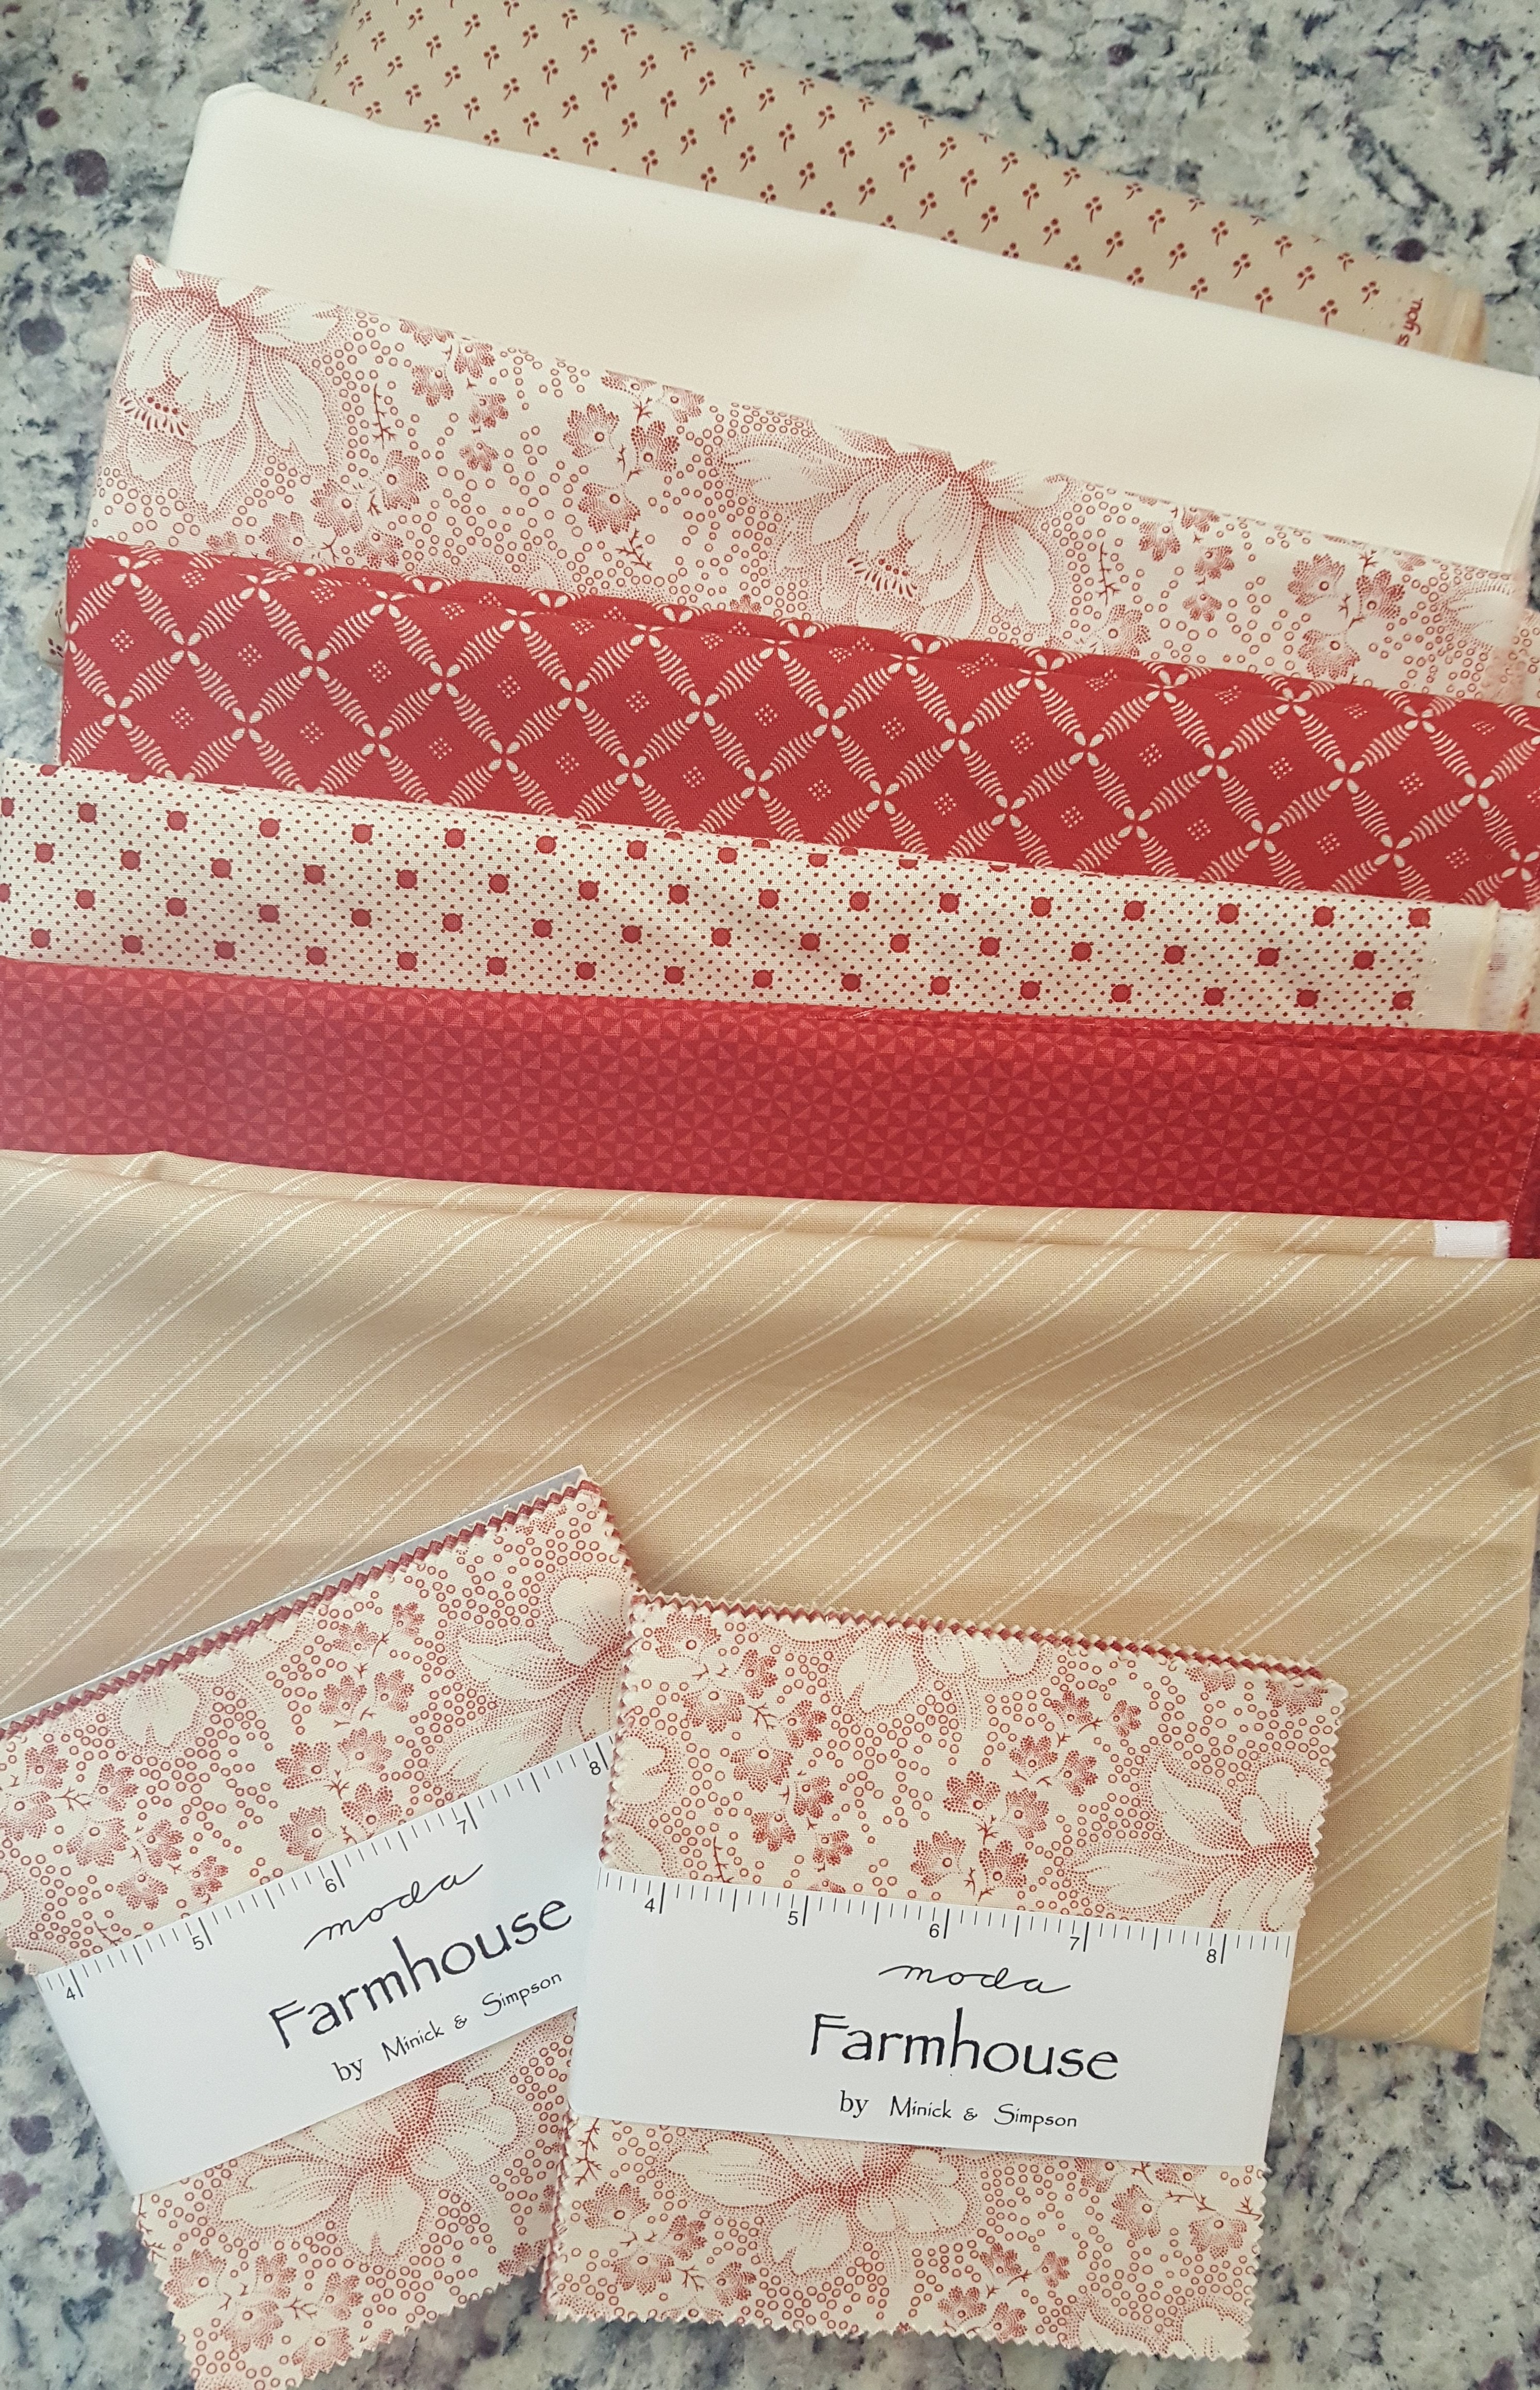
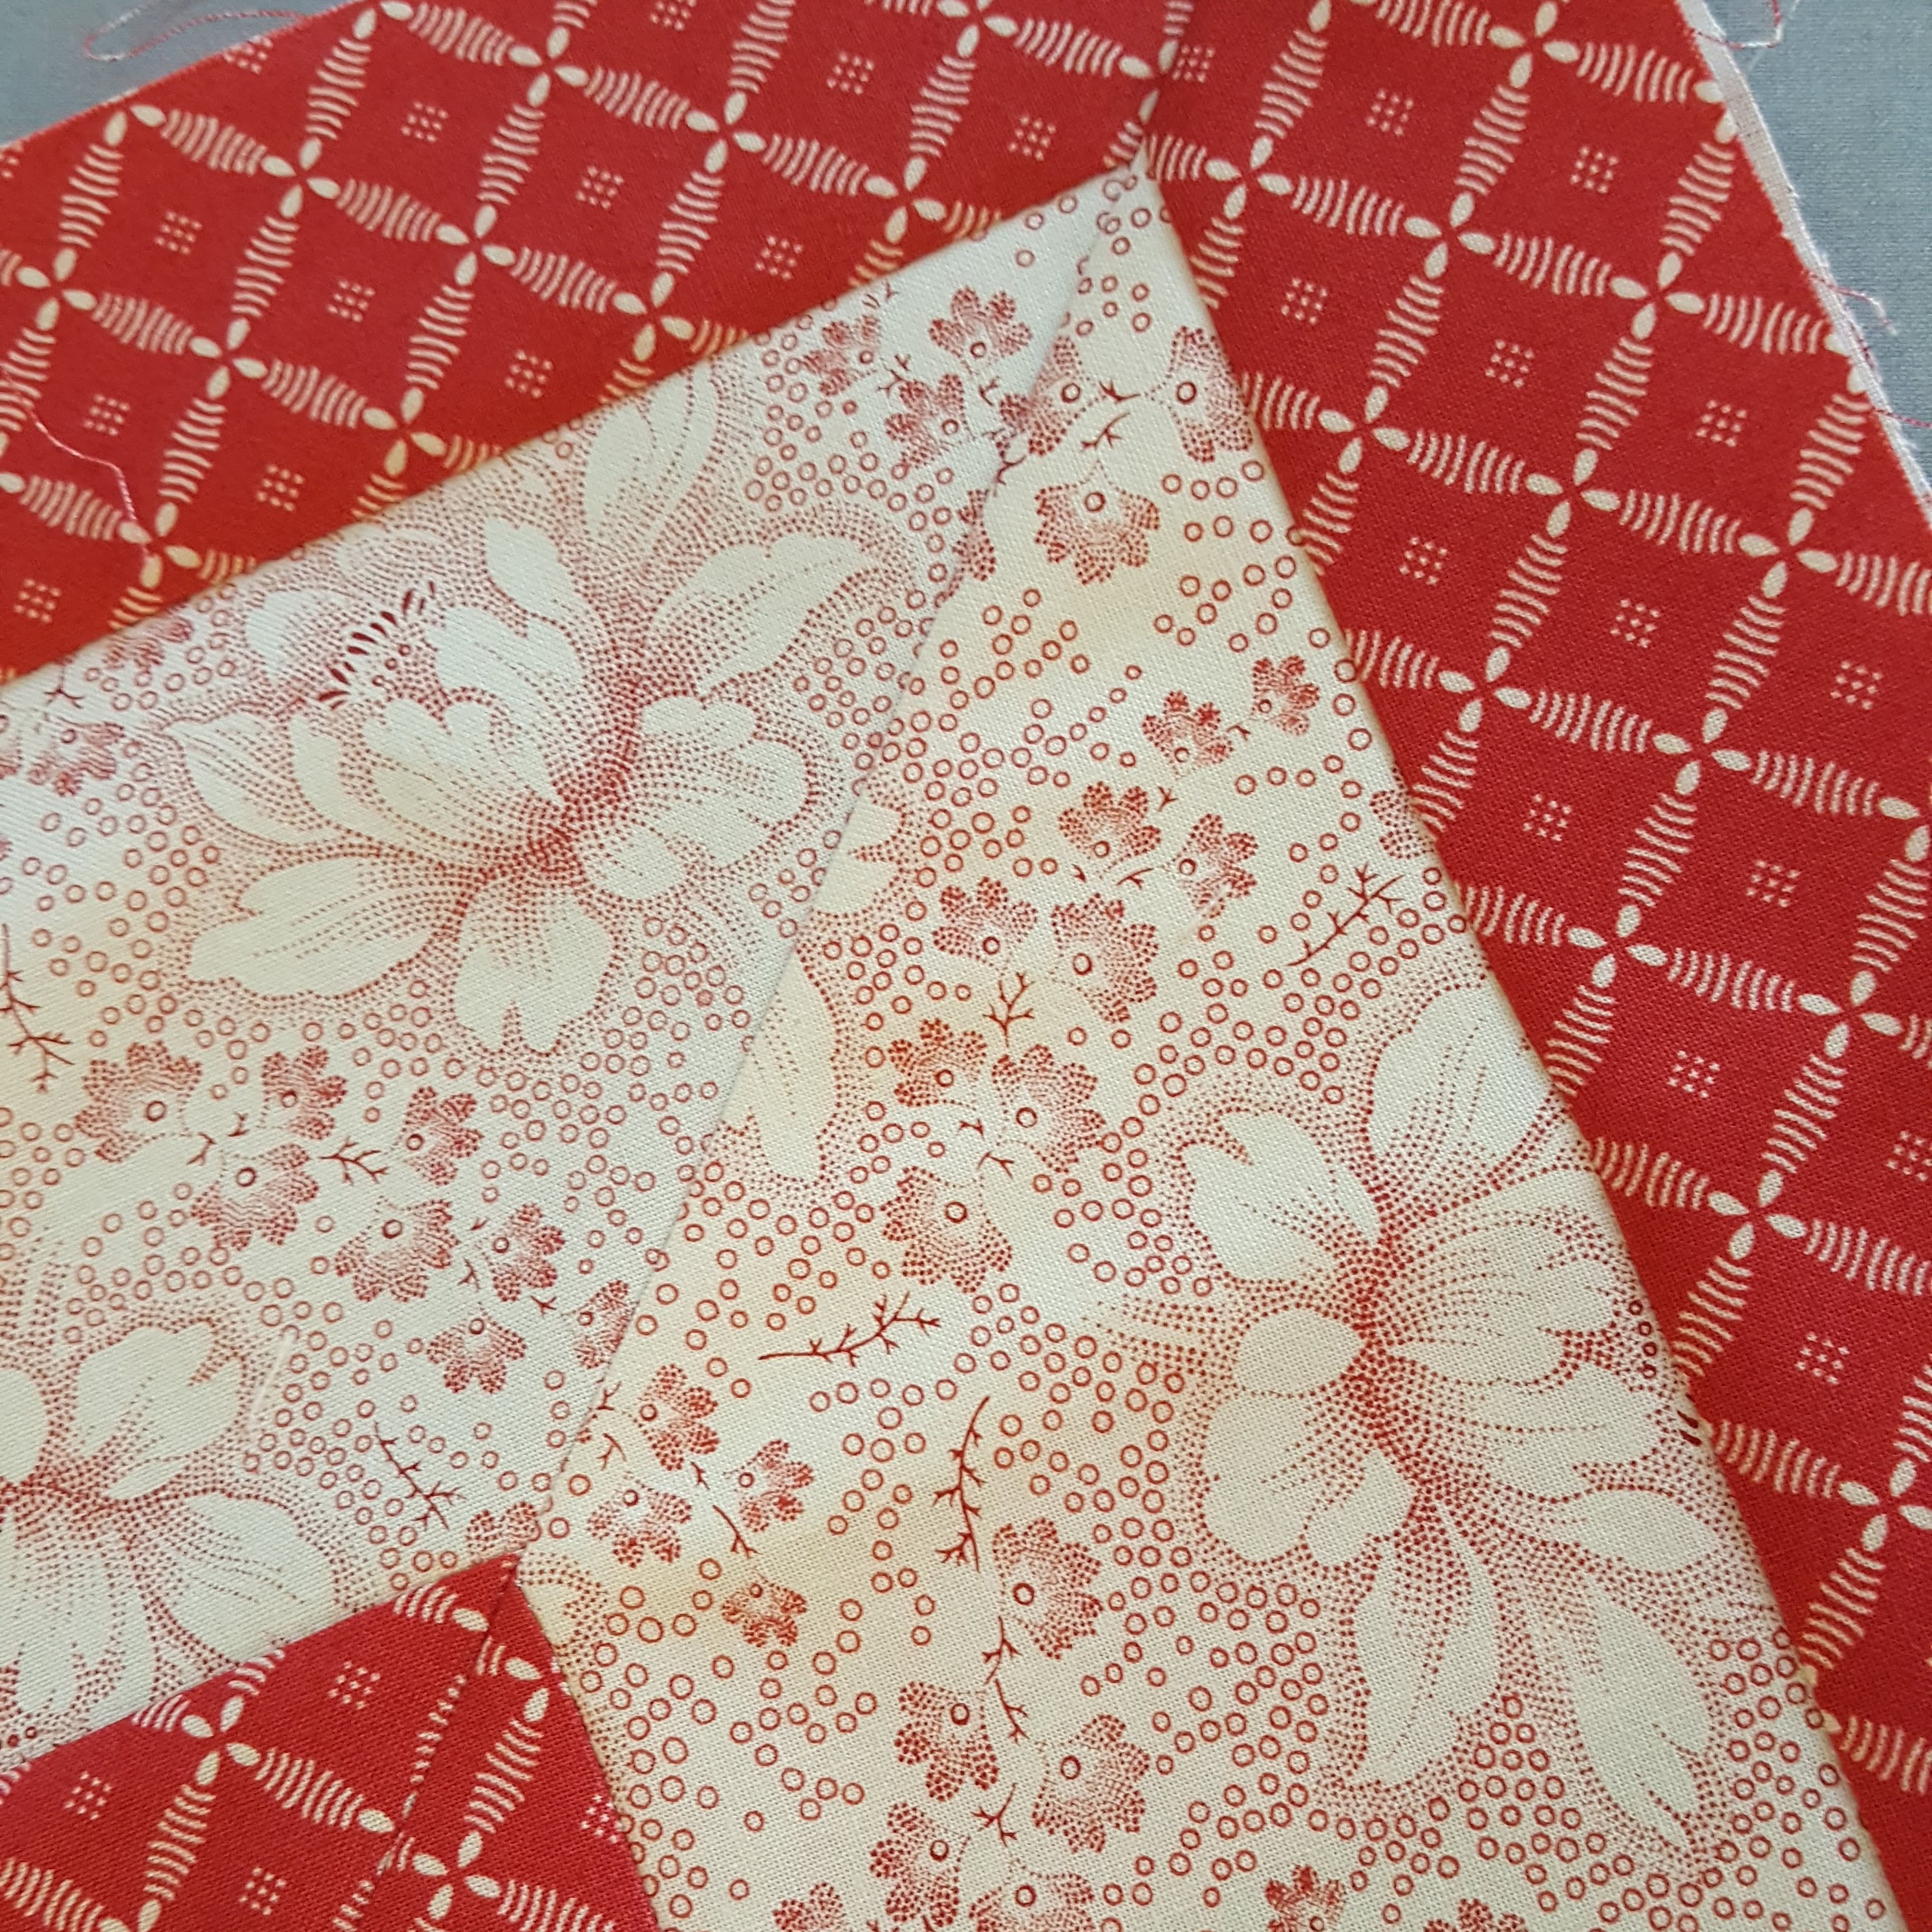
1 Charm Pack* {Farmhouse Red by Minick & Simpson}
3 yards background fabric {Bella Solid in Snow}
1/3 yard Ornament Cap fabric {14853-12}
1 yard Borders #1 and #3 fabric {14857-11}
1 1/8 yard Border #2 fabric{14850-13}
4 yards backing fabric {14856-12}
1/2 yard (piping) binding fabric {14855-13}
1/3 yard binding fabric {14854-21}
(or 5/8 yard binding fabric - if not making piped binding)
*This quilt is made with 42 ornament blocks, I used two charm packs for my Farmhouse Red version so I could avoid using the very light colored charms
![]()
Prep Work:
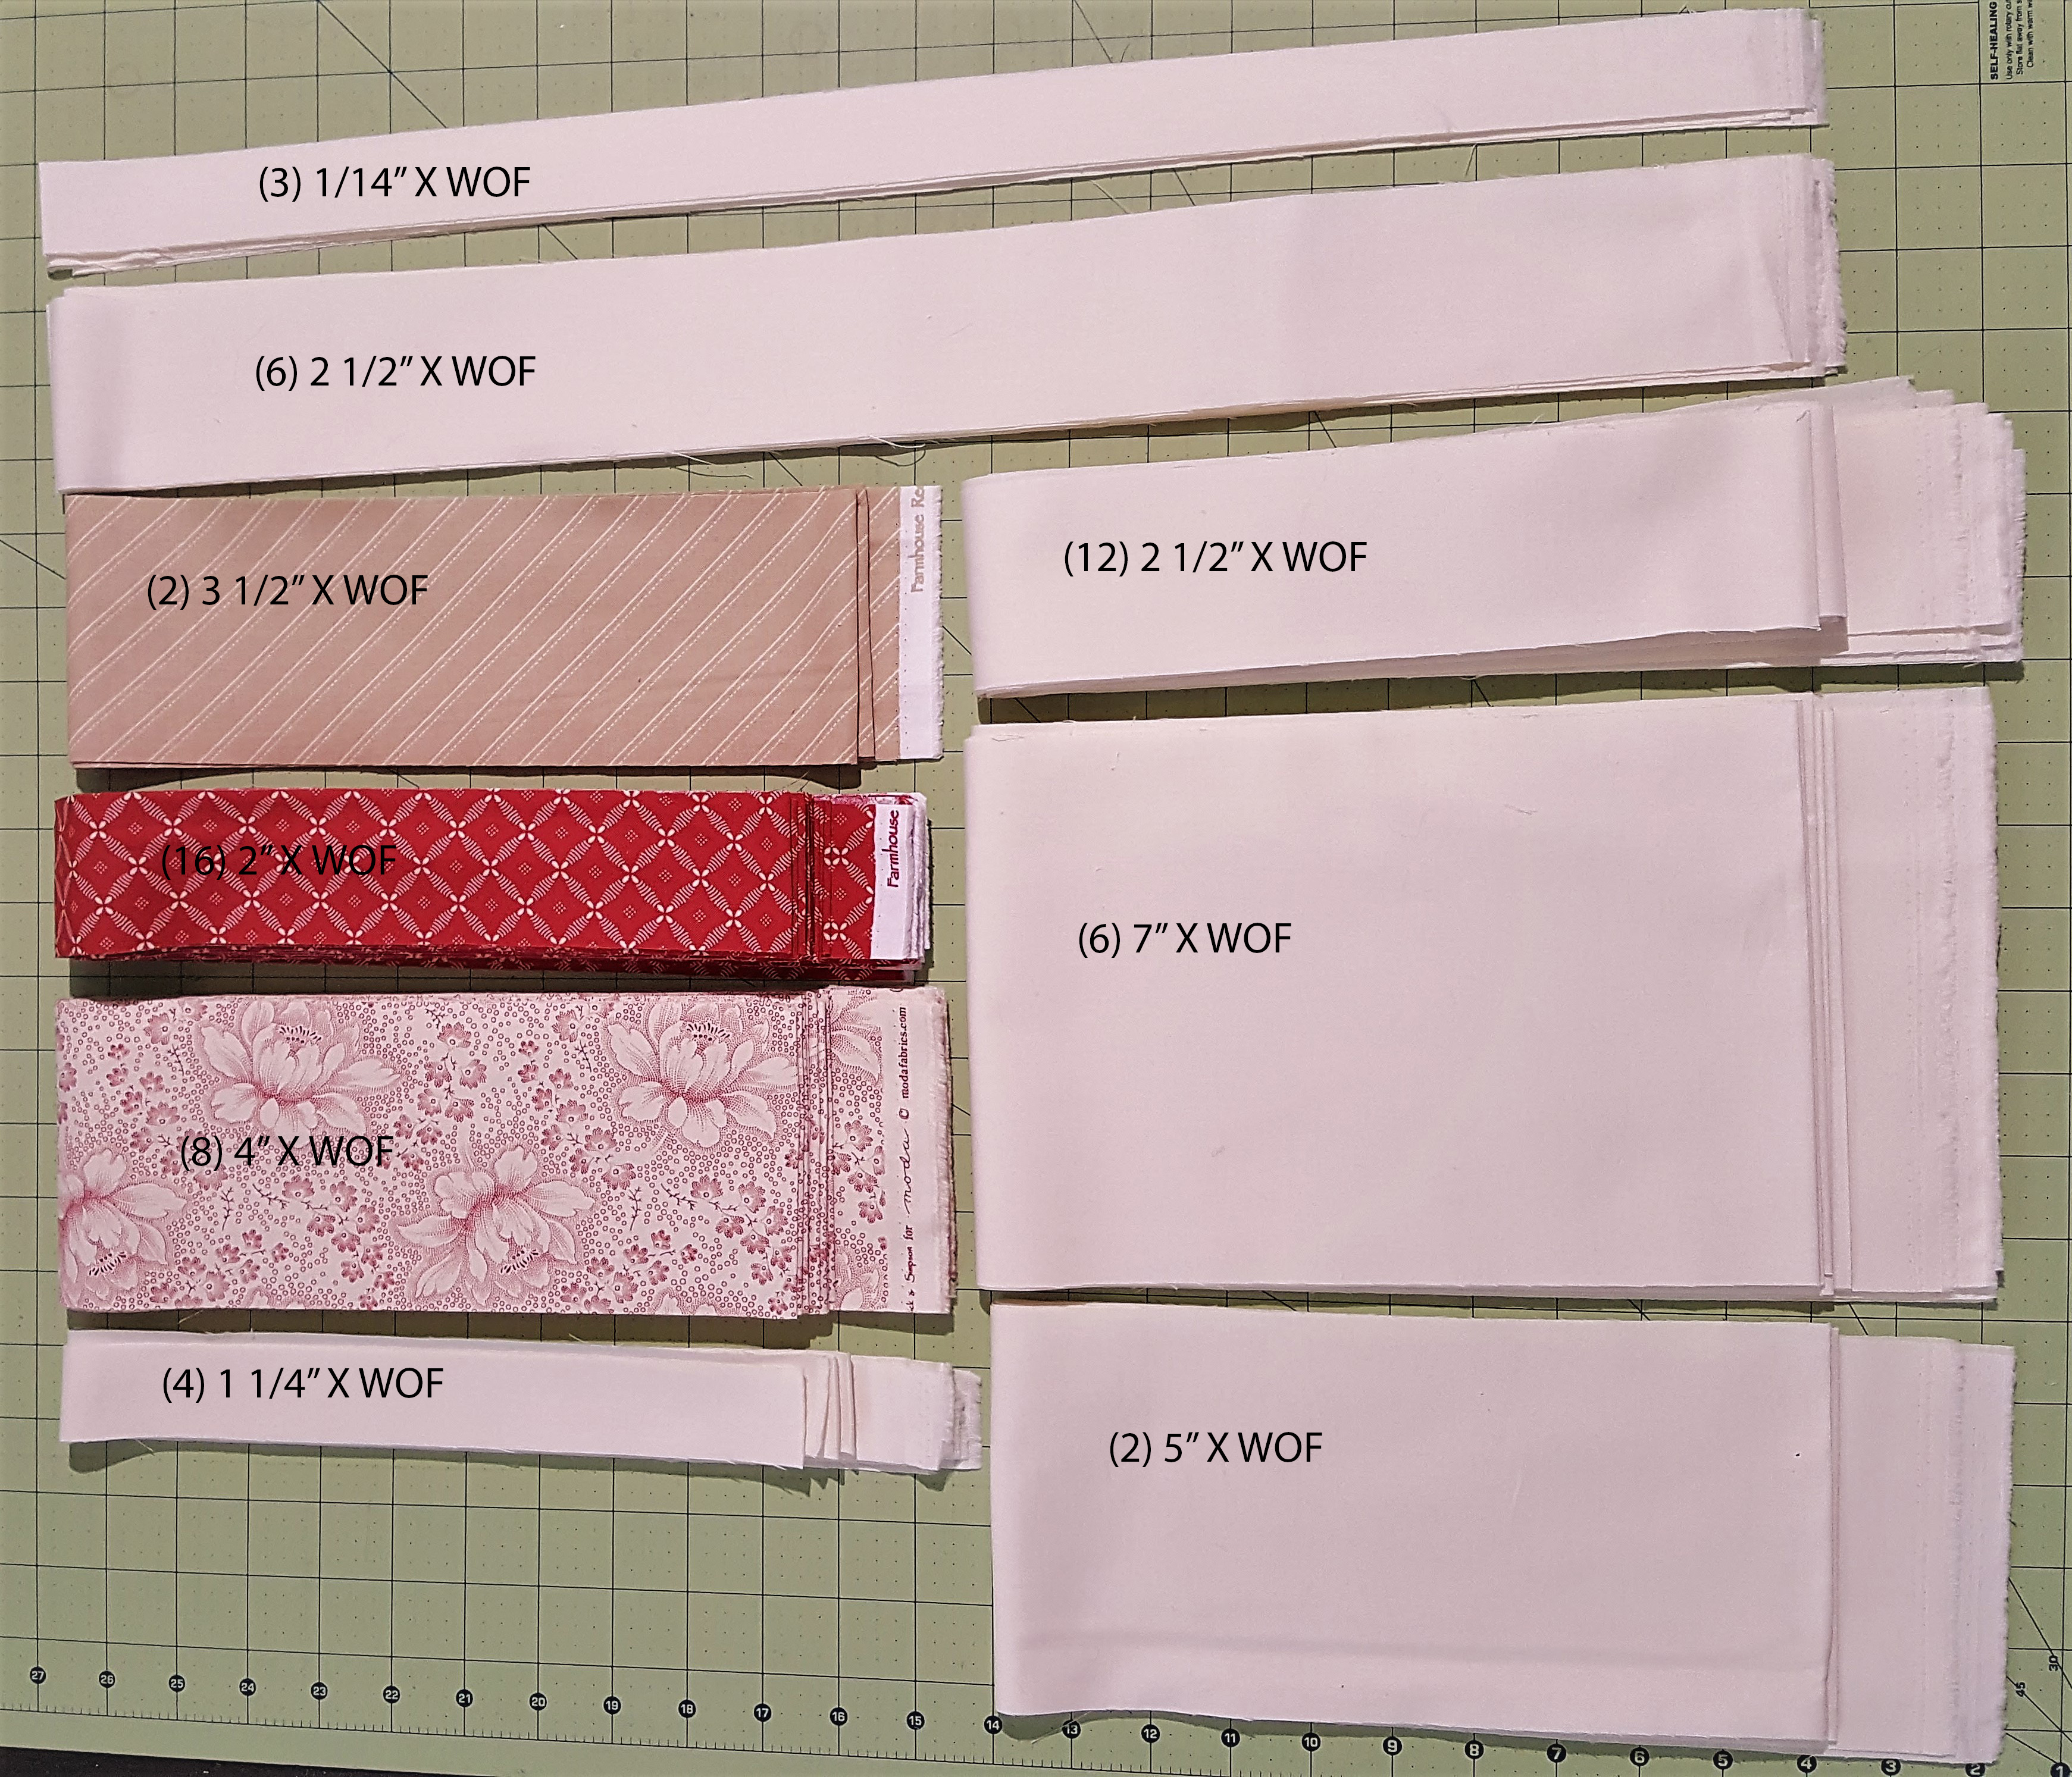
Background:
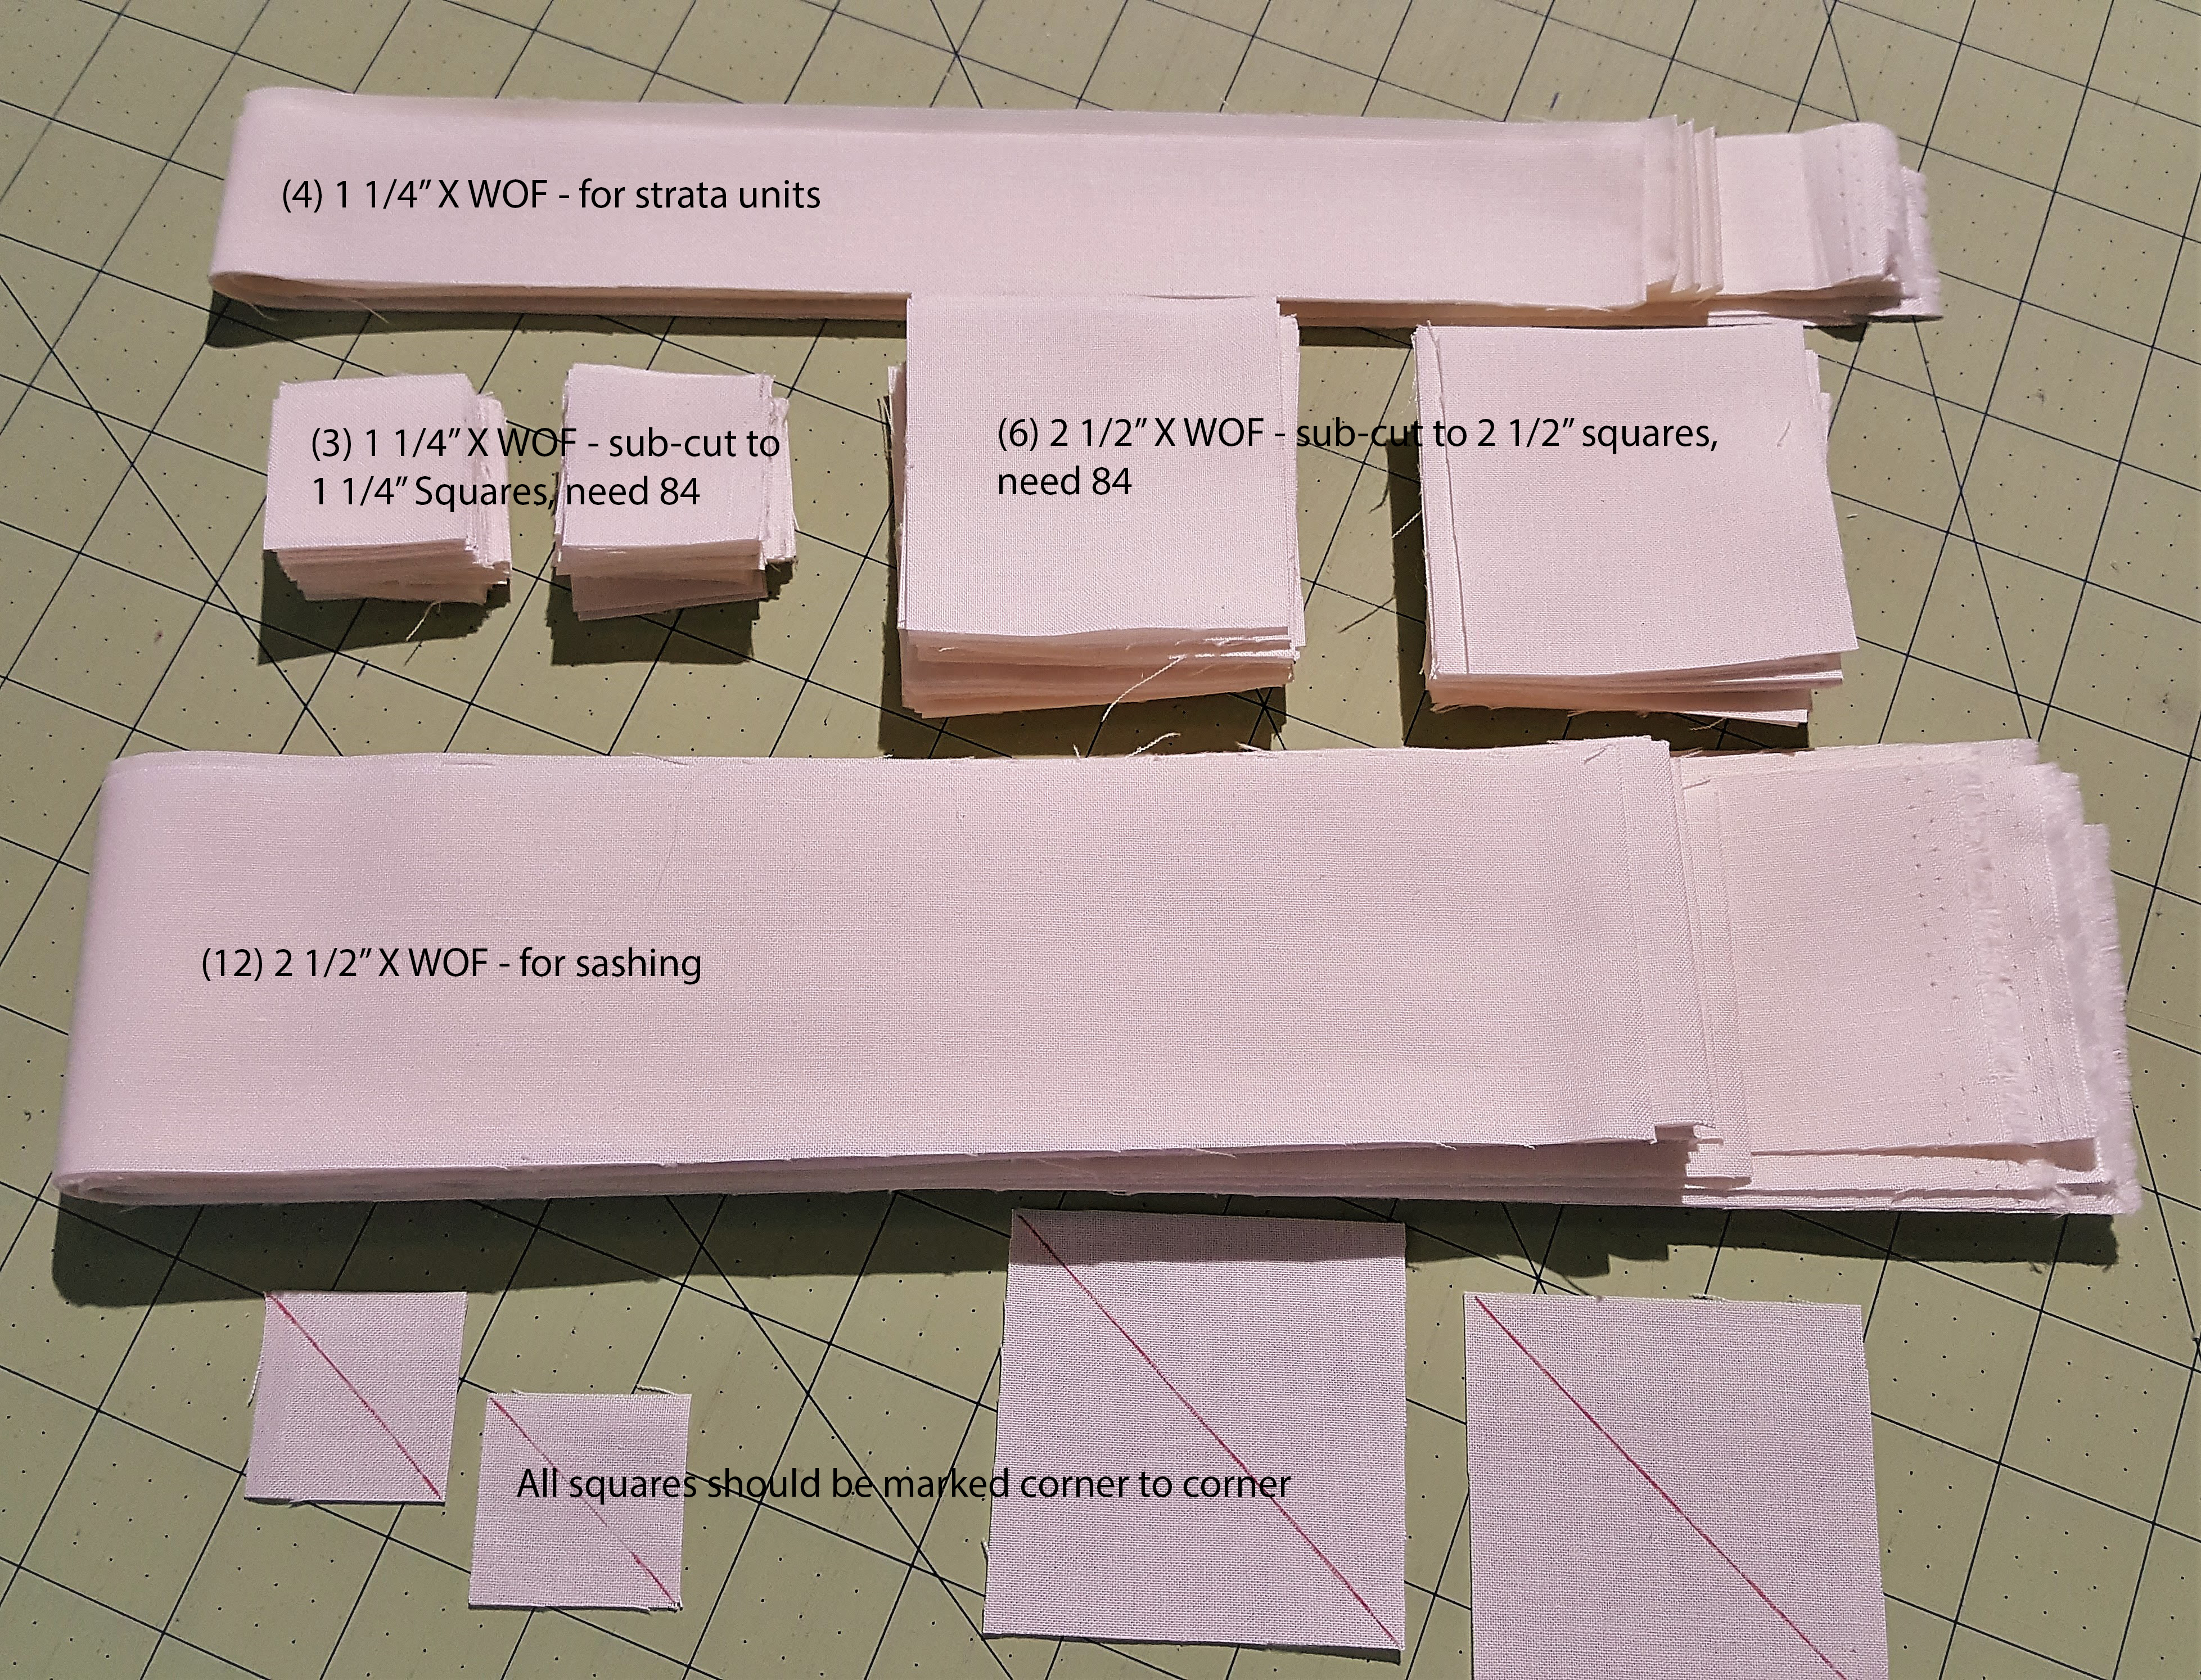
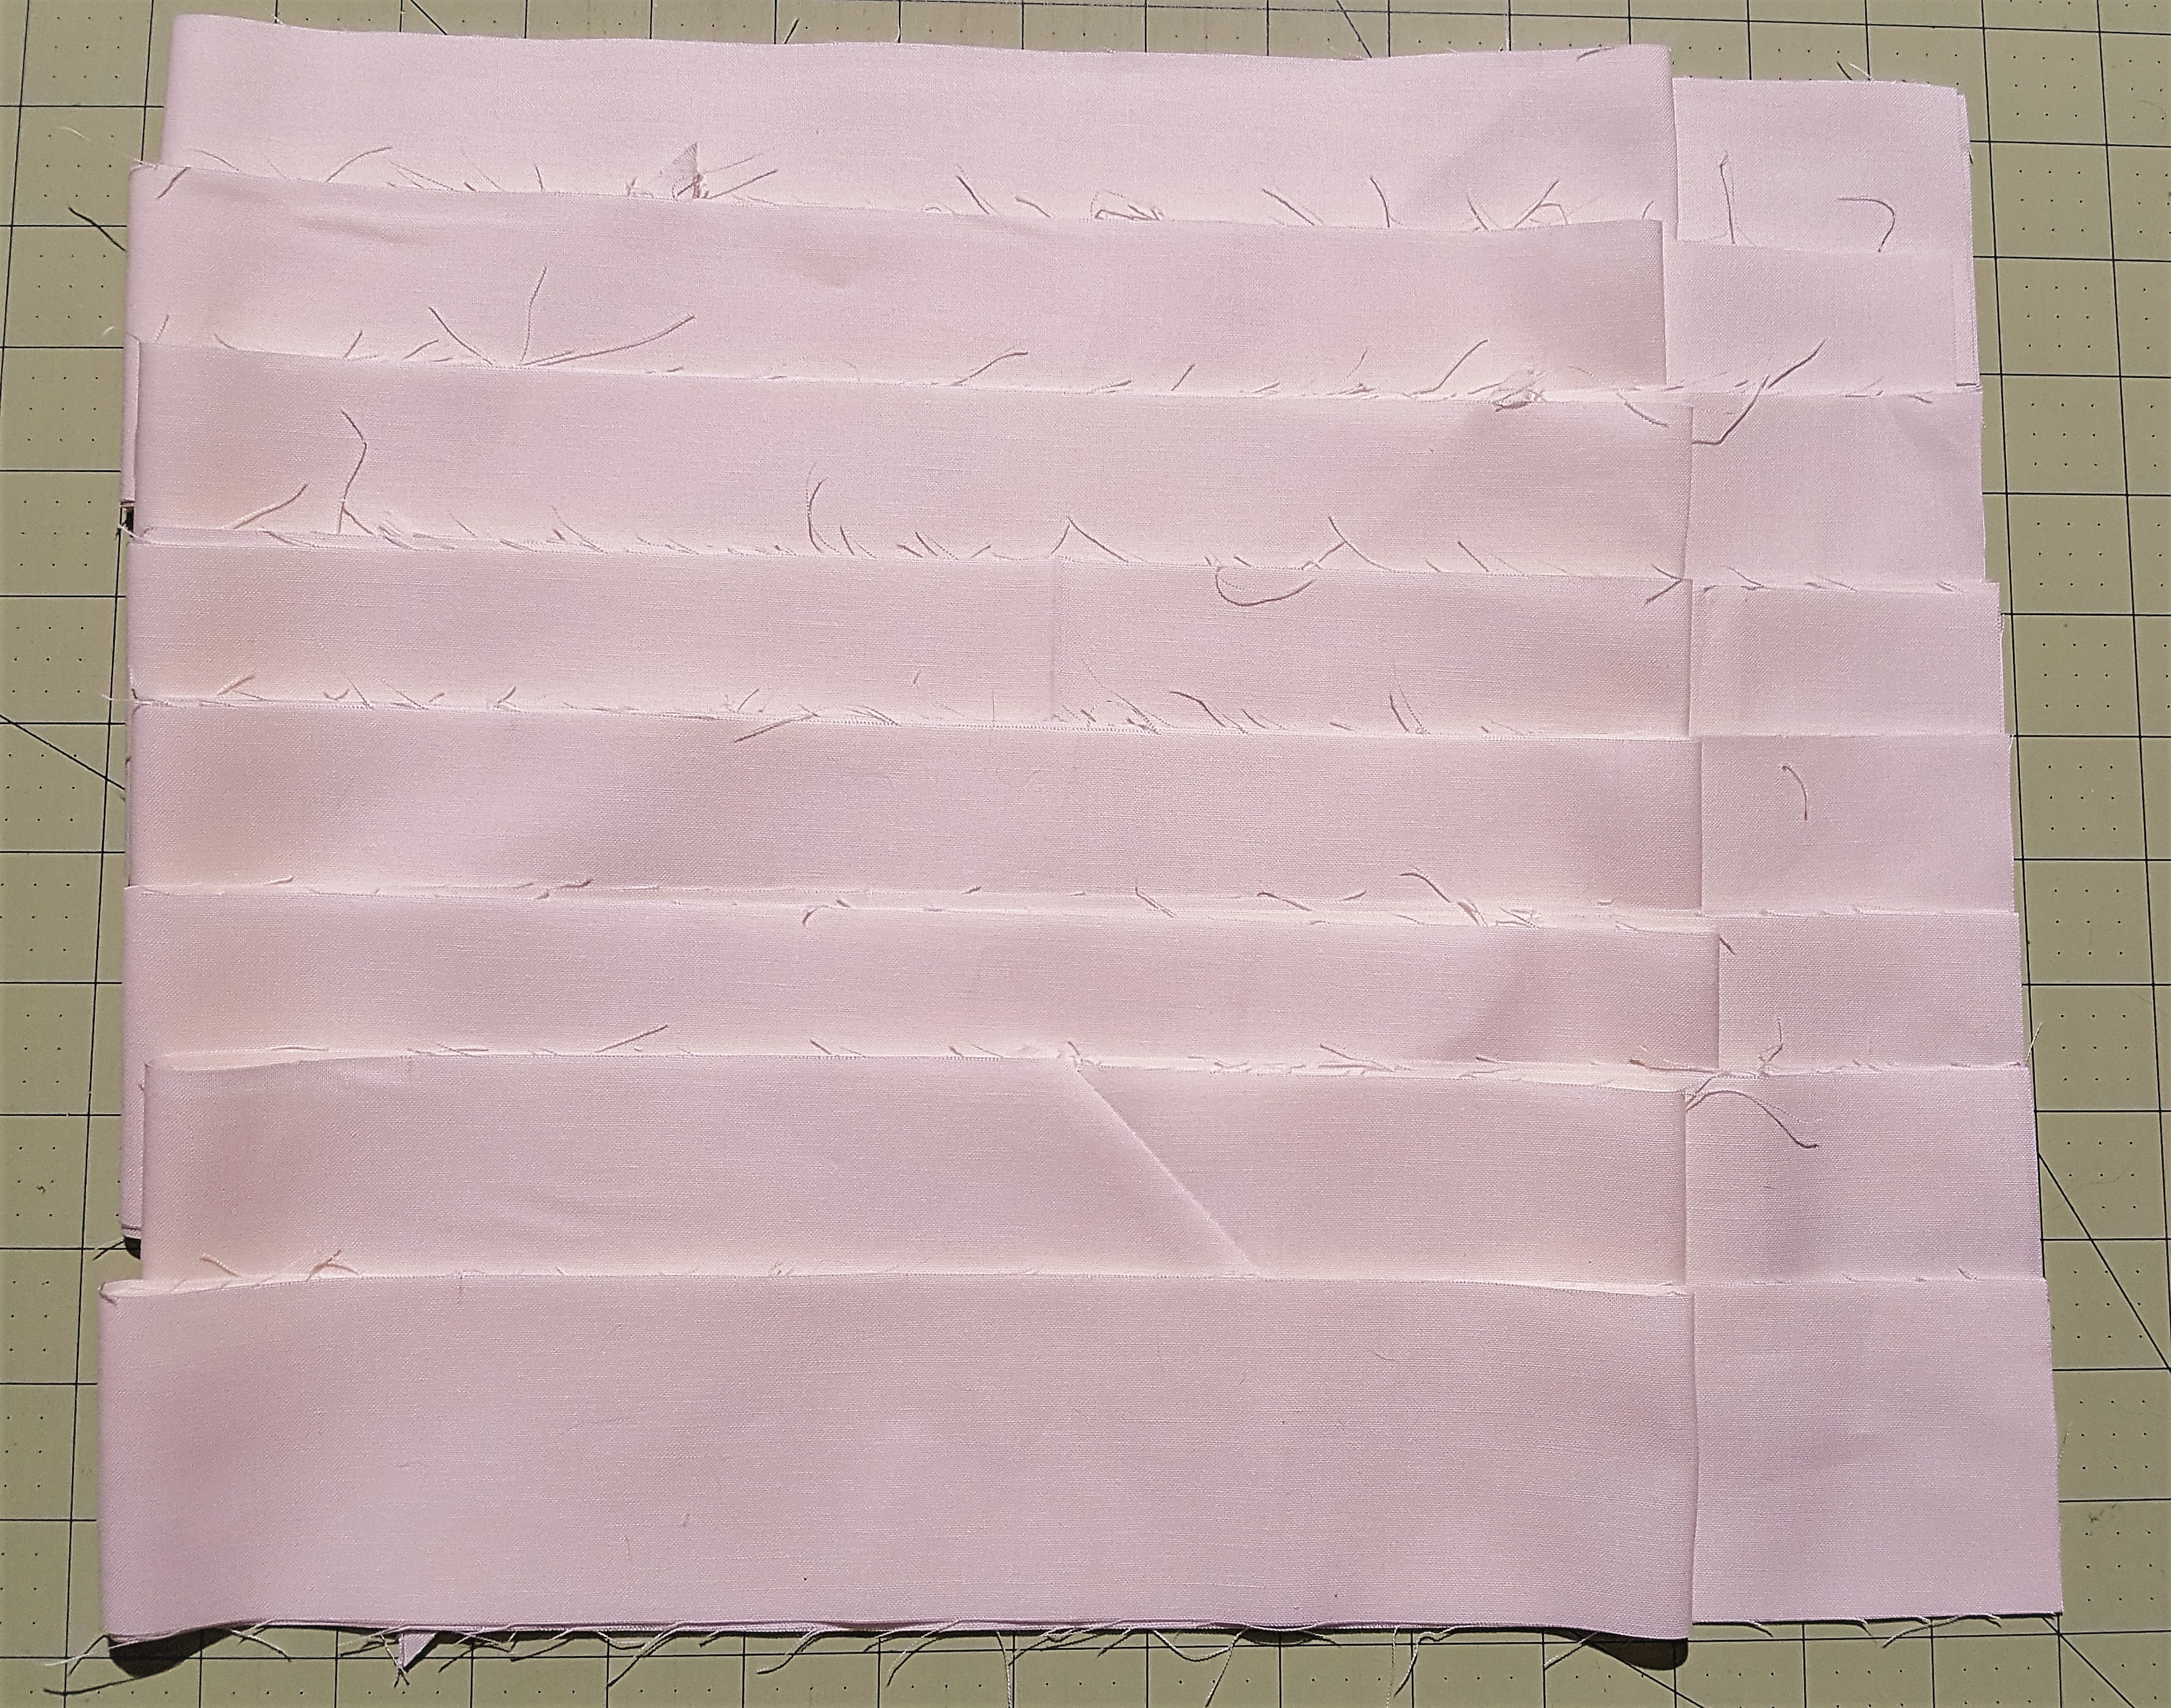
Cut (7) strips 1 ¼" X WOF
Sub-cut (3) strips into 1 ¼” Squares, need 84 (Mark the squares diagonally, corner to corner)
(4) strips will be used for strata unit
Cut (6) strips 2 ½” X WOF
Sub-cut into 2 ½” square, need 84 (Mark the squares diagonally, corner to corner)
Cut (2) strips 5” X WOF
Sub-cut into 5” X 1 ½” rectangles, need 42
Cut (6) strips 7” X WOF
Sub-cut into 7” X 2 ½” rectangles, need 91
Cut (12) strip 2 ½” X WOF for Long Sashing
Stripe (Ornament Cap):
Cut (2) strips 3 ½” X WOF
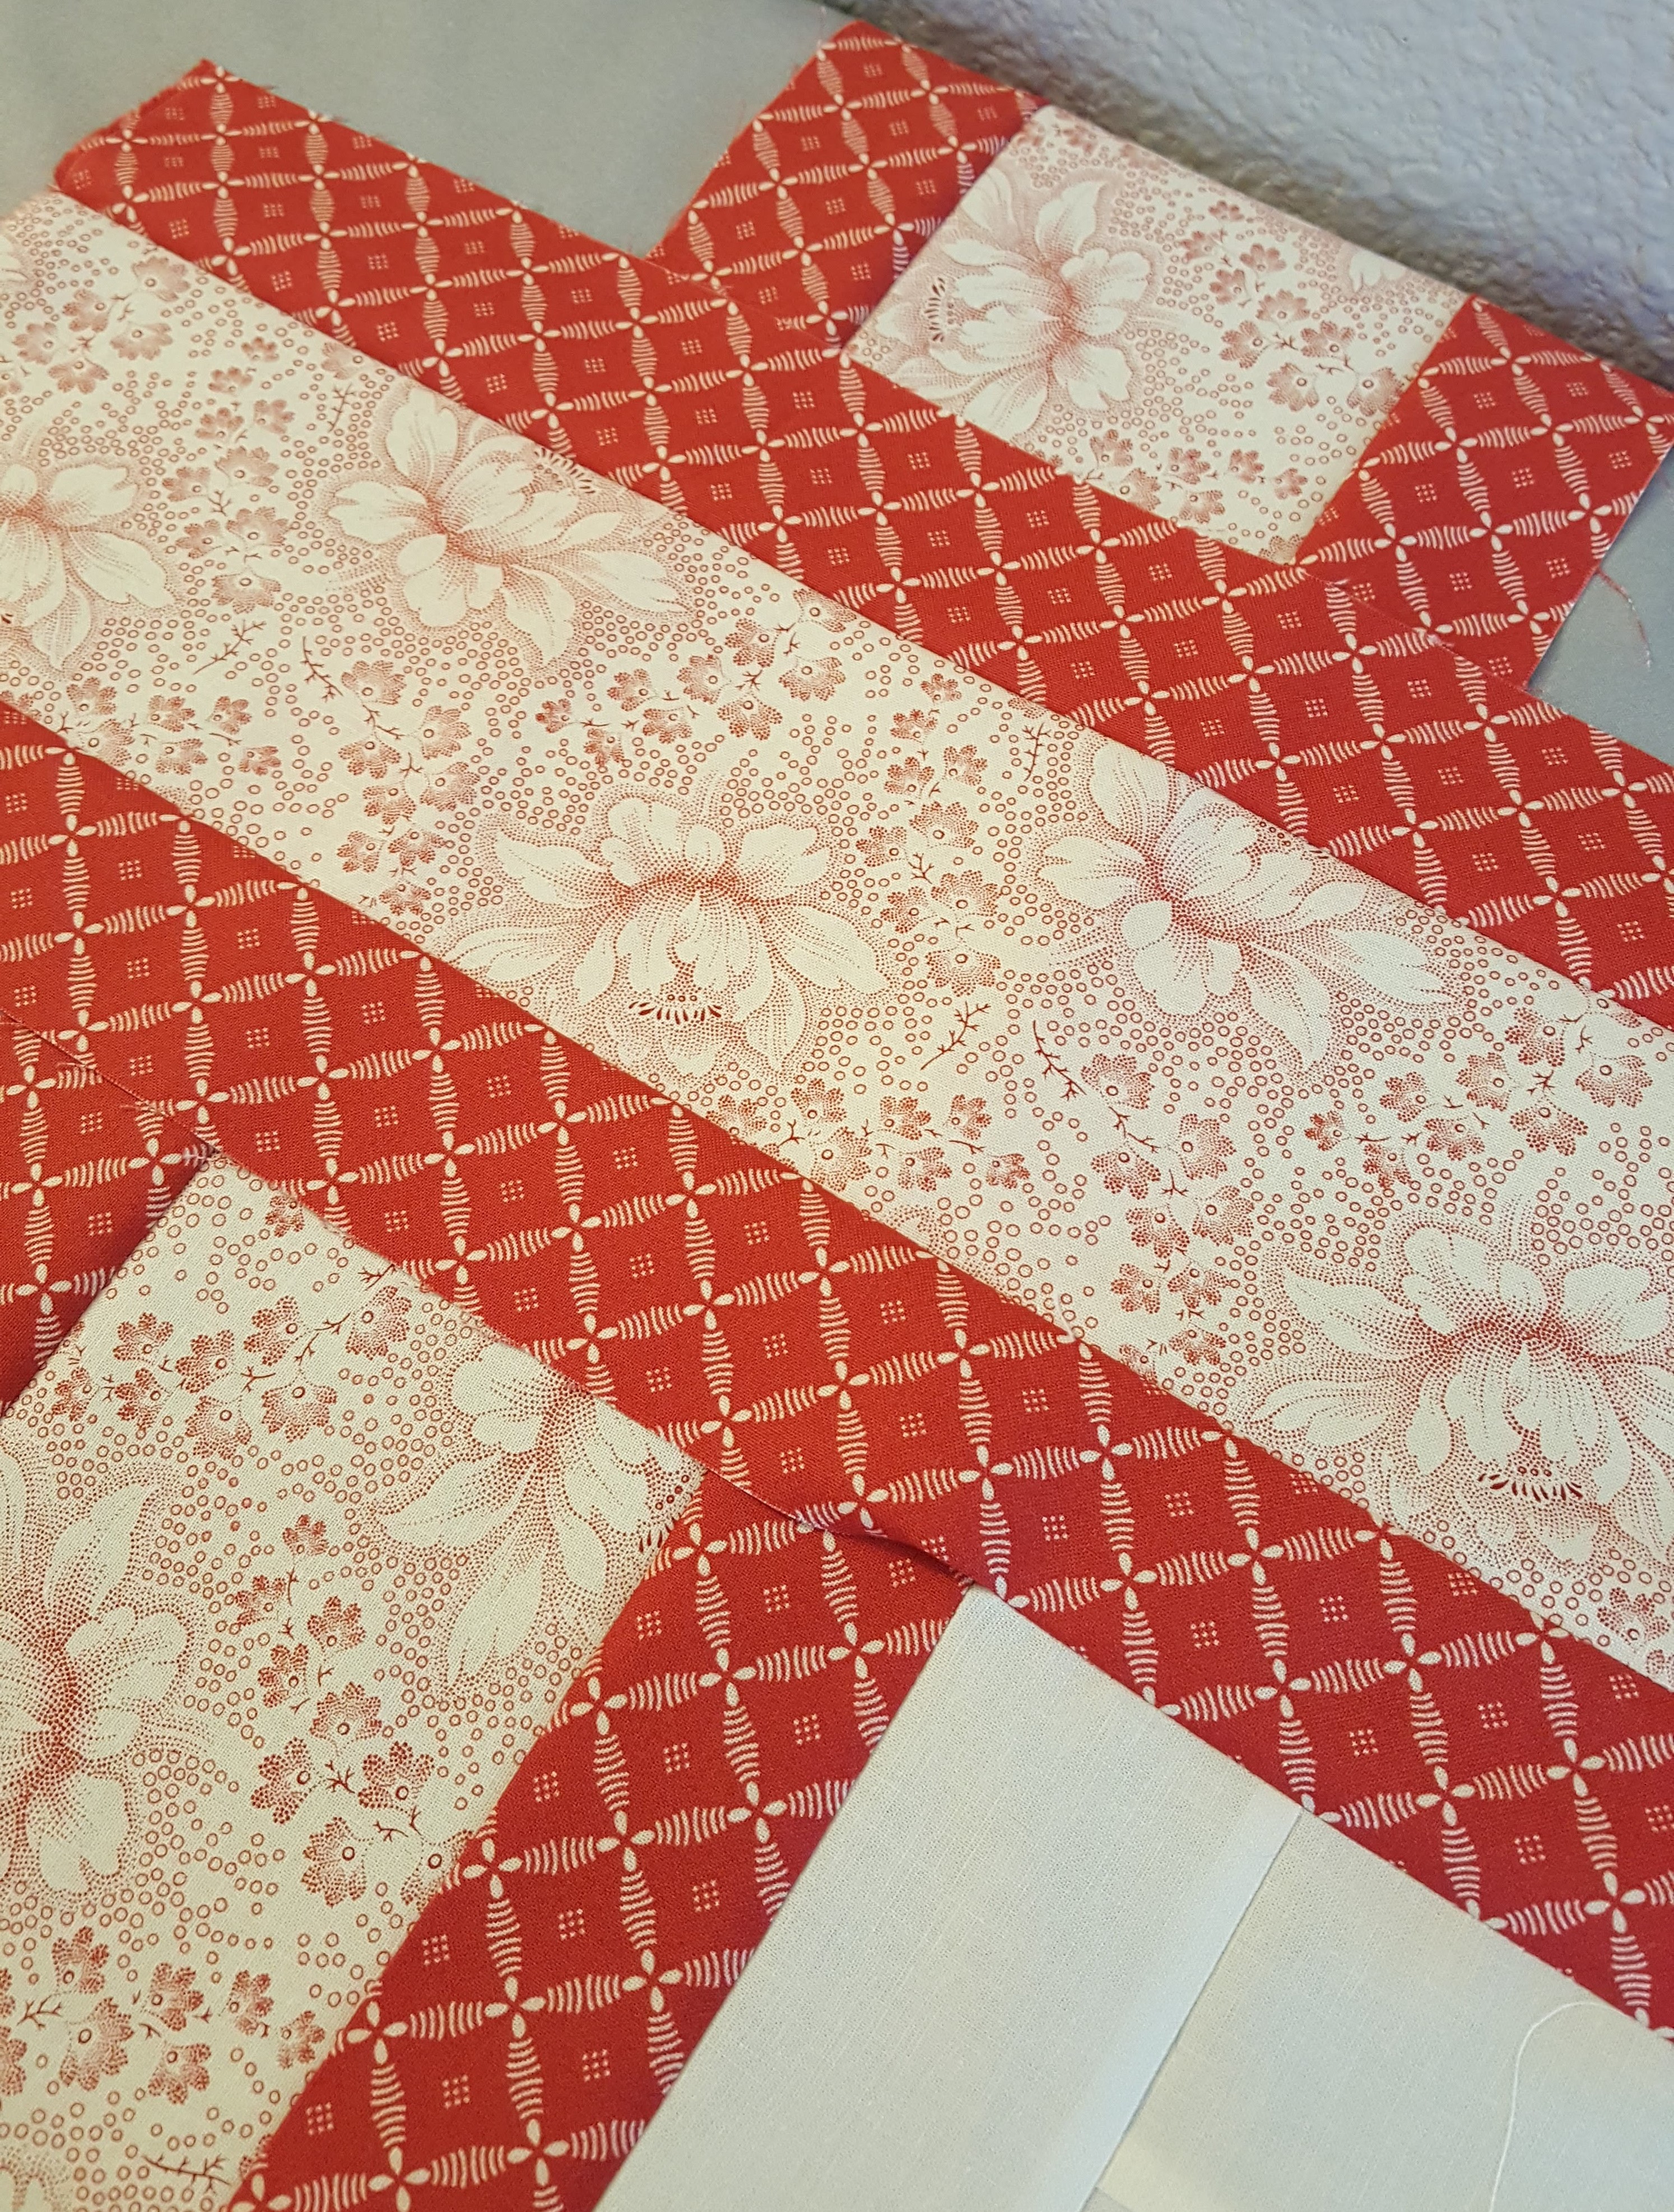
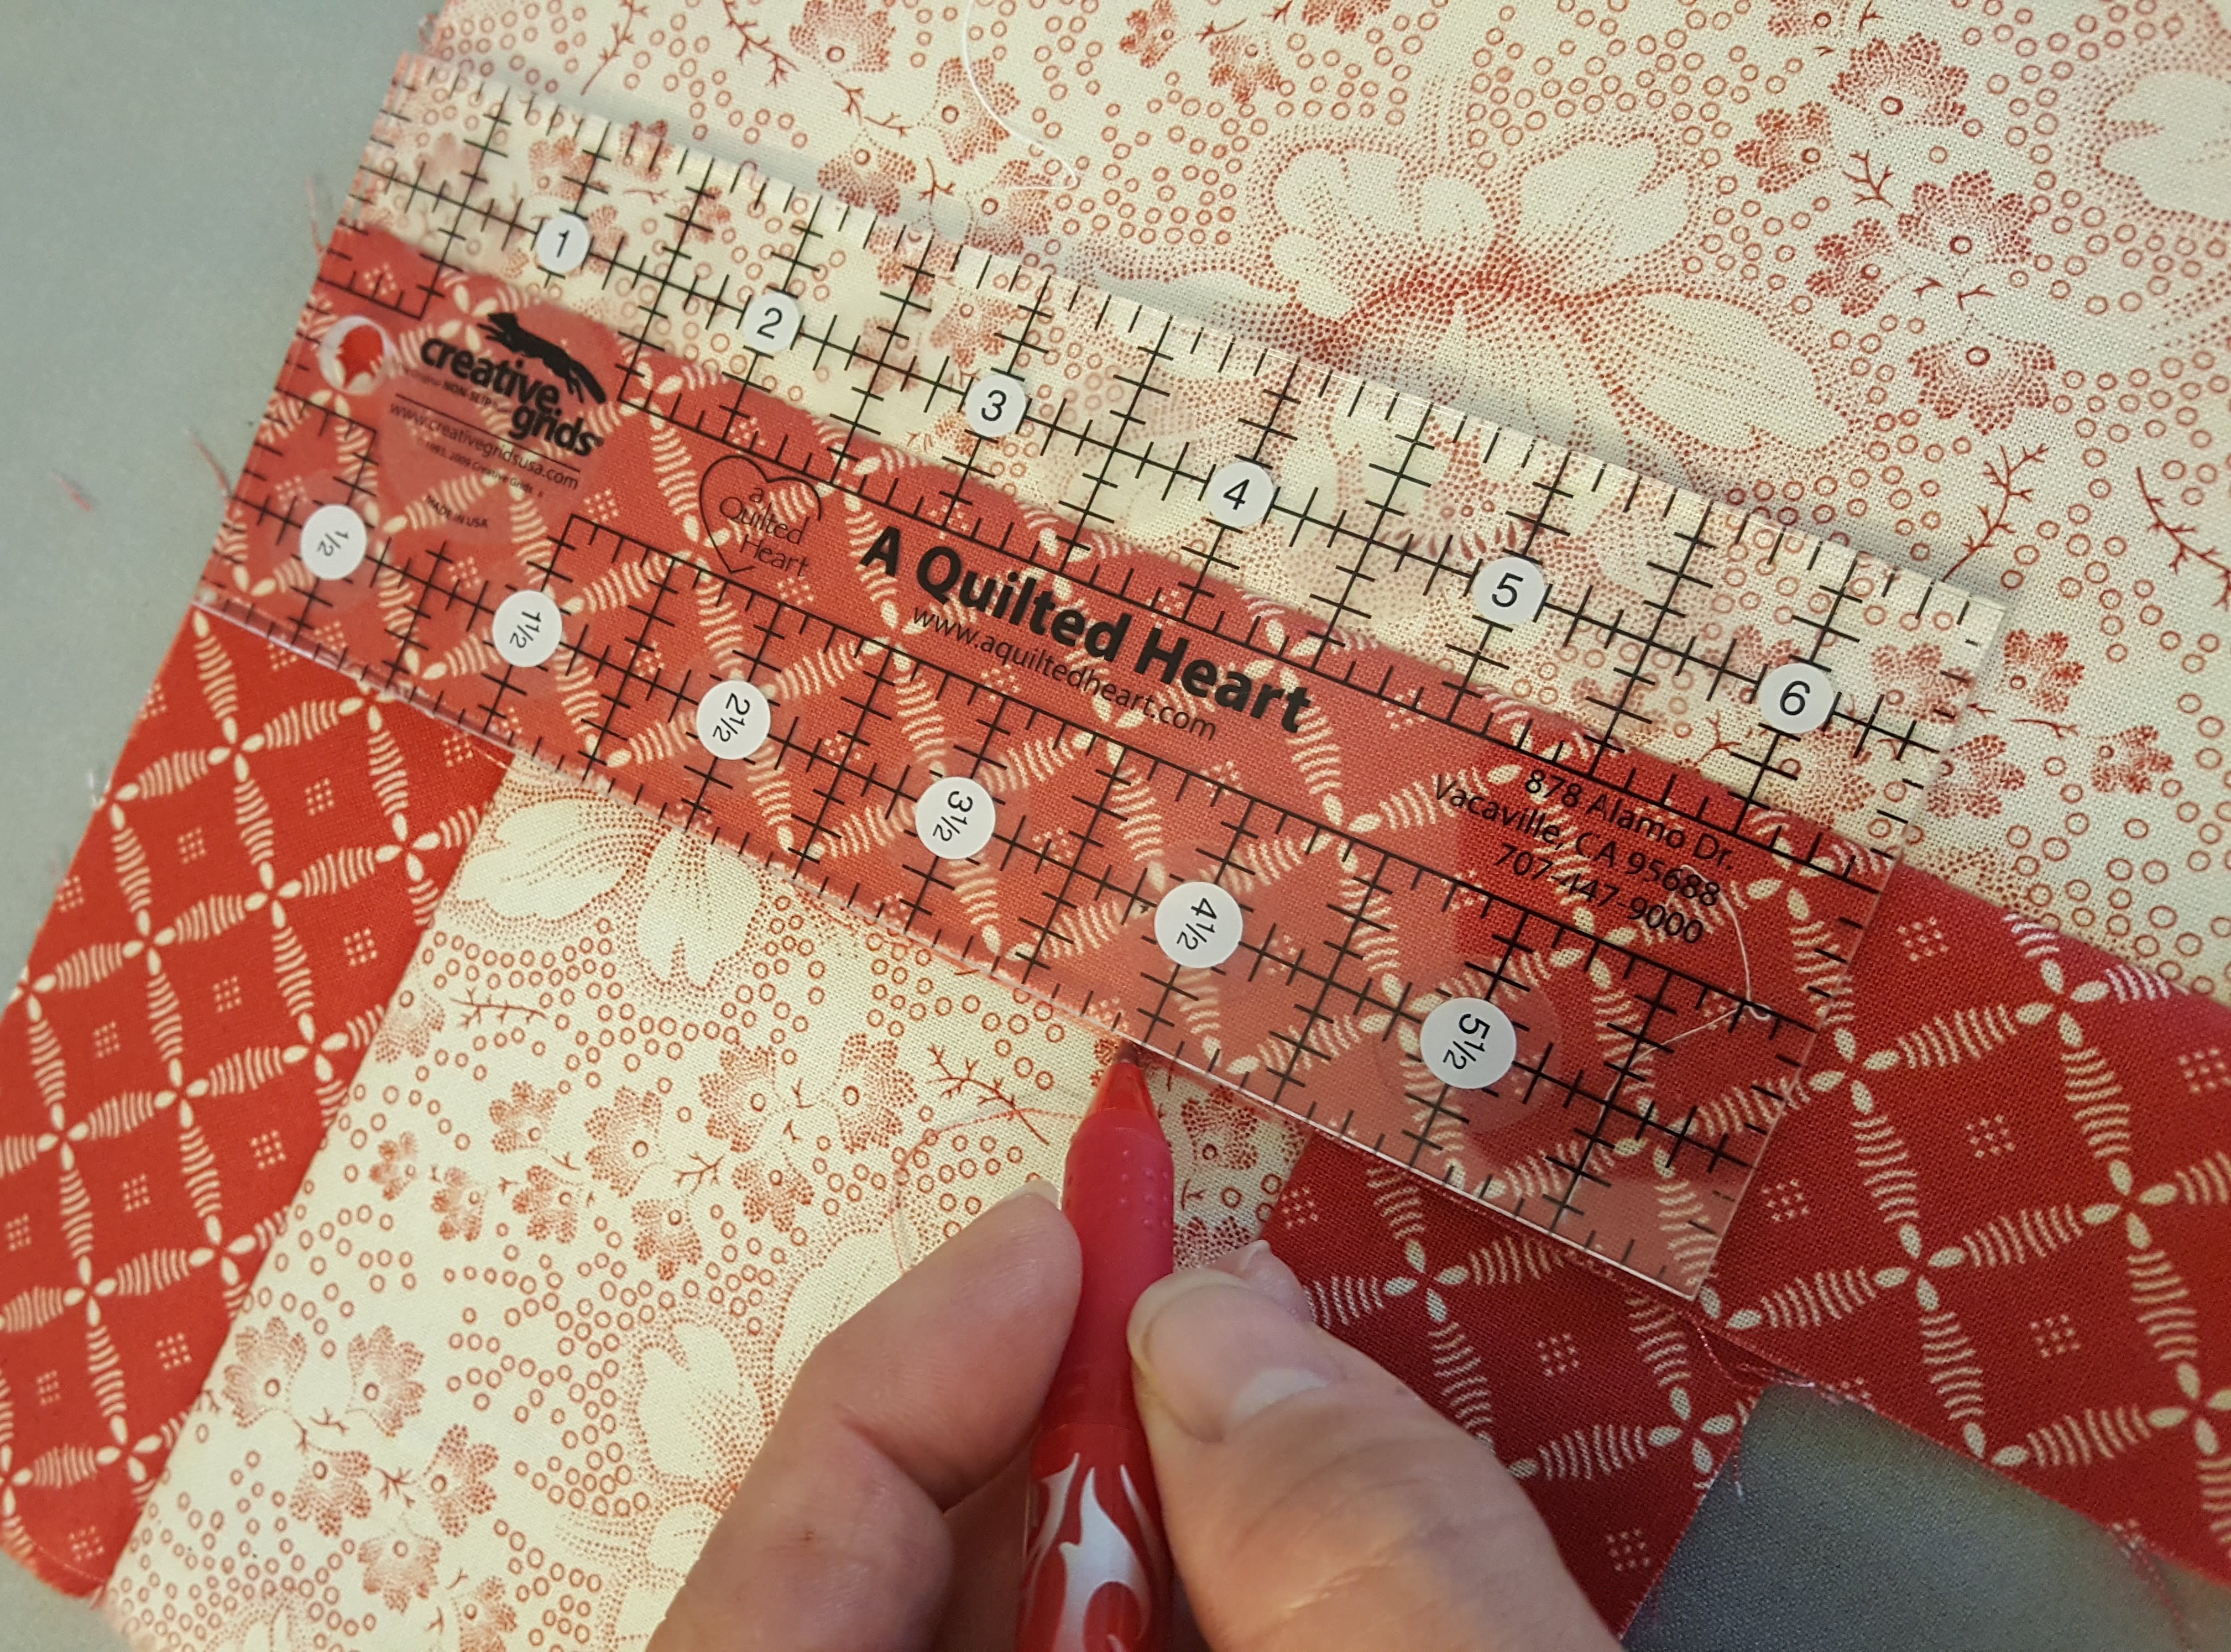
Red (Border #1 & #3):
Cut (16) 2’ X WOF
Rose Print (Border #2):
Cut (8) strips 4” X WOF (do not trim off selvage, will be trimmed in border mitering)
Recipe:
Step #1 - Ornament Caps:
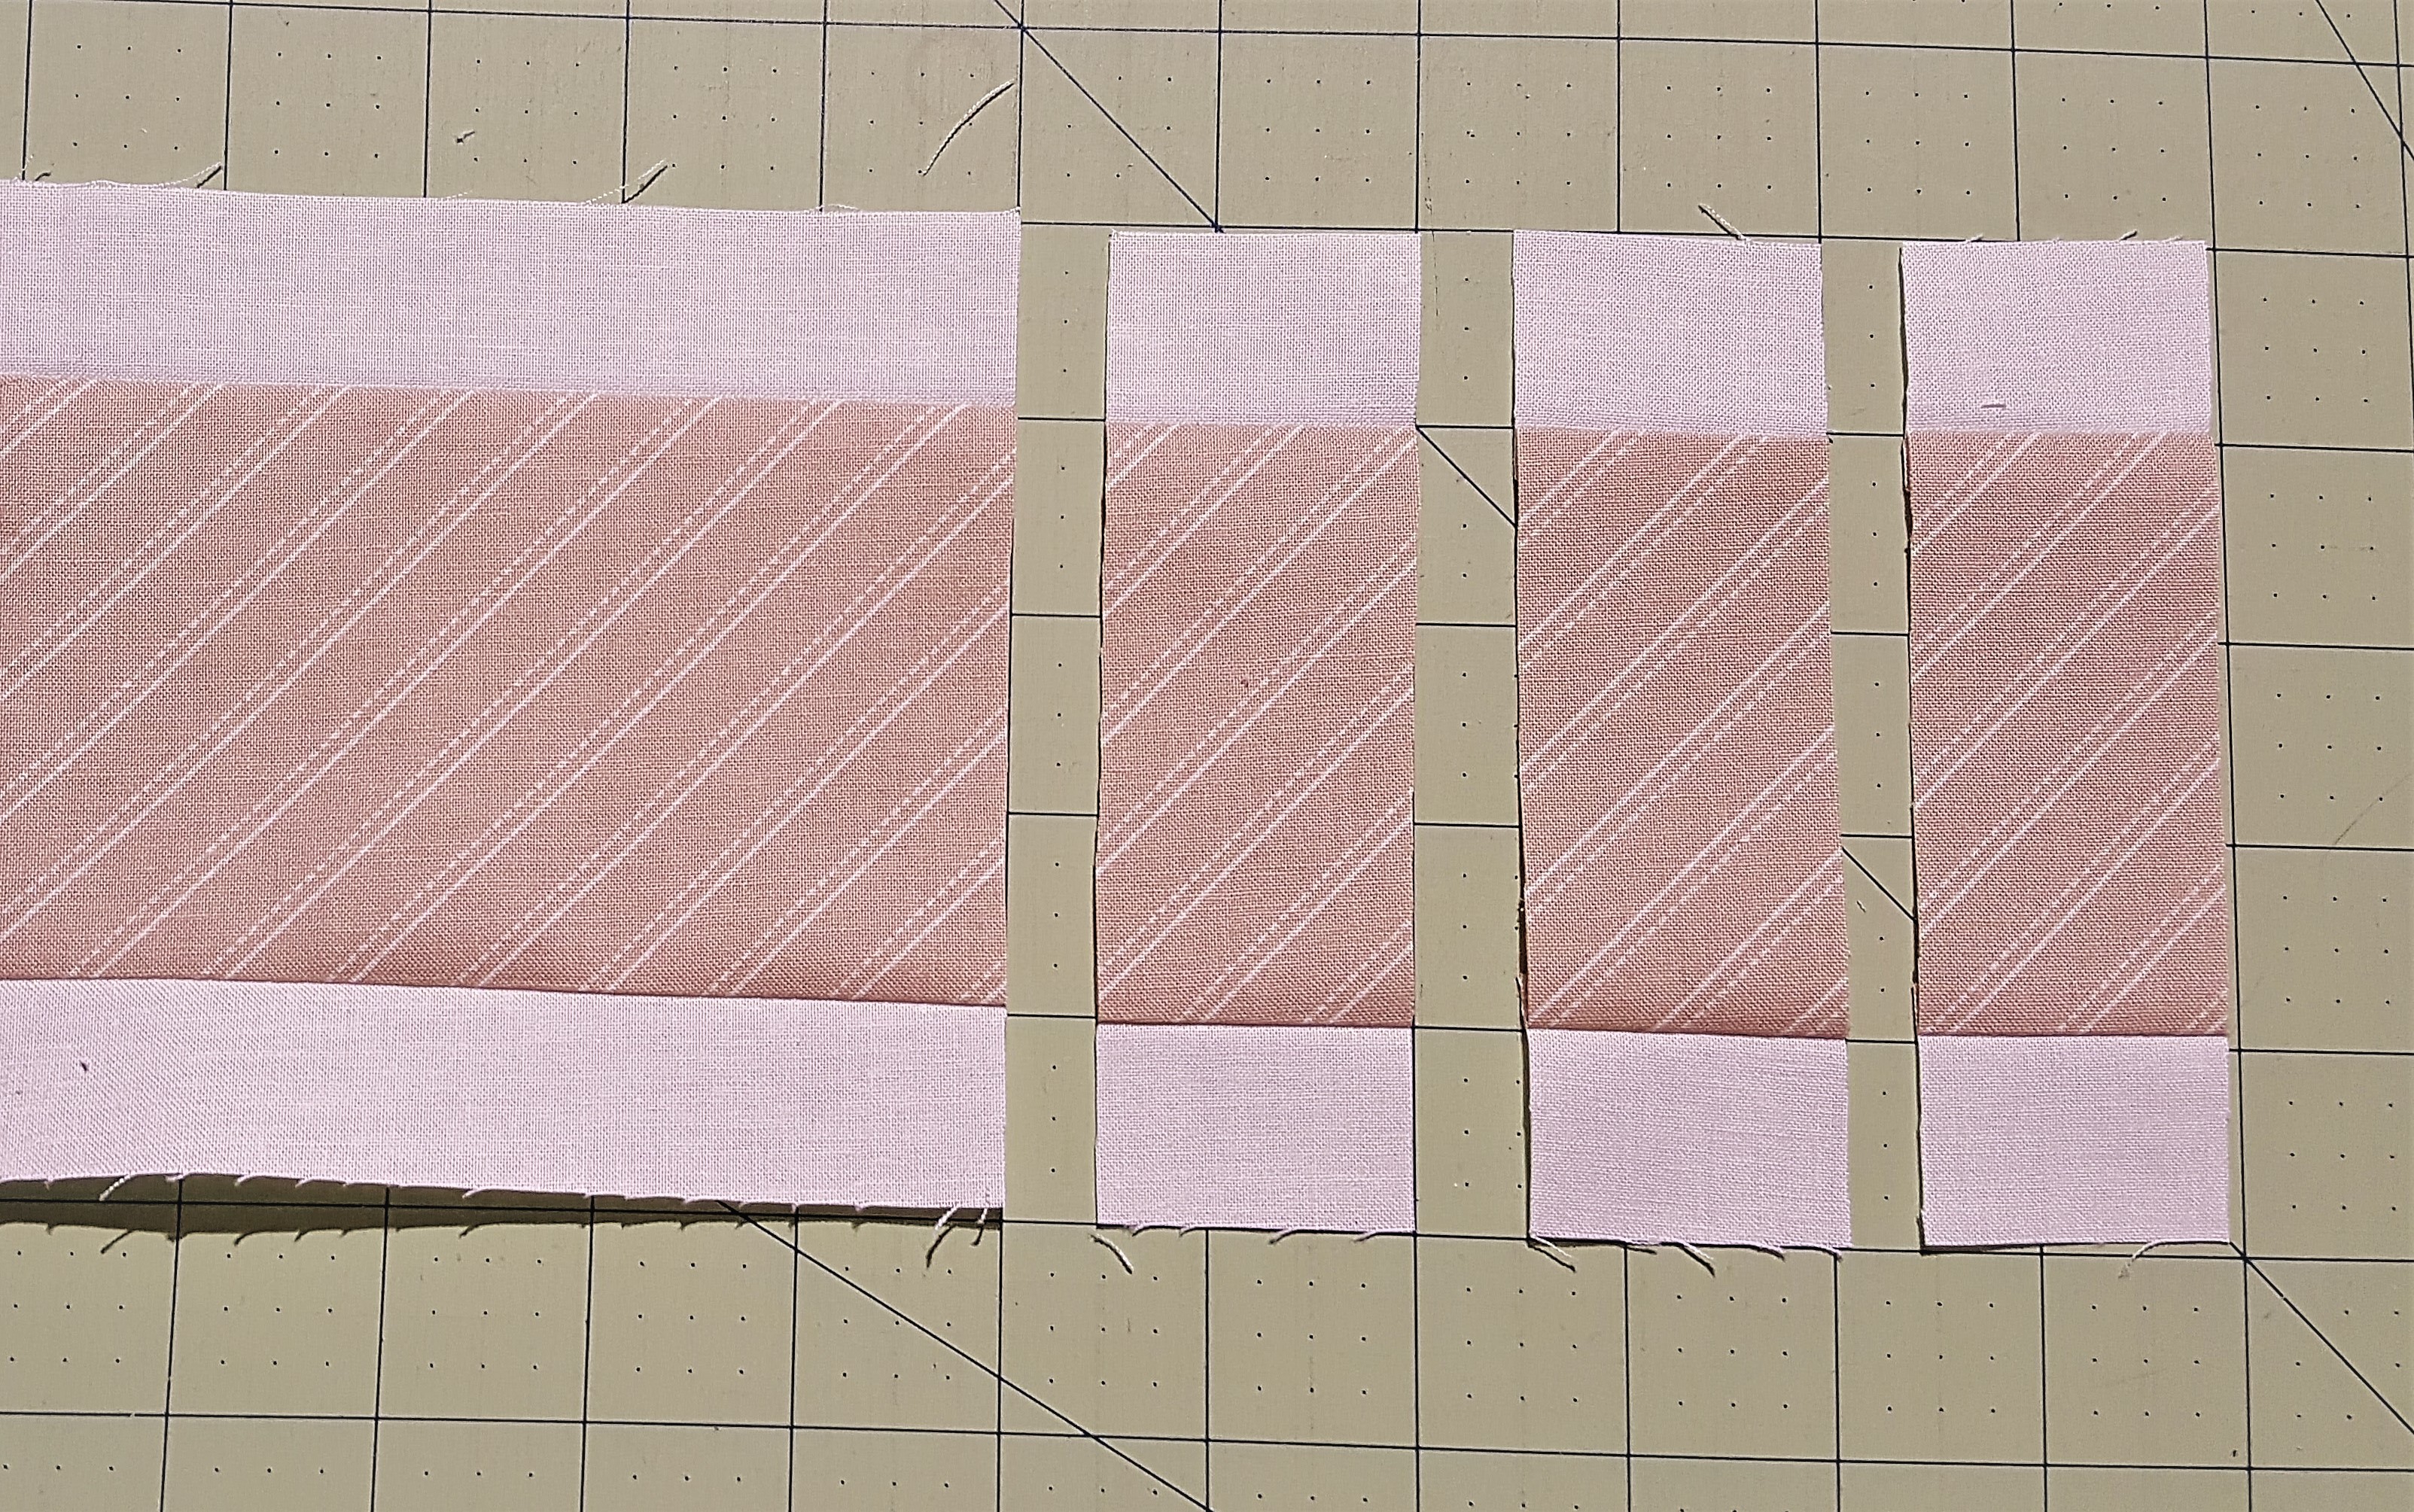
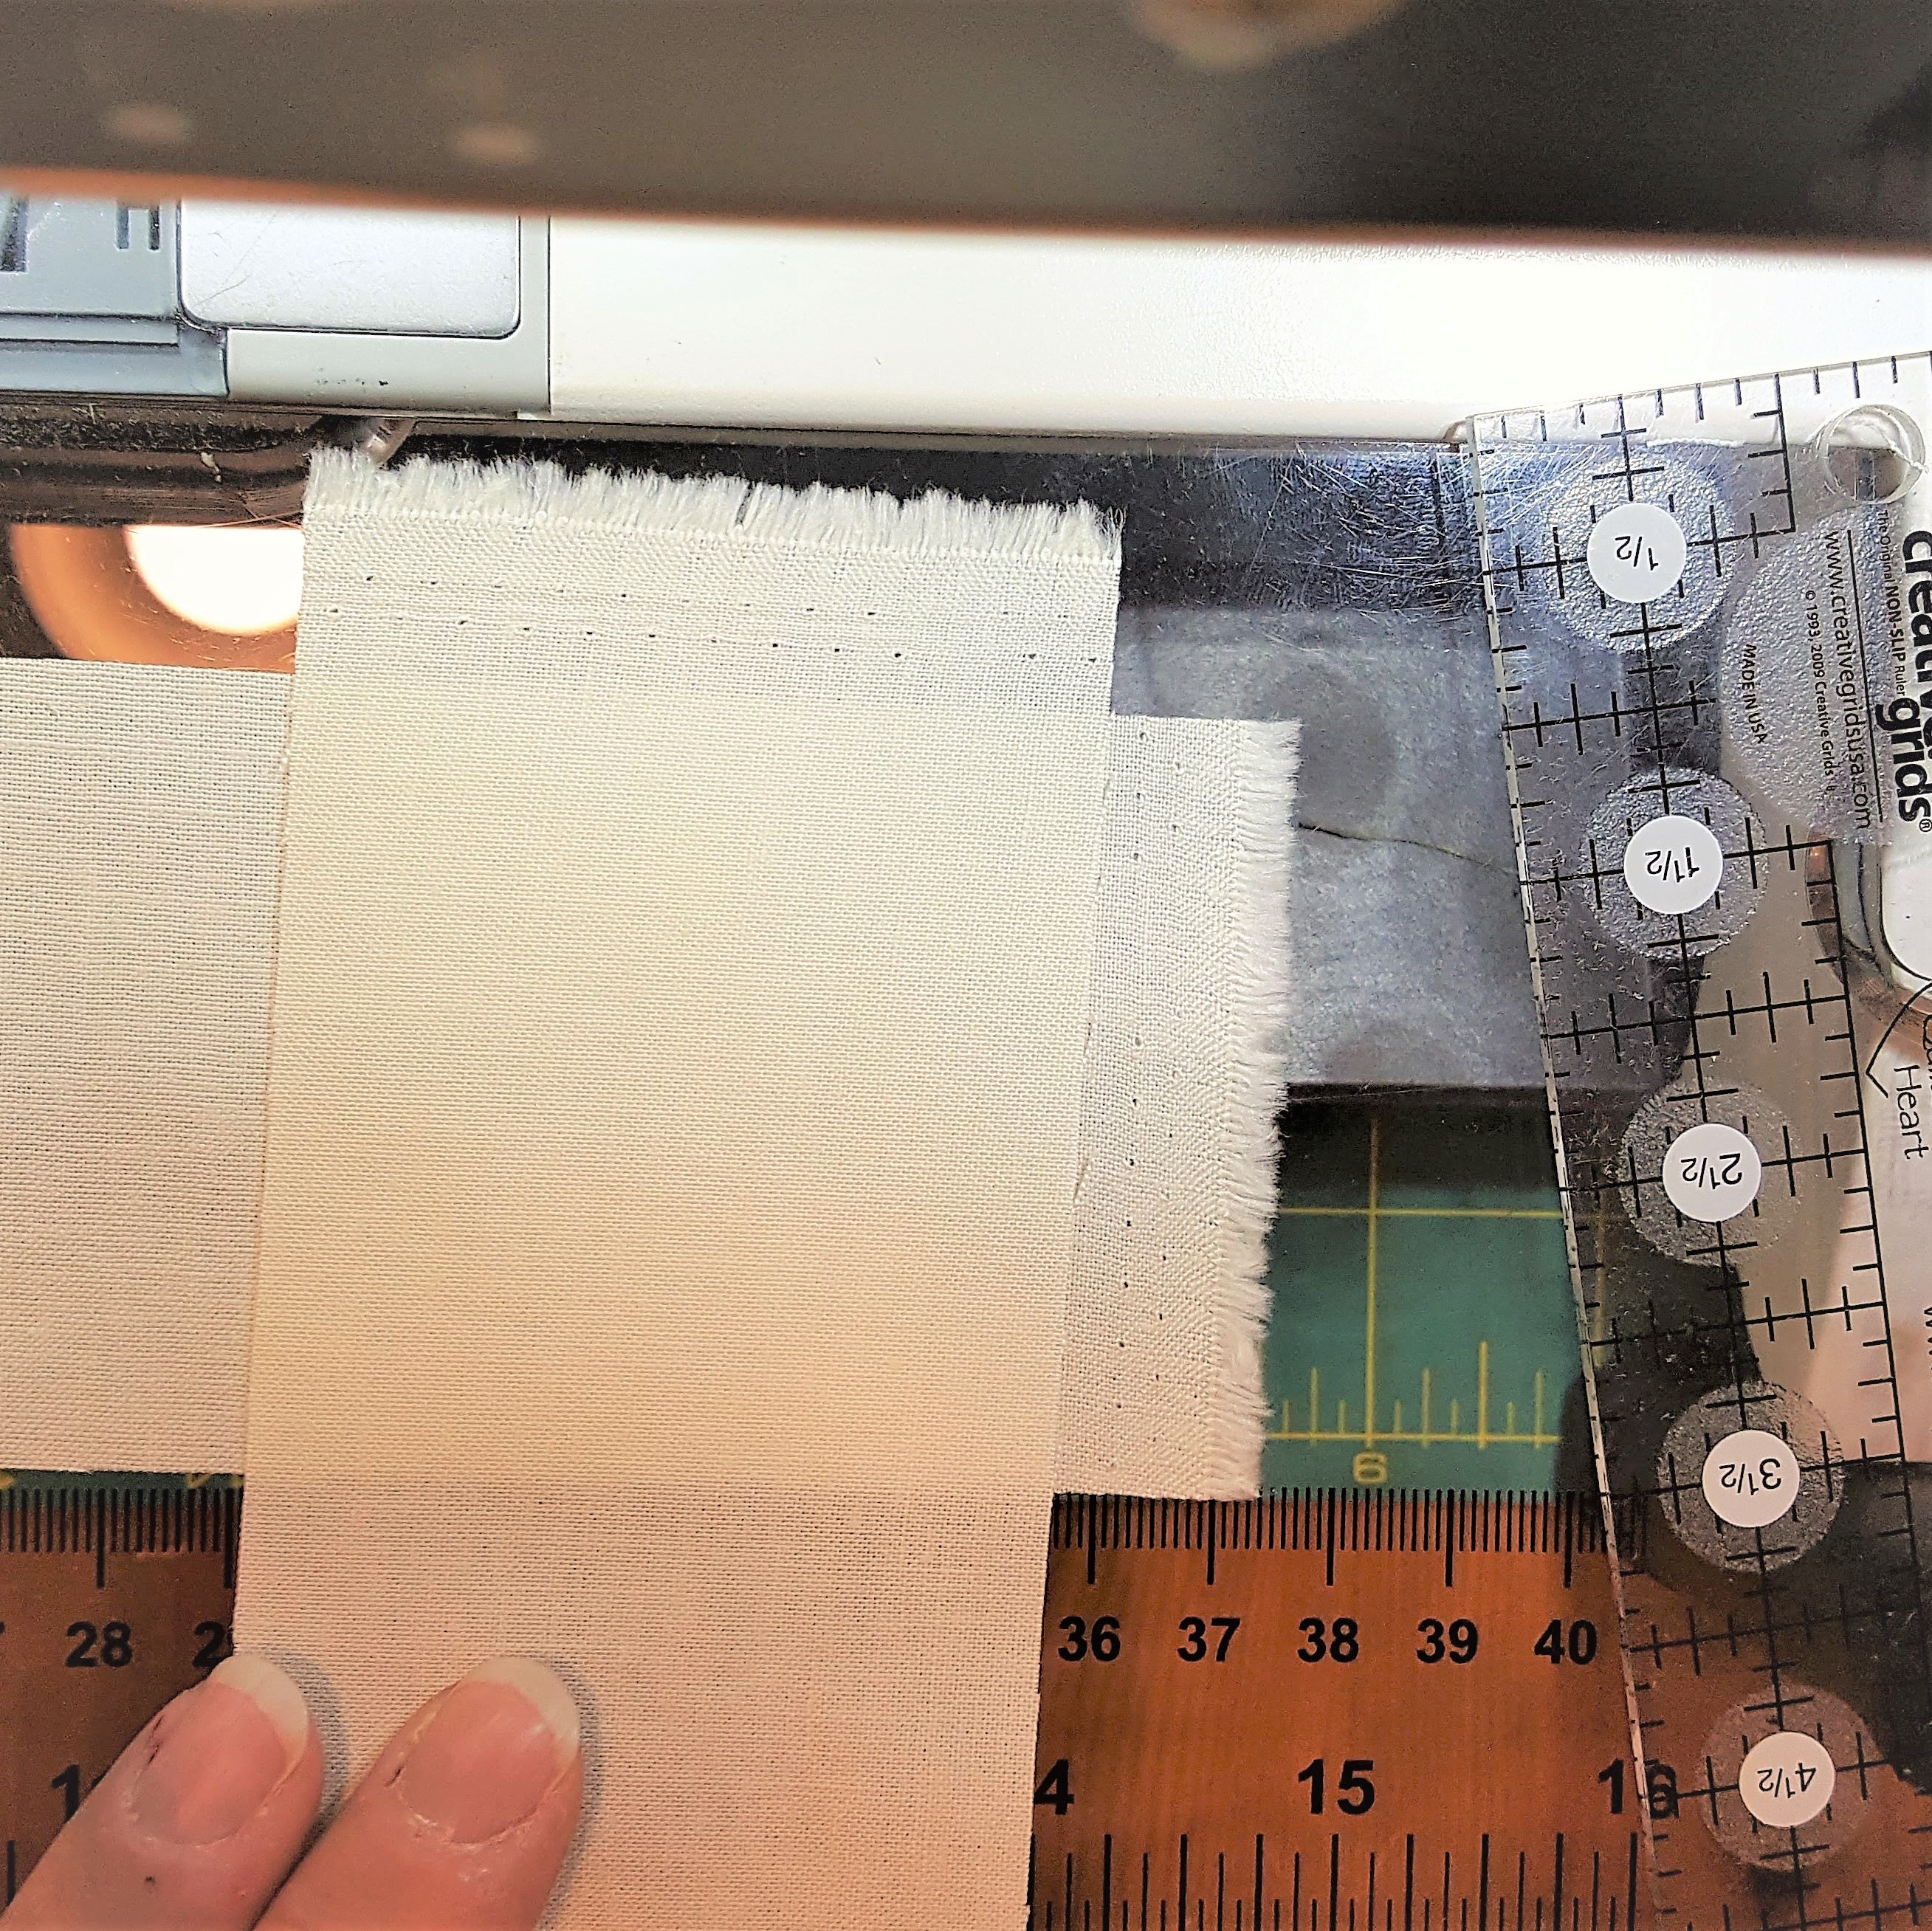
The ornament caps are cut from a strata unit, which eliminates the need for a lot of small pieces and short seams. Sew together two 2 ½” X WOF strips of background fabric and one 2 ½” X WOF strip of Ornament Cap fabric, alternate: background, cap, background. Press the fabric towards the center. Make two strata.
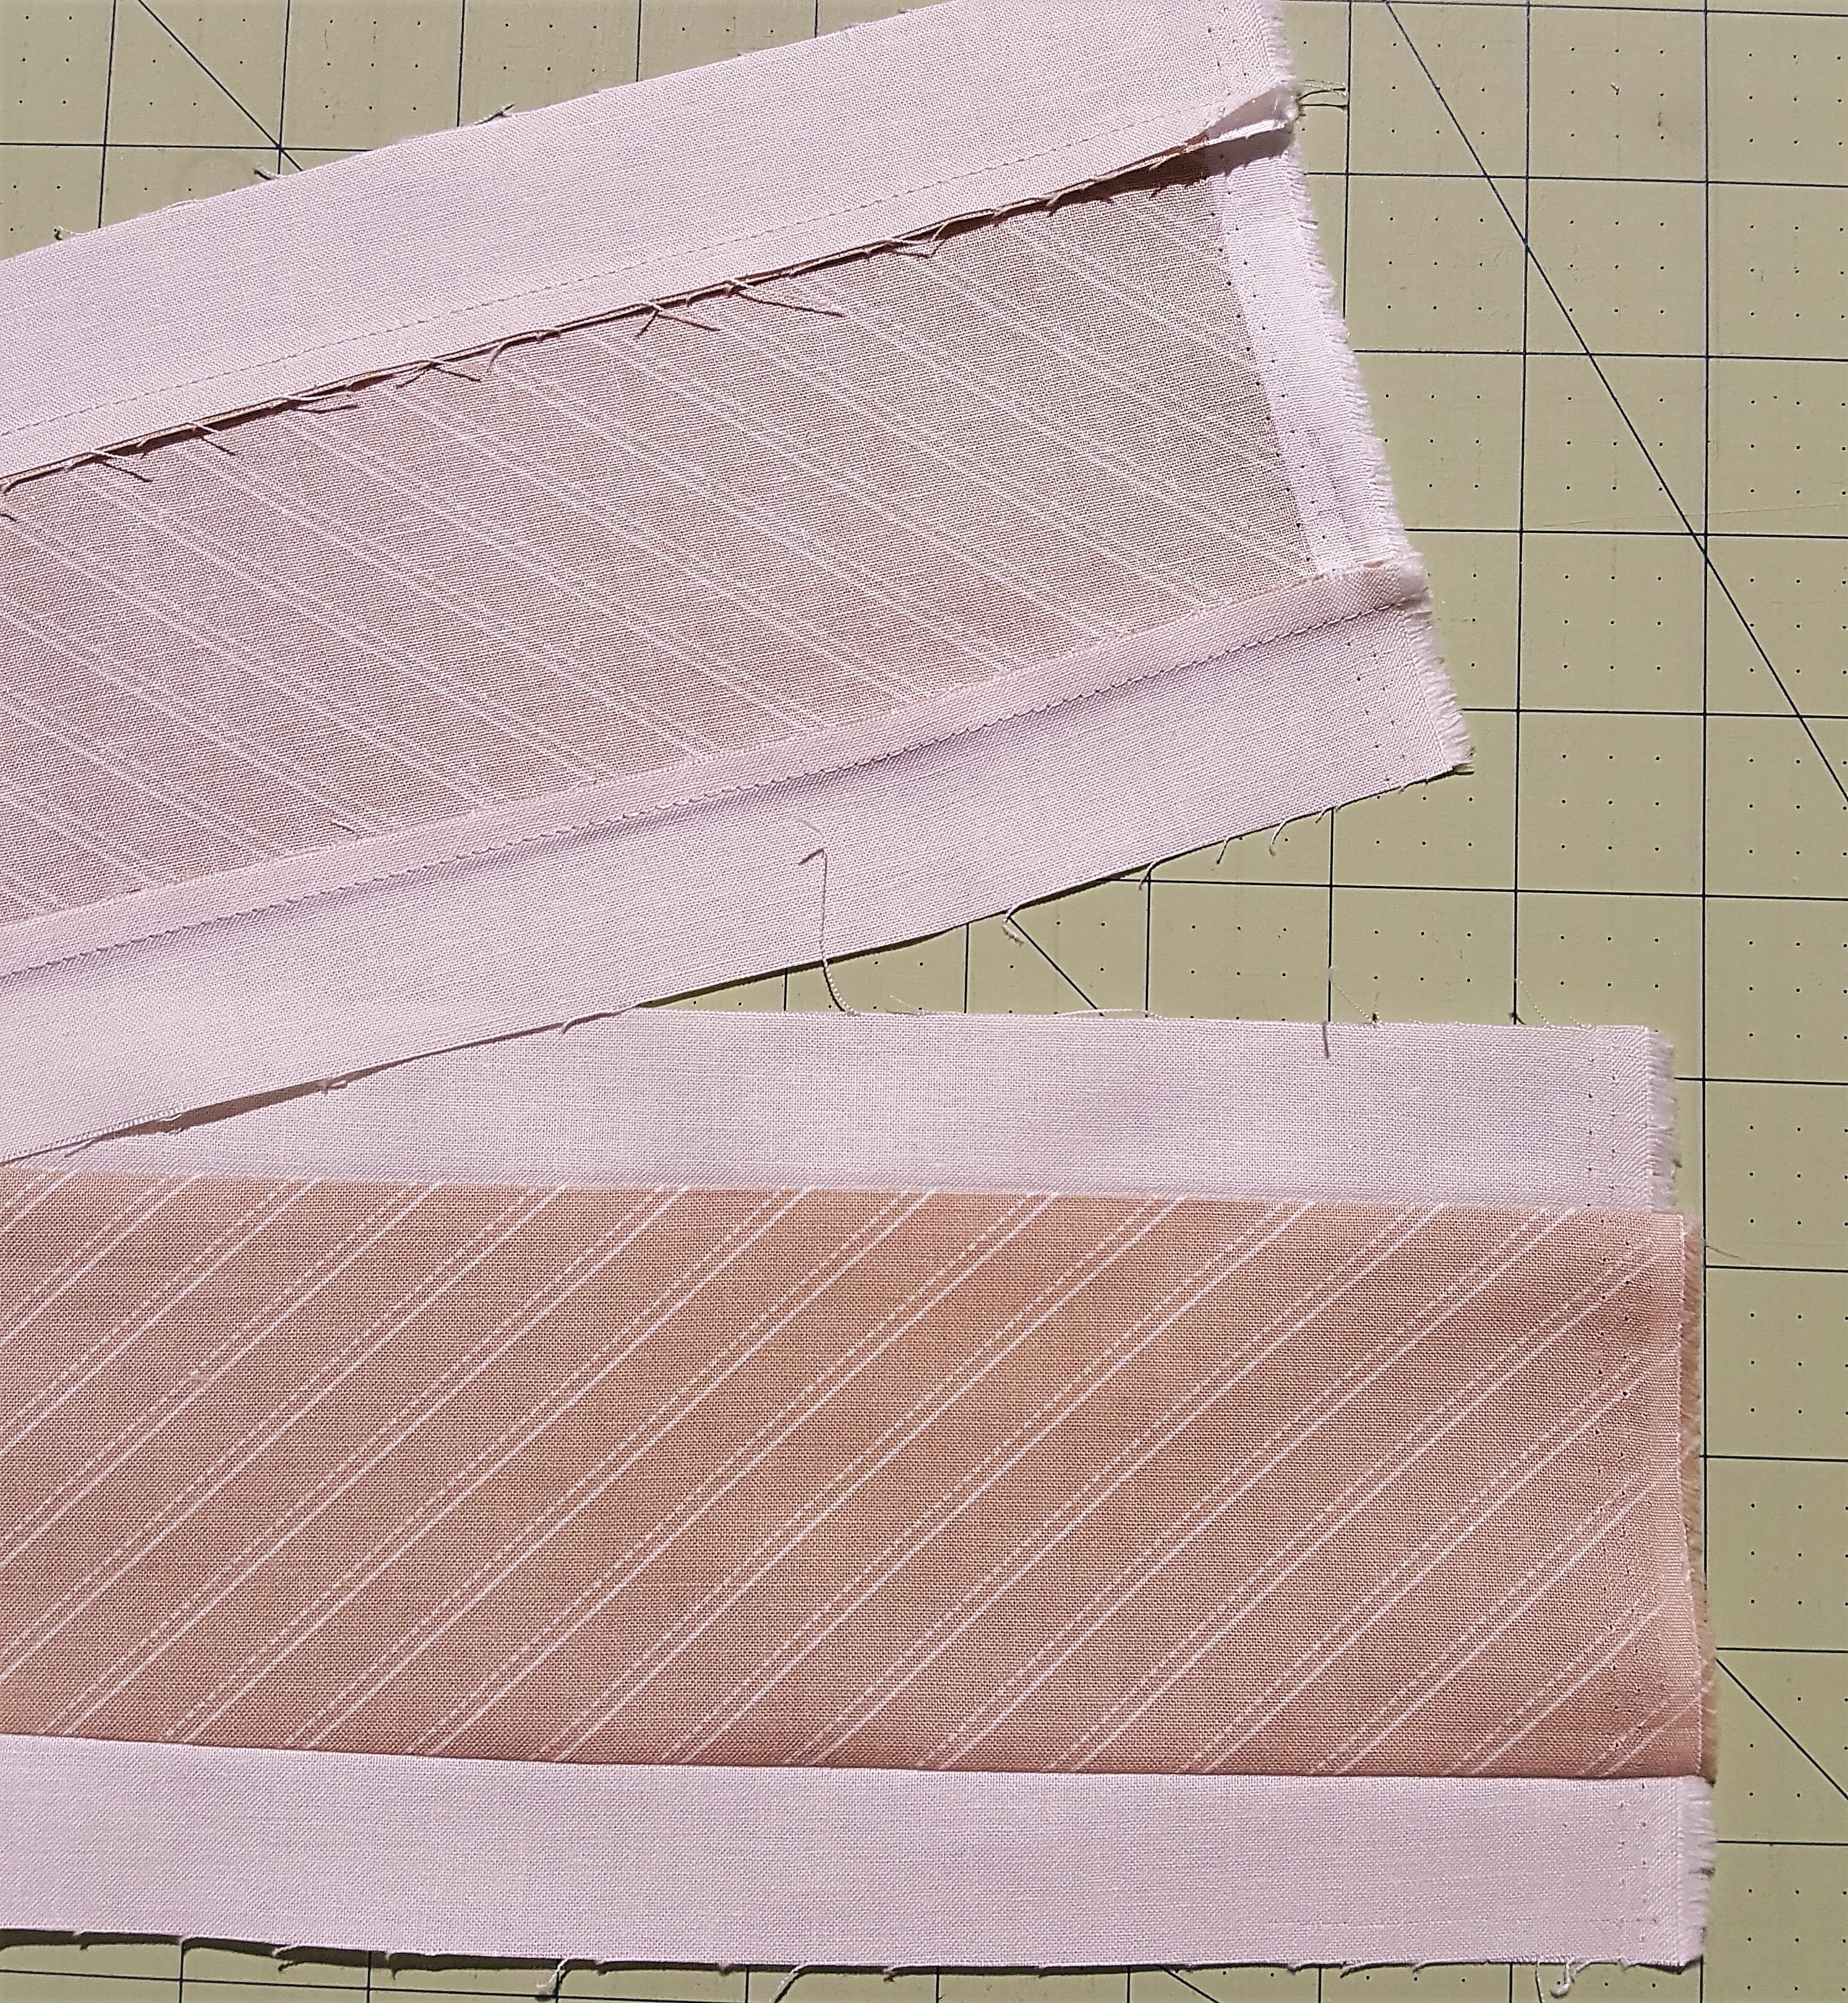
Sub-cut the strata units into “Caps” that are 1 ½” X 5”, cut (42) Cap units. Set these units aside until Step #3.
Step #2 - Long Sashing:
Sew the remainig (6) 2 ½” X WOF strips together, end to end, with mitered seams.
Trim and press the miters and sub-cut into (8) sashing strips, each measuring 53 ½” X 2 ½”. Set these aside until Step #7.
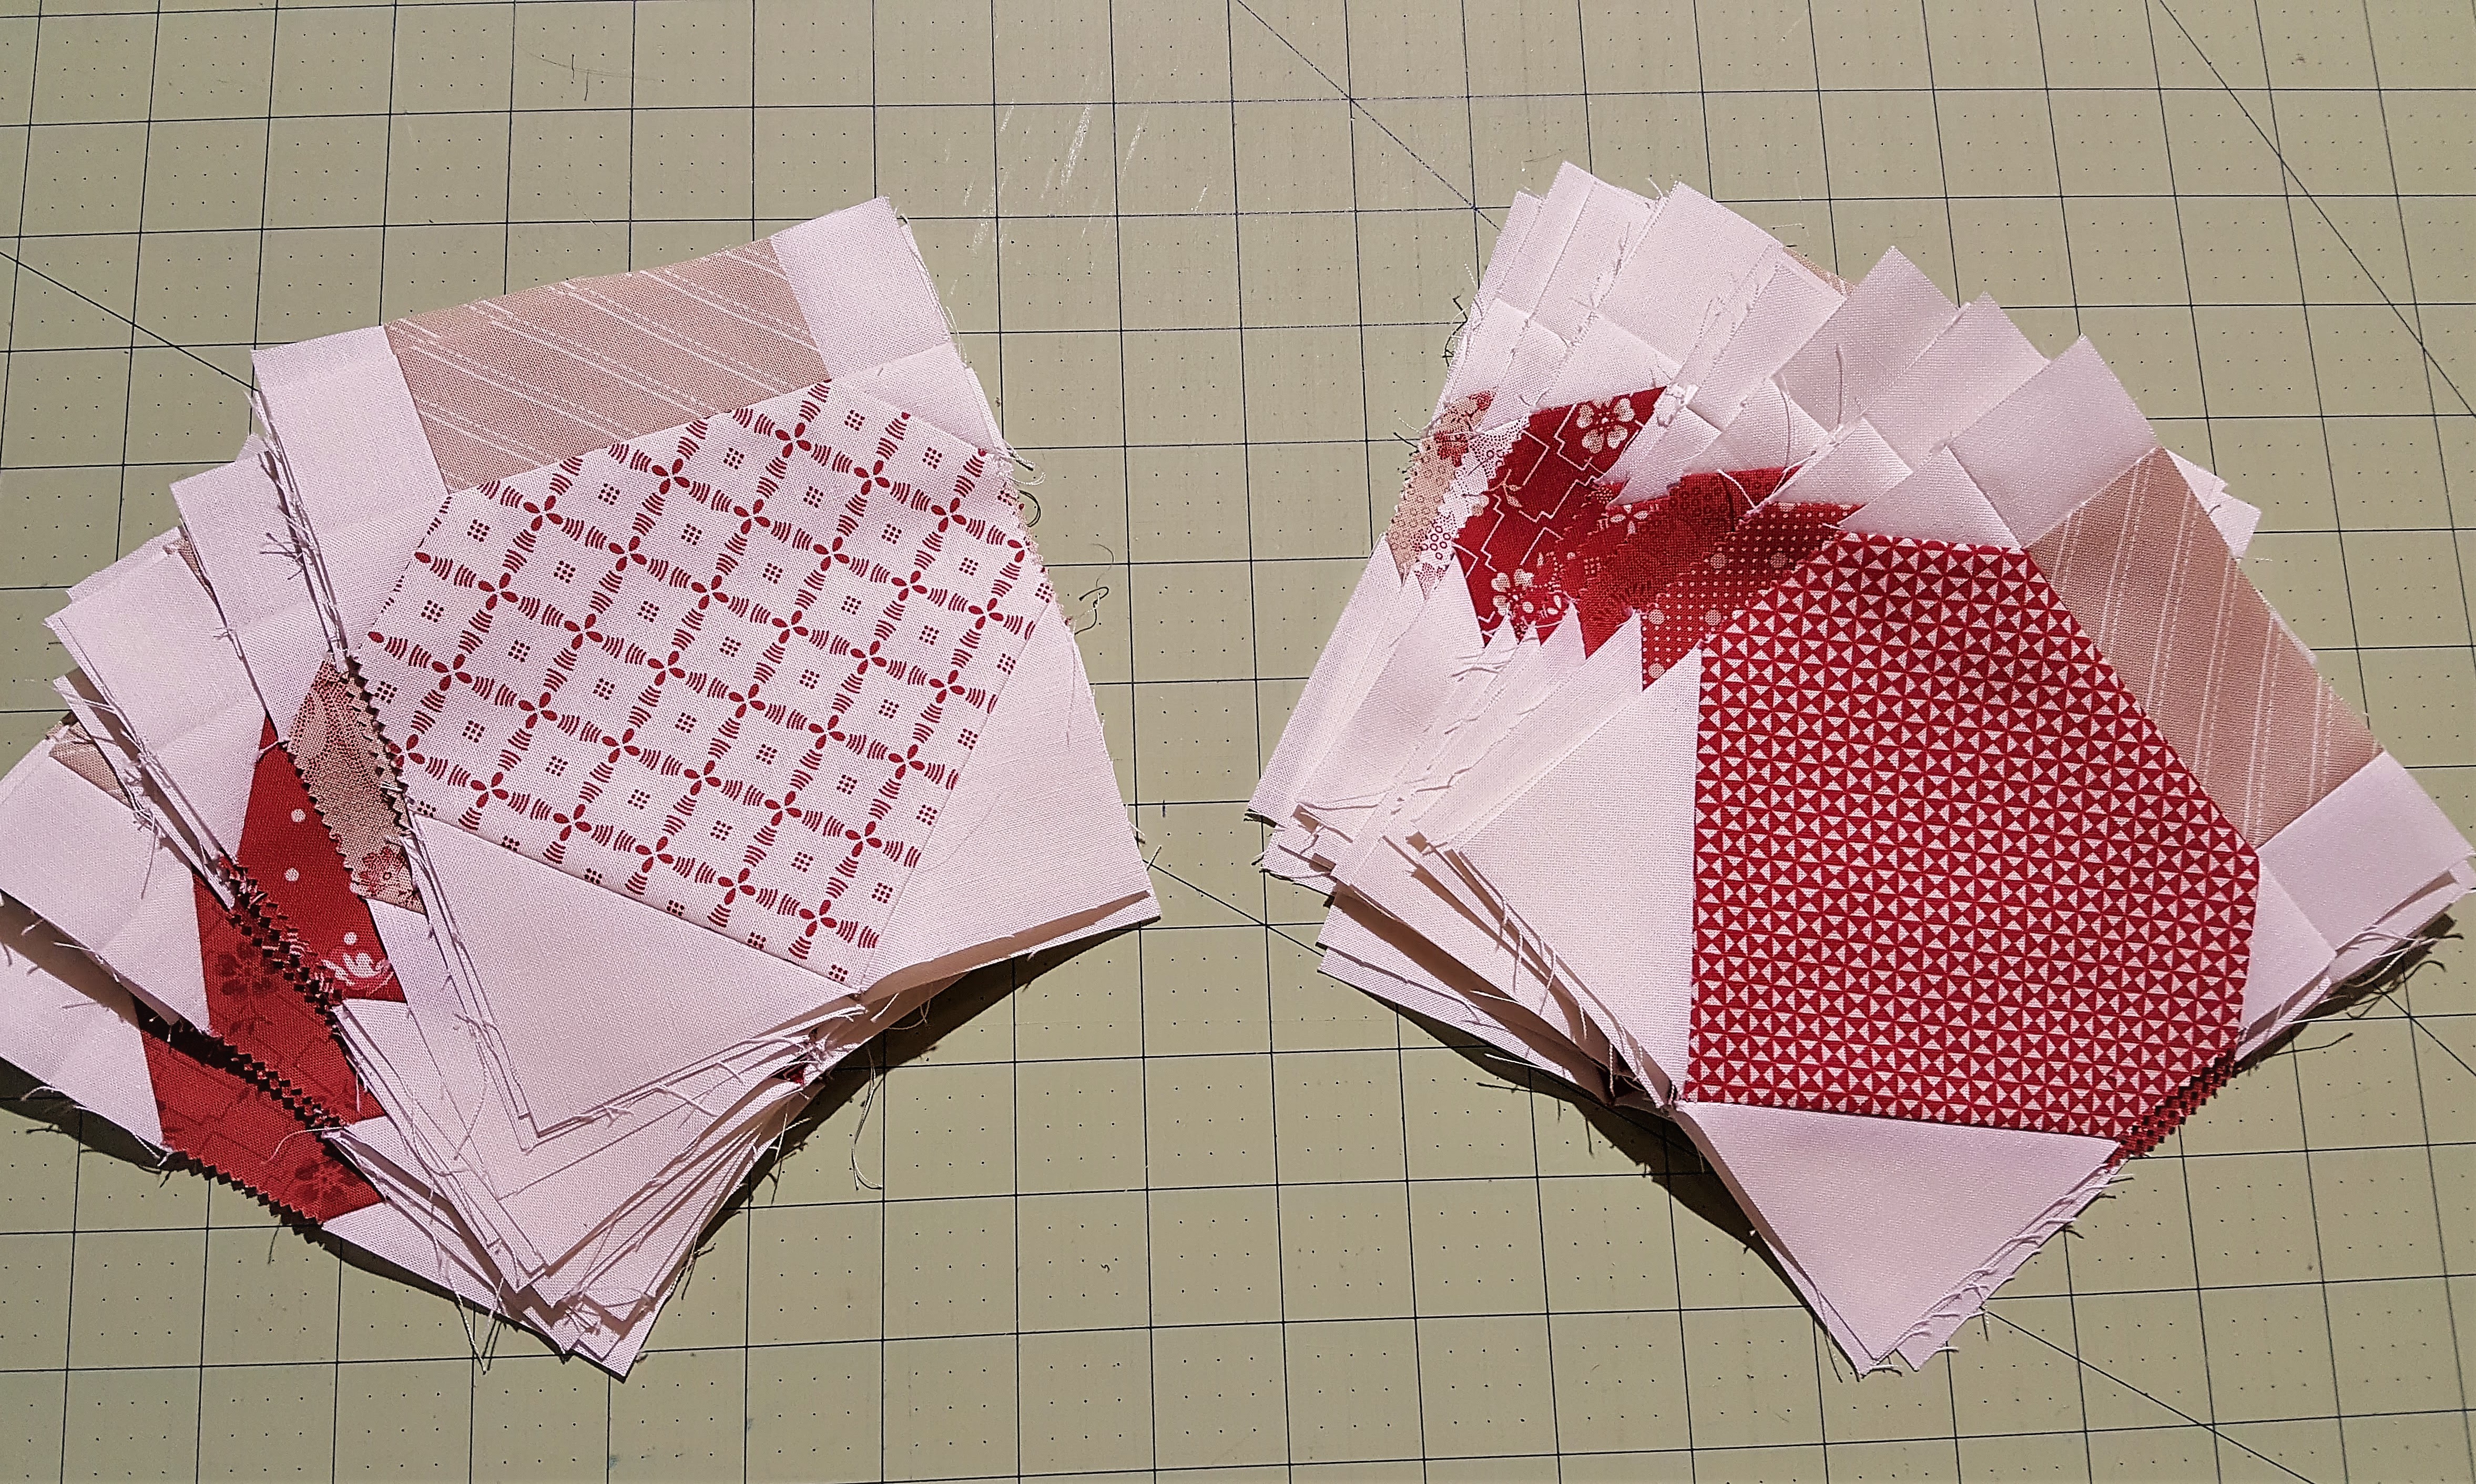
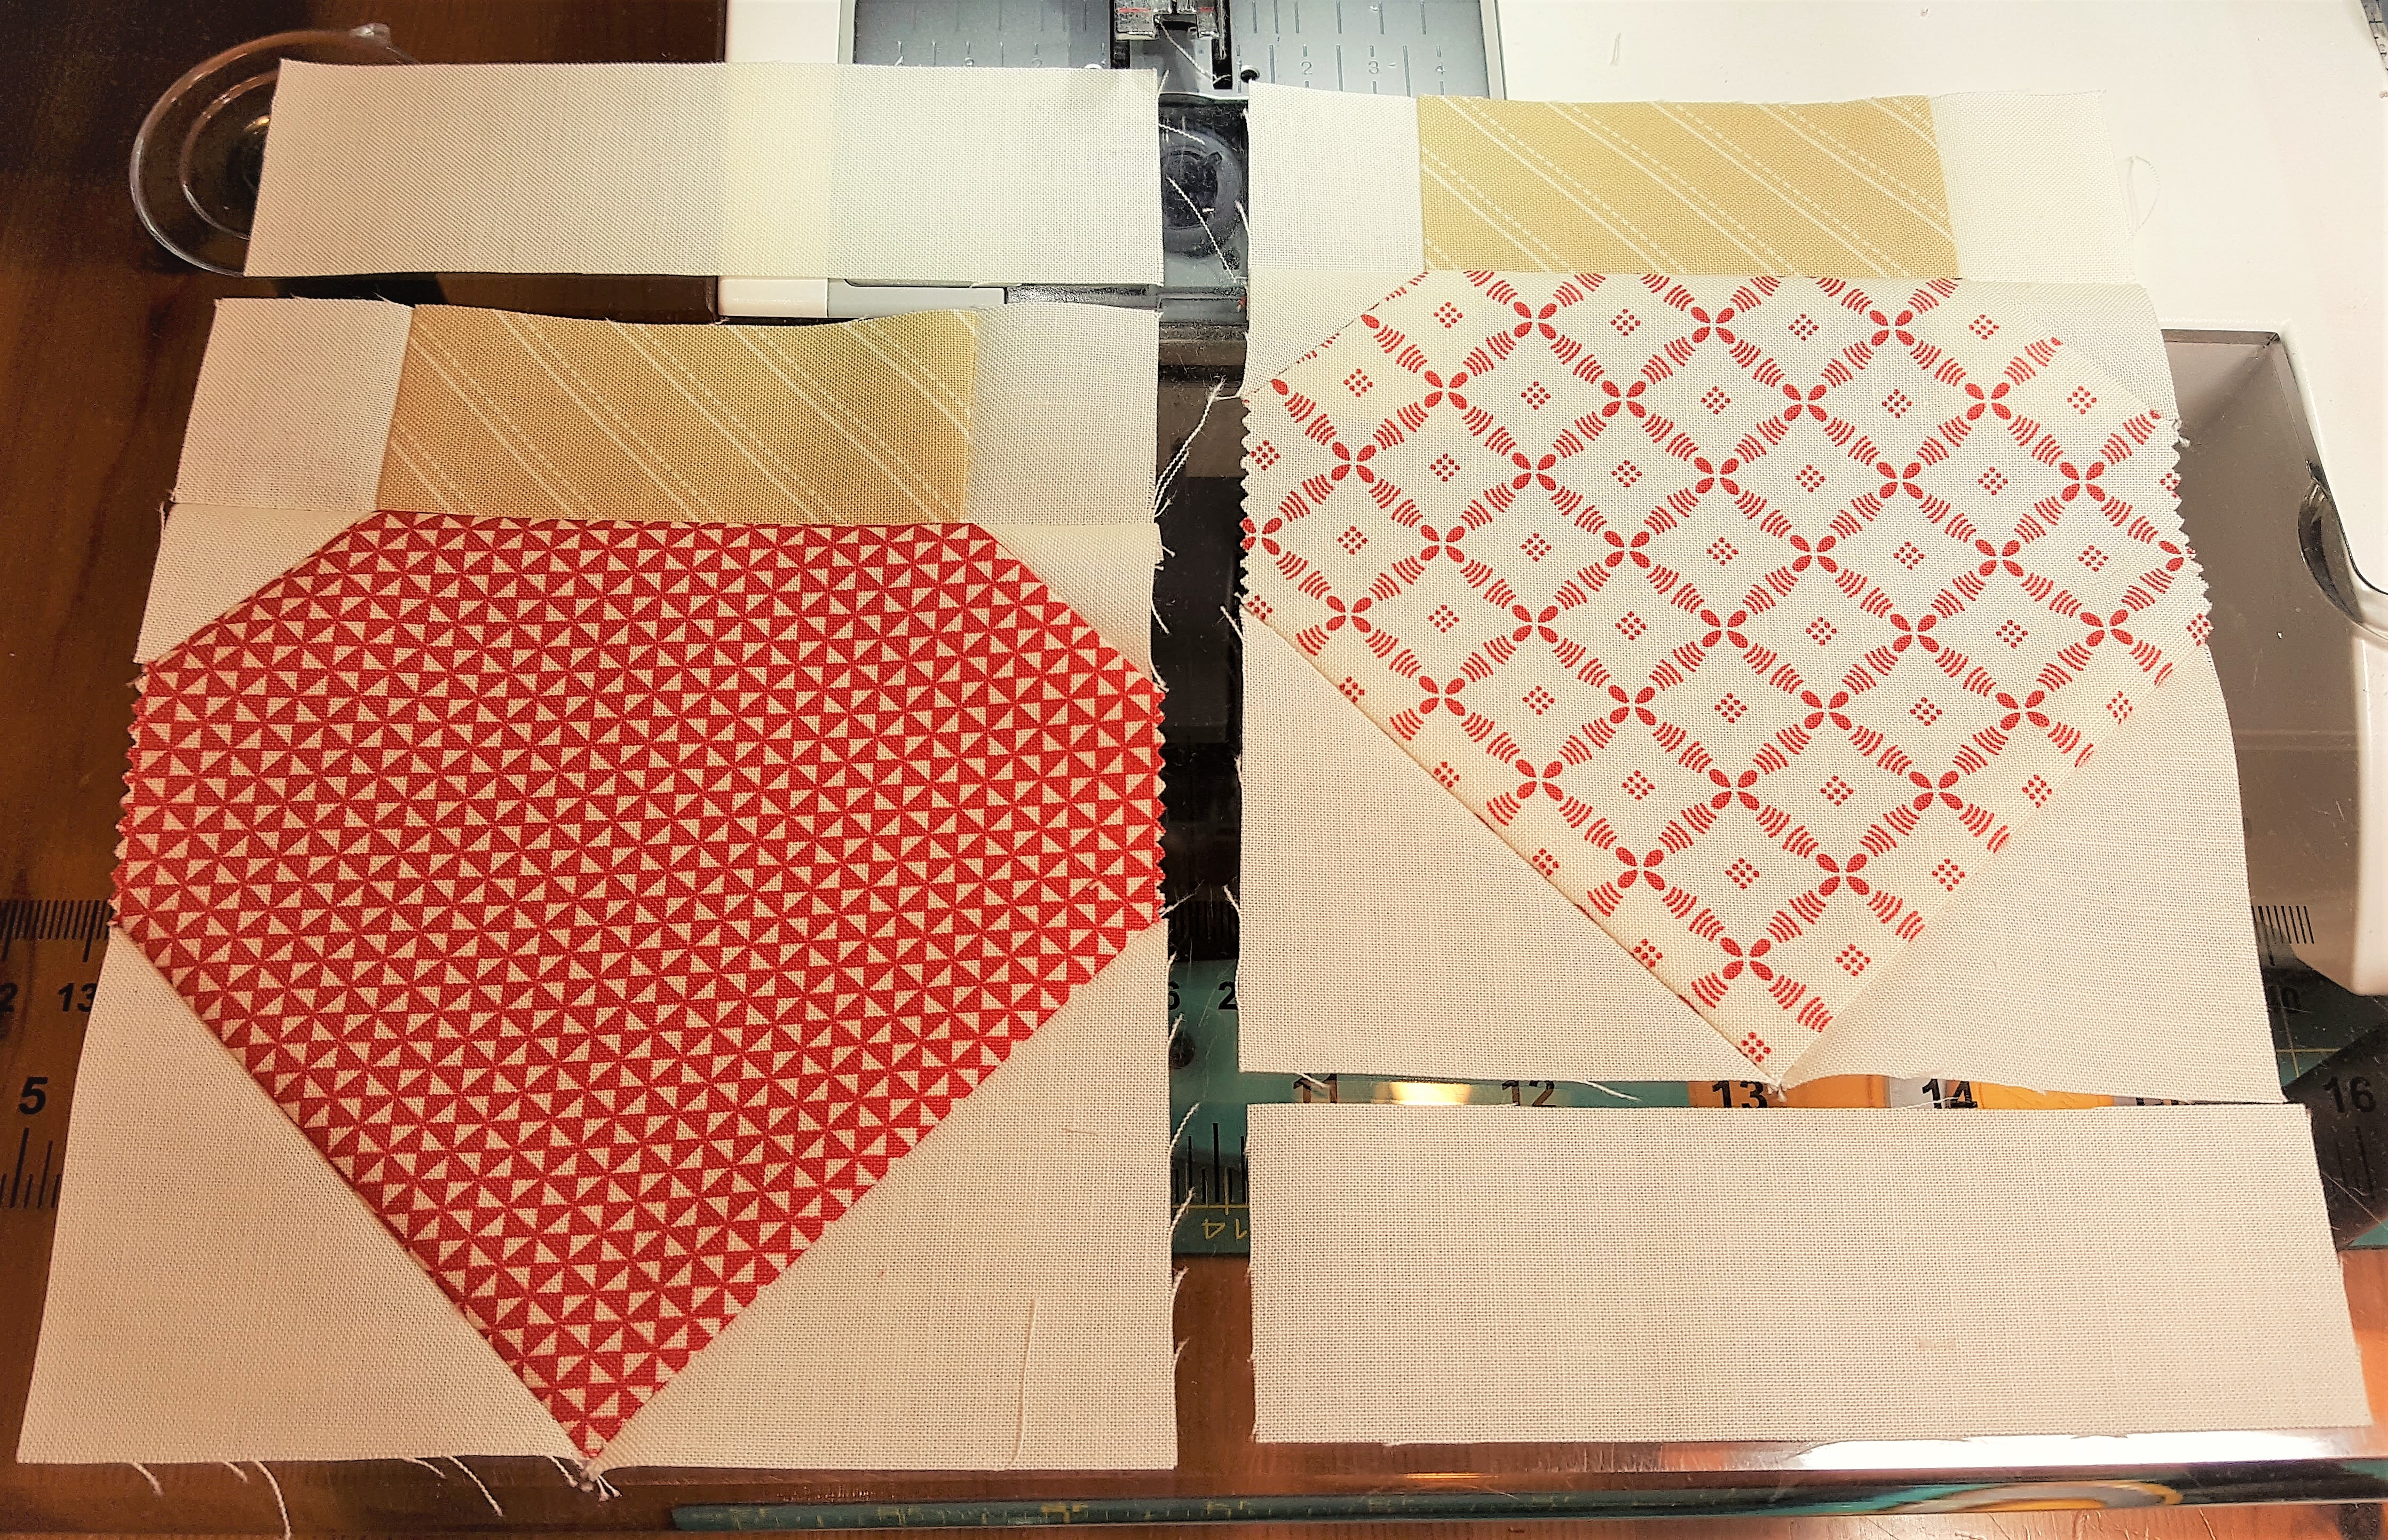
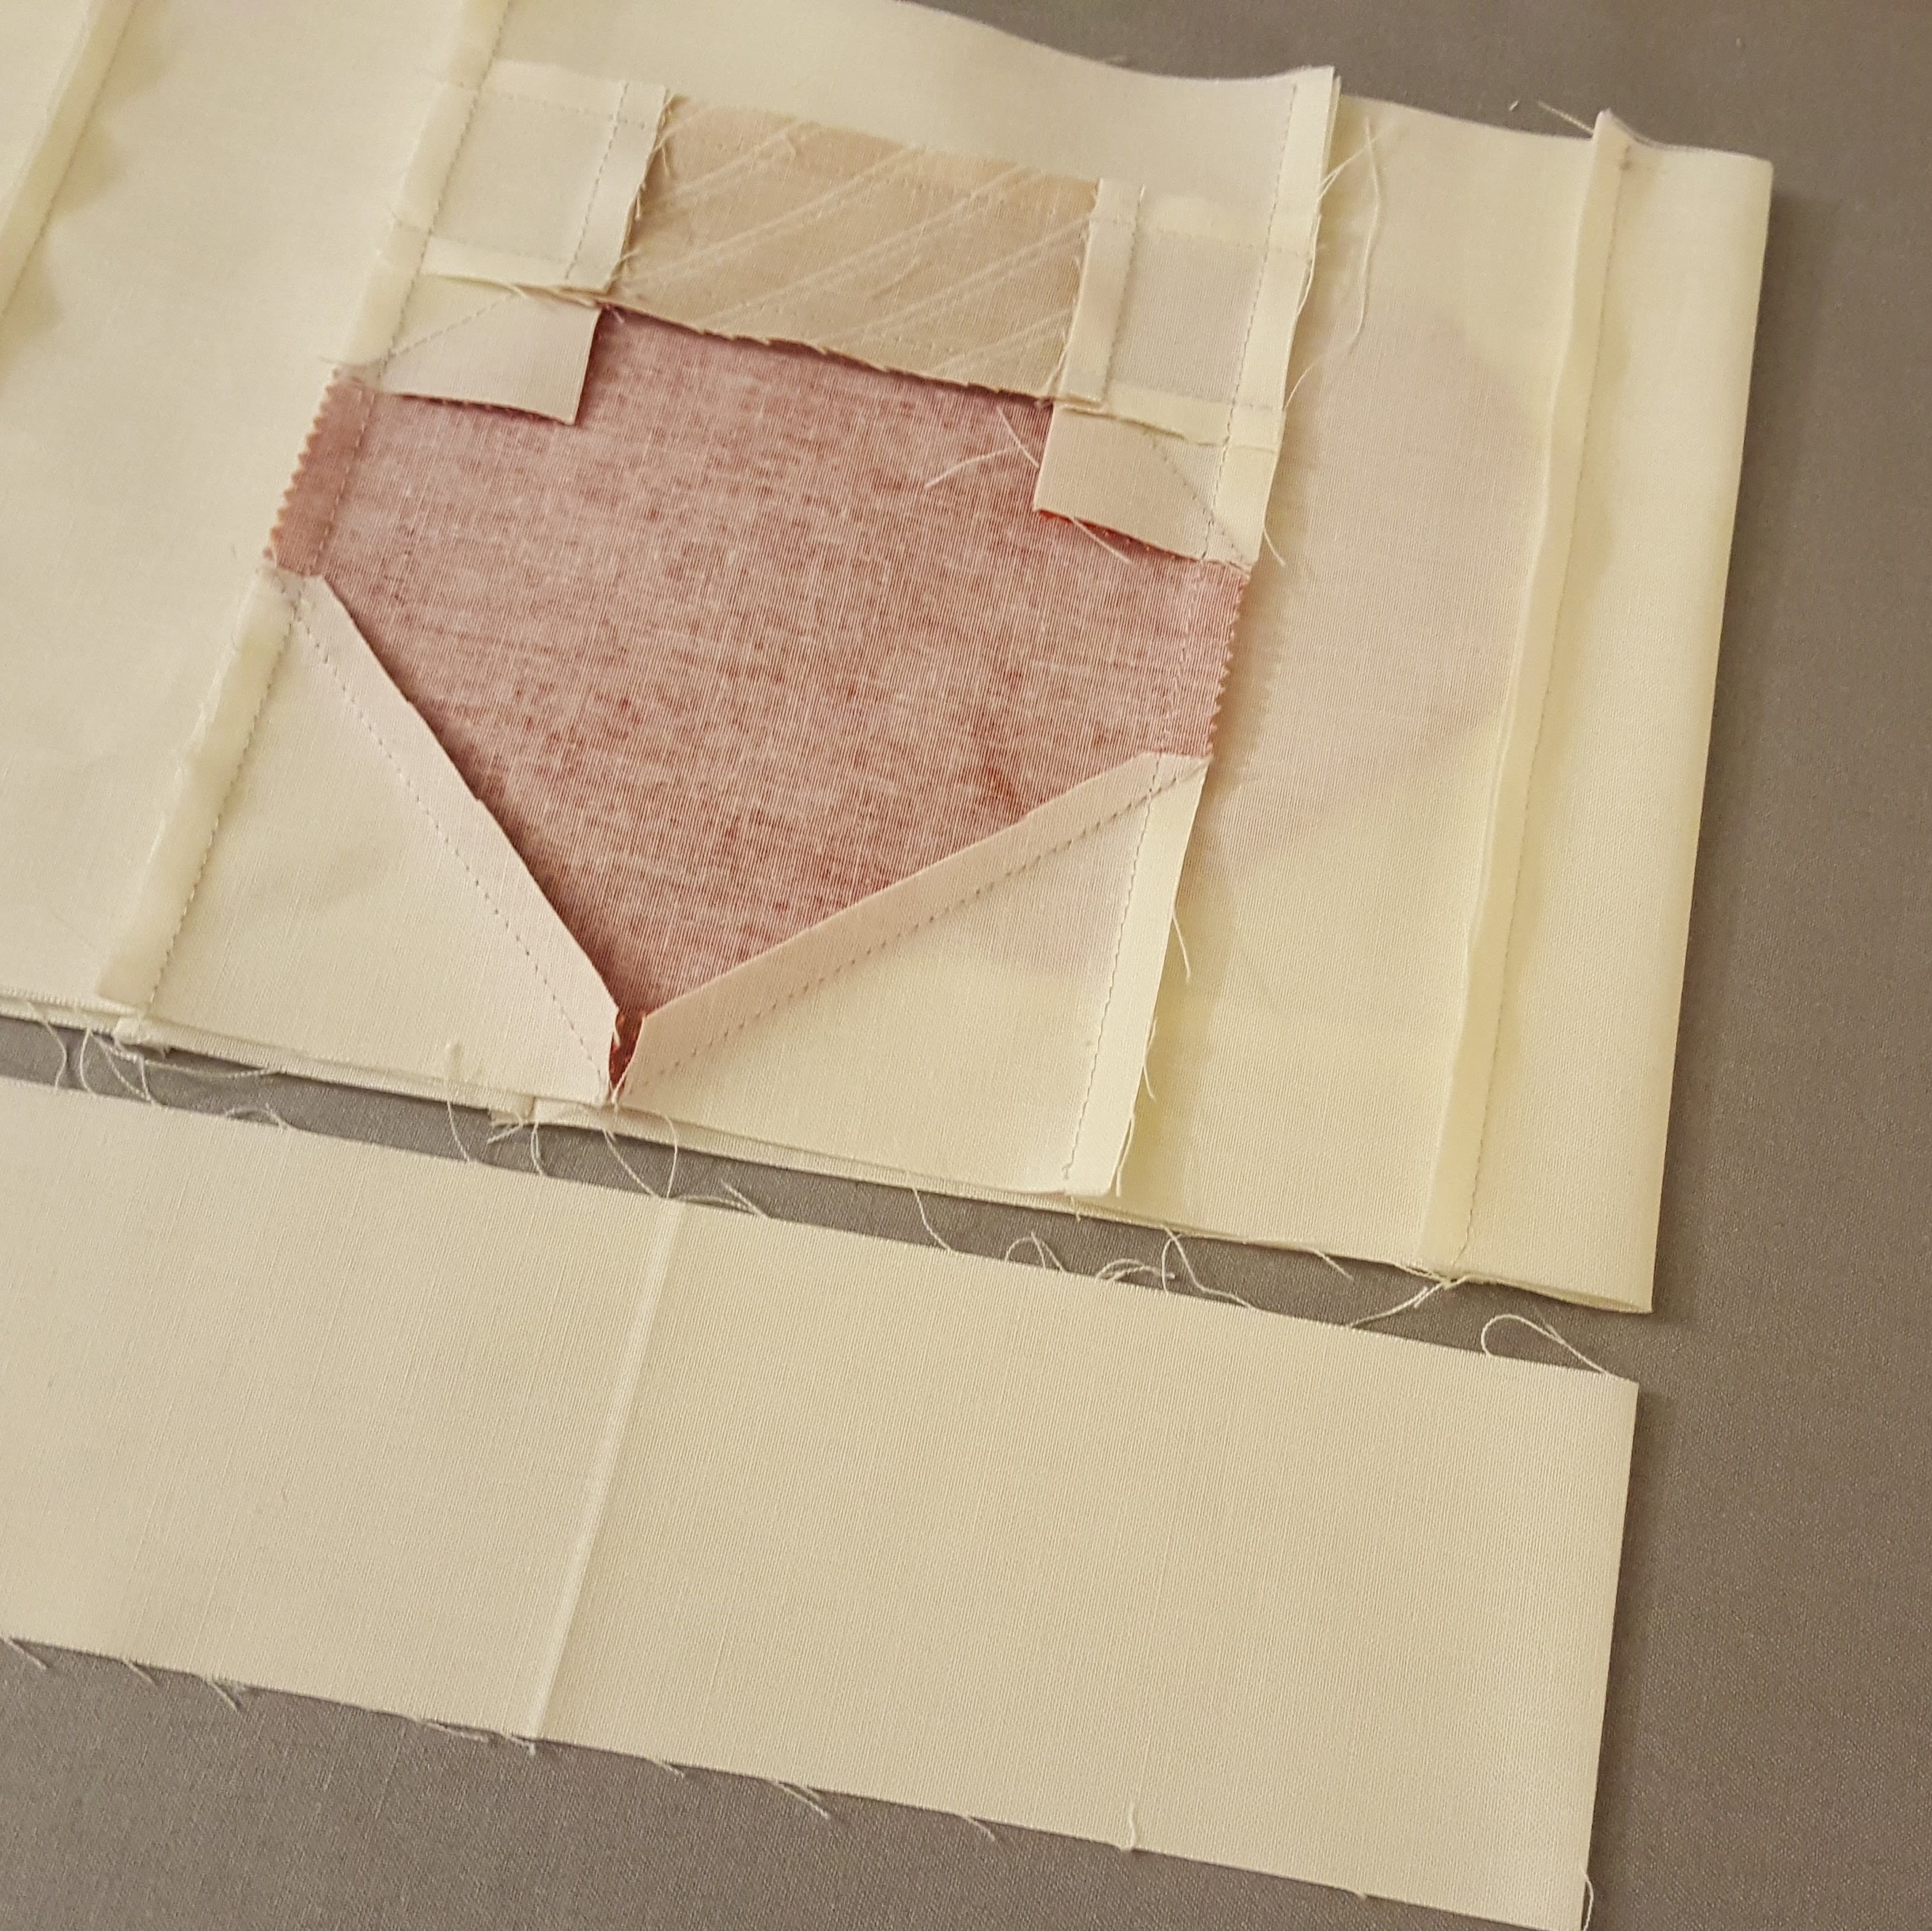
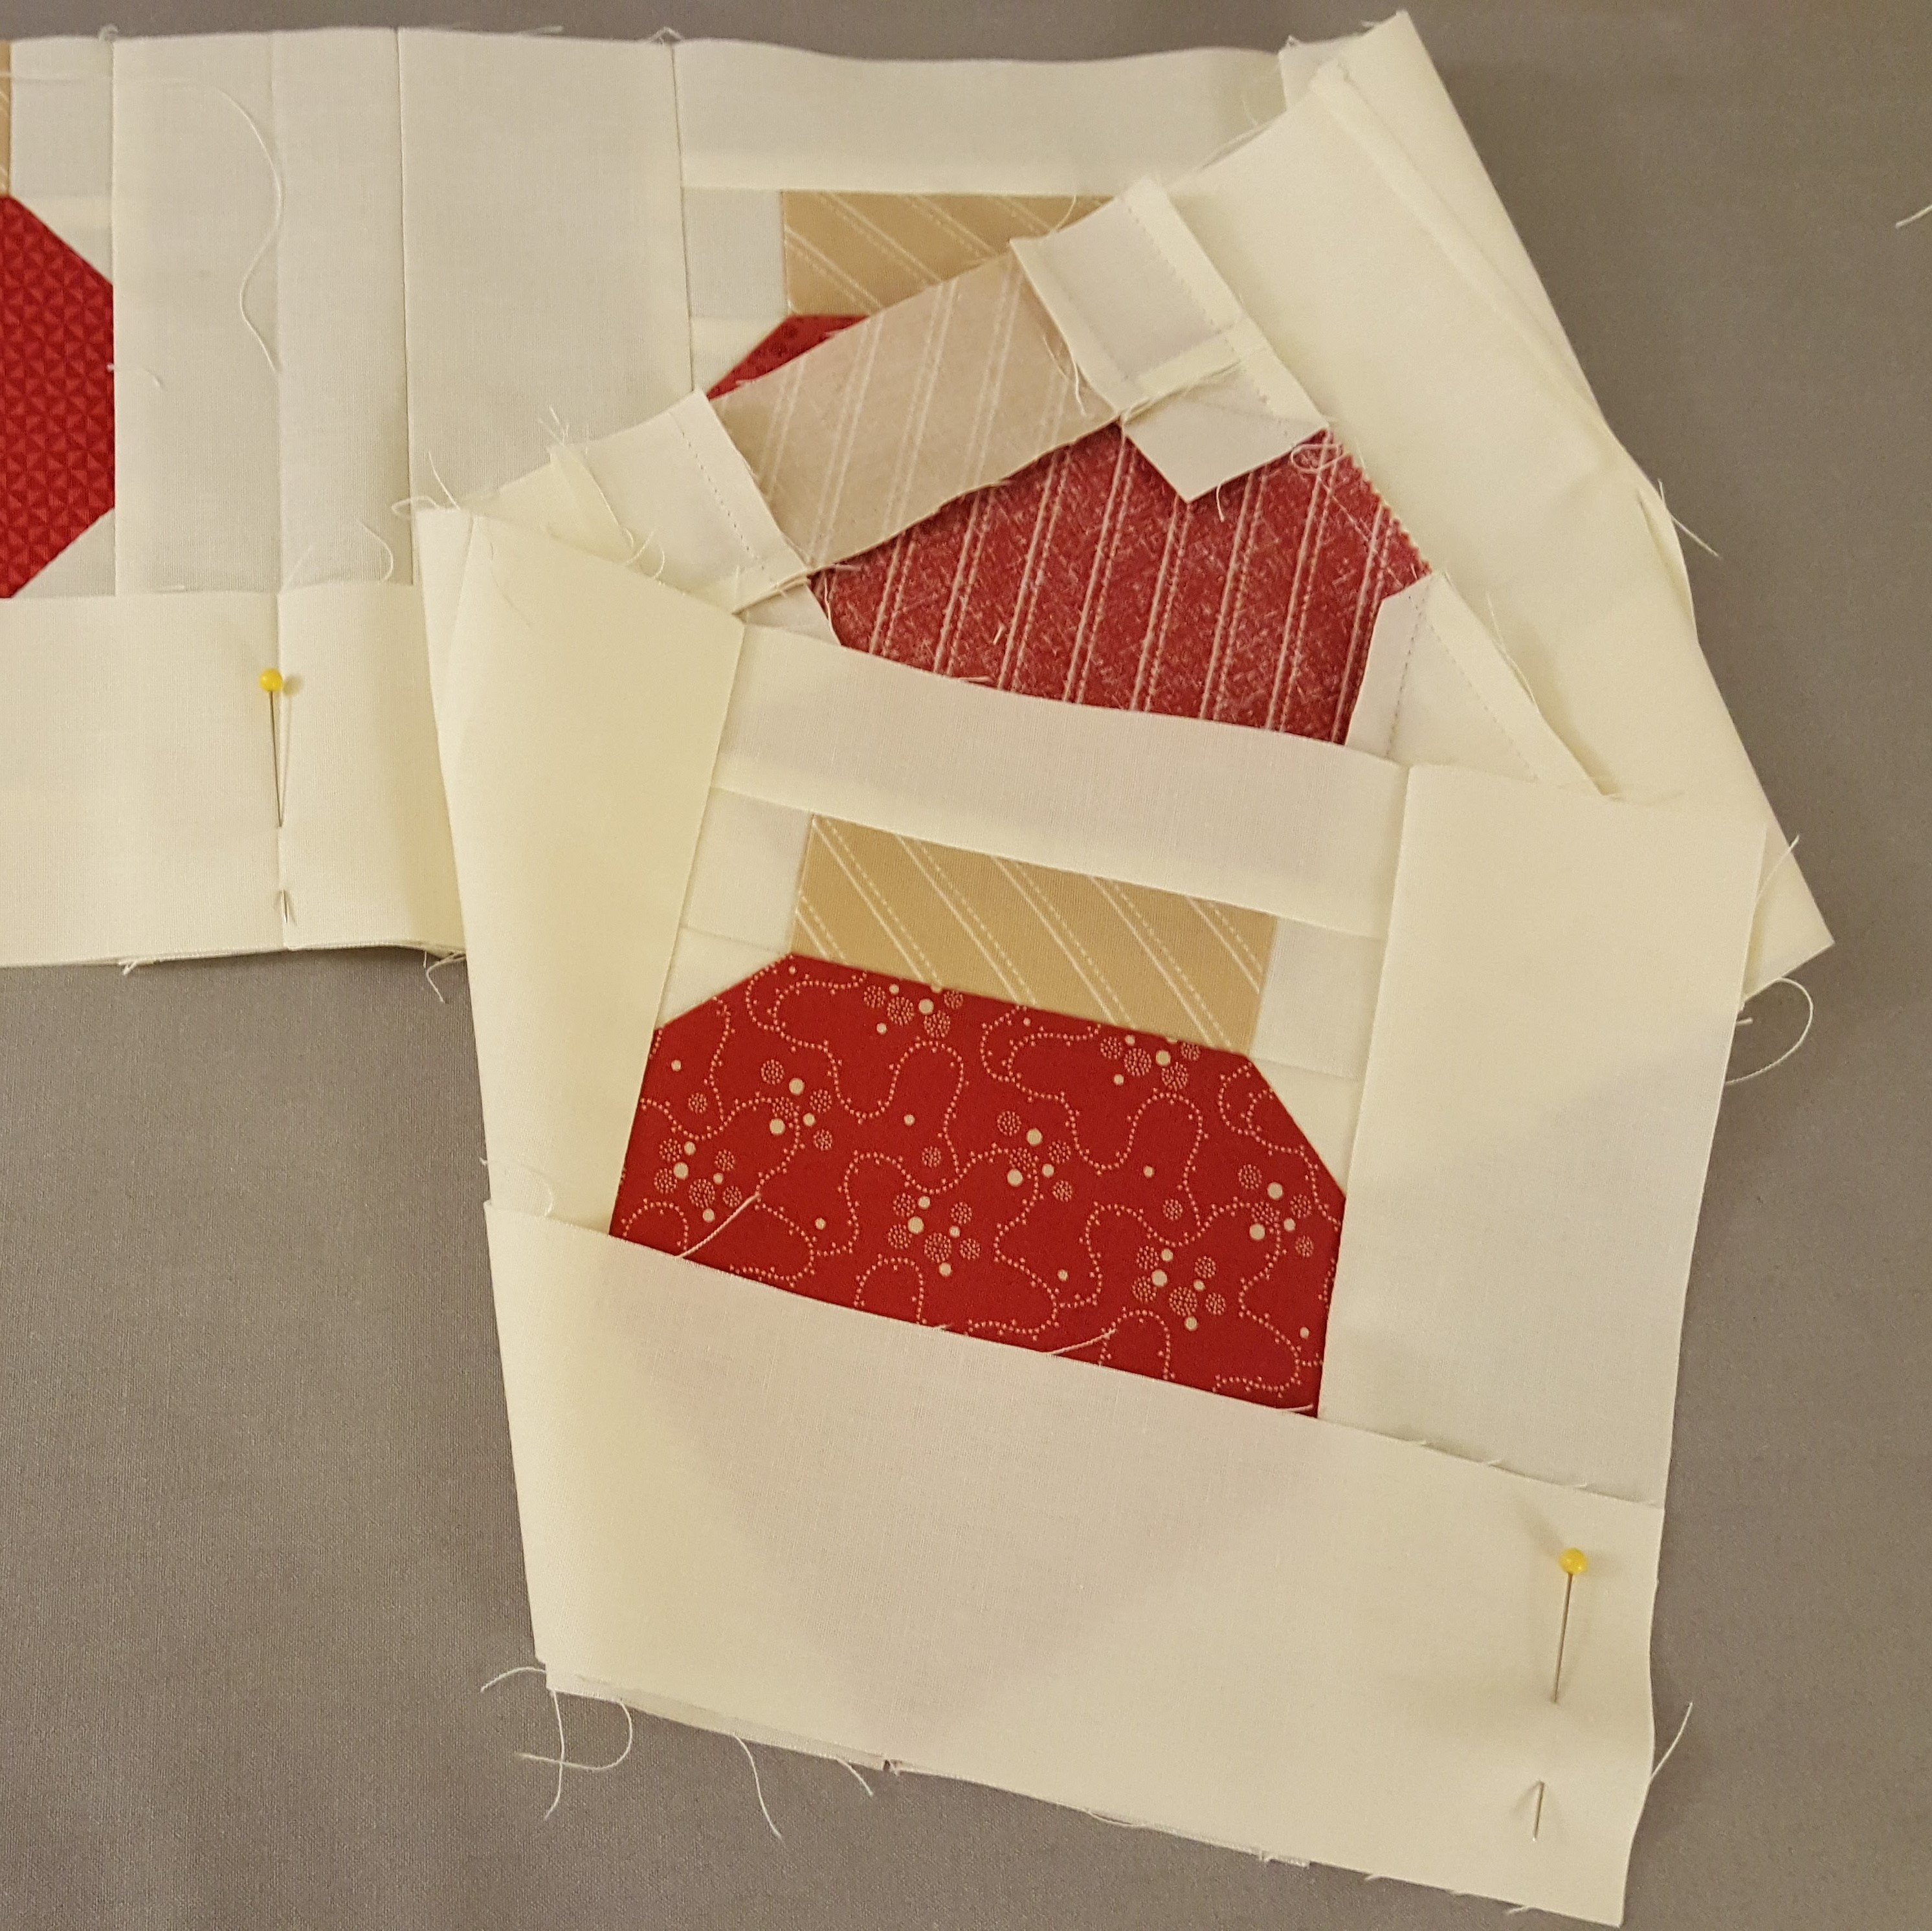
Step #3 - Ornaments:
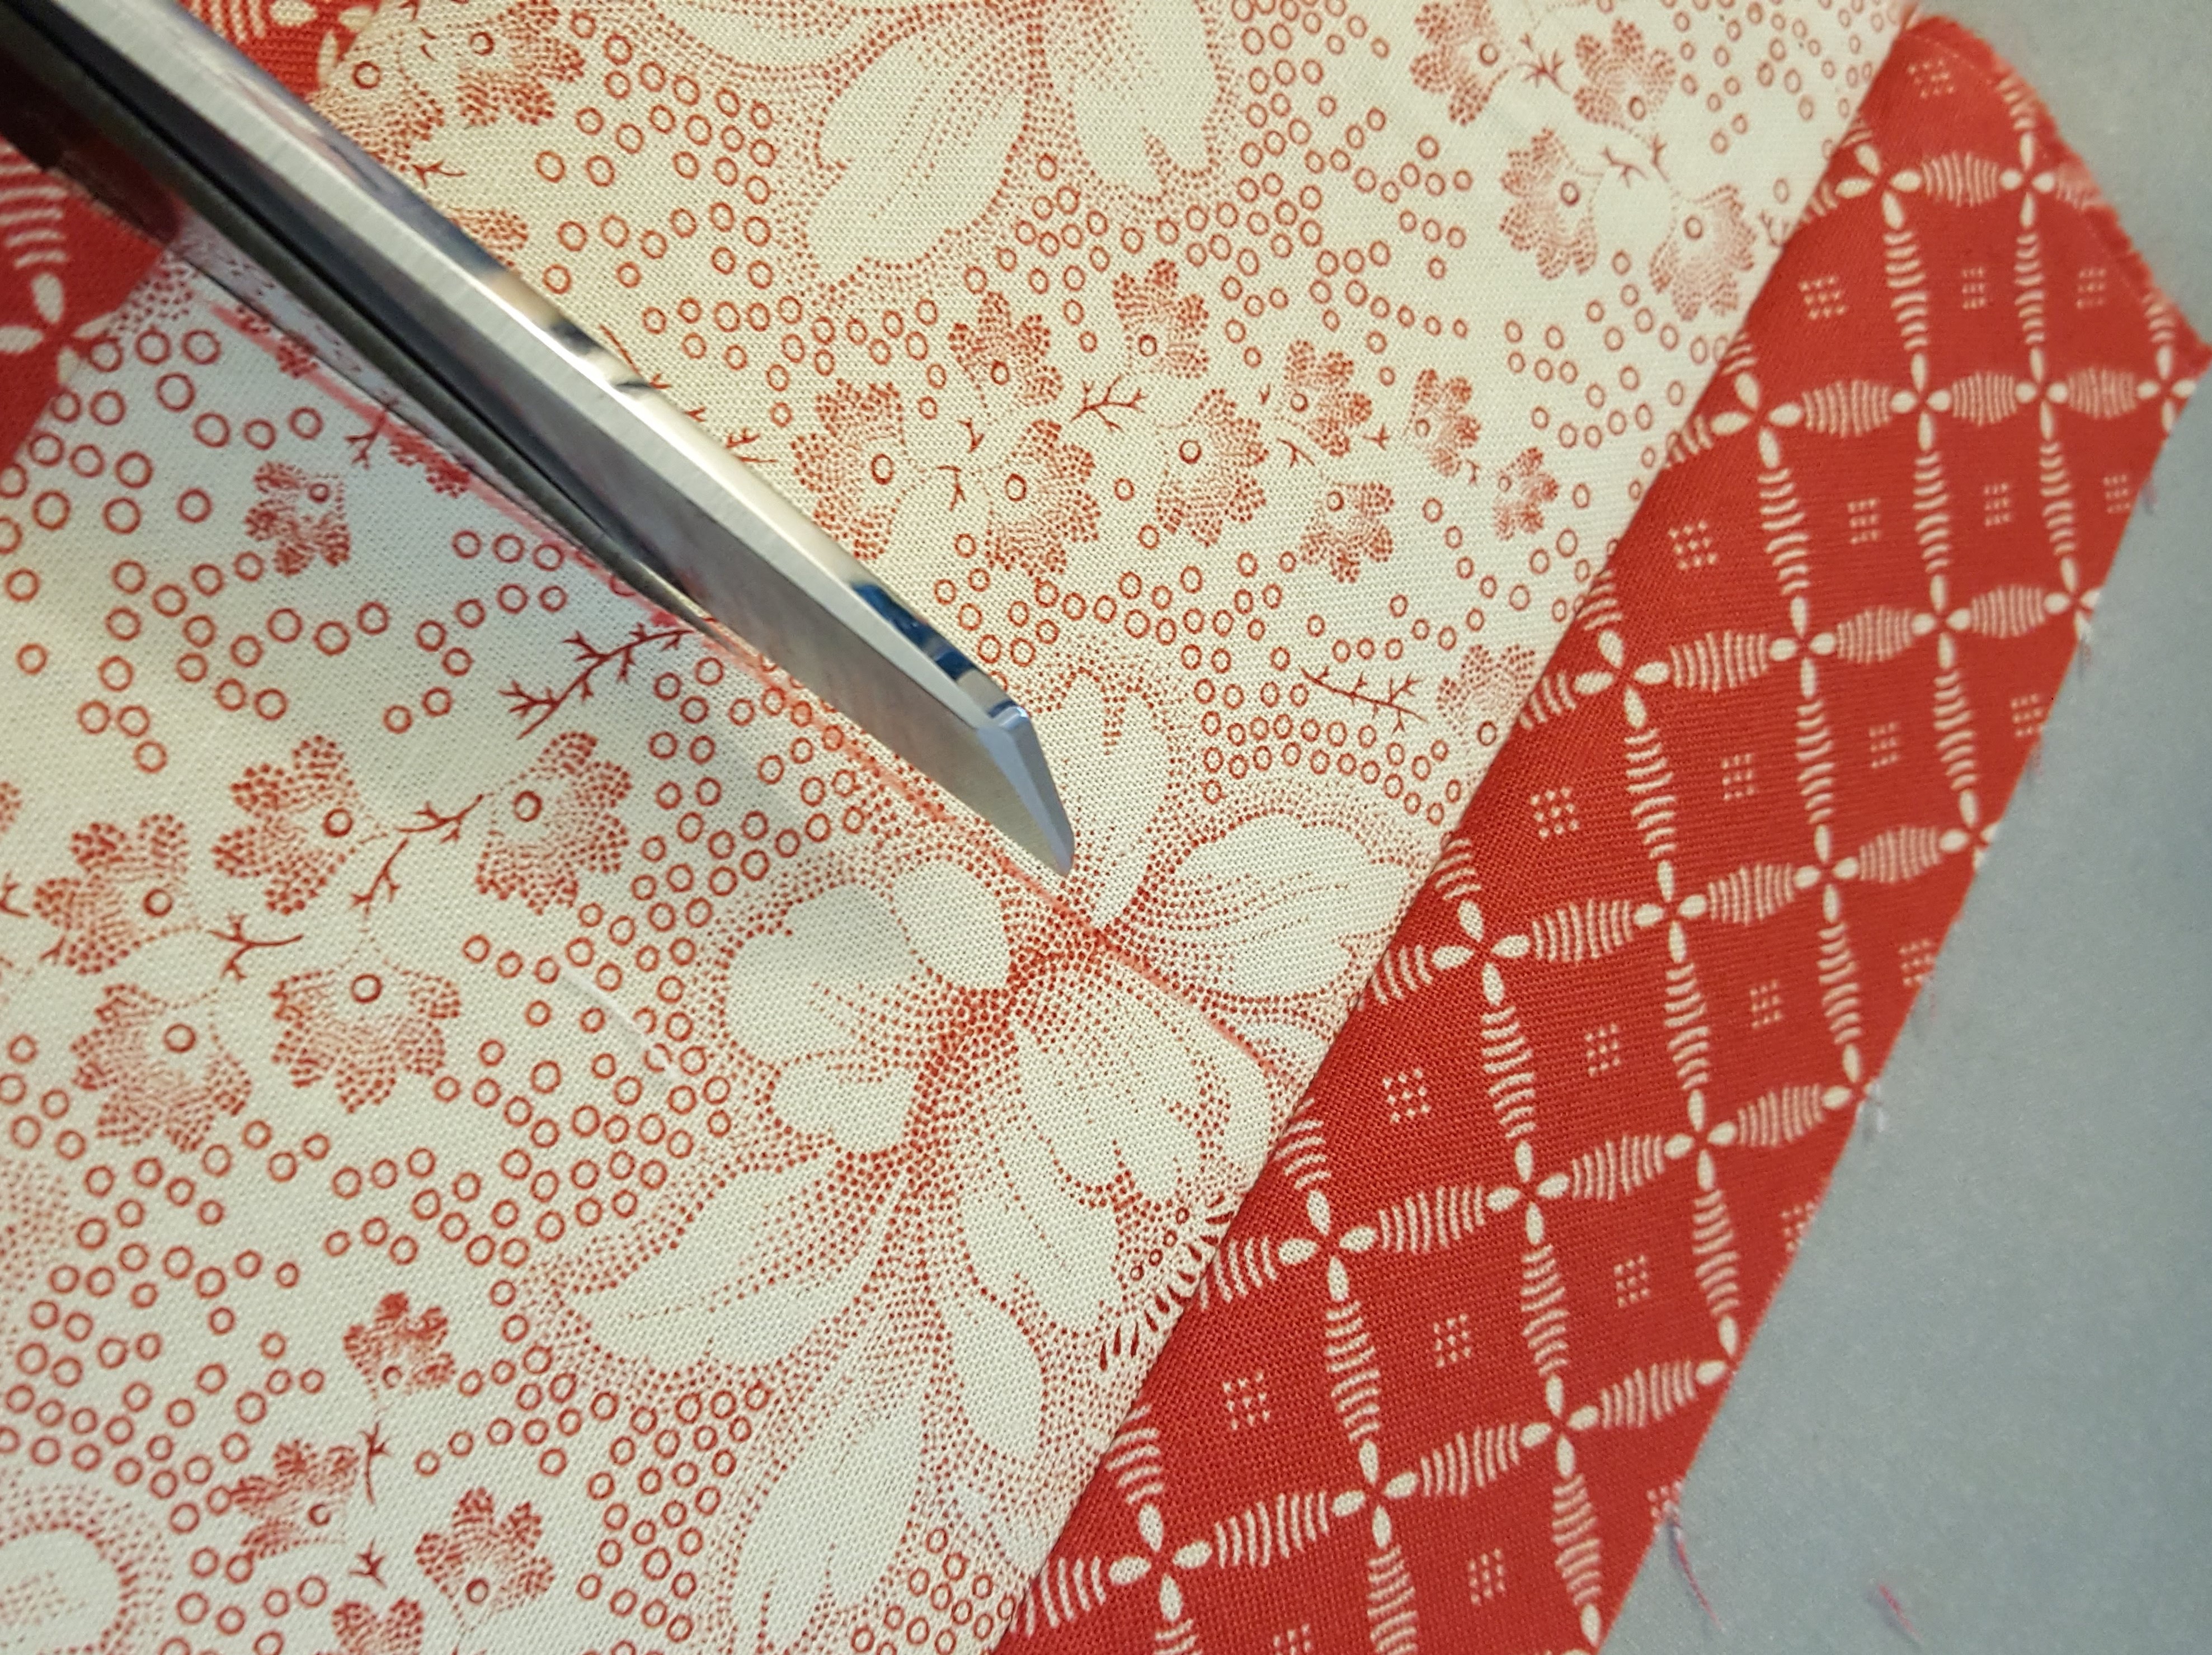
The ornaments are made using the stitch-and-flip method to snowball each corner. The top ornament corners use the marked 1 ¼” squares, and the bottom corners use the marked 2 ½” squares.
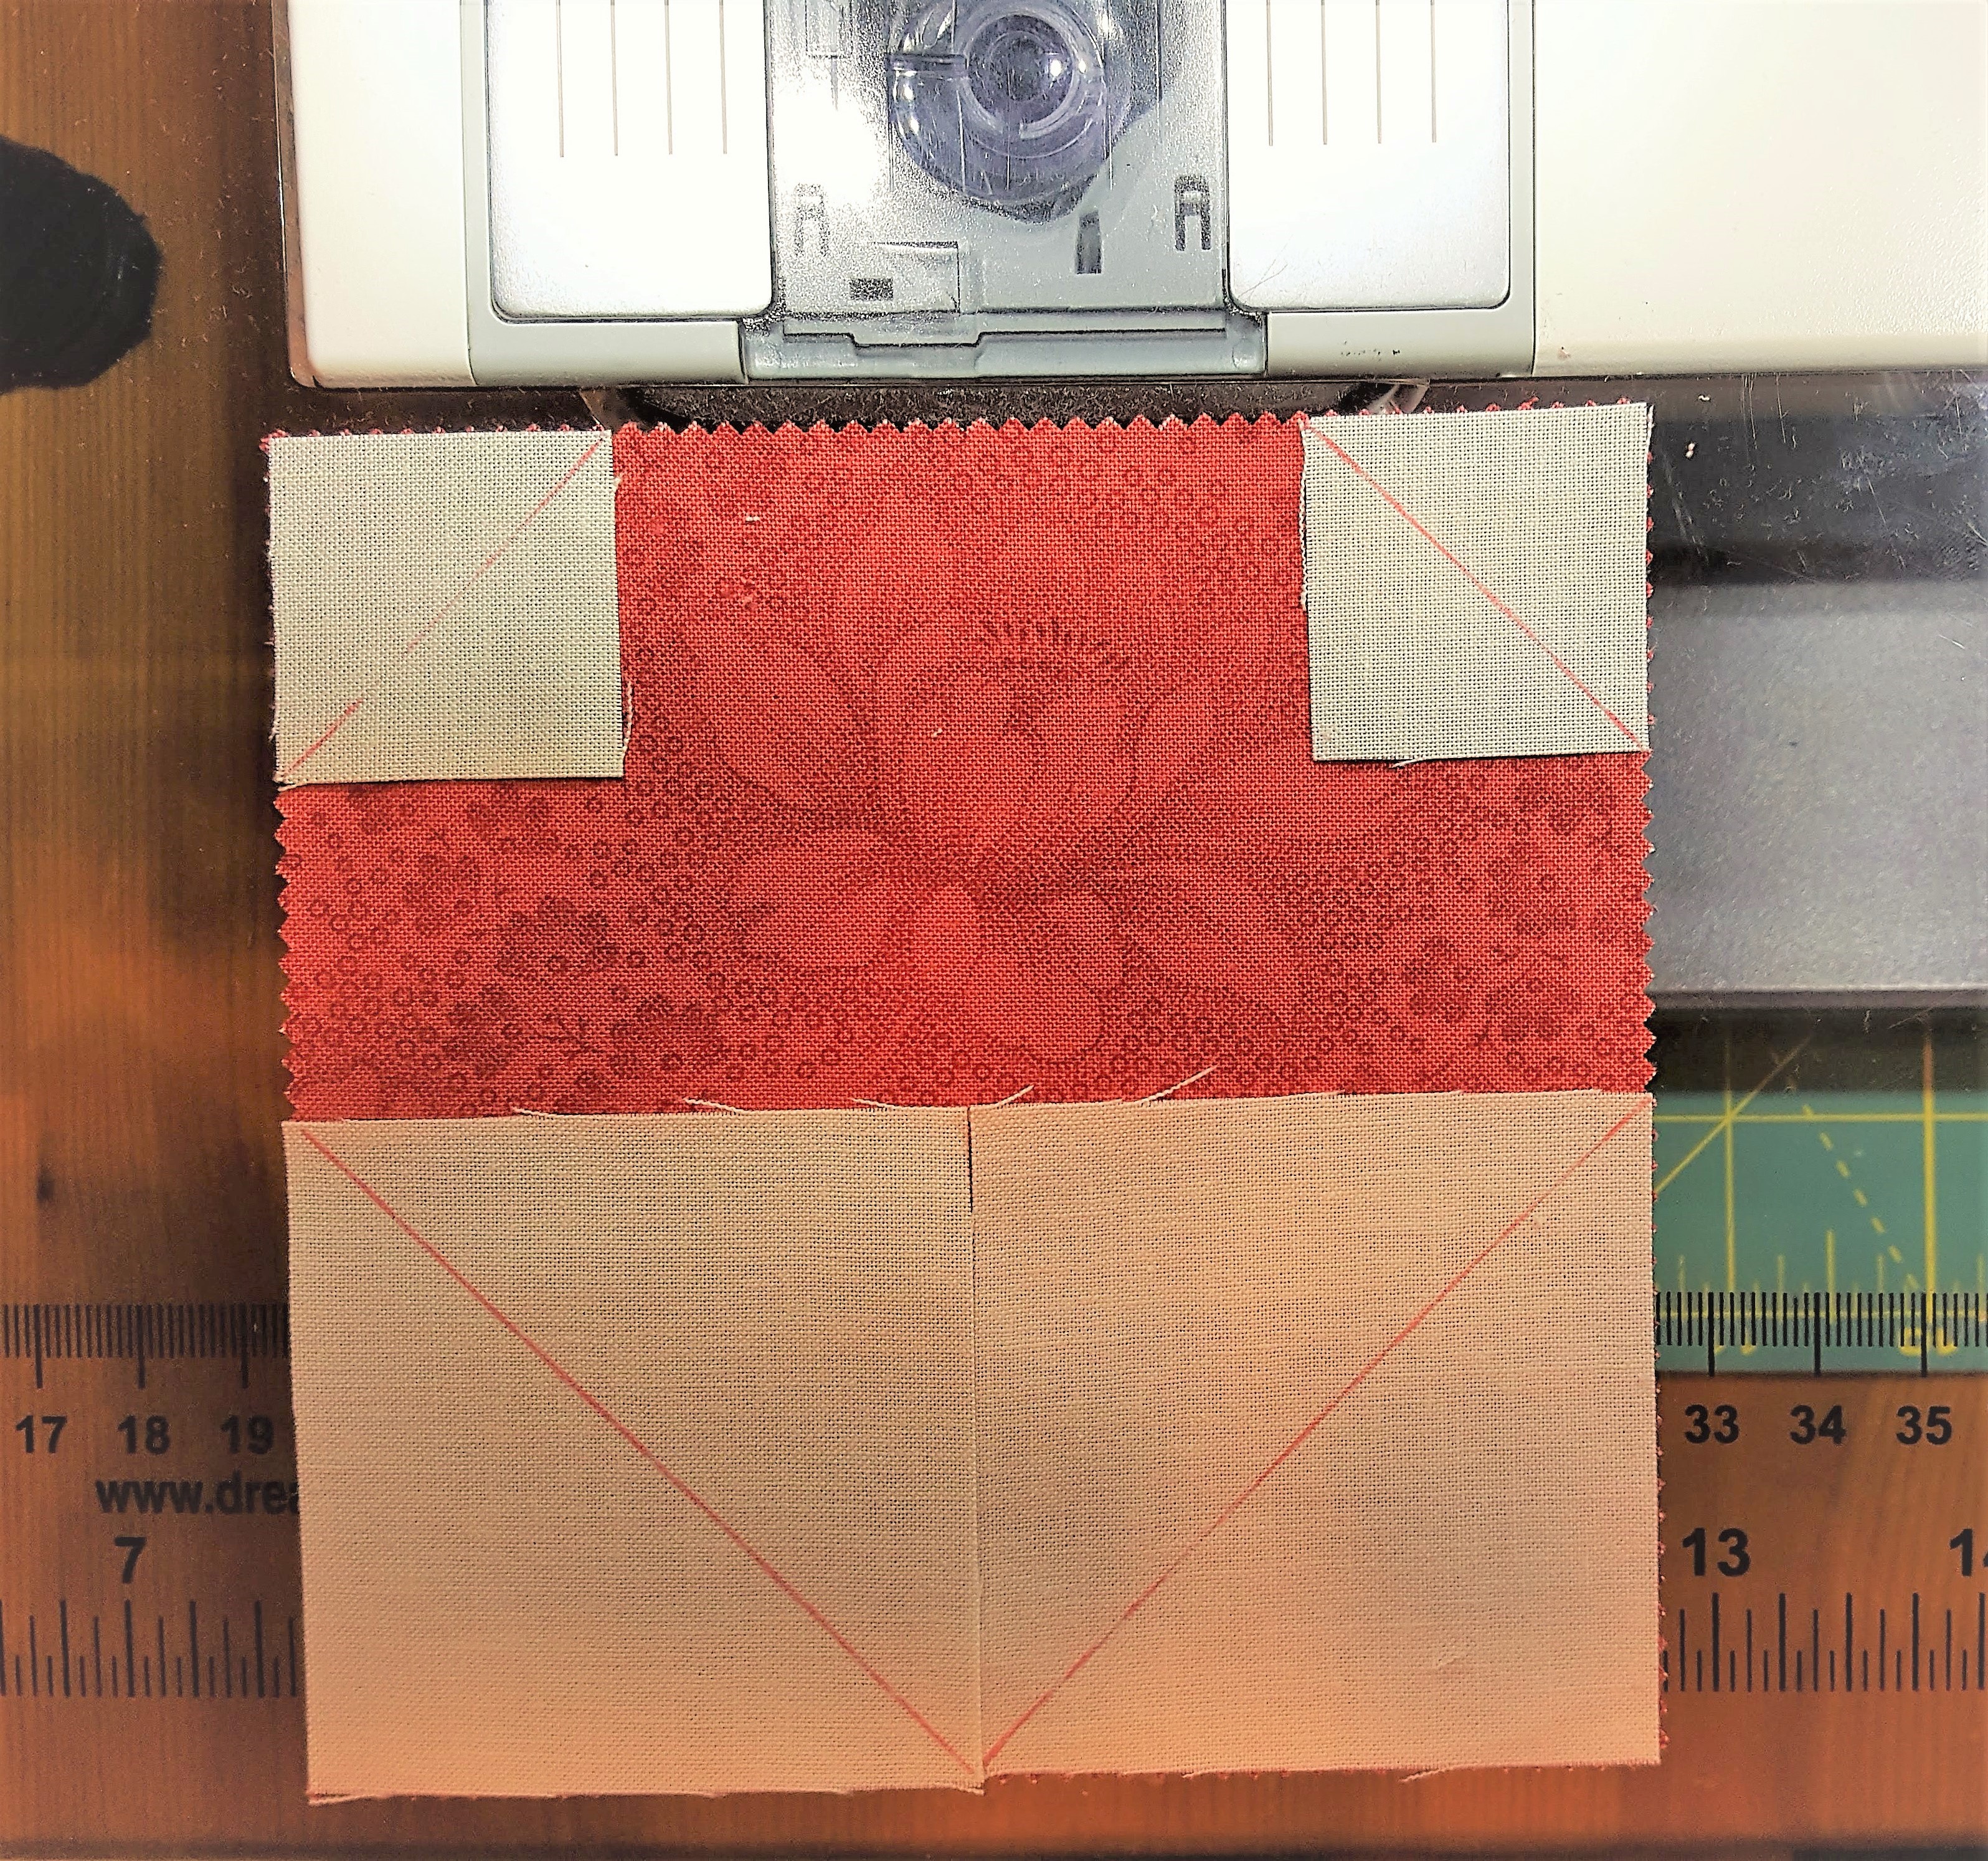
Place a square on each corner and sew on the marked line, preferable the stitched line should be a threads-width to the outside of the marked line.

Flip the entire corner unit to the back and press BEFORE trimming.
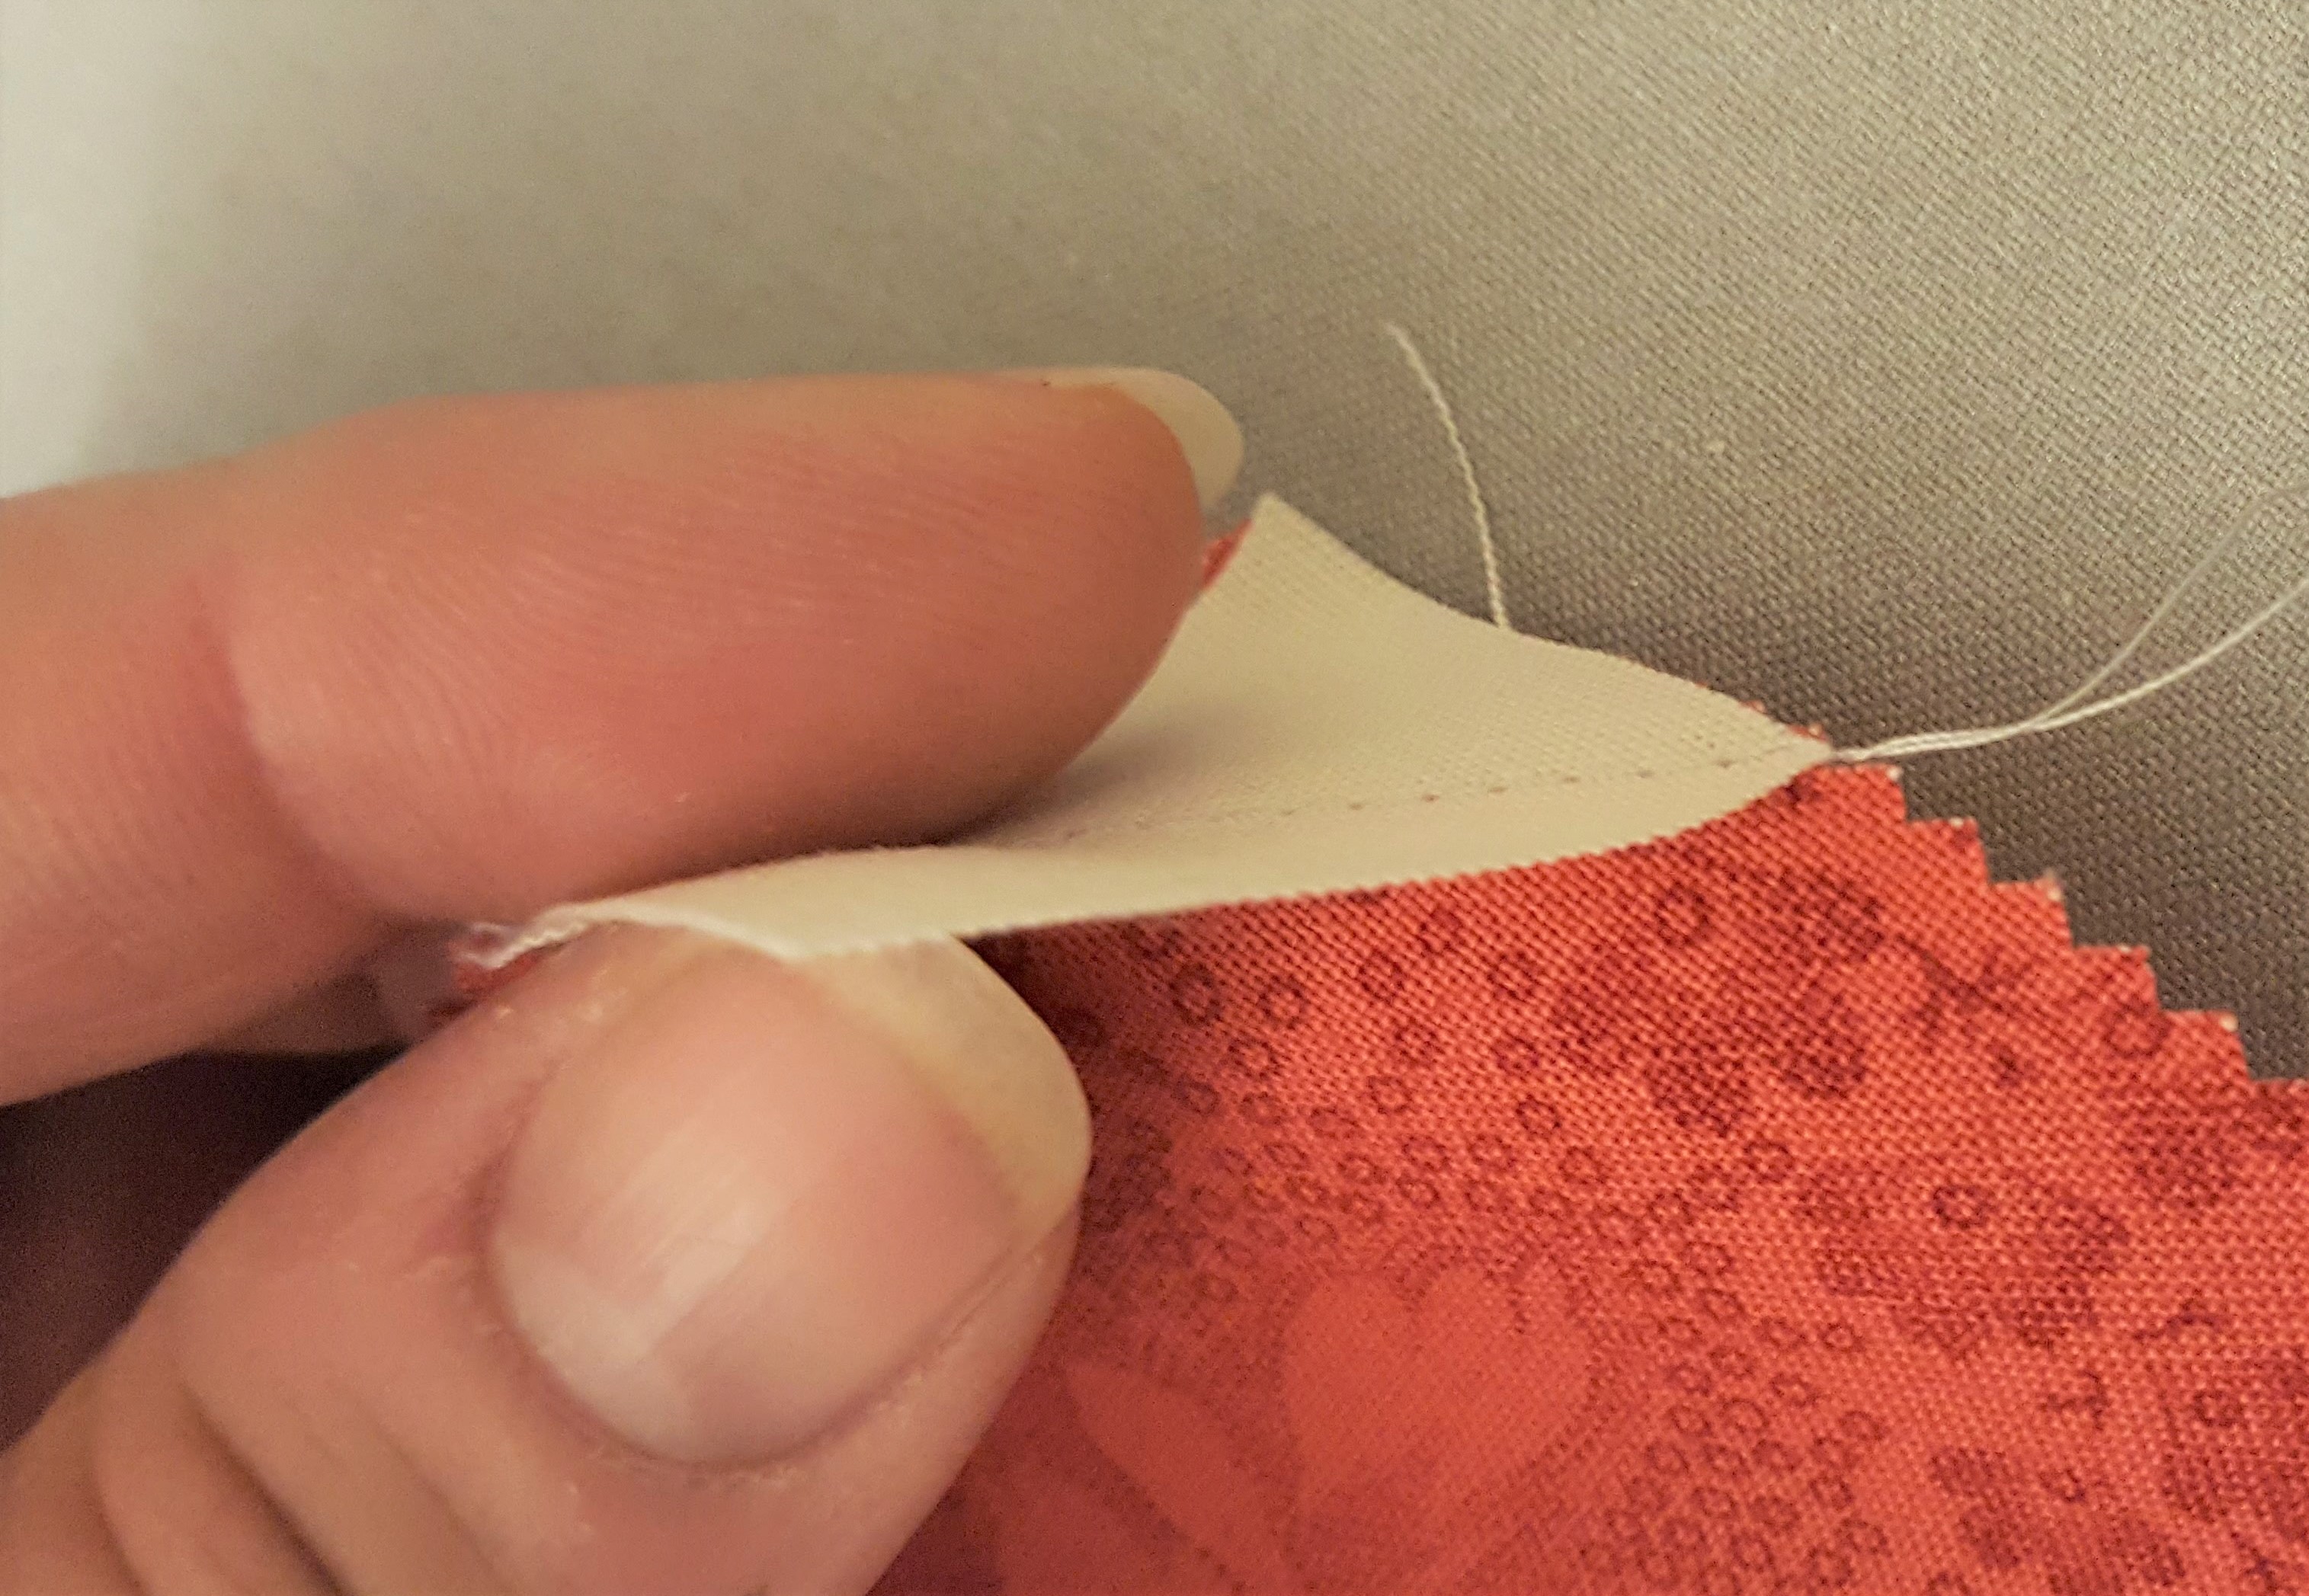
From the back of the block, you will see the entire corner square, do not fold the corner square in half. I find that the added stability of the whole square gives me a crisp press without distortion of the bias seam.
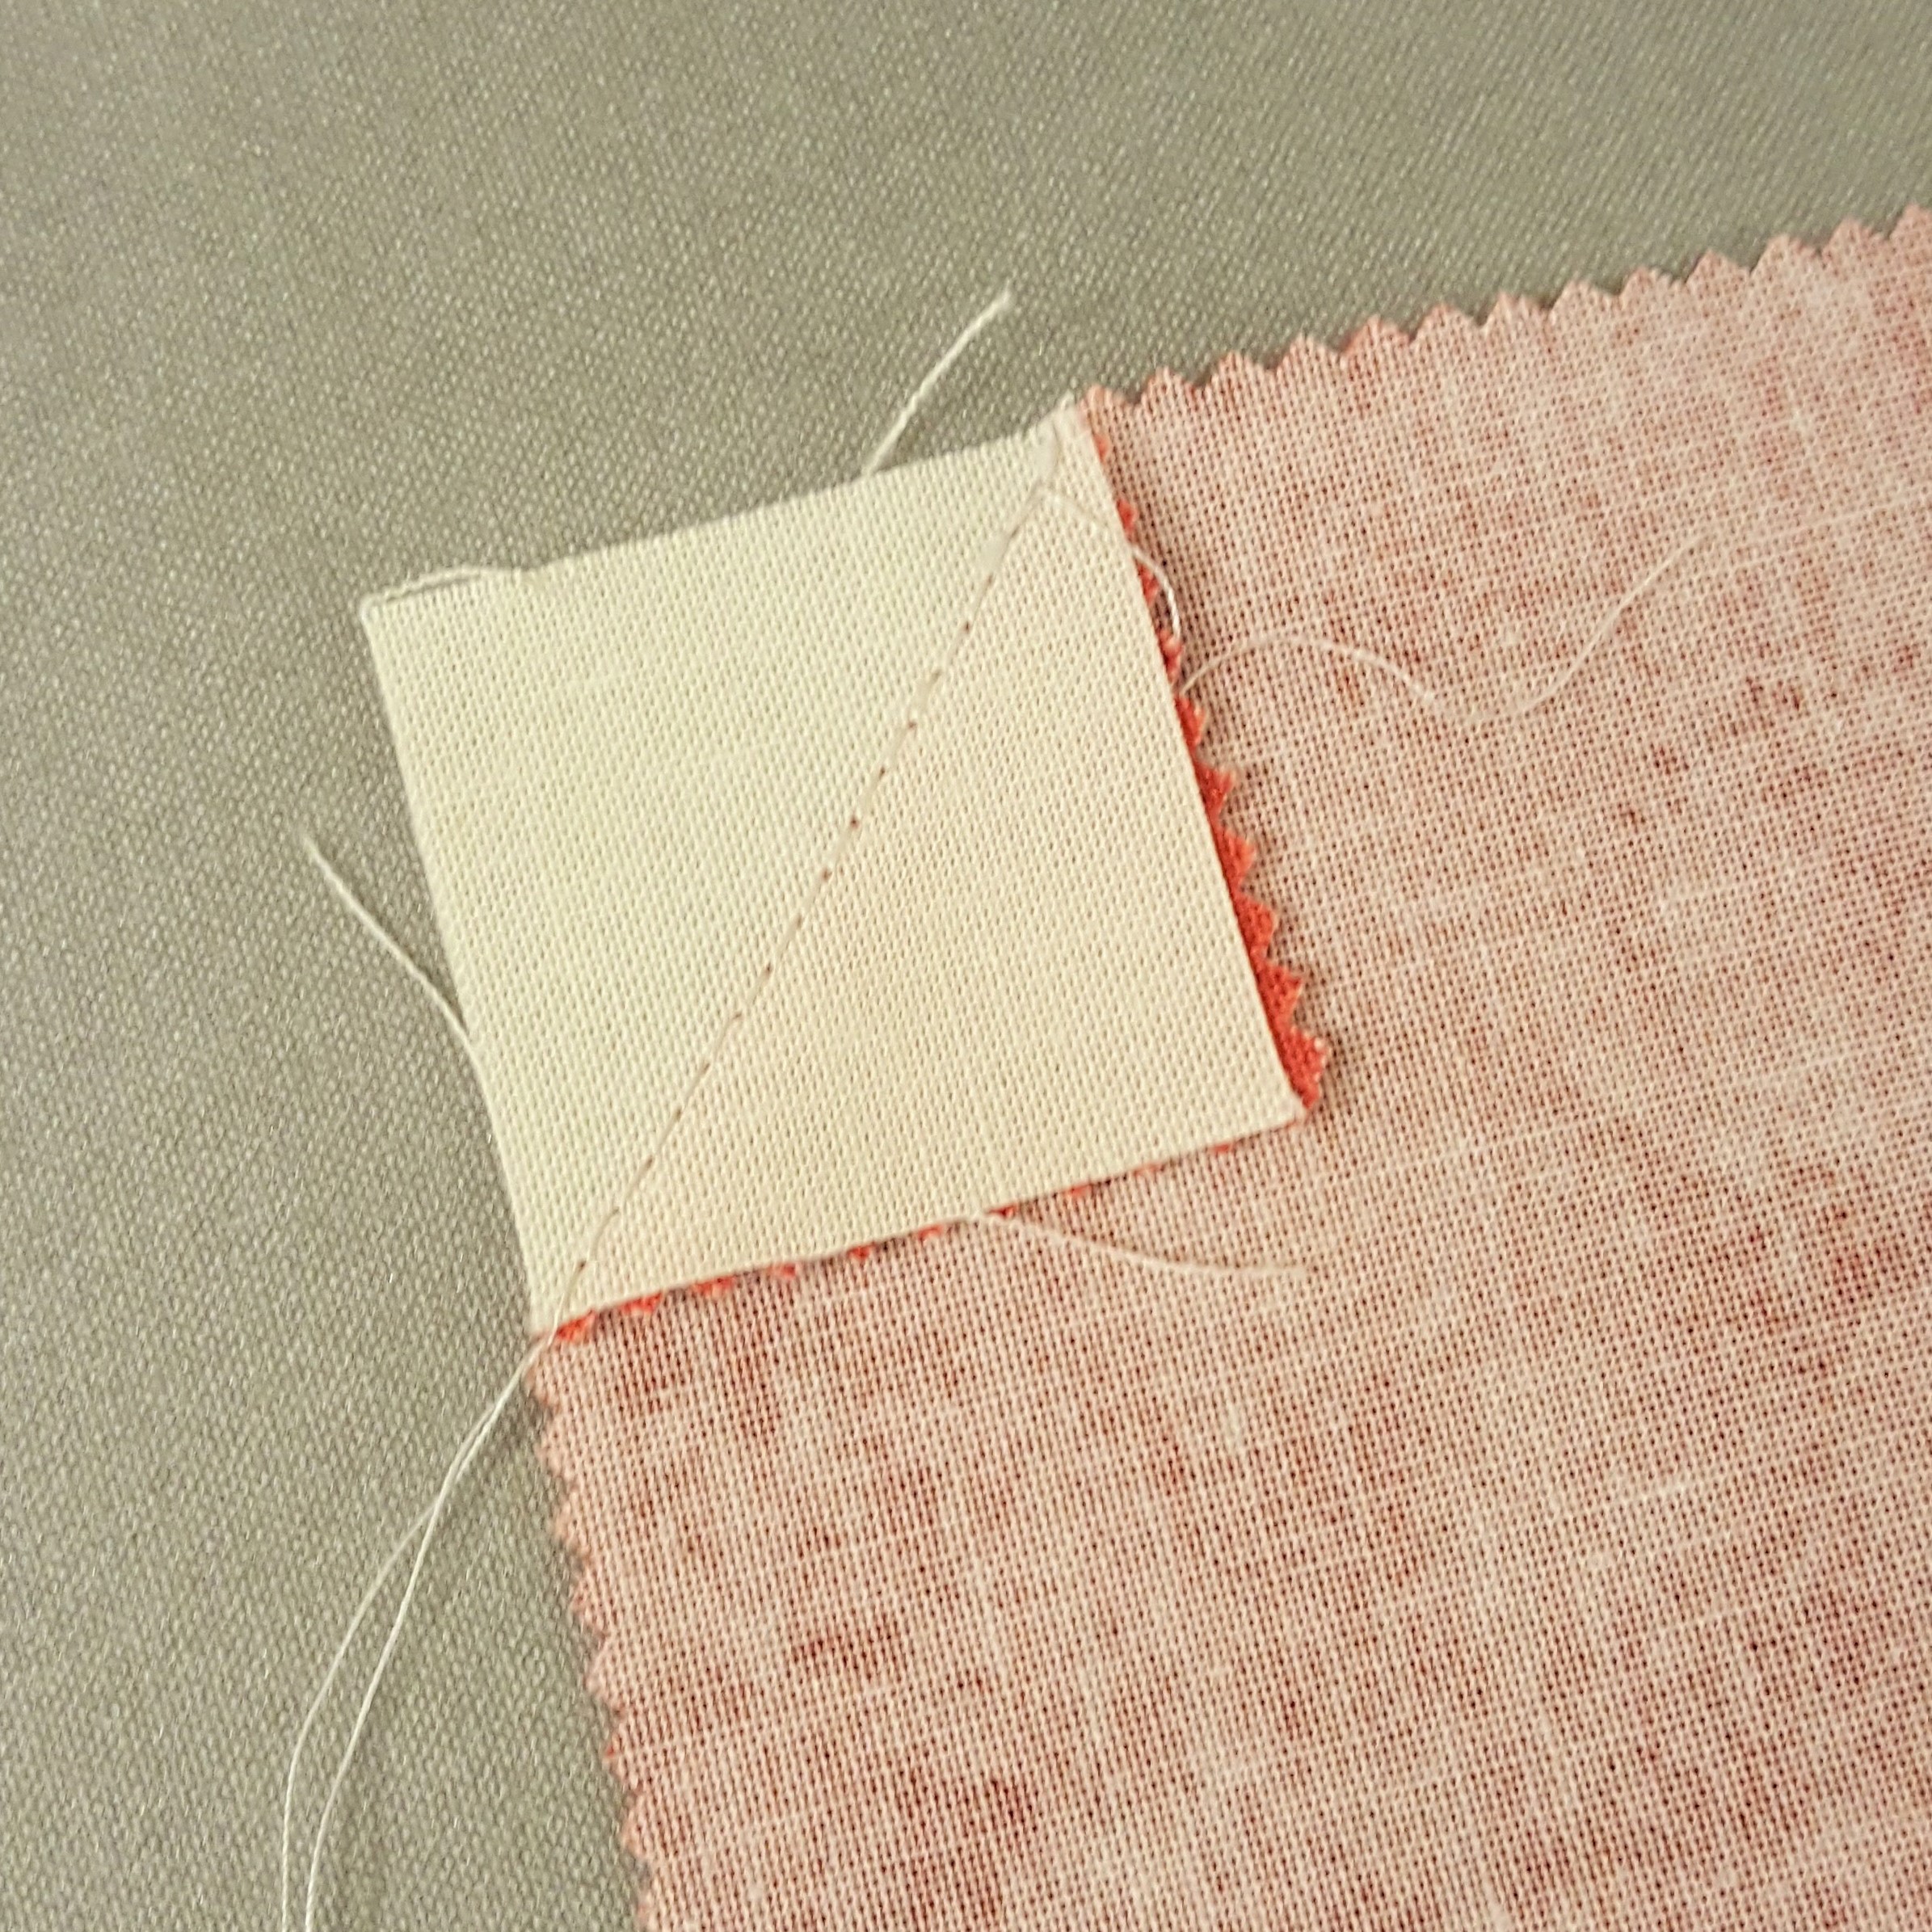
Trim the corners squares about ¼” away from the seam after pressing. For my ornaments, I trimmed all of the 2 ½” corners squares, but left the 1 ¼” corner squares whole. Again, this added a little stability to the corner but did not add much bulk to the top.
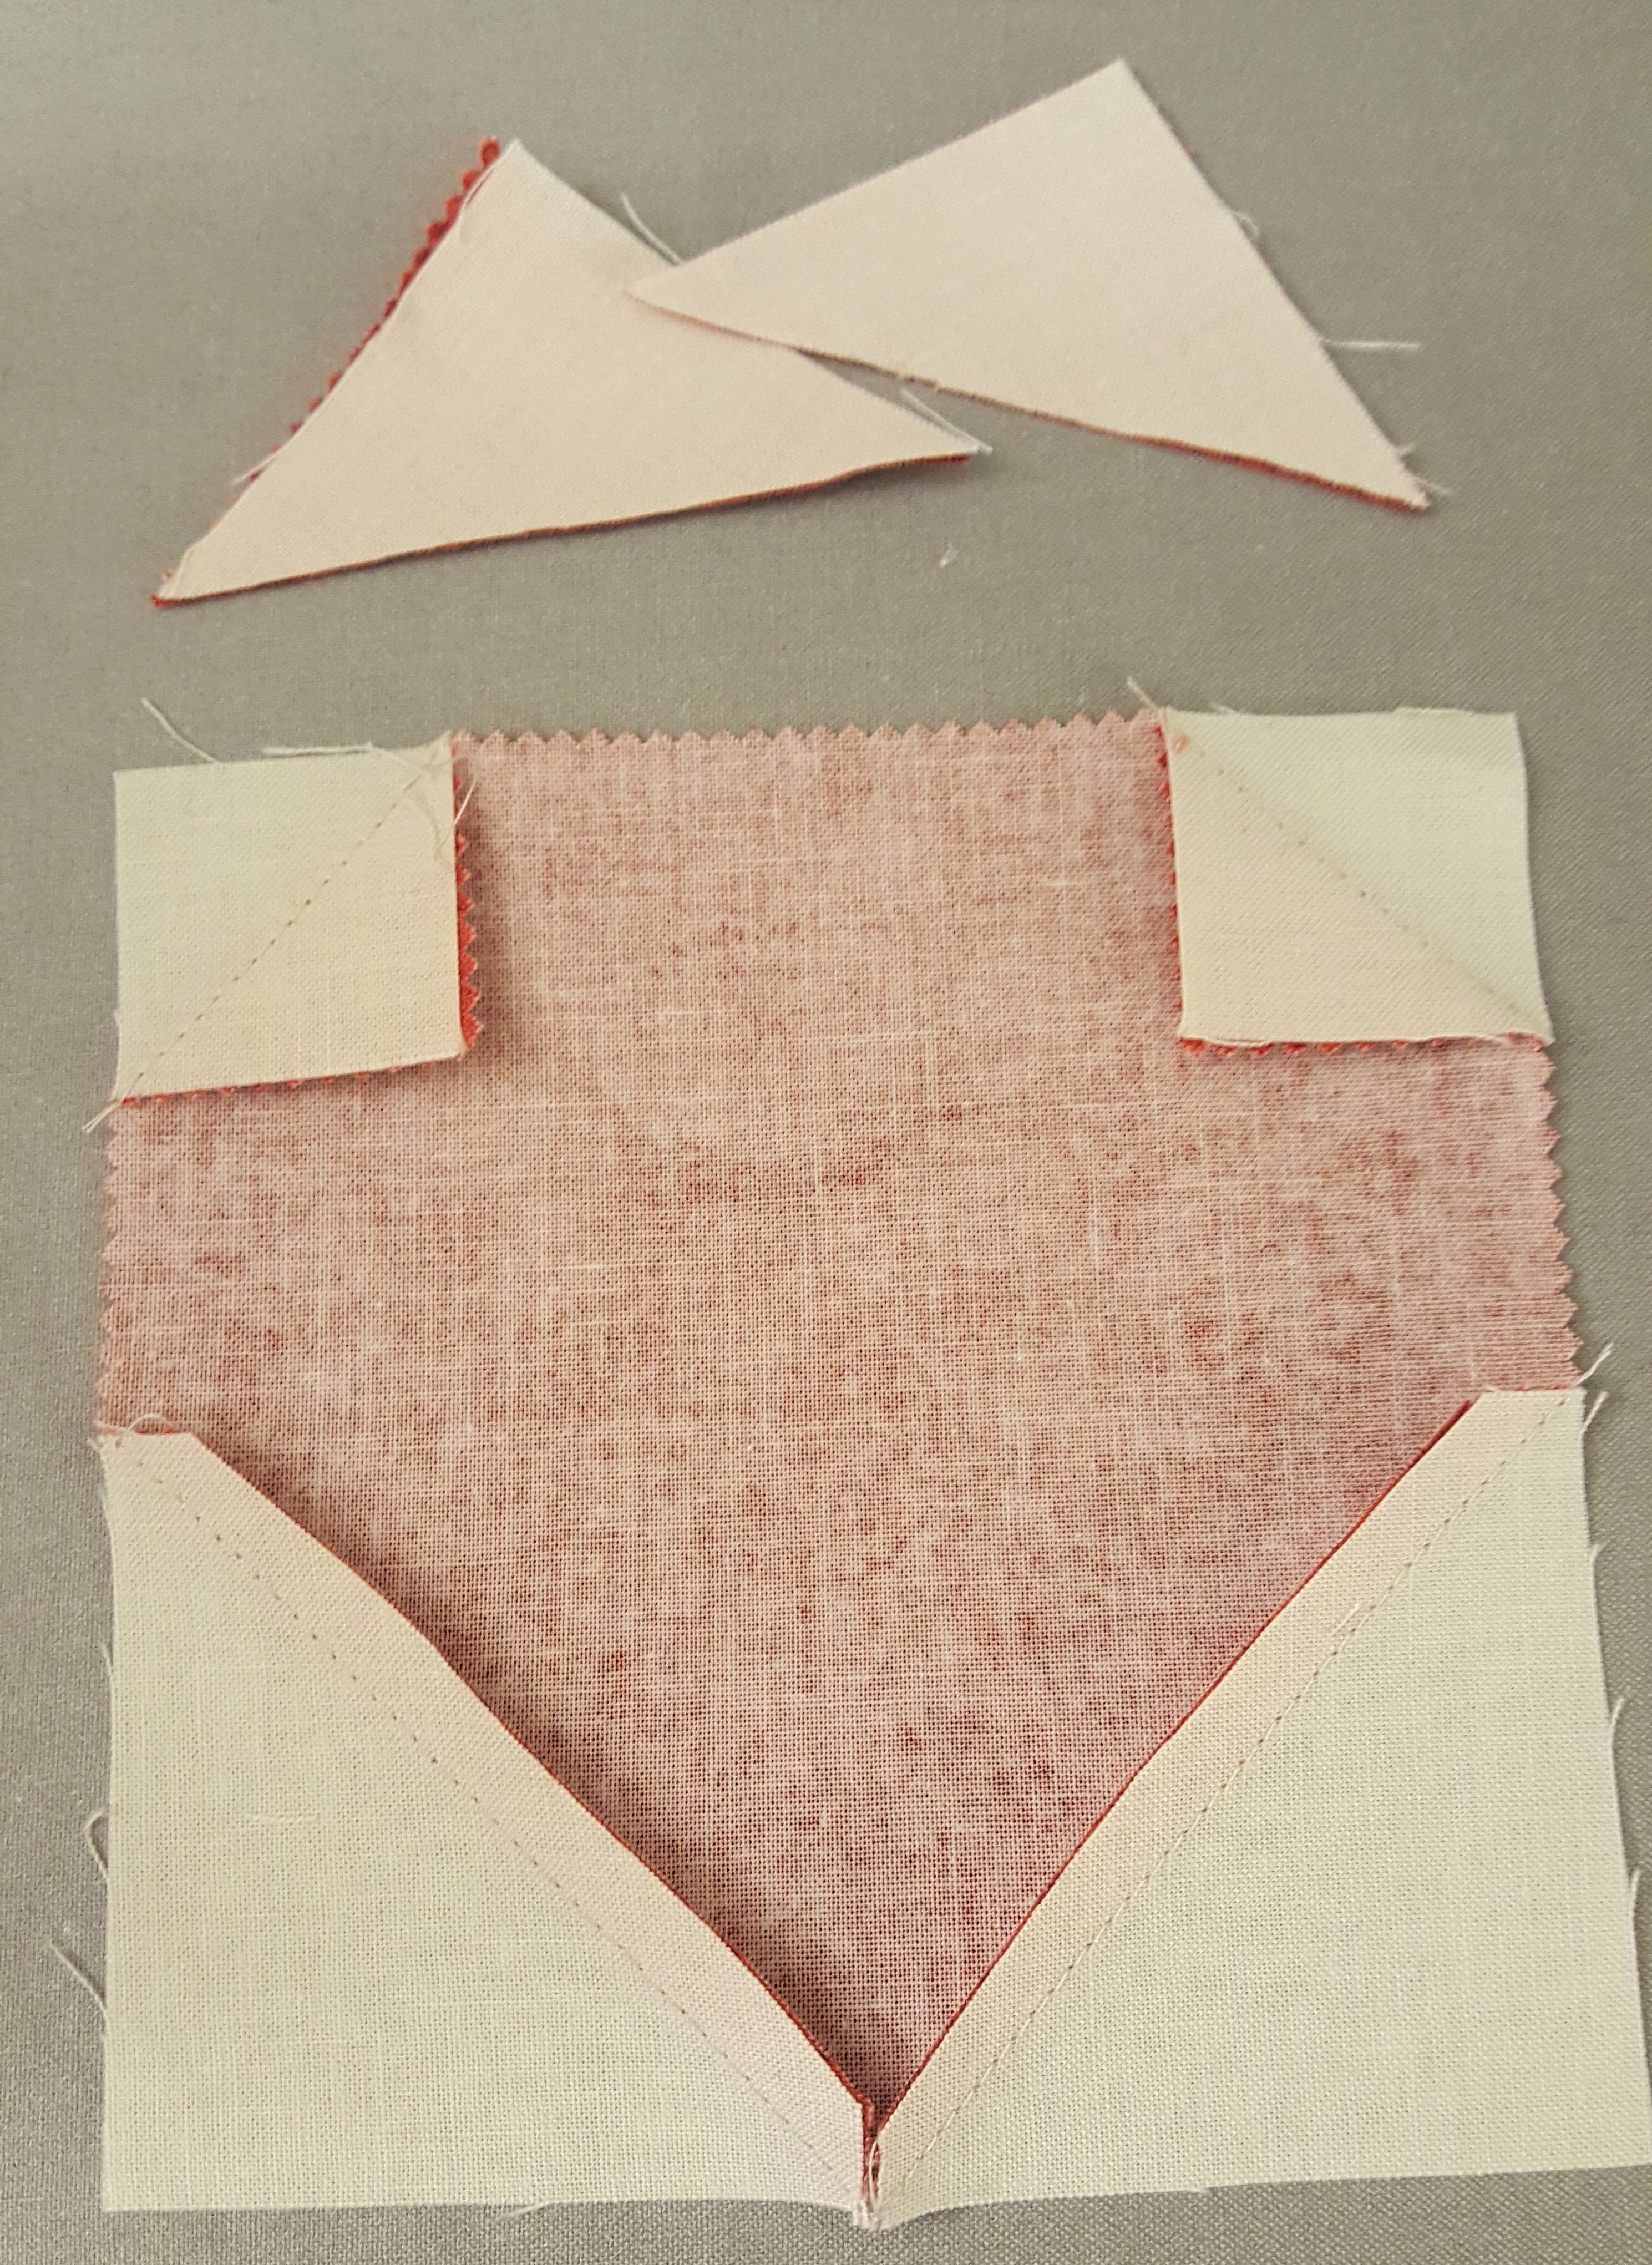
After the ornament corners are snowballed, add a Cap unit to the top edge.
Press the Cap unit towards the Ornament unit.

Repeat to make (42) Ornaments
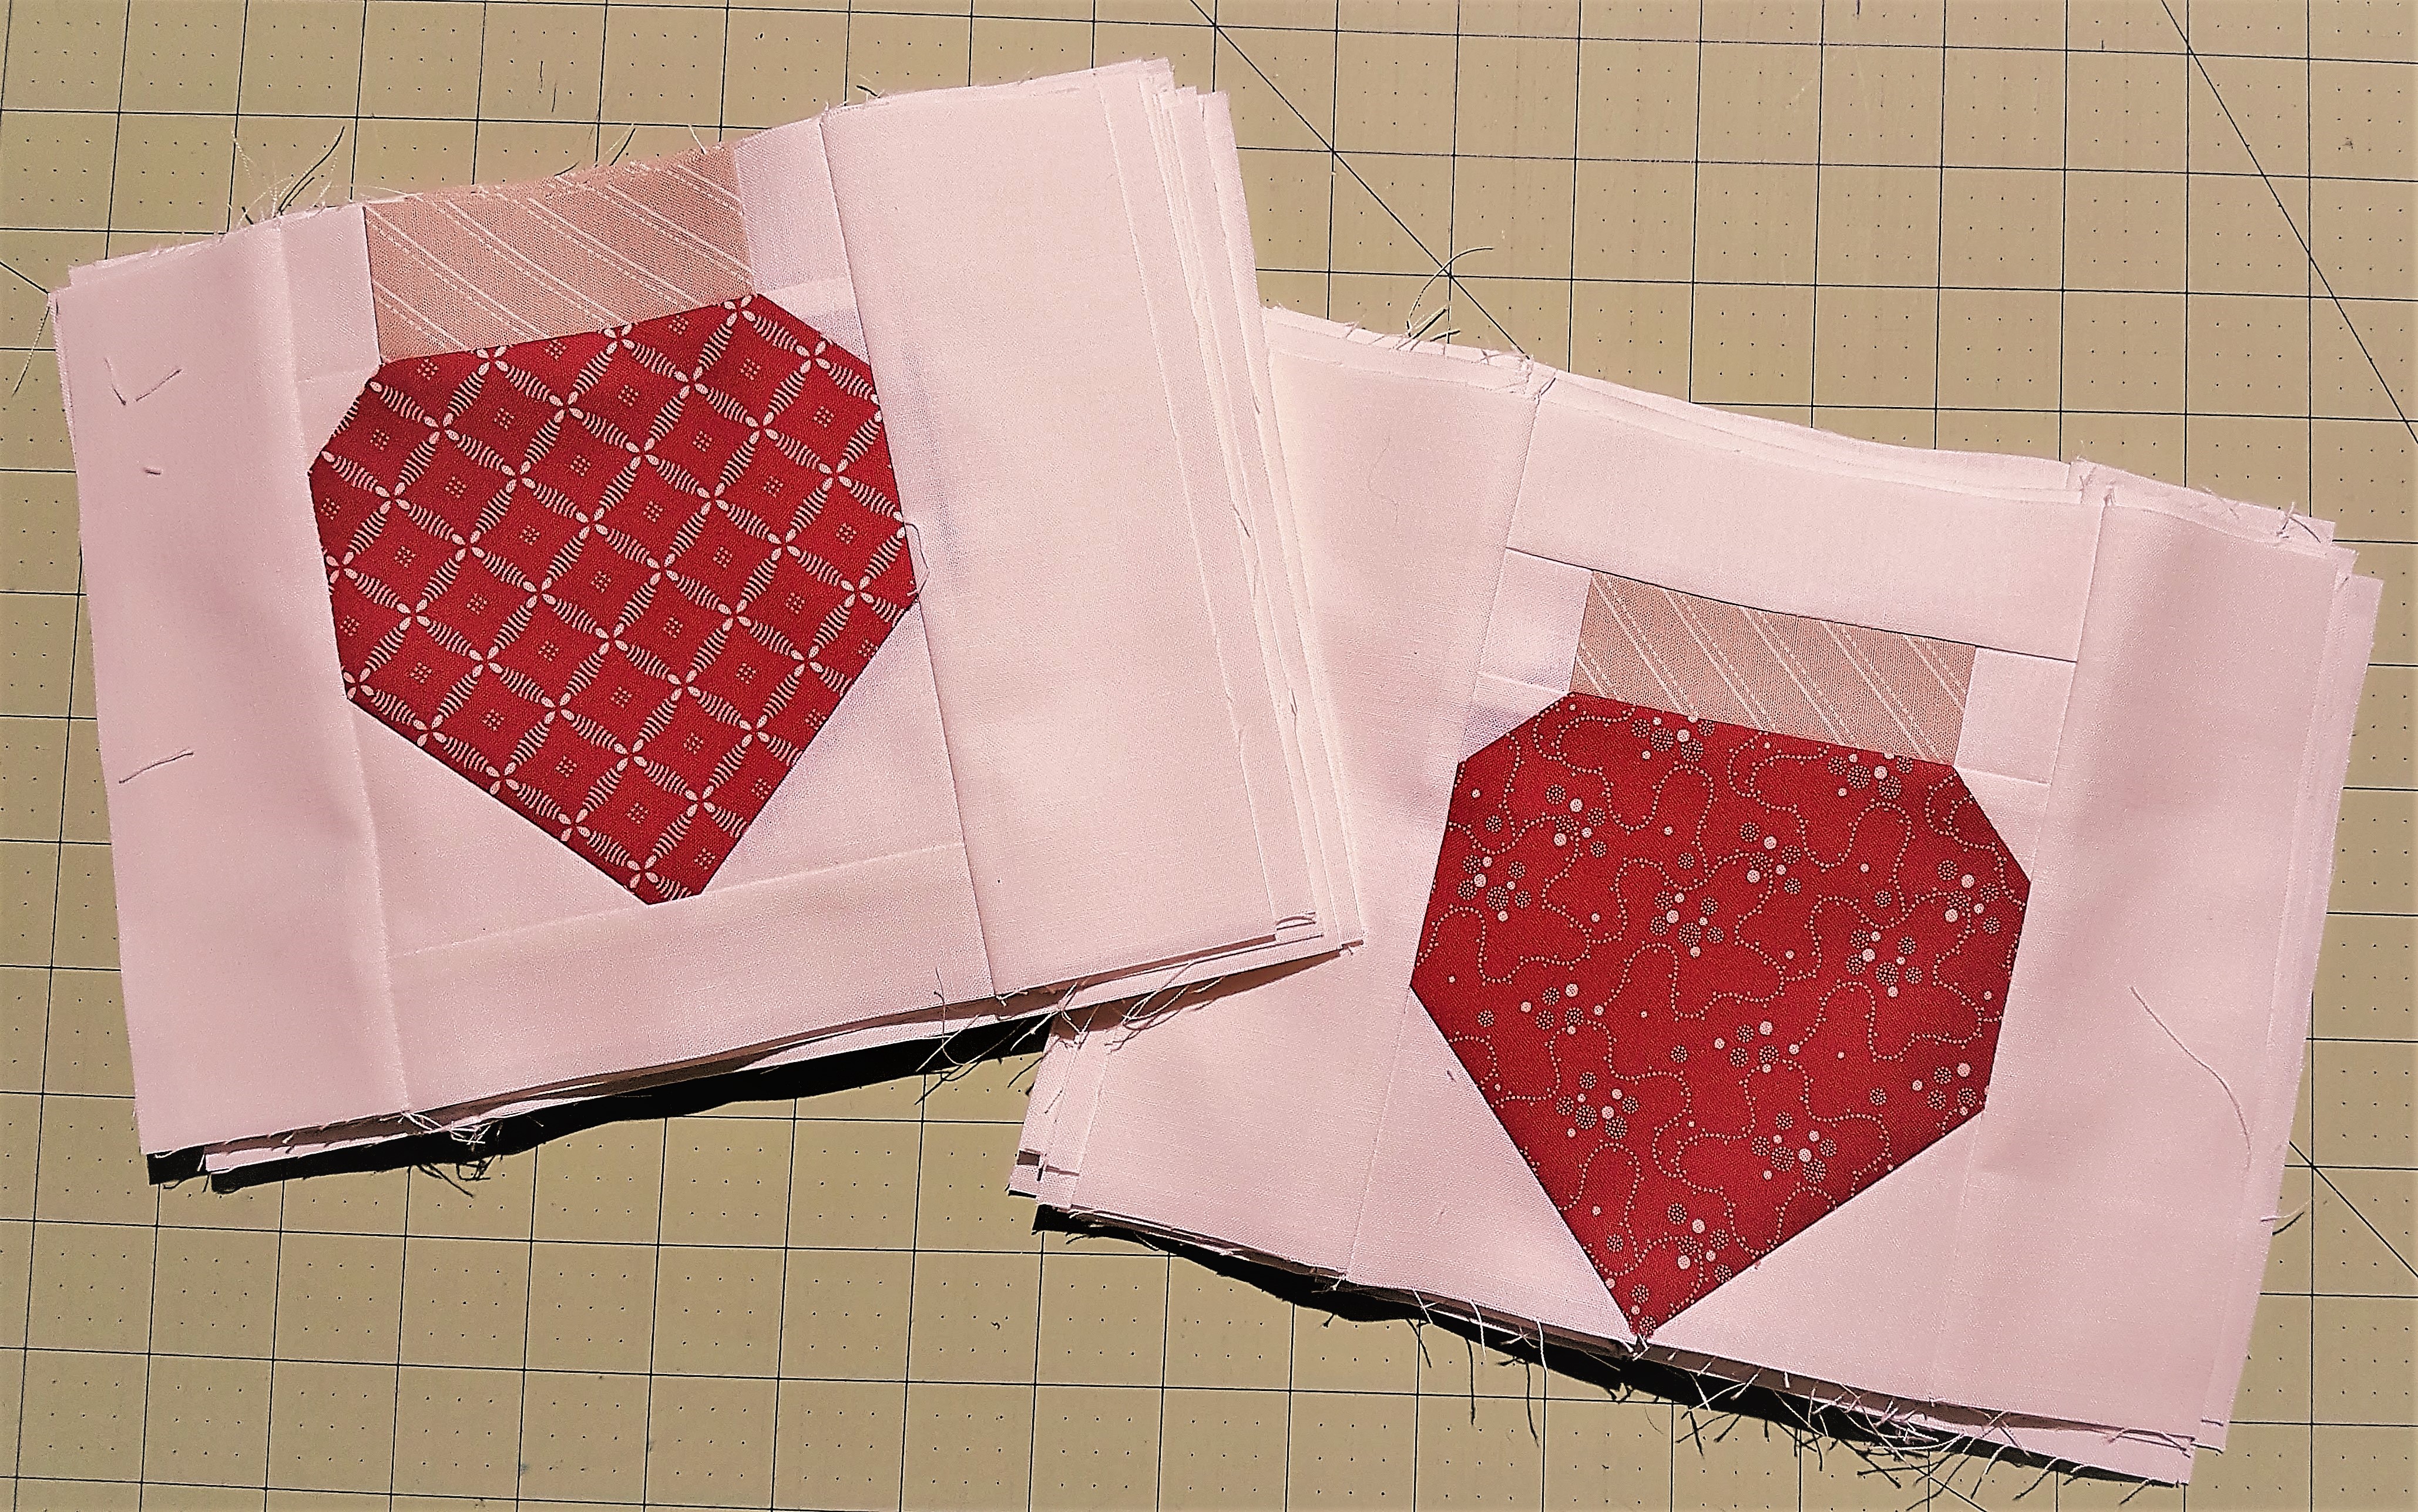
Step #4 - Layout Colors* and Add Spacers:
If you do not need to layout your ornaments ahead*, simply separate your ornament blocks into two piles of 21. A spacer piece is added to either the top or the bottom of the ornament to make them “bounce” across the quilt top.
To one of your piles, add a 5” X 1 ½” background piece to the top top of the block. Add the remaining (21) 5” X 1 ½” pieces to the bottom of the blocks in the second pile. Press towards the spacer piece.
*If you have a charm pack with varied colors, you can arrange your ornament blocks in seven rows of six blocks on a design-wall to balance the colors and patterns. After you are satisfied with the block placement, carefully stack each row with the left most ornament block on top. Continuing to work with the row-piles, add a spacer piece to the bottom of the first block, and a spacer piece to the top of the next block, continue to alternate between bottom and top spacer pieces for the remaining four blocks in the row-pile. Every row (and row-pile) begins with a spacer bar on the bottom of the block.
After spacers are added to all (42) of the ornament blocks, trim the unit to 5”X7”.
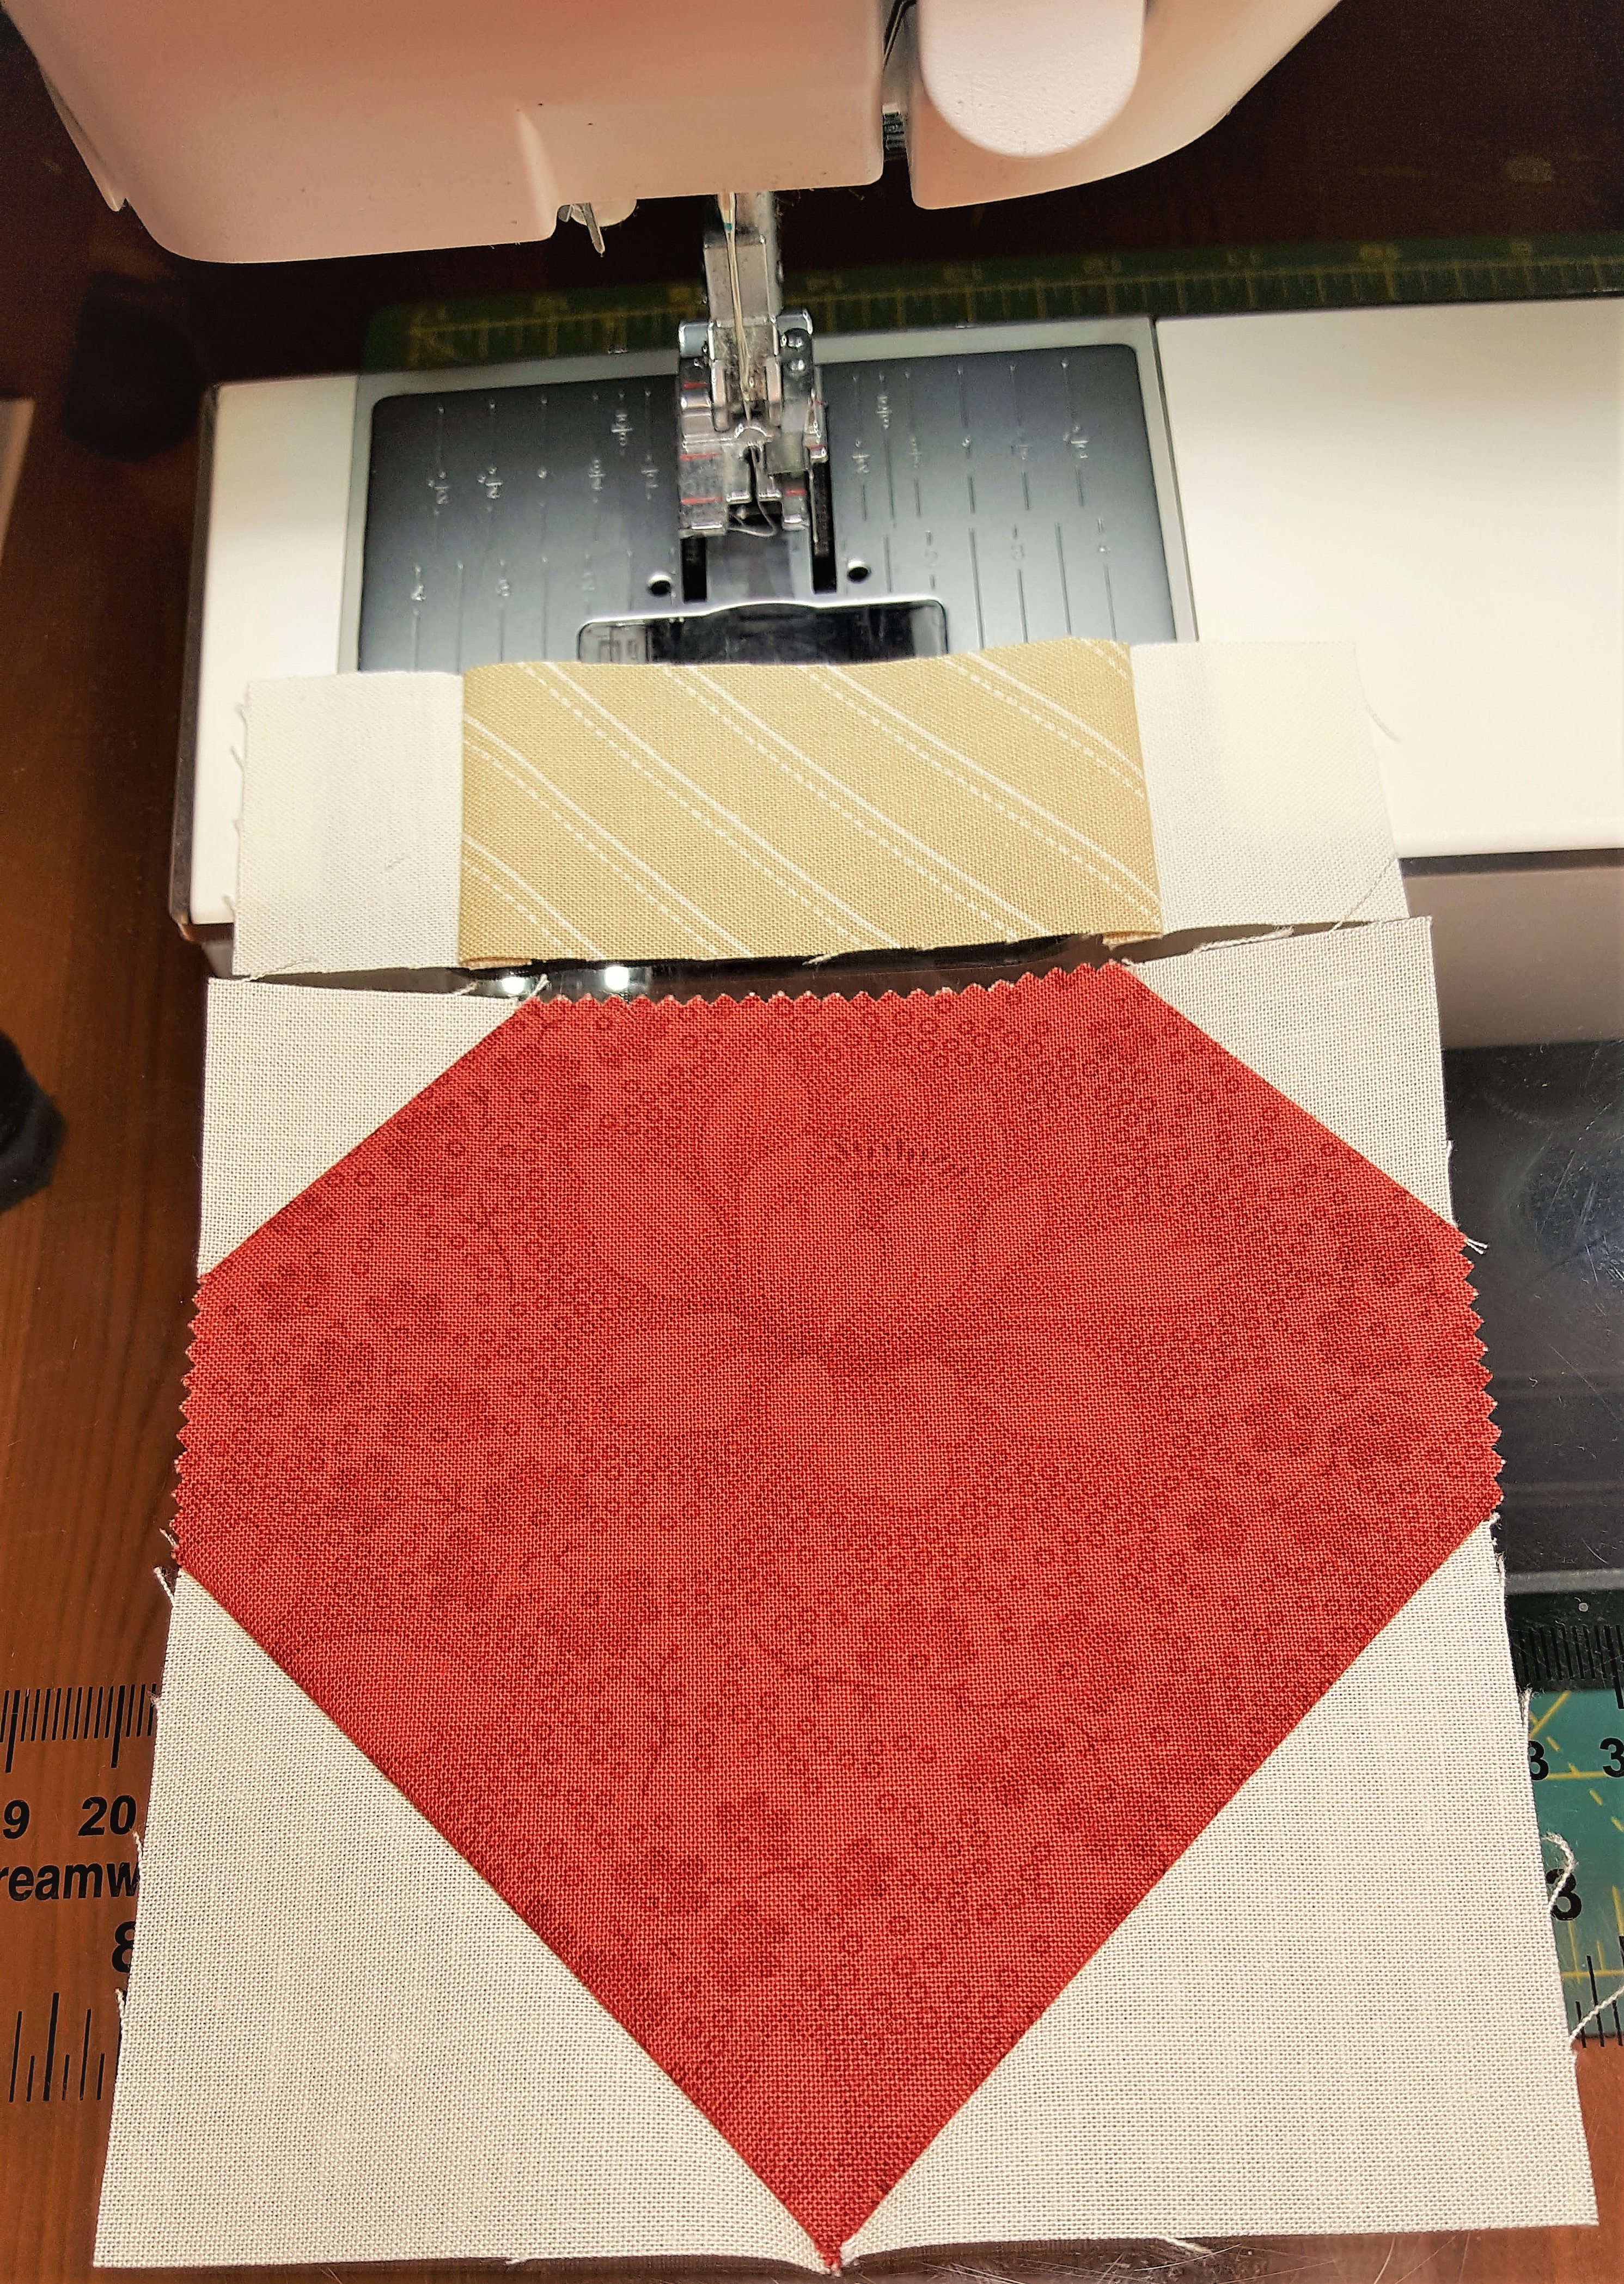
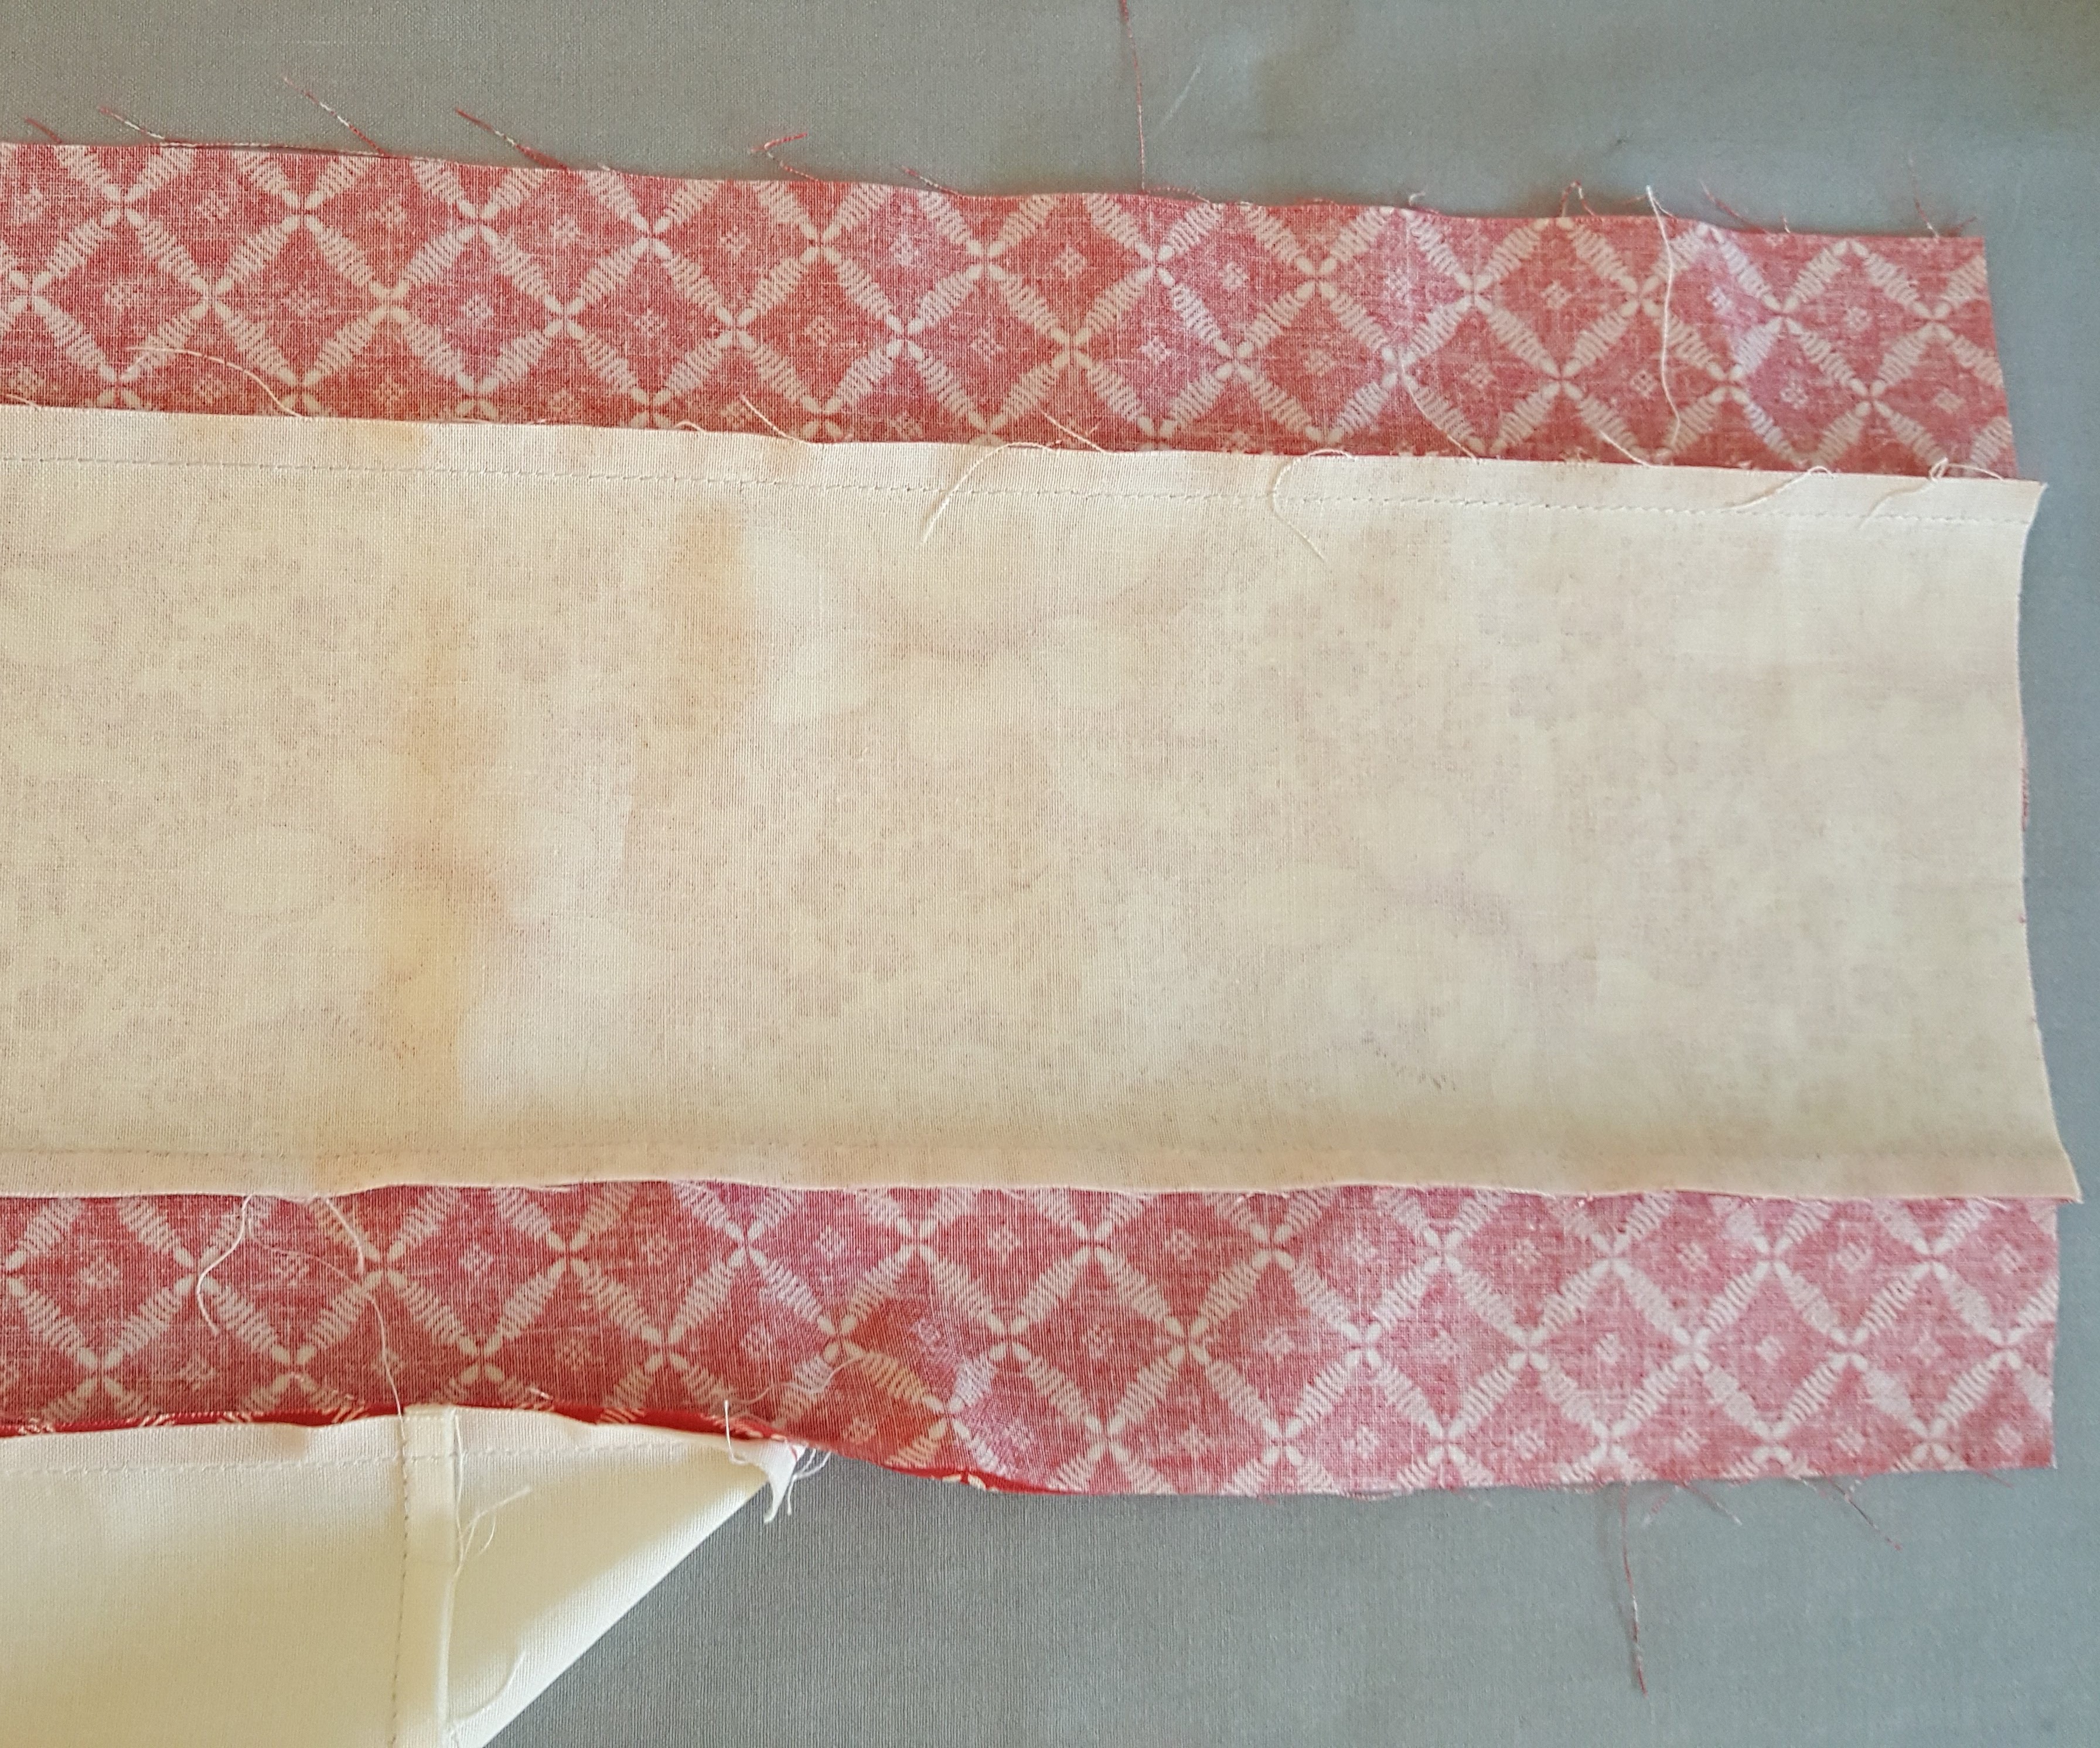
Step #5 - Add Short Sashing:
Next add a 7” X 2 ½” short sashing piece to both the left and right sides and press open. There will be (7) left-over 7” X 2 ½” pieces, they will be used in the next step.
The ornament block will measure 9” wide X 7” tall.
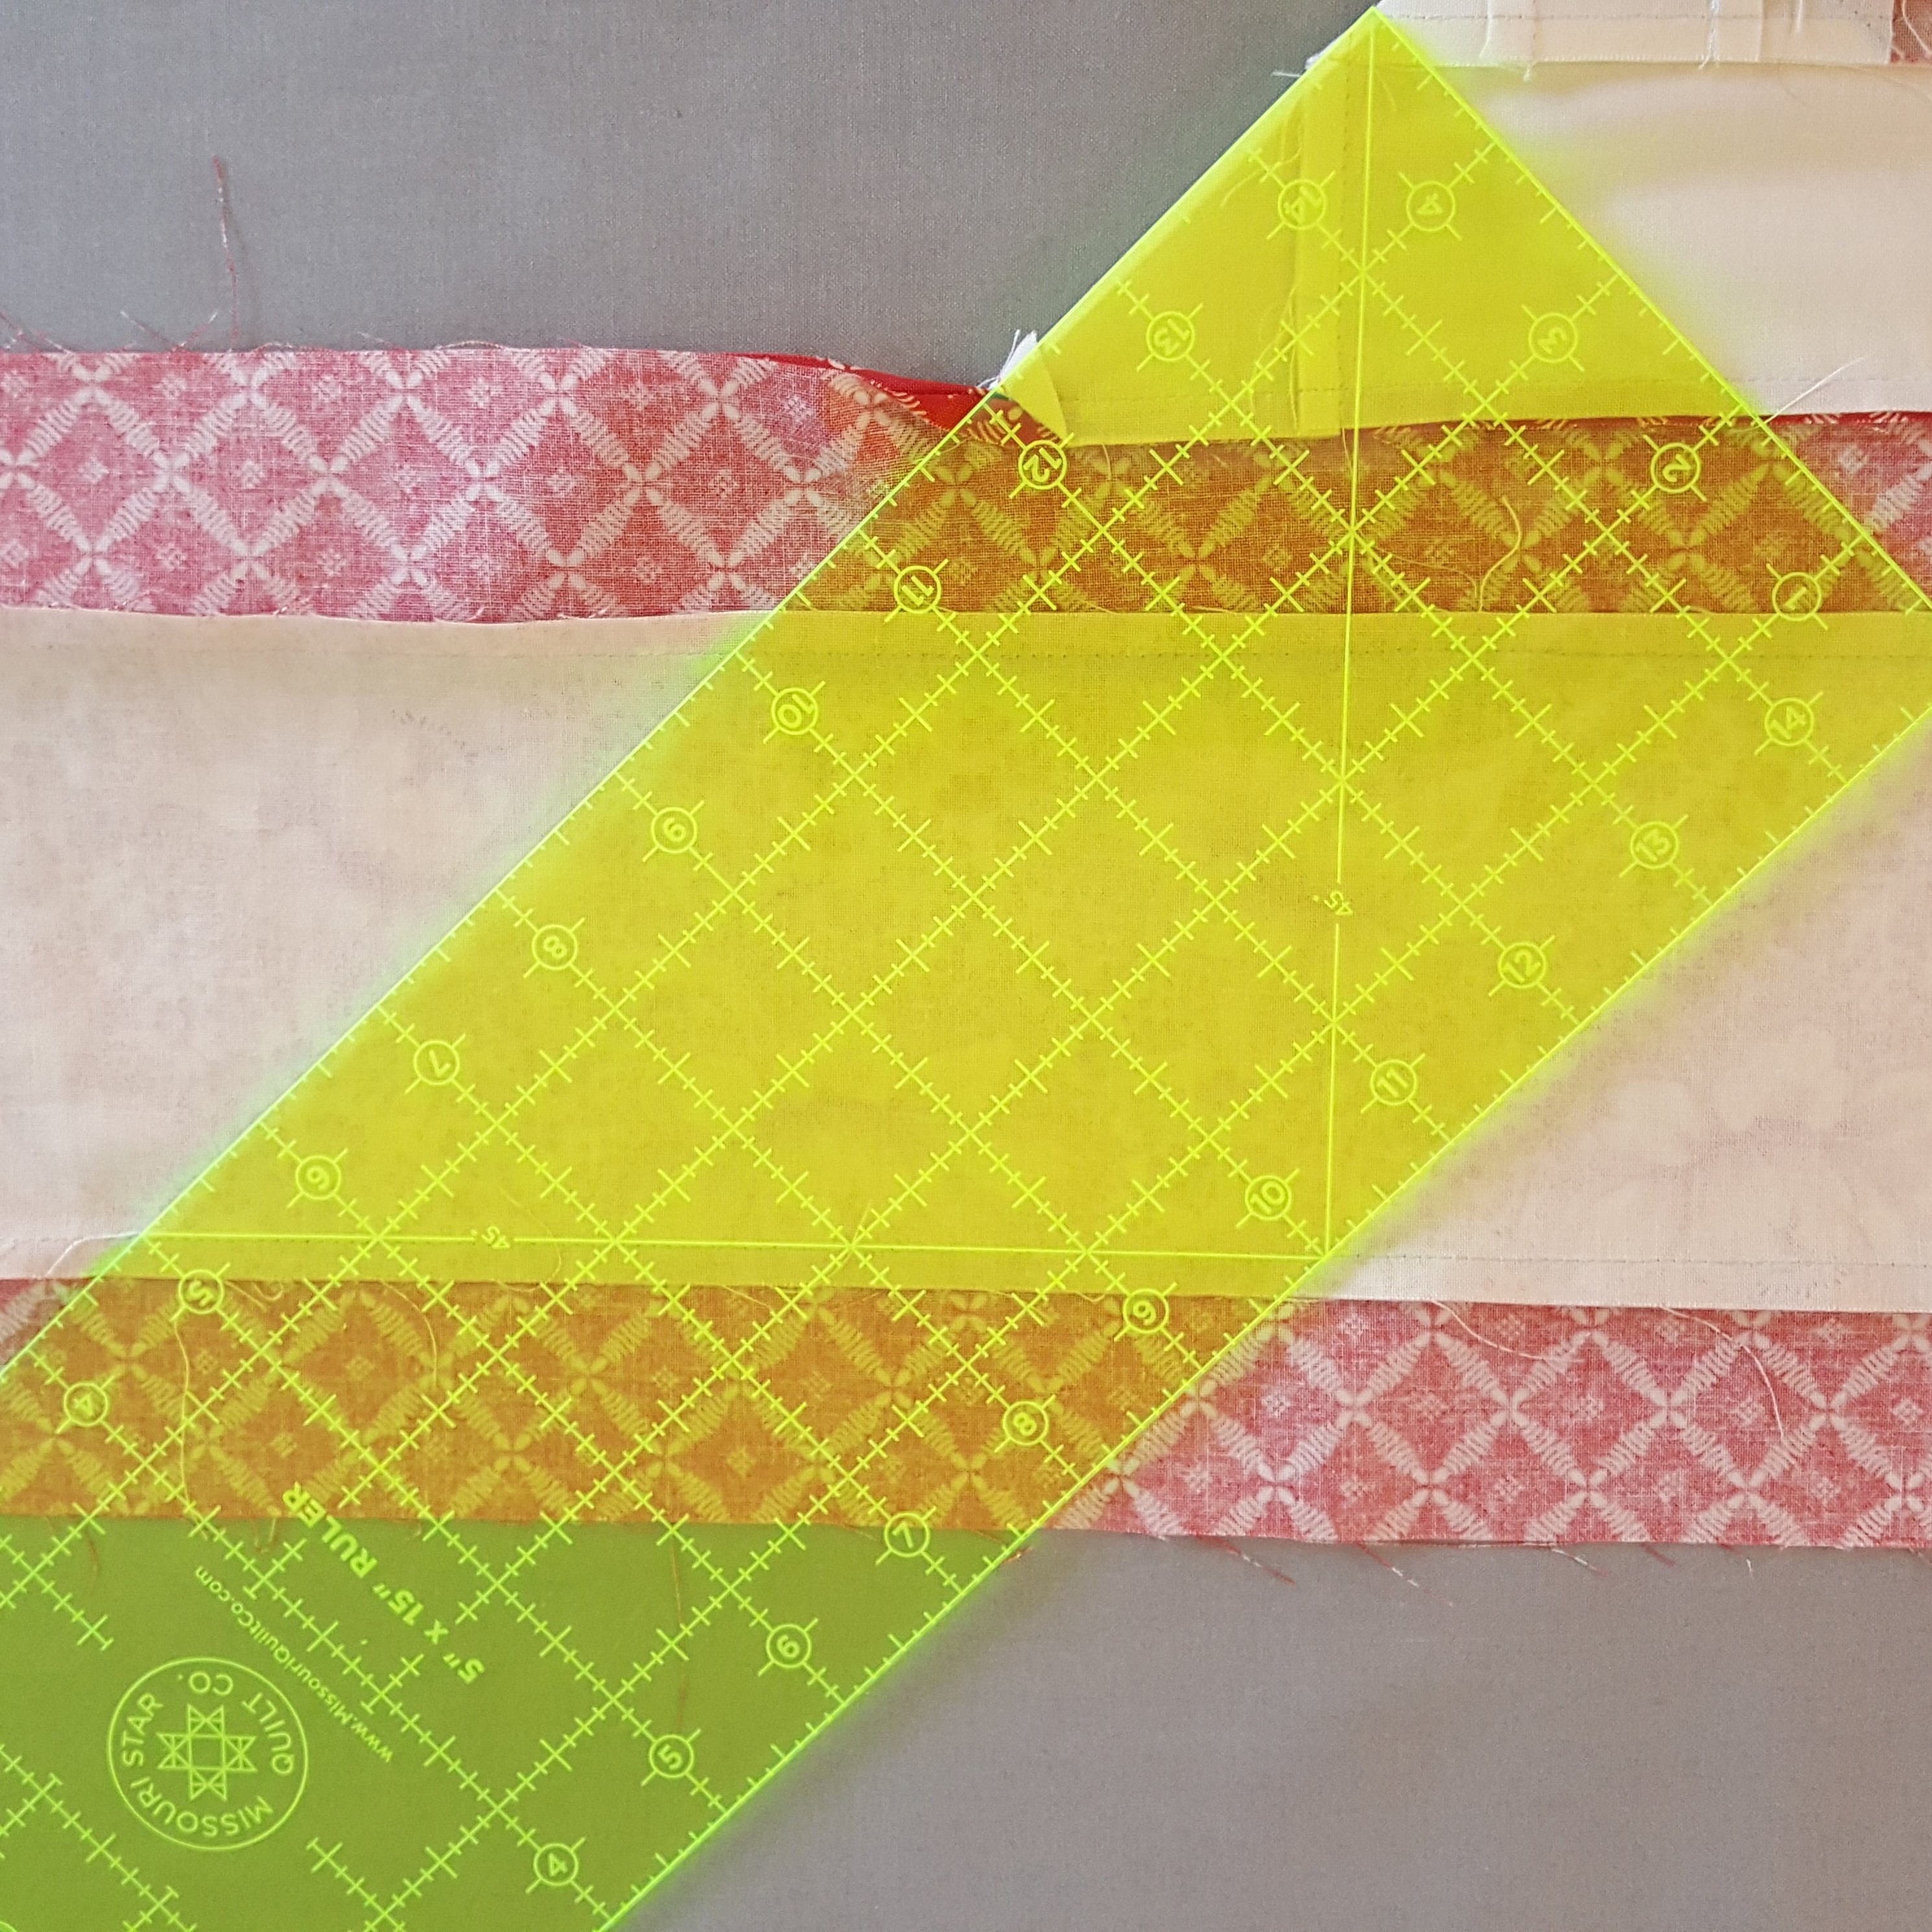
Step #6 - Sew Row Together
Sew the Ornament blocks together into seven rows of six blocks. Layout the rows as desired and add a short sashing piece to the left of the odd numbered rows (#1, #3, #5 and #7) and to the right of the even numbered rows (#2, #4 and #6)
Step #7 - Add Long Sashing:
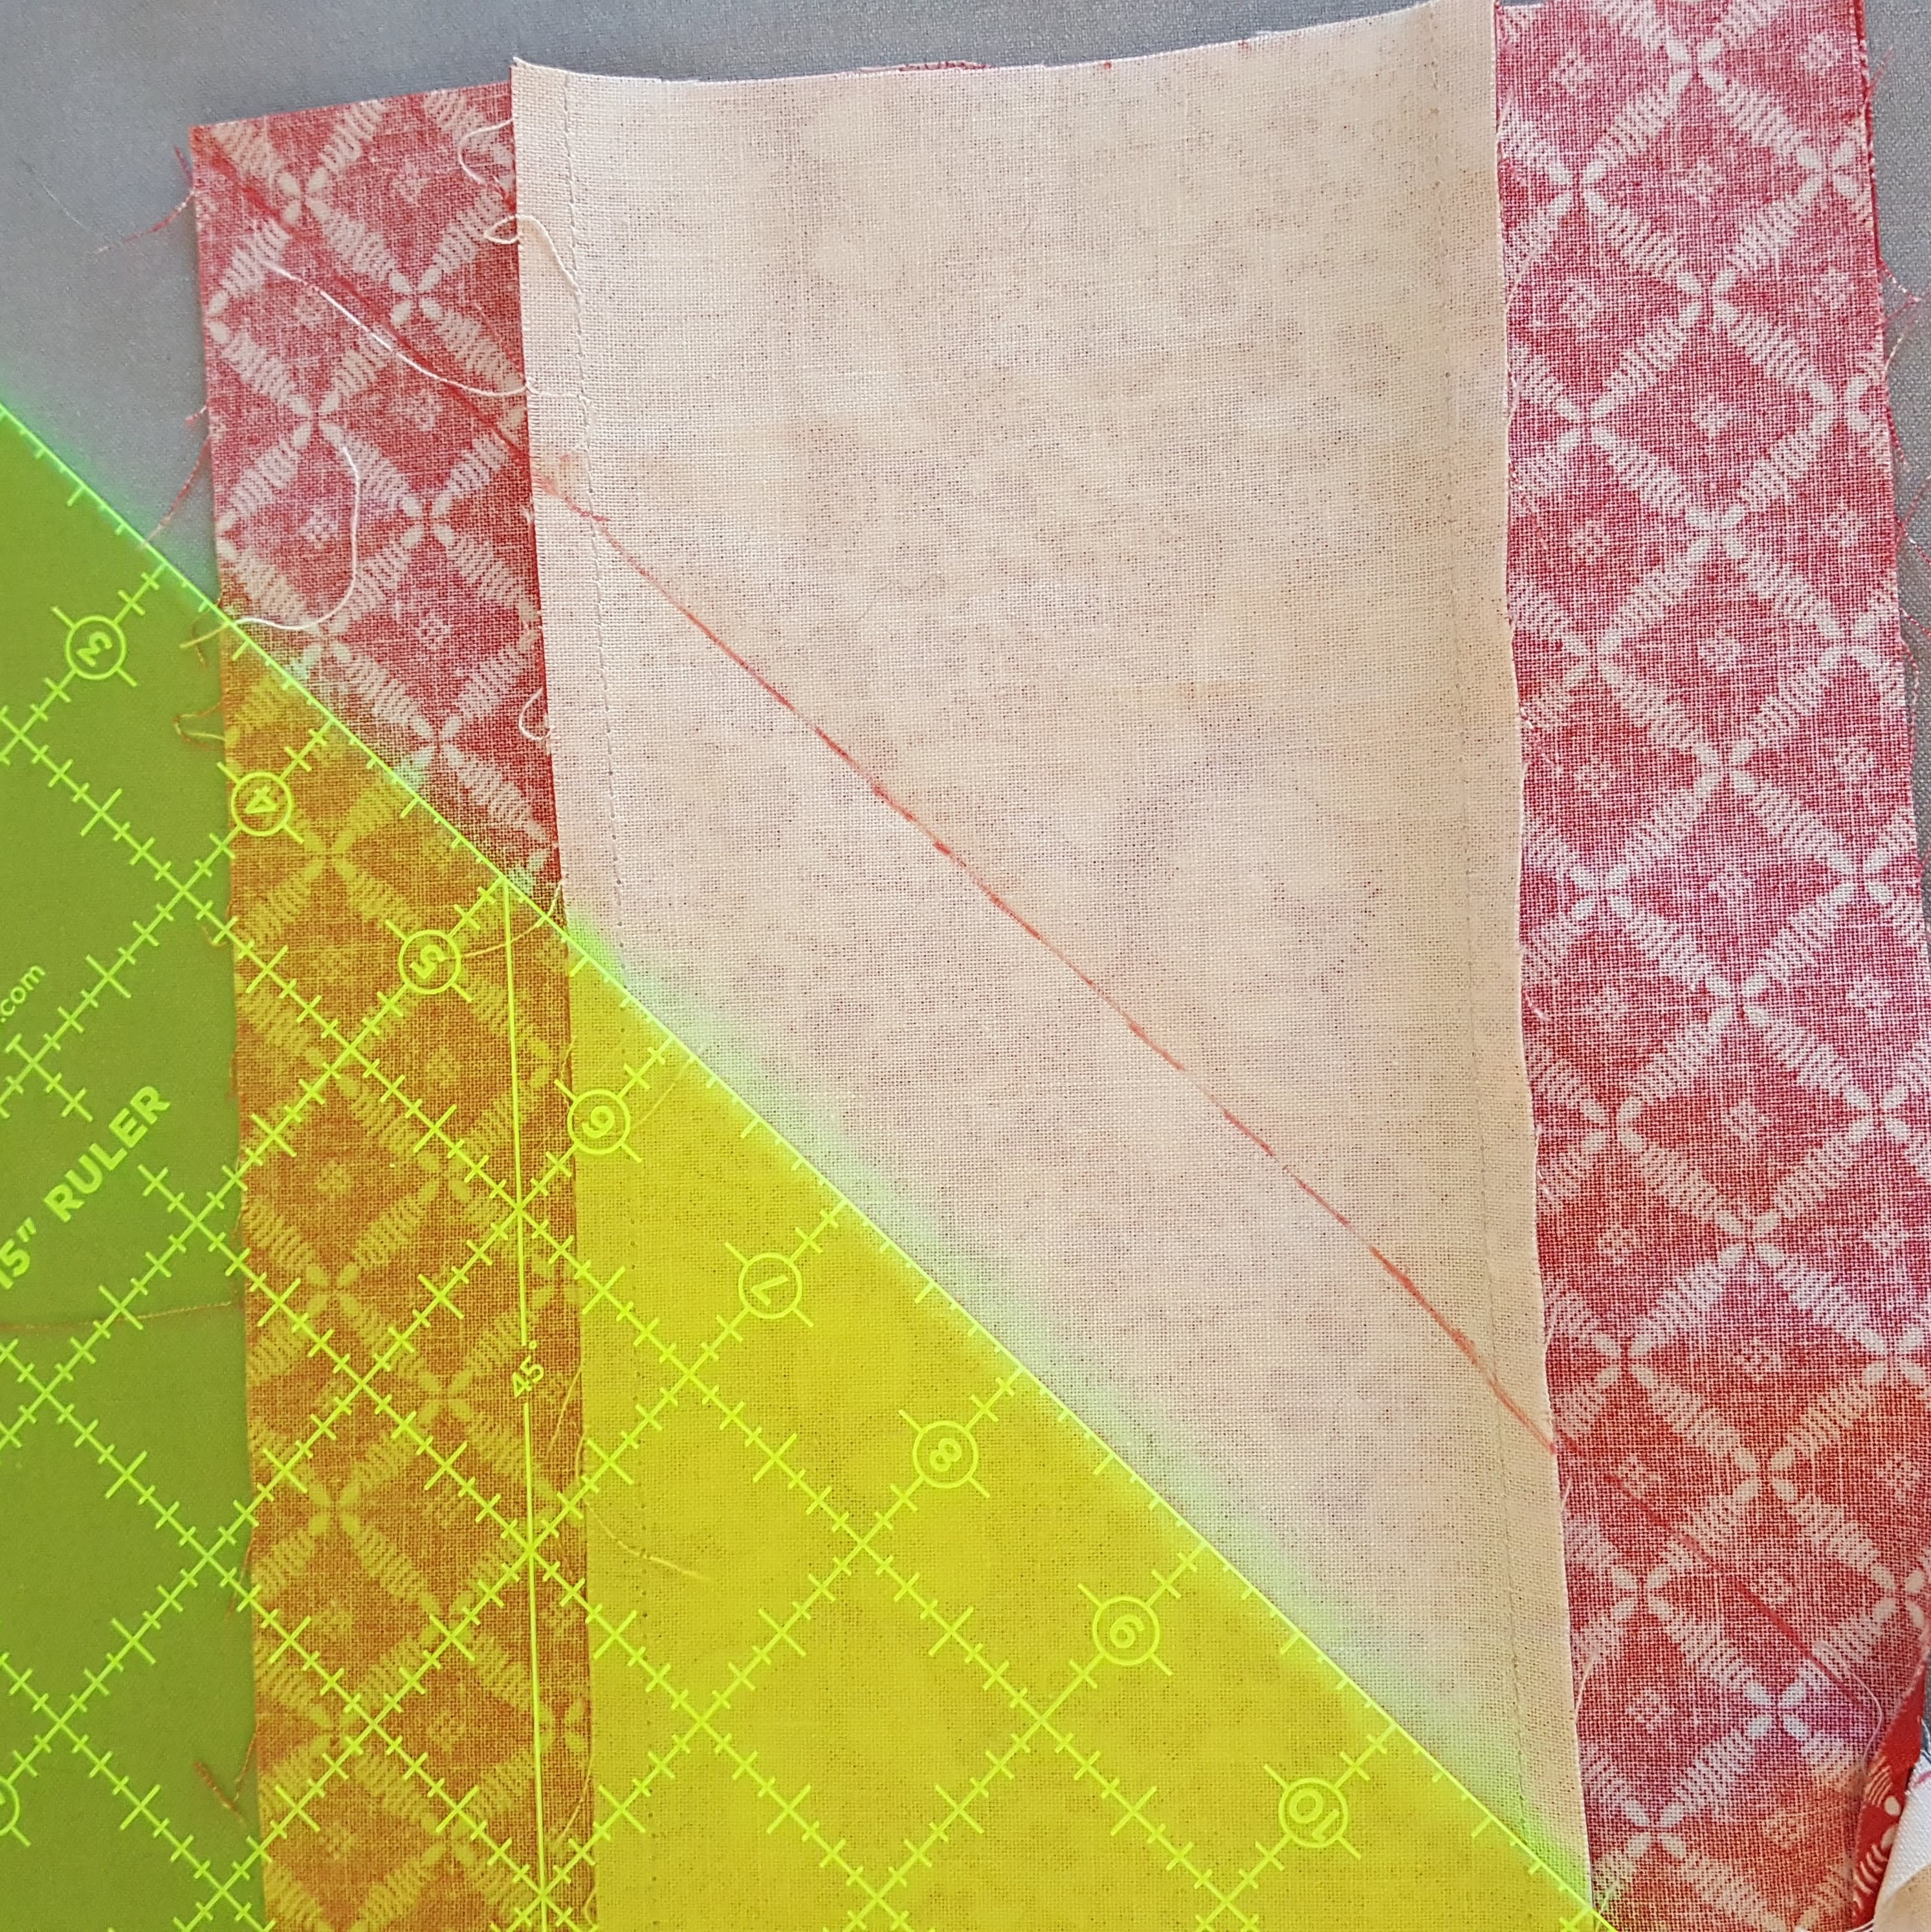
Add one long sashing strip (made in step #2) to the bottom of each row. fold both the long sashing and the row in half to find the center.
Match the center of the long sashing to the center of the row, and pin at the center and at each matched end of the row.

Ease the row and sashing together, if necessary, between the pinned points.
Sew the rows together and add the remaining long sashing to the top.
Step #8 - Add borders
The borders are sewn into four strata that are added to each side of the quilt center and mitered together at each corner.
Sew two red 2” X WOF border strips together at the short end with a mitered join. Repeat to make (8) long red pieces. Sew two floral 4” X WOF border strips together at the short end with a mitered join. Repeat to make (4) long floral pieces.
Sew the long pieces into (4) strata – Red, Floral, Red. Press to the dark fabrics. Trim the ends of the strata straight and fold in half lengthwise to find the center.
Working on one side at a time, pin a border strata to each side matching the center border strata to the center of the quilt side. The border strata is much longer than the sides, just lay the border flat on the quilt top and pin ¼” in from the left and right side edge of the quilt center. Start and stop sewing ¼” from quilt edge (where your pin is placed). Be sure to back stitch a couple of stitches at the beginning and the end.

Repeat on all four sides of the quilt.
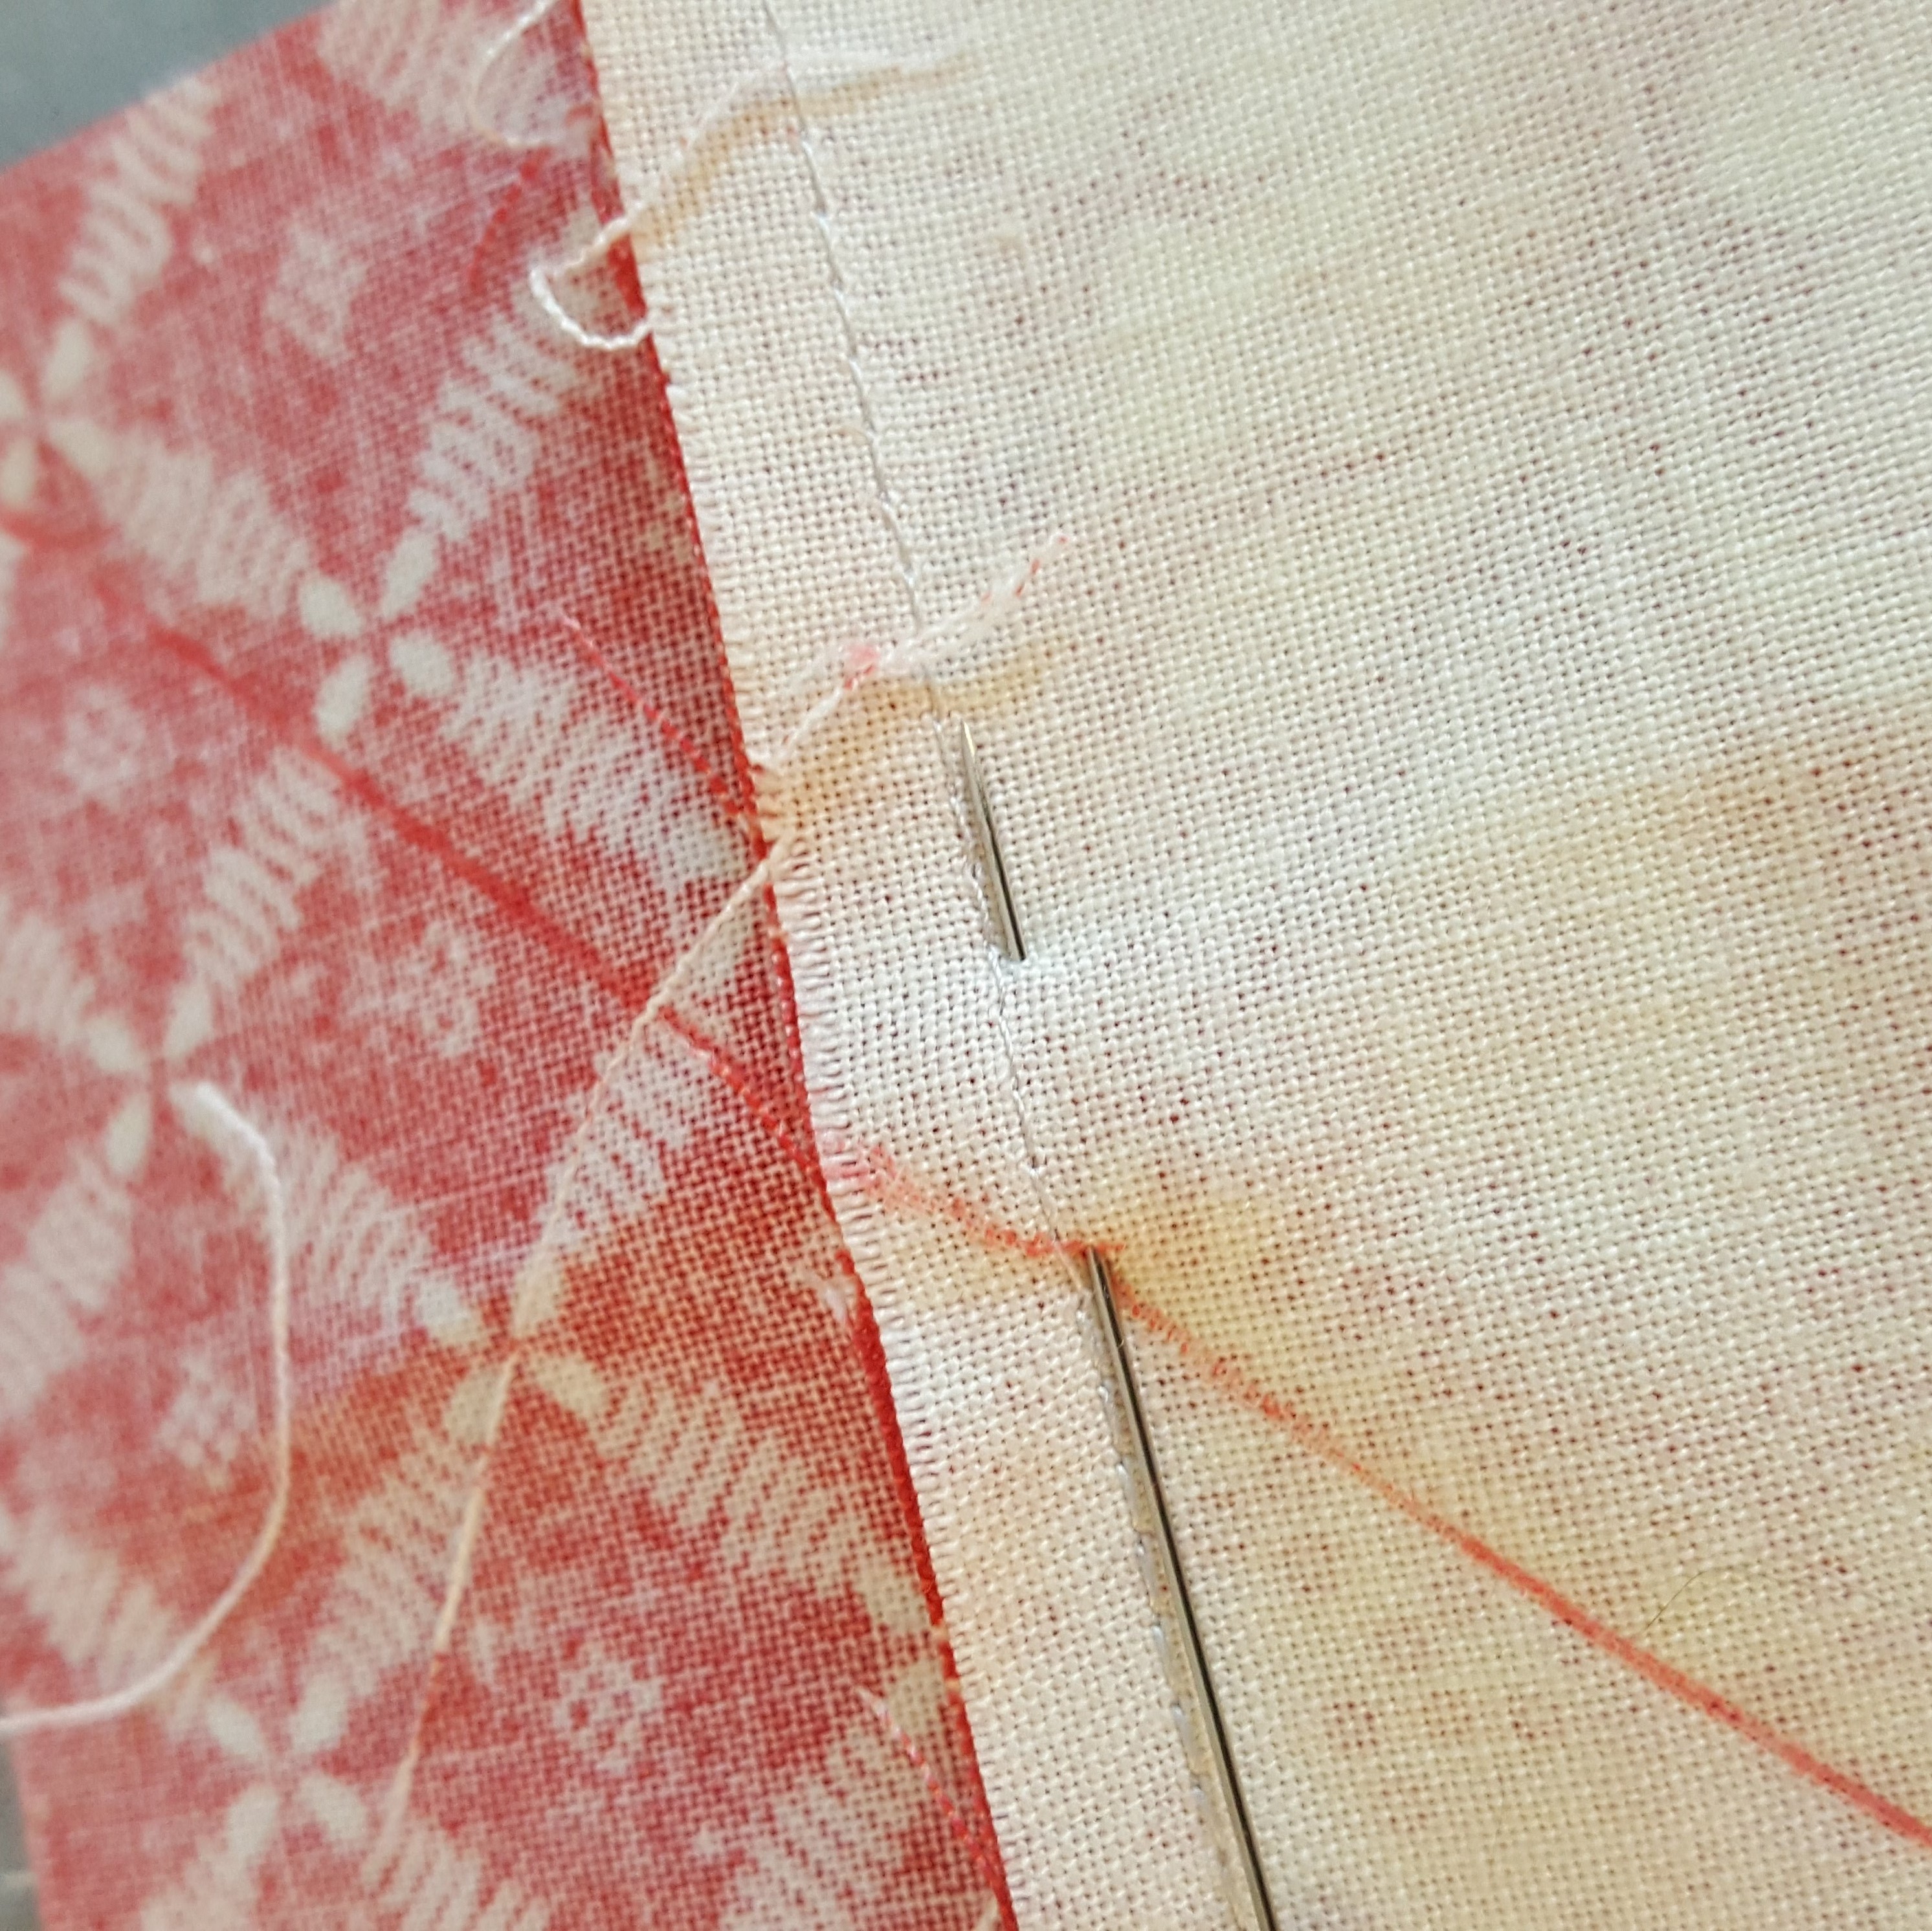
Step #9 - Mitered Corners
After the border strata are added to each side, open the borders flat and cross one side on top of the other.
Mark where the borders cross each other on the outside edge.
Trim the borders on the marked line.
Fold the quilt top so the borders are matched on their long edges and at their ends.
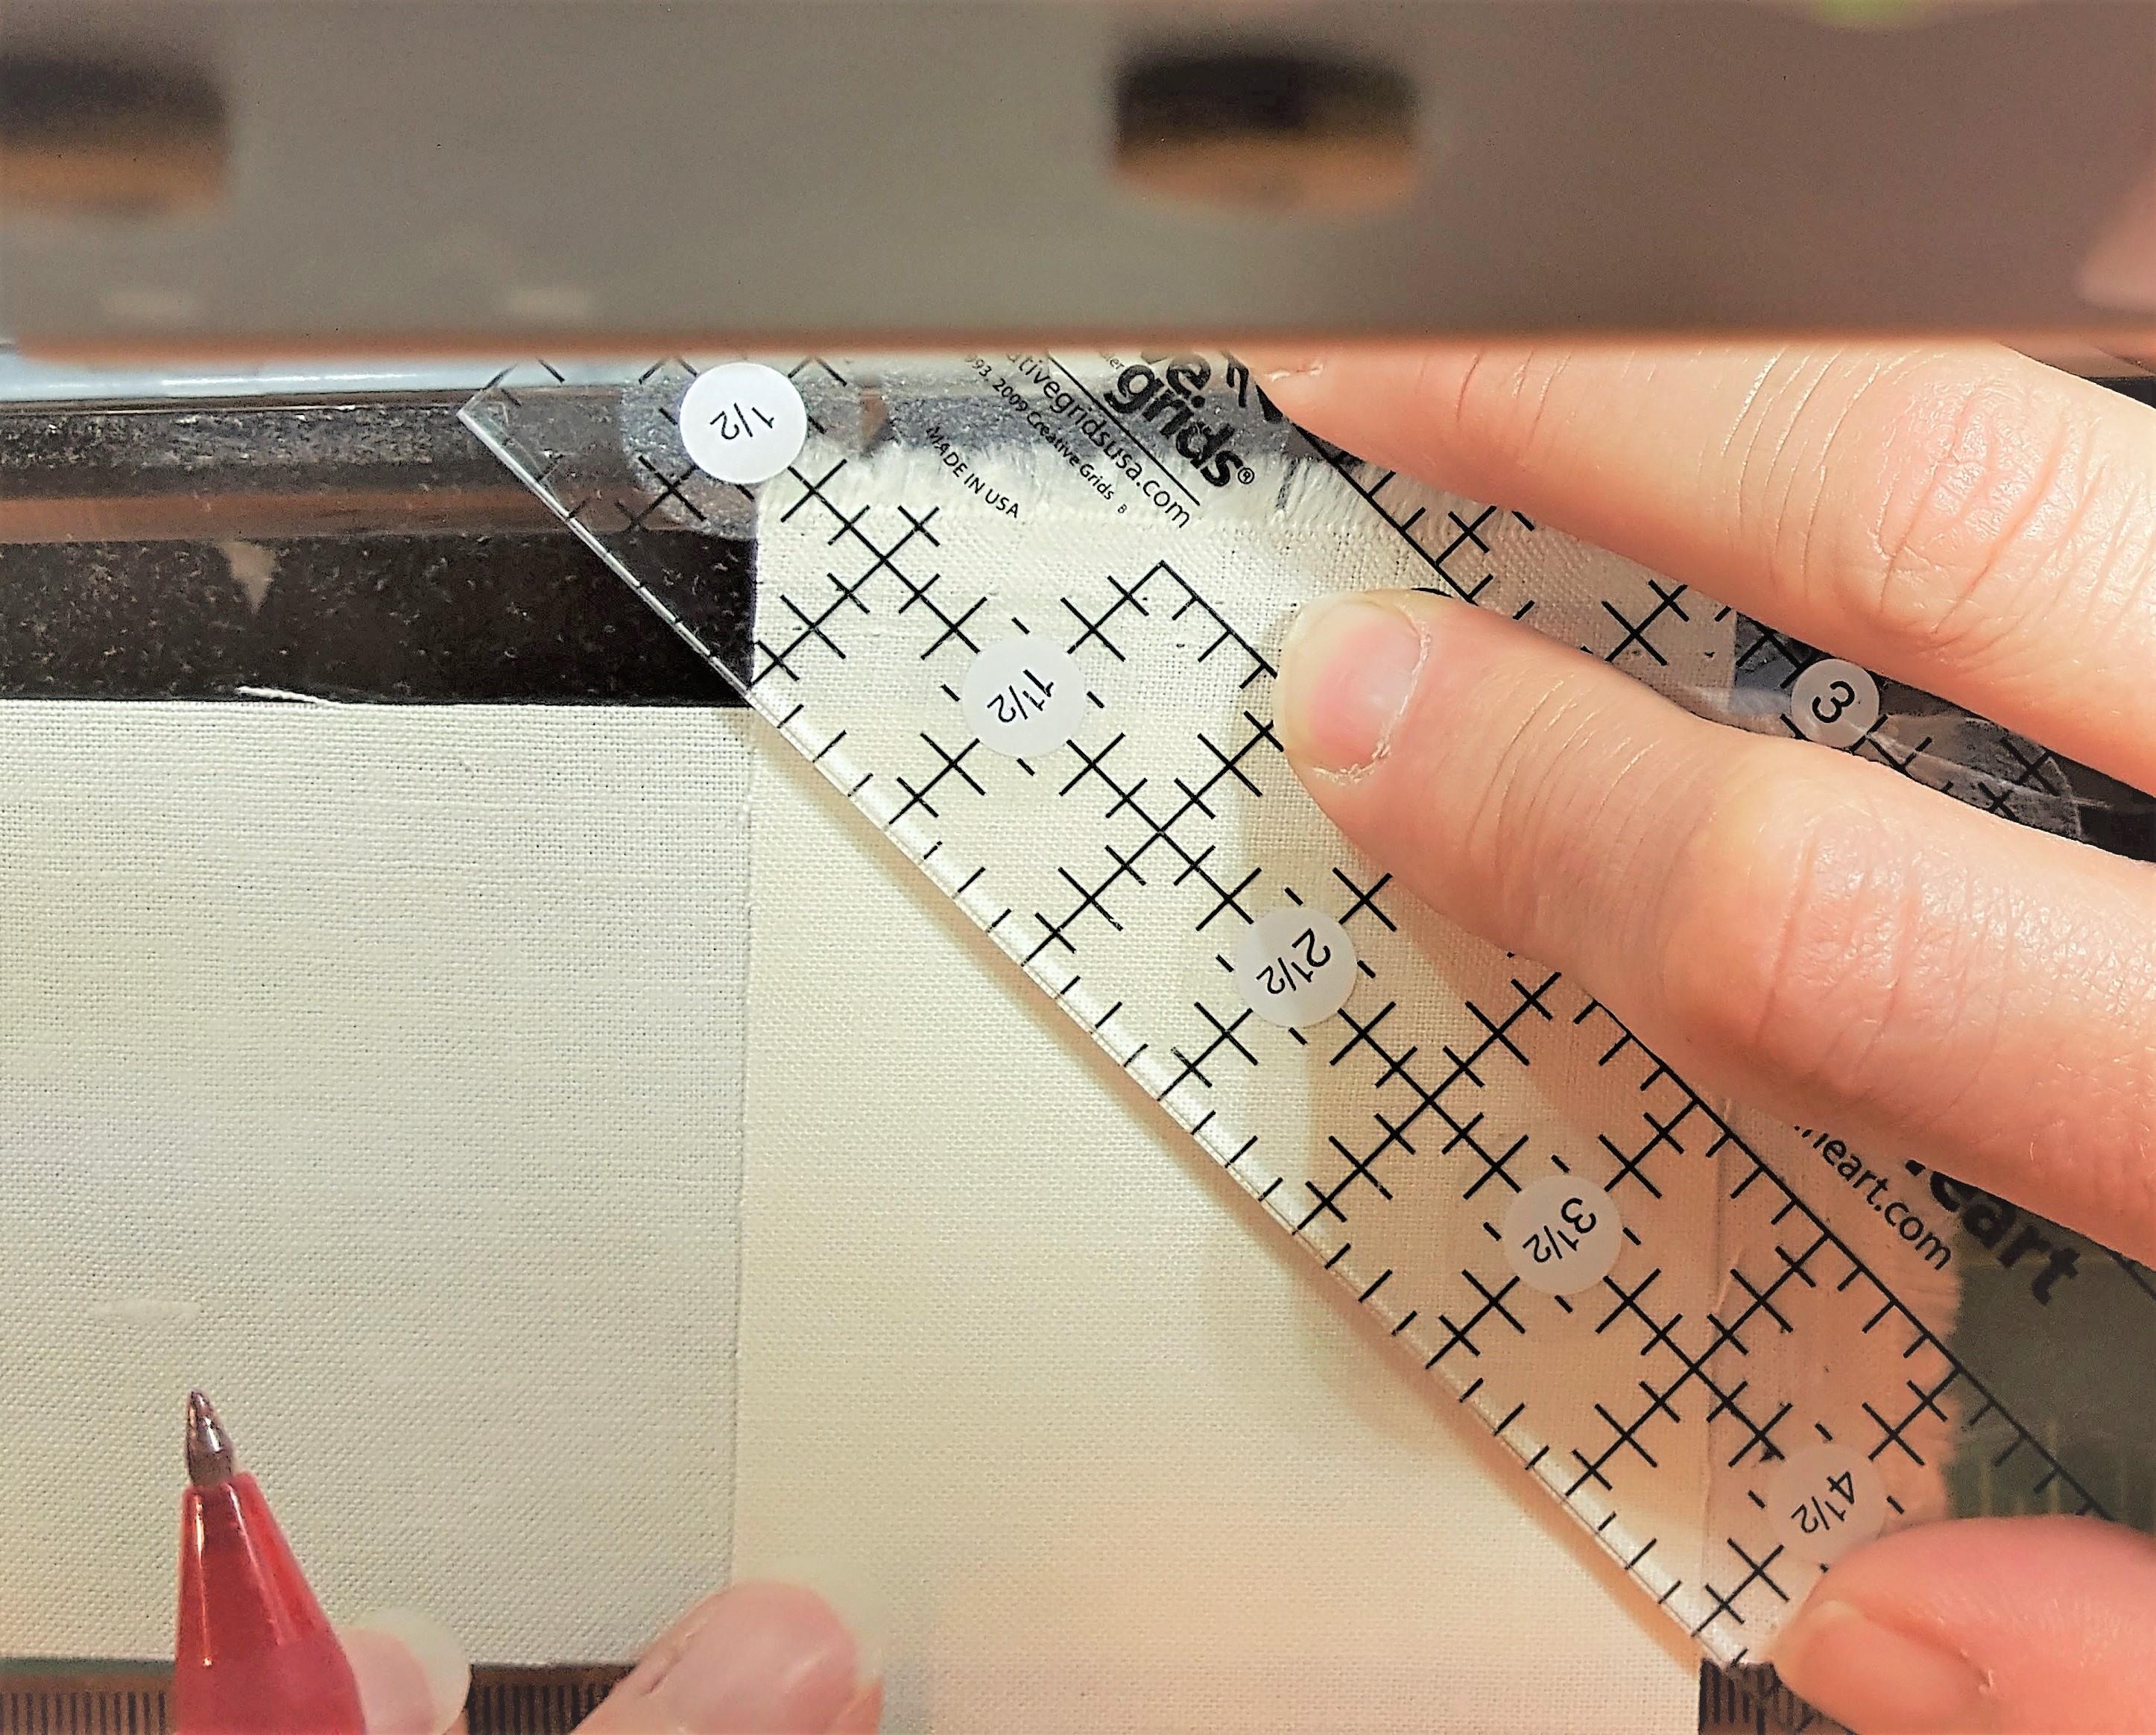
Lay a ruler, with a 45° marking, parallel to the diagonal fold in the quilt and through the corner of the borders.
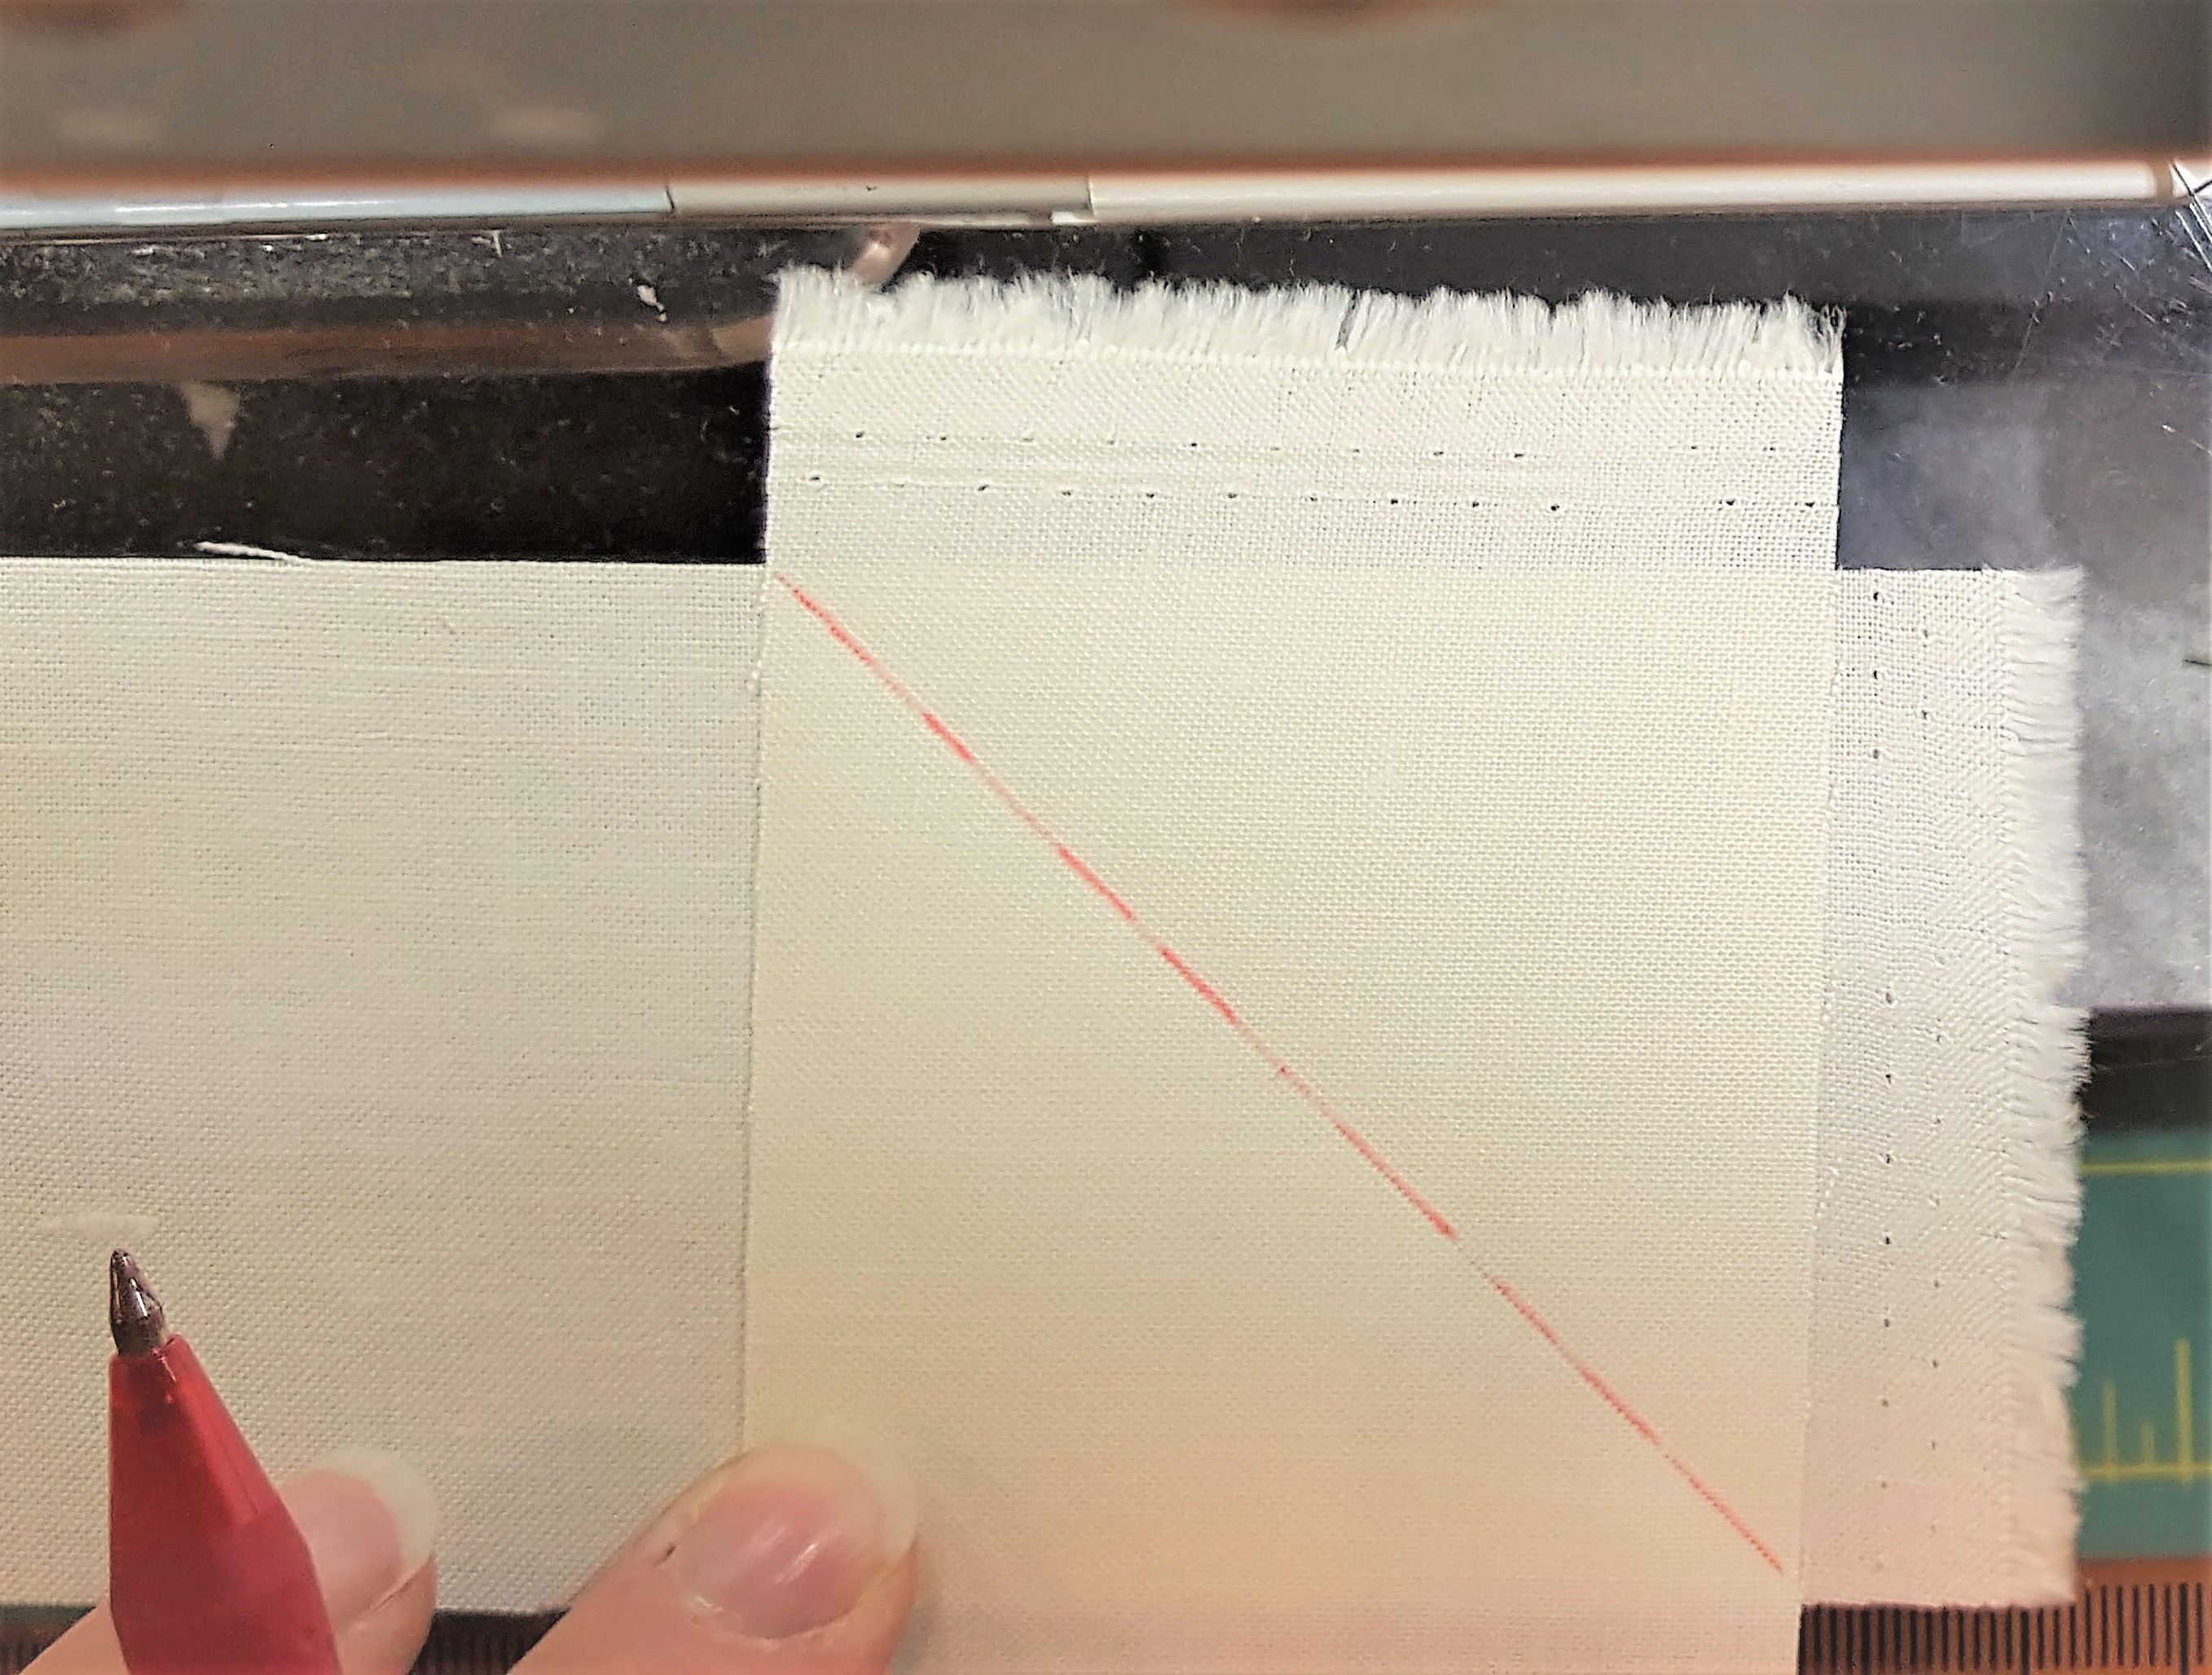
The 45° marking should line up with the border seam lines. Mark the line, DO NOT CUT.
Pin at the intersection of the marked line and the border strata seam line, checking underneath to make sure the seam lines match.
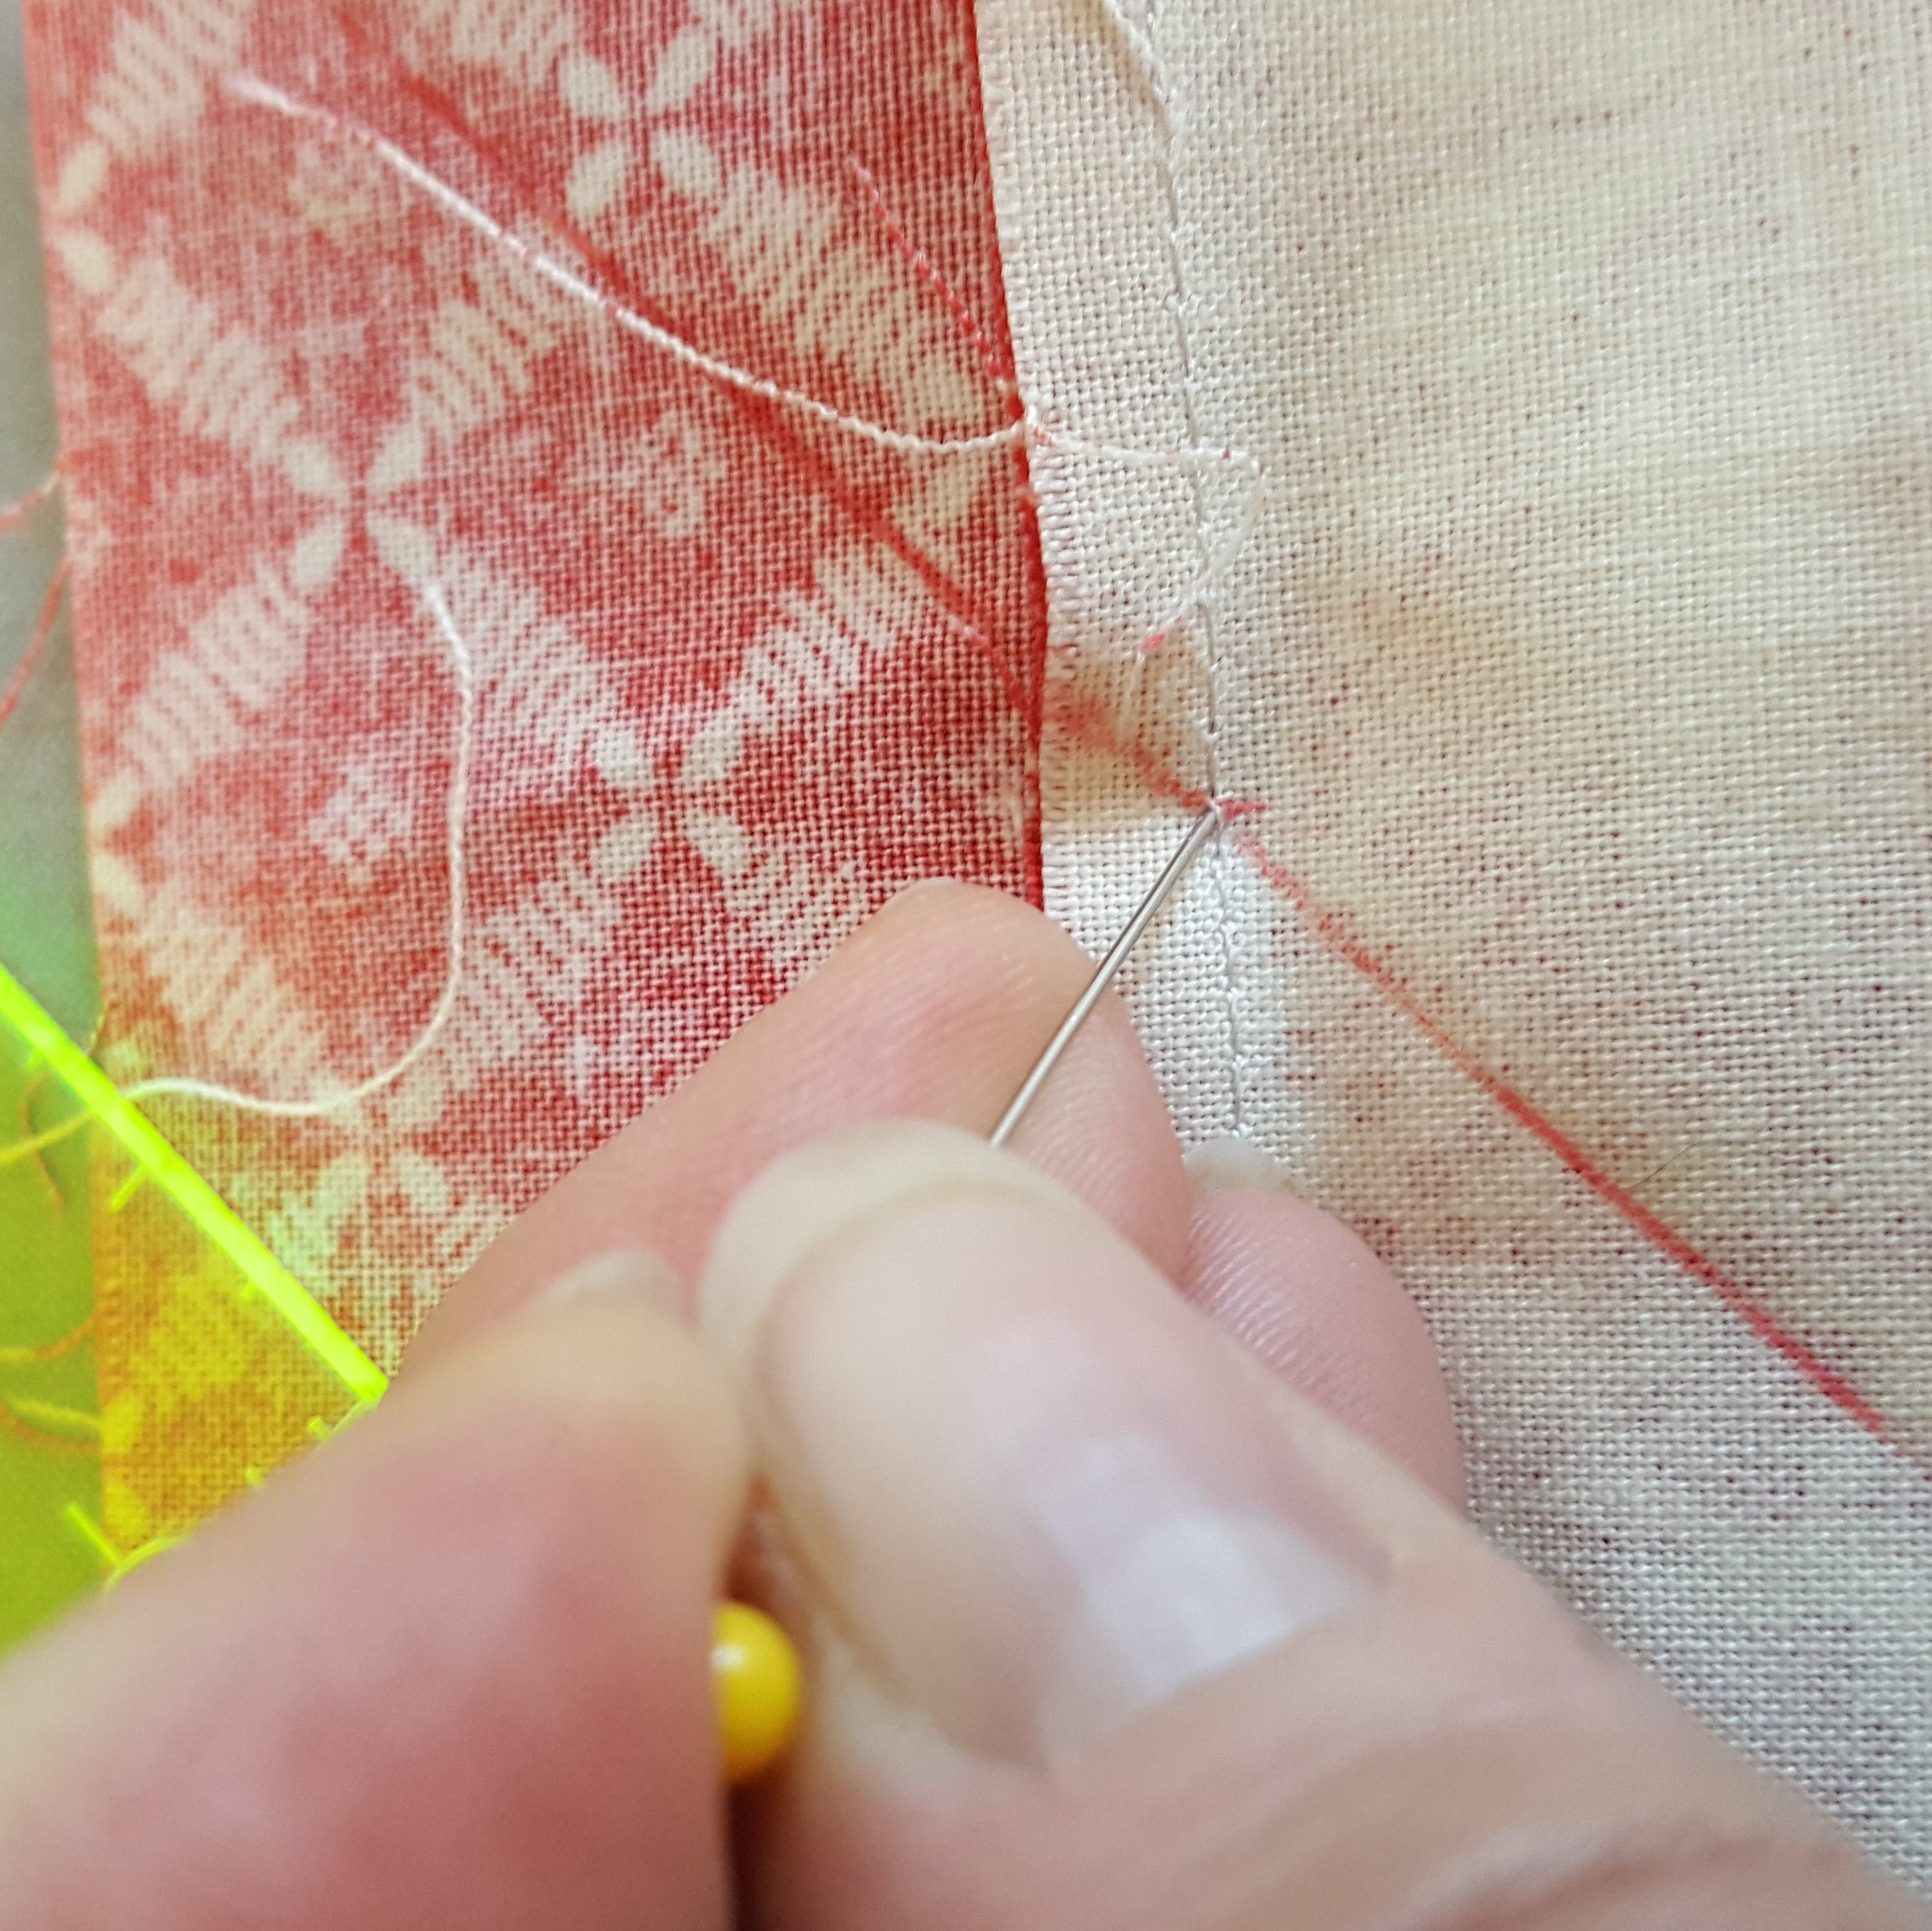
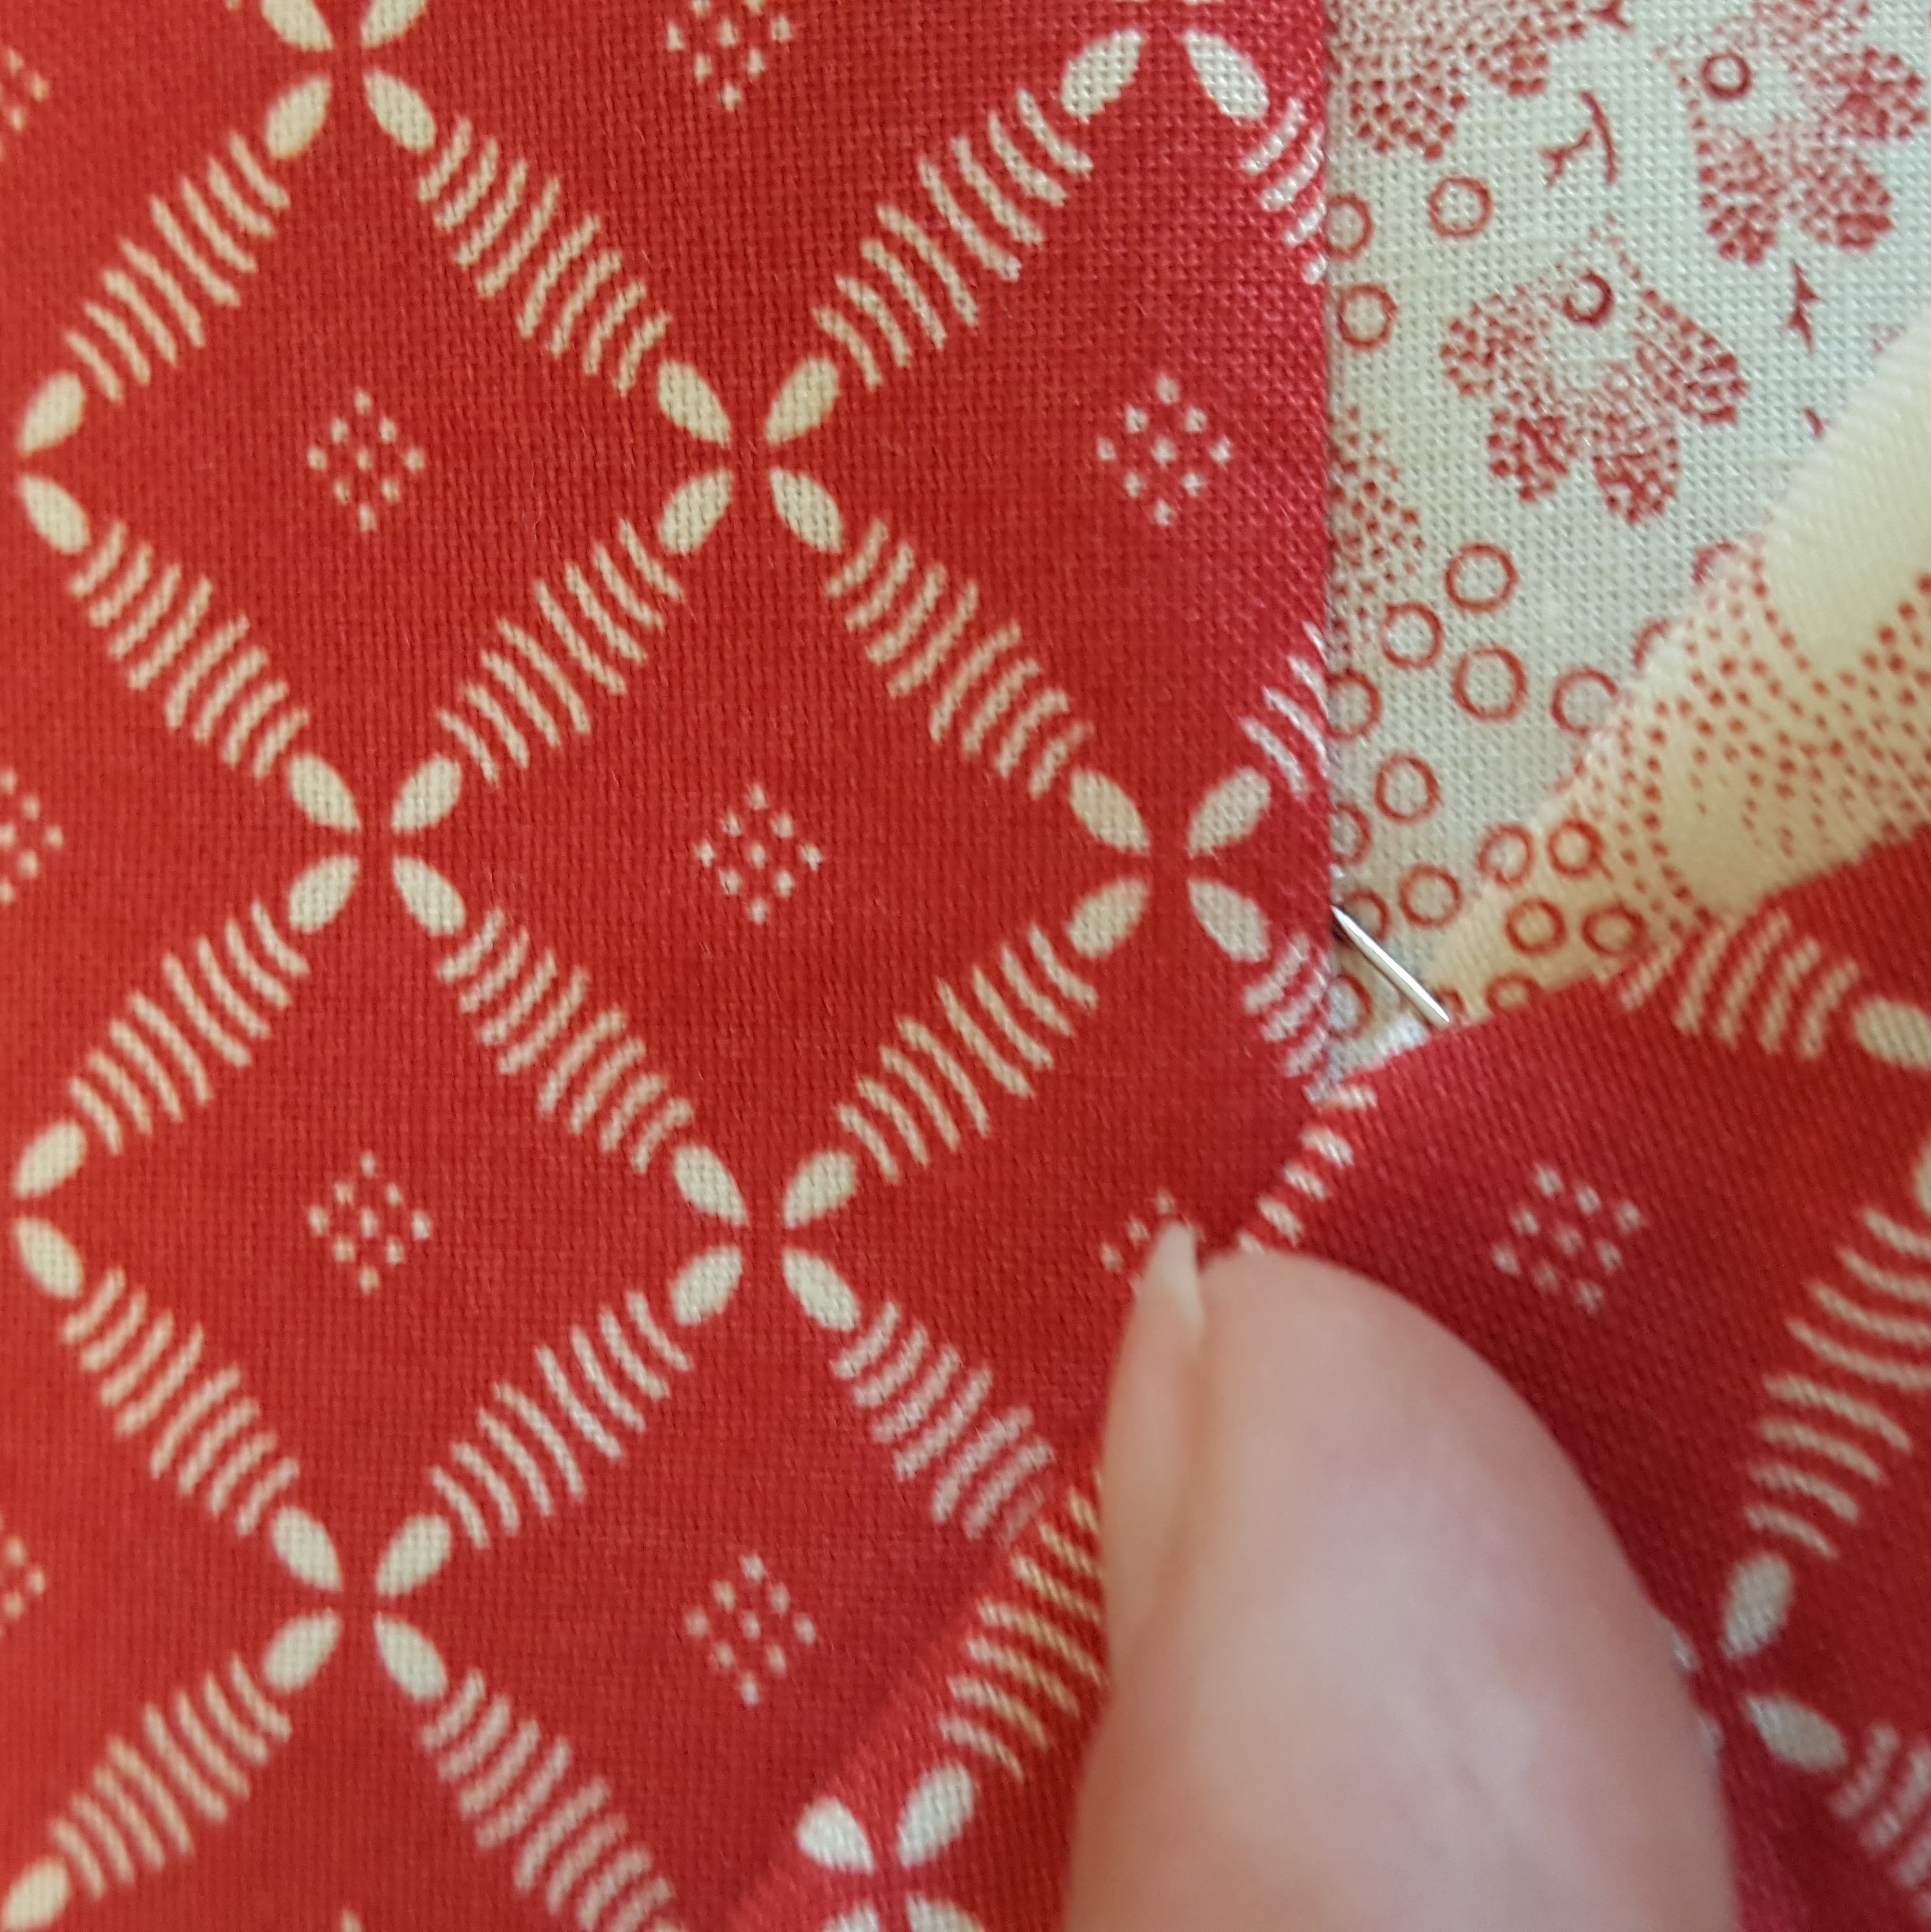
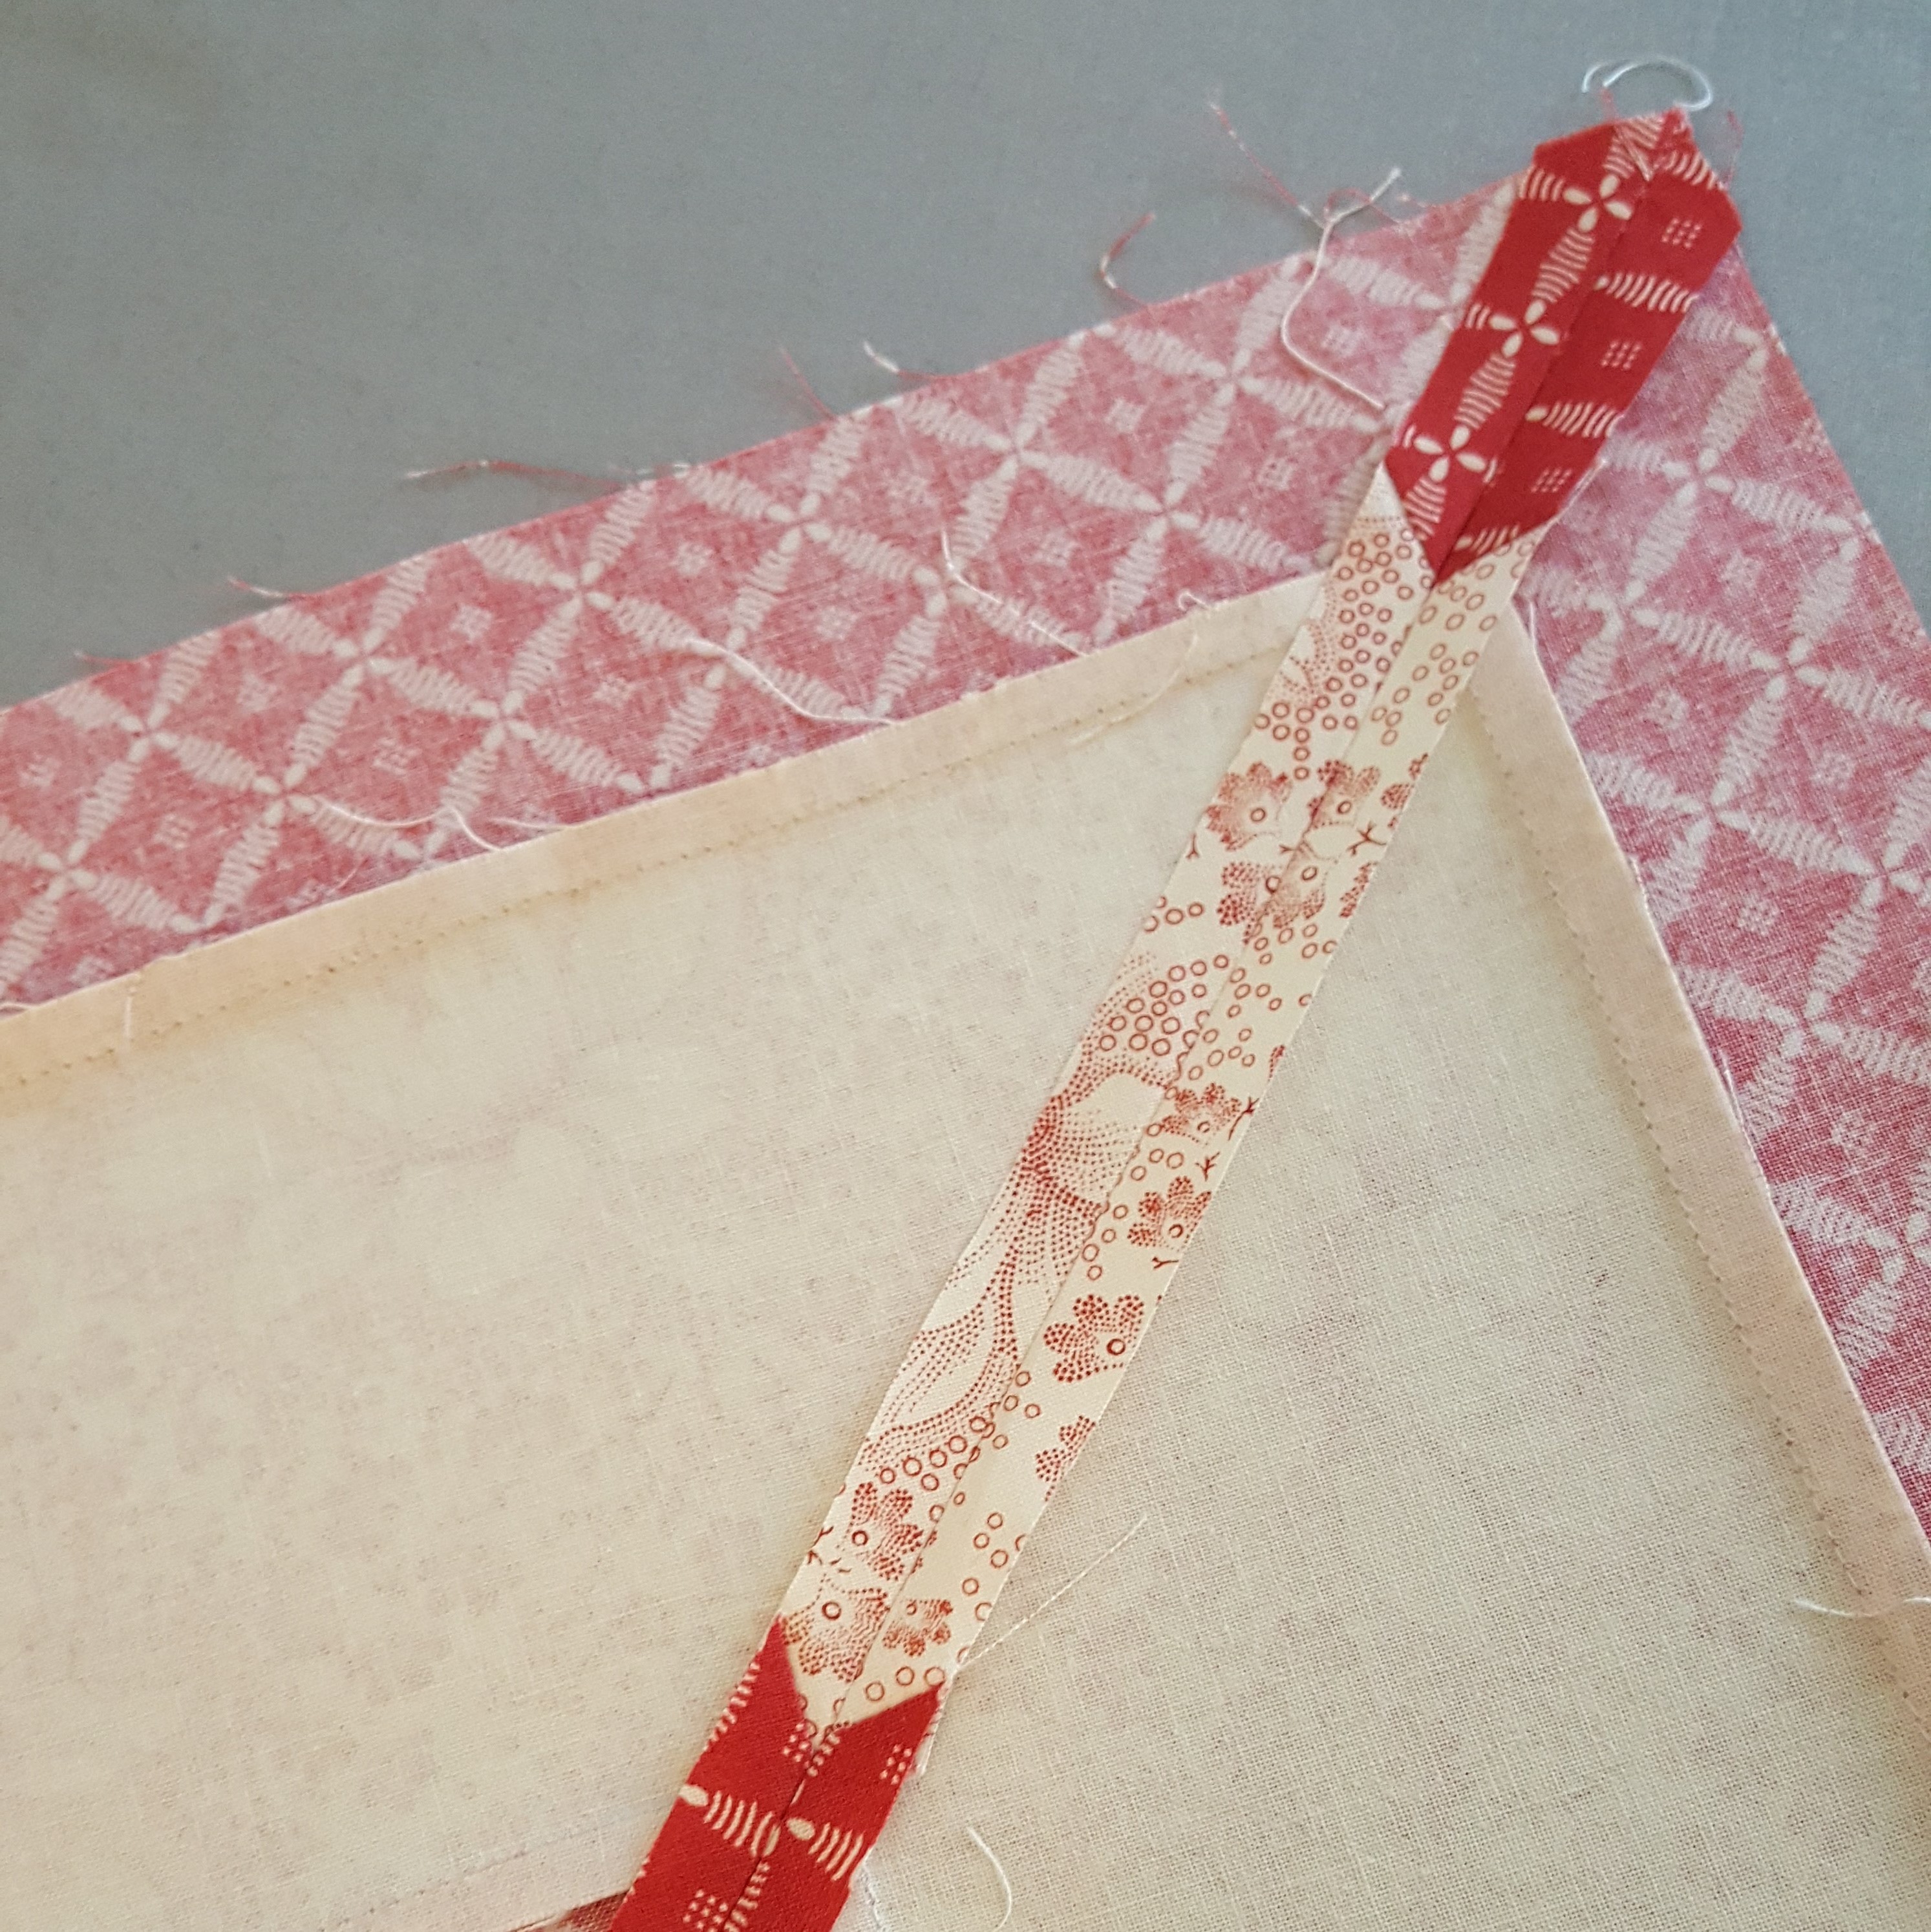
Sew on the marked line. Check the miter to make sure the borders match, and then trim off the excess.
This is one of the few places I always press the seam open. When the mitered seam is pressed open, the corner of the center quilt top will lay flat.
Step #9 - Baste & Quilt & Bind
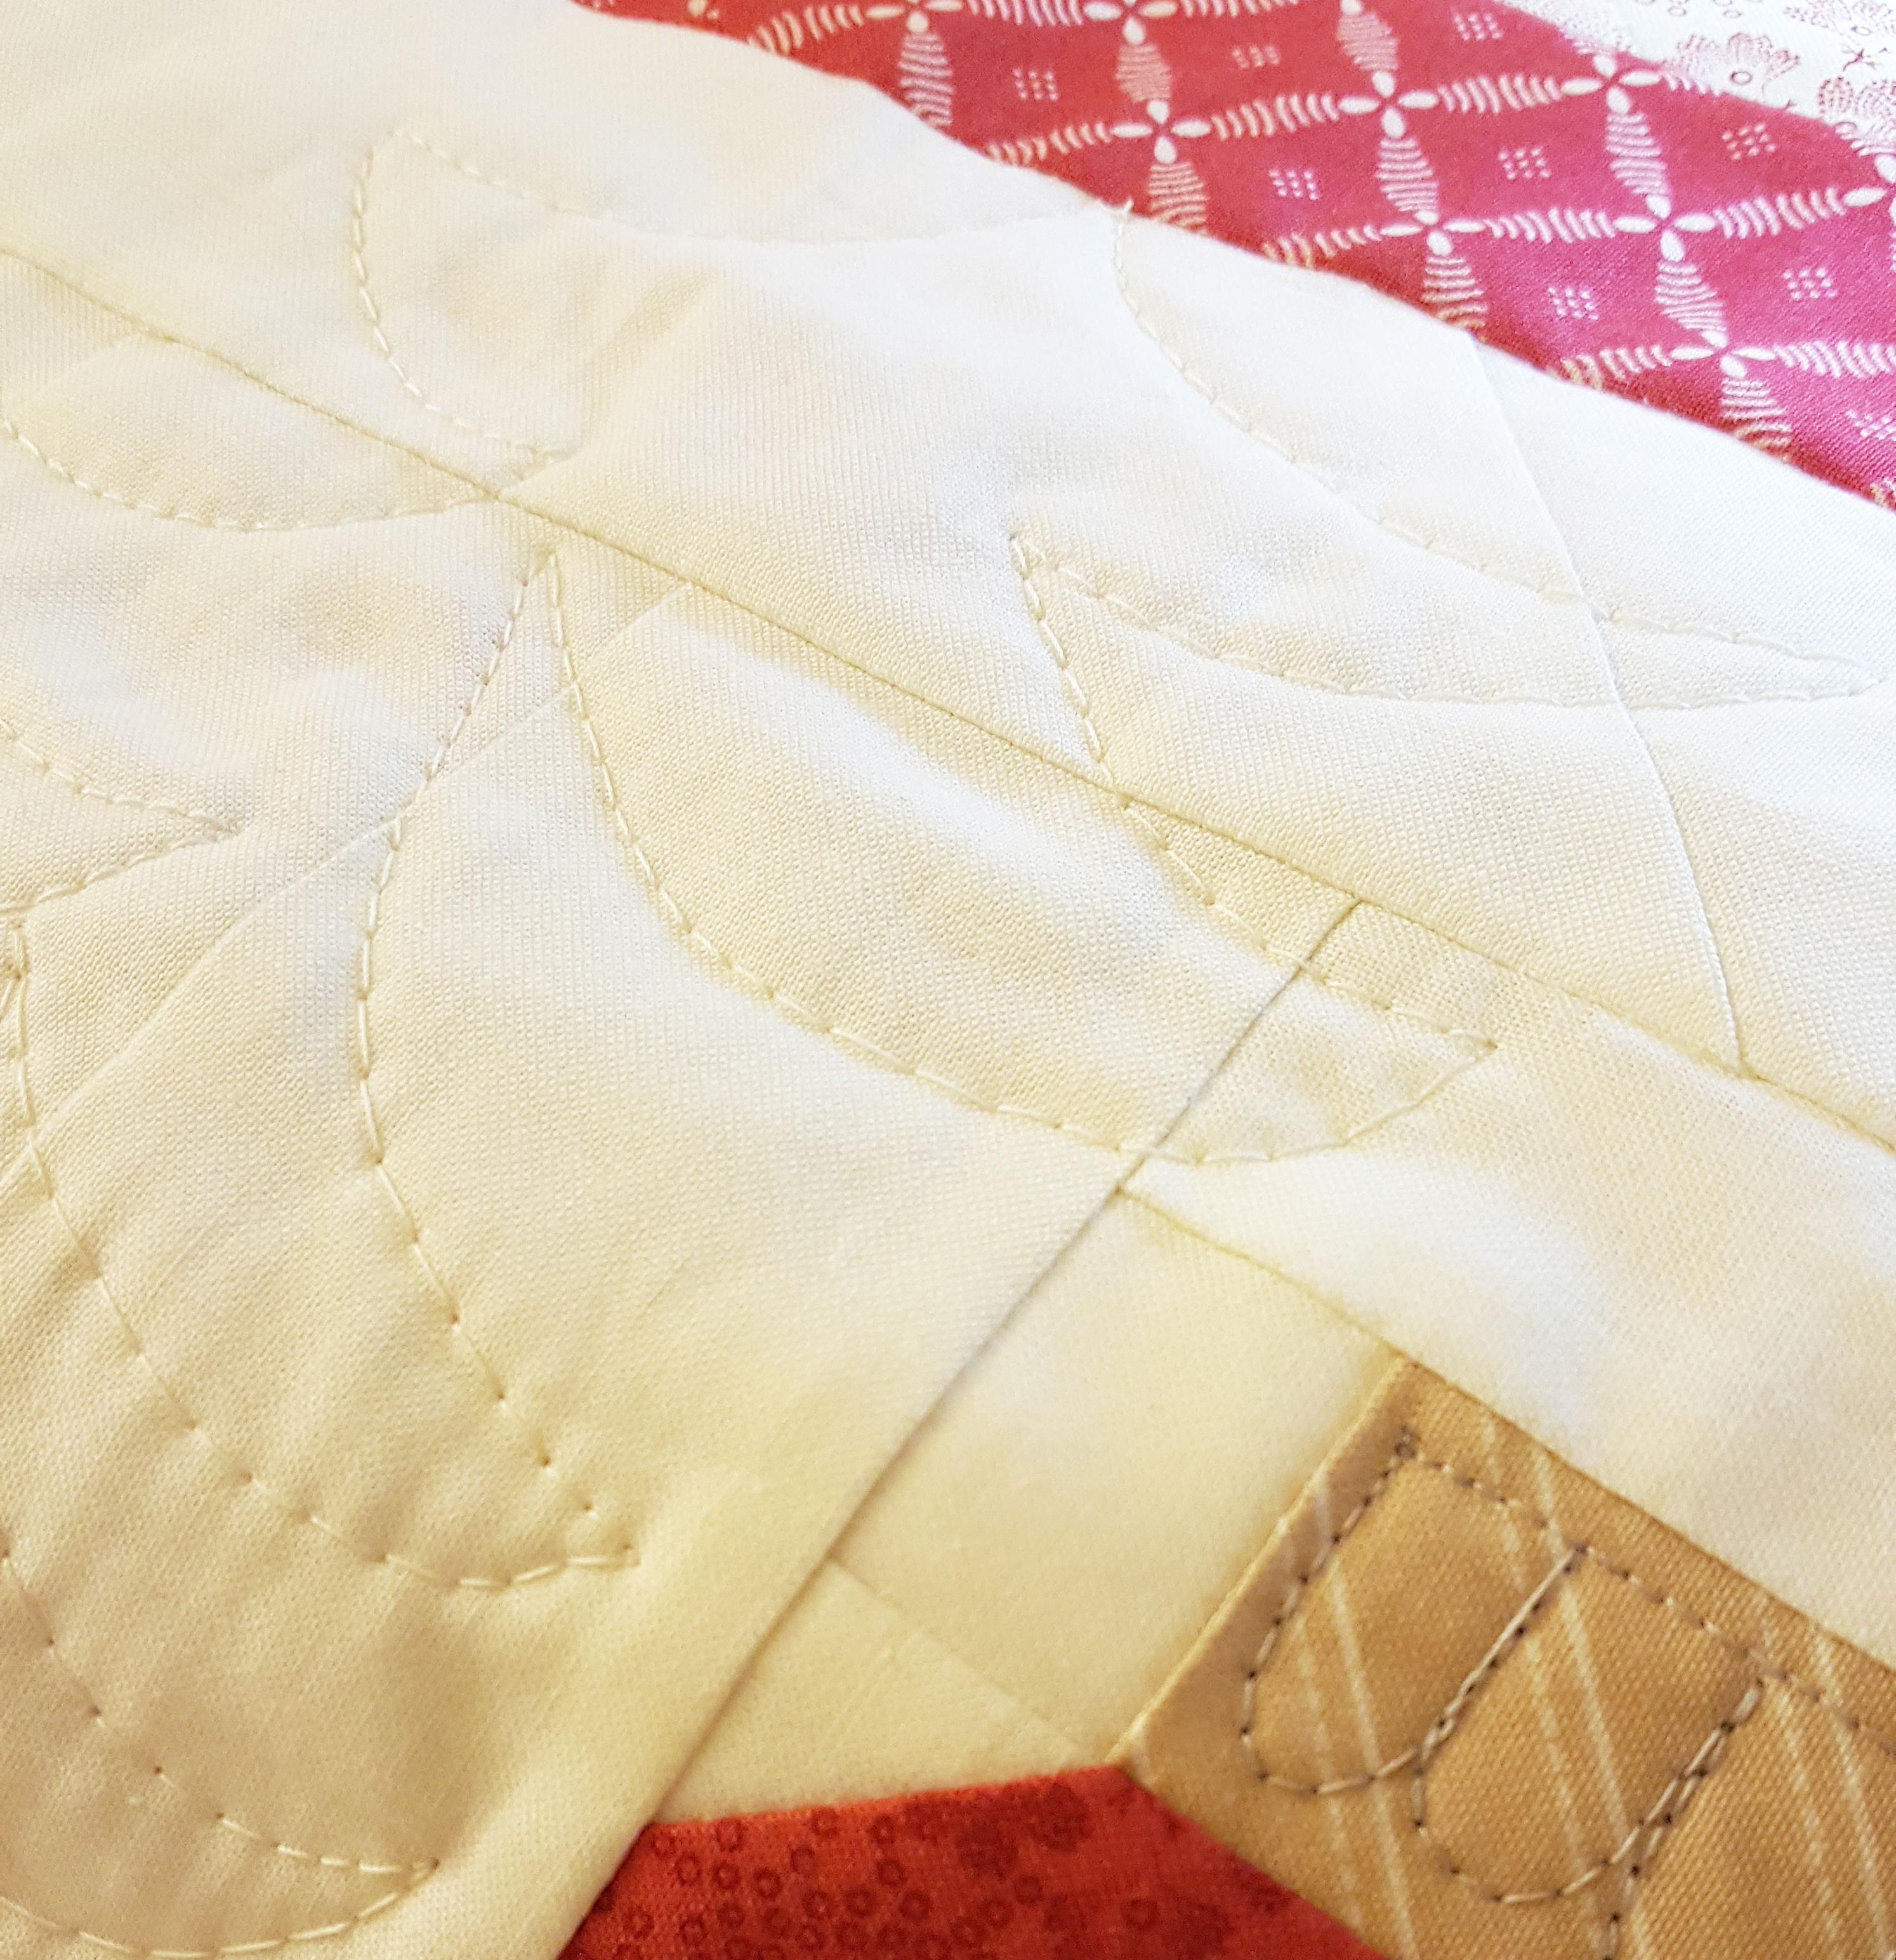
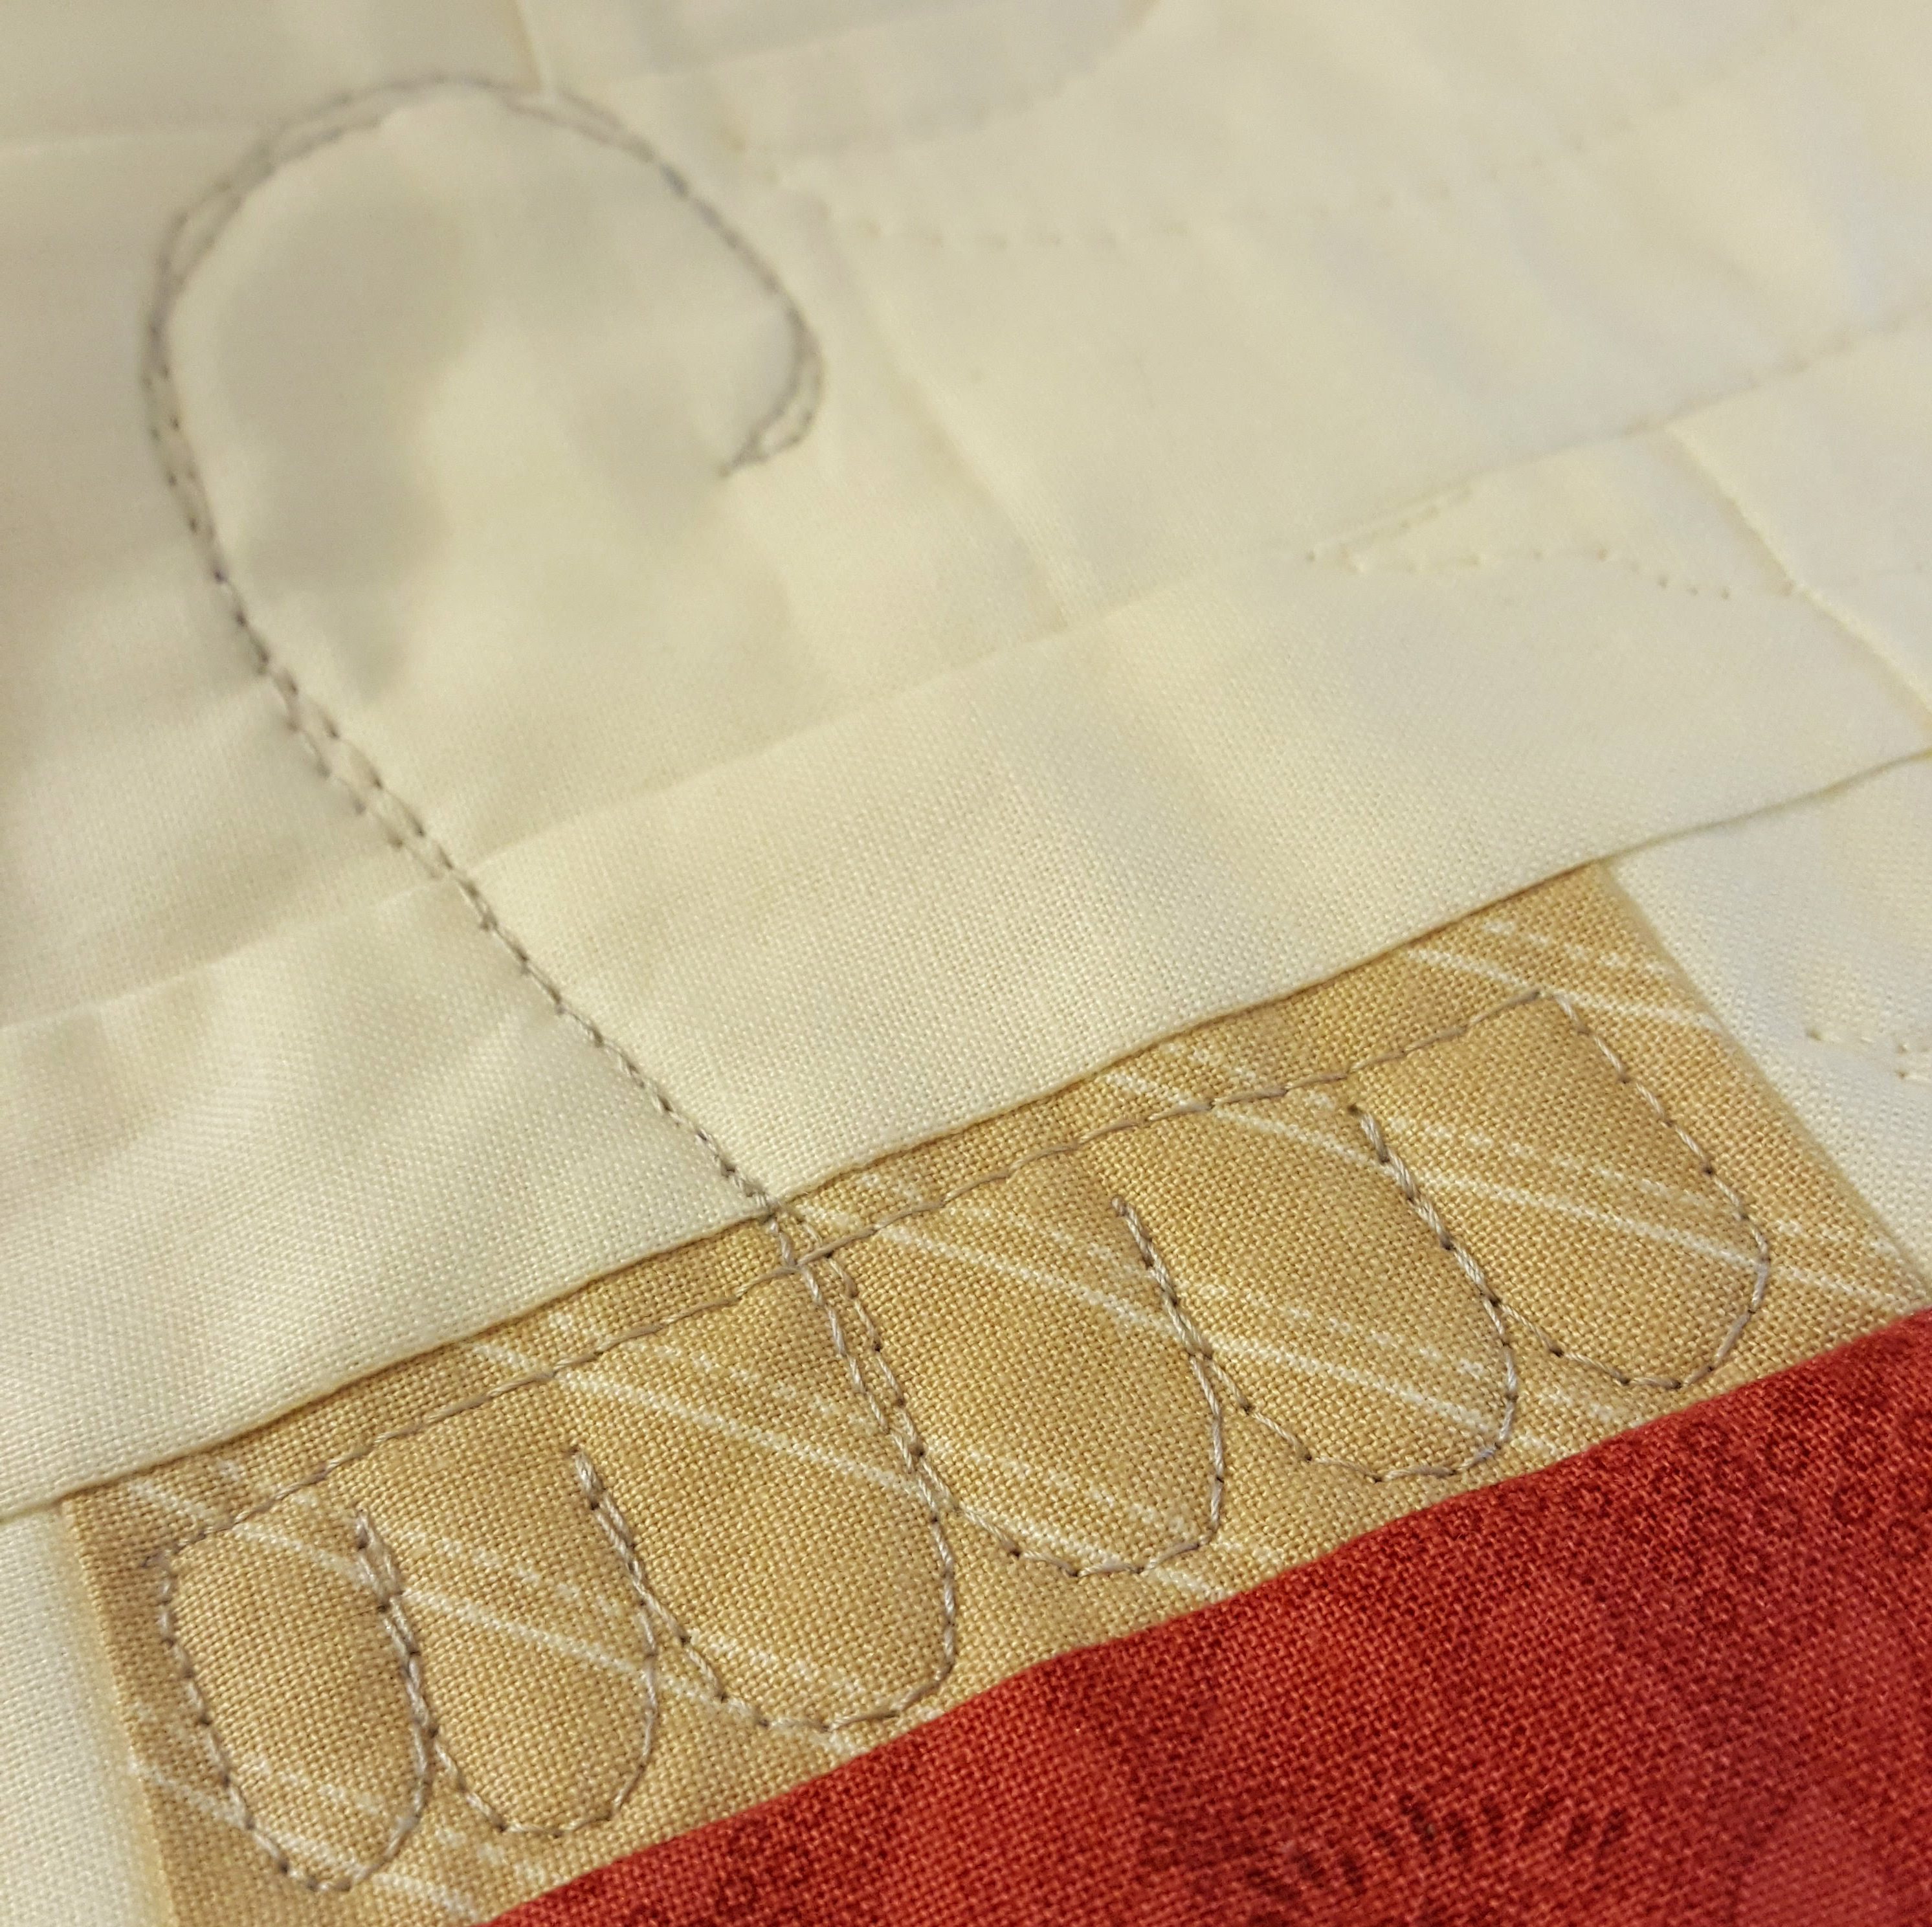
Baste and quilt as desired. I added the ornament hanger detail with my quilting, and quilted random Christmas Tree branches in the background.
Bind with your favorite method. I have my piped binding instructions on my blog.
![]()
This quilt finishes at 68" x 75".
I would love to see any quilts made with my pattern, you can tag me on Instagram, @catinthegrass
Christine Diamond
{catinthegrass}
![]()
Posted in:
Comments