Welcome to Moda Fabrics!
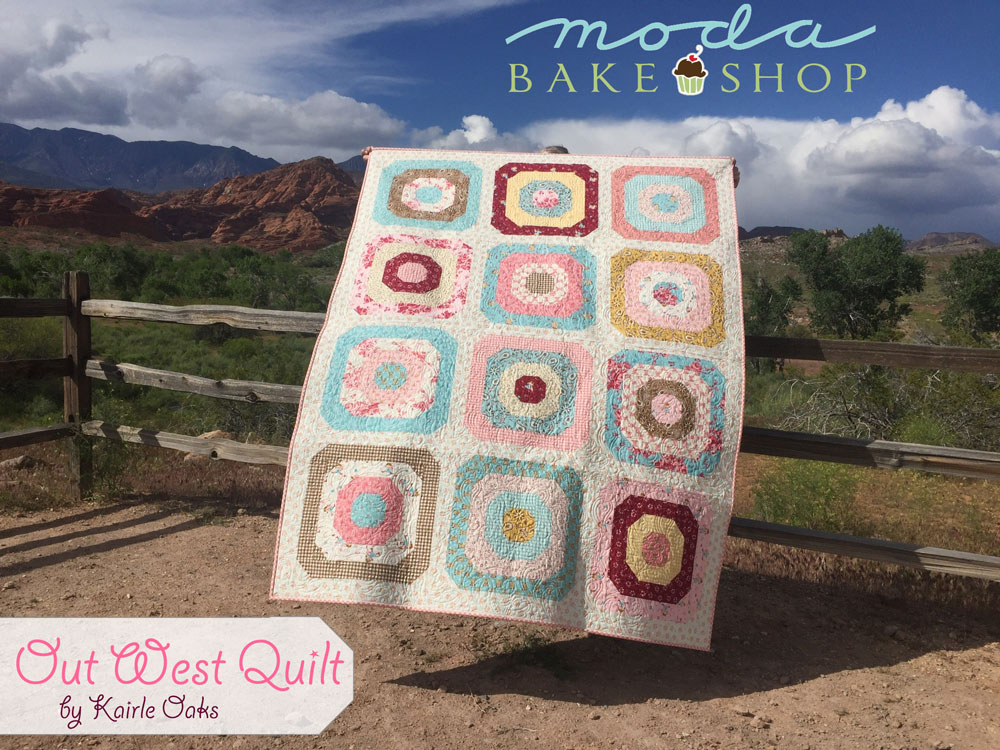
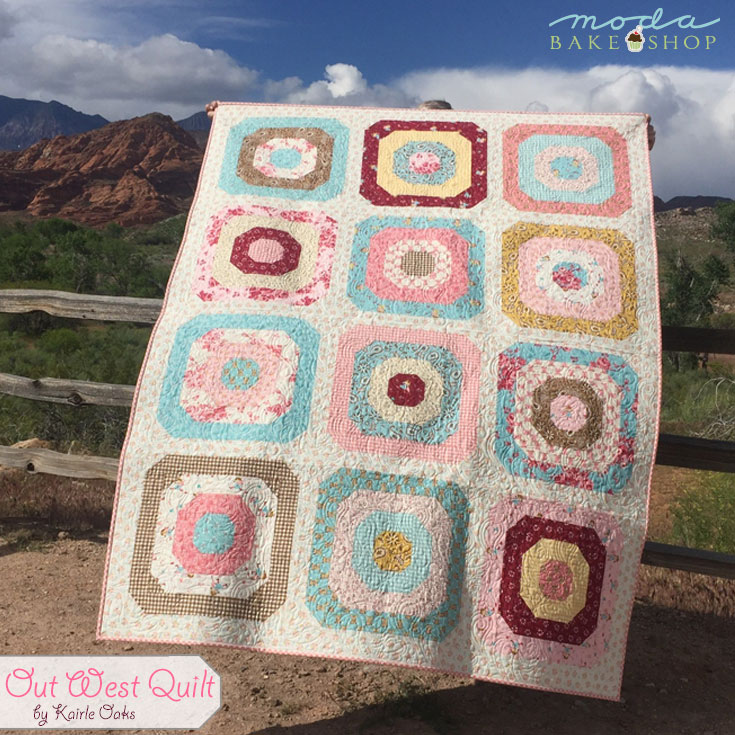
Out West Quilt
Out West Quilt
Published:
Apr 14 2017 - 23:00

Howdy, friends! I'm Kairle Oaks and I'm so excited to share my first recipe on Moda Bake Shop! You can find me on Instagram and on my blog, Happy Valley Quilter.
My quilt, Out West, is made using the fun and creative "Howdy" line of fabric by the talented Stacy Iest Hsu. From the moment I first opened the Fat Quarter Bundle I was in love. The adorable little cowboys and cowgirls quickly lassoed my heart and pull me right in!
Out West is a fat quarter friendly quilt that finishes at 58" x 76". The large 16" blocks are a variation of the traditional courthouse steps block and go together so quickly that you and your posse will be snuggling under your quilt in no time at all. So let's round up all of our supplies and get going!
![]()

1 "Howdy" Fat Quarter Bundle by Stacy Iest Hsu
1-1/2 yards sashing fabric {porcelain 20554-11}
4-1/2 yards backing fabric {spray 20552-15}
1/2 yard binding fabric {pink gingham 20556-19}
Note: If cutting gingham binding on the bias as I did, you may want to allow for additional fabric.
![]()
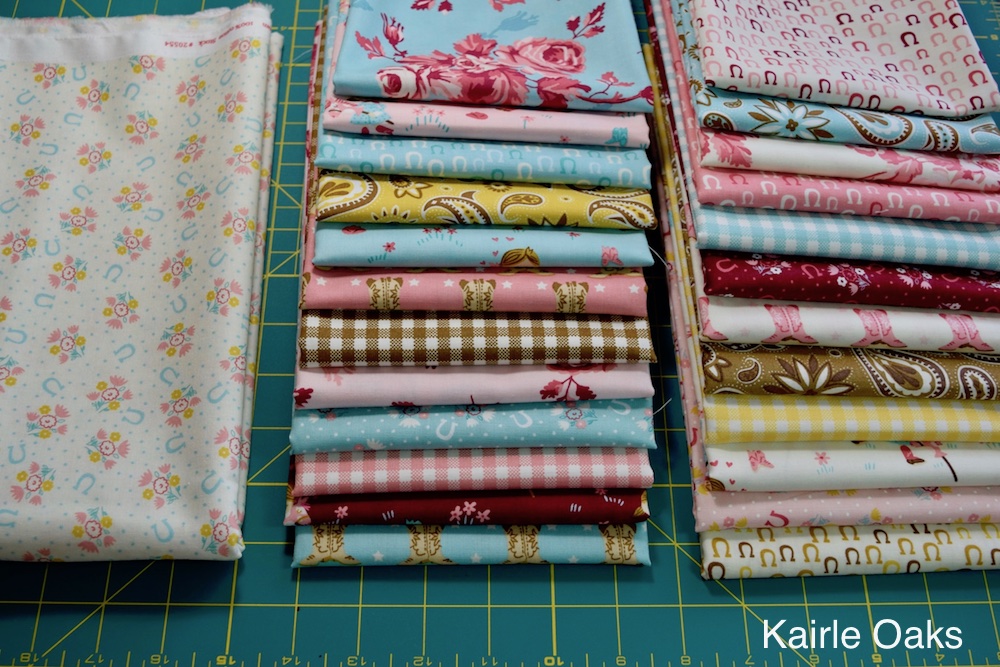
Choose 24 fat quarters from your bundle, making sure you have a good variety of colors and patterns. You can see that I chose mostly cowgirl colors for my quilt. That's because the cowgirls outnumber the cowboys in our family!
Divide into two stacks of 12 fat quarters each. One stack will be used for the center square and outside circle, the other stack will be used for the two inside circles.
In the photo above, the stack on the left is the one that I chose for the center square and outside circle. Notice that they contrast, rather than blend, with the sashing fabric. This makes the circles stand out on the quilt.
FROM CENTER SQUARE AND OUTSIDE CIRCLE FAT QUARTERS, CUT AND GROUP TOGETHER AS FOLLOWS:
OUTSIDE CIRLCE
- TWO - 16-1/2" x 2-1/2" strips
- TWO - 12-1/2" x 2-1/2" strips
- FOUR - 2-1/2" squares
CENTER SQUARE
- ONE - 4-1/2" square
FROM FIRST AND SECOND CIRCLE FAT QUARTERS, CUT AND GROUP TOGETHER AS FOLLOWS:
SECOND CIRCLE
- TWO - 12-1/2" x 2-1/2" strips
- TWO - 8-1/2" x 2-1/2" strips
- FOUR - 2-1/2" squares
FIRST CIRCLE
- TWO - 8-1/2" x 2-1/2" strips
- TWO - 4-1/2" x 2-1/2" strips
- FOUR - 1-1/2" squares
 Wonder Clips are a great tool for grouping your pieces once they are cut.

Now comes the fun part! Each block will need a center block, first circle, second circle, and outside circle (shown above). Mix and match your groups using different patterns and colors.

After mixing and matching a few times, this is what I ended up with.
Are you ready to make the blocks? Alright then, saddle up and let's go!

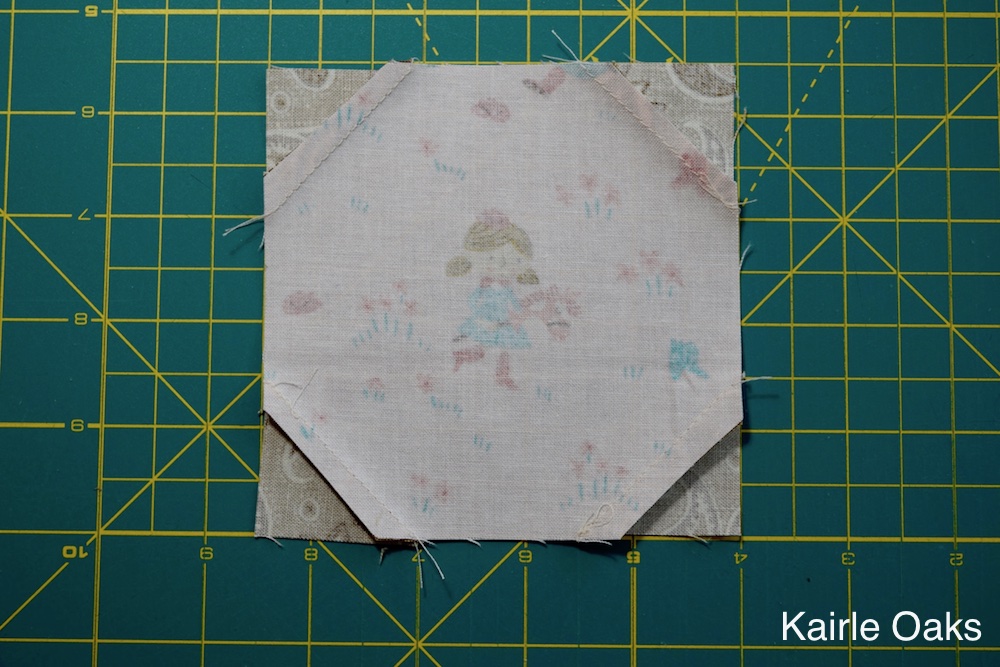
Take the center square and the 1-1/2" squares from the first circle fabrics. Sew together as shown in the above picture. Press the corners back and trim.


Add the 4-1/2" x 2-1/2" strips to the sides, then press. Next add the 8-1/2" x 2-1/2" strips to the top and bottom, then press.
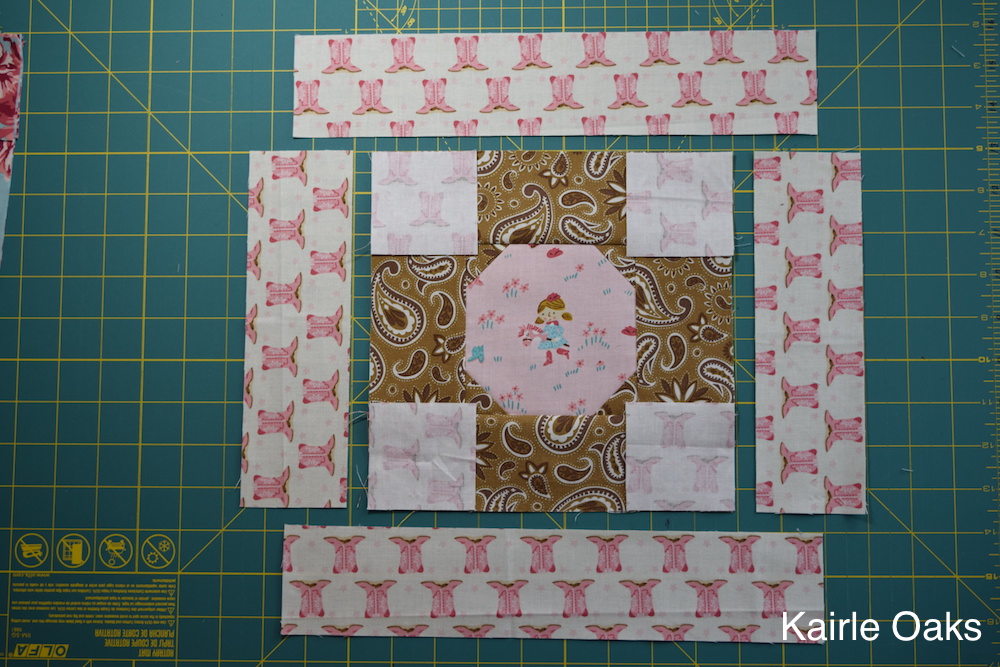
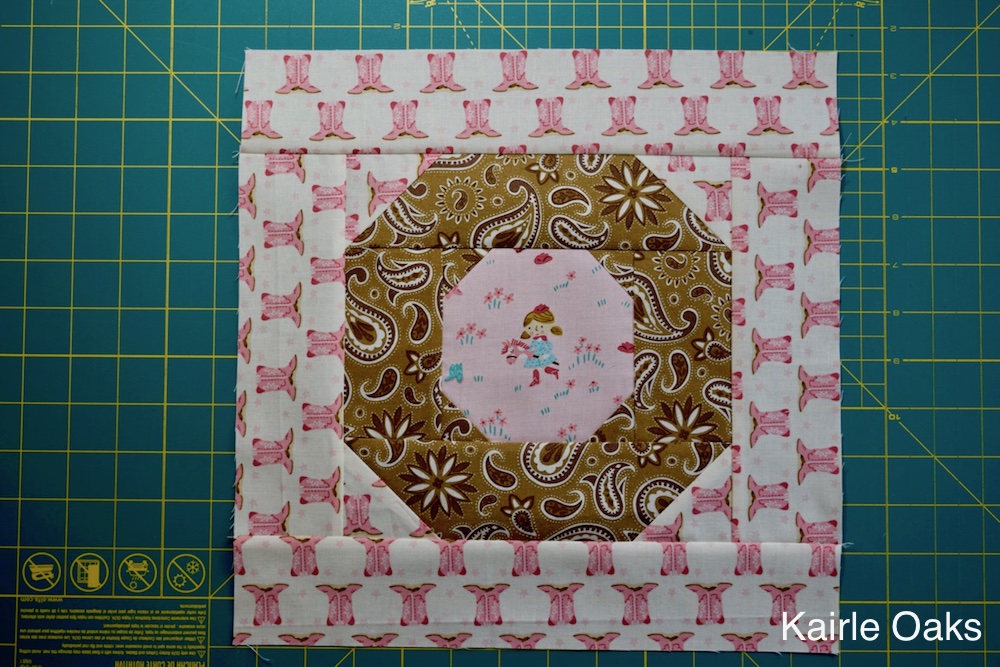
Repeat with fabrics for the second circle.


And one last time with the outside circle fabrics.
We're almost finished! Are you ready for the sashing and borders?

FROM THE SASHING FABRIC CUT:
THREE - 2-1/2" x width of fabric strips
- Subcut into FORTY-EIGHT 2-1/2" squares
- Sew one square to the corners of each block in the same way you did on the previous corners
Once the blocks all have their final corners added from the sashing fabric, arrange into four rows with three blocks each.
CUT:
FOUR - 2 1/2" x width of fabric strips
- Subcut into EIGHT 16-1/2" x 2-1/2" strips (measure your blocks; you may need to adjust the length of this strip to match the size of your blocks)
- Sew the strips vertically between the blocks in each row
CUT:
FOUR - 2-1/2" x width of fabric strips
- Sew together and then cut THREE pieces 52-1/2" long (measure your rows; you may need to adjust the length of this strip to match the length of your rows)
- Sew sashing strips between each row

When sewing your rows together, make sure that your vertical sashes line up. I pinned mine at each intersection to make sure that they aligned.
CUT BORDERS:
SEVEN - 3" x width of fabric strips
- Sew strips together for borders
- Cut TWO strips 70-1/2" x 3" for the side borders (measure the center of your quilt from top to bottom and adjust this measurement accordingly)
- Sew borders to the sides of the quilt
- Cut TWO strips 57-1/2" x 3" for the top and bottom borders (measure the center of your quilt from side to side and adjust this measurement accordingly)
- Sew borders to the top and bottom of the quilt
Your quilt top is finished! Now all you have left to do is quilt and bind! Utah Valley Quilting made my quilt all fancy with a sweet paisley pattern to coordinate with the bandanna fabrics in the quilt.

![]()
This quilt finishes at 58" x 76".
Thanks so much for joining me today. I hope you'll have fun making Out West for your little partner. I can't wait to see your work. Please use the #outwestquilt hashtag.
Kairle Oaks
{Happy Valley Quilter}
{@kairleoaks}
![]()
Posted in:
Comments