Welcome to Moda Fabrics!
Starry Field Quilt
Starry Field Quilt
Published:
Jul 19 2016 - 23:00
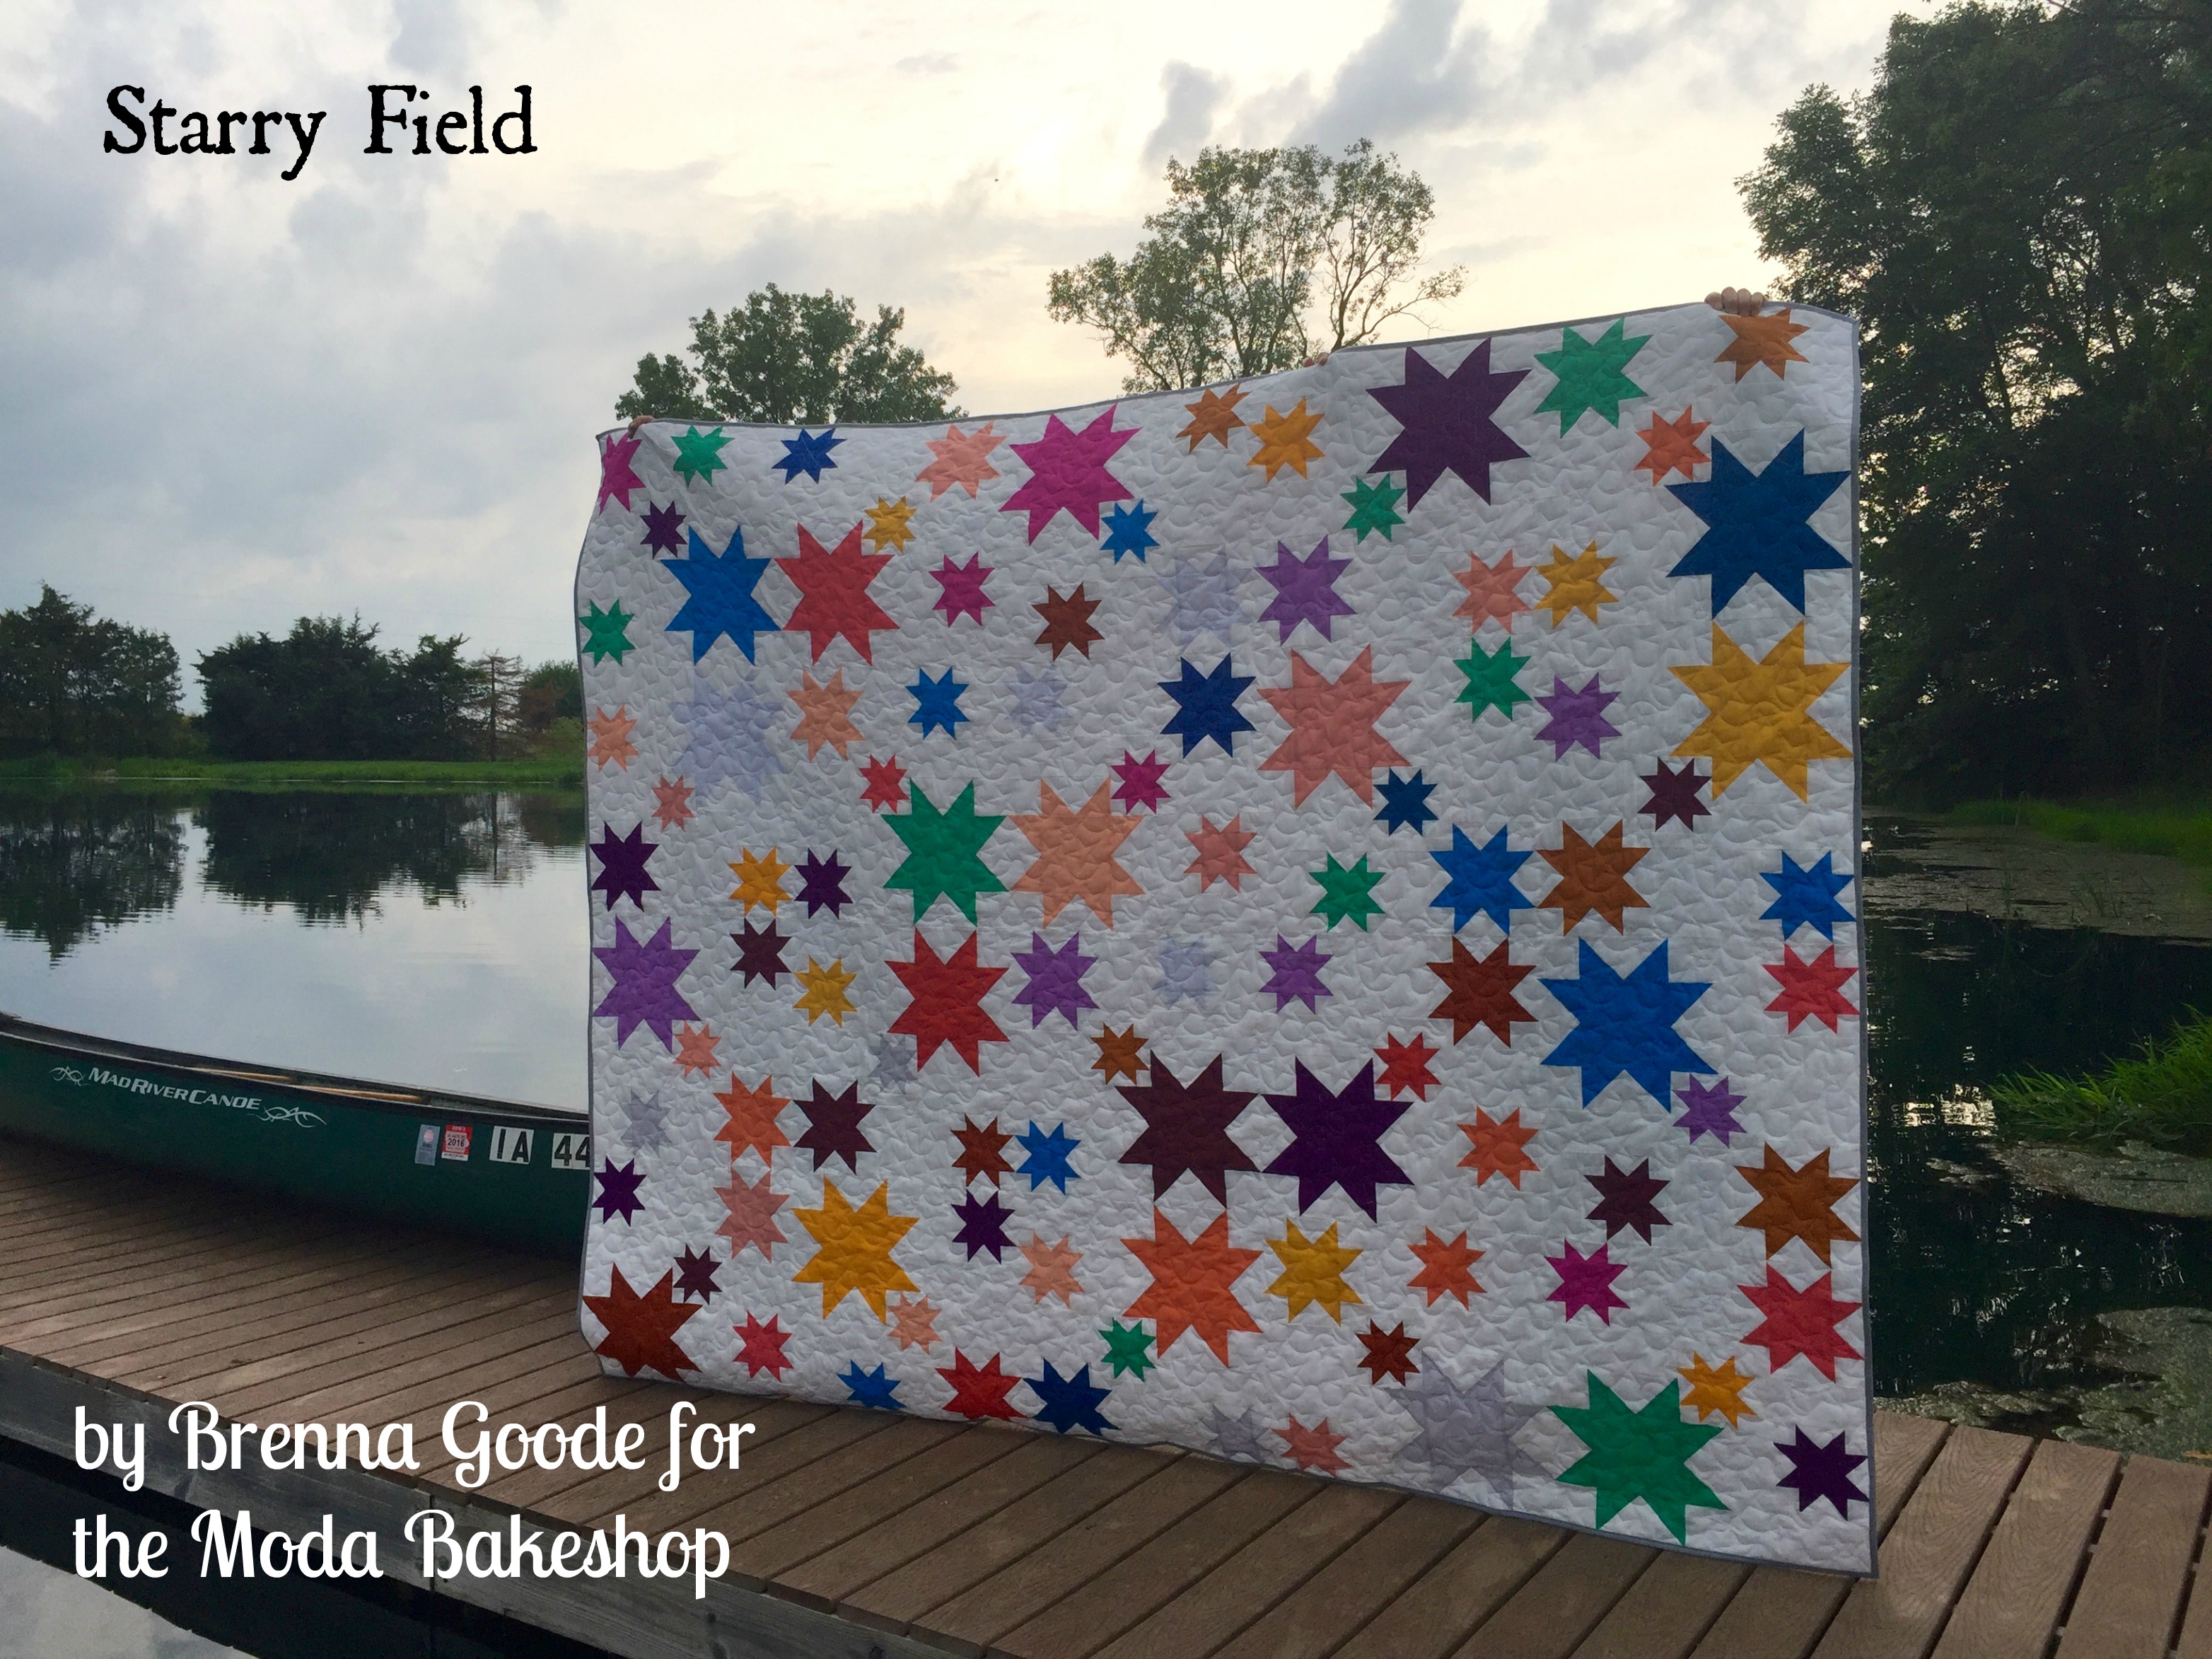

I'm happy to be back at the Bake Shop with a fun, star-filled, queen sized quilt. This project uses the new Bella Solids colors. There are a wide variety of colors in this bundle, and I wanted something that would show them off, while also being a bit more challenging. I think the final results fit the bill quite nicely!
This pattern finishes at a generously queen sized 84" x 105".
![]()

Fabric:
1 Fat Quarter Bundle {Bella Solids | 9900N5AB}
6.5 yards background {Bella Solids | Bleached White PFD 9900 97}
1 yard binding {Bella Solids | Steel 9900 184}
3 yards 108" backing fabric
(I used two fat quarter bundles to get a different distribution of colors, but you only need 20 fat quarters)
![]()
Select 20 fat quarters to use in this project, and get yourself a fresh rotary cutter blade, because we're going to be doing a LOT of cutting. From each fat quarter:
Lay the fat quarter in front of you, with the 22 inch side facing you.
Cut one strip 18" x 6.5". Sub-cut into one square 6.5 x 6.5. Cut a strip of the remainder 3 and 7/8th inch wide. Sub-cut this piece into two 3 and 7/8th inch square pieces. Cut the narrower strip into four 2 and 1/8th inch square pieces.
Cut the next strip from the fat quarter 3 1/8th inches wide. Sub-cut this into four 3 and 1/8th inch pieces. Cut the remainder into two 2 and 3/8th inch square pieces.
Cut the next strip from the fat quarter 3.5 inches wide. Sub-cut to two 3.5 in.² pieces. Cut one 3 in.² piece. Cut the remainder into three 2 and 3/8th inch square pieces.
Cut a 4.5 in.² piece from the remainder of the fat quarter (WITHOUT cutting a strip). From what's left cut a strip 3 and 7/8th inches wide. Sub-cut into two 3 and 7/8th inch square pieces.
From the remainder, cut three 2 and 3/8th inch square pieces.
From the background fabric, cut the following:
20 squares 7 1/4 x 7 1/4 inch (for Star A)
60 squares 3 1/2 x 3 1/2 (for Star A)
20 squares 5 1/4 x 5 1/4 (for Star B)
60 squares 2 1/2 x 2 1/2 (for Star B)
40 squares 4 1/4 x 4 1/4 (for Star C)
160 squares 2 x 2 (for Star C)
20 squares 3 3/4 x 3 3/4 (for Star D)
80 squares 1 3/4 x 1 3/4 (for Star D)
40 rectangles 3 1/2 x 9 1/2 (background)
20 rectangles 3 1/2 x 6 1/2 (background)
20 rectangles 4 1/2 x 6 1/2 (background)
20 rectangles 1 1/2 x 6 1/2 (background)
20 rectangles 1 1/2 x 5 1/2 (background)
20 rectangles 7 1/2 x 6 1/2 (background)
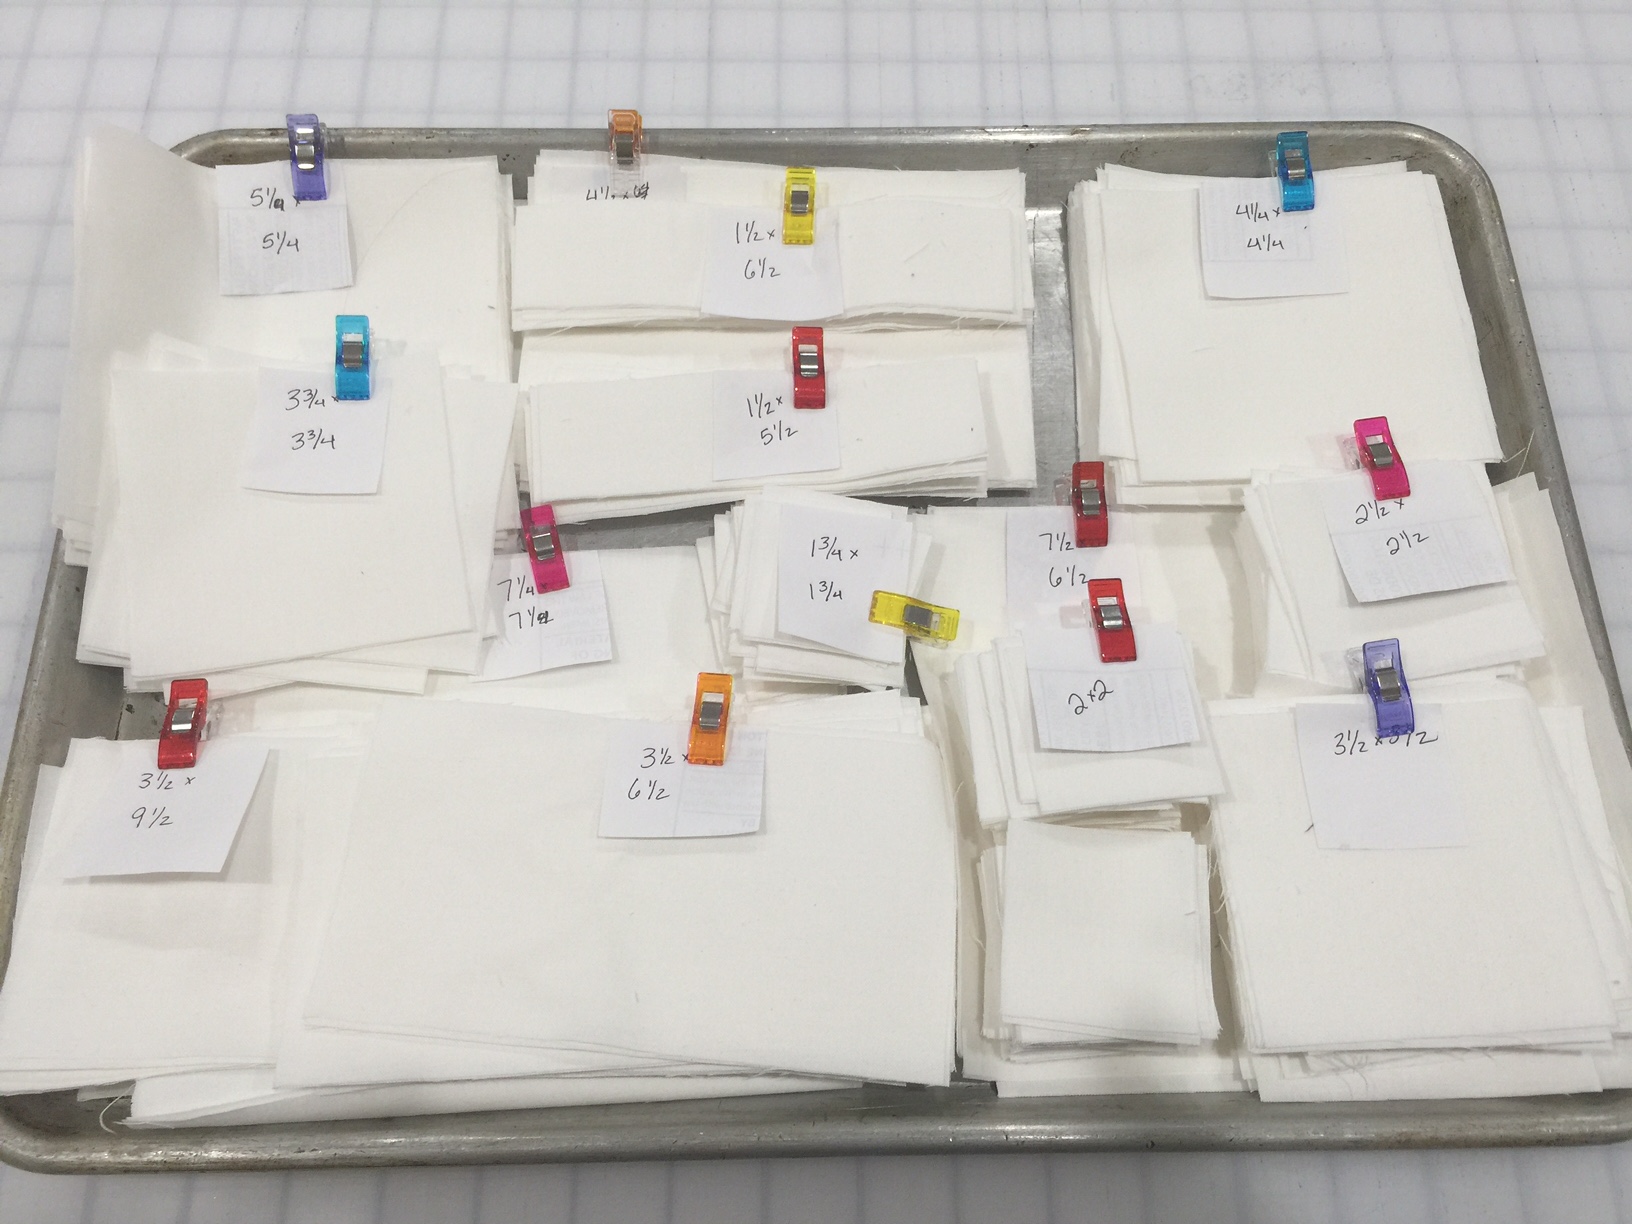
Keeping things organized is key in this project.
For the background fabric, I stacked them all by size, and clipped a label to the top of each stack.
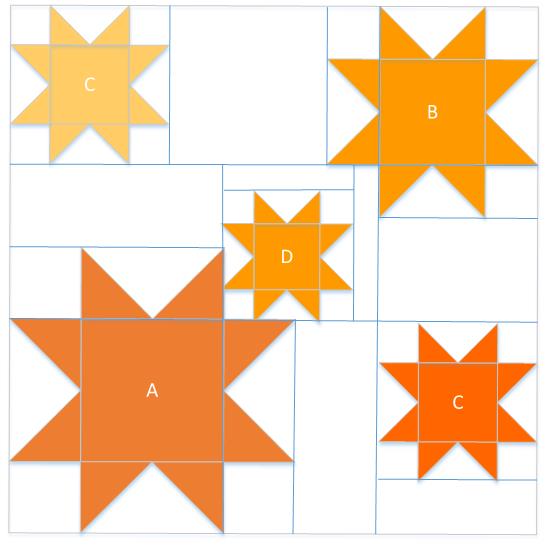
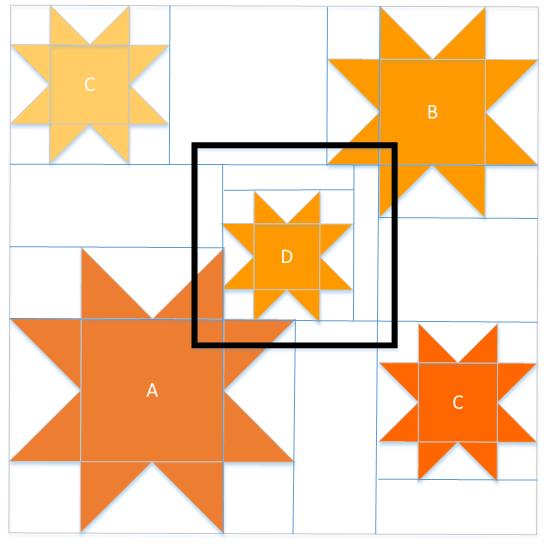
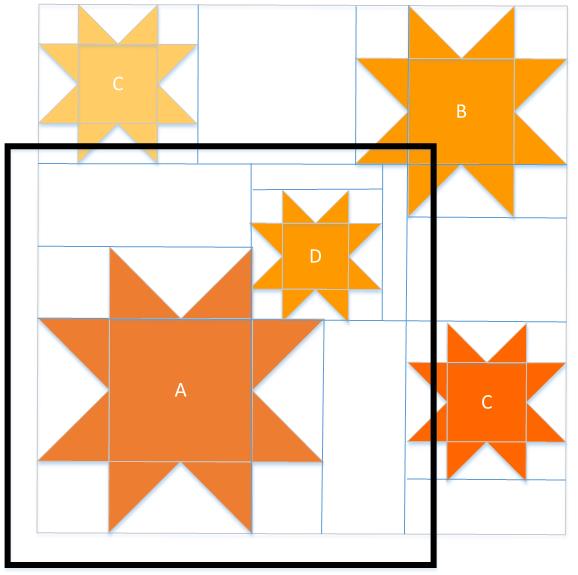
We're going to be making five stars per block; one with a 6 inch finished center square (star A), one with a four inch center square (star B), two with a 3 inch center square (star C), and one with a 2.5 inch center square (star D). I've labeled them according to size, but we're doing to do them in the order required to complete the block most easily.
Sort the pieces into stacks, based on size. This uses the no-waste method for making flying geese for making the star points.
For each quilt block, put the following colored squares together:
For Star A: a 6.5 inch square and four 3 7/8 inch squares
For Star B: a 4.5 inch square and four 3 1/8 inch squares
For Star C: two 3.5 inch squares and eight 2 3/8 inch squares (one set of each in a different color)
For Star D: a 3 inch square and four 2 1/8 inch squares
Add the background squares indicated in the cutting directions.
Start by making star D:
Take the four smaller colored squares for star D, and the background square measuring 3 3/4 x 3 3/4. Lay the two squares of color fabric onto the background on opposite corners, and draw a line diagonally across. Sew a seam 1/4 inch on each side of the line.
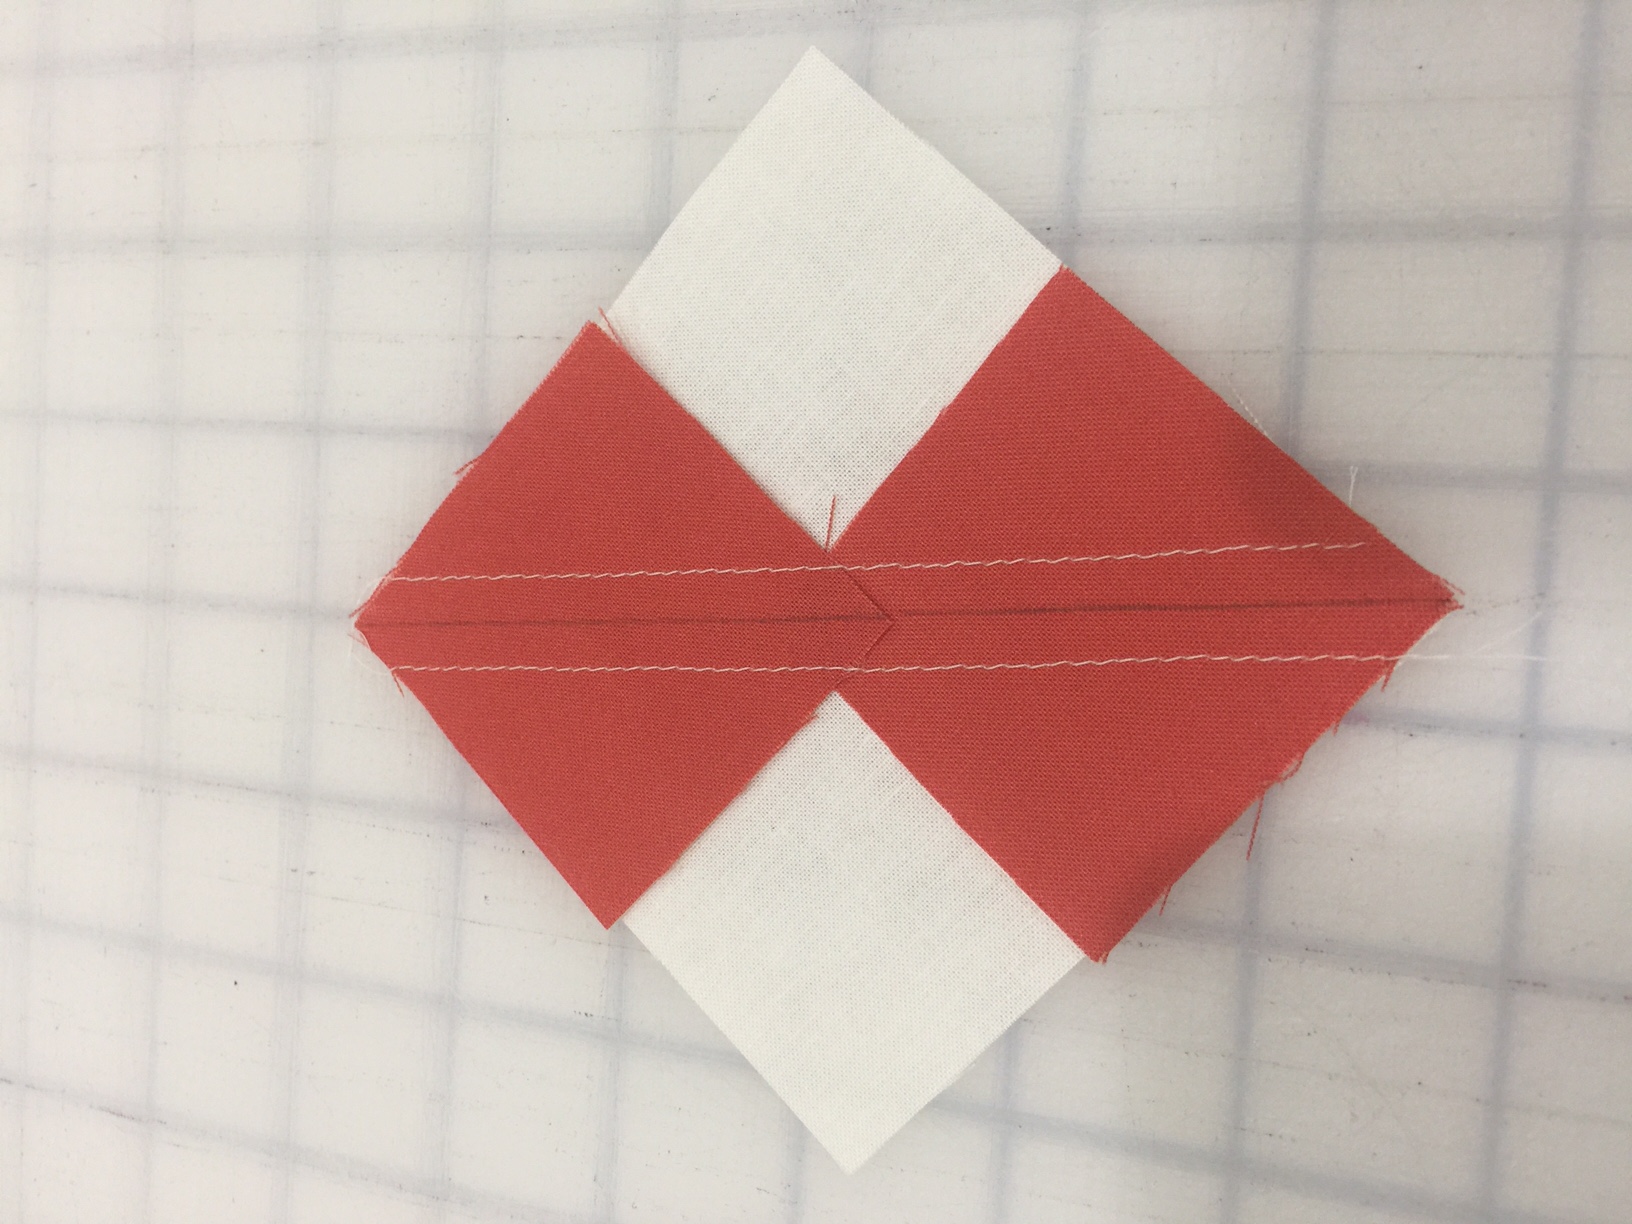
Cut along the diagonal line, and press away from the background fabric.
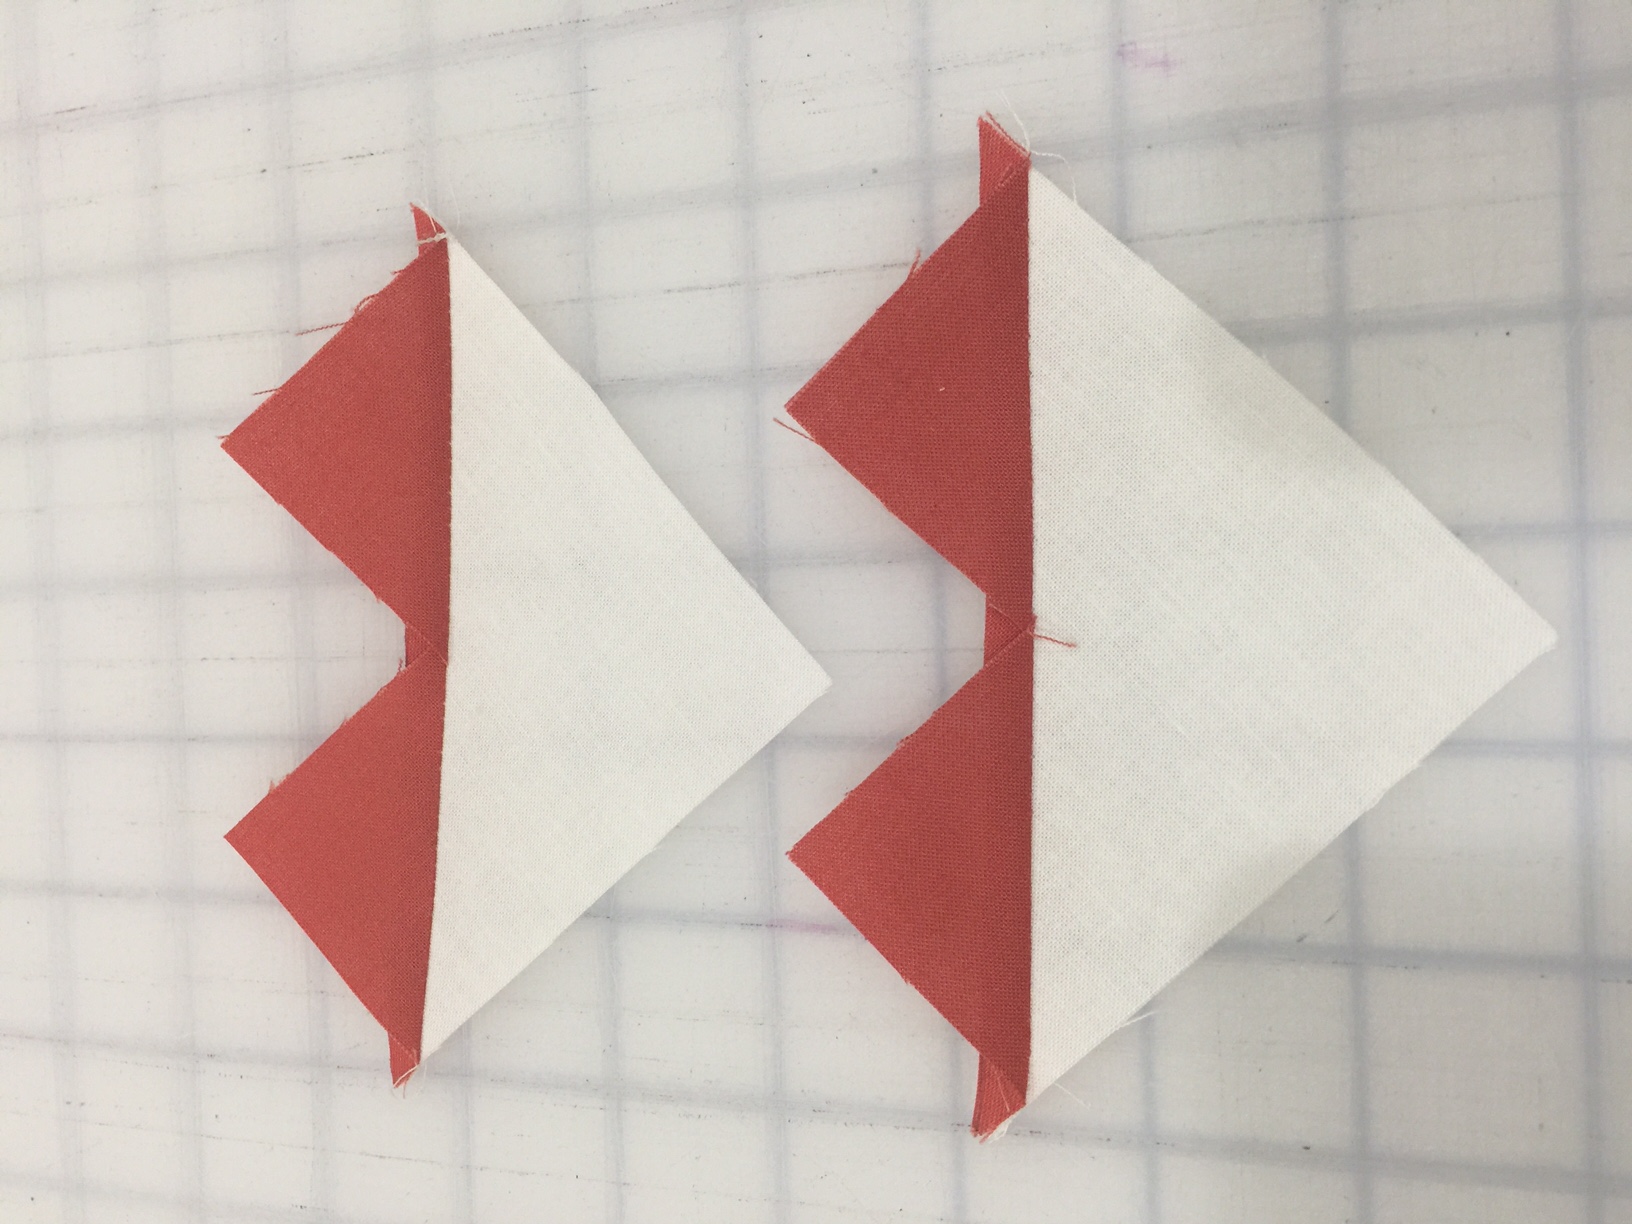
Lay the two remaining colored squares on the corner, and draw a line diagonally. Sew a 1/4 inch seam on either side.

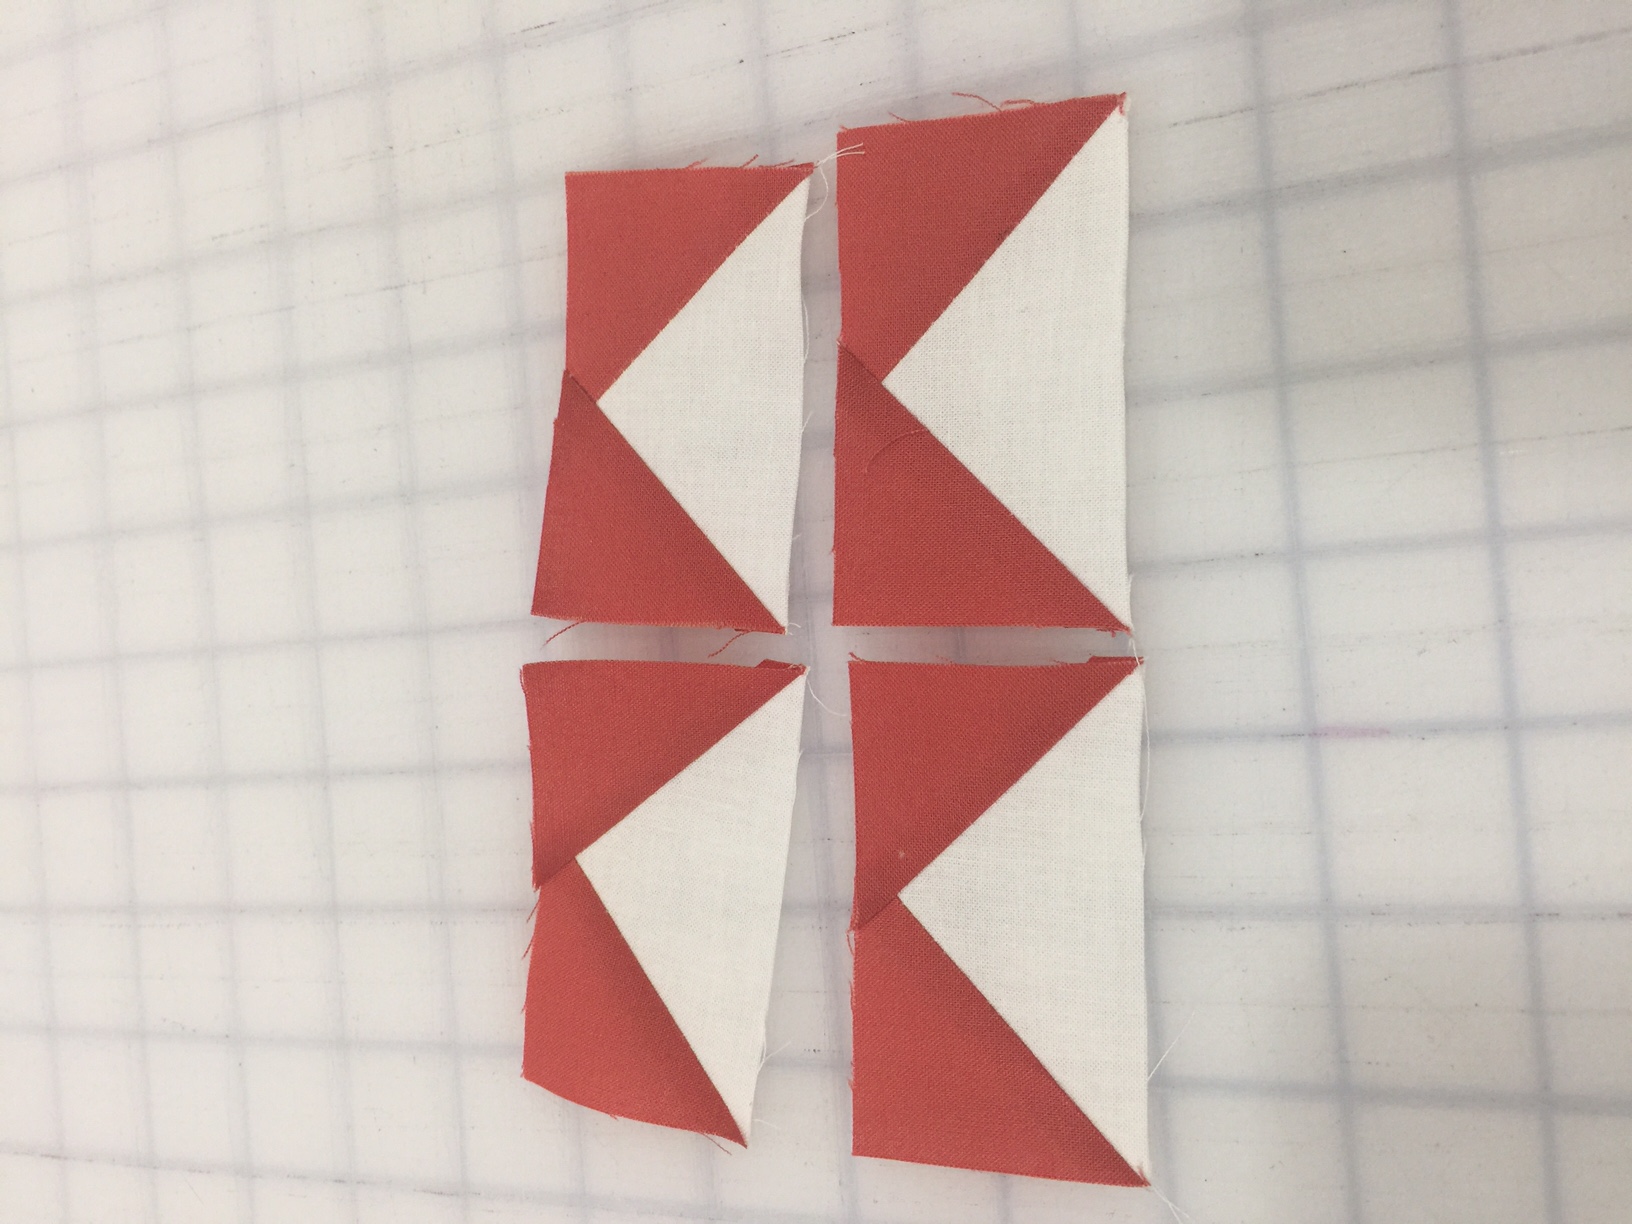
Cut along the diagonals, press open, and trim to 1 3/4 x 3 to create your four flying geese.
For the block construction; on each step, assemble the area inside the dark square.
Using the center square, the four flying geese units you just created for Star D, and four of the 1 3/4 by 1 3/4 inch squares, assemble into a star.
Sew two of the 1 3/4 inch background squares onto the short sides of one of your flying geese. Press the seams away from the center.
Sew two of the flying geese onto the center colored square. Press the seams towards the center.

Sew the remaining two background squares to your remaining flying geese block. Press the seams away from the center. Assemble the three pieces into your star, nesting seams.
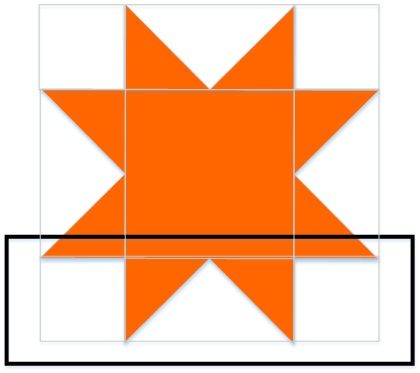
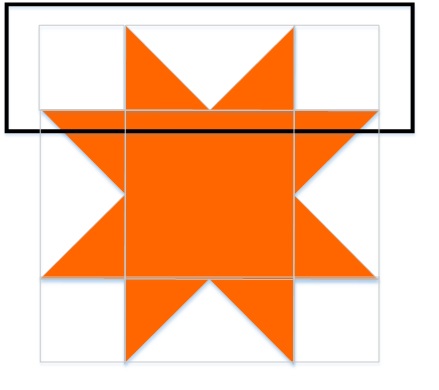
Along one side, sew a 1 1/2 x 5 1/2 inch background rectangle. Press open. Sew a 1 1/2 x 6 1/2 background rectangle onto the long edge. Press.
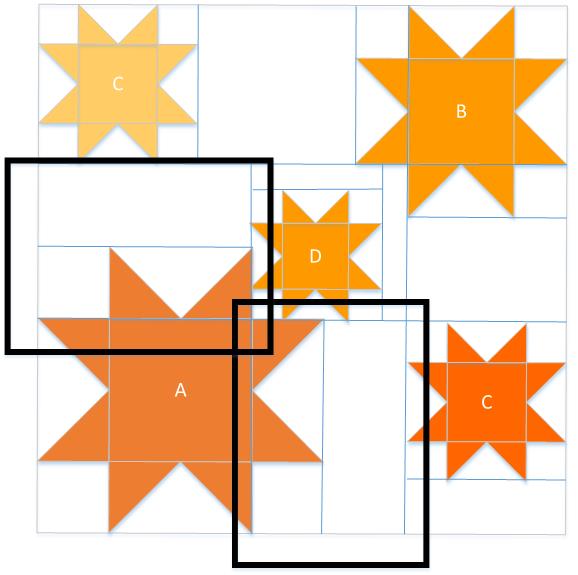
Next we're assembling Star A - this requires the 7 1/4 inch background square, three 3.5 inch background squares, and the colored squares for Star A.
Take a 7 1/4 inch background square, and four of the smaller colored squares for star A. Using the same no-waste method, create four flying geese. Trim to 3.5 x 6.5. As shown in the selected areas, sew a 3 1/2 inch background square to the side of one of the flying geese, making sure that you watch the orientation of your flying geese and that you're sewing the square onto the correct side for each unit. Press, and sew on a 3 1/2 x 9 1/2 inch background rectangle.
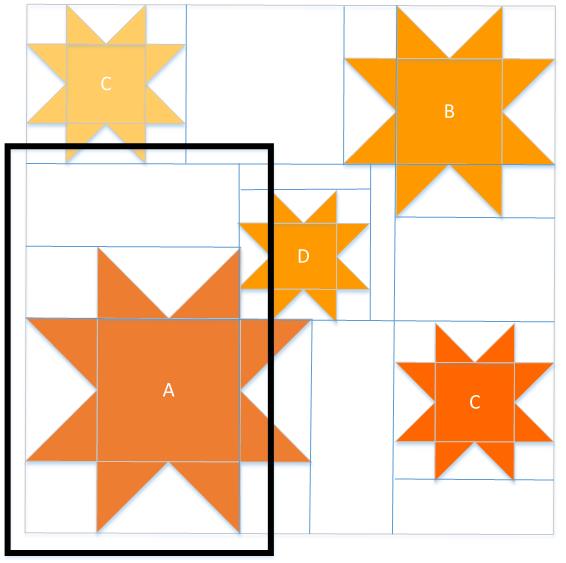
Take the 6 1/2 inch colored square, a 3 1/2 inch background square, and the two remaining flying geese for star A, and assemble the selected area.

Sew the two units together as shown.
Sew star D to the other flying geese unit as shown.
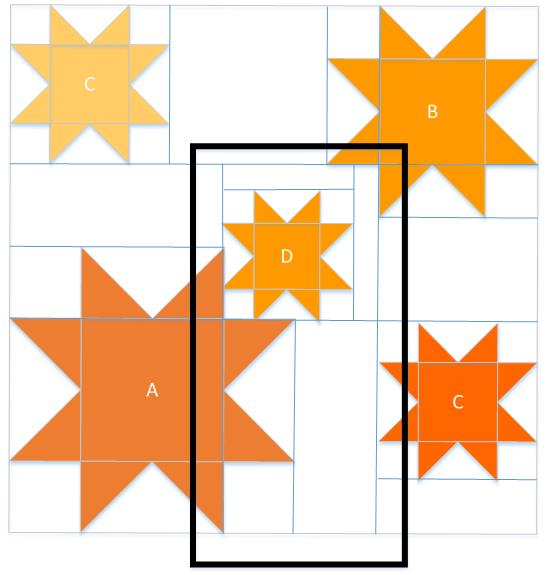
Sew these two units together.
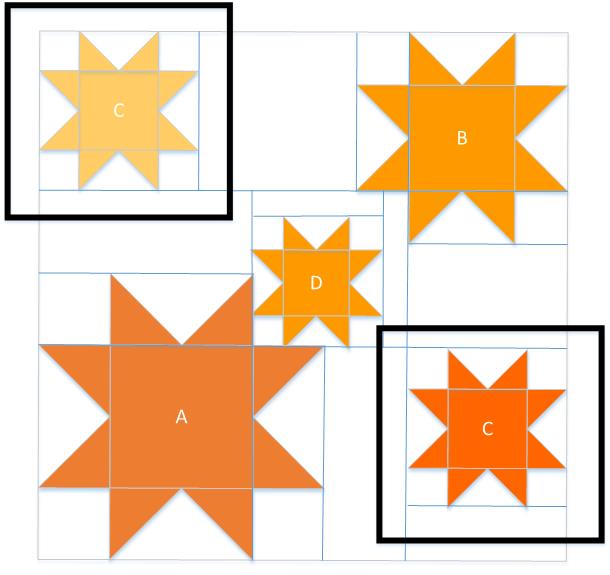
Next up we're assembling the two Star C's. This requires the 4 1/4 inch background squares, the 2 x2 background squares, and the colored squares listed for Star C.
Using a 4 1/4 inch background square and four of the smaller colored squares, assemble 8 flying geese units. Trim to 2 x 3.5.
Take four 2x2 background squares four flying geese units and the larger colored square and assemble the star. Repeat to make two Star C units.
Next up is Star B. You will need the 5 1/4 inch background square, three of the 2.5 x 2.5 inch background squares, and the colored squares listed for Star B.
From the 5 1/4 inch background square, and the four smaller colored squares for star B, assemble the flying geese for star B. Trim to 2.5 x 4.5.
Using the 4 1/2 inch colored square, three of the flying geese units created for star B, and two of the 2 1/2 inch background squares, assemble the unit shown.

To assemble the next unit shown, take the final flying geese unit of the star B flying geese units, and attach a 2 1/2 inch background square the side as shown. Attach a 4 1/2 x 6 1/2 inch background rectangle to the long edge of this unit. Attach a star C to the end, and finally attach a 3 1/2 x 6 1/2 inch background rectangle.
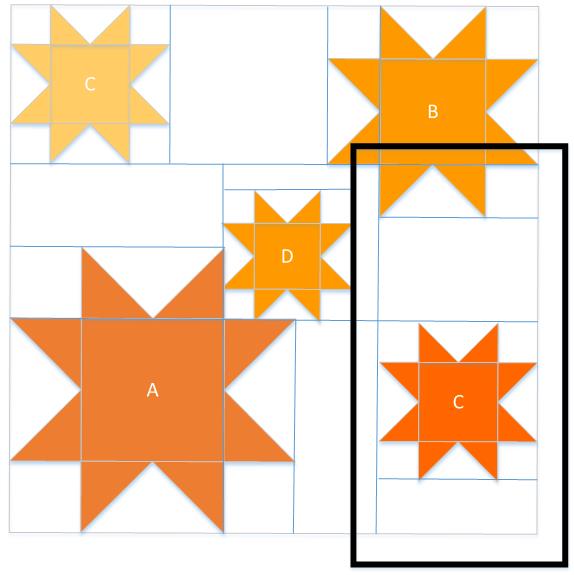
Attach this unit to the larger unit created earlier.

Attach a star C, the 6 1/2x7 1/2 inch background rectangle and the unit sewn above to create the final sub-unit.
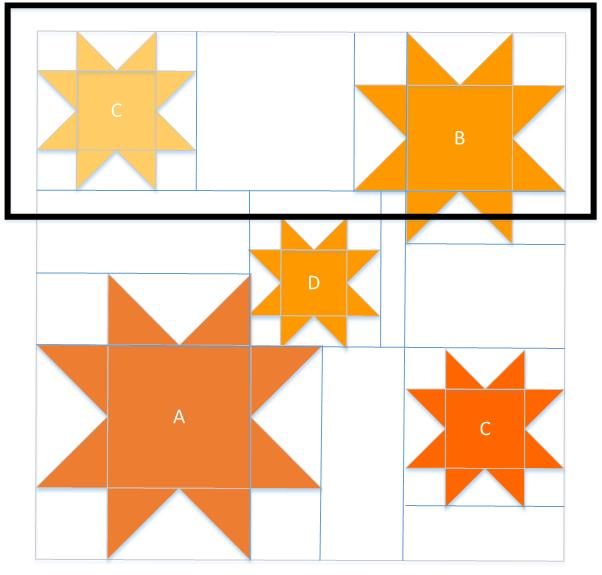
Sew the two sub-units together to create your first block.
This square should measure 21.5 inches square.
Repeat to make 20 squares.
Using a large design wall, lay out your squares. Rotate squares as you like, to end up with a pattern you like. I rotated each square ninety degrees, but feel free to experiment for a look that works for you.

Assemble the squares into rows. Later, baste and quilt as desired. My quilter did a great all-over star based design in white thread, and it really works well with the overall design.
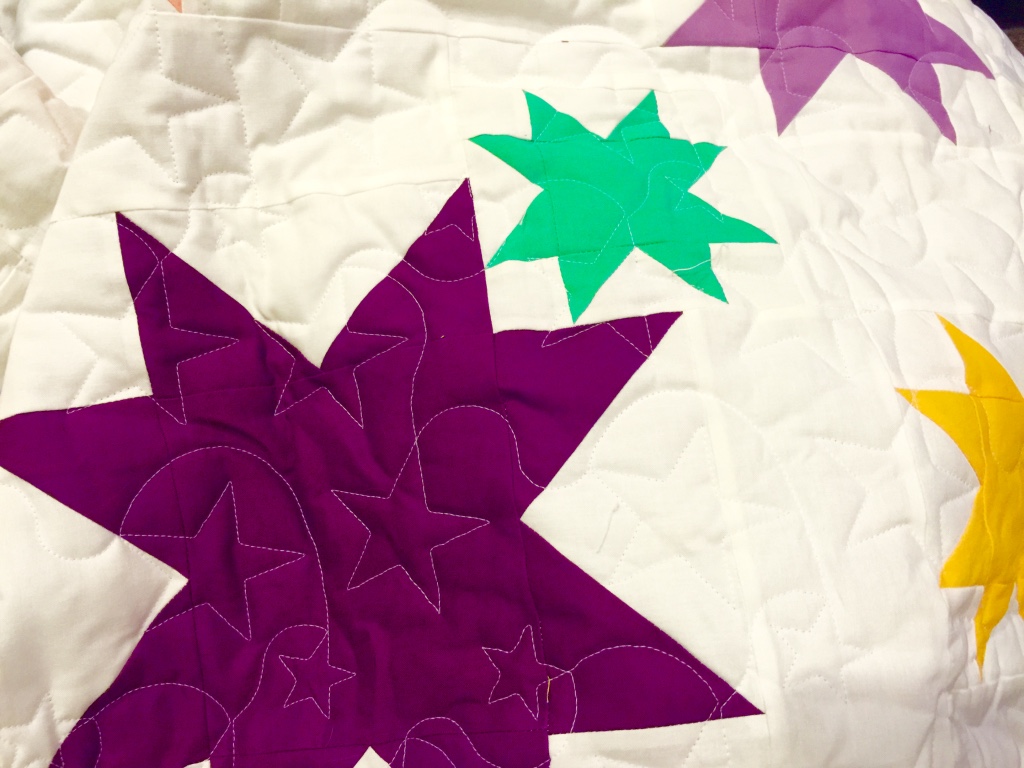
![]()
This quilt finishes at 84" x 105".
I love how this project turned out! There are tons of possibilities for this pattern, and you can go as monochromatic or as scrappy as you like. Please stop by my blog for some additional pictures, and I'd love to see what you come up with!
Brenna Goode
{Quilting in the Heartland}
![]()
Posted in: