Welcome to Moda!
Peppermint Mittens
Peppermint Mittens
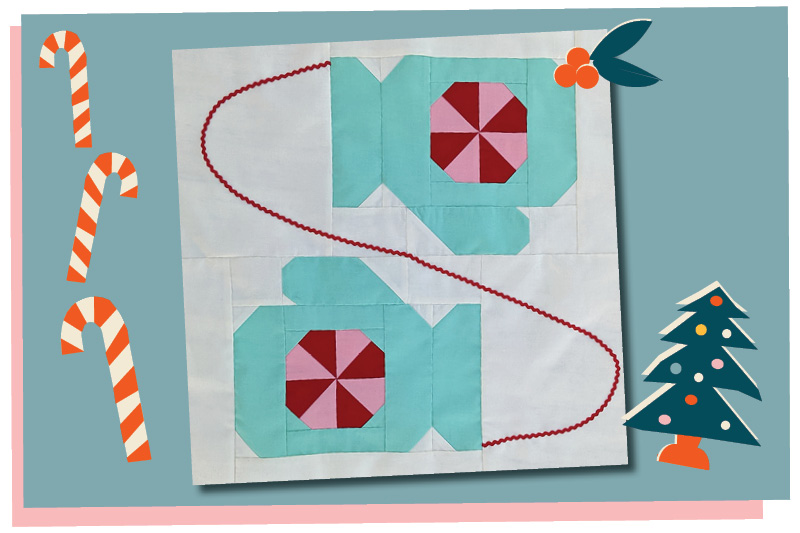
YIELD
18" finished block (18 1/2" unfinished)
INGREDIENTS
From Snow (9900 11), cut:
{A} (2) 6½" x 9½" rectangles
{B} (2) 2” x 10½” rectangles
{C} (2) 2½" x 3½" rectangles
{D} (4) 2½" squares
{E} (2) 2 ½” x 9½” rectangles
{F} (4) 1” squares
{G} (12) 1½" squares
From Peacock (9900 216), cut:
{H} (6) 2½" x 6½" rectangles
{I} (4) 1½" x 4½" rectangles
{J} (2) 2½" x 5½" rectangles
{G} (4) 1½" squares
From Geranium (9900 258), cut:
{L} (4) 3¼" squares
From Bubble Gum (9900 88), cut:
{L} (4) 3¼" squares
Garnish:
1⅛ yard of ¼” Rick-Rack or ribbon
INSTRUCTIONS
STEP 1. MAKE PEPPERMINTS
On the wrong side of (4) peppermint color 2 squares, mark a diagonal line from corner to corner. Pair right sides together with (1) peppermint color 2 square. Stitch ¼” on each side of the line. Cut on the line. Press. Trim to 2½”. Repeat for remaining peppermint squares to create a total of (8) 2½” HSTs. Join together in sets of 4 to create pinwheels that measure 4½” square.

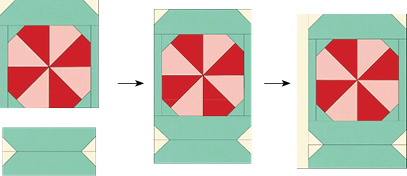
Mark a diagonal pencil lin on the wrong side of (8) 1½” mitten squares. Use these to create ECTs on the peppermints as shown. Add a 1½” x 4 ½” mitten rectangle to each side of the peppermint pinwheel. Press toward rectangle. Should measure 4½” x 6½”.

STEP 2. MAKE MITTEN
Make ECTs: On the wrong side of (12) 1 ½” x 1 ½” background squares, mark a diagonal line from corner to corner. Using (1) 2 ½” x 6 ½” mitten rectangle and (2) 1 ½” background squares place a square on opposite corners. Sew on the line, trim ¼” from the sewn line (trim line indicated by the dotted line). Press toward square.
![]()
Repeat for a total of (6) 2 ½” x 6 ½” mitten rectangles and (12) 1 ½” background squares. Press toward square on 4 of these units and press toward mitten rectangle on 2 of these units.
Join ECT units and peppermint units as shown. Add the 2” x 10 ½” background rectangle to the side of the unit. Square to 7 ½” wide x 10 ½” tall
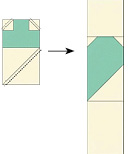
On the wrong side of (4) 1” background squares and (2) 2 ½” background squares, mark a diagonal line from corner to corner. Add (2) 1” background squares and (1) 2 ½” background square to a 2 ½” x 5 ½” mitten rectangle. **Sew on the line, trim ¼” from the sewn line (trim line indicated by the dotted line). Press toward squares. Make 2.
**Note: Watch Angle of Stitching Line
Add (1) 2 ½” background square and (1) 2 ½” x 3 ½” background square to thumb unit. Make 2. Should measure 2 ½” x 10 ½”
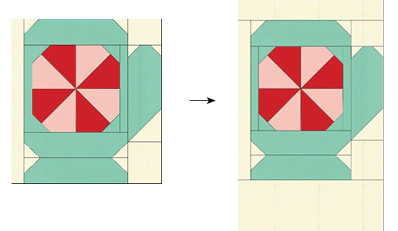
Attach thumbs to mittens. Measures 9 ½” x 10 ½”
Add (1) 2 ½” x 9 ½” rectangle to the top of the mitten and (1) 6 ½” x 9 ½” rectangle to the bottom of the mitten. Press toward background. Make 2 Should measure 9 ½” x 18 ½”.
STEP 3. ASSEMBLE BLOCK
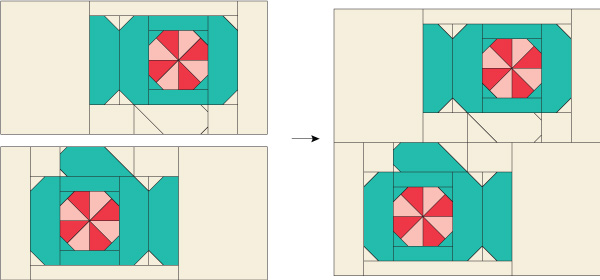
Assemble the block as shown. Measures 18½” square unfinished.
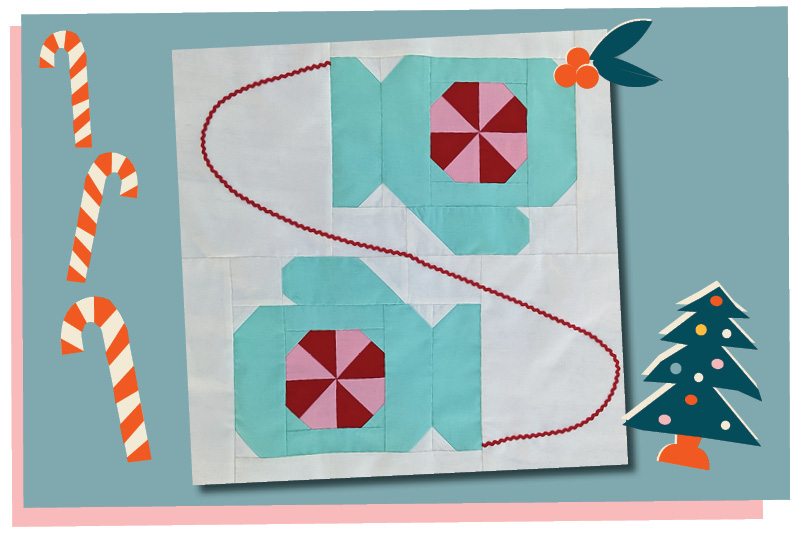
Using 1⅛ yard of ¼” Rick-Rack or ribbon, stitch a cord connecting both mittens. Use a frixion pen to mark a stitching line for the rick-rack. Use main picture as a guide.
Megan McGuire
---------------------------------------------------
A few things to let you know about the Moda Bake Shop Cozy Little Christmas QAL.
-- For fabric information - https://my.modafabrics.com/inspiration-resources/cozy-little-christmas-faqs
-- To "join", all you need to do is check Moda's Inspiration+Resources page for the latest block. Blocks will be published by 8:30 am CST.
-- The easiest way to find all of the pubished Cozy Little Christmas blocks and blog posts is to use this link - https://my.modafabrics.com/tags/countdowntochristmas2021
-- There will only be three Newsletters sent for the 2021 Moda Bake Shop Countdown to Christmas quilt-along. Those will be sent December 1, December 10, and December 31. The last two will include links to prior blocks and posts so you don't miss anything.
-- We can not "add" you to the Newsletter e-mail list, you must sign up for it here - https://modafabrics.com/inspiration-resources/newsletter.

Comments