Welcome to Moda Fabrics!
Holly Jolly Stockings
Holly Jolly Stockings
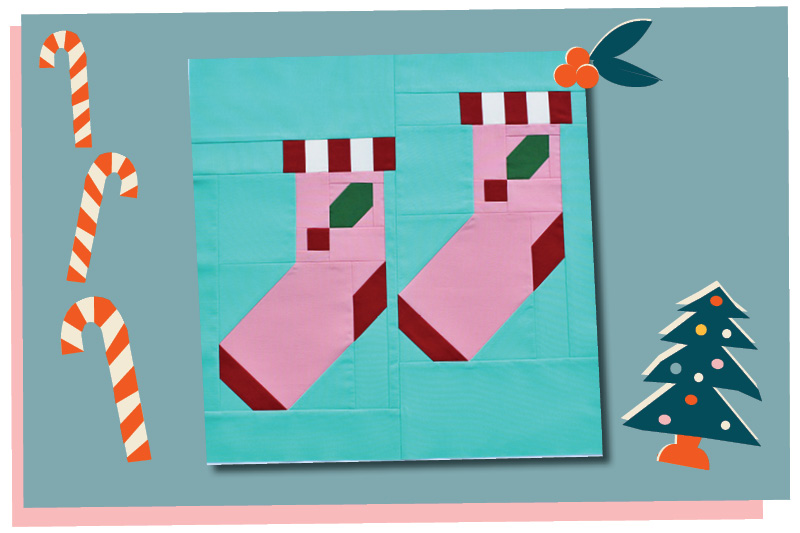
YIELD
18" finished block (18 1/2" unfinished)
INGREDIENTS
From Peacock (9900 216), cut:
{A} (2) 4½” x 9½” rectangles
{B} (2) 4” x 4½” rectangles
{C} (2) 4” squares
{D} (2) 3½” squares
{E} (2) 2½” x 9½” rectangles
{F} (1) 2” x 11” rectangle
{G} (2) 2” x 5” rectangles
{H} (1) 2” x 4½” rectangle
{I} (1) 2” x 3½” rectangle
{J} (2) 2” squares
{K} (1) 1½” x 11” rectangle
{L} (1) 1½” x 2” rectangle
{M} (1) 1” x 11” rectangle
From Betty’s Pink (9900 120), cut:
{N} (2) 6½” x 7” rectangles
{O} (4) 2” x 3” rectangles
{J} (2) 2” squares
{P} (4) 1½” squares
{Q} (2) 1” x 3” rectangles
{R} (2) 1” x 2½” rectangles
{S} (2) 1” x 2” rectangles
{T} (2) 1 x 1½” rectangles
From Country Red (9900 17), cut:
{D} (2) 3½” squares
{U} (2) 2” x 4” rectangles
{L} (6) 1½” x 2” rectangles
{P} (2) 1½” squares
From Snow (9900 11), cut:
{L} (4) 1½” x 2” rectangles
From Dill (9900 77), cut:
{V} (2) 2½” squares
INSTRUCTIONS
MAKE UNIT A
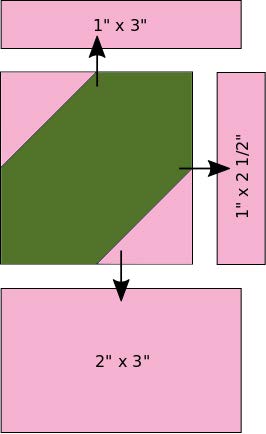
1. On the wrong side of two pink 1½” squares, use a pencil to lightly draw a diagonal line from corner to corner. Layer a marked pink 1½” square atop one corner of a green 2½” square with right sides together as shown. Stitch the pair together on the drawn line. Trim seam allowance to ¼” and press toward the green.

2. Use the same stitch-and-flip method to sew a pink 1½” square to the opposite corner of the green 2½” square.

3. Sew a pink 1” x 2½” rectangle the right side of the unit from step 2. Sew a pink 1” x 3”rectangle to the top of the unit. Sew a pink 2” x 3” rectangle to the bottom of the unit.
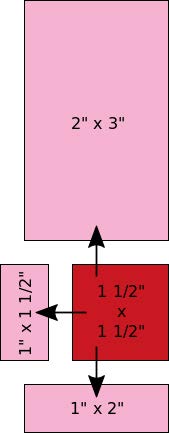
4. Sew a pink 1” x 1½” rectangle to the left side of a red 1½” square. Sew a pink 1” x 2” rectangle to the bottom of the unit. Sew a pink 2” x 3” rectangle to the top of the unit.
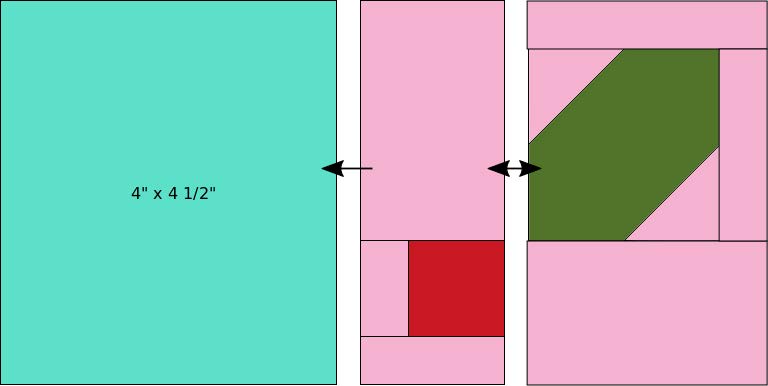
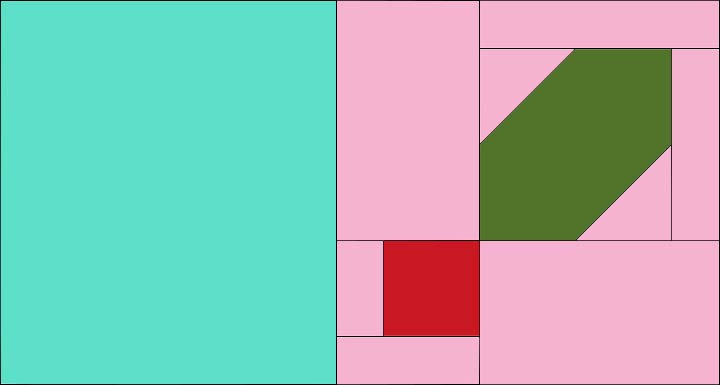
5. Sew together the units from steps 3 and 4 as shown. Sew a turquoise 4” x 4½” rectangle to the left side of the unit to make a Unit A measuring 4½” x 8”, including seam allowances. Repeat to make two Unit As total.
MAKE UNIT B
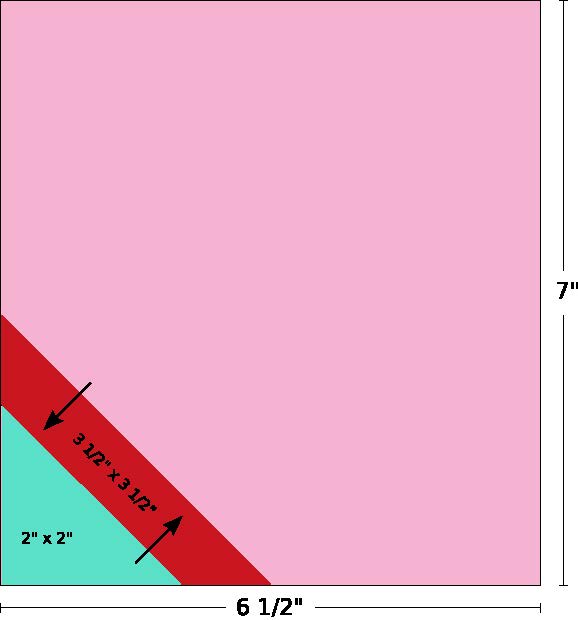
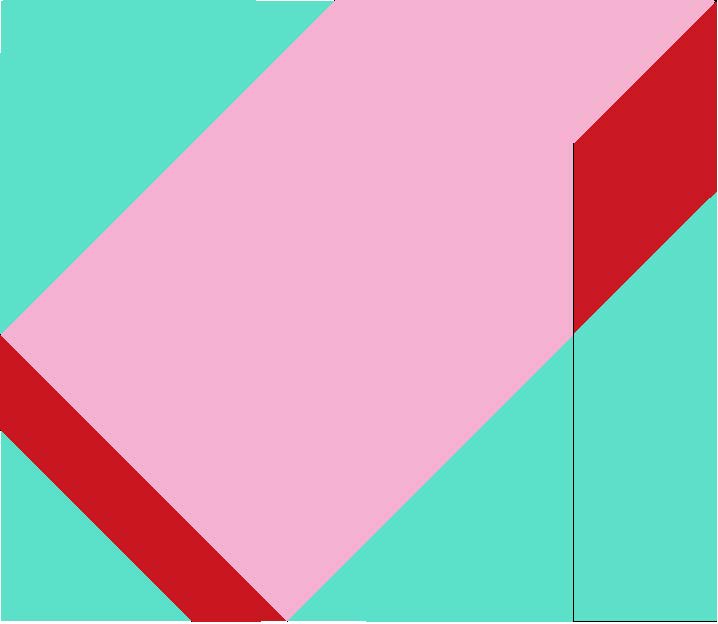
1. Use the stitch-and-flip method to sew a red 3½” square to one corner of the pink 6½” x 7” rectangle as shown. Use the stitch-and-flip method to sew a turquoise 2” square to the same corner of the red/pink 6½” x 7” rectangle as shown.
2. Use the stitch-and-flip method to sew a turquoise 4” square to the upper left corner of the unit from step 1. Use the stitch-and-flip method to sew a turquoise 3½” square to the bottom right corner of the unit from step 1.
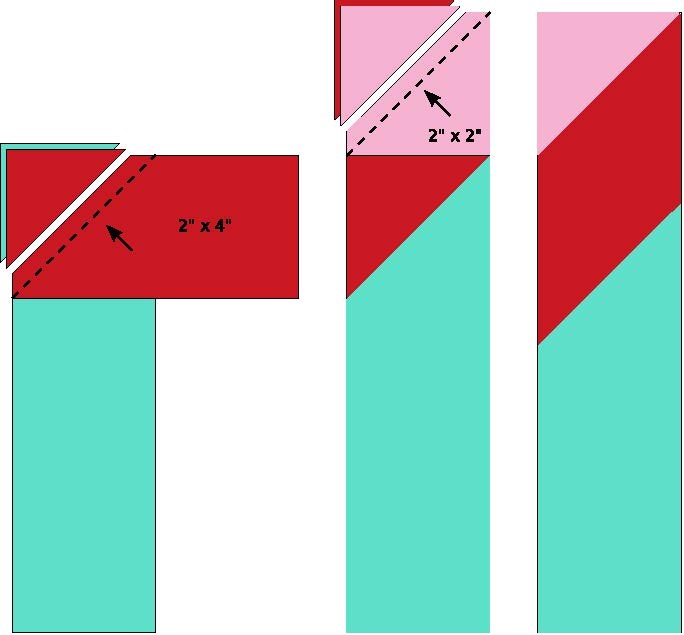
3. Use the stitch-and-flip method to sew a red 2” x 4” rectangle to one corner of a turquoise 2” x 5” rectangle as shown. Use the stitch-and-flip method to sew a pink 2” square to the unit as shown.
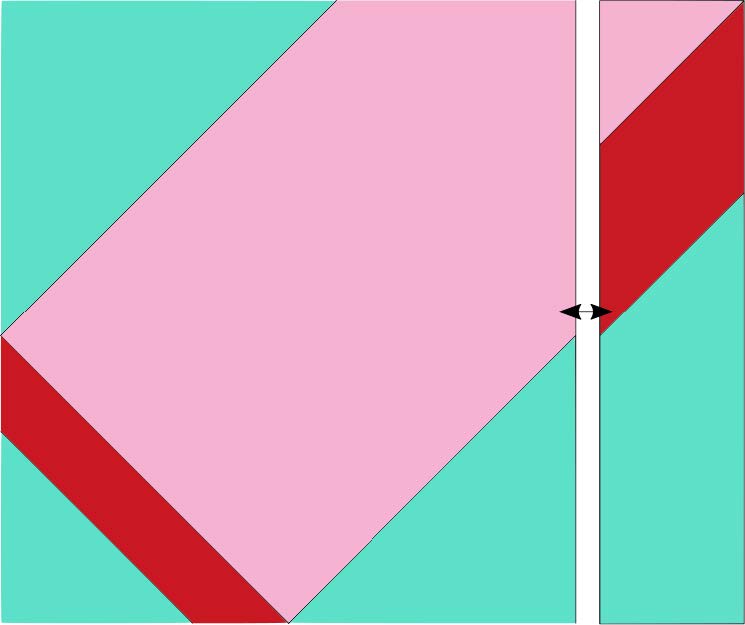
4. Sew together the units from steps 2 and 3 to make a Unit B measuring 7” x 8”, including seam allowances. Repeat to make two Unit Bs total.
MAKE UNIT C
Join together one turquoise 2” x 4½” rectangle, three red 1½” x 2” rectangles, and two white 1½” x 2” rectangles as shown to make a Unit C measuring 2” x 9½”, including seam allowances.
![]()
![]()
MAKE UNIT D
Join together one turquoise 2” x 3½” rectangle, three red 1½” x 2” rectangles, two white 1½” x 2” rectangles, and one turquoise 1½” x 2” rectangles as shown to make a Unit D measuring 2” x 9½”, including seam allowances.
![]()
![]()
ASSEMBLE BLOCK
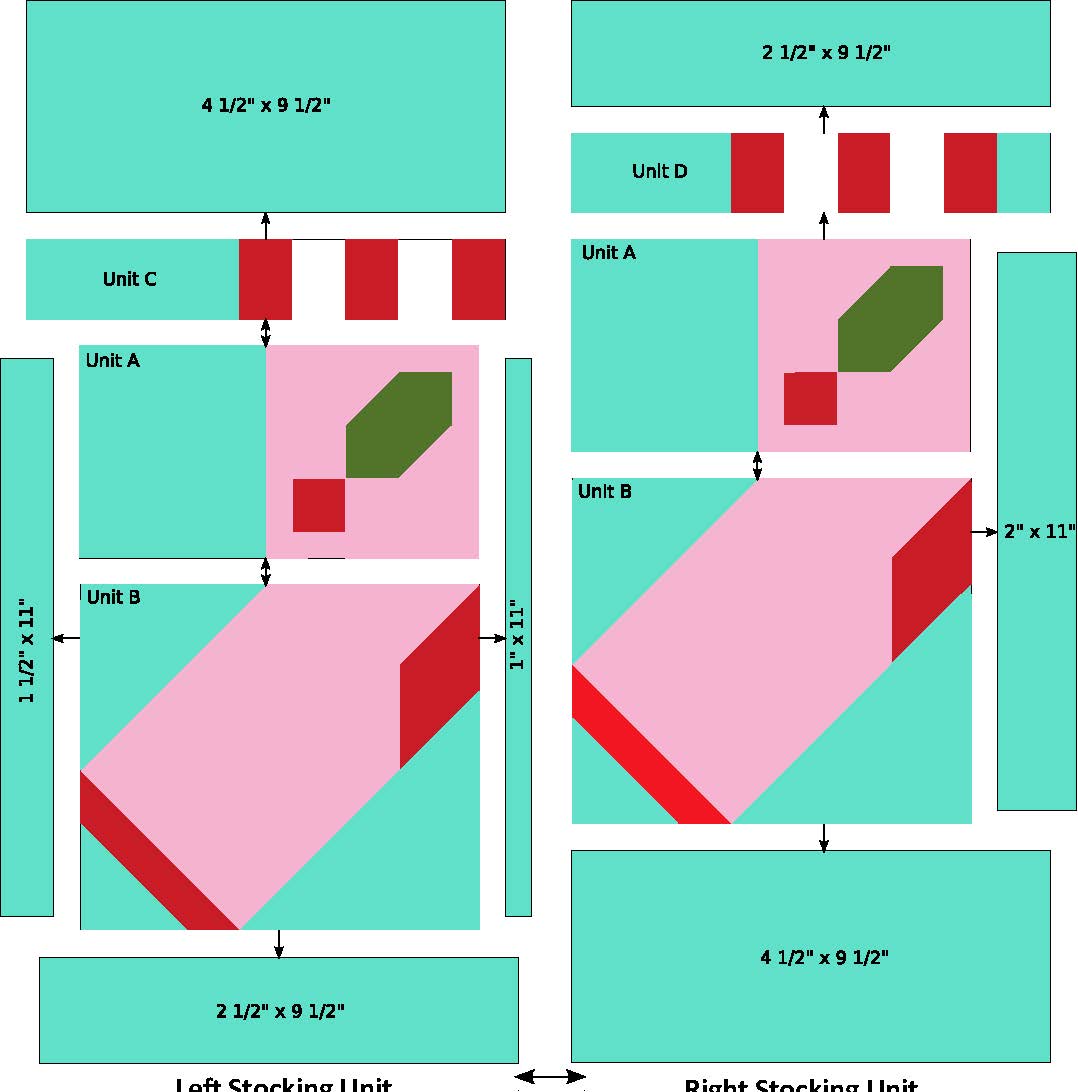
1. Join a Unit A and a Unit B. Sew a turquoise 1” x 11” rectangle to the right side of the unit. Sew a turquoise 1½” x 11” rectangle to the left side of the unit. Sew Unit C to the top of the unit. Sew a turquoise 4½” x 9½” rectangle to the top of the unit. Sew a turquoise 2½” x 9½” rectangle to the bottom of the unit to make a Left Stocking Unit measuring 9½” x 18½”, including seam allowances.
2. Join a Unit A and a Unit B. Sew a turquoise 2” x 11” rectangle to the right side of the unit. Sew Unit D to the top of the unit. Sew a turquoise 2½” x 9½” rectangle to the top of the unit. Sew a turquoise 4½” x 9½” rectangle to the bottom of the unit to make a Right Stocking Unit measuring 9½” x 18½”, including seam allowances.
3. Join together Left Stocking Unit and Right Stocking Unit to make a Holly Jolly Stockings block measuring 18½” x 18½”, including seam allowances—18” finished.
Jen Daly
---------------------------------------------------
A few things to let you know about the Moda Bake Shop Cozy Little Christmas QAL.
-- For fabric information - https://my.modafabrics.com/inspiration-resources/cozy-little-christmas-faqs
-- To "join", all you need to do is check Moda's Inspiration+Resources page for the latest block. Blocks will be published by 8:30 am CST.
-- The easiest way to find all of the pubished Cozy Little Christmas blocks and blog posts is to use this link - https://my.modafabrics.com/tags/countdowntochristmas2021
-- There will only be three Newsletters sent for the 2021 Moda Bake Shop Countdown to Christmas quilt-along. Those will be sent December 1, December 10, and December 31. The last two will include links to prior blocks and posts so you don't miss anything.
-- We can not "add" you to the Newsletter e-mail list, you must sign up for it here - https://modafabrics.com/inspiration-resources/newsletter.

Comments