Welcome to Moda Fabrics!
At the Seashore - Saltwater Taffy Quilt Setting
At the Seashore - Saltwater Taffy Quilt Setting
Published:
Jun 11 2019 - 23:00
 I absolutely love where I live. I live about 15 miles due north of the Pacific Ocean in Southern California. My house is nestled in a valley of the quiet Santa Monica Mountains, but I know the ocean in Malibu is a quick 20 min drive away. The salty sea air and the whip of the wind bring me right back to my childhood growing up on the Atlantic Coast, splashing in the waves, building sand castles, and eating lots of salt water taffy. When the sand hits my toes, I know that all will be right with the world and my frustrations melt away. It’s our family’s go to place for sunset picnic celebrations (wrapped in quilts to keep warm!), tide pool adventuring and just relaxing while watching the local surfers catch the next big wave.
 I designed this quilt with our family in mind. Often, we will grab a quick picnic dinner or a pizza and head to the beach. It might be 100 degrees at home, but as we make the quick drive through the mountains, the temperature drops and we quickly cool off. We spread out a quilt on the beach and eat our supper and watch the dolphins and seals swim about and the sea gulls fight for left over dinner scraps. As the sun begins to set, we huddle together in our beach chairs and wrap ourselves in quilts to keep warm while we marvel at the sun setting just beyond the Point.
  I used the Moda Chambray in black for the background because of its soft feel, and its dark background color makes it perfect for accidental picnic spills! The Ombre Confetti Cottons have all the colors of the beach - the sand, the water, the sun, and all the bright colors of buildings, swimsuits, surfboards and salt water taffy that I enjoyed as a child. The metallic dots glisten just like the grains of sand. It’s a winning combination! The setting for this quilt does not use all 20 of the blocks. Feel free to pick and choose blocks that you enjoy making and/or substitute your favorite 12” finished blocks! Hint: This setting is extremely customizable, and easy for you to shift the filler blocks around in each section. If you think your quilt would flow better with the filler blocks and open space on opposite sides of the row or in between blocks, feel free to change things up. This post is part of our summer quilt-along series. Find the rest of the posts by clicking {here}.
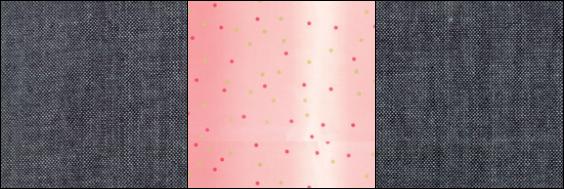
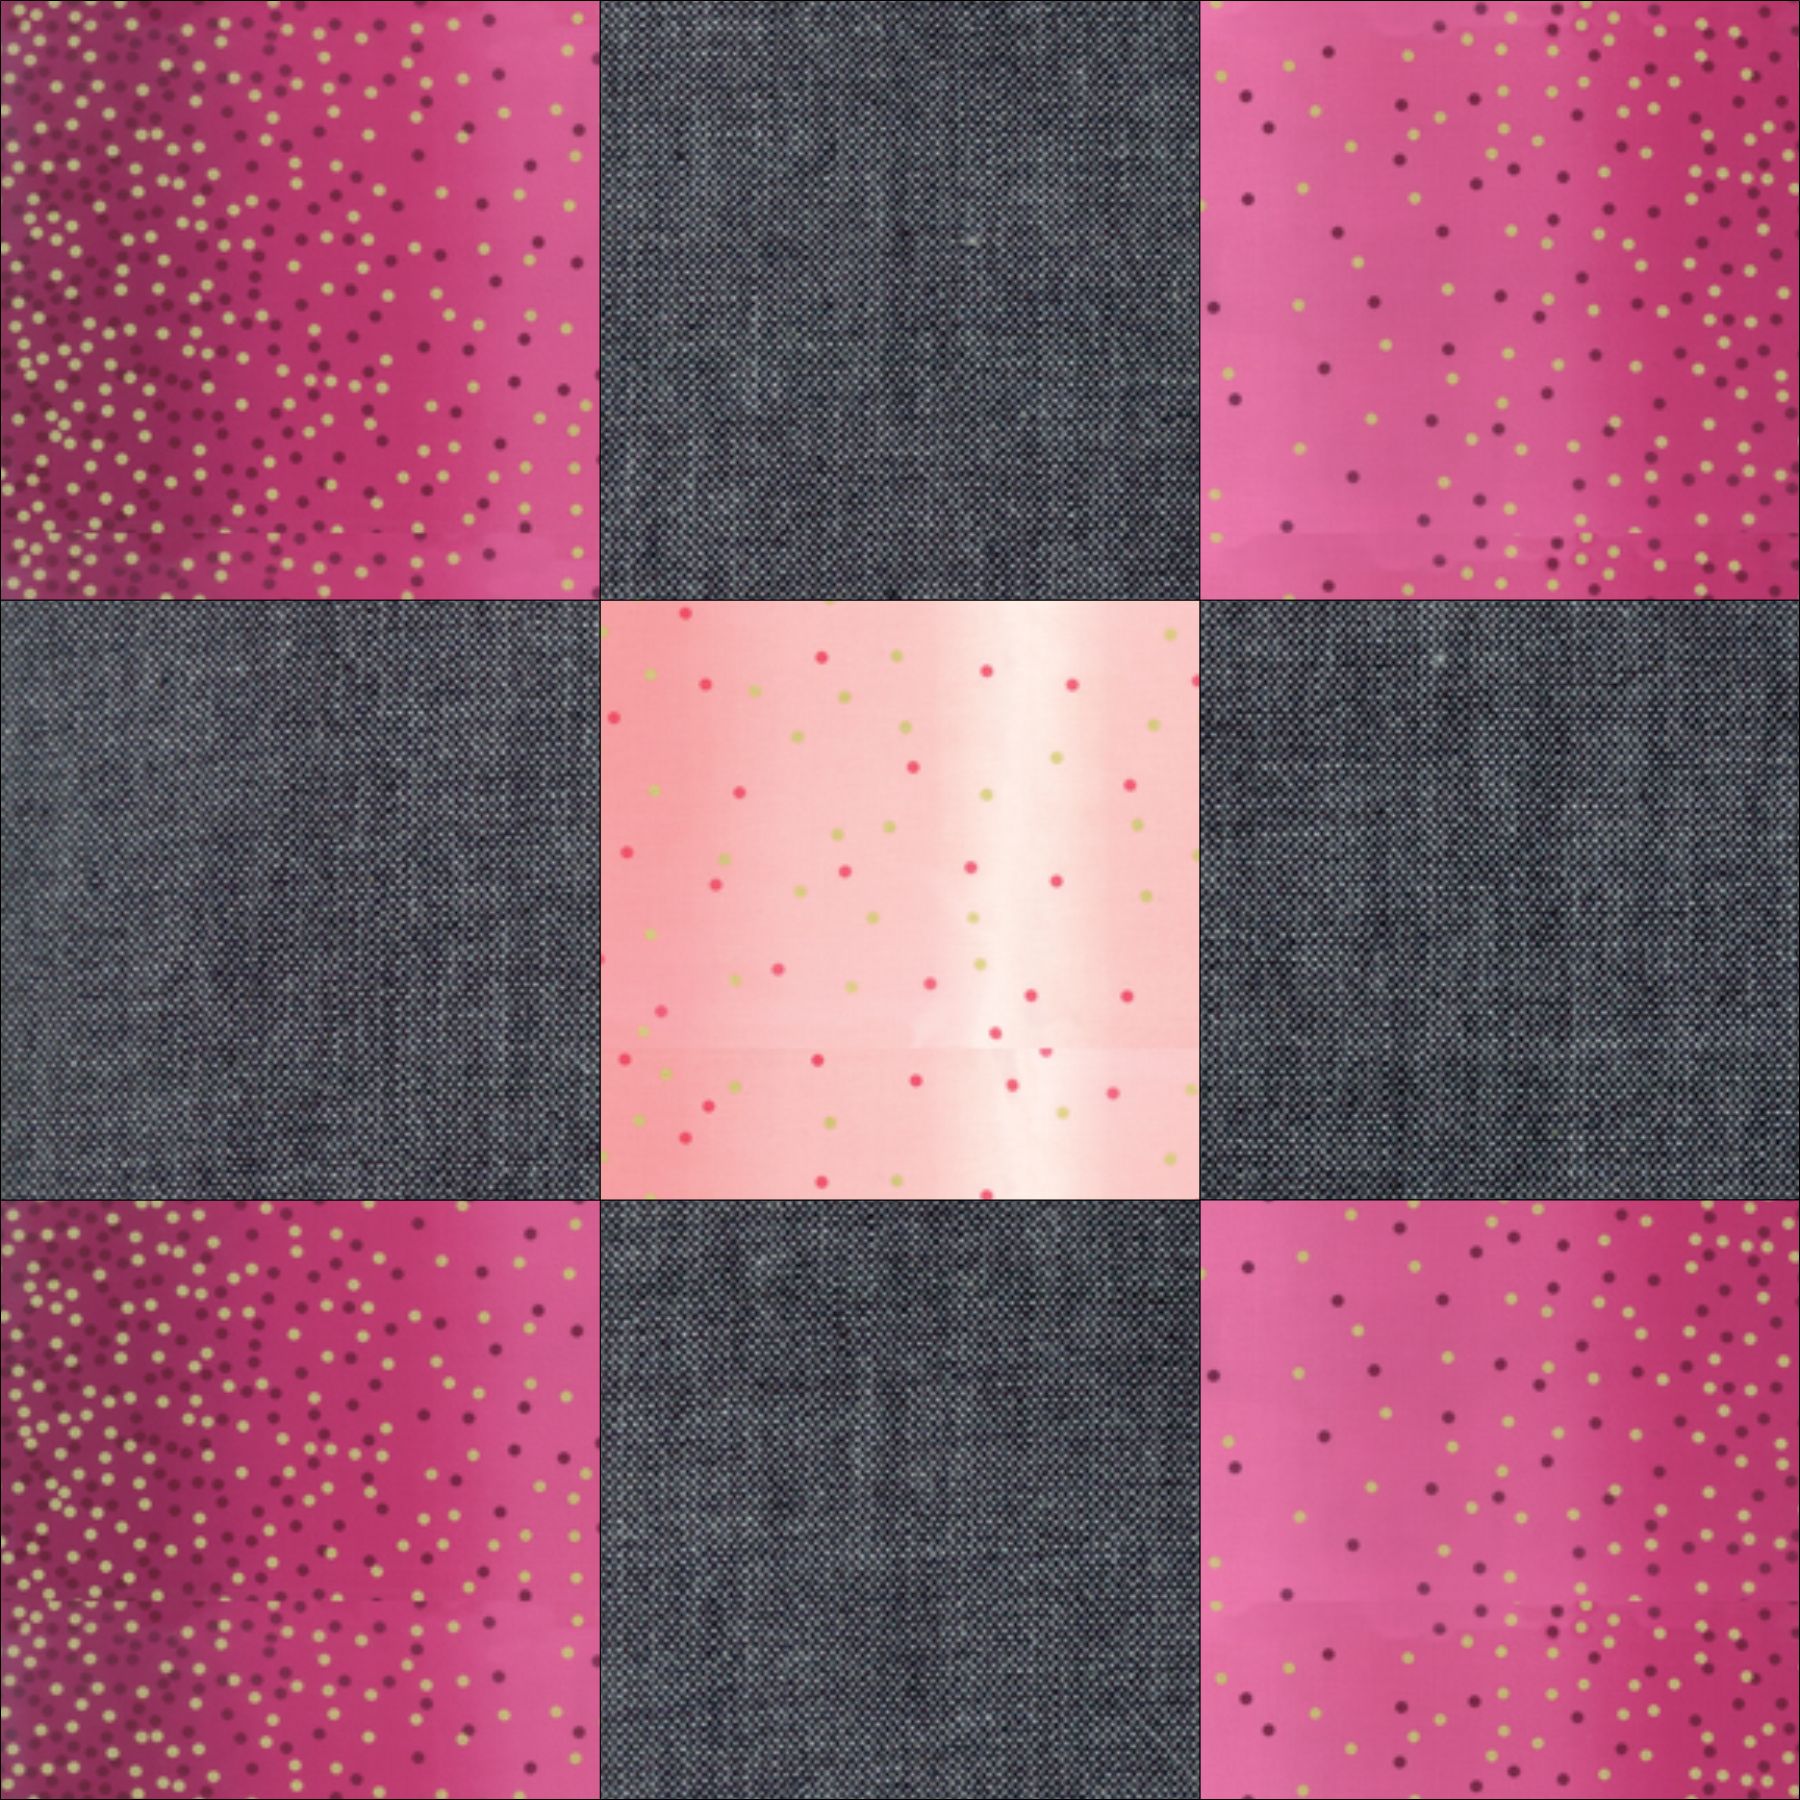
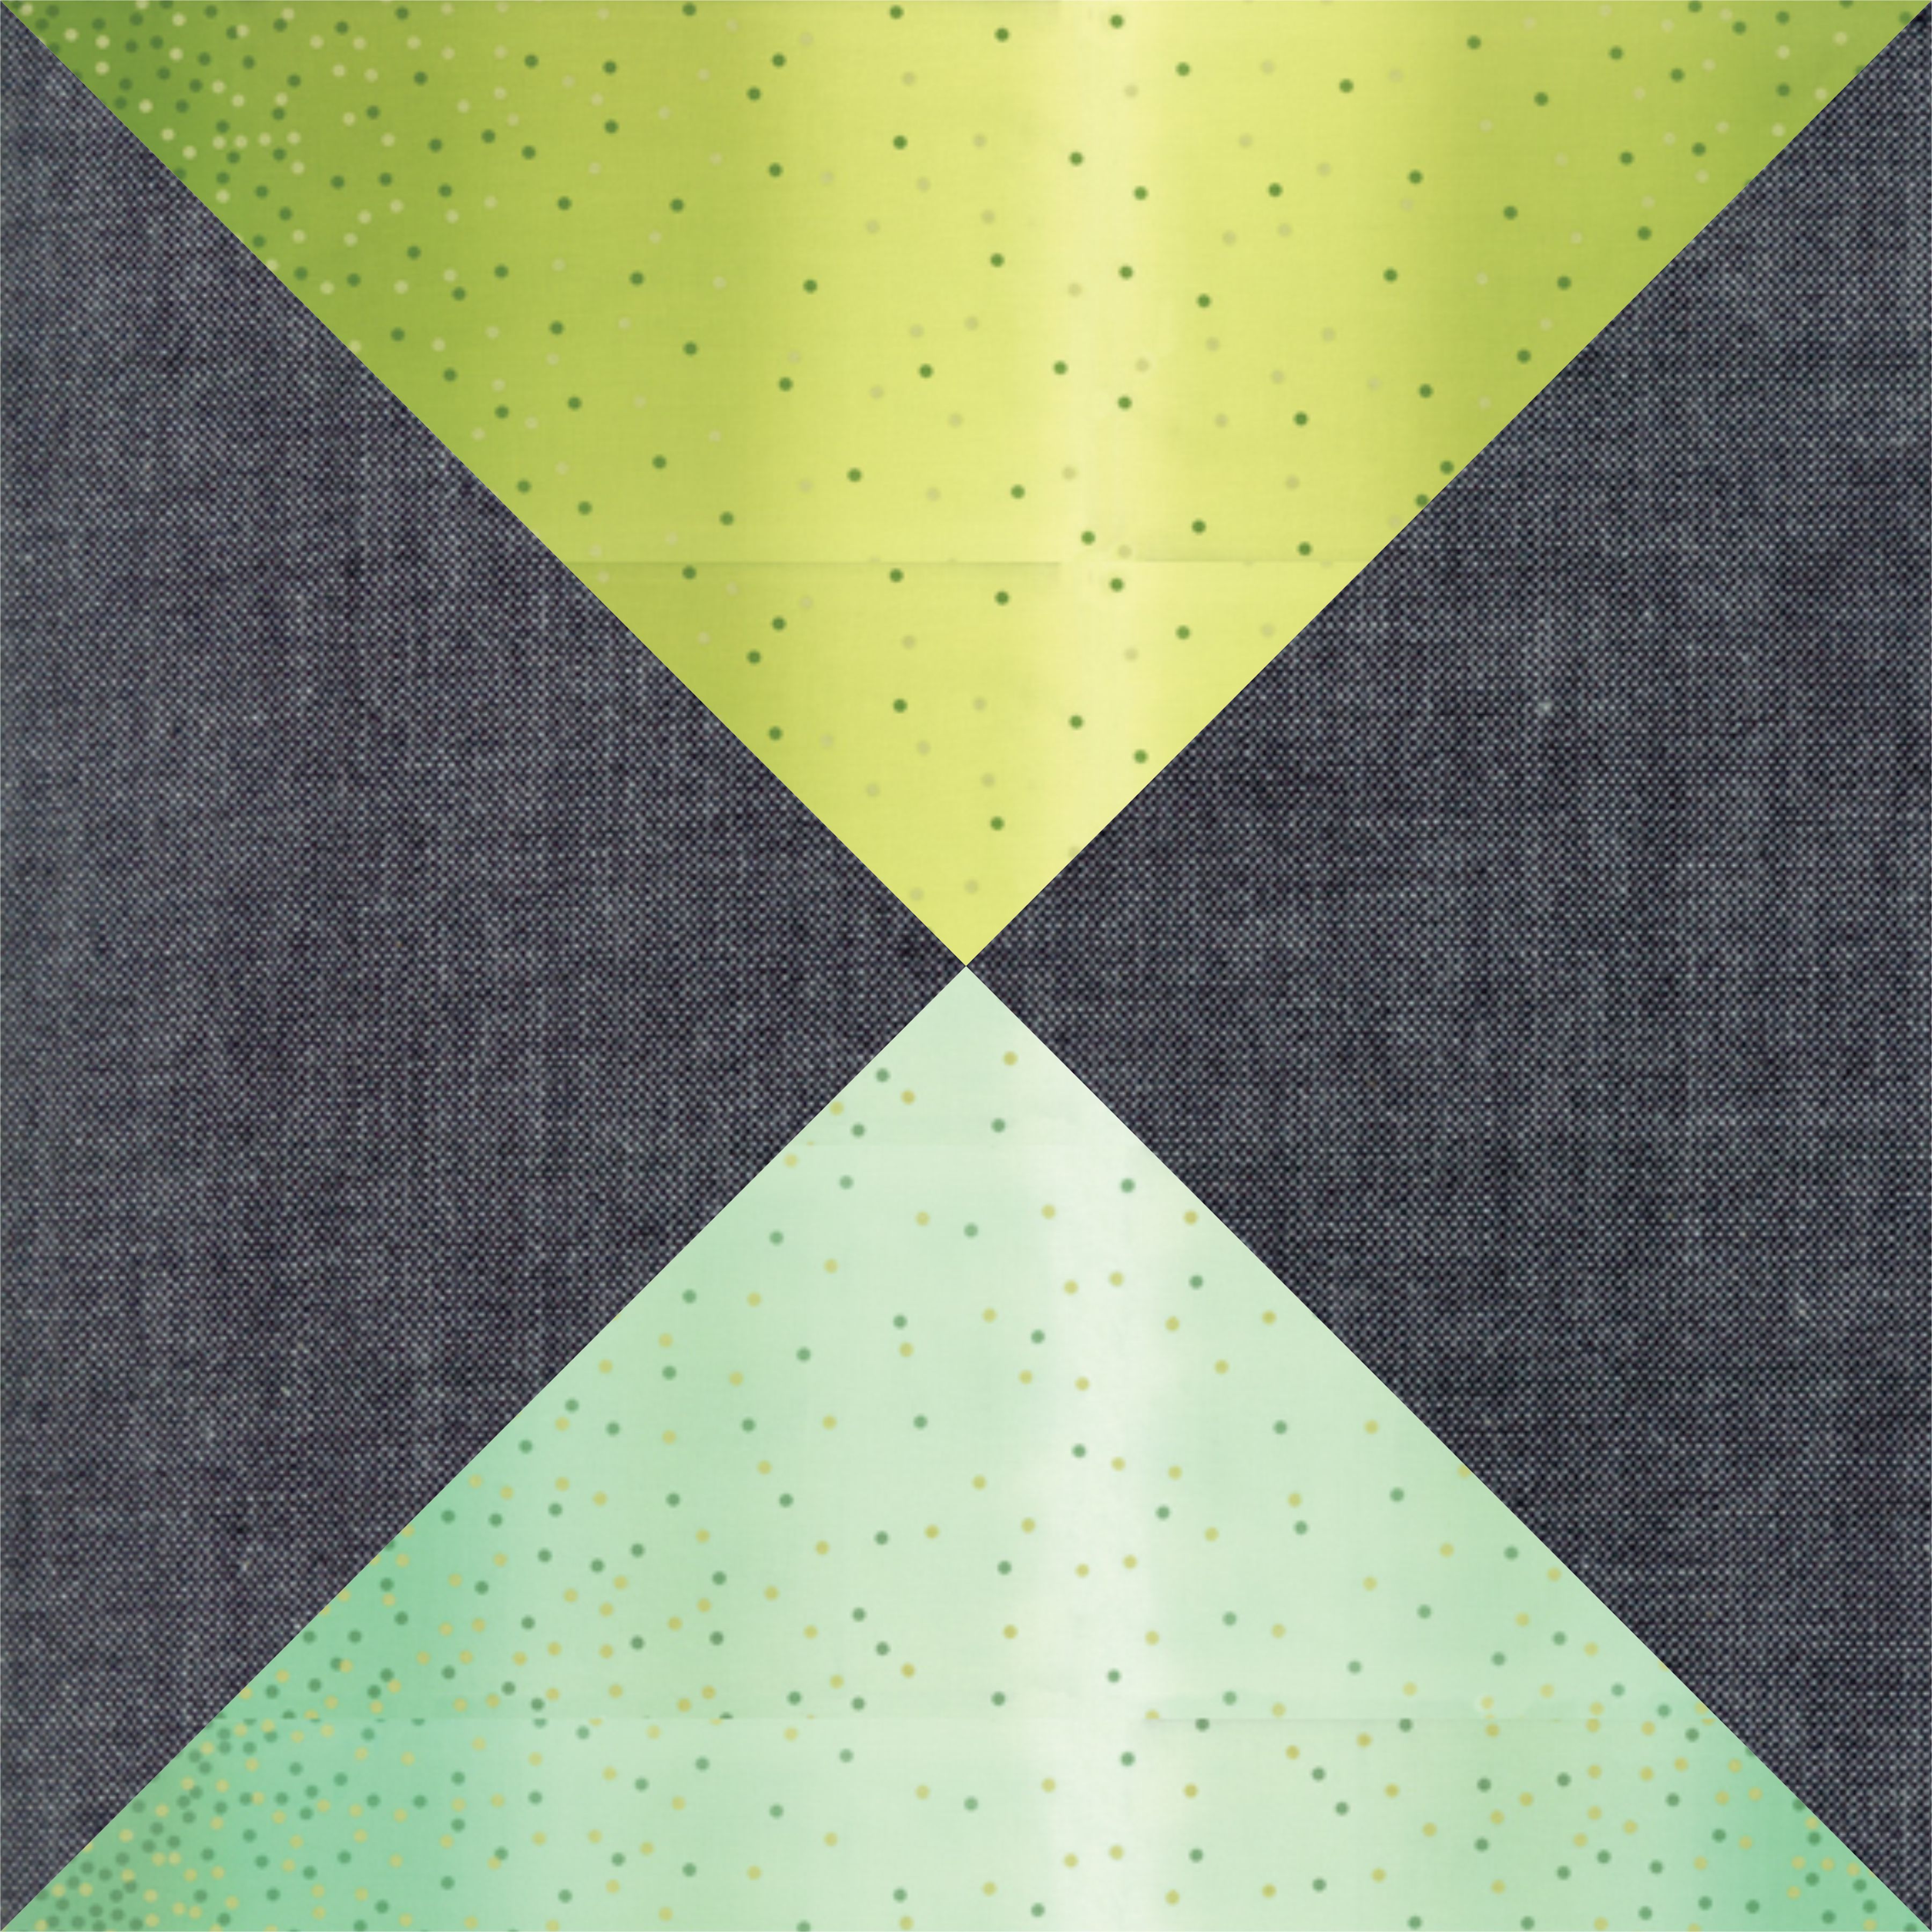
 ![]()
- Scraps: I will be using left over scraps from the Ombre Confetti fabrics by Vanessa Christenson. I am starting my project with a half yard bundle of the Original Colors, and a fat quarter bundle of the New Colors, and will have plenty to mix and match with in my quilt. If you are starting with no fabric scraps, I would recommend 8-12 Fat Eighths (9” x 22”) to achieve the scrappy look. You will have plenty left over for your next scrappy project.
- Background: I used the Moda Chambray in black as my background. For just the setting, I used 1 ½ yards.
- Backing: 3 ¾ yards
- Binding: 5/8 yard
Cutting Instructions will be noted with each block or section you are constructing, in case you want to mix and match your rows or setting blocks. ![]() Block 1: Flying Geese Row (2” x 4” finished, 2 ½” x 4 ½” unfinished; row measures 4”x 24” finished, 4 ½ ” x 24 ½ ” unfinished ) Cut: From assorted fabrics cut (12 pairs) of 2 ½” x 2 ½” squares. From Background cut (1) 4 ½” by WOF strip. Sub cut into (12) 2 ½” x 4 ½” rectangles of fabric. Draw a diagonal line on the back of each 2½” x 2½” print fabric. Place a print square right sides together on the right hand side a 2 ½” x 4 ½” background rectangle. Sew along the line and trim ¼” away from the seam. Press out. Repeat on the left hand side, creating a Flying Geese block. Make (12) Flying Geese blocks. Each block will measure 2 ½” x 4 ½” unfinished.
Block 1: Flying Geese Row (2” x 4” finished, 2 ½” x 4 ½” unfinished; row measures 4”x 24” finished, 4 ½ ” x 24 ½ ” unfinished ) Cut: From assorted fabrics cut (12 pairs) of 2 ½” x 2 ½” squares. From Background cut (1) 4 ½” by WOF strip. Sub cut into (12) 2 ½” x 4 ½” rectangles of fabric. Draw a diagonal line on the back of each 2½” x 2½” print fabric. Place a print square right sides together on the right hand side a 2 ½” x 4 ½” background rectangle. Sew along the line and trim ¼” away from the seam. Press out. Repeat on the left hand side, creating a Flying Geese block. Make (12) Flying Geese blocks. Each block will measure 2 ½” x 4 ½” unfinished.  Sew Flying Geese together as shown to create a row that is 4 ½” wide by 24 ½” long unfinished. Press seams open to reduce bulk.
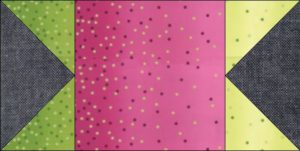
  Block 2: Simple Star (Make 2 blocks) (6” finished block, 6 ½” unfinished) From two different print fabrics, cut (8) 2” x 2” squares of fabric for star points From two different prints fabrics cut (1) 3 ½” x 3 ½” square of fabric for star center **From background cut (1) 2” by WOF strip. Sub cut into (8) 2”x 3 ½” rectangles and (8) 2” x 2” squares. **Depending on the width of your fabric you might not be able to cut all the pieces from this strip. Use the left over background fabric cut from the flying geese row to make up the difference. Draw a diagonal line on the back of each 2” x 2” print fabric square. Place print square right sides together on the righthand side a 2” x 3 ½” background rectangle. Sew along the line and trim ¼” away from the seam. Press out. Repeat on the left hand side, creating a Flying Geese block. Each Flying Geese block will measure 2” x 3 ½” unfinished. Make (4) Flying Geese blocks per star set. Combine into rows as shown with 2”x 2” background squares and 3 ½” Center print squares. Sew rows together to form Simple Star Block. Make 2. Blocks measure 6 ½” unfinished.
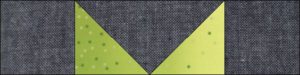

 Block 3: Nine Patches (Make 2 Blocks) (6" finished, 6 1/2" unfinished) From two different print fabrics, cut (4) 2 ½” x 2 ½” squares of fabric for outer corners From two different print fabrics, cut (1) 2 ½ ”x 2 ½” square for the inner square. From Background cut (1) 2 ½ ” by WOF strip. Sub cut into (8) 2 ½” x 2 ½” squares. Sew Nine Patch into rows as shown. Press toward the print squares. Combine rows to form a 6½” unfinished block, pressing seams open. Make two Nine Patch blocks.
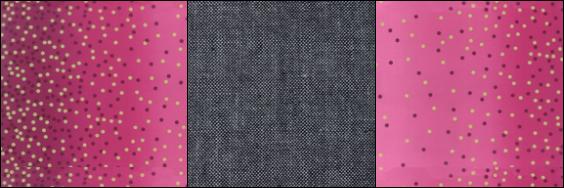
 Block 4: Quarter Square Triangle Blocks (Make 2 blocks, 2 Blocks will be extra) (6” square /6 ½” square unfinished) Fabrics Needed: From 4 different prints, cut (1) 7 ¼” x 7 ¼” square. From Background, cut (1) 7 ¼” by WOF Strip. Sub cut into (4) 7 ¼” squares. Make Half Square Triangle Units: Draw a line on the back of each 7 ¼” print square. With right sides together, layer one print square and one 7 ¼” Background fabric square. Sew ¼” on each side of marked lines. Cut along the diagonal line. Press toward the print square. Make Half Square Triangle units from all 4 prints. You will use (4) of these Half Square Triangle Units (one of each print) in the next step, and remaining will be left over.
  Make Quarter Square Triangle Units: Gather two coordinating Half Square Triangle units (created in above step) and layer with opposite directions on top of each other so seams nestle together. Draw a diagonal line on the back of the top square and sew ¼” on either side of marked line. Cut apart and press open. Trim blocks to 6 ½” square.
 Repeat the above step with the (2) remaining Half Square Triangle units. At this point, you will have a total of (4) 6 ½” unfinished blocks. (2) blocks will be used in the quilt setting and two will be extra. Hint: Feel free to use extra Half Square Triangle and Quarter Square Triangle Blocks in lieu of solid filler blocks since they can be trimmed to the correct size, or piece them into your quilt back for an added surprise! Refer to quilt diagram with dimensions for extra opportunities to use these blocks! Block 5: Half Square Triangle Block (3” finished Half Square Triangle, 3 ½” unfinished; 6” x 12” finished block 6 ½” x 12 ½” unfinished) From assorted prints, cut (4) 4” Blocks From Background cut (1) 4” by WOF Strip. Sub cut into (4) 4” blocks. Save the remainder of fabric to use for filler strips. Draw a line on the back of each 4” print square. With right sides together, layer one print square and one 4” background square. Sew ¼” on each side of marked lines. Cut along the diagonal line. Press and trim squares to 3 ½” square. Repeat with each fabric to make a total of (8) Half Square Triangles. Sew Half Square Triangles together as shown creating a block measuring 6 ½” x 12 ½” unfinished. Press seams open to help reduce bulk.
 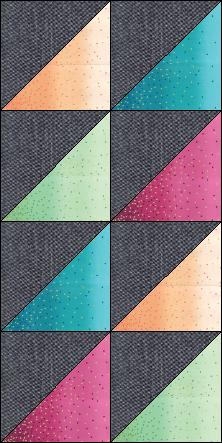 Block 6: Checkerboard (4” x 12” finished, 4 ½” x 12 ½” unfinished) From assorted prints, cut (6) 2 ½ ” x 2 ½” Blocks From Background cut (1) 2 ½ ” by WOF Strip. Sub cut into (6) 2 ½” x 2 ½” blocks. Save the remainder of fabric to use for filler strips. Lay out fabric squares as shown, alternating print with Background squares. Sew into a Checkerboard block as shown. Press. Block measures 4 ½” x 12 ½” unfinished.
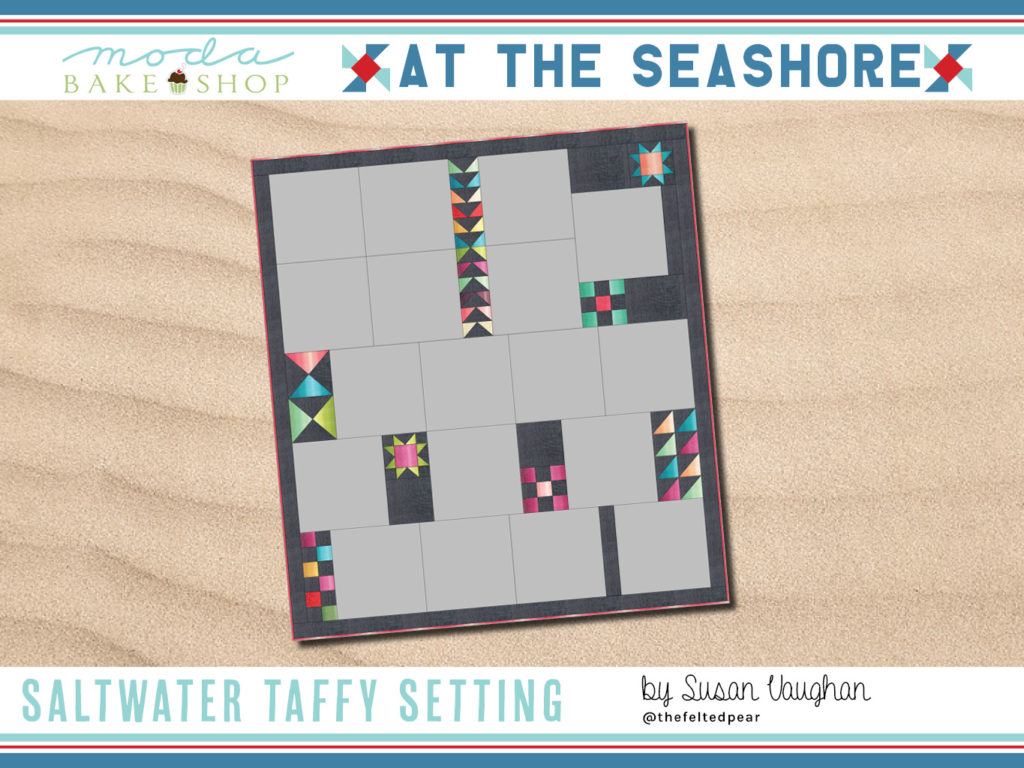
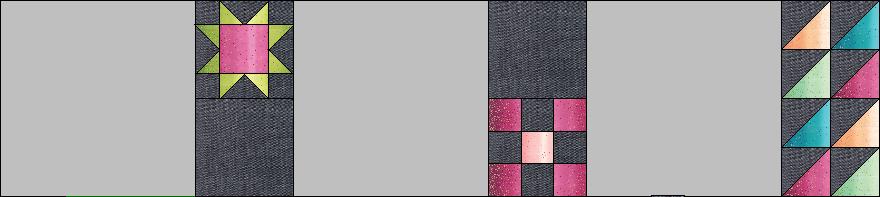
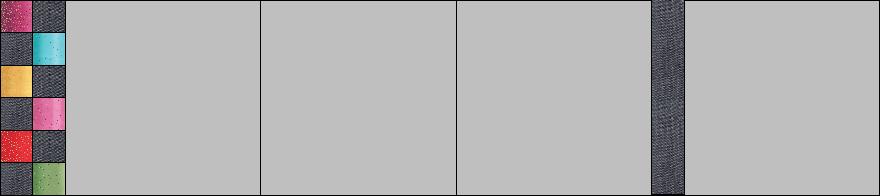
 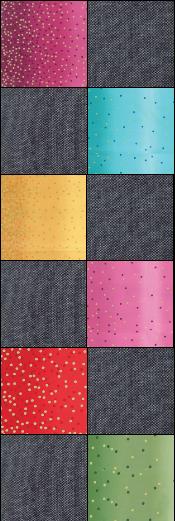 Quilt Assembly: From Background, cut (1) 6 ½” by WOF strip of fabric. Sub cut into (2) 6 ½”x 8 ½” rectangles and (2) 6 ½” squares for fillers. From remainder of Background strips from previous blocks, cut (2) 2 ½” x 12 ½” rectangles as filler strips. Gather (18) blocks from Moda’s “At The Seashore” Quilt Along. Lay out the blocks, your small filler blocks, and the filler background pieces until you are happy with the arrangement. Hint: Use the following diagram to help you plan out your quit! Feel free to color it in to play with color combinations, or as a visual aid to see where filler blocks are located. Feel free to move the placement of the filler blocks around in each section to balance color and design! Sizes noted are unfinished sizes.
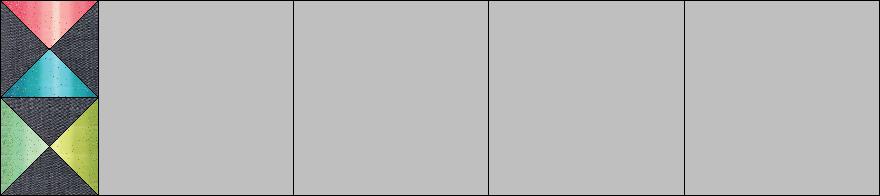
 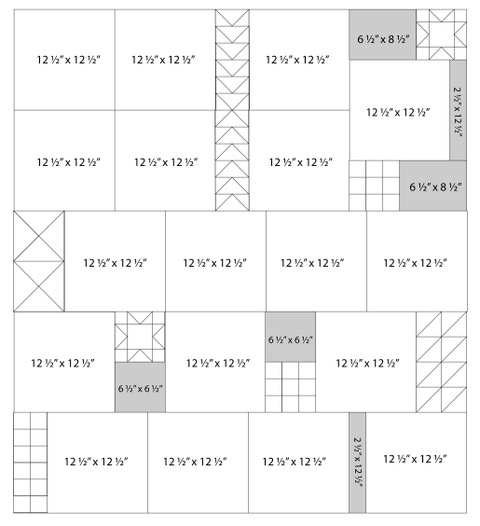 Sew together to form sections as shown. Press seams open as needed to reduce bulk.
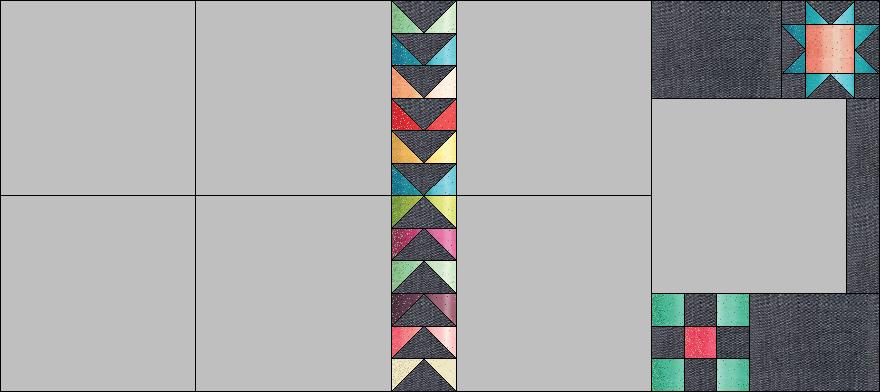
 Sew together sections to complete quilt top.
 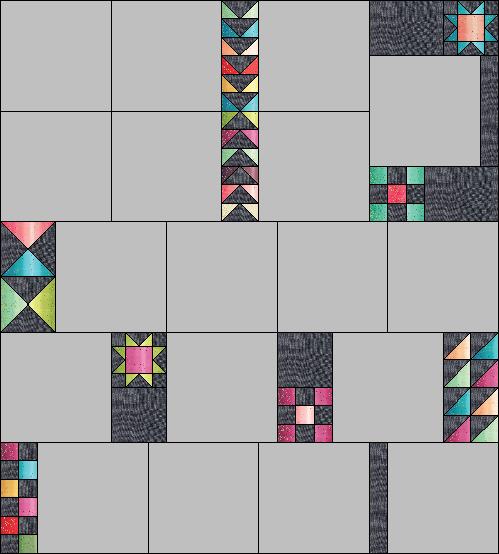 Cut (6) strips 2 ½” by WOF. Sew together to create (2) 2 ½” x 60 ½” left and right borders and (2) 2 ½” x 58 ½” top and bottom borders. Sew left and right borders and press out. Sew top and bottom borders and press out. Quilt as desired and bind with (7) 2 ½” by WOF binding strips.
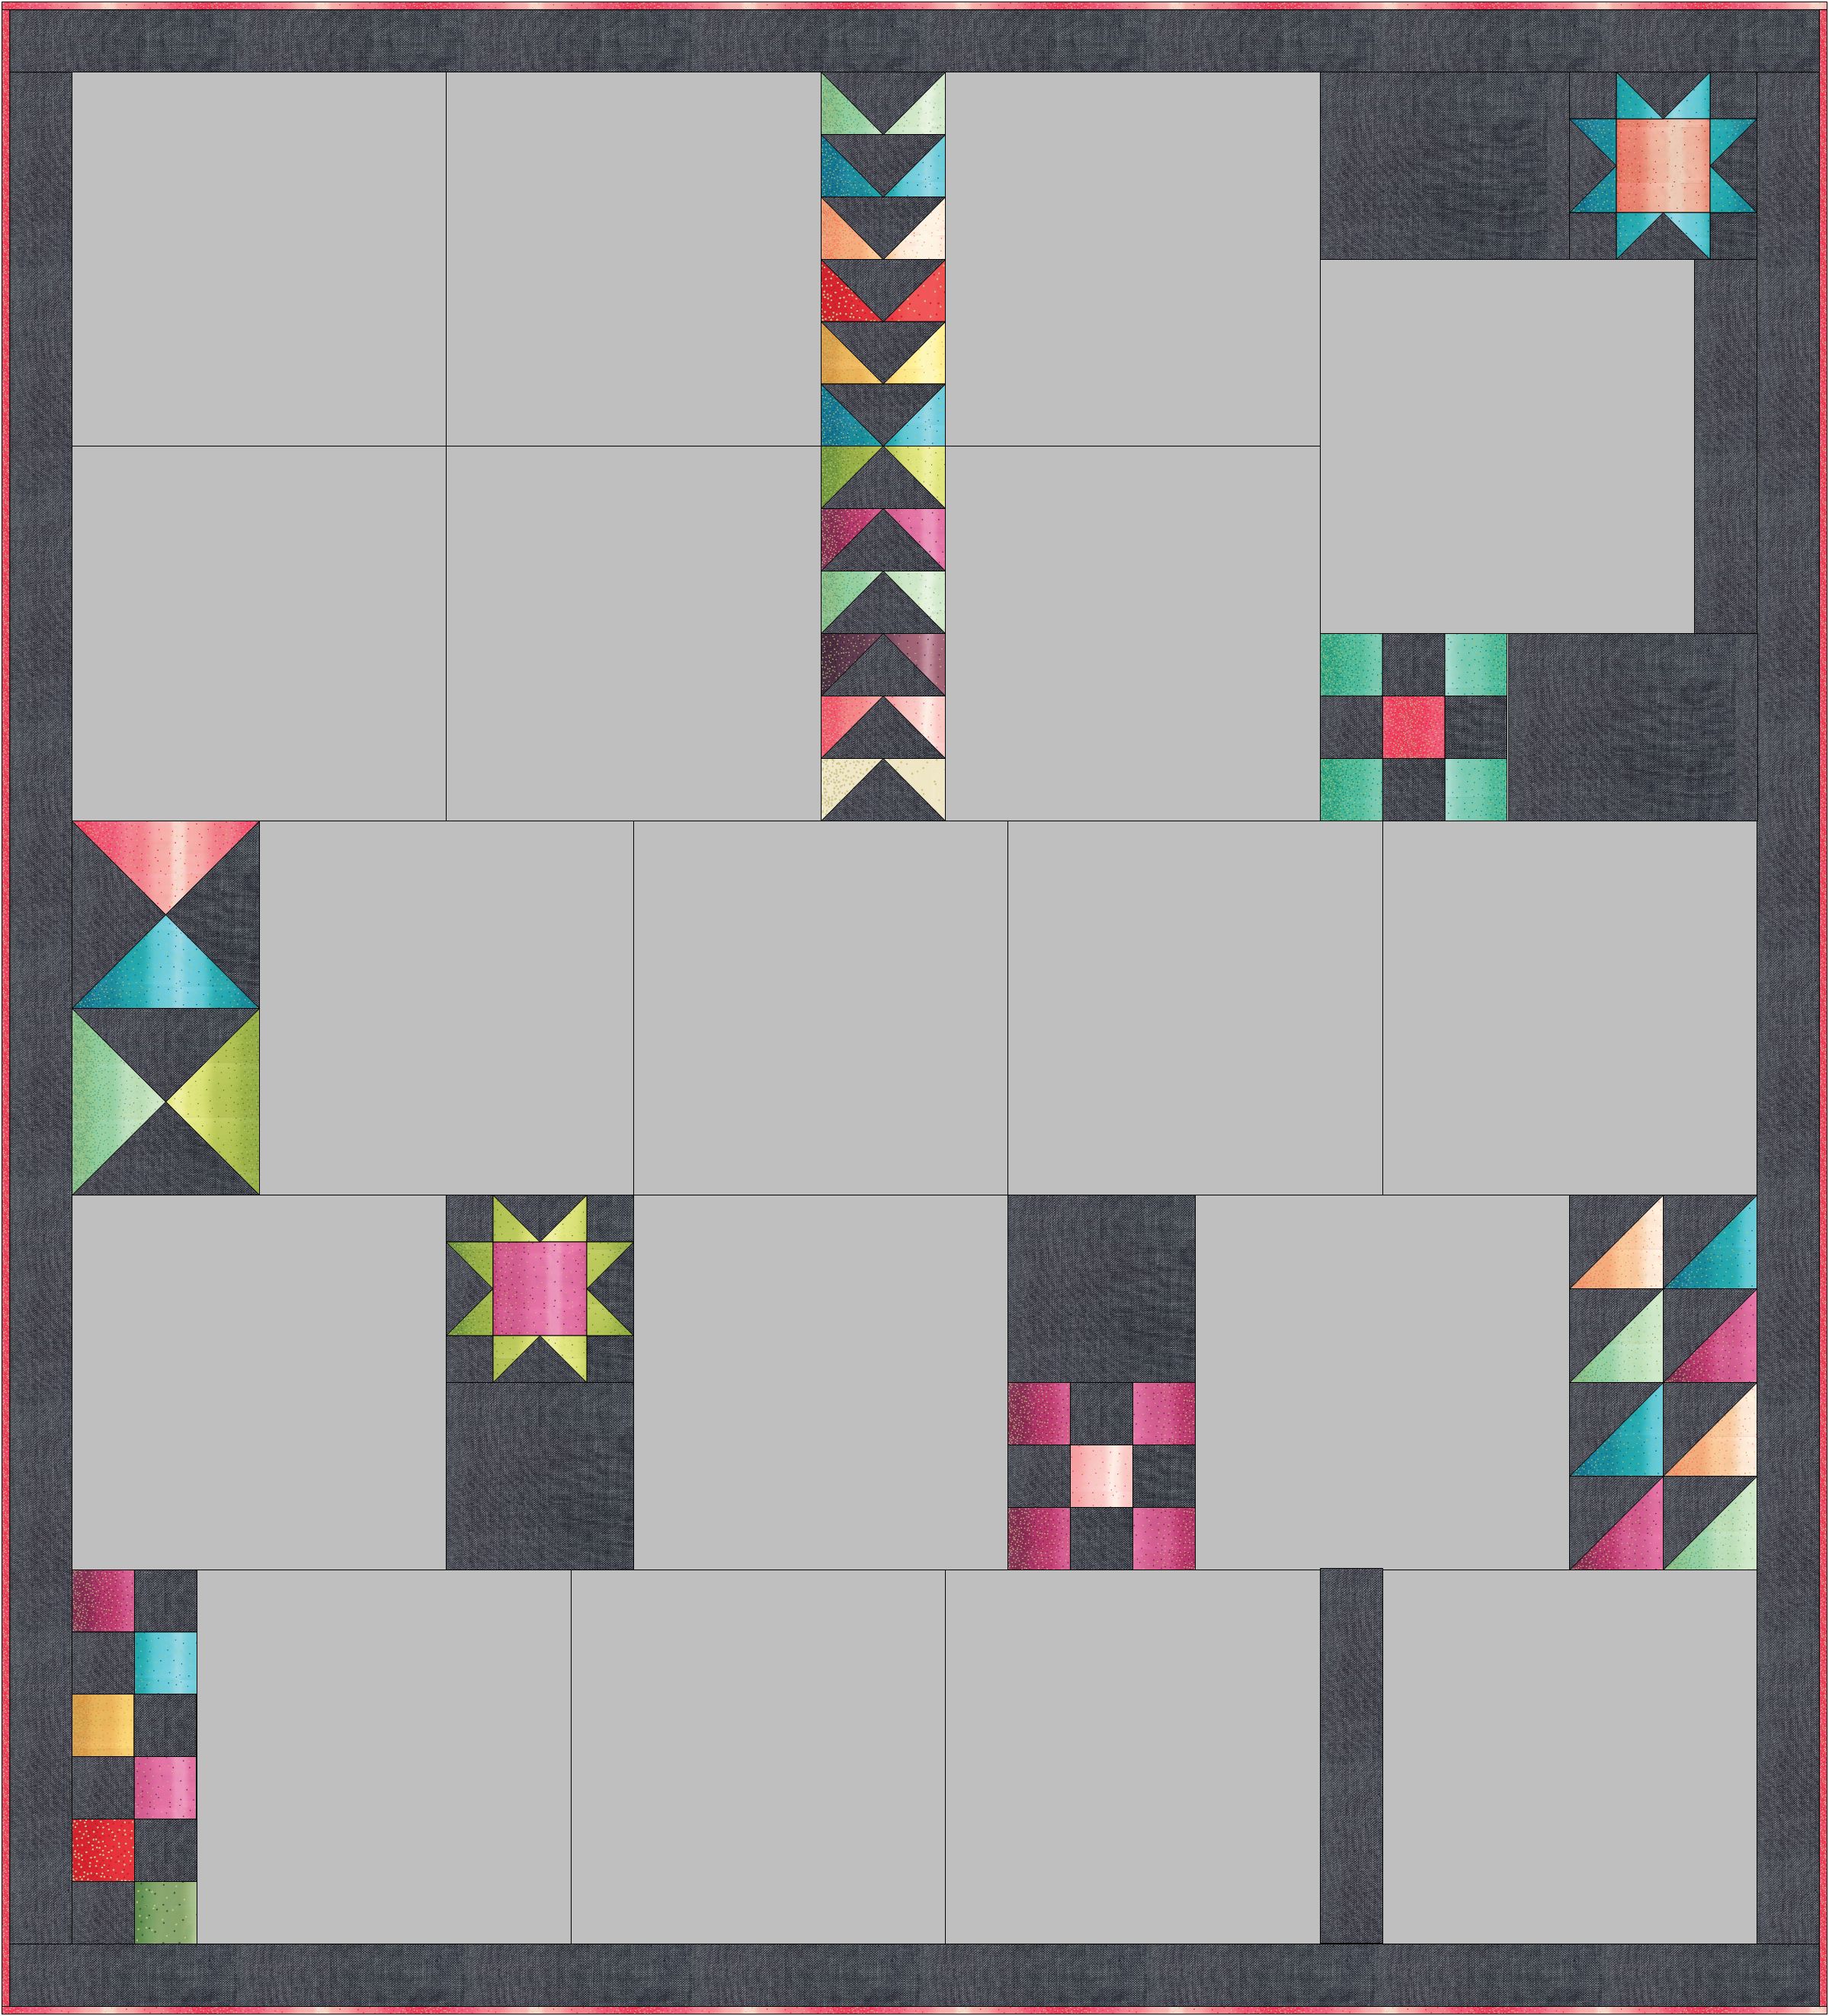
![]() Quilt Measures 58” x 64”. I can't wait to see y'all "At the Seashore" this summer! I will be sewing along-- making and posting my blocks on my Instagram feed (@thefeltedpear). Be sure to stop by and say "Hello"! I'd love to see what you are making and cheer you along. Susan Vaughan {instagram: The Felted Pear}
Quilt Measures 58” x 64”. I can't wait to see y'all "At the Seashore" this summer! I will be sewing along-- making and posting my blocks on my Instagram feed (@thefeltedpear). Be sure to stop by and say "Hello"! I'd love to see what you are making and cheer you along. Susan Vaughan {instagram: The Felted Pear} ![]()
Posted in:
Comments