Welcome to Moda Fabrics!
Going Dutch Quilt
Going Dutch Quilt
Published:
Feb 20 2019 - 23:00
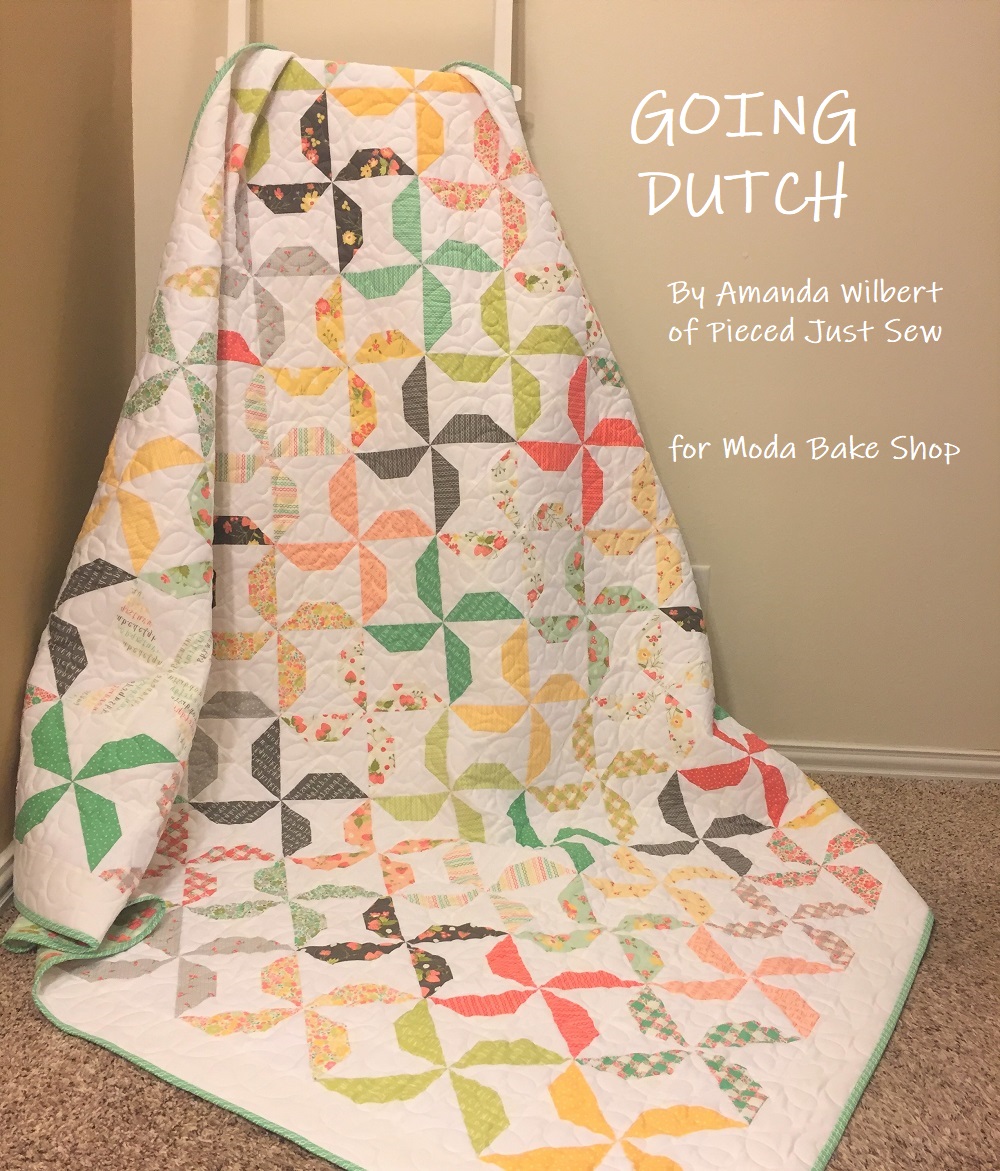
![]() Hello! I’m Amanda of Pieced Just Sew and I am happy to be sharing a new quilt tutorial with you today! I love how a slight change to a traditional block can give you a whole new look. Here, one change to a traditional pinwheel block gives you a block that I think looks like a windmill. Let’s get started!
Hello! I’m Amanda of Pieced Just Sew and I am happy to be sharing a new quilt tutorial with you today! I love how a slight change to a traditional block can give you a whole new look. Here, one change to a traditional pinwheel block gives you a block that I think looks like a windmill. Let’s get started!
This quilt finishes at 70″ x 78″. ![]()
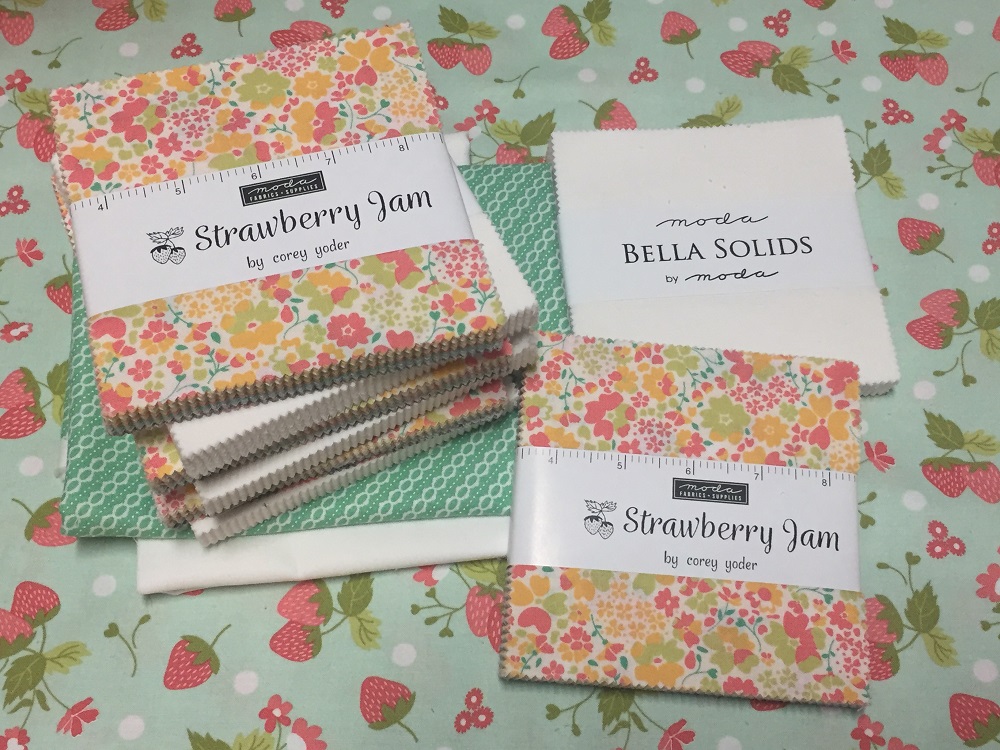 4 charm packs of Strawberry Jam by Corey Yoder 4 charm packs for background (Bella Solid 9900-98)* 1-3/4 yards for background (Bella Solid 9900-98)* 3/4 yard binding fabric (SKU 29066-28) 4-1/2 yards backing fabric (SKU 29062-19) *If you do not have solid charm packs, you will need a total of 4-1/4 yards of background fabric.
 ![]() From the Strawberry Jam charm packs, choose a total of 144 squares (or 36 per charm pack). You do not have to use the same squares from each charm pack, but make sure you have an even number of each print since each block uses two matching charms. Cutting: From the background fabric:
From the Strawberry Jam charm packs, choose a total of 144 squares (or 36 per charm pack). You do not have to use the same squares from each charm pack, but make sure you have an even number of each print since each block uses two matching charms. Cutting: From the background fabric:
- 15 strips, 2” wide; subcut into 2” squares (20 per strip) until you have 288 squares.
- 8 strips, 3-1/2” wide; set aside for borders.
If you are not using solid charm packs for the background, also cut 18 strips, 5” wide. Subcut into 5” squares (8 per strip) until you have 144 squares. From the binding fabric, cut 8 strips, 2-1/2” wide. Making the block: Draw a diagonal line from corner to corner on the background charm squares. Pair each square with a print charm square, right sides together. Sew 1/4” away from the line on both sides. Cut apart on the center lines and press towards the print fabric to create half square triangles (HST). Trim each to 4-1/2”.  Draw a diagonal line from corner to corner on the 2” background squares. Place a square on the corner of each HST unit as shown below. Make sure that the square is covering only the print fabric. If it is touching any background fabric at all, the square is on the wrong corner. Sew directly on the line. Trim 1/4” away from the sewn line and press towards the corner square. Repeat for all of the HSTs.
 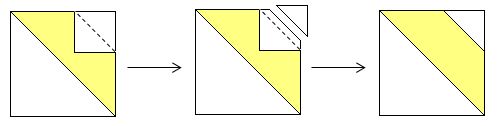 Pair up two units with matching prints. Arrange them as shown below. Sew the two units together and press as shown. Repeat until all of your units have been paired up.
 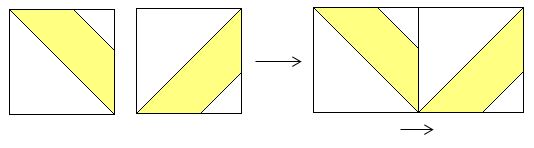 Tip: There are two ways to make this block. You will want to make sure that you make every block the same way. Otherwise, your windmills will not all spin the same way. Keep this in mind when sewing your blocks as it might not be obvious that a block is sewn the wrong way until you begin sewing the blocks to each other. The photo below shows the two ways to make the windmills. Neither is wrong on its own, but you don’t want both in your quilt. I made my blocks like the pink block on the left.
 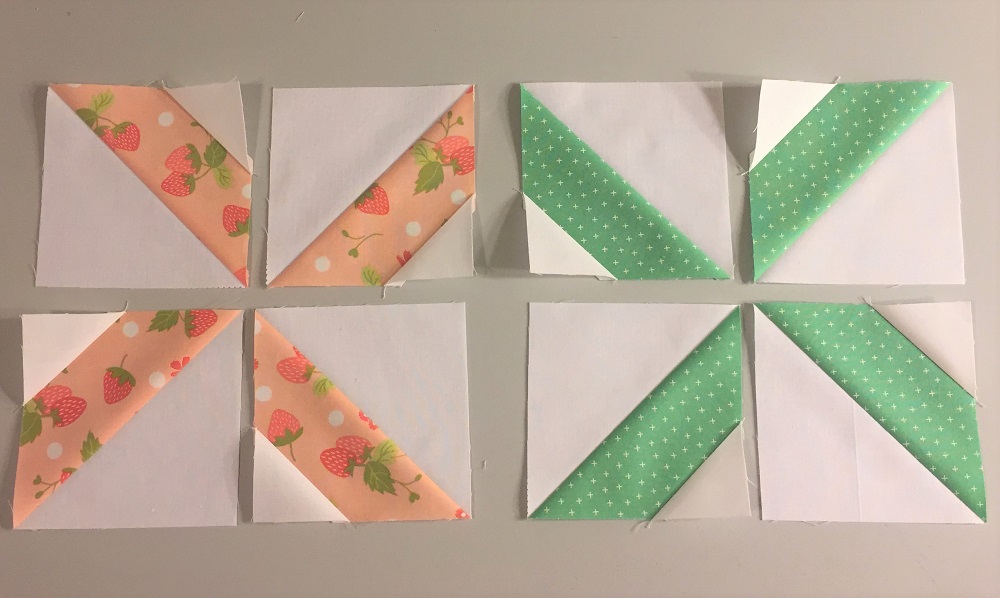 To make the block, take two matching pairs from the previous step. Rotate one pair 180 degrees so that the two pairs are arranged as shown below. Sew together and press. The center of the block may be bulky, so I recommend pressing the seam open. Repeat until you have 72 blocks.
 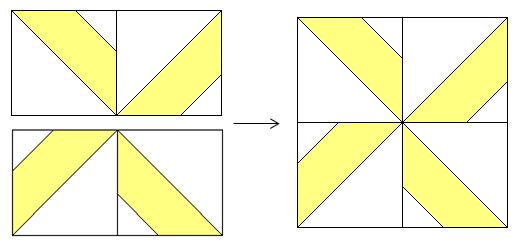 Assembling the quilt top: Lay out your blocks into nine rows of eight blocks each. Once you’ve decided on an arrangement, sew the blocks together into rows, and then join the rows together. If the seams are bulky once blocks are sewn to each other, press the seams open. Otherwise, press every other row in the opposite direction so that the seams will nest when the rows are sewn to each other.
  Sew the border strips end-to-end. Measure your quilt from top to bottom. Cut strips for the size needed and sew to each side. Repeat for the top and bottom by measuring your quilt top from side to side.
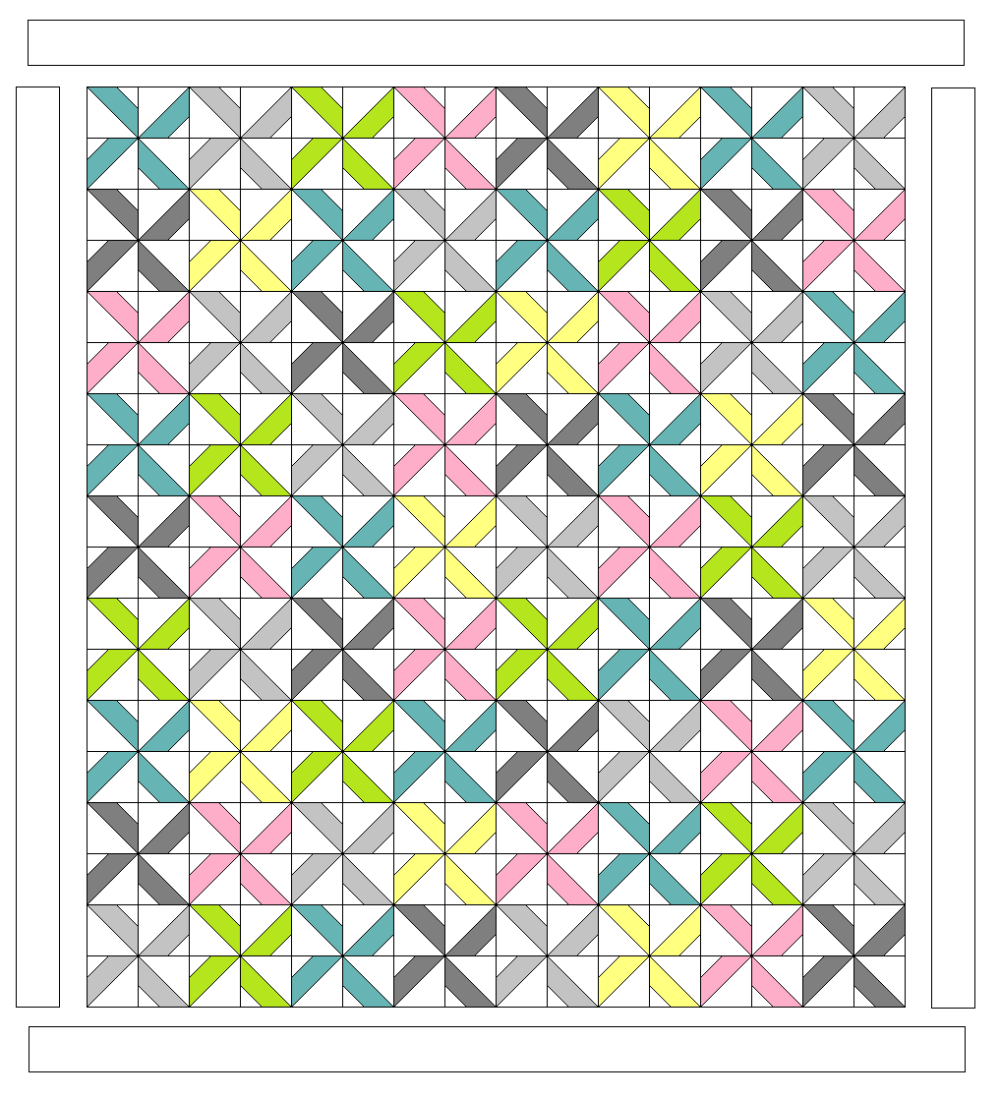
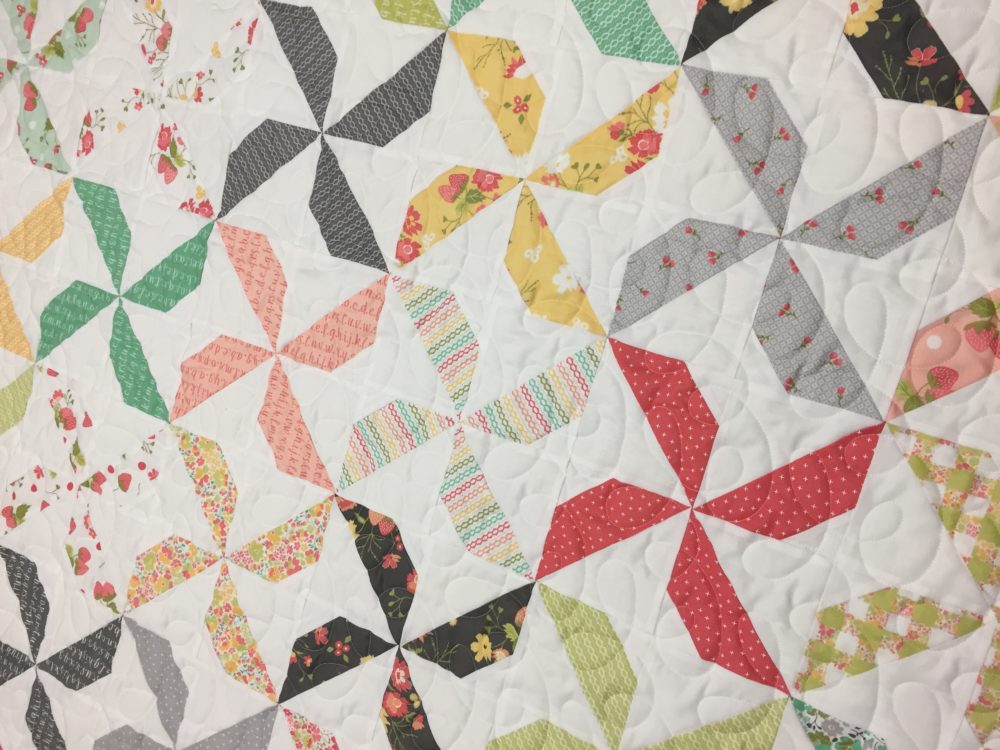
![]() Your finished quilt should measure approximately 70” x 78”. I quilted mine with an edge-to-edge pantograph called Spring Thing.
Your finished quilt should measure approximately 70” x 78”. I quilted mine with an edge-to-edge pantograph called Spring Thing. 

Thank you for joining me today! You can see what else I’m up to by following me on Instagram or on my blog. If you make this quilt, please share and tag me! I would love to see yours! Amanda Wilbert {blog: Pieced Just Sew} {instagram: Pieced Just Sew} {shop: Pieced Just Sew}
PRINTER-FRIENDLY PDF
Printer-Friendly PDF Alternate
Posted in:
Comments