Welcome to Moda Fabrics!
Snowbirds Quilt
Snowbirds Quilt
Published:
Jan 3 2018 - 23:00
![]()
Painter Bob Ross used to remind viewers of his popular PBS show that "We don't make mistakes. We have 'happy accidents'." The Snowbirds quilt is indeed, a happy accident. As I was making the blocks for my last Moda Bake Shop "recipe" (Stargazer), I kept sewing units together backwards. While I was unsewing yet another seam, my friend (and longarm quilter) Kathy said, "I liked it the way it was." I went home and sketched the error out, and sure enough, it wasn't a mistake...it was a new pattern!
As with Stargazer, this is a simple pattern - just squares and half-square triangles - but you will have to be careful to sew them together correctly.
![]()

1 Layer Cake® - I used "Wild Nectar", designed by Crystal Manning for Moda
3-1/2 yds background fabric - Grunge Basics 30150-71 Essence
1 yd border & binding fabric - Wild Nectar 11800 17 Navy
4.5 yards backing fabric
![]()
Tools: Rotary Cutter
Mat and 24" long ruler for cutting strips of your background fabric.
12-18" long ruler for cutting Layer Cake squares.
Square ruler (at least 4.5") with a diagonal line from corner to corner.
A 12" square rotating mat is not essential, but it comes in handy for cutting Layer Cake squares and trimming half-square triangles.
![]()
First, cut the background fabric:
Cut ten 5" x WOF (Width of Fabric) strips, and cut eight 5" squares from each strip. Cut each square diagonally.
Cut ten 4.5" x WOF strips, and cut eight 4.5" squares from each.
Next, cut the Layer Cake:
 Cut 1
Cut 1
 Cut 2
Cut 2
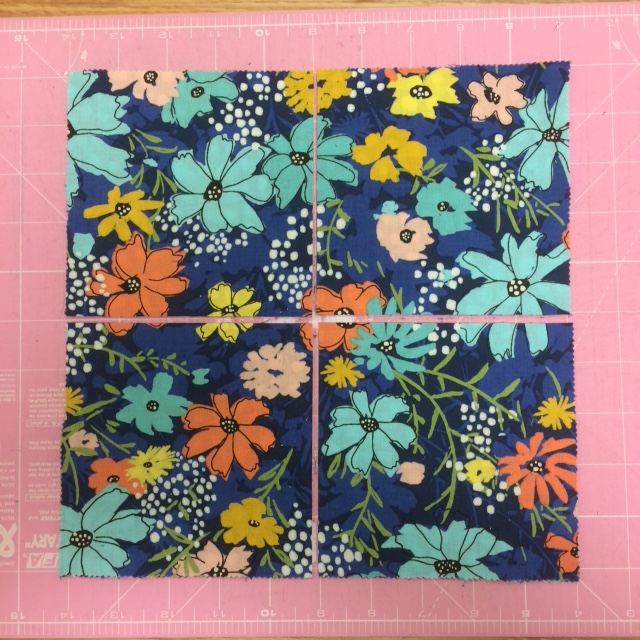
1. Cut each 10" square into four 5" squares. (You need 40 10" squares.)
2. Cut two of the squares diagonally. Trim the other two squares to 4.5" x 4.5".
CONSTRUCTION
Step 1a: Sew background triangles to each of the print triangles.You can either press the seams open (my preference) or press toward the print triangle.
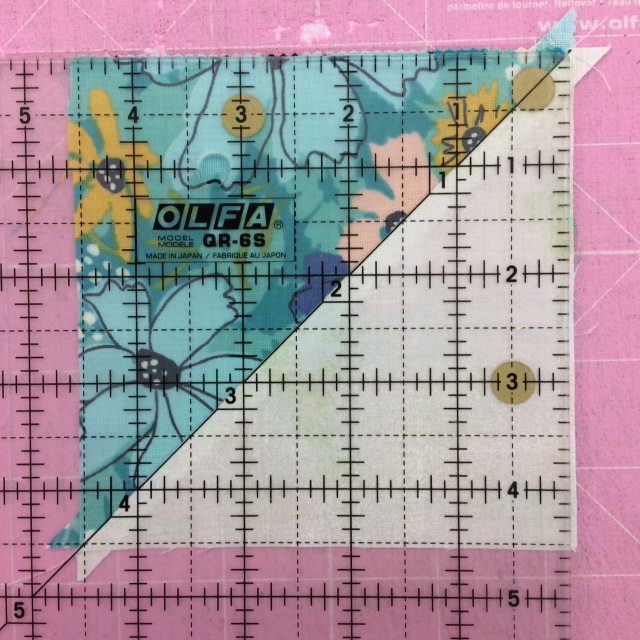 Step 1b: Trim each Half-Square-Triangle (HST) to 4.5". To do this, Lay your square ruler on the HST so that the diagonal line on the ruler is on the seam line. Notice that the HST extends beyond the 4.5" vertical and horizontal lines on the ruler. Trim the top and right edges.

Rotate the HST and lay the ruler down, again with the diagonal line on the seam. This time the edges you just trimmed should line up with the 4.5" vertical and horizontal lines on the ruler. Trim the top and right edges.
Now you have a perfect 4.5" HST, and no dog ears to deal with later! One down...159 to go.

Step 2a: Lay out two matching HSTs, a matching square and a background square.

Step 2b: Flip the triangles over onto the squares. As you feed each pair into the sewing machine, be sure that you're leading with the seam, and sewing the right edge of the print triangle. You can press the seam open, or press toward the squares.

Step 2c: Rotate the HST/print pair so the square is to the right of the HST. Sew to the HST/background pair to make one Snowbird". Repeat to make 80 Snowbirds.
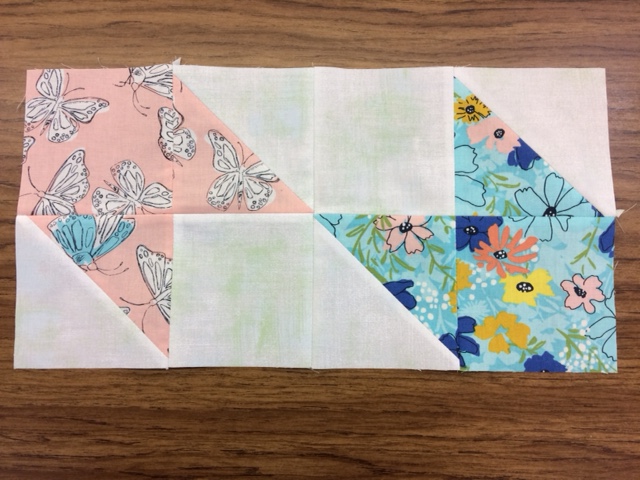
Step 3a: Sew 40 of your Snowbirds into pairs as shown. Note that the left (pink) Snowbird is pointing to the northwest, and the right (blue) Snowbird is pointing to the southeast. These pairs will be the top half of each of your Snowbird blocks.
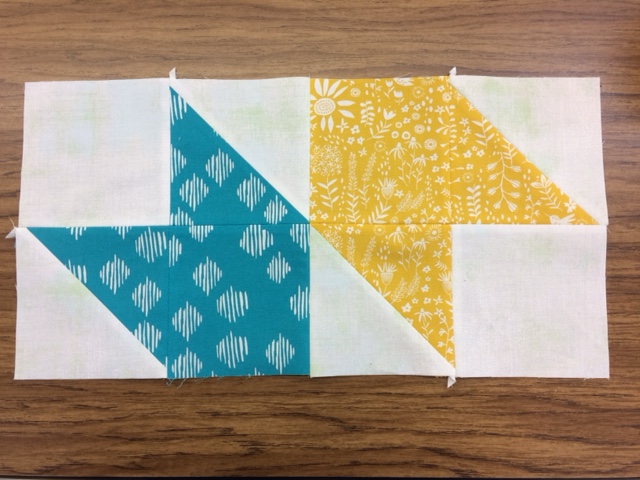
Step 3b: Sew 40 of your Snowbirds into pairs as shown. Note that the left (blue) Snowbird is pointing to the southeast, and the right (yellow) Snowbird is pointing to the northwest. These pairs will be the bottom half of each of your Snowbird blocks.
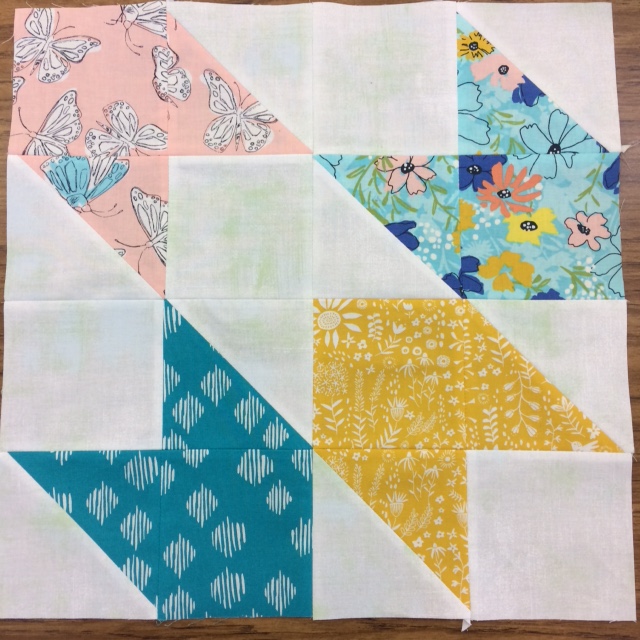
Step 3c: Sew the pairs from Step 3a to the pairs from Step 3b to make 20 Snowbird blocks. Make sure that in each block, the upper left and lower right snowbirds point to the northwest, and the upper right and lower left snowbirds point to the southeast.
Each block should measure 16.5" x 16.5".
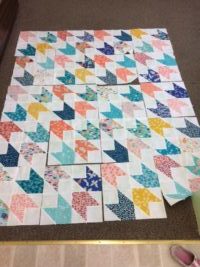
Step 4: Lay the blocks out in five rows, with four blocks in each row. As it happened, half of my Snowbirds were blue or turquoise, and the other half were other colors, so I set my quilt up so that all of my blue and turquoise Snowbirds are headed southeast, and the other colors are headed northwest. That's simply a matter of personal preference.
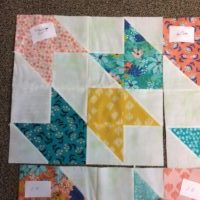
Having arranged all of my blocks carefully, I really don't want to take a chance of getting one or more out of order, or turned incorrectly while sewing them together. (Oh, how easy it is to do that!) So, I take the time to label the blocks before picking them up. I pin a slip of paper to the upper left corner of each block. It shows the row number, and the position of this block in that row. 1-A is the first block in the first row, 1-B is the second block in the first row, etc. Because the label is always in the upper left corner, I know which way the block is oriented, too.

When I sew block 1-A to block 1-B, I remove the label from block 1-B, so it isn't in the way when I sew and press the seam. When I sew block 1-C to block 1-B. I can take the label off of block 1-C. The first block in each row keeps its label until I sew the rows together. Using this system, no matter how many times construction is interrupted, I can always lay the blocks and rows out exactly as I planned.
Step 5 is to add the optional borders. Your quilt top at this point should measure 80.5" long. I like my twin-size quilt tops to be a little longer than that, so I chose to add 4" (finished) borders to the top and bottom of this quilt.
Cut four 4.5" x Width of fabric strips from your coordinating fabric. Trim two of these strips to 40.5" long. Cut the other two strips into four 4.5" x 14" strips, and sew these strips to both ends of the 40.5" strips. Measure the width of your quilt top. Ideally, it will be 64.5", but go with whatever your measurement is. Trim your two border strips to this length, and sew to the top and bottom of your quilt.
The remainder of your border fabric is for binding.
![]()
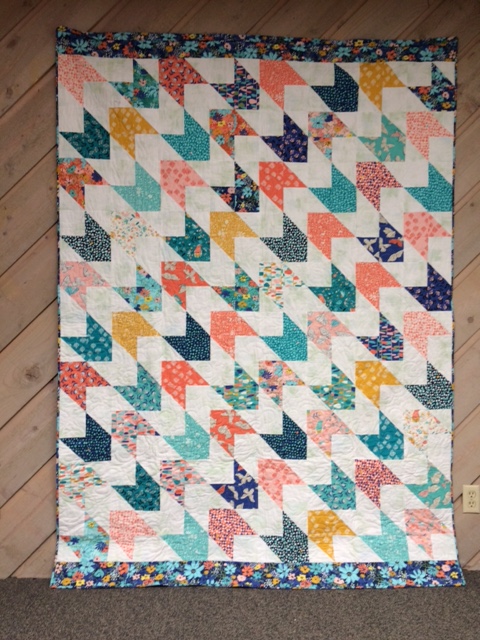
This quilt finishes at 64" x 88".
The Snowbirds quilt is just the thing for curling up in by a warm fire, while dreaming up my next "recipe" for the Moda Bake Shop. I'm thinking SPRING!
Anne Wiens
Blog: Seams Like a Plan
![]()
Posted in:
Comments