Welcome to Moda Fabrics!
Caroling Quilt
Caroling Quilt
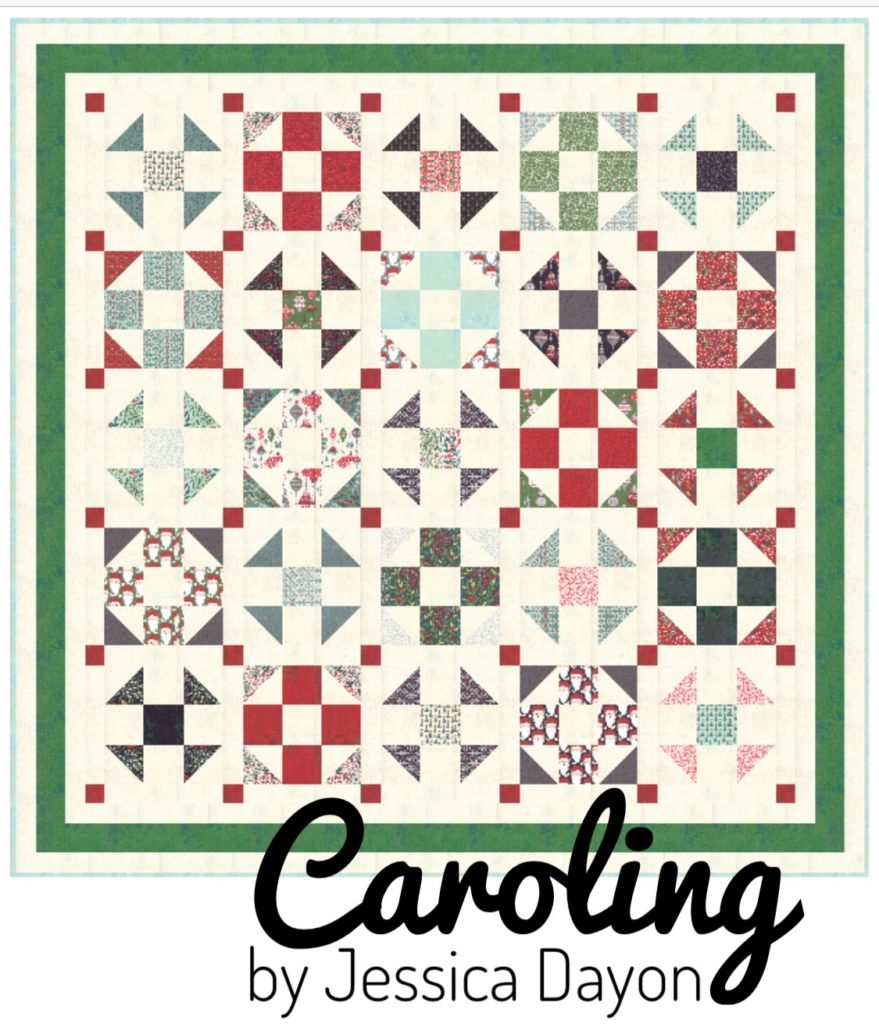
Hi, Everyone! It is Jessica Dayon (@jessicadayon) here today and I'm here to share with you my new layer cake pattern! I love buying layer cakes! Sometimes I have a tendency to hold on to them though because I don't know exactly what pattern to use for them. Because of that, I am ALWAYS looking out for new layer cake patterns. I often want to see how big I can make a quilt while only using one layer cake ;)
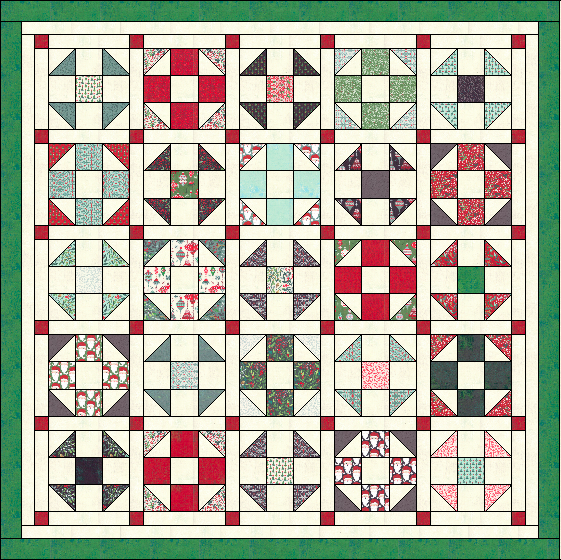
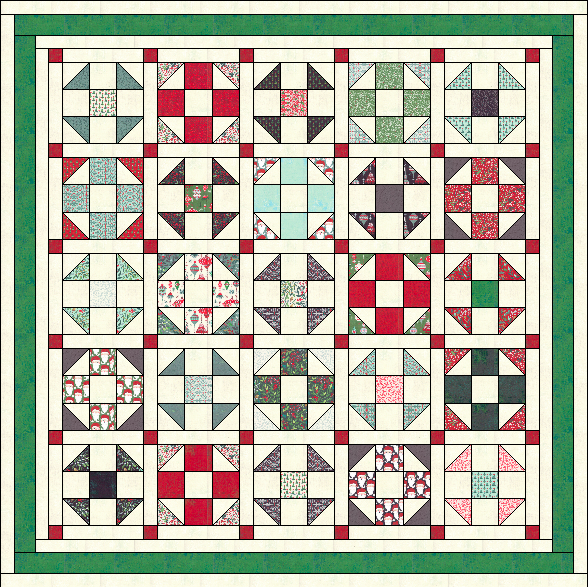
This quilt is very simple and only uses one block (with the fabric laid out differently to make 2 blocks). I find that I come back to this block over and over. I really love it and it's really versatile. This quilt is fast and fun. It uses only one layer cake (plus background and some accent fabric) and its pretty big, finishing at 86" x 86".
Let's get started with the pattern!
This quilt finishes at 86" x 86".
- 1 Layer Cake of Kringle and Claus by BasicGrey {SKU 30590LC}
- 4 3/4 yards Background fabric {used here SKU 30150-506}
- 1/2 yard 30150-508- red cornerstones
- 1 yard 30150-510- green border
- 7.5 yards backing {used here SKU 30596-11}**
- 1 yard binding 30150-514- frosty blue
**You may be able to get away with 5 yards backing, depending on whether you prewash or not and depending on how much backing overage you want when quilting.
ABBREVIATIONS-
WOF- width of fabric
HST- half square triangle
RST- right sides together
CUTTING-
From the layer cake, select
- 12 layer cake squares and cut each into 4- 4.5" squares, set aside
- 4 layer cake squares and cut each into 4- 4.5" squares, set aside separately from the other 4.5" squares
- 13 layer cake squares and each cut into 4- 5" squares
From the background, cut:
- 7- 5" x WOF strips, subcut into 50- 5" squares
- 8- 4.5" x WOF strips, subcut into 64- 4.5" squares
- 4- 12.5" x WOF strips, subcut into 60- 2.5" x 12.5" (sashing)
- 16- 2.5" x WOF strips (borders)
From the red fabric, cut 3- 2.5" x WOF strips, subcut into 36- 2.5" squares (cornerstones)
From the green fabric, cut 8- 3.5" x WOF strips (border)
From the binding fabric, cut 9- 2.5" x WOF strips
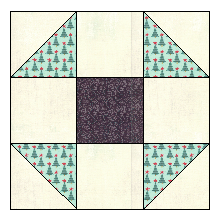
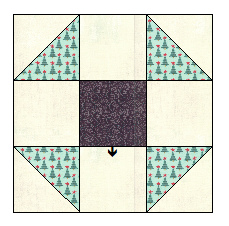
MAKE MAIN BLOCK- 13 TOTAL
For 1 main block, you will need:
1- 4.5" print square
2- 5" print squares
2- 5" background squares
4- 4.5" background squares
Make 2 at a time HST- Use 2- 5" square print pieces and 2- 5" square background pieces. On the print pieces draw a line, diagonally across the middle from one corner to the other corner. Then, take one print square and one background square. Match them right sides together. Sew 1/4" away from the center line on one side, then the other side. Cut apart on the center line. Press, with the seam allowances going to the darker color. Trim each HST to measure 4.5" square.
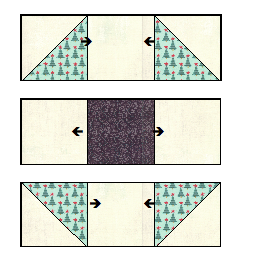
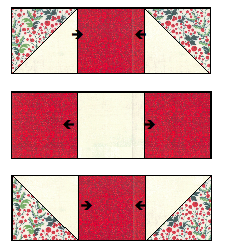
Lay the block out as shown below. Sew the squares together in rows.
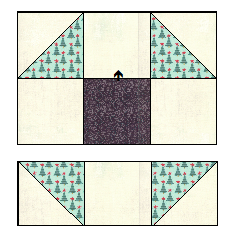
Sew the top row to the middle row.
Then sew the bottom row to the rest.
The block will measure 12.5" unfinished. Repeat these steps until you have a total 13 blocks.
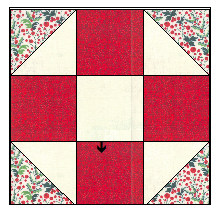
MAKE ALTERNATE BLOCKS- 12 TOTAL
For 1 alternate block, you will need:
1- 4.5" background square
2- 5" background squares
2- 5" print squares
4- 4.5" print squares
Make 2 at a time HST- Next, gather the 2- 5" square Print 1 pieces and 2- 5" square background pieces. On the print pieces draw one, diagonally across the middle from one corner to the other corner. Then, take one print square and one background square. Match them right sides together. Sew 1/4" away from the center line on one side, then the other side. Cut apart on the center line. Press, with the seam allowances going to the darker color. Trim each HST to measure 4.5" square.
Lay the block out as shown below. Sew the squares together in rows.
Sew the top row to the middle row.
Then sew the bottom row to the rest.
The block will measure 12.5" unfinished. Repeat these steps until you have a total 12 blocks.
QUILT TOP ASSEMBLY
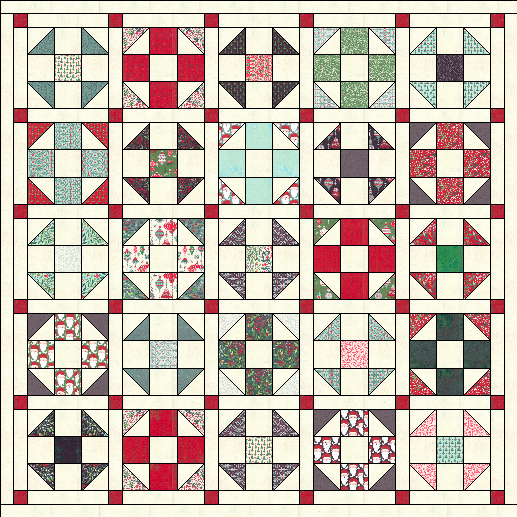
Gather all of the blocks and the 30- 2.5" x 12.5" background pieces. Sew each row together with sashing at the beginning of each row, between each block, and at the end of each row, one row shown below.
Gather the remaining 2.5" x 12.5" background pieces and the red cornerstones. Sew together a unit with cornerstones and sashing as shown below.
Repeat this until you have 6 cornerstone/sashing strips.
Assemble the rows to make the quilt top.
BORDER 1
Gather 8- 2.5” x WOF background strips. Piece 2- 2.5” x WOF pieces together, end to end, to yield a 2.5” x 86” piece. Repeat three more times. Use two of these pieces as the left and right borders. Trim the border pieces to fit the quilt exactly. Sew these on as the top and bottom borders. Trim the border pieces to fit the quilt exactly.
BORDER 2
Gather 8- 3.5” x WOF green strips. Piece 2- 3.5” x WOF pieces together, end to end, to yield a 3.5” x 86” piece. Repeat three more times. Use two of these pieces as the left and right borders. Trim the border pieces to fit the quilt exactly. Sew these on as the top and bottom borders. Trim the border pieces to fit the quilt exactly.
BORDER 3
Gather 8- 2.5” x WOF background strips. Piece 2- 2.5” x WOF pieces together, end to end, to yield a 2.5” x 86” piece. Repeat three more times. Use two of these pieces as the left and right borders. Trim the border pieces to fit the quilt exactly. Sew these on as the top and bottom borders. Trim the border pieces to fit the quilt exactly.
FINISHING
Baste, quilt, and bind according to your preferred methods.
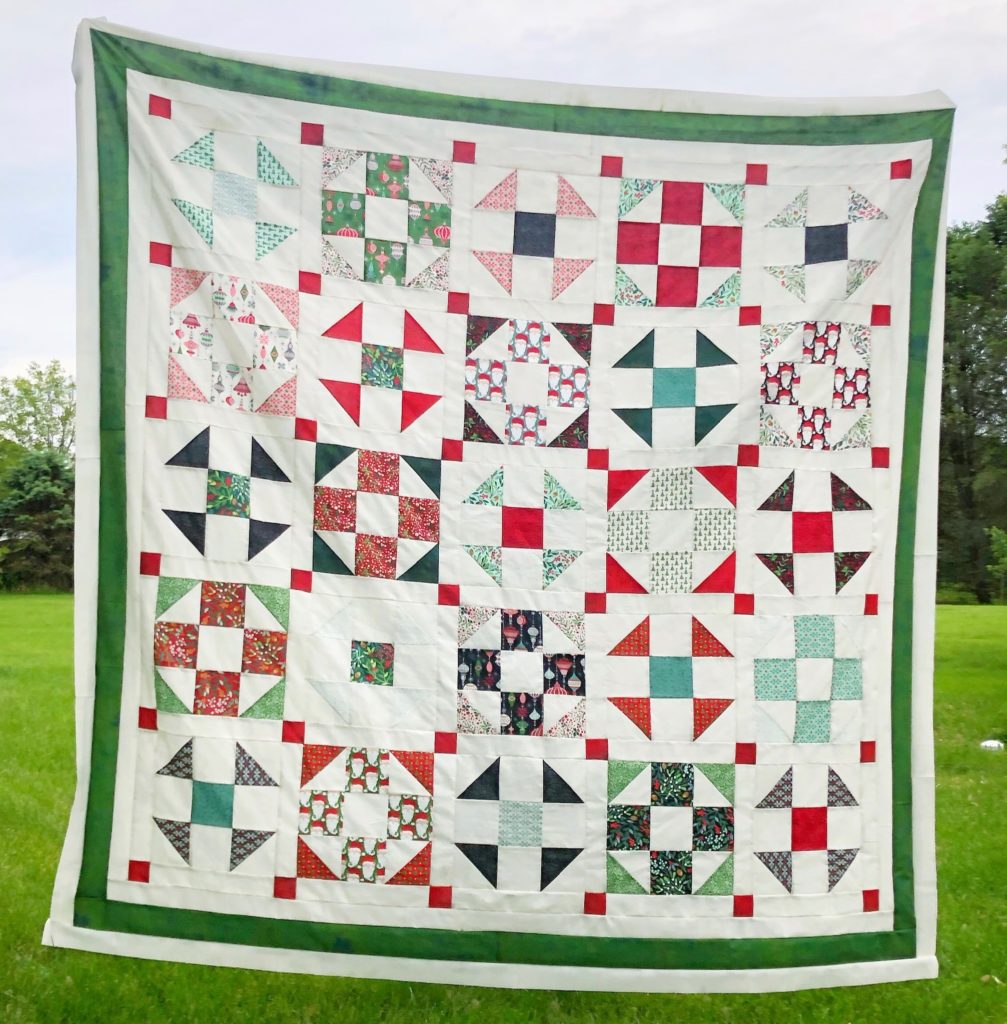
Here is the one I made!
This quilt finishes at 86" x 86".
I hope you enjoyed this tutorial and plan to get one of your layer cakes out and make this quick and fun quilt! Please let me know if you have any questions. I would be happy to help! Come follow me on Instagram- @jessicadayon- where I share my latest projects, patterns, and quilt-alongs. Hope to talk to you there!
Jessica Dayon
{blog: Jessica Dayon}
{instagram: @jessicadayon}





Comments