Welcome to Moda Fabrics!
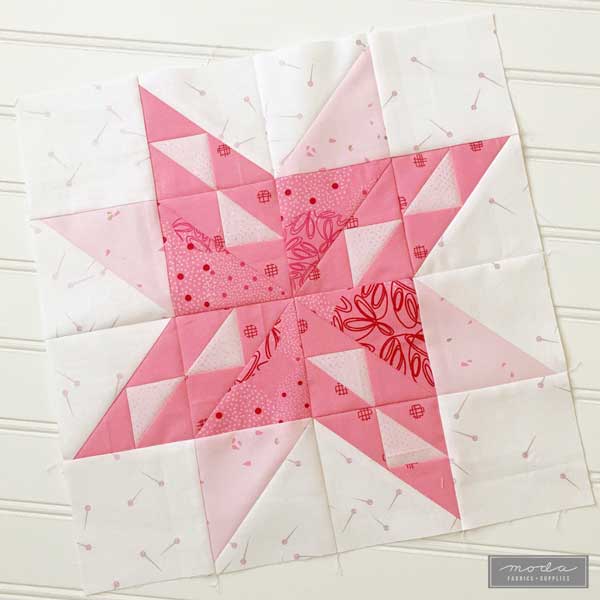
Stitch Pink Block 29
Stitch Pink Block 29
Published:
Oct 29 2020 - 04:42
Twinkle twinkle little star... The words of this British lullaby are from a poem by Jane Taylor, written in 1806.
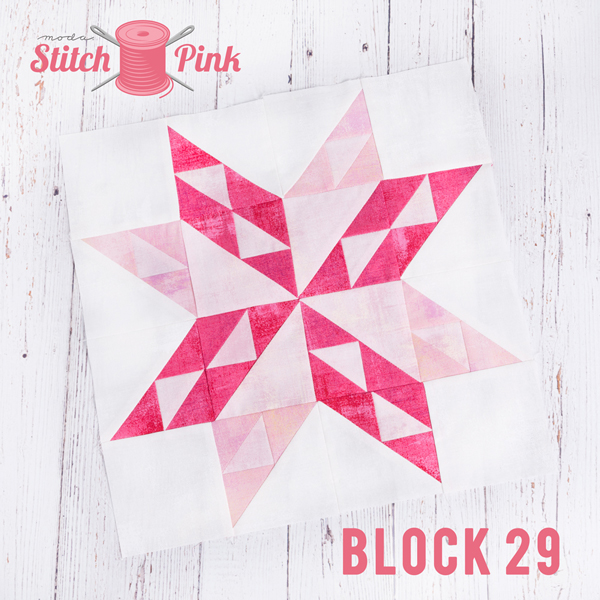
Block Instructions >> Block 29 - Twinkle Twinkle.
This block has always been one of my favorites to make, and I won't pretend that the first one came out perfectly. But with a few tips and tricks, the blocks have gotten much better.
First, when working with these half-triangles, handle them carefully, taking care not to stretch the long edges. Think of bias edges as cranky siblings. We love them most of the time. Except when they're being... cranky.
Carrie Straka didn't have cranky triangles.
She knows how to wrangle the triangles.
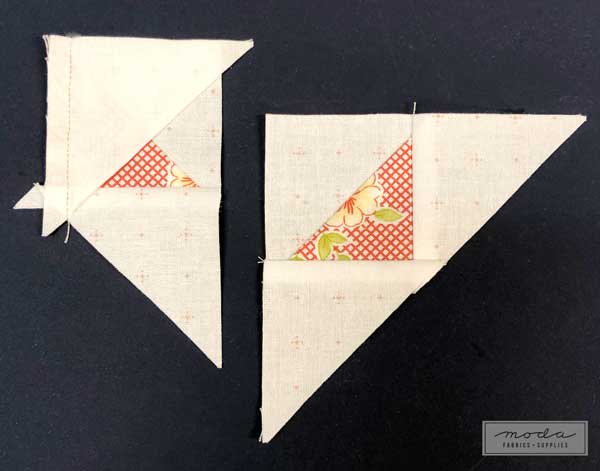
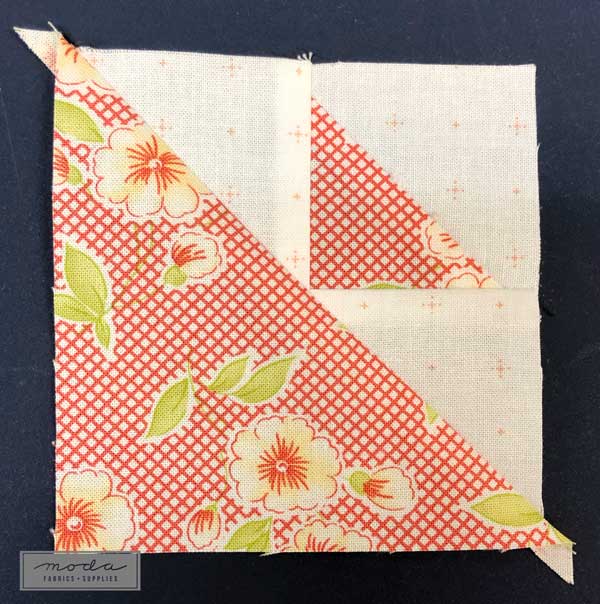
Second, I cut the B squares at 4-1/8" so I can square-up each pieced unit. It won't guarantee perfect points, but pieced-units that are square will improve the overall finished block, making it easier to overlook a missing point or seven. After the four small triangles are joined and pressed, that unit is centered on the larger triangle and stitched. Press the seam to the larger triangle and trim the finished unit to 3-1/2" x 3-1/2".

Third, on Step 5, piece the corner HTS first. Measure it. It should measure 2" x 2". If it's too big, trim it to size. If it's too small, un-stitch and re-stitch. If you'd like to trim it just a bit and you've cut the squares at 2-3/8", use a smaller-than-usual seam allowance. If this HTS is a little bit off, adding the next two triangles only adds to the problem. So make sure the corner HTS is the size it needs to be.
BasicGrey knows how to measure - just look at the perfect points on their Twinkle Twinkle block.

Finally, seam allowance. This is one of those times when it matters. Make sure the cut edges are even, and when a ruler is aligned with the cut edges of the fabric, the line of stitching should be just inside the 1/4" line of the ruler. Next to it. Almost under it, but not quite. If you want to practice a perfect seam allowance, I recommend trying one of these seam guides - Seam Guide 4 in 1 Tool by It's Sew Emma or the Perfect Piecing Seam Guide by Perkins Dry Goods. I have used both, and using one of them to find your "scant 1/4" sweet-spot is time well-spent. (I wrote about scant 1/4" seam allowances here - Five little letters...)
If you're game to try something new, this is a block where "glue basting" can help. It's a thing. It's also a thing that works.
The first thing you need is water-soluble glue, either a bottle or a glue stick. For glue-basting, I prefer liquid glue, and I use Roxanne's because I like this applicator bottle. (It's the little things.) But any water-soluble glue will work, including old-fashioned "school glue". Whichever one you use, remember that "a little dab will do 'ya."
On the right side of one of the two pieces being joined, dot or swipe a tiny bit of glue within the seam allowance. Don't worry if a little bit gets into the piece, it's water-soluble and it can be removed with a spritz of water later.
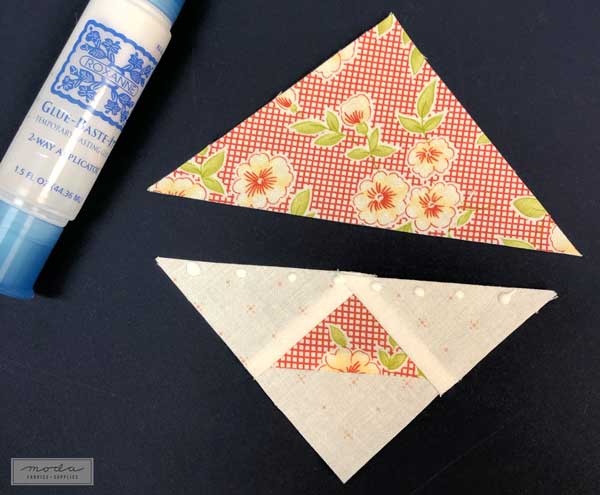
This is probably a bit more than is needed but I've always been an over-gluer and over-taper.
Align the two triangles as if you were getting ready to pin or stitch it - right sides together. Press the piece to set the glue. Do not use steam.
Stitch the seam with a scant 1/4" seam allowance. (Yes, these are shown with the over-sized large triangle that I prefer.)

Carefully open the pieced unit and press the seam to the large triangle. Note: This doesn't work if you like pressing seams open.
One more step.
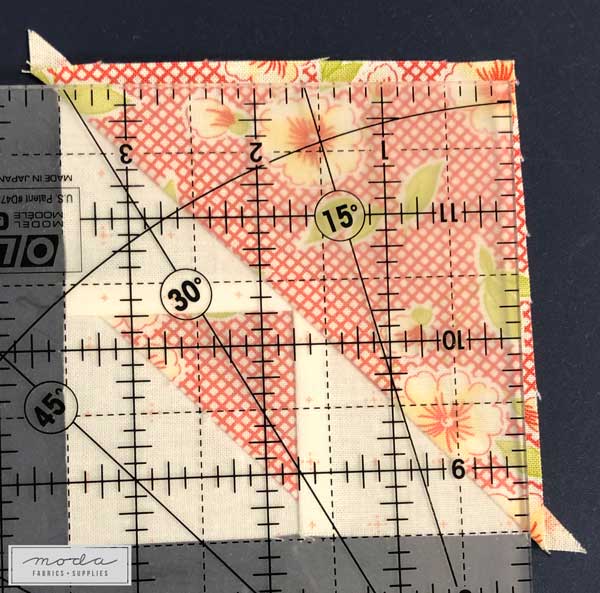
Trim the unit to measure 3.5" x 3.5". The small HTS should line up with the 1.75" x 1.75" lines on the ruler.
No matter how careful I am with the glue, it does like to spread a bit. So I use the back of an old cutting mat when I've got several pieces to glue. For the ironing step, place a dry tea towel on the ironing board to protect the surface. When I'm done gluing and pressing, wet the tea towel and use that to wipe off any residue from the cutting mat.
I don't know who first advocated glue-basting for quilting, but I learned the technique many years ago from Cristy Fincher of Purple Daisies Quilting.
That's it for today. Whew.
While this is our penultimate block for Stitch Pink 2020, the preceeding twenty-eight blocks and five bonus projects can be found here - Stitch Pink Archive.
We've been sharing blocks and projects to #ModaStitchPink on Facebook and Instagram, and we hope you're sharing there too.
Stay well.
Posted in:
Comments