Welcome to Moda Fabrics!
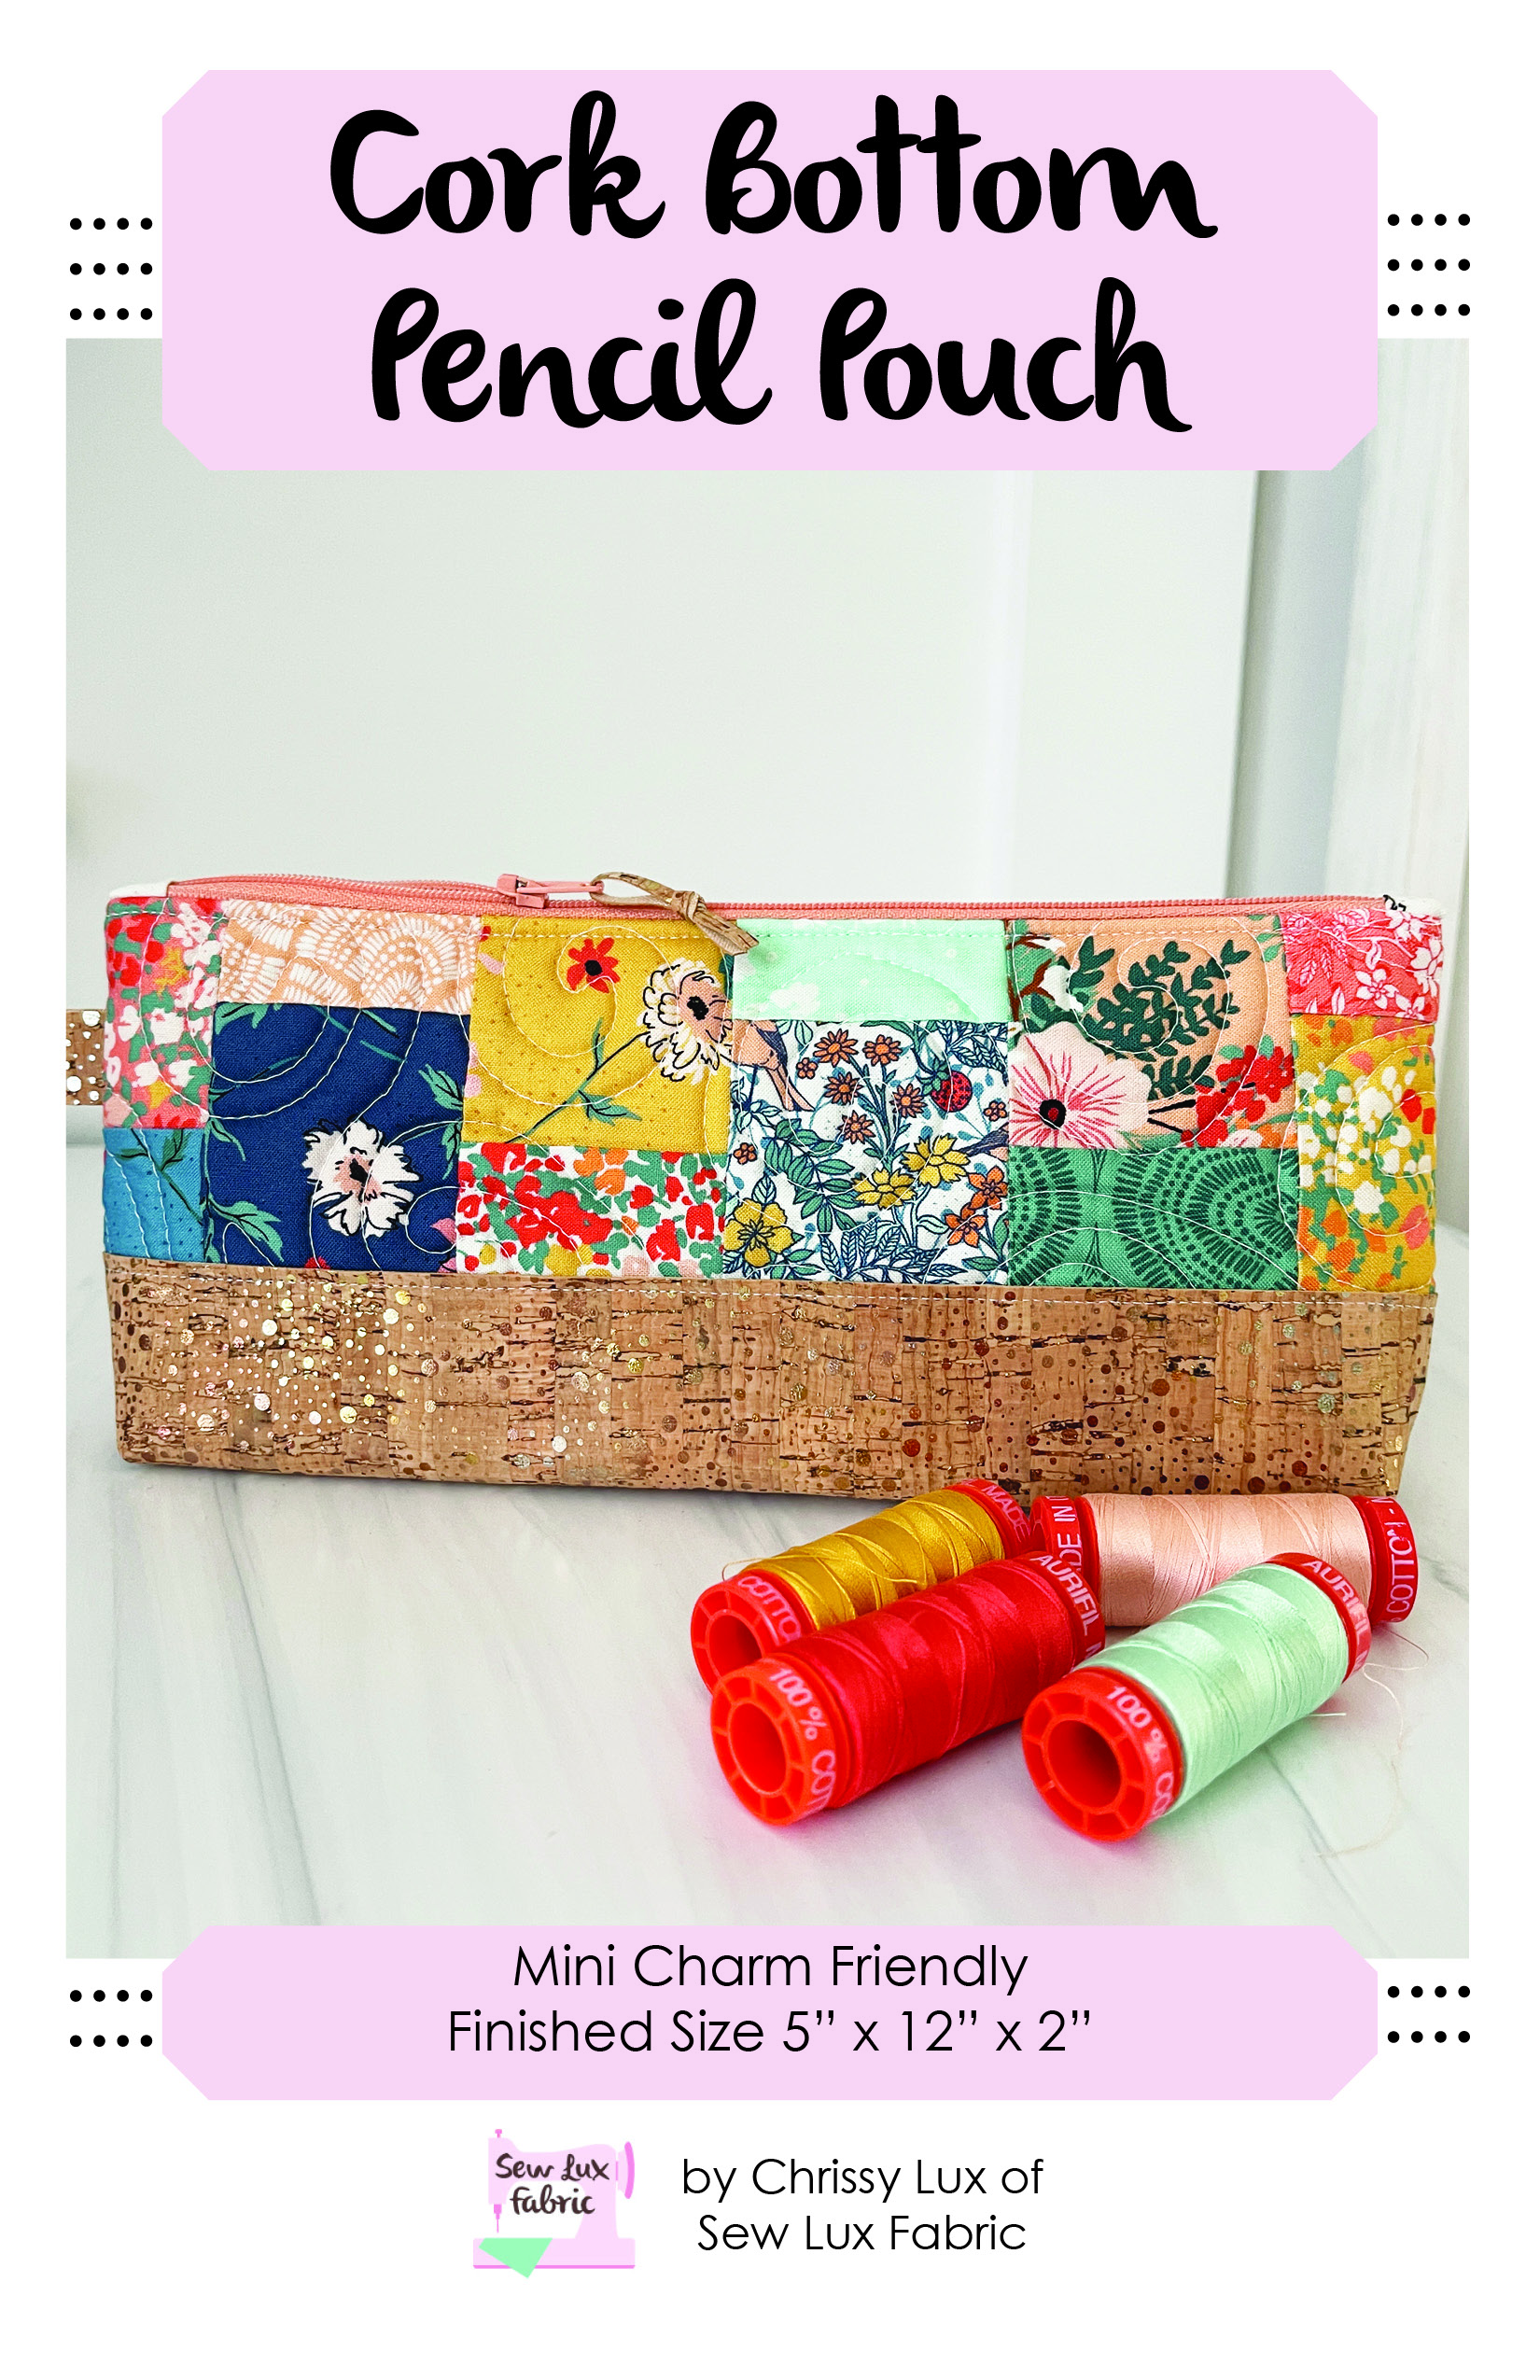
POUCH CLUB: CORK BOTTOM POUCH
POUCH CLUB: CORK BOTTOM POUCH
Published:
Oct 17 2024 - 08:00
Materials Needed:
You will need the following to complete this project:
- 1 Mini Charm Pack
- 1 Fat Quarter Lining
- (1) 12" or longer zipper
- 7" x 13" cork fabric
- 13" x 18" Soft & Stable or similar
- Cork Bottom Pouch Pattern SLF2108*
Paper and PDF patterns as well as kits are available in our shop at Sew Lux Fabric or ask your local quilt shop to carry the paper pattern and kit one up for you!
This project is great for Mini Charm Packs, scraps and leftover Jelly Roll strips! For this example, I am using the new Grand Haven collection by Minick & Simpson.
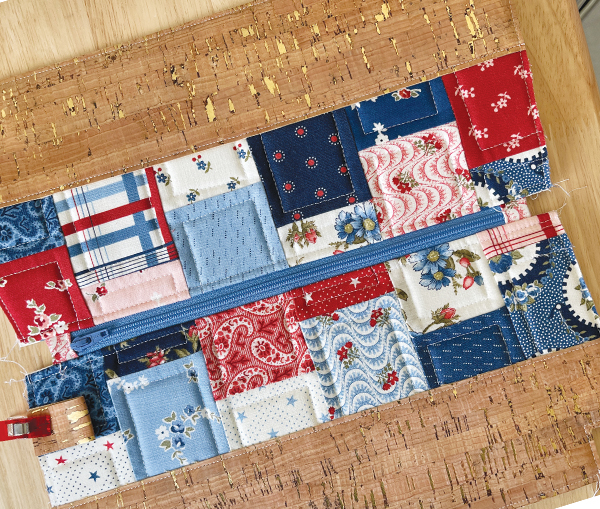
Step 1: Piece the Pouch Exterior
Follow the directions in the pattern to create two patchwork panels. Baste each panel to Soft & Stable or preferred batting. I like to use a spray baste, but you can use whatever method you prefer. You could also substitute fusible fleece or batting for the Soft & Stable, if you'd like.

Quilt the panels as desired. For this pouch, I usually do some random wavy lines with a walking foot.
Then follow the directions regarding placement of the cork strip and topstitch in place.
After quilting both panels and attaching the cork, follow the directions in the panel to trim and shape the pouch front and exterior as well as lining pieces.

Step 2: Prepare & Install the Zipper
Follow the directions in the pattern to make and add tabs to the ends of the zipper. And to then install the zipper using a zipper foot and top stitch the exterior & lining in place.
Step 3: Finish the Pouch
Arrange the pouch so that the exterior is RST and the lining pieces are RST. Make sure the zipper is half open and pin or clip in place around all four sides. Sew down the sides, being sure to backstitch at both ends. Sew the bottom of the exterior closed. And then sew the bottom of the lining closed, leaving an opening for turning later. Be sure to leave the cut out corners unsewn so you can box them to finish up the pouch assembly.
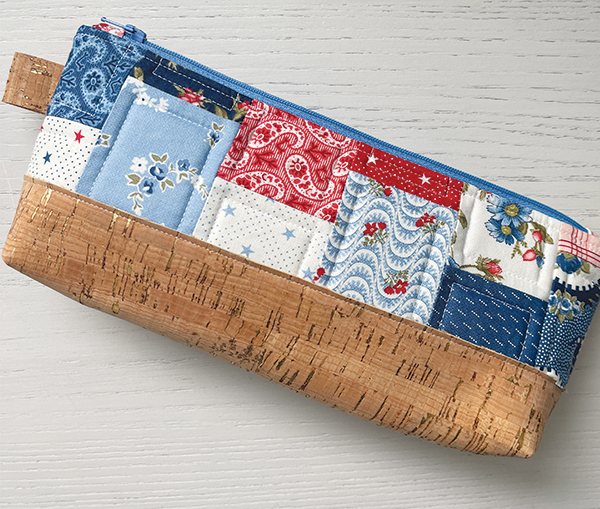
Turn the pouch right sides out through the hole in the bottom of the lining, press well and close the opening by hand or machine.
Your finished pouch is now ready to use and enjoy! I made a few other versions in some coming-soon collections (Feb & Mar 2025), too! This one looks great with all kinds of fabrics & styles!

Top to Bottom: Bee Garden by Gingiber, Sagewood by Crystal Manning, and Raspberry Summer by Sherri & Chelsi
Check out the video for this pouch to see how it comes together by clicking the image below!

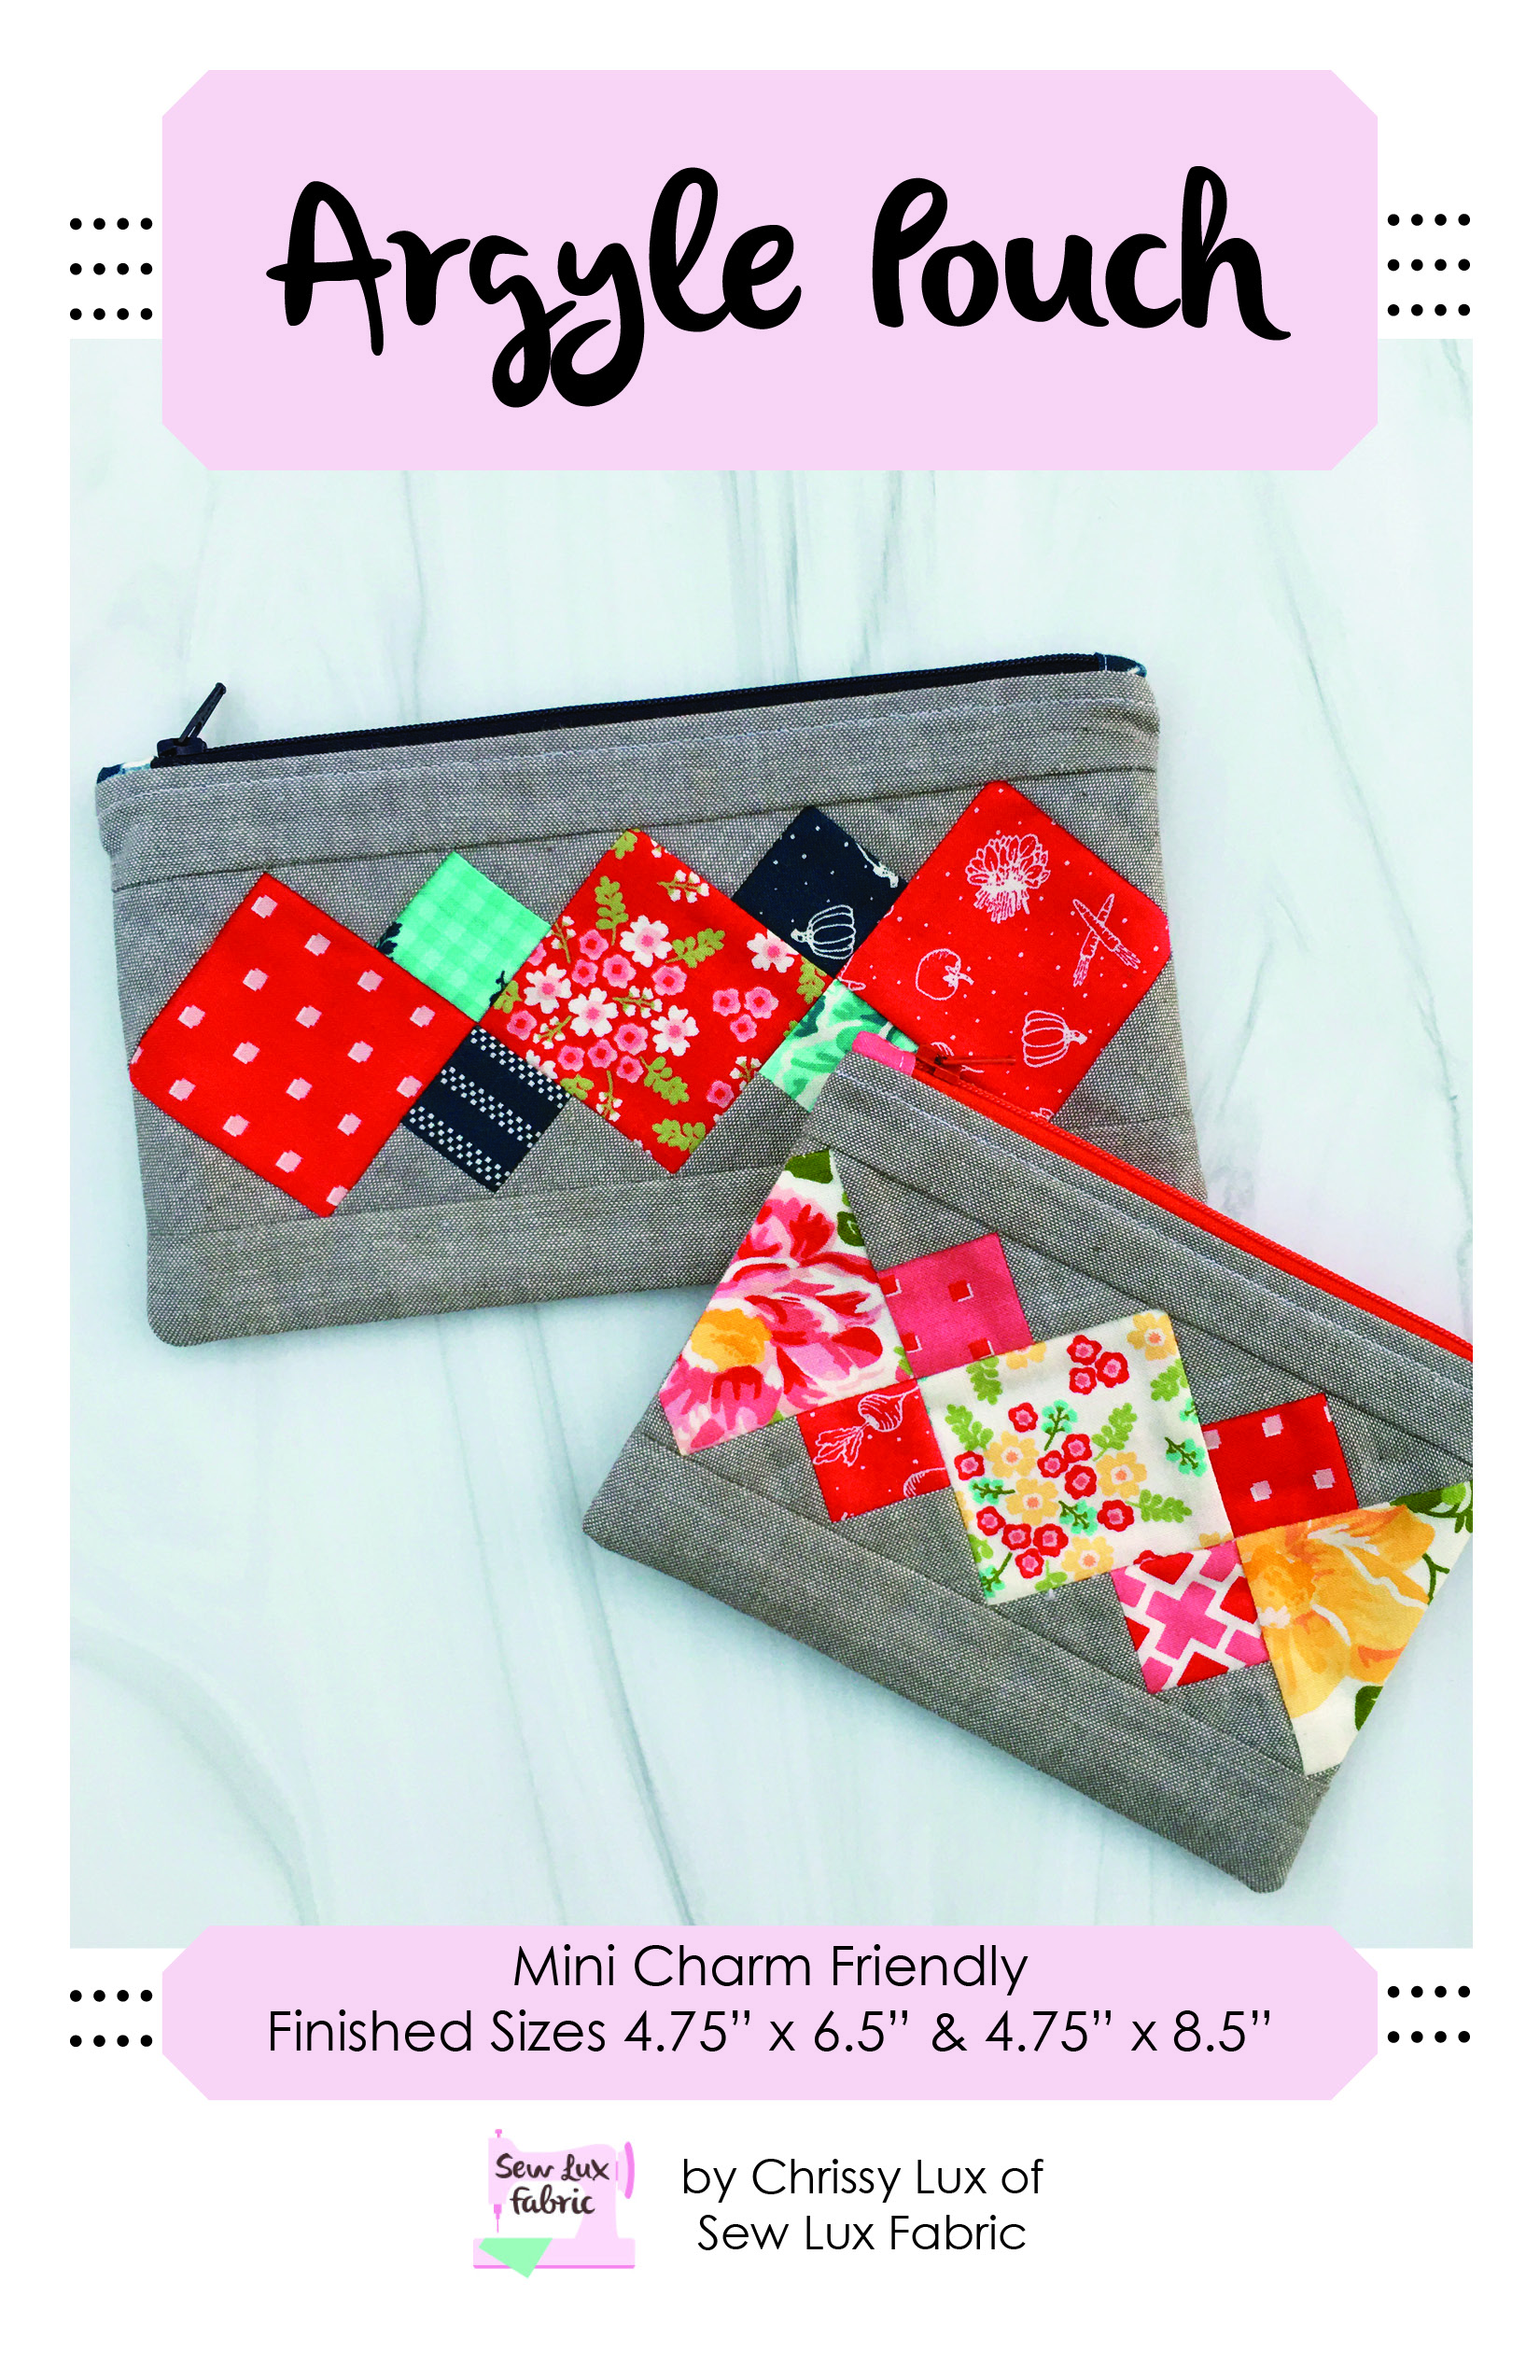
Next month, we will be making the Argyle Pouch, a Mini Charm Pack or scrap friendly project that has two sizes to choose from! See you back here on November 21st for our next installment of the Pouch Club Series.
Posted in: