Welcome to Moda Fabrics!
MMQAL-Week 12
MMQAL-Week 12
Published:
Jun 25 2022 - 08:11
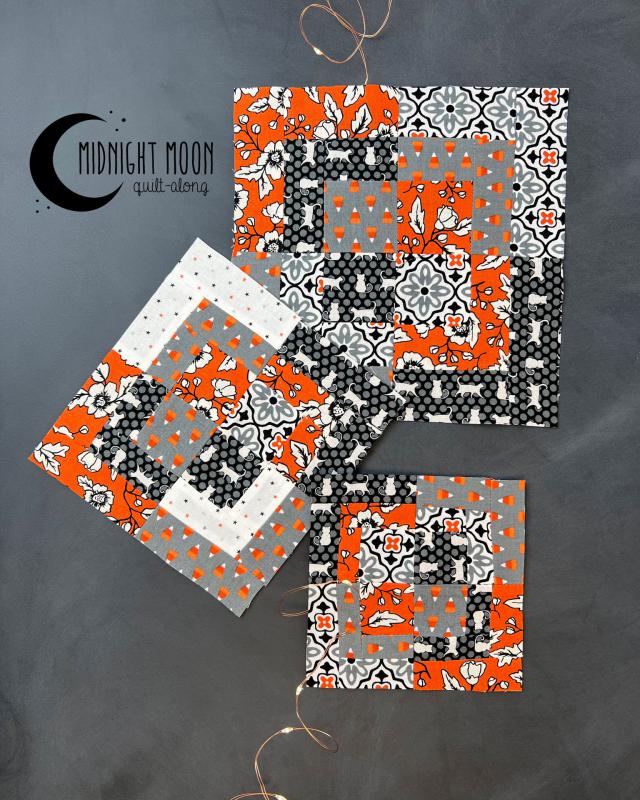
Week 12 – June 25 – Four X + Log Cabin
Today we have a pressing matter to discuss.
Do you press your seams open or towards the dark?
Do you use steam or dry iron?
Do you finger press as you go and then do a final press when the block is finished?
I’m a press your seams open with steam after each seam kind of a gal. - Tammy
I let the project and fabrics determine how I press, especially when using solids. - Lissa
For some blocks like the log cabin, I might finger press as I go and then do a final steam press. I don’t think there is a right or a wrong way to do it. Historically, seams were pressed to the dark side. This was for a couple of different reasons, hand quilting was commonly done 1/4" away from the seam, and having the seam to one side gave you options on which side to quilt on while eliminating bulk. The main reason seams were pressed to one side was that the batting would not "beard" through the seams. What is bearding? It’s when the fibers of a quilt’s batting migrate through the fabric and are visible on the top and back of your quilt. While there are several other causes for bearding, including quality of materials, static electricity, and so on, the best news is that the quality of battings we are using now is much better. We have so many pressing and quilting options. One other tip, consult your longarm quilter and ask for their preferences on pressing. One time I sent a quilt and pressed all my seams open for no real reason. The longarmer uses the seams to "bounce" off to do my chosen design. No complex fast rules; do what works for you.
Four X – I played around with pressing different ways to see which way had the flattest seam in this block.
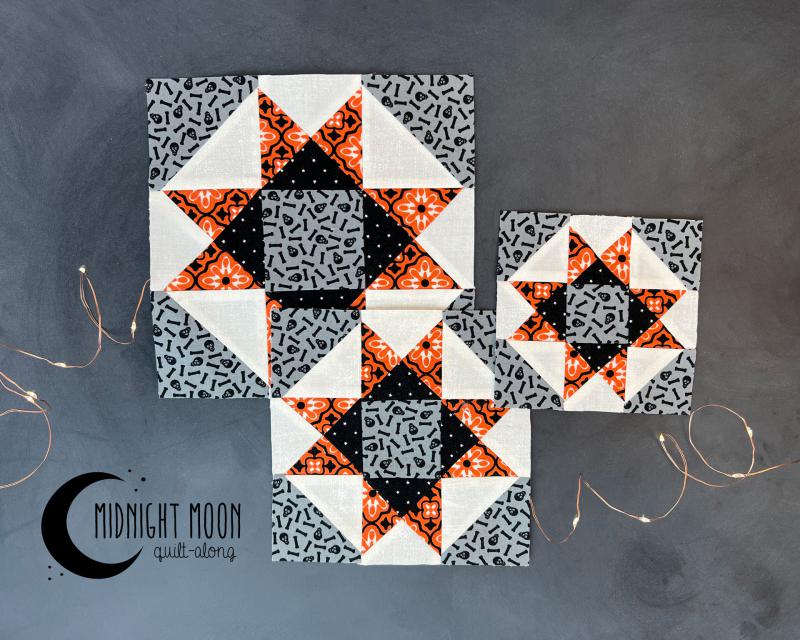
Again, this is just a personal preference, and it did not make that big of a difference on just one block, but on an entire quilt, it will lay flatter, especially on the smaller blocks.
I made a video that explains the information listed below as a quick reference.
First up, press both seams together and opposite so they would lock in the middle for a sharp point. Try to have the top seam toward your sewing machine foot. This way, you can watch the seam and ensure it stays in place, and it tends to lock the seam better than if the seam goes down on top and up on the bottom.
Now try two different ways to press the second seam. On the right unit, the seam is undone with a couple of stitches and turned to create a spinning effect. The seam allowances are evenly distributed, spinning around the block. On the left one, the second seam is pressed open. This way left a couple of areas with bulk due to the first seam being pressed one way, and then the second seam allowance had double the fabric on two sides.
Next, I pressed the seams open to start. No seams were locking, so I had to line up the seams while sewing carefully. I’m not a pinner, but I use a stiletto or awl to help guide the fabric once it has been matched up at the seams. The Tulip brand is my favorite and very lightweight.
The bottom line worked; I prefer to press my seams to open most of the time. The unit is flat and easy to square up to the size it needs to be.- Tammy
If you're on Instagram and/or Facebook, we'll share blocks using the hashtag - #modamidnightmoonqal.
We'll see you next Saturday!
------------------------------------
If you missed any posts about the Midnight Moon Quilt-along:
Posted in:
Comments