Welcome to Moda Fabrics!
Discovering the Charm of Hexagons and English Paper Piecing with Sherri McConnell
Discovering the Charm of Hexagons and English Paper Piecing with Sherri McConnell
Published:
Jul 2 2024 - 11:06
We're thrilled to bring you some fantastic tips and tricks for English Paper Piecing (EPP) from the wonderful Sherri McConnell of A Quilting Life.
Sherri recently shared her expertise in our new studio and we can't wait to pass on her wisdom to you. Make sure to watch the video embedded below for the full tutorial!
Sherri’s Love for English Paper Piecing
Sherri McConnell loves English Paper Piecing, and it’s easy to see why. EPP is not only versatile but also incredibly portable, making it a perfect project to take on the go. Whether you're traveling, at a sporting event, or simply relaxing at home, EPP can be a delightful and meditative activity that is easy to take with you when you have long stents away from your precious sewing machine.
Getting Started with EPP
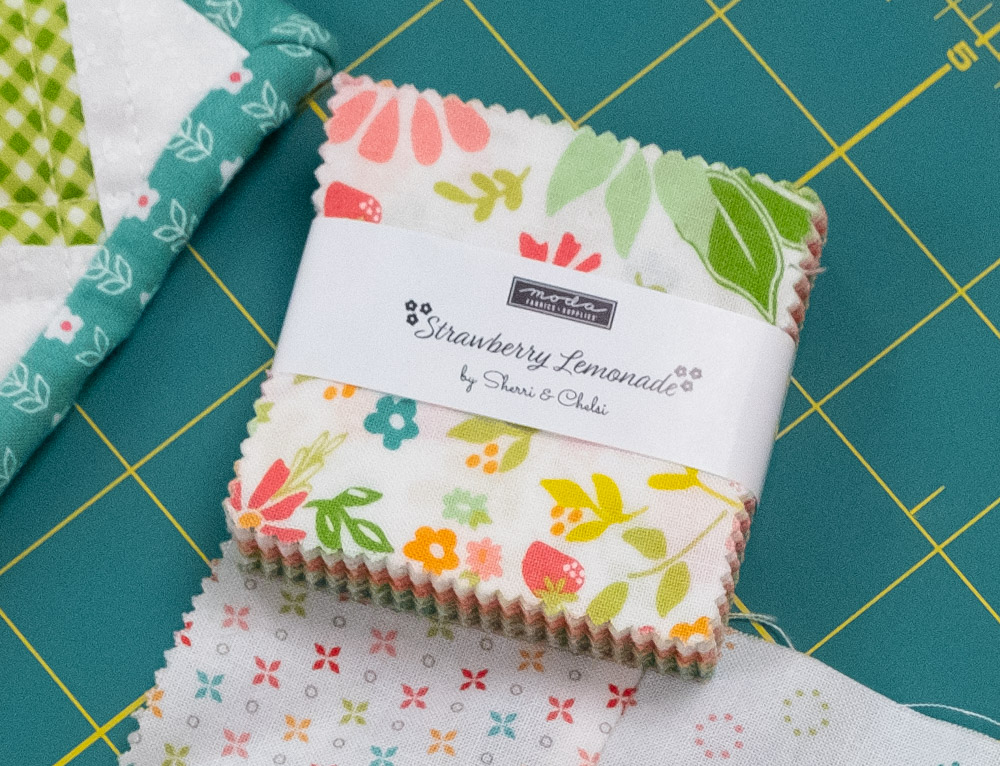
One of Sherri’s favorite starting points for EPP is using a mini charm pack. These pre-cut squares are the perfect size for creating one-inch hexagons, which are her go-to shape for many projects. Jelly Roll strips also work incredibly well. 1" hexies are a great way to use up leftover or partial jelly roll strips. One of Sherri's tips is to stack them 3 or 4 at a time to increase your cutting effieciency.
Sherri’s English Paper Piecing Process
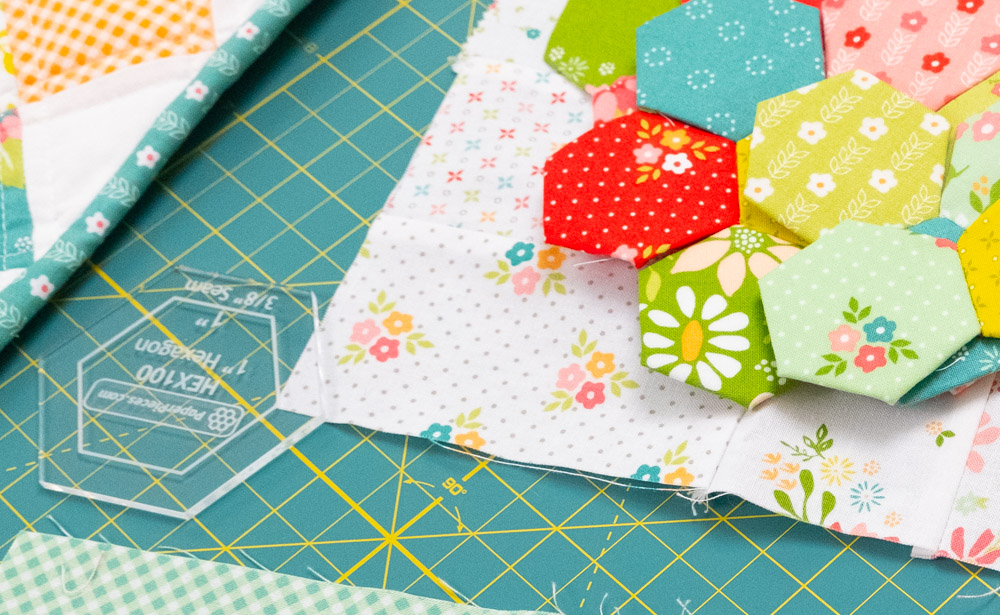
- Cutting the Fabric: Sherri likes to use an acrylic template from Paper Pieces (and the corresponding precut 1”papers) to cut her fabric into hexagon shapes, even though you can baste the squares as they are. Using a rotating cutting mat can make this step easier and more efficient. You can stack multiple strips of fabric to cut several shapes at once.
- Basting the Hexagons: While some people prefer using glue to baste their fabric to the paper pieces, Sherri enjoys thread basting. This method is portable and doesn’t involve the fuss and mess that comes with trying to glue bast on the go. She starts by folding the fabric over the paper piece and securing it with small stitches, working her way around until the hexagon is completely basted.
- Joining the Hexagons: Sherri uses a simple whipstitch to sew the hexagons together. She emphasizes that the stitches don’t need to be perfect. If you use a thread color similar to your fabric, the stitches will blend in beautifully. Don’t stress over your stitches!
Projects and Ideas
In the video, Sherri shares some wonderful project ideas to inspire your next EPP creation:
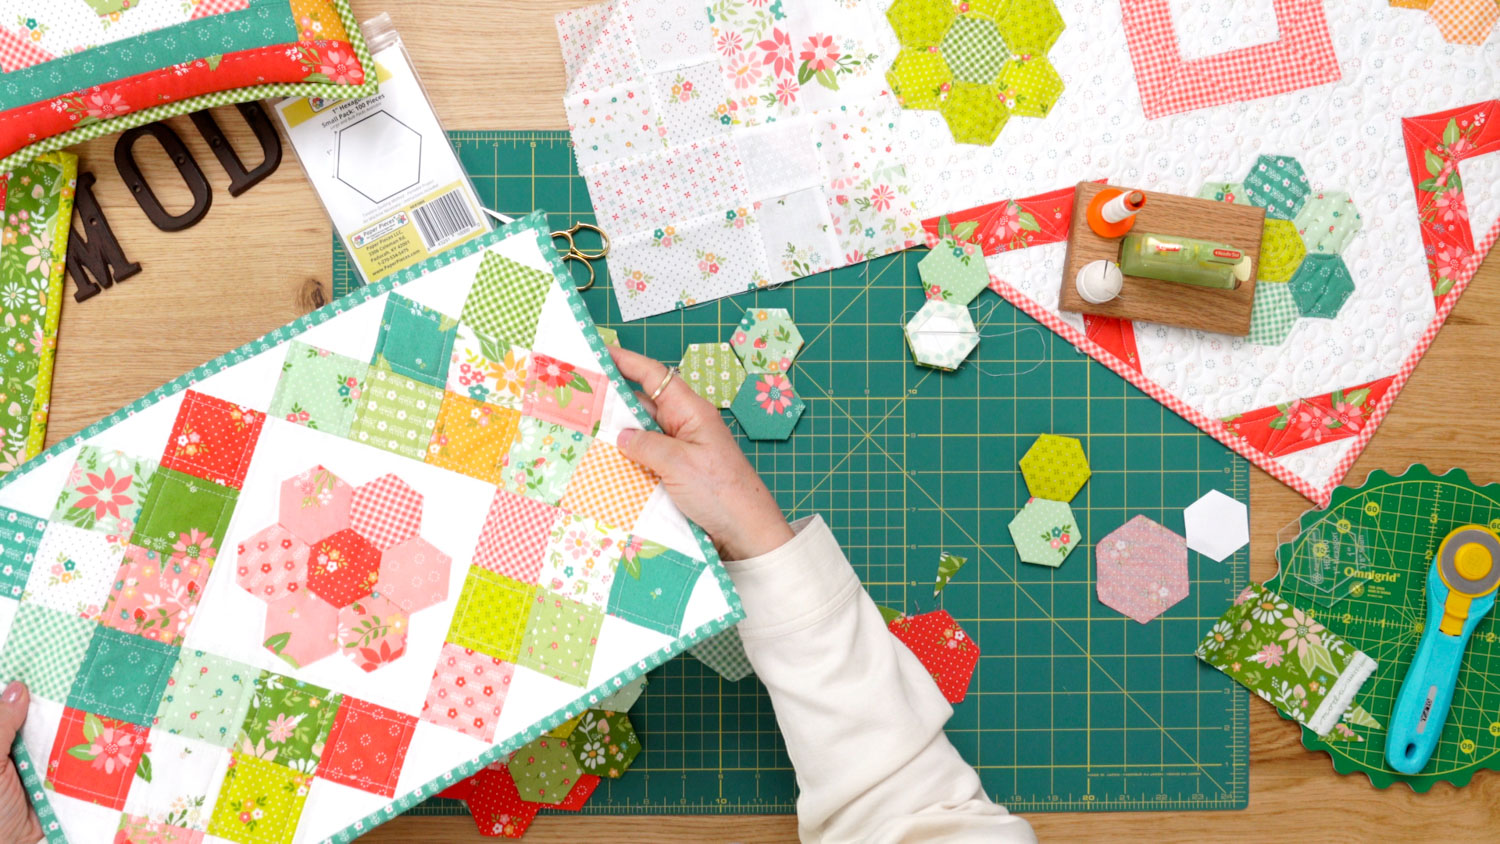
- Table Mat: Using a patchwork background gives a perfect way to line up and center your EPP pieces. These smaller projects can take some of the intimidation out of an EPP project where you might be trying new skills for the first time!
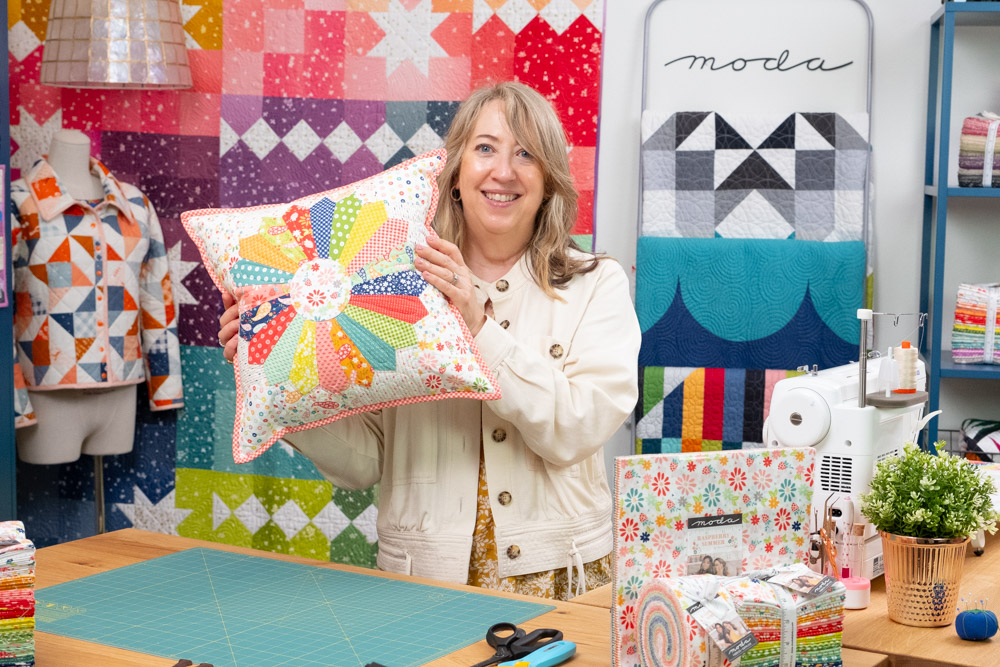
- Pillow: A simple background with added details like contrast corners and scrappy borders can make a stunning pillow.
- Free Pattern: In this free English Paper Piecing project pattern download you will have the best of both worlds. You can use this project sheet to create a Sherri inspired table mat or pillow cover!
Other Handy English Paper Piecing Tools
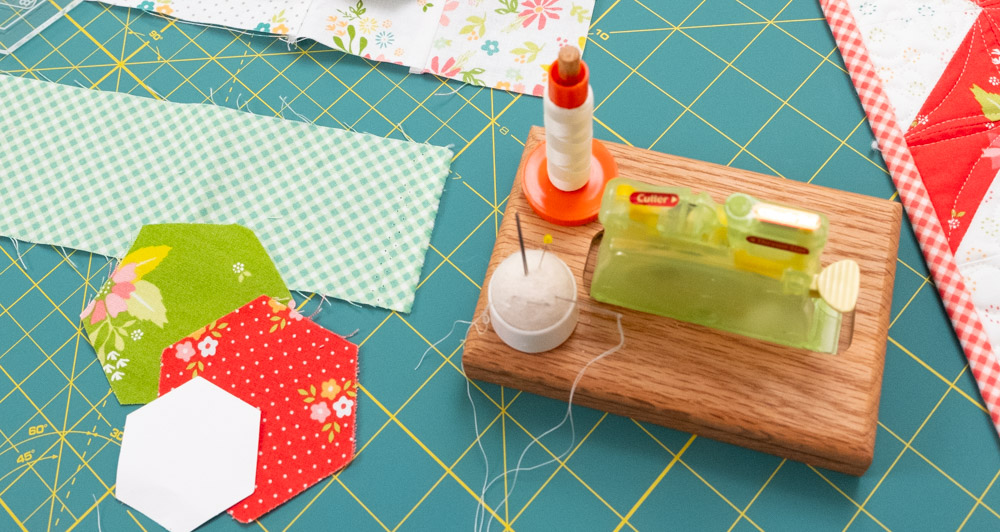
Sherri demonstrates a handy Clover needle threader, which makes threading needles a breeze. This tool is perfect for EPP projects, saving you time and frustration. You might have noticed her adorable little thread cutter base that also has a pin cushion and spool holder--those can be found on Etsy at the shop in the Quilts and Clappers shop!
She also shares a quick method for tying the classic quilter’s knot (taught to her by her aunt) ensuring your projects are secure. Be sure to watch the video to see it in realtime.
Finishing Touches
Before appliquéing your EPP pieces to a background fabric, Sherri recommends pressing the completed unit to ensure it’s flat. You can appliqué by hand or machine, depending on your preference. We recommend using a bit of water soluble glue to tack your EPP pieces into place. Remember to remove the paper pieces before appliquéing to avoid any issues.
We hope you enjoyed these tips and tricks from Sherri McConnell. For a detailed tutorial and more insights, be sure to watch the video below. Stay tuned for more quilting tips and inspiration! Don't forget to share your EPP projects with us on social media! Happy quilting!
Posted in: