Welcome to Moda Fabrics!
Dec 14: Dala Horse
Dec 14: Dala Horse
Published:
Dec 13 2018 - 23:00

![]()
Hello lovely Moda Bakers, I hope you’re enjoying the smorgasbord of gorgeous advent blocks this month. I’m Nicola Dodd from CakeStand Quilts and I have Scandinavian themed recipe to share with you today: a Swedish Dala Horse. Traditional Dalahast are beautifully hand painted, usually on a red background, which makes this quilt block ideal for fussy cutting or embellishing with embroidery.
This block finishes at 6" or 12" square.
![]()
{list pieces to cut from fat quarters}
| 6" Block | 12" Block |
|---|---|
| From white fabric, cut (1) 2½" x 5" piece, (1) 2½" x 3" piece, (1) 2" x 4½" piece, (1) 2" square, (1) 1½" square, (1) 1" x 3" piece, (1) 1" x 1½" piece and (1) 1" square | From white fabric, cut (1) 4½" x 9½" piece, 4½" x 5½" piece, (1) 3½" x 8½" piece, (1) 3½" square, (1) 2½" square, (1) 1½" x 5½" piece, (1) 1½" x 2½" piece and (1) 1½" square |
| From solid red fabric, cut (1) 2½" x 5" piece, (1) 2" x 4" piece, (2) 2" x 3" pieces and (1) 1" square | From red print fabric, cut (1) 4½" x 9½" piece, (1) 3½" x 7½" piece, (2) 3" x 5" pieces and (1) 1½" square |
![]()
- White embroidery floss
- Embroidery/chenille needle
- Water soluble pen to mark your design
![]()
Sizes are given for the 12” block, with the sizes for the 6” block in brackets {}. Directions are given to make a red horse on a white background, but feel free to reverse the colours.
1. To create the horse’s body, mark a diagonal line on the back of the 1½” {1”} background square and pin, right sides together, on the top right-hand corner of the 4½” x 9½” {2½” x 5”} red piece. Stitch on the line, flip ‘open’ and press, trimming away the back layers ¼” away from the seam, to make an Easy Corner Triangle (ECT).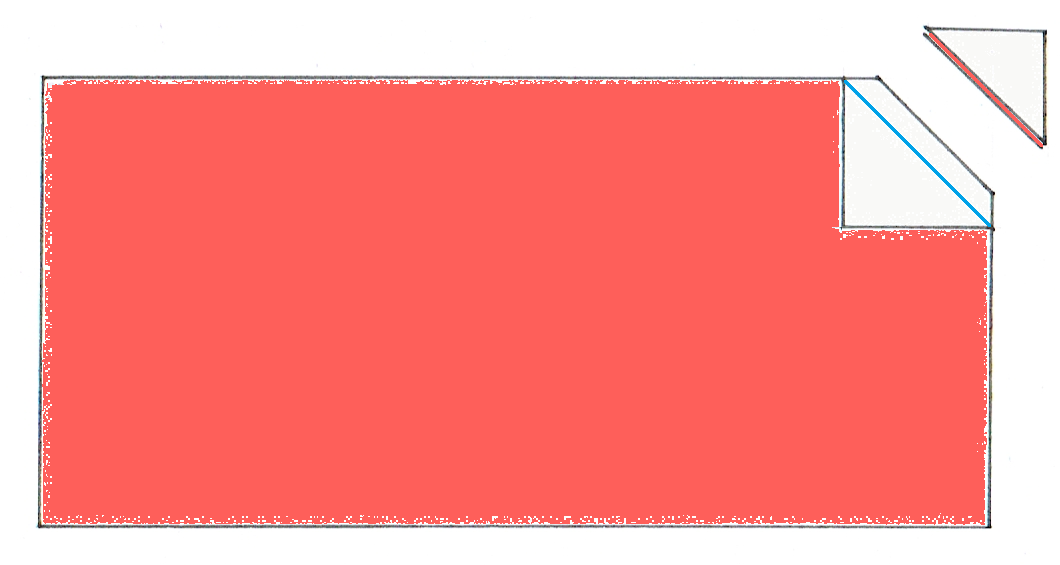
2a. To create the horse’s legs, first prepare the (2) 3” x 5” {2” x 3”} red pieces by placing them right sides together and marking a point 1¼” {¾”} along the short side (marked in blue). Trim diagonally, discarding the smaller portions. You should have two mirror image pieces.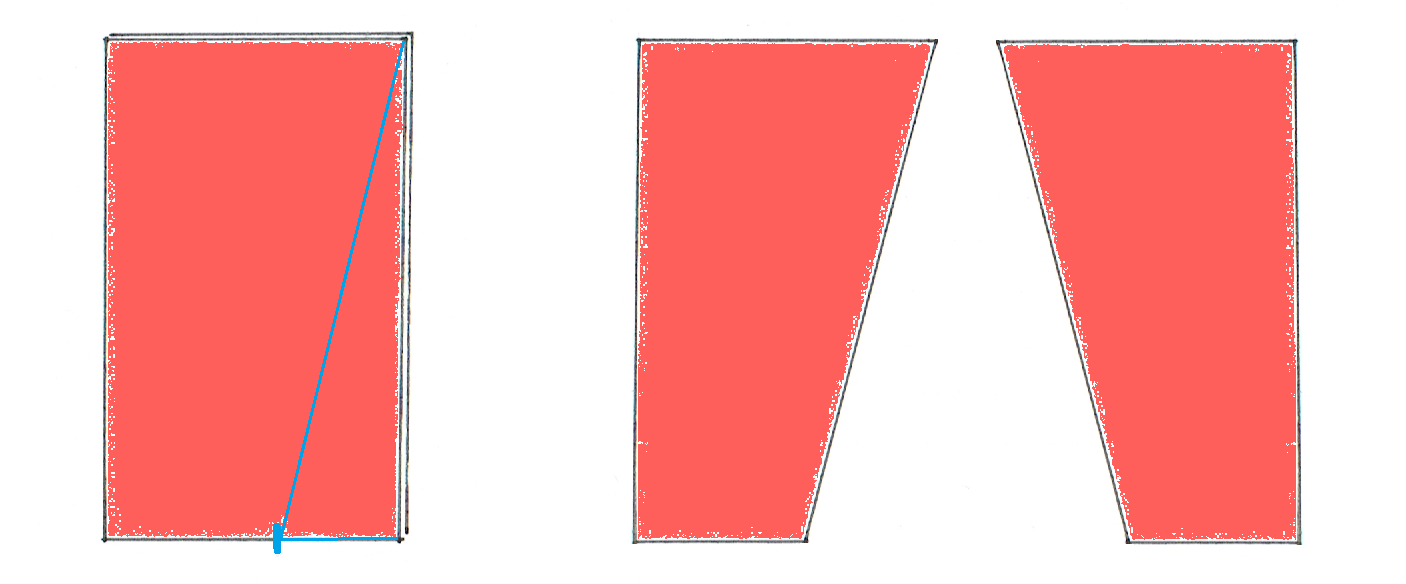
2b. Prepare the 4½” x 9½” {2½” x 5”} background piece by marking points 2” {1”} from both corners of the long side and 1” {½”} from both corners of the opposite side. Using those points, mark placement lines, shown in blue.
2c. Position a trimmed red piece right sides down on the placement line and stitch a ¼” away from the edge before flipping ‘open’ and pressing (the stitching line is marked in blue). Turn your unit to the wrong side and trim, using the background piece as a guide. Repeat to create the other leg.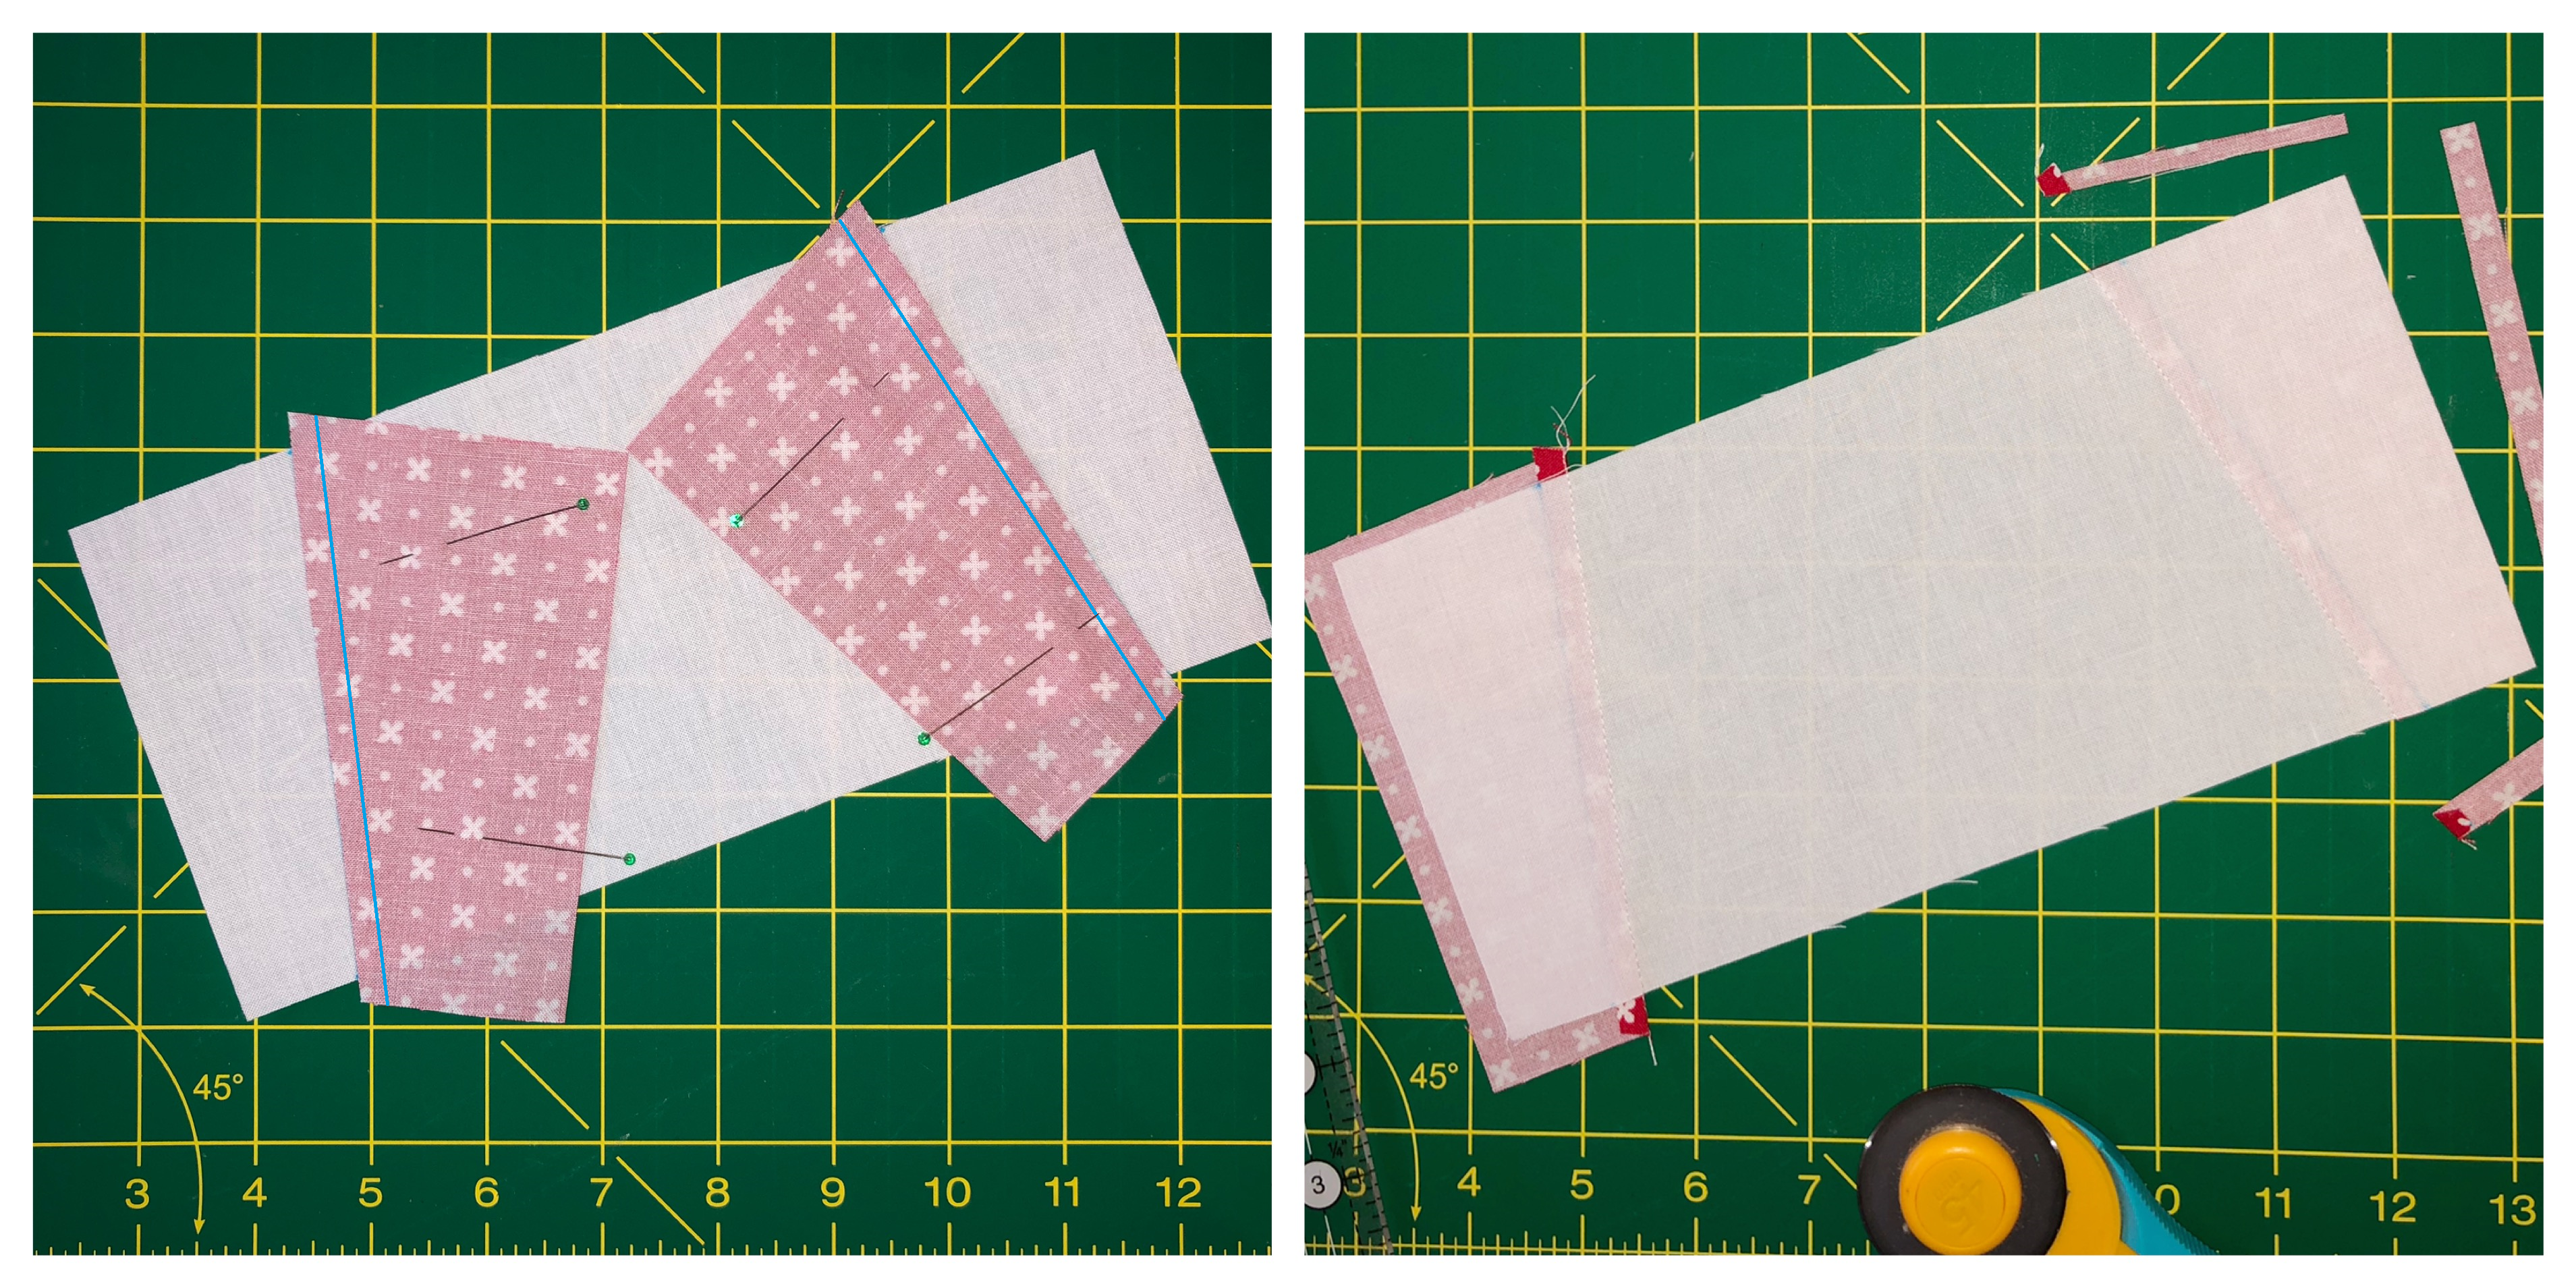
3. To create the horse’s head form an ECT (as described in step 1) with the 3½” {2”} white square at one end of the 3½” x 7½” {2” x 4”} red piece, taking care with the placement, as shown. Then form an ECT with the 2½” {1½”} white square at the other end, again as shown.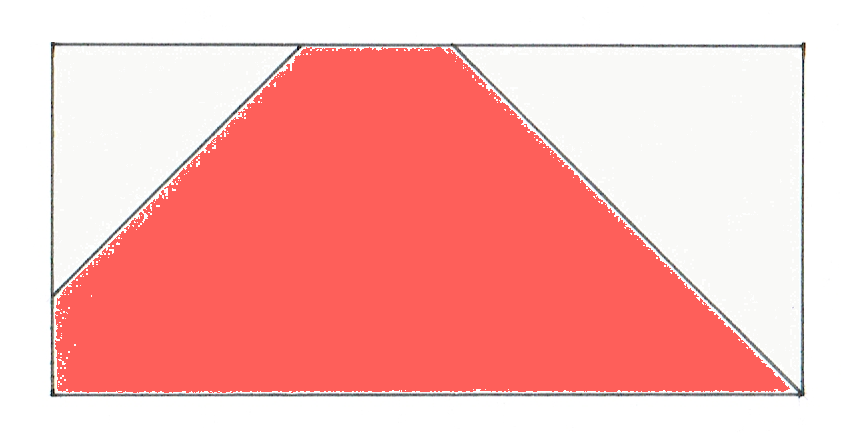
4. To create the horse’s ear form an ECT with the 1½” {1”} red square at one end of the 1½” x 5½” {1” x 3”} white piece, taking care with the placement as shown. Then join a 1½” x 2½” {1” x 1½”} piece, pressing away from the ear.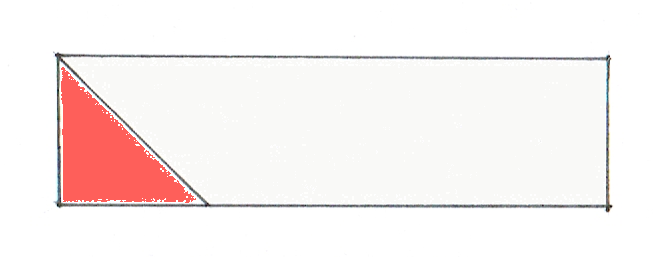
5a. To assemble the block, join the legs to the body, pressing away from the leg, then join a 3½” x 8½” {2” x 4½”} white piece to the side, pressing away from the front leg.
5b. Join the ears to the head, pressing away from the ear, then join a 4½” x 5½” {2½” x 3”} white piece to the side, pressing away from the mane. Finally, join both sections together, pressing towards the head.
6. If you'd like to, add the reins and saddle with white embroidery floss. I used simple back-stitch and running-stitch to embroider the 6" block and you can download the template I used here.
![]()
This block finishes at 6" or 12" square.
I thought it would be fun to use my blocks to make Christmas gift bags and I’ve shared a tutorial on my blog if you’d like to do the same. Small gift bags would be perfect to use as an advent calendar, using all of the gorgeous blocks posted this month! But however you use yours, do come and say hello on Instagram and share your blocks with the #mbscountdowntochristmas hashtag.
Wishing you all very Merry Christmas and a Happy New Year,
Nicola xx
{blog: Nicola's Sketchbook}
{instagram: nicolajdodd}
{shop: CakeStand Quilts}
![]()
Posted in:
Comments