Welcome to Moda Fabrics!
Dec 11: Candy Cane Christmas
Dec 11: Candy Cane Christmas
Published:
Dec 10 2018 - 23:00

![]()
Happy December, Bakers! I am Jen of Heritage Threads and I love the Christmas season for so many reasons, but most of all because of extra time with family. I love passing on traditions from my family and my husband's family to our children and watching the magic of the season through their eyes. One tradition that happened in my house growing up was that of hanging candy canes on the Christmas tree. My dad's dad would always send us candy canes for our tree. I thought of this when looking for inspiration for my block and hope you enjoy making it!
This block finishes at 6" or 12" square.
![]()
| 6" Block | 12" Block |
|---|---|
| From white fabric, cut (2) 1" x 21" strips, (2) 1½" x 1½" squares, (1) 1½" x 2½" rectangle, (1) 1½" x 4½" rectangle, (2) 1½" x 6½" rectangles, (1) 4½" x 4½" square. | From white fabric, cut (3) 1½" x 21" strips, (2) 2½”x 2½" squares, (1) 2½ x 4½" rectangle, (1) 2½ x 8½" rectangle, (2) 2½ x 12½" rectangles, (1) 8½" x 8½" square. |
| From solid red fabric, cut (2) 1½" x 1½" squares | From solid red fabric, cut (2) 2½"x 2½" squares |
| From red print, cut: (2) 1" x 21" strips | From red print, cut: (3) 1½" x 21" strips |
![]()
I will include the measurements for both blocks during this explanation by listing the 6" requirements first, followed by the 12" requirements inside of { }.
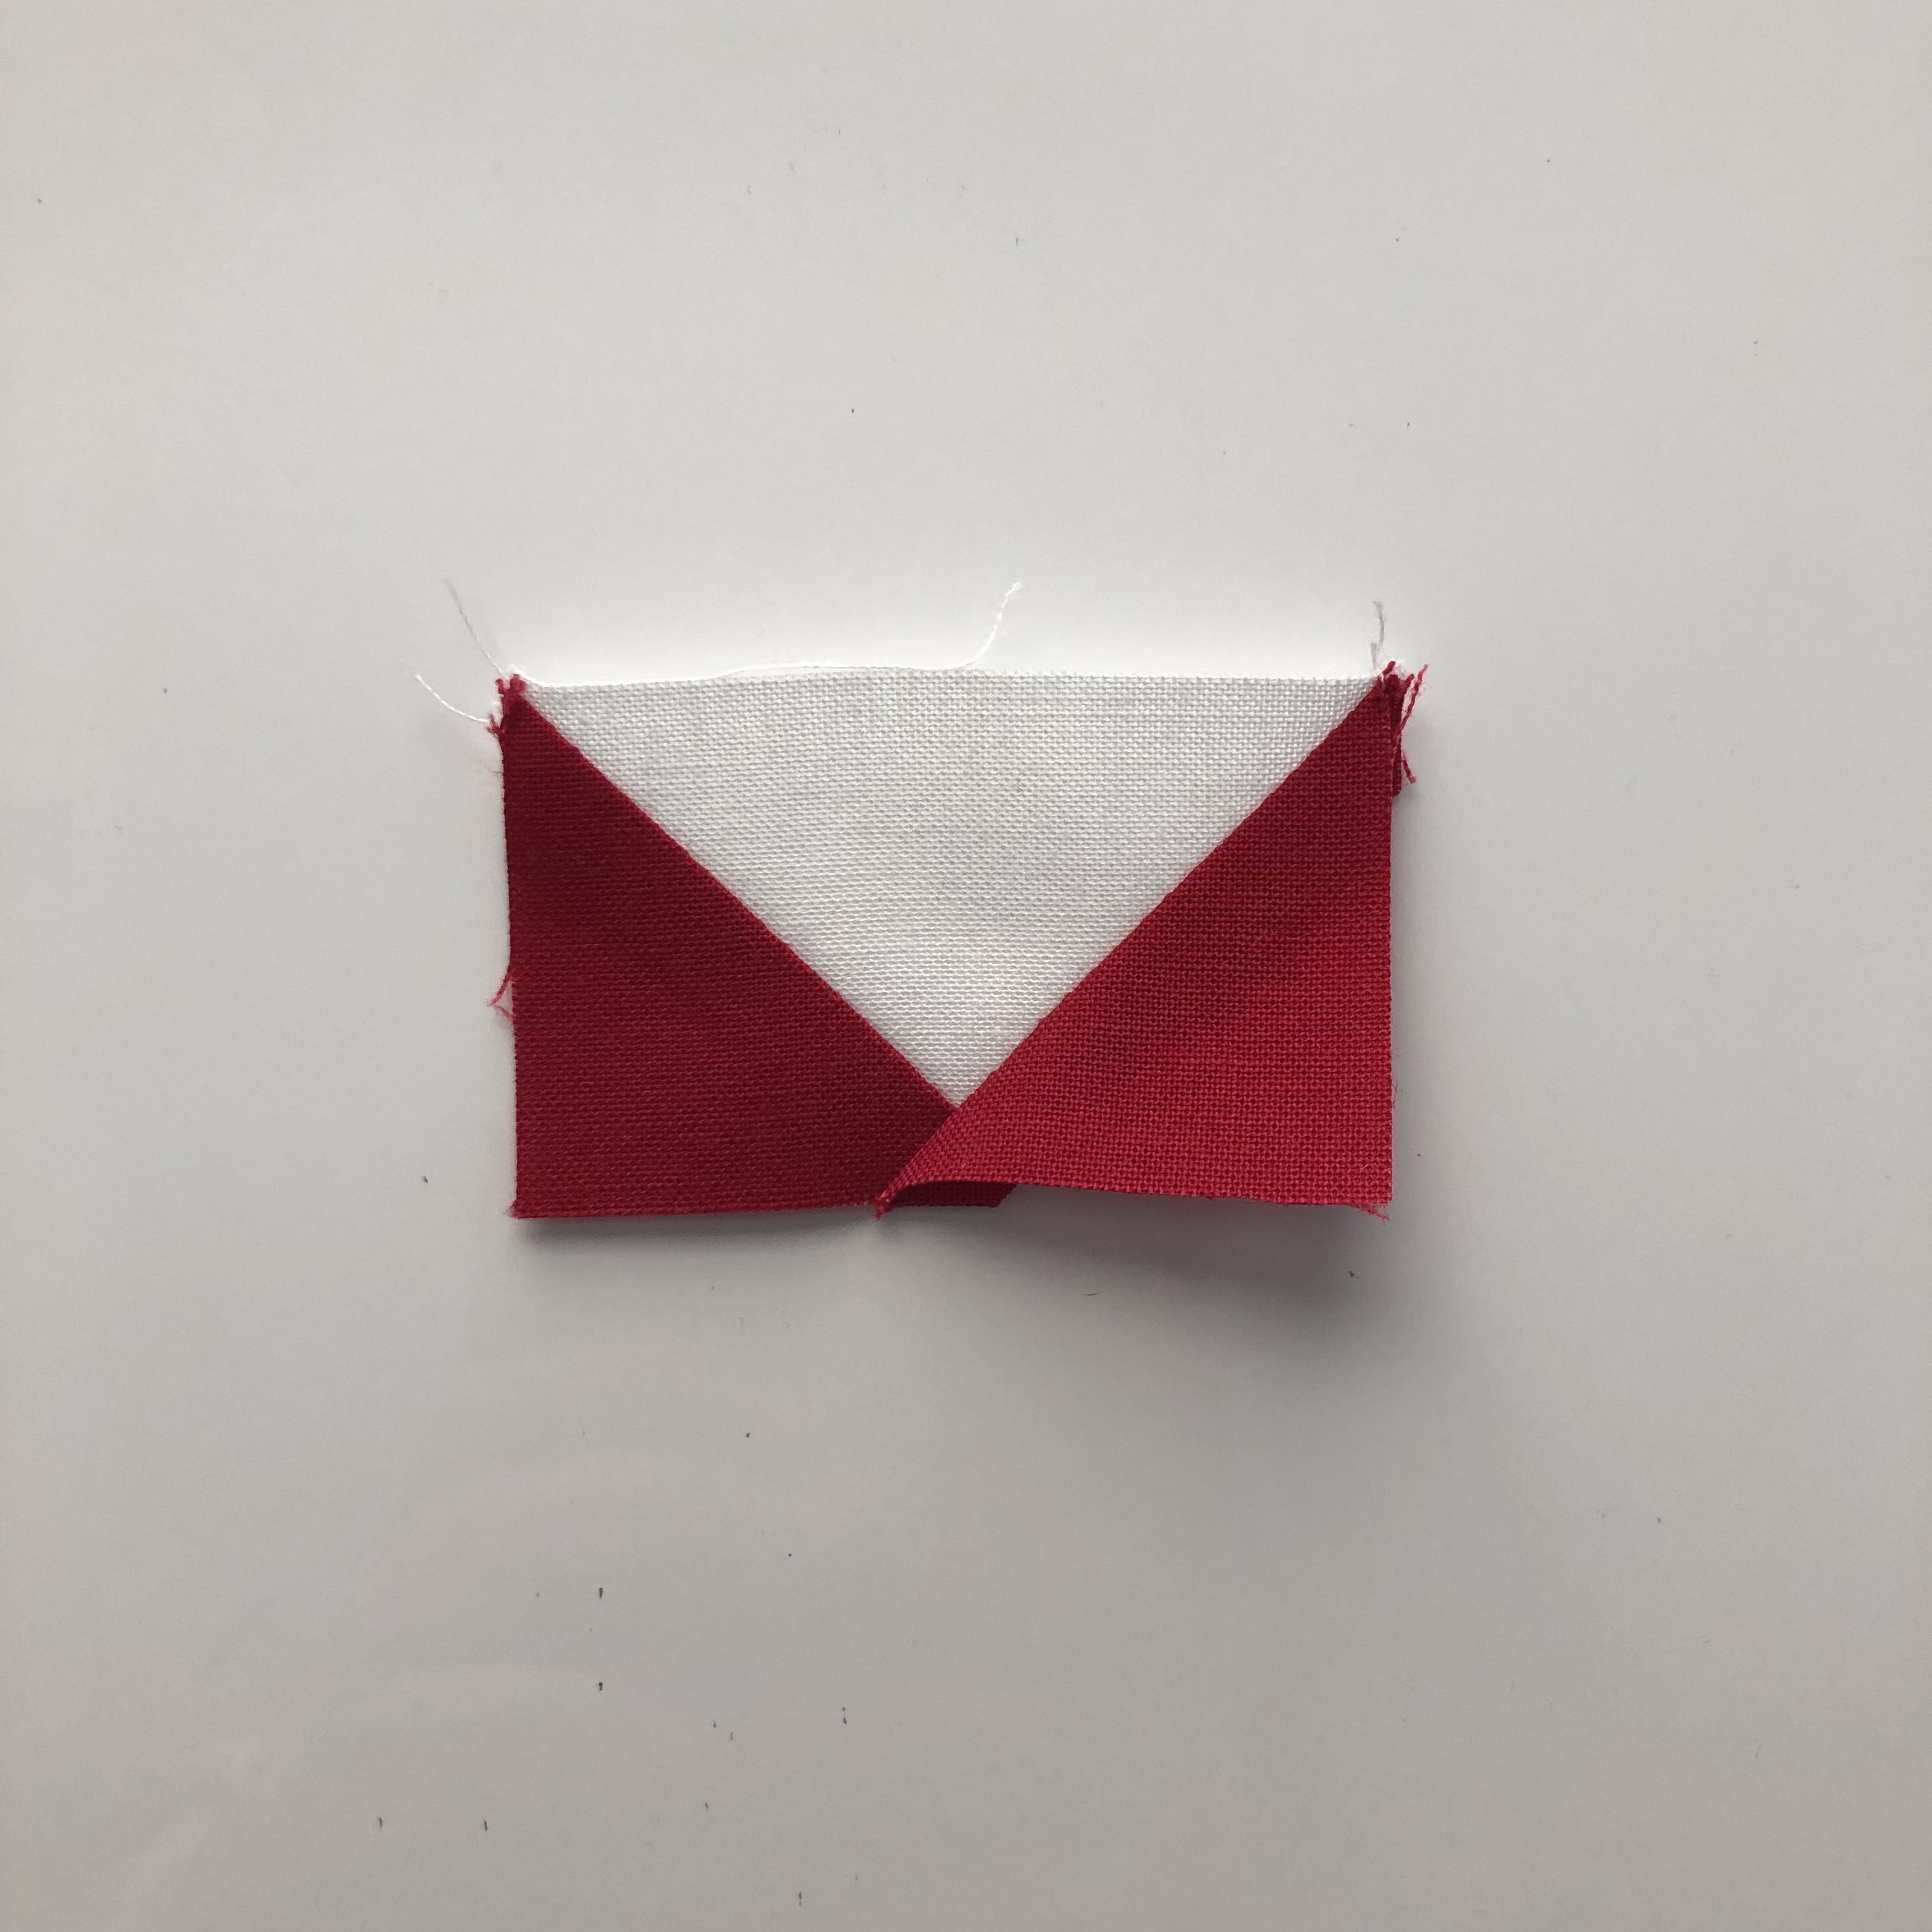
Make Flying Goose
Take the (1) 1½" x 2½" {(1) 2½ x 4½"} white rectangle. Place (1) 1½" x 1½" {(1) 2½”x 2½"} red square on top of this, lining up with the right side. Sew down the center of the red square. Repeat for the other side until you have 1 flying goose unit that measures 1½" x 2½" {2½ x 4½"}. This will become the bow of your present.
Make Present
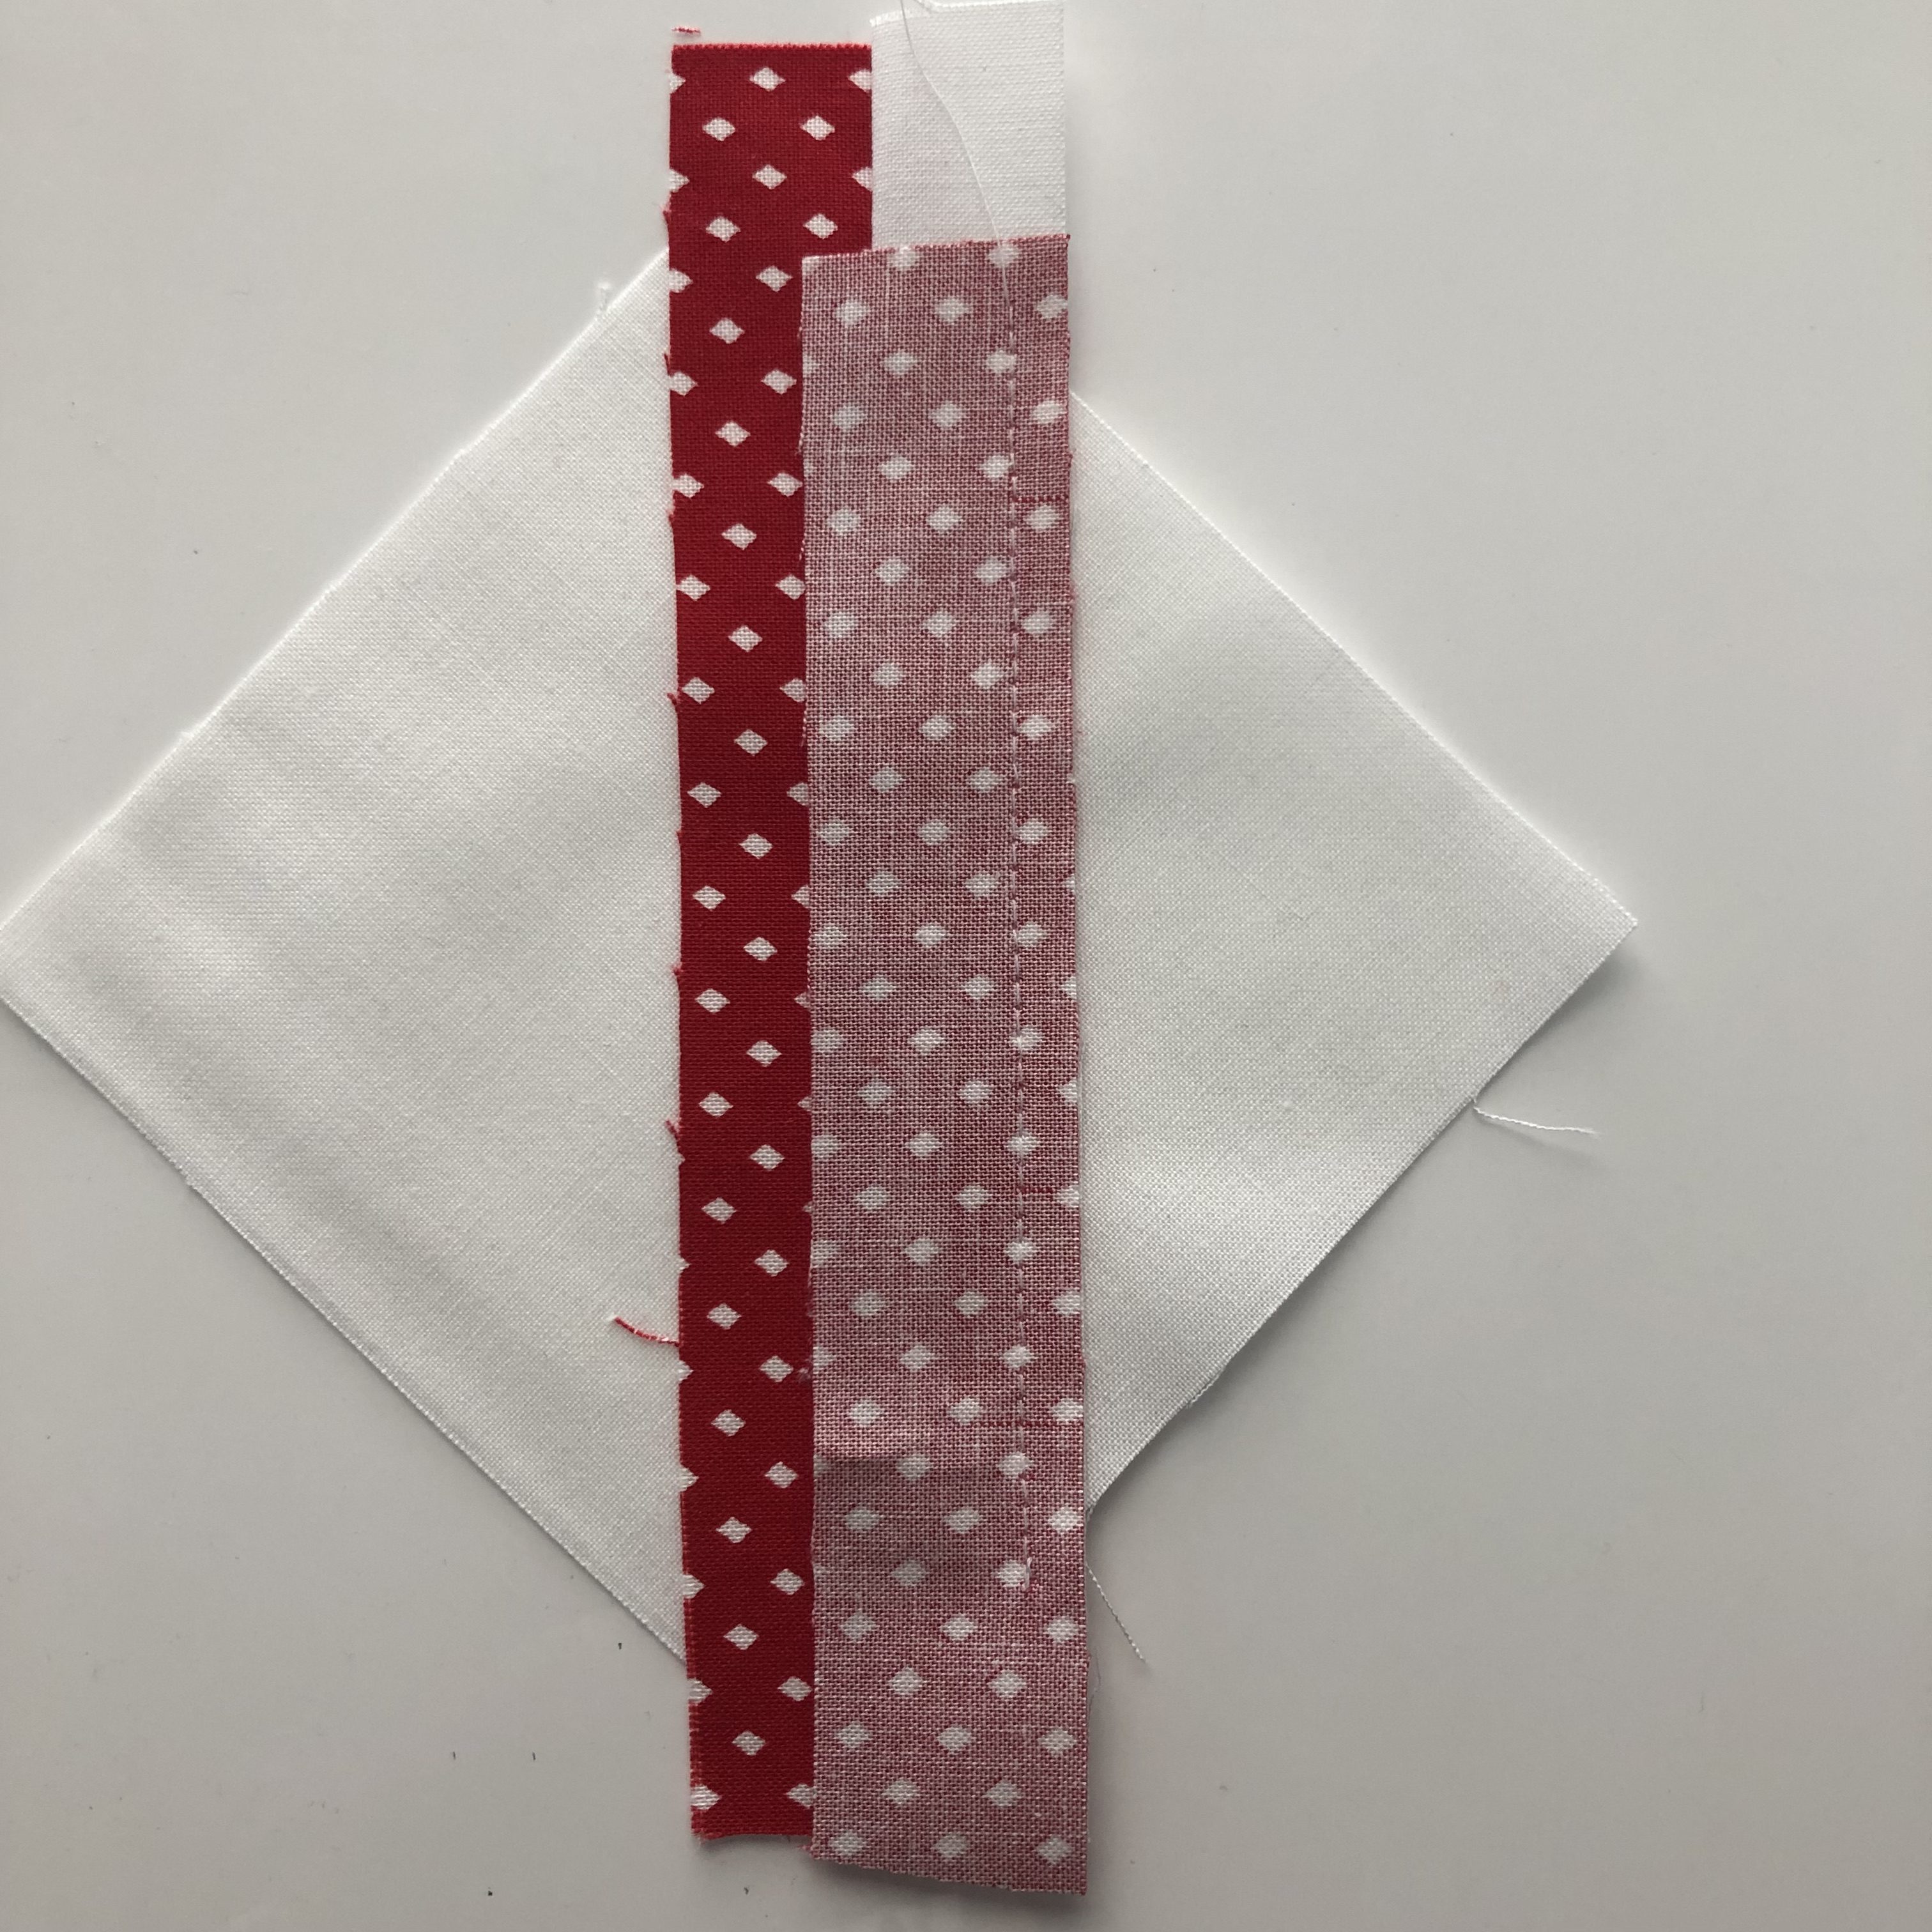
Take the 4½" x 4½" {8½" x 8½"} base piece. Center as best as you can (1) 1" x 21" {(1) 1½" x 21"} red print on it diagonally. I chose to pin along the left side edge of this piece to hold it in place.

Place (1) 1" x 21" {(1) 1½" x 21"}white piece on top of this. You will then sew along the right hand side using a 1/4" seam allowance. Leave yourself a bit of room and then trim off the excess red and white strip so they can be used in the next steps.

Press this toward the white piece. Take the leftover red print you trimmed off and repeat this process.
Continue alternating red and white until you have reached the corner.

You will now repeat this process on the other half of this base piece until you have covered the entire base with these red and white strips.

Move to your cutting mat, flip this over so the wrong side is facing up, and then trim along the edges of the base.
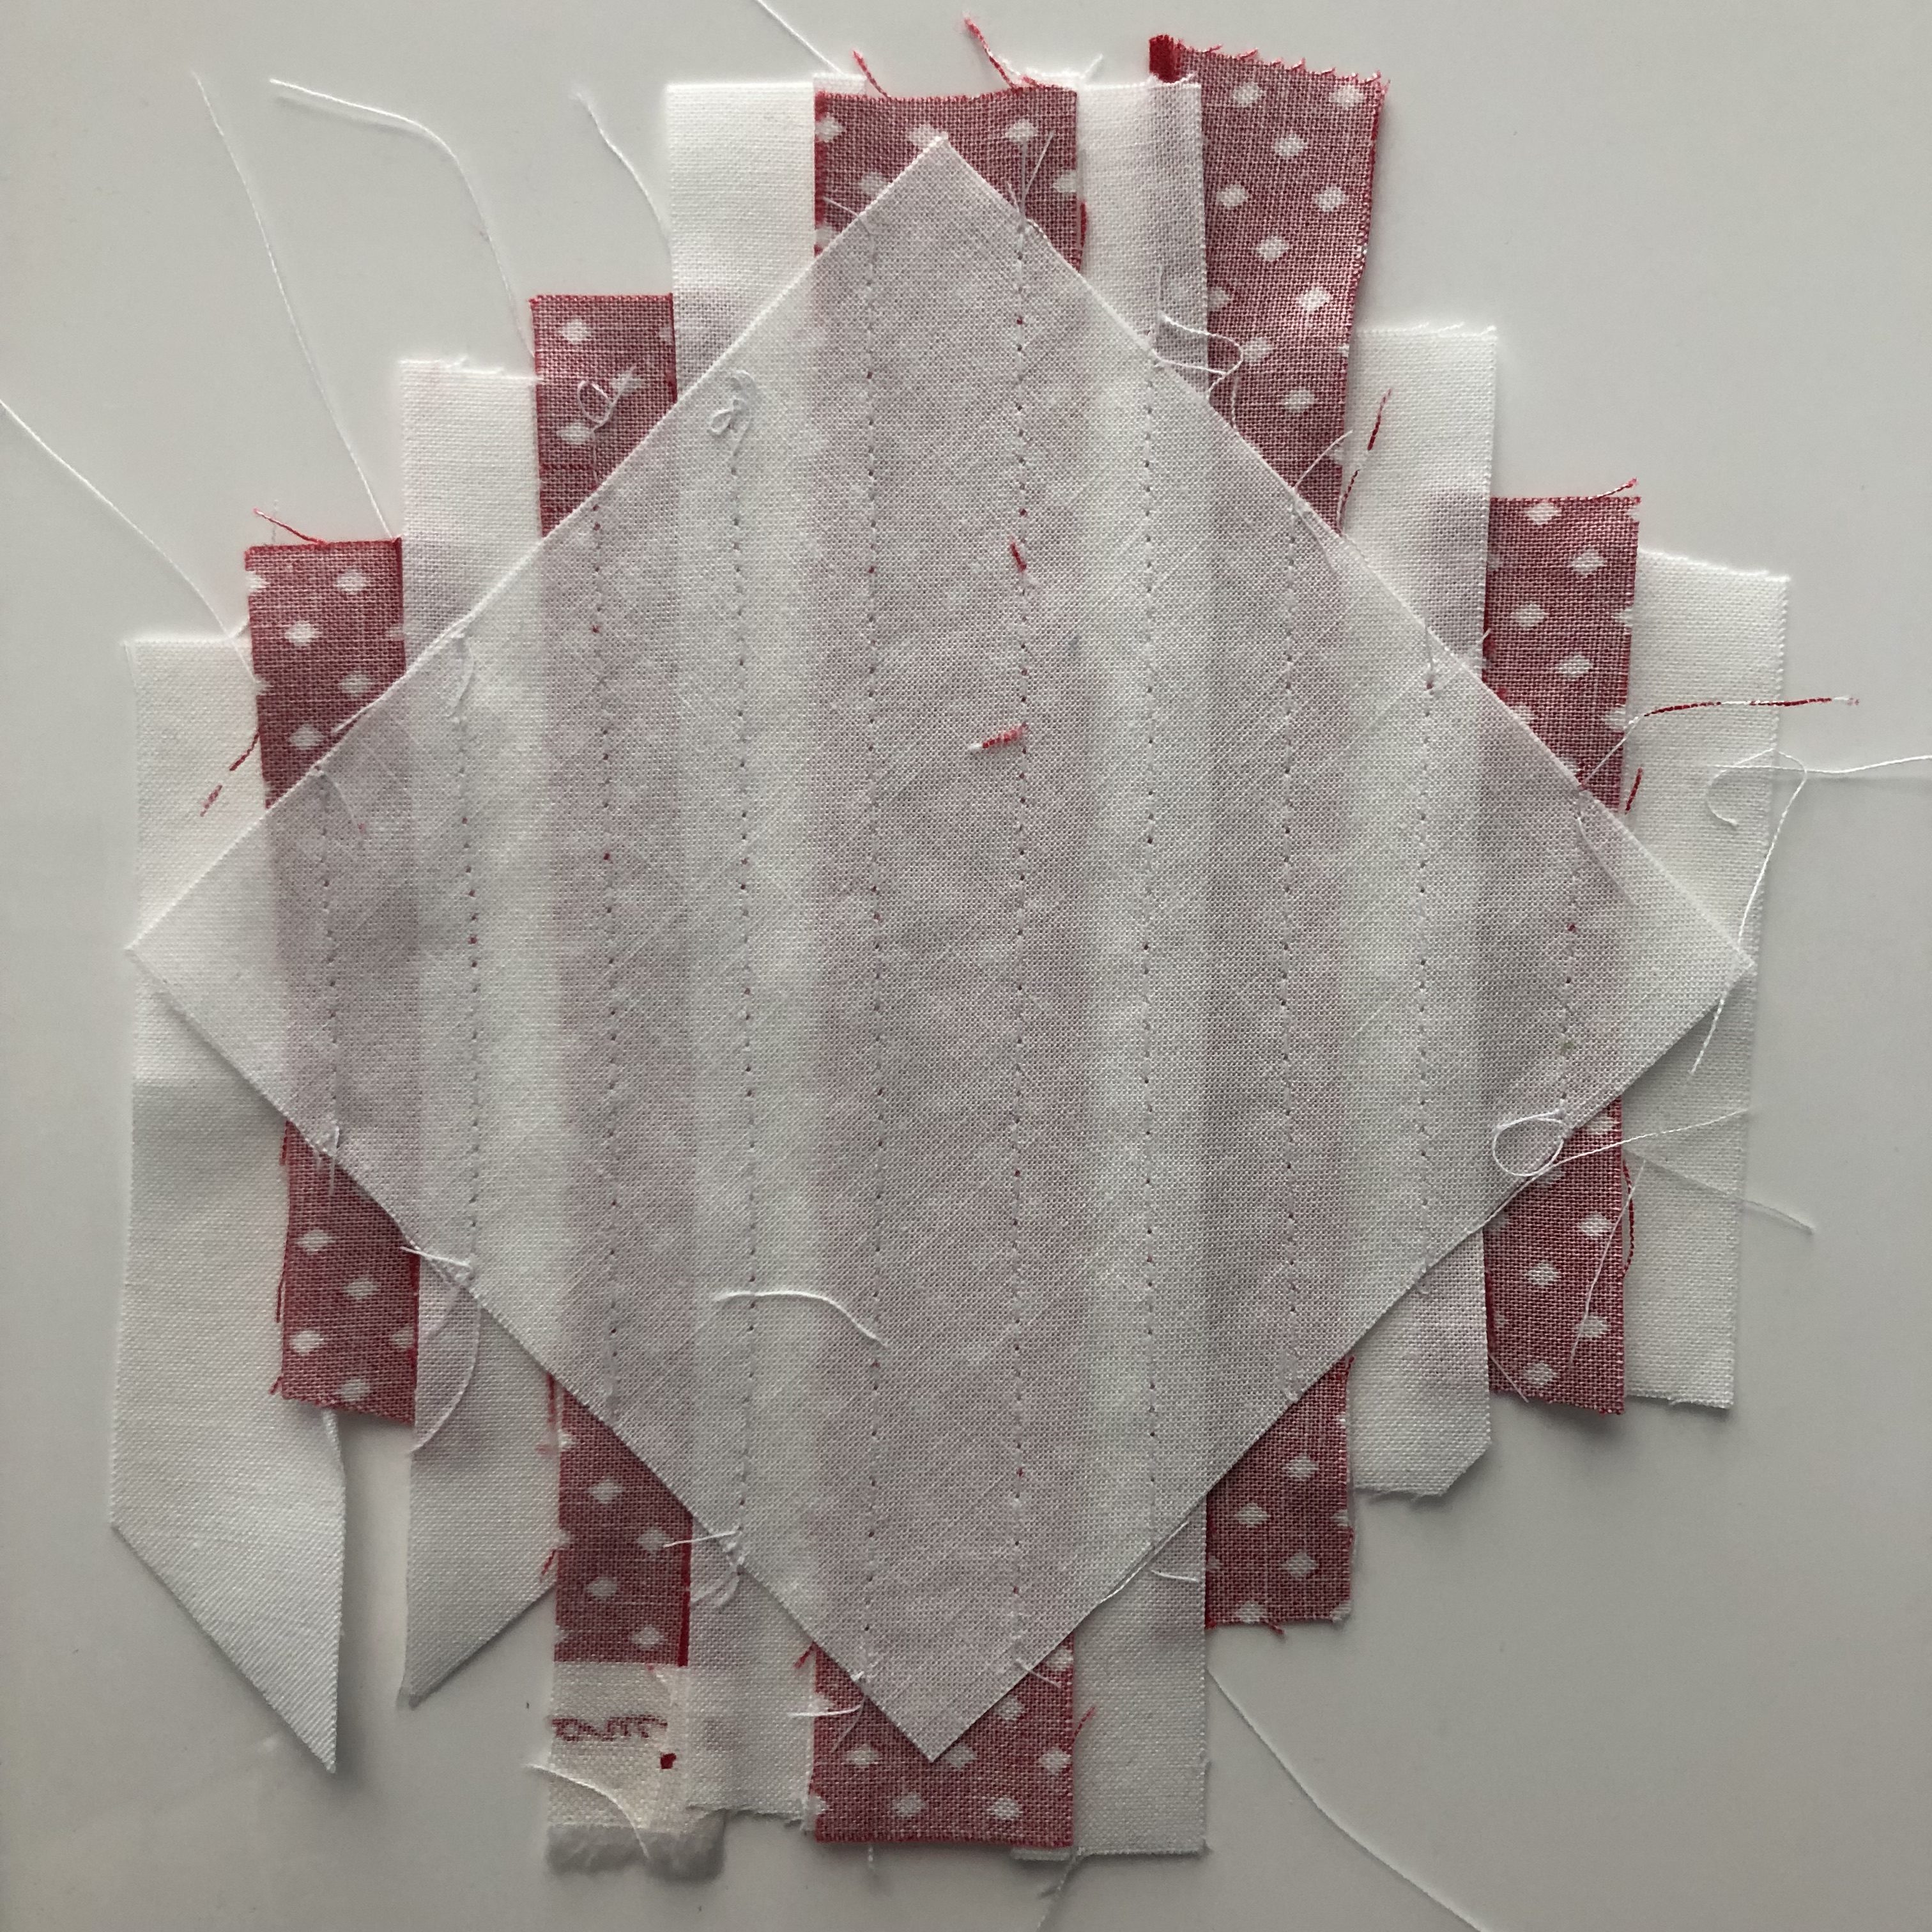
Your present is now complete and you are ready to assemble your block using your 4½" x 4½" {8½" x 8½"} present box.

Block Assembly
Attach (1) 1½" x 1½" {2½”x 2½"} white square to both sides of the flying goose bow.
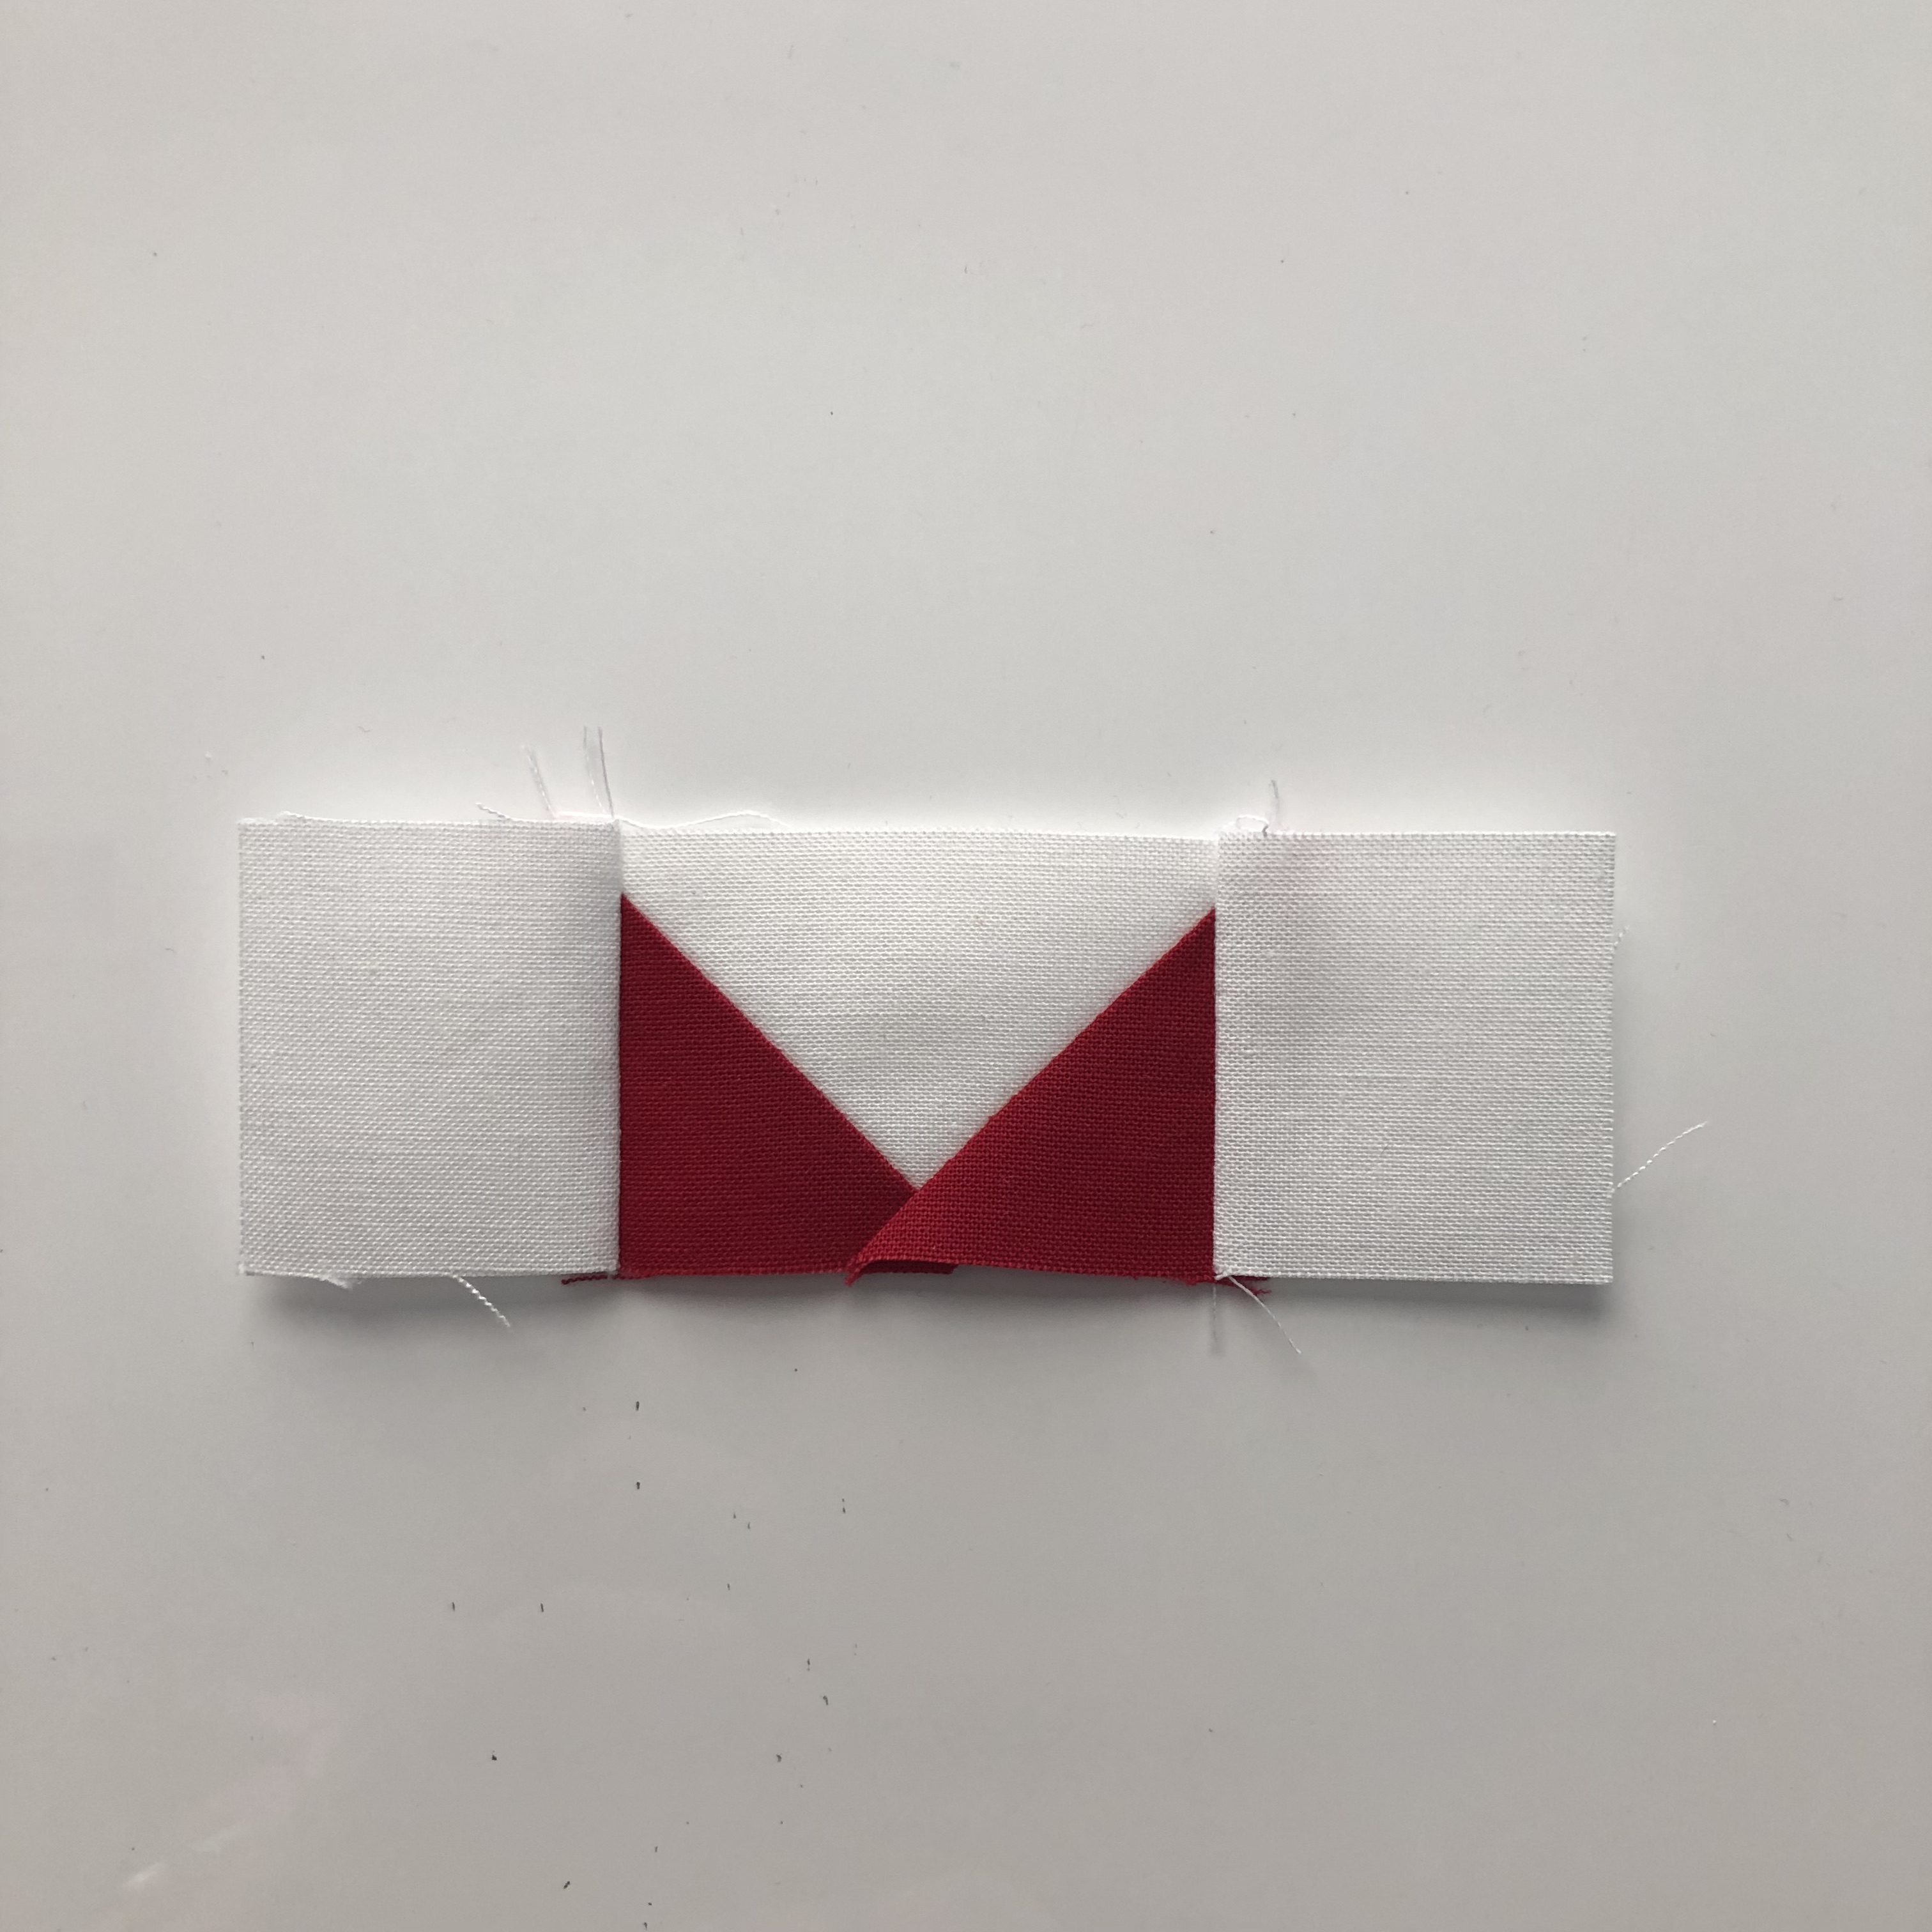
Attach the (1) 1½" x 4½" {(1) 2½ x 8½"} rectangle on to the top of the bow unit.

Sew the bow unit on to the present box.
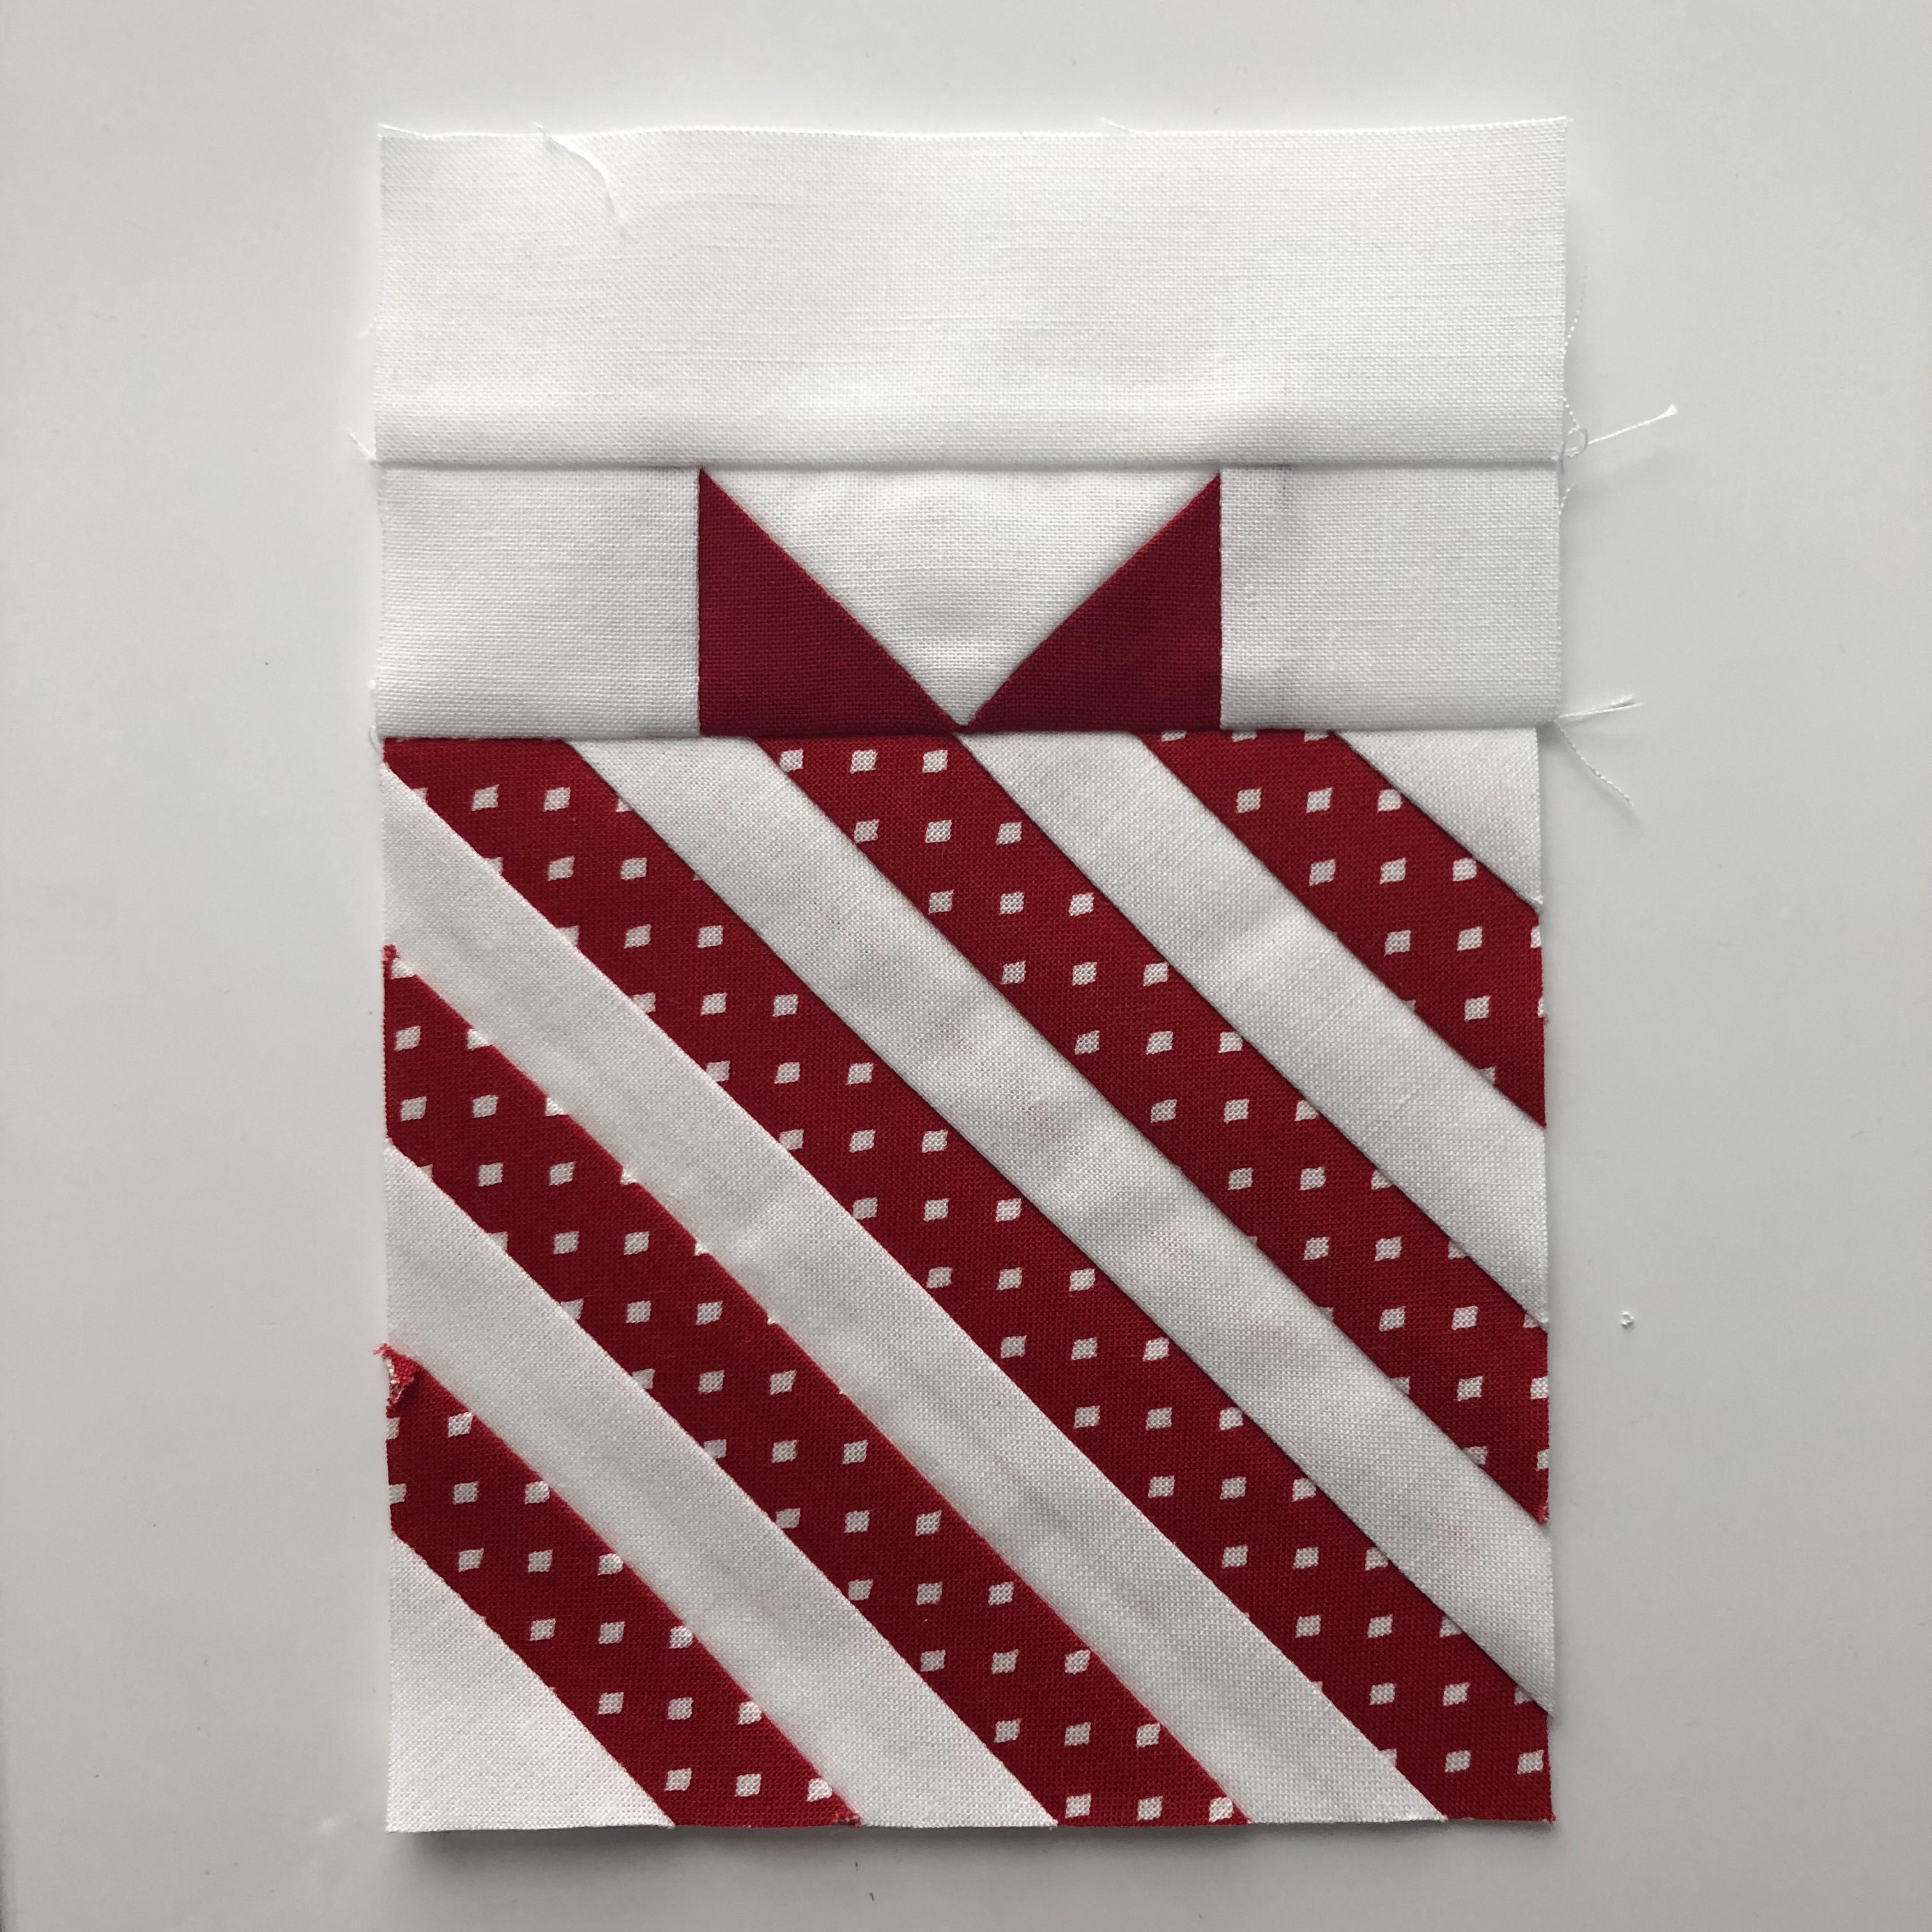
The last step is to sew (1) 1½" x 6½" {(1) 2½ x 12½") rectangles on to both sides of the present.

![]()
This block finishes at 6" or 12" square.

I LOOOOVE how this block turned out, so much more than I imagined. I have grand plans to make a really colorful version (think aqua, pink, green, red, blue) for my family as a Christmas quilt. I think this would be such a fun scrap buster quilt.
Jen Van Orman
{blog: Heritage Threads}
{instagram: Heritage Threads}
{shop: Etsy pattern shop}
![]()
Posted in:
Comments