Welcome to Moda Fabrics!
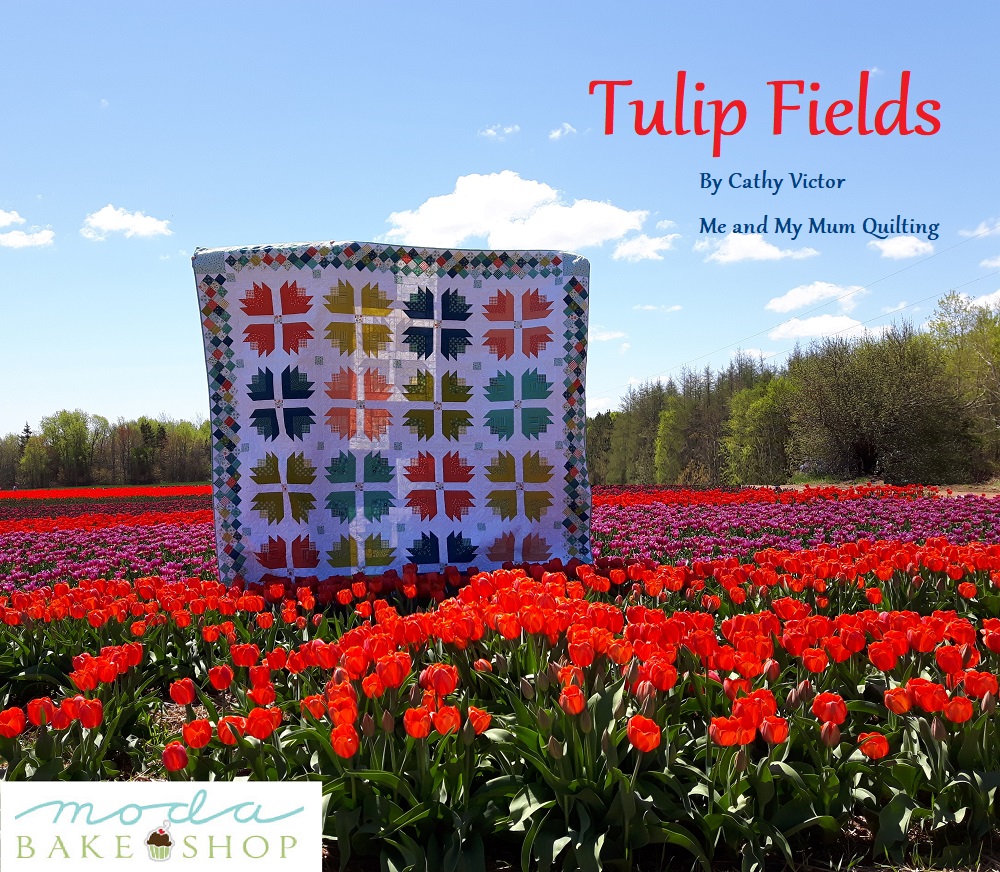
Tulip Fields
Tulip Fields
Published:
Jun 4 2018 - 23:00
![]()
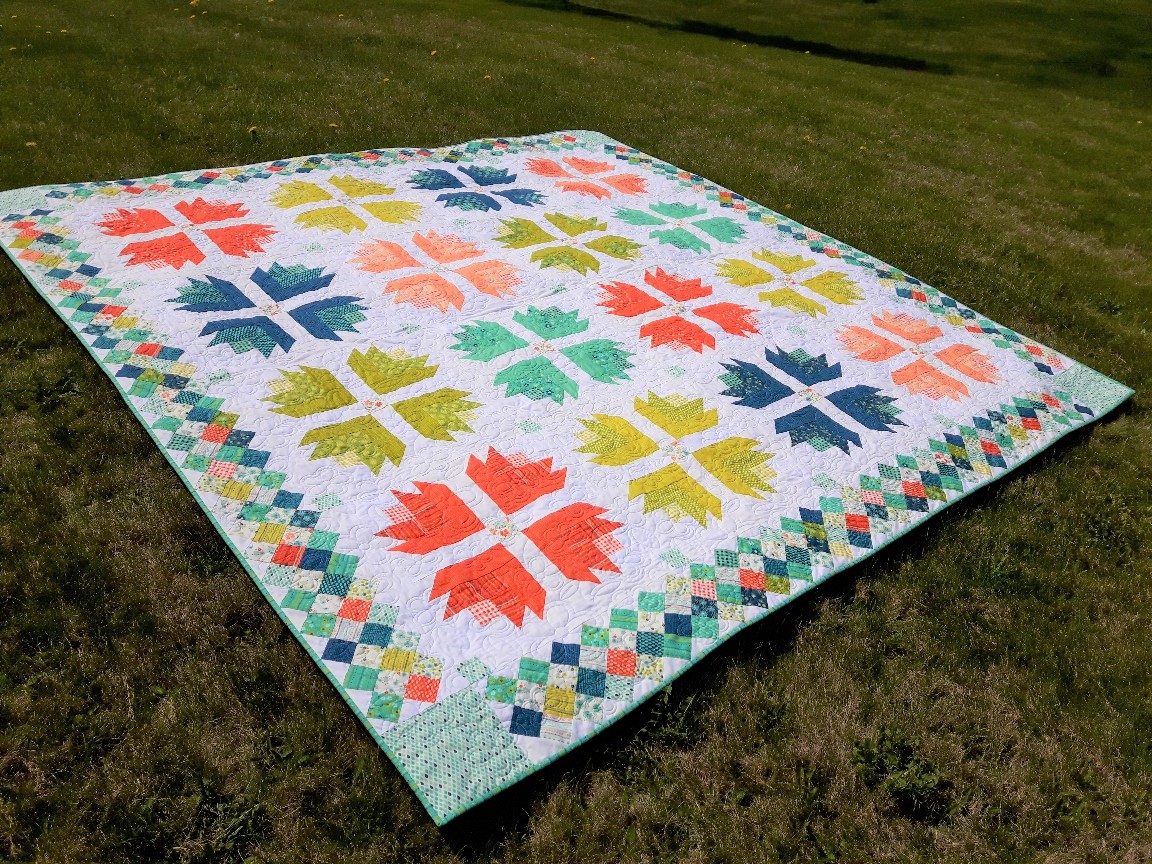
One of the best things about living in Prince Edward Island are the blue skies, amazing water views and rich soil perfect for planting vegetables and flowers. Some of my favorite Springtime flowers are tulips, and I am fortunate to have an amazing tulip farm not far from where I live. This quilt was inspired by the gorgeous Vanco Farms tulip fields, and I was lucky enough to have my quilt finished in time to photograph it while the tulips were still in bloom.
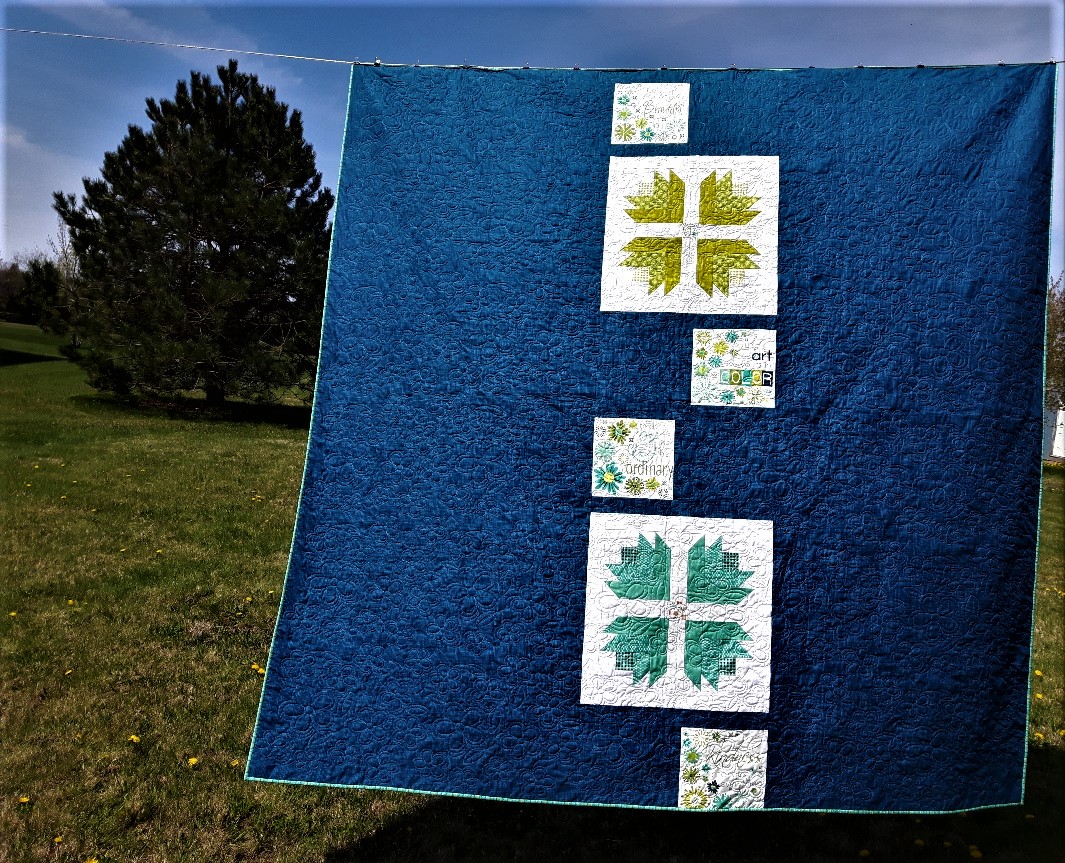
I think this design would also be stunning in the new Ombres that are so popular these days, and solids would be lovely, too. Be sure to stop by Me and My Mum Quilting to check out my Mum's version too. It's bright and modern and lot's of fun. I have also included a simple reference for how I assembled my pieced backing.
This quilt/project finishes at 96" x 96".
![]()
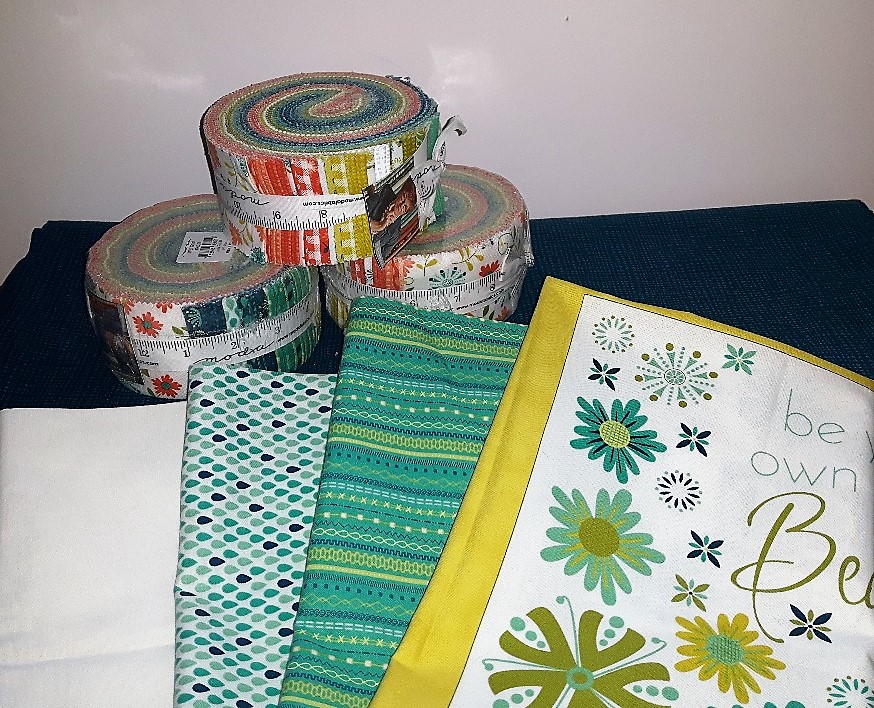
2 -3 x Jelly Roll®, {Well Said by Sandy Gervais 17960 JR}
6 yards Bella Solids White - background fabric {9900 98} OR 2 x Jelly Roll & 1/4 yd Bella Solids White
1/4 yard corner fabric {17965 13}
3 1/4 yards 108" wide backing fabric {11141 13}
1 yard binding fabric {17967 12}
1 x Well Said panel {17960 19}
![]()
I found it useful to have:
- a 8/12" x 24 " ruler for trimming the pieced border.
- a smaller ruler for marking lines.
- a * square ruler.
- a sharp rotary cutter.
- design wall or free space to lay out blocks.
![]()
NOTE: When selecting your fabric collection the following information is important:
If you want a quilt where the tulips have the same color throughout, you ideally want to have 33 - 34 colored strips per jelly roll. The remaining can be closer to your background fabric. This would mean you would have enough from 2 jelly rolls.
If you do not have that ratio, you can always use a 3rd jelly roll (which is what I did), or purchase smaller cuts of 3-4 additional fabrics to supplement the 2 jelly rolls.
If you are going for a scrappy version, feel free to mix up the fabrics in whatever way pleases you. Have fun!!
Sorting your Jelly Rolls
The jelly rolls need to be sorted into matched sets, which means you will be using 1 strip from each jelly roll to yield 2 identical fabrics per set.
- Set aside 2-3 matched sets for the buds (you could also just use 1 fabric for all the buds).
- Set aside 16 matched sets for the outer tulip petals.
- Set aside 16 matched sets for the inner petals (my sets of inner petals match up with the colors of my outer petals).
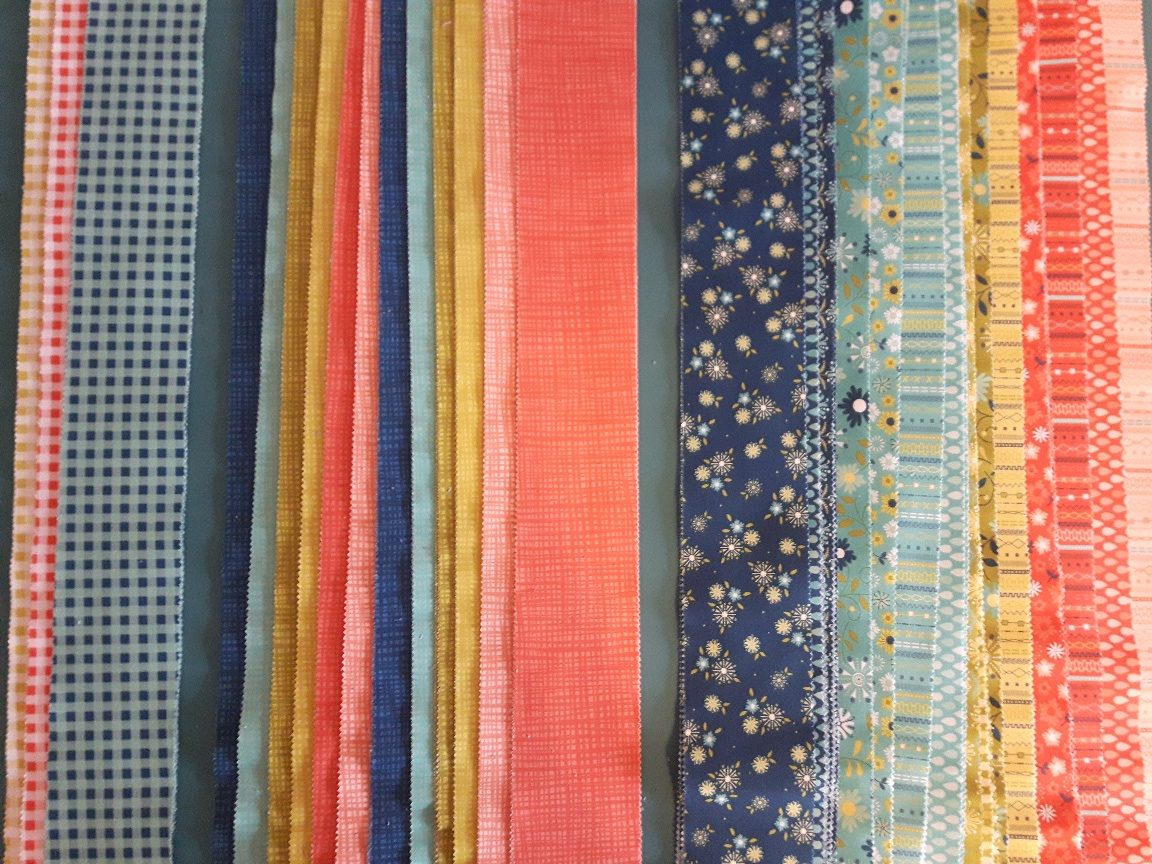
- set aside 1 strip for the centre block squares.
- set aside 2 strips for the sashing cornerstones (I used the same fabric as the 1/4 yd listed above as the outer corners).
- the remaining strips can be set aside for the pieced border.
Background Fabric cutting
Cut your background fabric yardage into (78 - 82) 2 1/2" strips x WOF (or use 2 Jelly Rolls)
- Set aside 12 for the bud units. These will be left whole for strip piecing.
- Subcut 16 strips into: (64) 2 1/2" x 8 1/2" block sashing strips.
- Subcut 20 strips into: (40) 2 1/2" x 18 1/2" quilt sashing strips.
- Subcut 12 - 16 strips into: (256) 2 1/2" squares. (You can use the leftovers from the above cutting to yield as many squares as possible before cutting into your full strips).
- Subcut 18 strips into: (240) 2 1/2" x 2 3/4" rectangles (Set aside for the pieced borders).
You will also need a 6" x WOF strip.
- Subcut into: (8) 3" x 6" segments for the borders.
Tulip Block Cutting
Let's begin with the Outer Tulip Petals. From each set of matching fabrics you need to cut:
- (4) 2 1/2" x 8 1/2"
- (4) 2 1/2" x 6 1/2"
You can leave the strips folded in half, to yield 2 per cut. The remaining fabric from the strip is set aside for the pieced borders.
Repeat for all 16 Outer Tulip Petal sets.
Next let's cut the Inner Tulip Petals. From each set of matching fabrics you need to cut:
- (4) 2 1/2" x 6 1/2"
- (4) 2 1/2" x 4 1/2"
You can leave the strips folded in half, to yield 2 per cut. The remaining fabric from the strip is set aside for the pieced borders.
Repeat for all 16 Inner Tulip Petal sets.
Tulip Block assembly
You will need the strips set aside for the Bud Units, and (4-5) background strips. You need (4) Bud Units per block.
- Sew a colored and background strip RST the length of the strips. Press towards the dark fabric.
- Subcut the strip set into 2 1/2" segments. Repeat to yield (64) 2-patch units.

- Using the remaining (8)uncut background strips, sew the 2-patch units to a background strip RST. Press.

- Subcut into 4 1/2" segments. Repeat to yield (64) Bud Units.
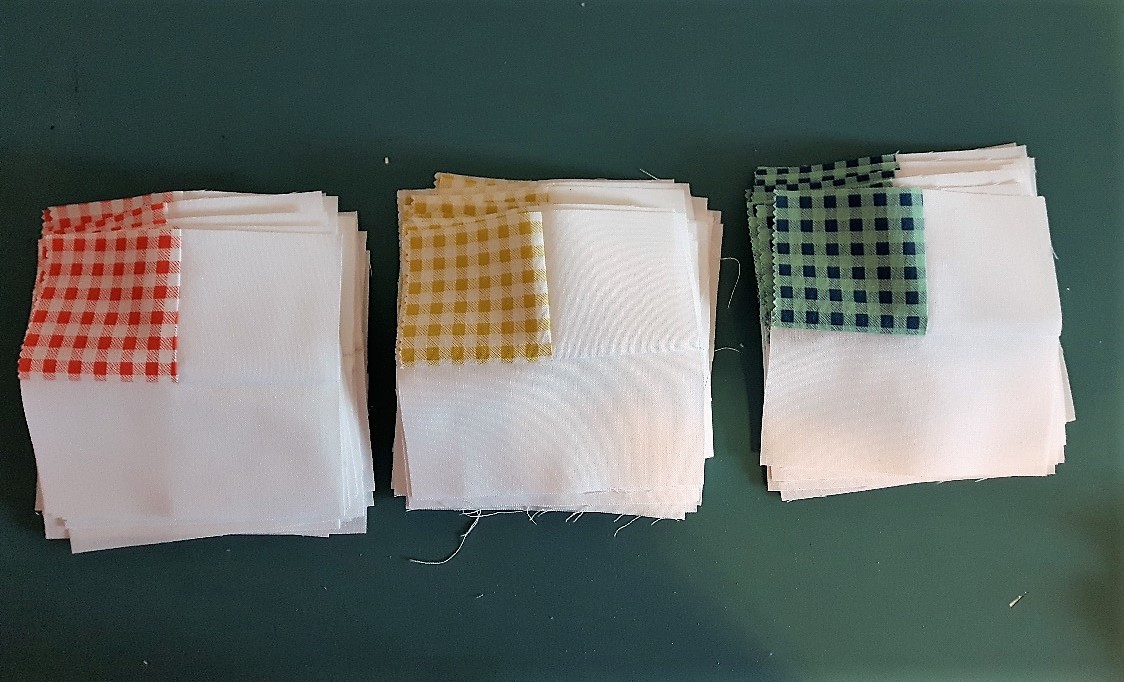
- Using a matching set of (4) 2 1/2" x 4 1/2" Inner Tulip Petal pieces, and a set of (4) Buds, Sew a Inner Tulip Petal to the Bud unit. We always sew opposite the background fabric. Press away from the bud.
- You should have a set of (4) 2 1/2" x 6 1/2" remaining. Sew to the adjacent side of the previous unit like the photo shows above. Always press away from the bud. Repeat for all 4 units.
- Draw diagonal lines on all (256) 2 1/2" squares.
- Time to snowball some corners. Place a marked 2 1/2" square on the outer end of the Inner Tulip Petals. Sew on the drawn line and trim away the excess leaving 1/4" from the sewn line.
- Each Tulip block uses 4 identical inner units. Go ahead and make all 16 sets.
- Repeat the process adding the Outer Tulip Petals.
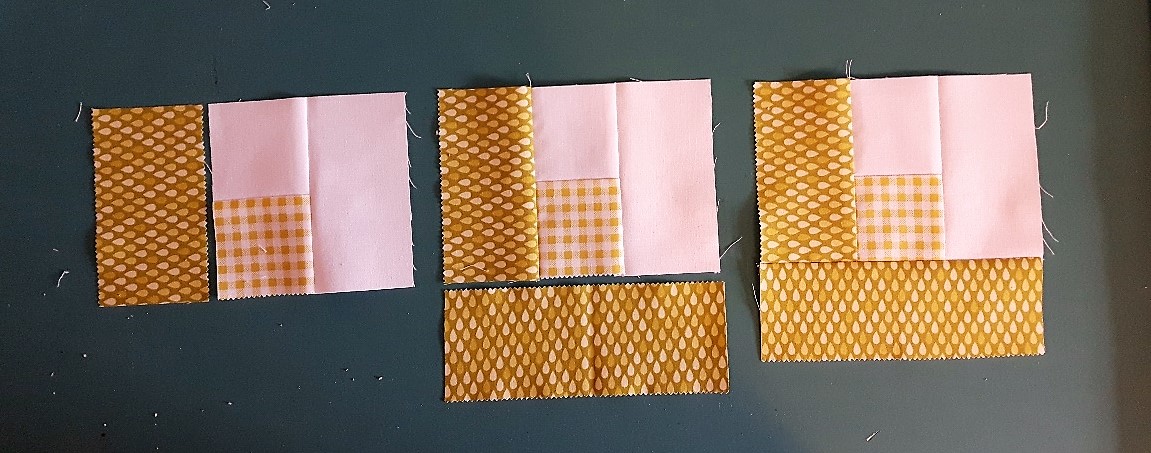
- Sew a different fabric set of (4) 2 1/2" x 6 1/2" Outer Tulip Petal pieces to the previous unit. Remember, we always sew opposite the background fabric. Press away from the bud.
- Using a matching set of (4) 2 1/2" x 8 1/2" Outer Tulip Petal pieces, sew to the adjacent side of the unit. Press away from the bud.
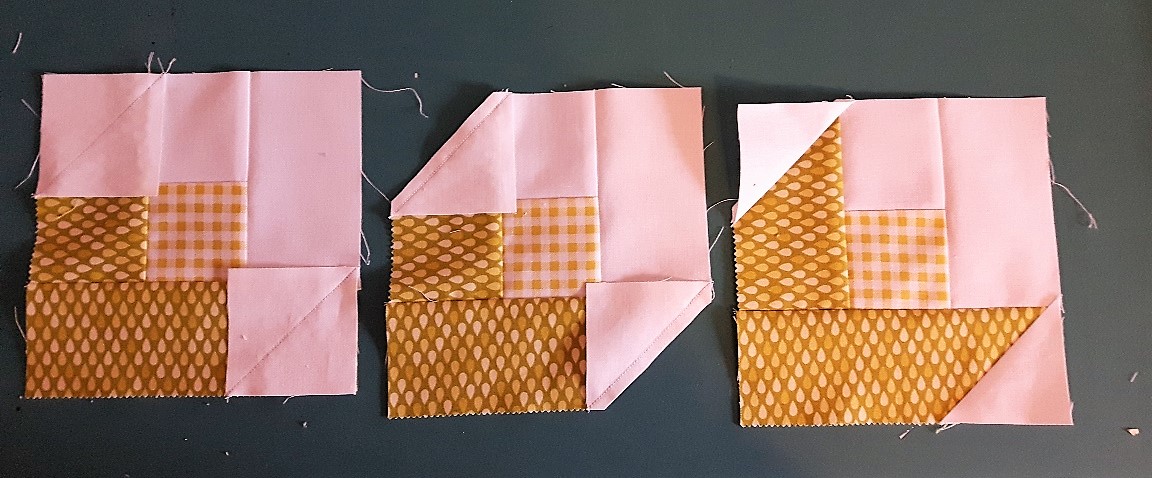
- Place a marked 2 1/2" square on the outer end of the Inner Tulip Petals. Sew on the drawn line and trim away the excess leaving 1/4" from the sewn line.
- Each Tulip block uses 4 identical units. Go ahead and make all 16 sets.
Tulip Block Assembly
You need the following to assemble a finished Tulip Block:
- (4) 2 1/2" x 8 1/2" background - block sashing
- (1) 2 1/2" centre block square.
- (4) matching tulip units.
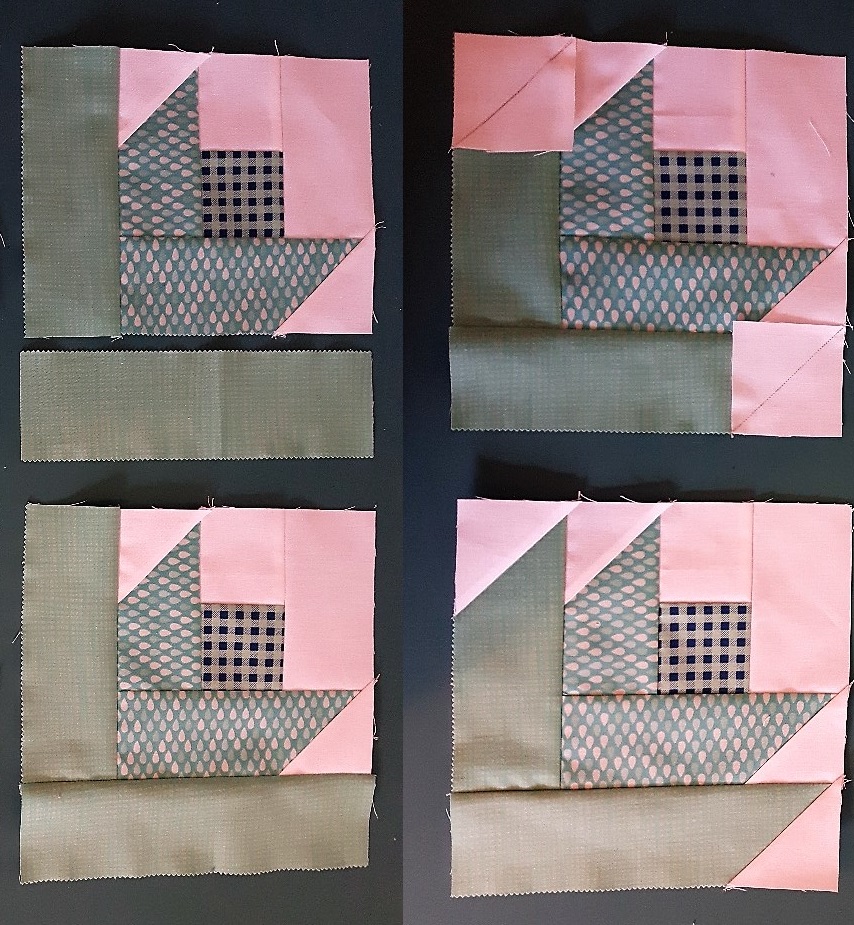
Assemble the Block using the photo below for reference. Be sure to rotate your tulip units so the base meets in the centre and the buds are in the corners. 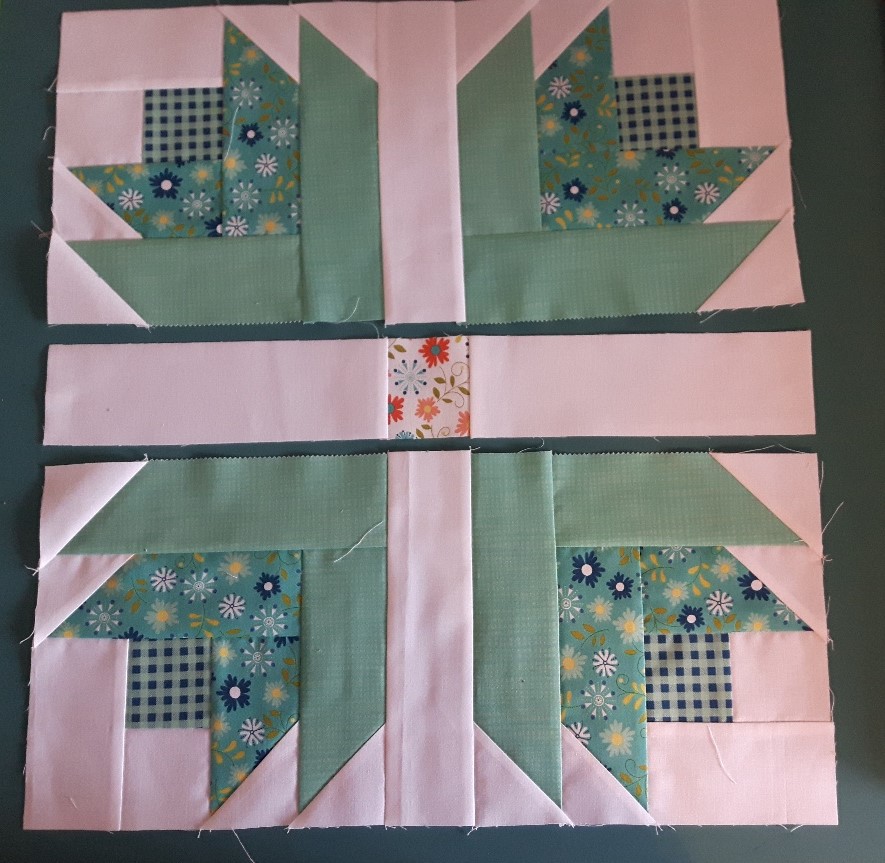
Repeat to make 16 Tulip Blocks.
Quilt Block Layout and Sashing
Arrange your blocks in a way that looks good to you. A design wall will be helpful, but you can use any flat space available.

I added sashing between my blocks and rows. My completed Blocks measured 18 1/2" x 18 1/2". Add a 2 1/2" x 18 1/2" sashing piece between each block in a row. Also add to both ends of each row. Repeat for all 4 rows. ( SS = sashing strip, T = Tulip Block)
SS + T + SS + T + SS + T + SS + T + SS.
We also need to assemble sashing/cornerstones between the rows. the following formula is how to assemble the sashing rows: ( C = cornerstone, SS = sashing strip)
C + SS =+ C + SS + C + SS + C + SS + C.
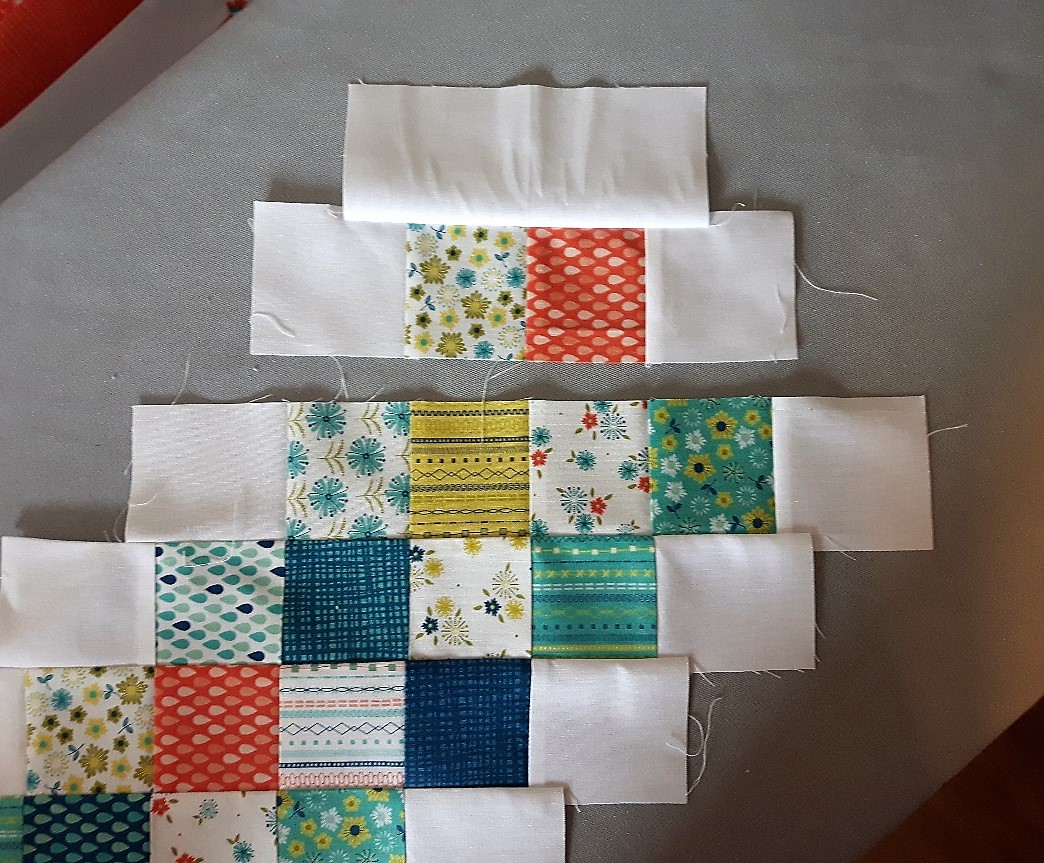
Pieced Borders Assembly
Using the remaining coloured strips from your Jelly Rolls and the leftover pieces from the inner and outer petals:
- Sew stripsets of 4 colors. Subcut into (120) 2 1/2" width segments.
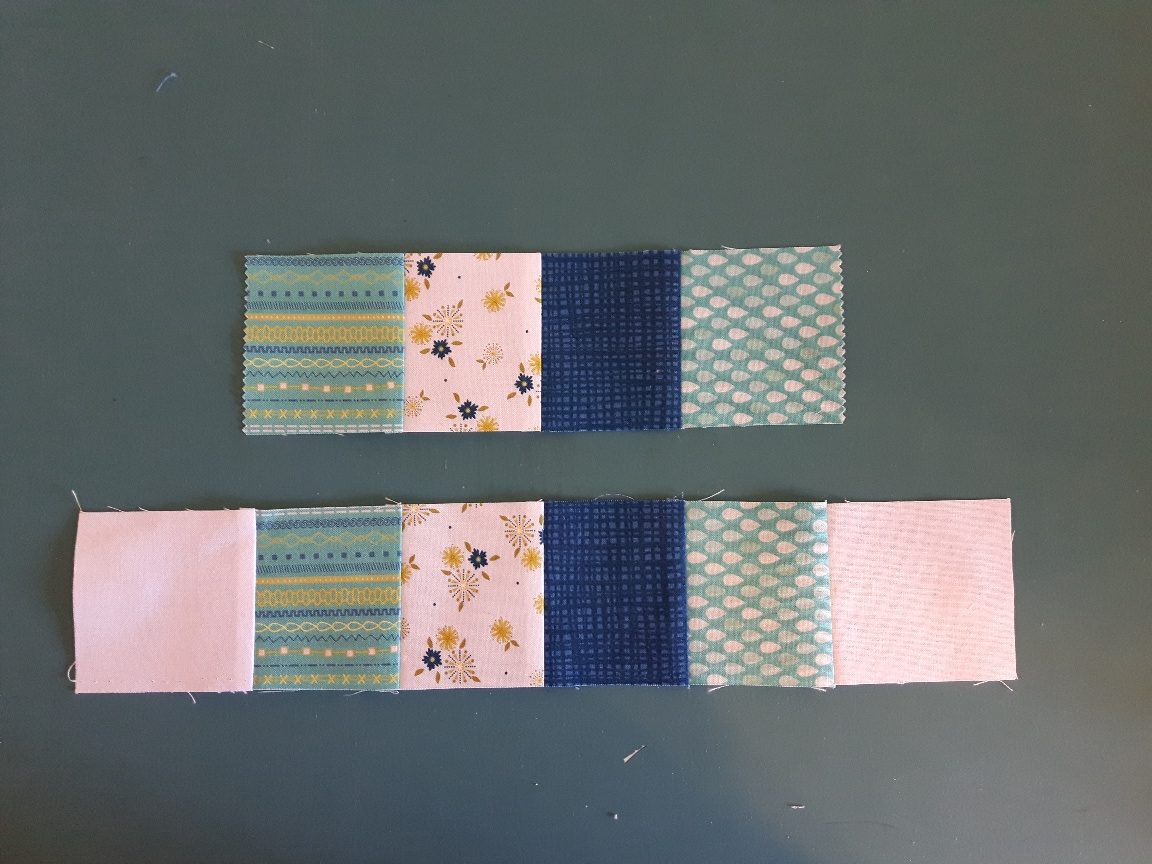
- Sew the 2 1/2" x 2 3/4" background pieces to both ends of each segment like the photo above.
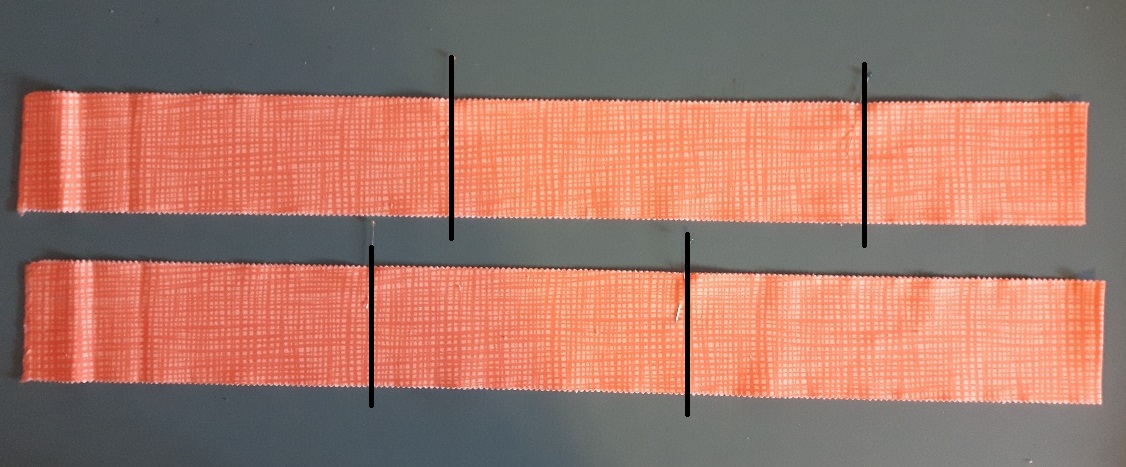
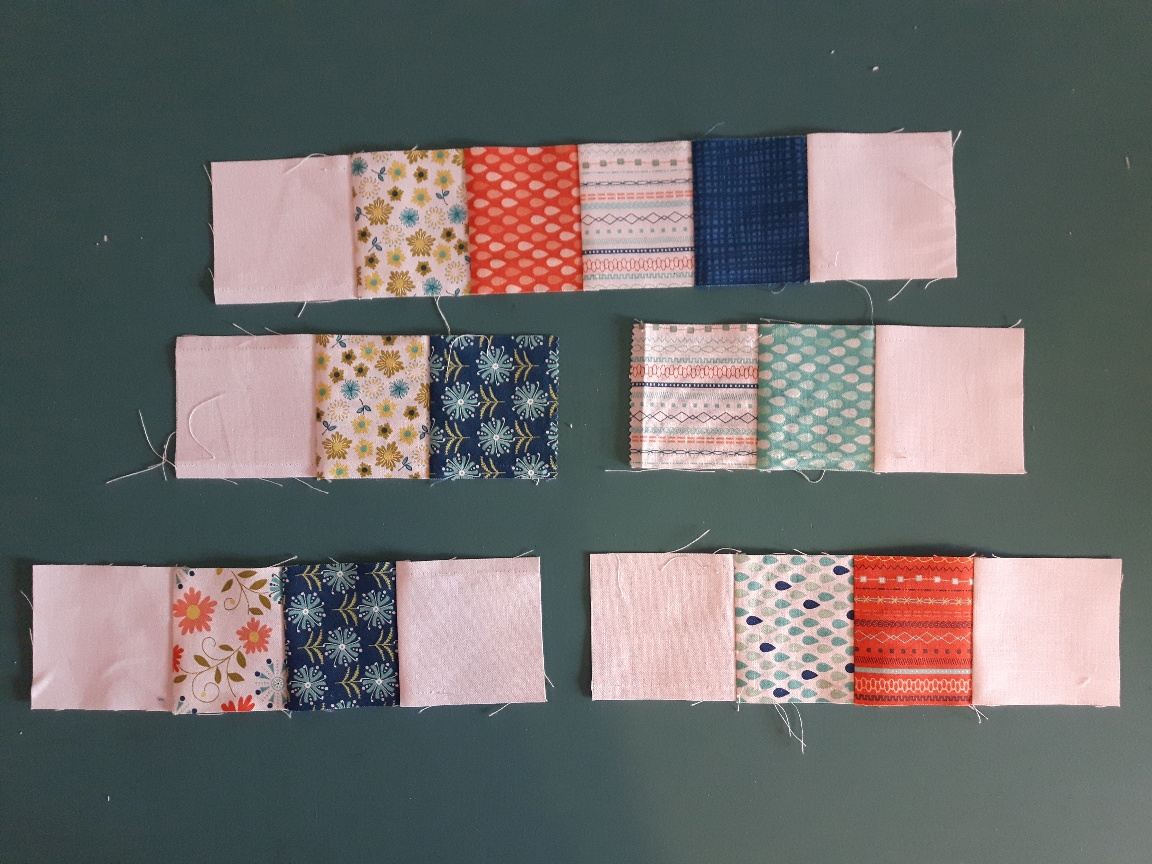
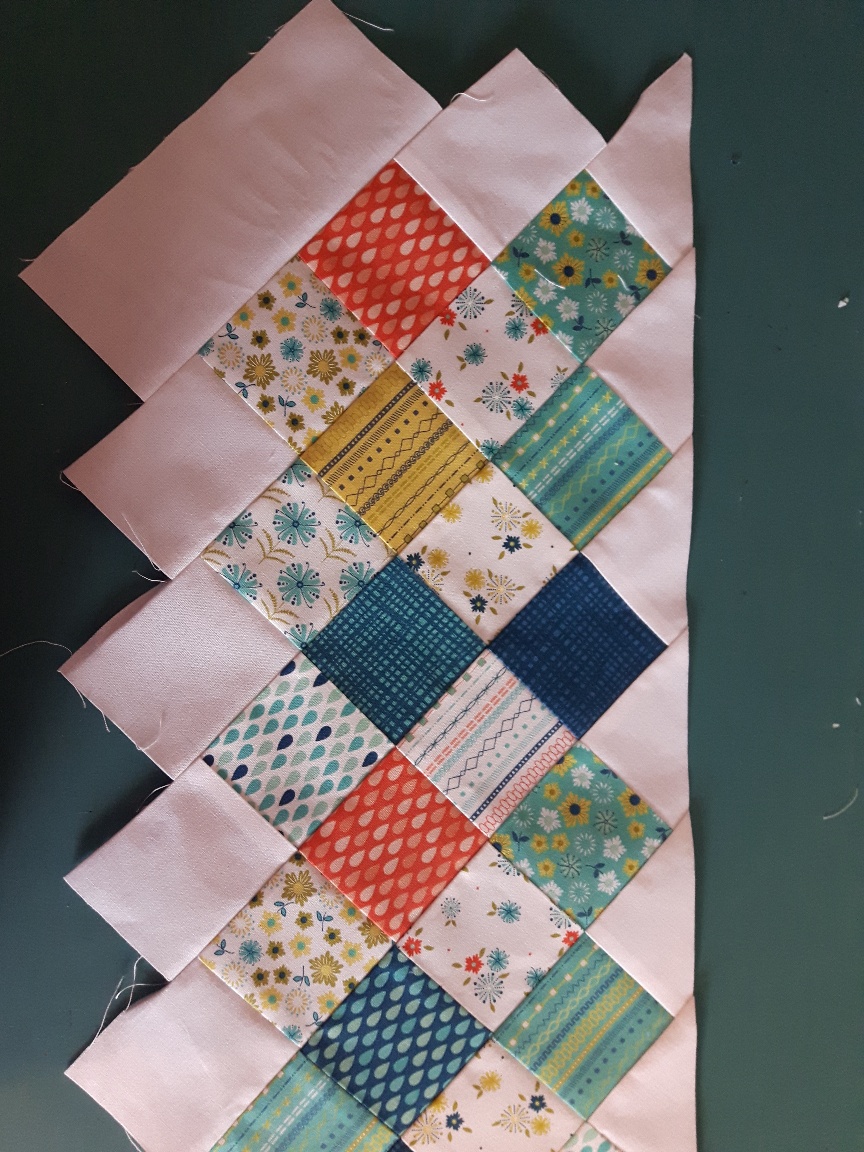
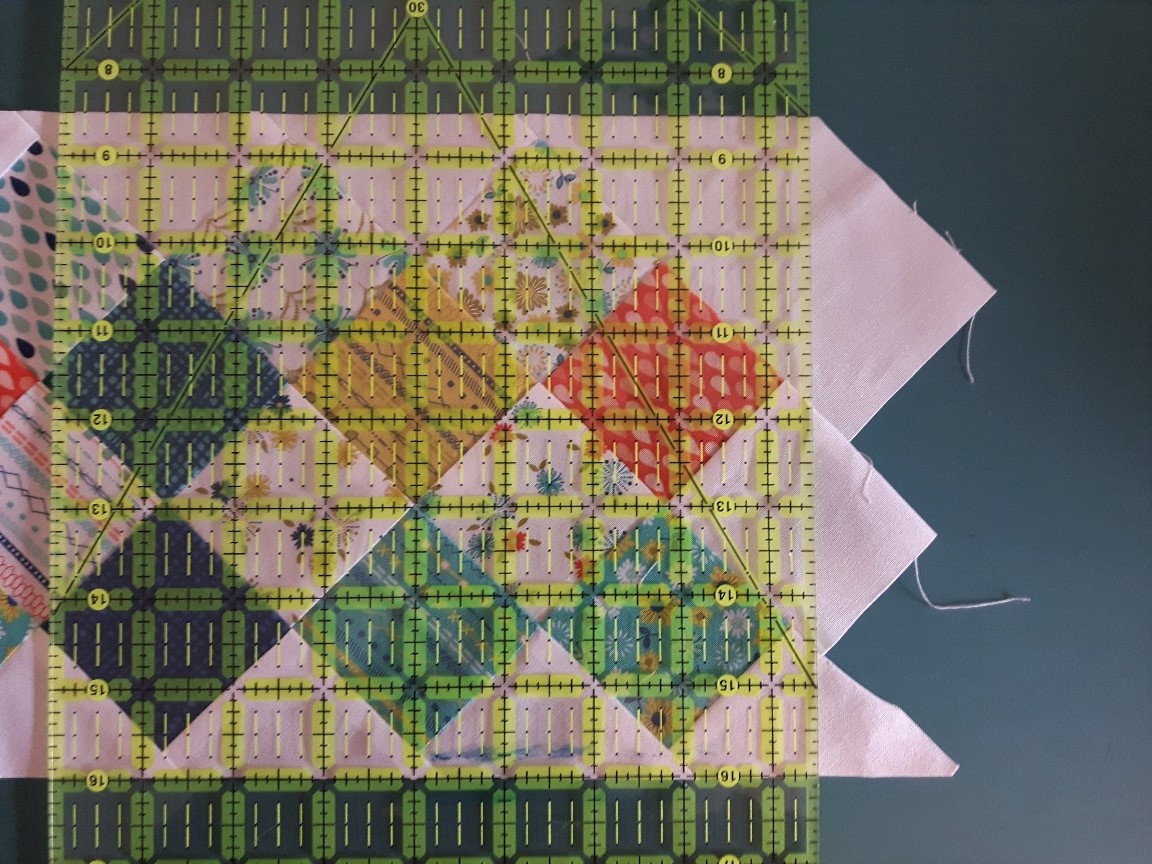
- Sew the segments together so they create a set of stairs. NOTE: Be sure they all follow the same direction (either make your stairs go up OR down from your left. The photo below shows 2 sets sewn correctly (going down from the left), while the circled set goes in the opposite direction, which is WRONG. Be consistent.

- Sew together 27 segments for each side, for a total of (4). I pressed all in the same direction, using starch to make sure everything is as flat as possible.
- Next we will disassemble 8 leftover segments to make the ends for each border. Separate each of the 8 segments in half.
- Sew an additional 2 1/2" x 2 3/4" background piece to the end that doesn't have one.
- Using the 3" x 6" rectangles of background, align and sew to the top of the altered segments, by finding the middle point of both units.
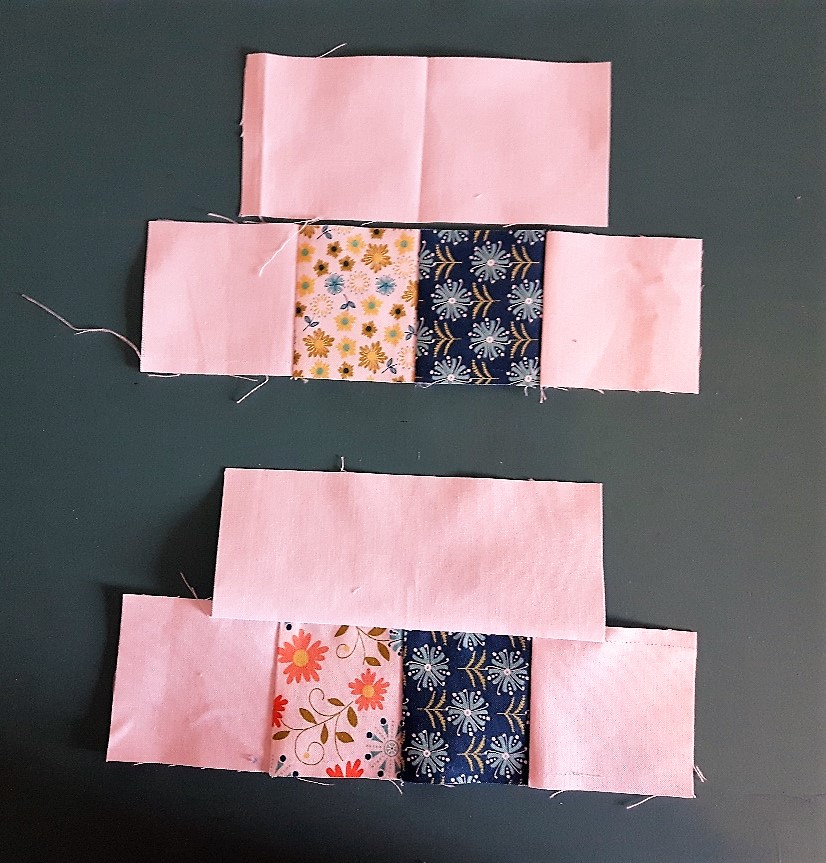
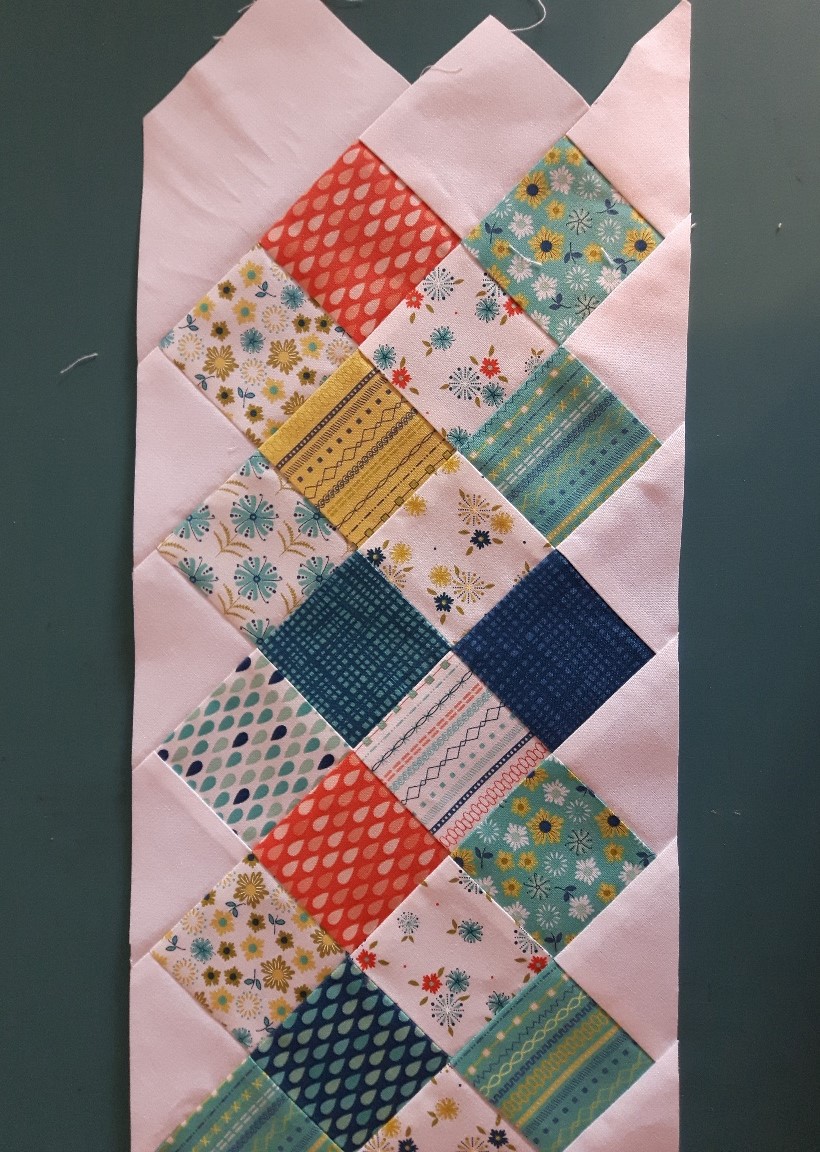
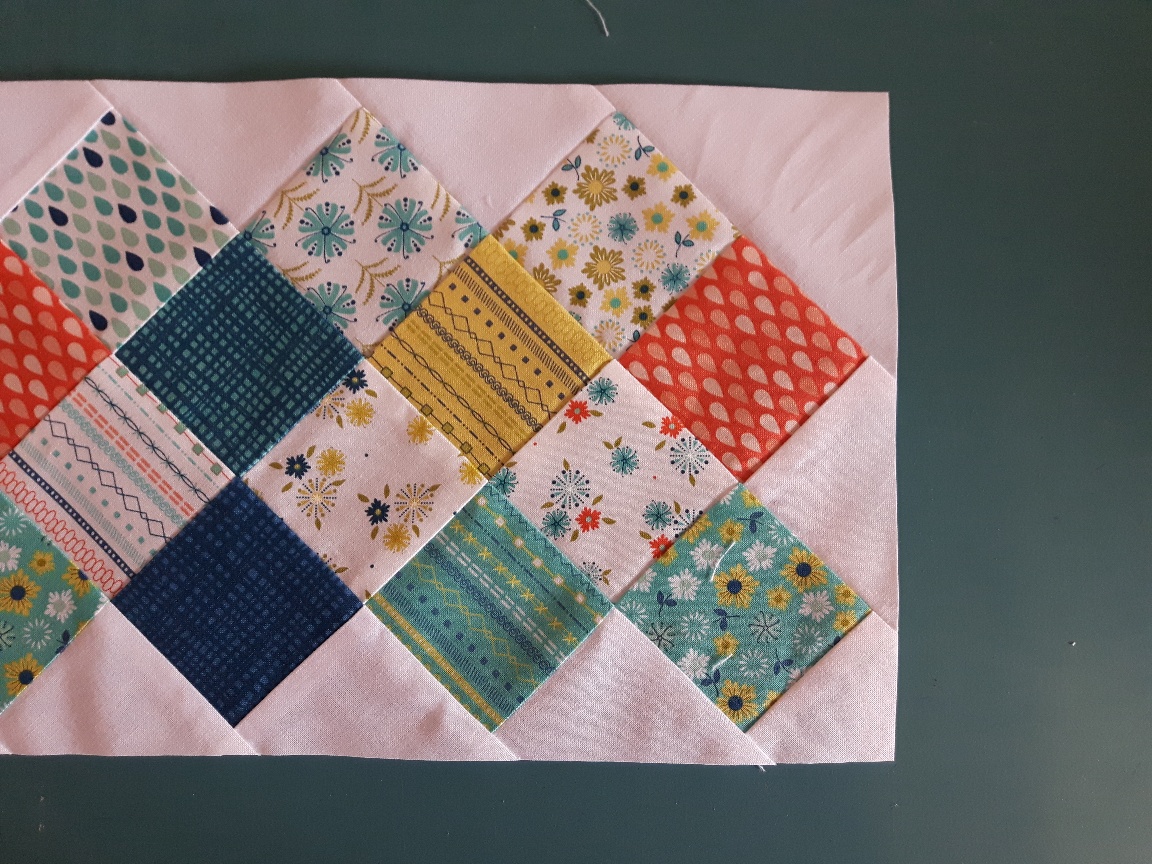
- Attach the corner units to each end of the 27 segments sewn previously. The border section should look like the photo below.
- Align your 8 1/2" x 24" ruler along the edge of the border making sure the 1/4" line is where the points cross.
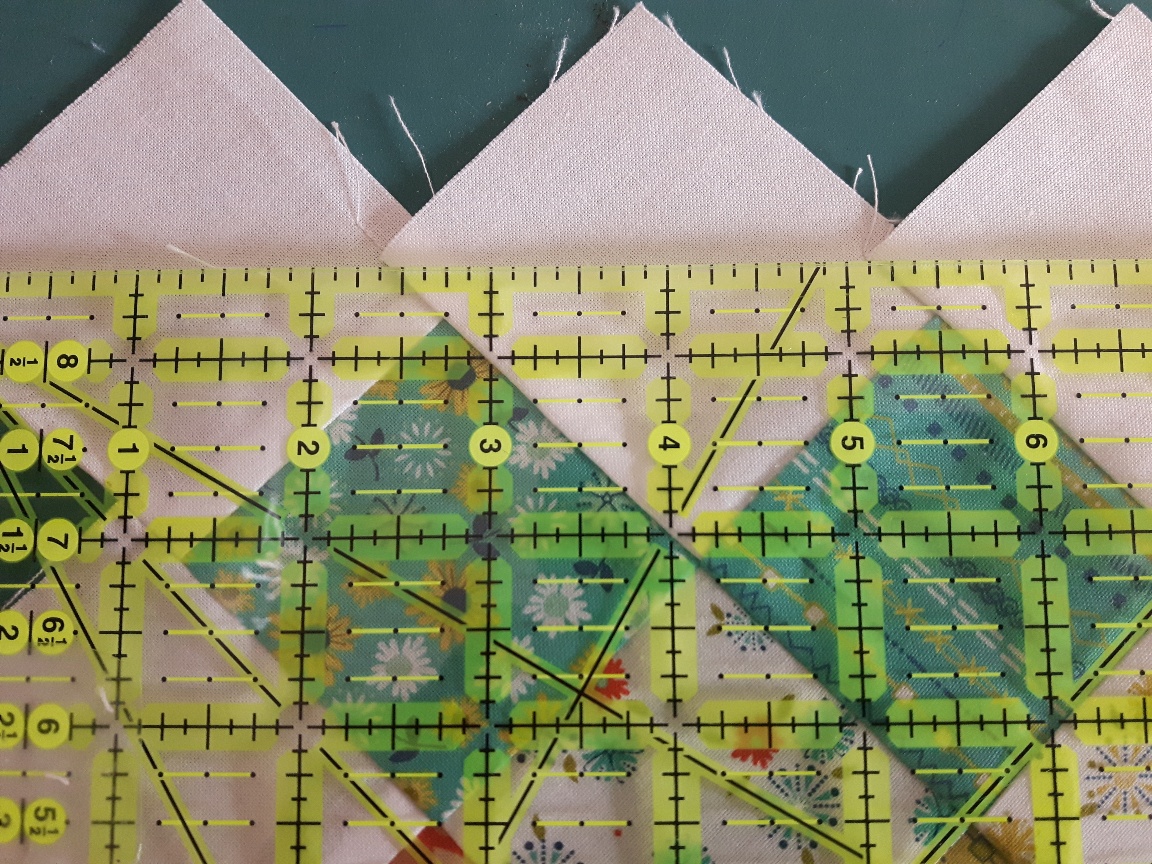
- Cut away the excess triangles, so the edge is straight.
- Repeat for the opposite side.
- Next, align the ruler so that the edges are straight and the end is 1/4" past the points like the photo below.
- Cut away the excess.
- You can now assemble the sides to the quilt. Start by finding the center of the quilt and the border. Pin. Next, align the ends and pin. Continue easing and pinning until the border and quilt are evenly pinned together. NOTE: if one side is bigger than the other and causes "ruffles", place the bigger side facing down. The feed dogs will ease the slack. Sew and press.
- Repeat for the opposite side.
- We are almost done!! Measure the width of your border segments. Cut 4 squares to that measurement (mine measured 7 1/2" " . Therefor I cut out (4) 7 1/2" squares.
- Attach a corner square to both ends of the remaining 2 borders. Sew and press.
- Sew the remaining top and bottom borders to the quilt using the same method as the 2 sides. Be sure to use lots of pins.
- Give the entire quilt a good press.
Binding
Cut out 10-11 strips x WOF using your desired width. I use 2 1/4" strips for my binding.
Baste, Quilt and Bind as desired.
![]()
This quilt finishes at 96" x 96".
I hope you feel inspired to play in your garden, fabric or otherwise. Be sure to check my blog post for tips on making a pieced backing. I would love to see your "Tulip Fields quilts" #tulipfieldsquilt, @catequilter.
My Tulip Fields Quilt was beautifully longarm quilted by Blueberry Cove Quilting Studio.
Thank You to Vanco Farms for inspiring this quilt and for the use of their fields for photography.
Cathy Victor @catequilter
http://meandmymumquilting.blogspot.ca
![]()
Posted in:
Comments