Welcome to Moda Fabrics!
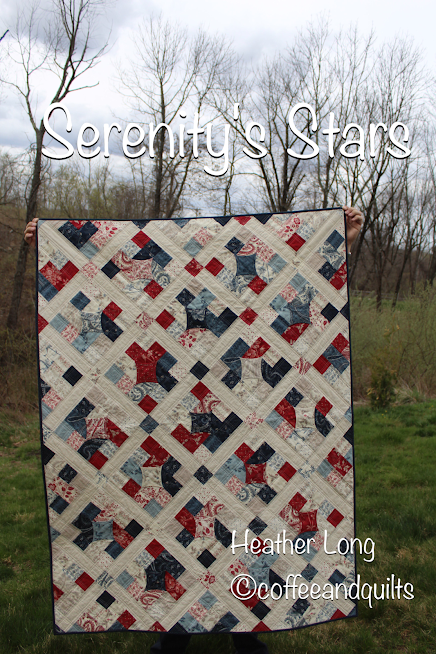
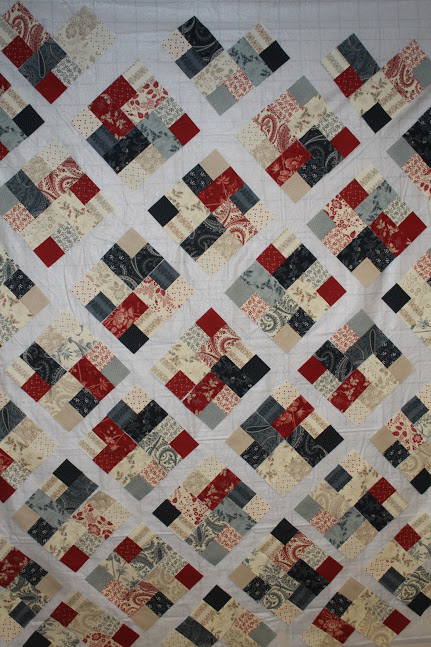
Serenity Stars Quilt
Serenity Stars Quilt
Published:
May 8 2018 - 23:00
![]()
I'm Heather of Coffee and Quilts. I'm thrilled to share this quilt today, you can read more of the story behind the design and the name of this quilt here on my blog. You can also find me on instagram @coffee_and_quilts.
This baby quilt uses a jelly roll, one charm pack, and some sashing fabric to create a fast quilt. Quickly strip piece the blocks, and then use a fun technique to create dimensional stars. This is a fantastic quilt to stretch your skills - applique, setting blocks on point, and 3-dimensional piecing! Be sure to read through the instructions first and make a test block before starting the quilt.
This quilt/project finishes at 43" x 58".
![]()

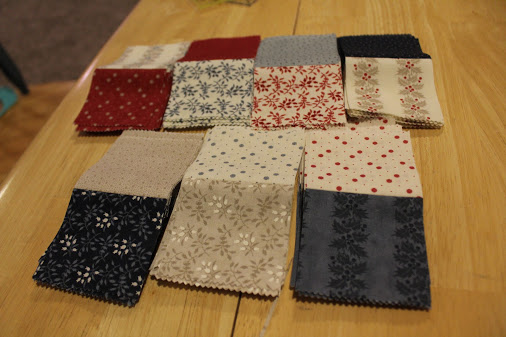
1 Charm Pack Holly Woods by 3 Sisters,
1 Jelly Roll® Holly Woods by 3 Sisters
3/4 yards background fabric Holly Woods by 3 Sisters 44177 11
2 2/3 yards backing fabric Holly Woods by 3 Sisters 44172 11
1/2 yards binding fabric Holly Woods by 3 Sisters 44177 16
![]()
Sew fabrics right sides together with a scant 1/4" seam allowance. These blocks can be bulky, pressing seams open can help minimize bulk and allow blocks to lay flatter. I pressed all my fabrics using Best Press prior to sewing, it helps keep seams crisp.
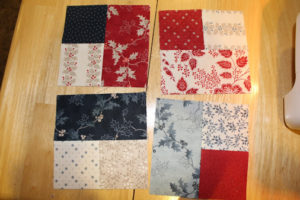
Unit Assembly, make 110. Choose 14 jelly roll strips for Step 1 and 14 for Step 3. (Chef's Note: I chose smaller prints for step 1 as they end up as smaller pieces and larger prints for Step 3. You may choose to sort by print size, fabric color, value, etc.)
Sew 2 jelly roll strips together along one long edge.

Press seam open.

Make 7 sets of 2 strips.
Subcut strip sets into 2 1/2" units.
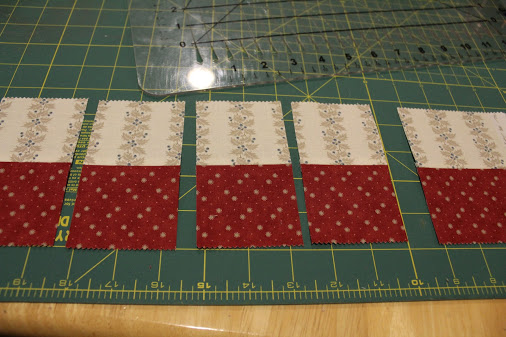
Each strip set yields 16-17 units, a total of 110 units is needed.
Sew units to jelly roll strip as shown.
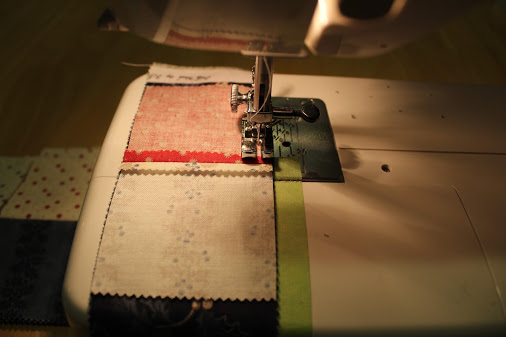
Align first unit and sew with scant 1/4" seam.

Leaving a small gap between units, continue adding units and sewing the length of the jelly roll strip.
Each strip will fit 8-9 units, I chose 8 for extra variety. Press seams open and trim units to 4 1/2" x 4 1/2"
If desired, arrange units as shown on a design wall, adjusting block arrangement
 Units on the design wall
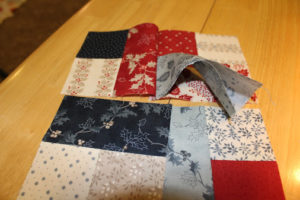
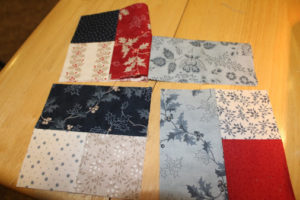
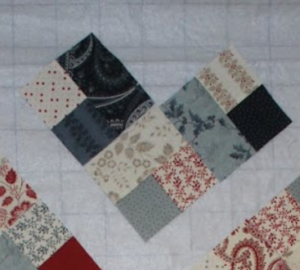
Block Assembly, make 17
- Choose four units and arrange as shown
 Unit orientation for block layout
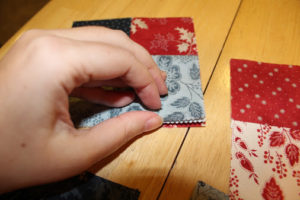
- Choose a charm square for the star. Fold in half wrong sides together and finger press crease, open and fold in half the other way and crease so both halves are creased
 Both halves creased
- With charm square folded in half wrong sides together, align raw edges with the bottom edges of the two top units, pin in place
 Raw edges aligned on bottom of top unit
 Other top unit added
- Sew center seam of top half of block
 Top seam sewn, double check that units are still aligned properly
- Holding the top units out of the way, align charm square raw edges with the top edges of the two bottom units, pin in place
 Top units held away, flip charm square down to align raw edges
 Raw edges of charm square aligned with the top edges of bottom units
- Sew center seam of bottom half of block
 Bottom seam sewn, the charm square will be suspended between the top and bottom
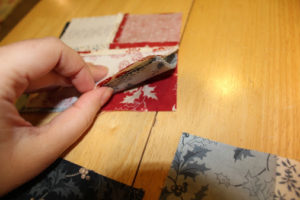
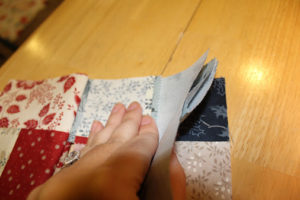
- (This next step is a touch tricky the first time you do it, but take your time and pin, pin, pin!) Open the charm square and fold in half the other way. Align the raw edges and pin in place.
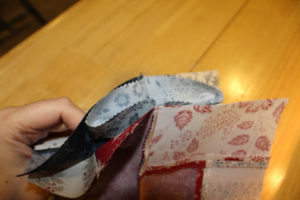 Open charm square and fold the other way
 Finger press top and bottom seams open as you align raw edges


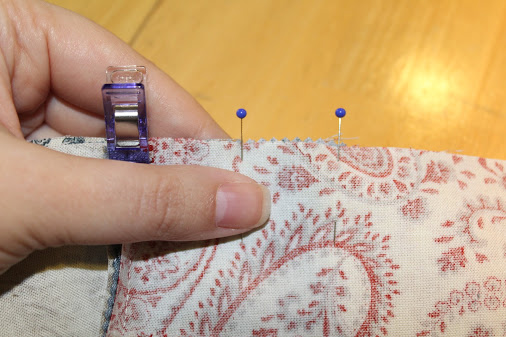
 A clip can help hold bulky seams together
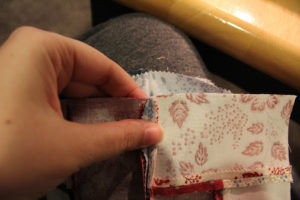
 Pin raw edges together. *note - the charm square edges can slip down, make sure they're fully aligned
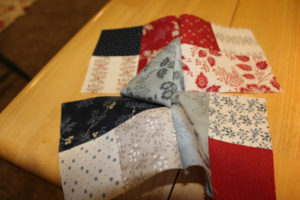
12. Sew final seam. Open and press block
 Final seam sewn. Block piecing is completed!
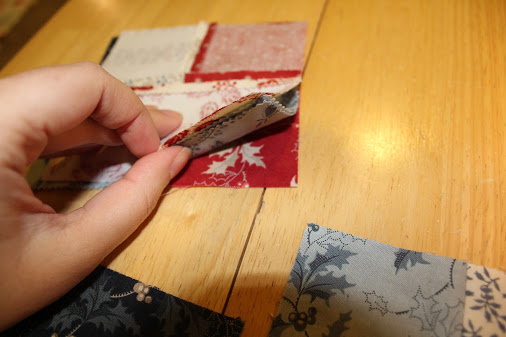
13. Gently fold loose bias edges of charm square towards the center of the block. Pin in place and stitch down. This stitching can be done by hand or machine. Decorative stitches or constrasting thread can add a special touch to each block.
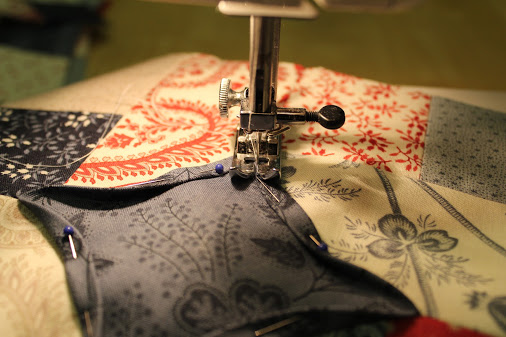 I used a straight stitch close to the edge for my blocks.
Setting Block Assembly, make 14
- Choose 3 units and arrange as shown. Sew units together and press.
 Alignment of units for setting blocks
- Trim units, measuring 1/4" beyond seam intersection
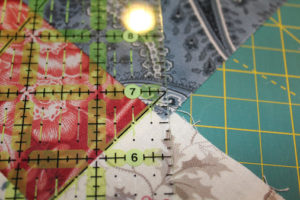 45-degree line on seam and 1/4" seam allowance left
- *optional - add a line of stay stitching 1/8" from edge to stabilize the bias edge. Be careful not to over handle and stretch bias edge.


Quilt Top Assembly
1. Cutting:
Sashing: from sashing fabric, cut (10) 2 1/2" strips. Subcut (48) 2 1/2" x 8 1/2" sashing units.
Corner stones: from remaining jelly roll strips and charm squares, cut (32) 2 1/2" squares.
2. Following layout, arrange blocks, setting blocks, sashing strips, and corner stones
 All arranged on design wall. *Note - I did not trim my outside corner stones prior to quilt top assembly.
3. Sew blocks together in rows, and then sew rows together.
4. Layer, baste, and quilt as desired. *notes on quilting - the center of the blocks has a lot of layers of fabric and can be quite bulky, take care in choosing quilting designs. The loose edges of the stars may catch on quilting feet if doing free motion quilting.
![]()
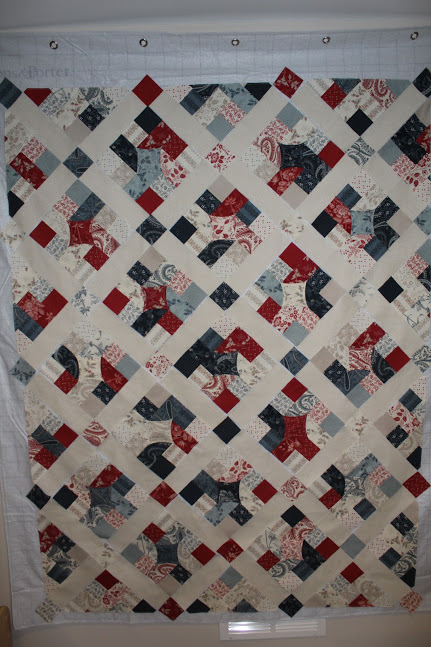
This quilt finishes at 43" x 58".
 Close up of a block once I completed quilting

I hope you enjoy making this quilt as much as I did. Please share your creations using #serenitysstars on social media and find my blog here. If you can't wait for these gorgeous Holly Woods fabrics to arrive in June 2018, this quilt is also beautiful in Victoria, also by 3 Sisters fabrics.
 How beautiful are these pinks and blues?
And the first collection I envisioned this quilt, Nest by Lella Boutique. I still need to get my hands on some of this fabric!
 These fabrics, um yes please!
Heather Long
coffeeandquilts.wordpress.com
![]()
Posted in:
Comments