Welcome to Moda Fabrics!
Step Down Quilt
Step Down Quilt
Hello all!
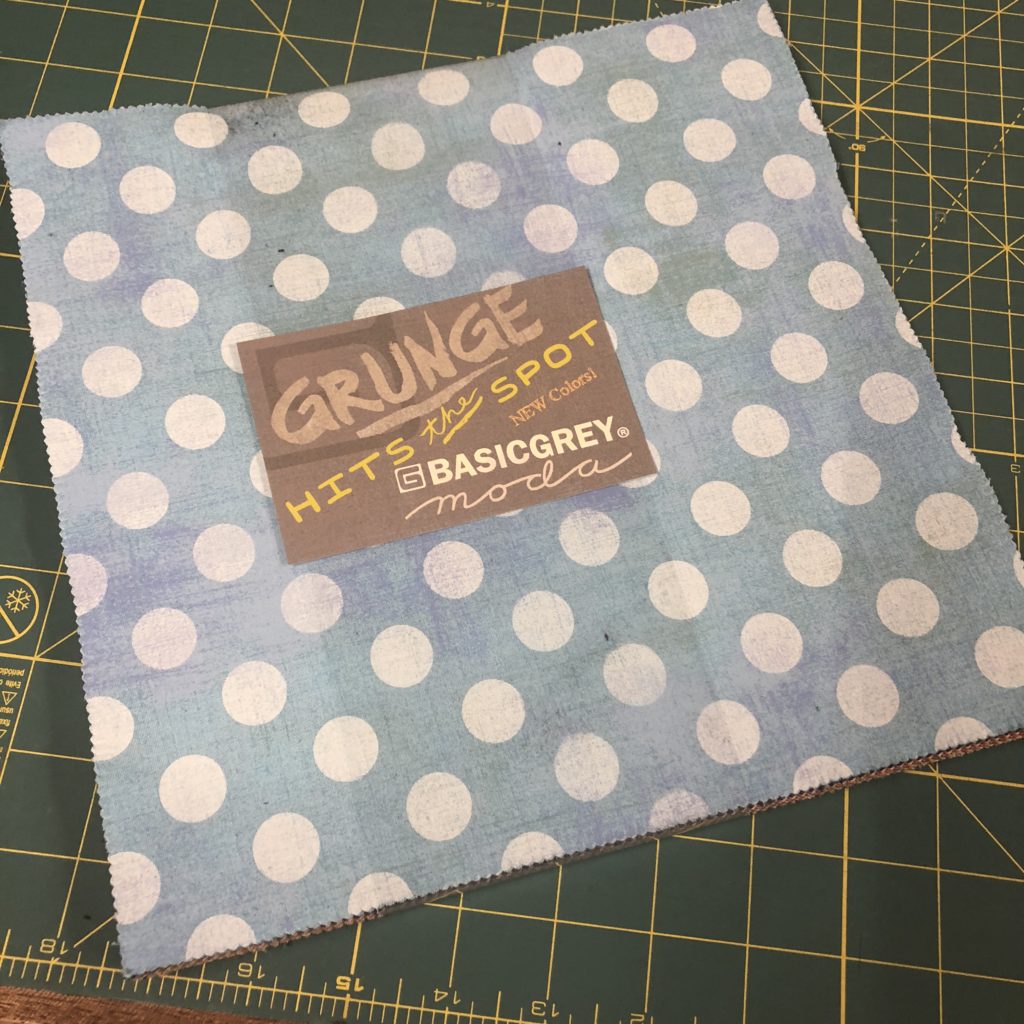
I’m thrilled to be back at the Bakeshop, baking up a quick layer cake quilt of the fabulous Moda Grunge Dots! This is a project for when you need a quick finish – think a birthday gift for a preschooler who has outgrown their baby blanket, or when you remember that you said you’d donate a quilt for the school auction that’s next week and you haven't actually started it yet. It goes together quickly and with the great options for layer cakes, it's a fun and fast finish!
This is made entirely of precuts – one layer cake and two contrasting solid jelly rolls. I went with basic black and white for the jelly rolls, but there are a ton of fun options in solid jelly rolls, so have a little fun with it! I was lucky enough to get to play with the Grunge Hits the Spot new colors for the layer cake, so it makes a fun final product.
This quilt/project finishes at 59" x 79".
1 layer cake Moda Grunge Hits the Spot by Basic Grey
1 jelly roll Bella Solids Black
1 jelly roll Bella Solids white
3/4 yd binding fabric
Backing fabric
First, select 20 layer cake square to use in your quilt. The remainder you can save for another project.
Next, take your white jelly roll strips and cut 40 pieces 10 inches long, and 40 pieces 14 inches long. Cut 25 pieces 2.5 inches by 2.5 inches
Take your black jelly roll, and cut 40 pieces 14 inches long.
For each layer cake you’re using, sew a 10 inch strip onto the top and bottom, then sew the 14 inch strips onto either side.
This is your basic block. The quilt is constructed in rows; Shifting the start of the rows creates the step down effect. Since the block centers finish at 9.5 inches, and not 10, the math doesn't work quite as perfectly as the chart, but it's easy to finish nonetheless.
Chose a layout for your squares. Keep in mind on row six the block will be cut in half, and half will be on either end of the row
For row 1: Assemble in order from left to right:
- 2.5 inch white square
- 14 inch black strip (horizontal)
- 2.5 inch white square
- 14 inch black strip
- 2.5 inch white square
- 14 inch black strip
- 2.5 inch white square
- 14 inch black strip
Row 2: Assemble in order from left to right:
- One block
- 14 inch black strip (vertical)
- One block
- 14 inch black strip
- One block
- 14 inch black strip
- One block
Row 3: Assemble in order from left to right:
- 14 inch black strip (horizontal)
- 2.5 inch white square
- 14 inch black strip
- 2.5 inch white square
- 14 inch black strip
- 2.5 inch white square
- 14 inch black strip
- 2.5 inch white square
For row 4: Assemble in order from left to right
- One block
- 14 inch black strip (vertical)
- One block
- 14 inch black strip
- One block
- 14 inch black strip
- One block
- 14 inch black strip
- 14 inch white strip
Row 5: Take one black strip and cut in half lengthwise. Assemble in order from left to right:
- Half length of a 14 inch black strip (horizontal)
- 2.5 inch white square
- 14 inch black strip
- 2.5 inch white square
- 14 inch black strip
- 2.5 inch white square
- 14 inch black strip
- 2.5 inch white square
- Half length of a 14 inch black strip
Row 6: Take one block and cut it exactly in half. Assemble in order from left to right:
- Half block
- 14 inch black strip (vertical)
- One block
- 14 inch black strip
- One block
- 14 inch black strip
- One block
- 14 inch black strip
- Half block
Row 7: Take one black strip and cut in half lengthwise. Assemble in order from left to right:
- Half length of a 14 inch black strip (horizontal)
- 2.5 inch white square
- 14 inch black strip
- 2.5 inch white square
- 14 inch black strip
- 2.5 inch white square
- 14 inch black strip
- 2.5 inch white square
- Half length of a 14 inch black strip
Row 8: Assemble in order from left to right:
- 14 inch white strip (vertical)
- 14 inch black strip
- One block
- 14 inch black strip
- One block
- 14 inch black strip
- One block
- 14 inch black strip
- One block
Row 9: Assemble in order from left to right
- 2.5 inch white square
- 14 inch black strip (horizontal)
- 2.5 inch white square
- 14 inch black strip
- 2.5 inch white square
- 14 inch black strip
- 2.5 inch white square
- 14 inch black strip
Row 10: Assemble in order from left to right
- One block
- 14 inch black strip (vertical)
- One block
- 14 inch black strip
- One block
- 14 inch black strip
- One block
- 14 inch black strip
Row 11: Assemble in order from left to right:
- 14 inch black strip (horizontal)
- 2.5 inch white square
- 14 inch black strip
- 2.5 inch white square
- 14 inch black strip
- 2.5 inch white square
- 14 inch black strip
- 2.5 inch white square
To assemble the rows:
Rows 1 and 2 are pretty straight forward - line up at the top left, and sew together. Trim off any excess from Row 1 to match the width of Row 2. (Row 2 is the baseline width of the quilt.)
For all the other rows, group them in two, starting with an odd number, so rows 3 and 4, 5 and 6, etc.
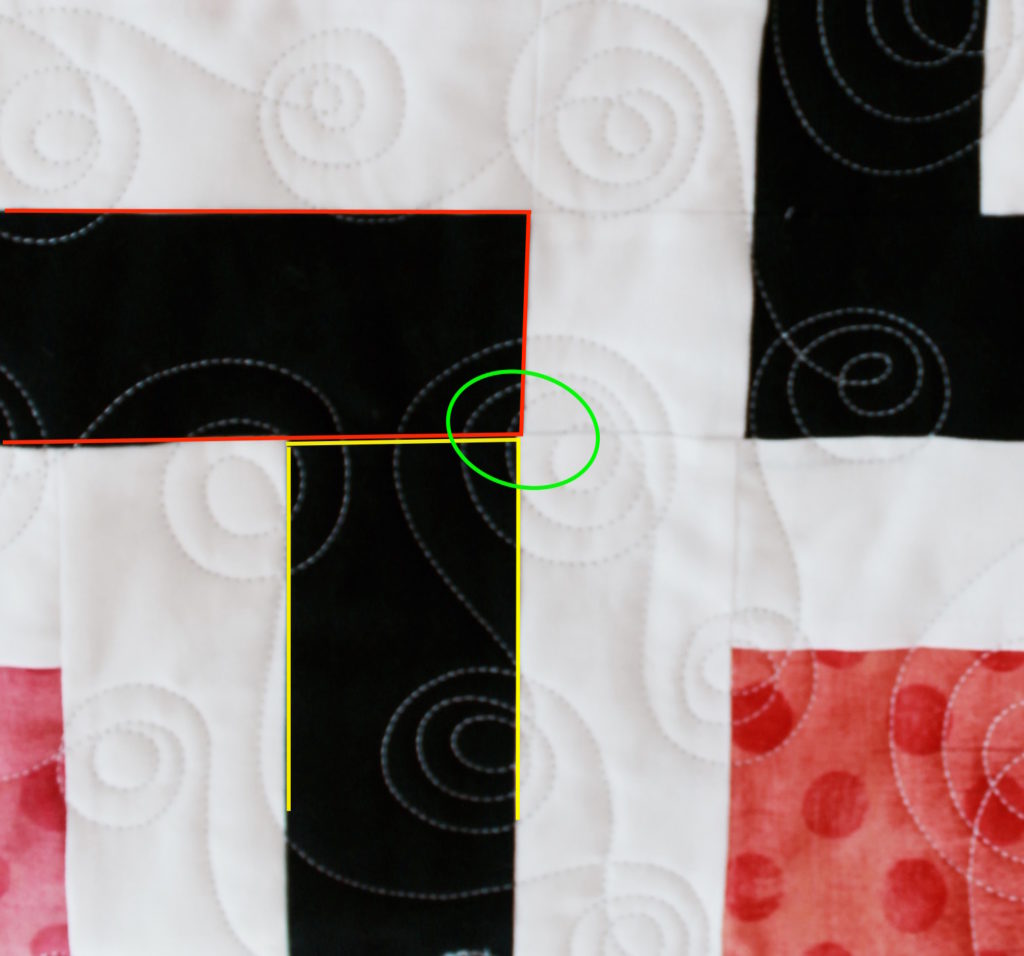
As I mentioned before, the math doesn't work perfectly on the sides of the quilt because the block centers finish at 9.5, so we're going to line up key points, and then pin out to the edges and sew. For the odd even pairs, such as rows 3 and 4, align the RIGHT end of a black piece in the odd numbered row (outlined in red) with the RIGHT side of one of vertical 14 inch black piece in the even numbered row (outlined in yellow). These points should match up along the all of the blocks, although the edges may not be equal.
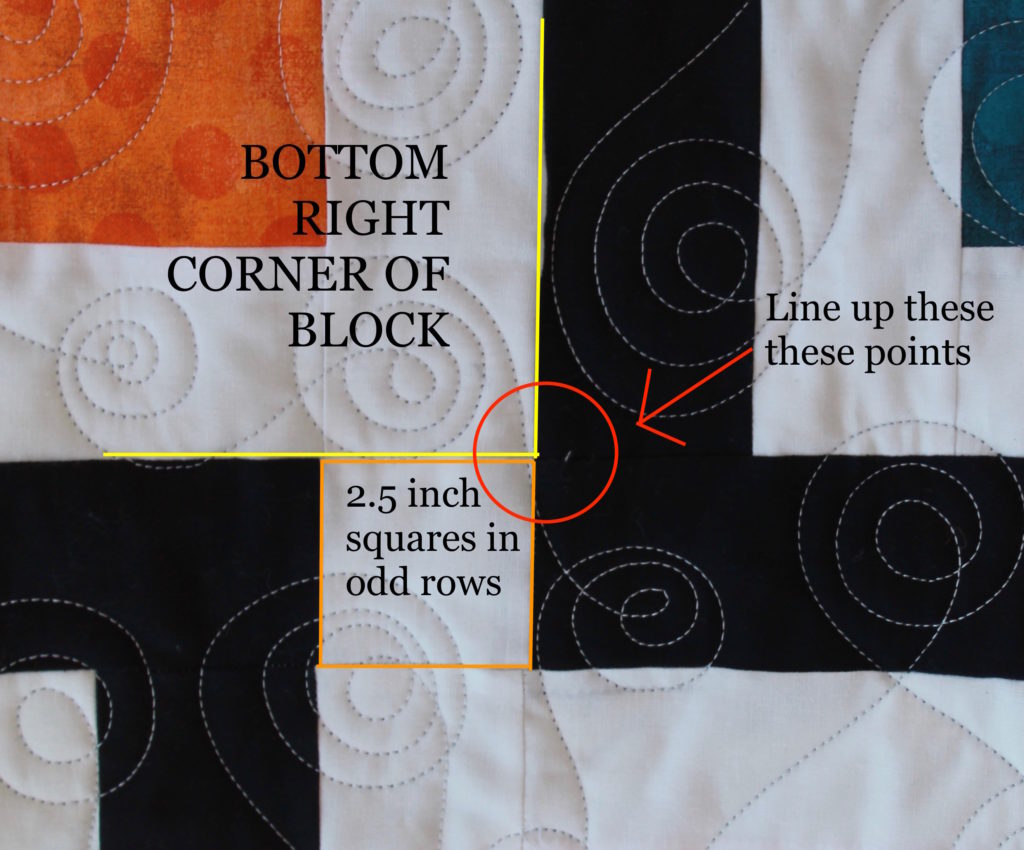
When you've sewn all of the odd/even pairs, begin assembling those into your quilt top. On the bottom right corner of the blocks in the even number rows, align the bottom right corner (outlined in yellow) to the right side of the 2.5 inch squares in the odd row below (outlined in orange). Line up these points, and pin out to the edges and sew the rows together.
Continue on until you've completed all the quilt top. Your edges will be uneven; using the Row 2 as your baseline, trim the excess on the remaining rows.
Baste and quilt as desired. I went with swirls to mirror the dots on the grunge and give it some lovely texture.
Cut 7 strips of binding to your preferred binding width, and bind. I used the grey grunge dot.
This quilt finishes at 59" x 79".
And that's it! A quick, easy finish for when you want to show off your favorite layer cake fabrics, with enough left over to make a second quilt. Stop by my blog for more pictures!
Brenna Goode
Quilting in the Heartland


Comments