Welcome to Moda Fabrics!
Garden Plots Quilt
Garden Plots Quilt
Published:
Jan 11 2018 - 23:00

![]()
Hello, fellow bakers! I'm Alison from Little Bunny Quilts back today sharing a brand new quilt featuring Voyage by Kate Spain! Lately, I've really enjoyed making and using big blocks to make quilts and this quilt uses only sixteen 18" blocks to make a very generous throw sized quilt! With no triangles to piece, this quilt would be easy to piece for a confident beginner with a mastery of the 1/4" seam. Let's put new blades in our rotary cutters and new needles in our machines and get to work!
This quilt finishes at 76" square.
![]()

One Jelly Roll of Voyage by Kate Spain
4.5 yards teal trellis print for backing + piecing
1/3 yard blue trellis print for piecing
1 yard pink trellis print for piecing and binding
One Jelly Roll Bella White -or- 3 yards Bella White
Note: All of the background piecing can be cut from a jelly roll -or- yardage -- it's your choice!
![]()
From your background, cut 32 rectangles 18.5" by 2.5" and 224 2.5" squares. Also cut 8 WOF strips 2.5" long -- these will be used as the outer border.
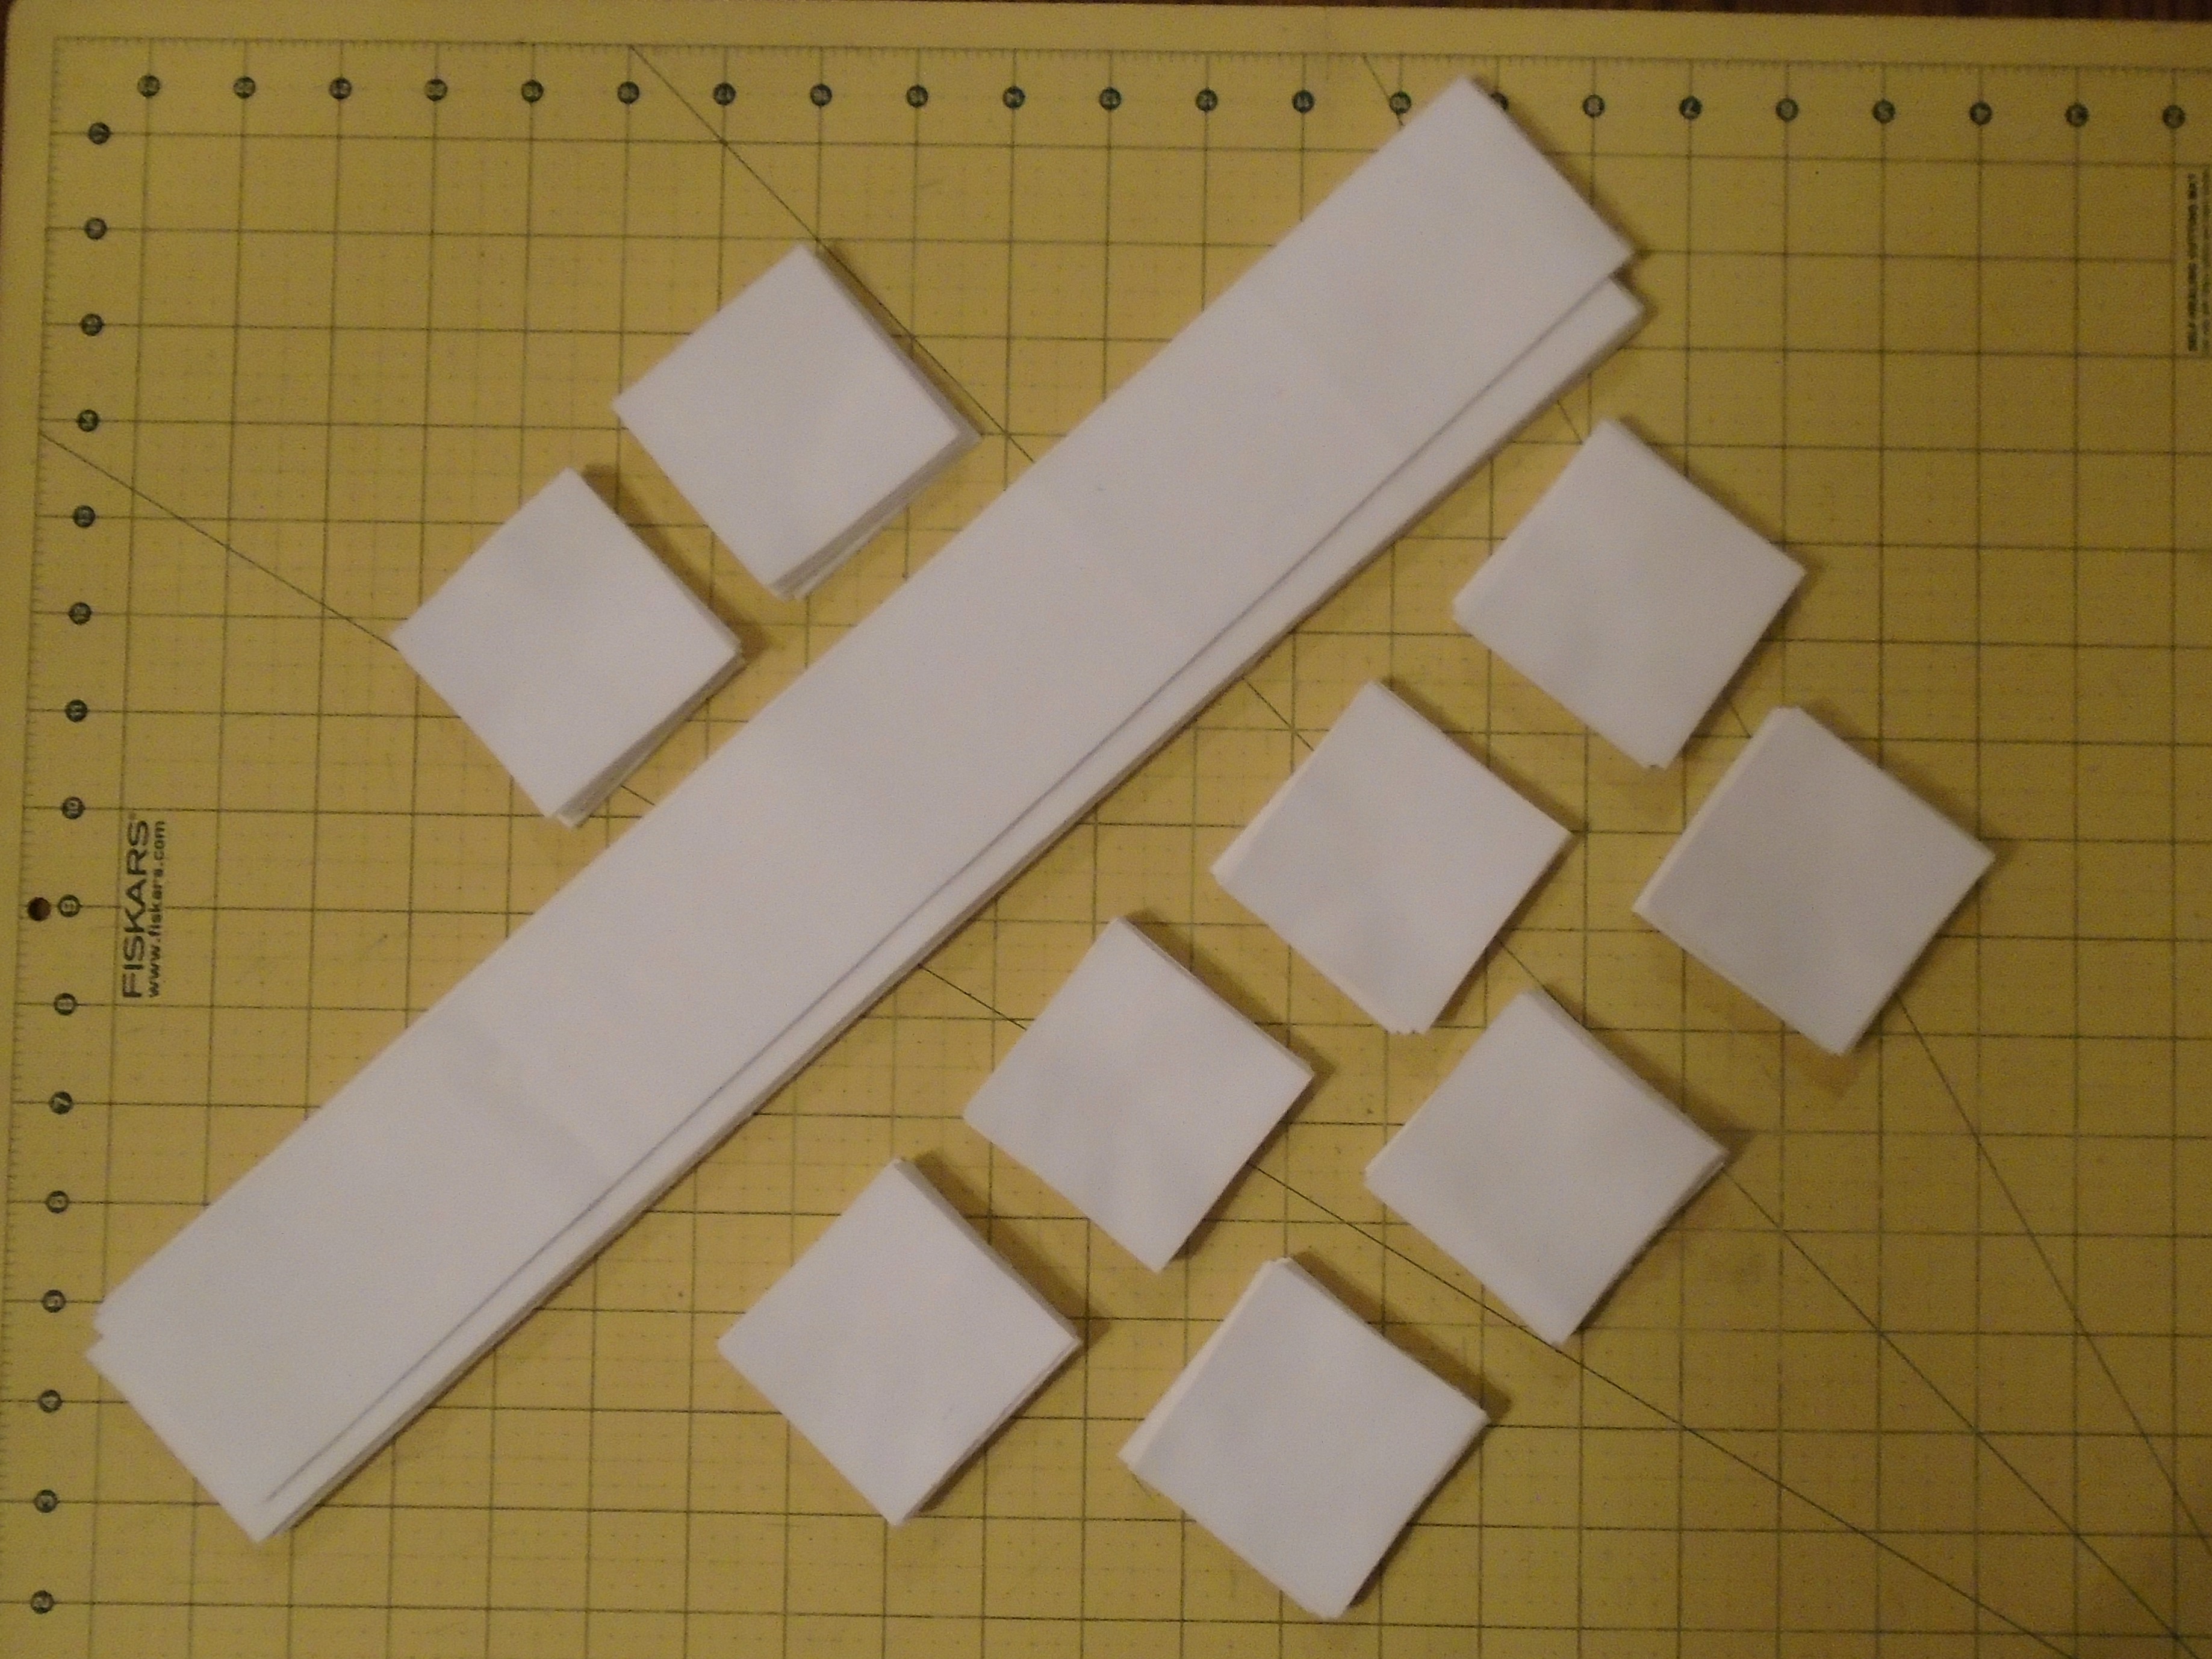
Cut a total of 16 rectangles 10.5" by 6.5" from your three focal fabrics. I cut 6 from the teal print and 5 each from the blue and pink prints. Set aside the remainder of the teal print to use for the binding. Set aside the remainder of the pink print for the border.
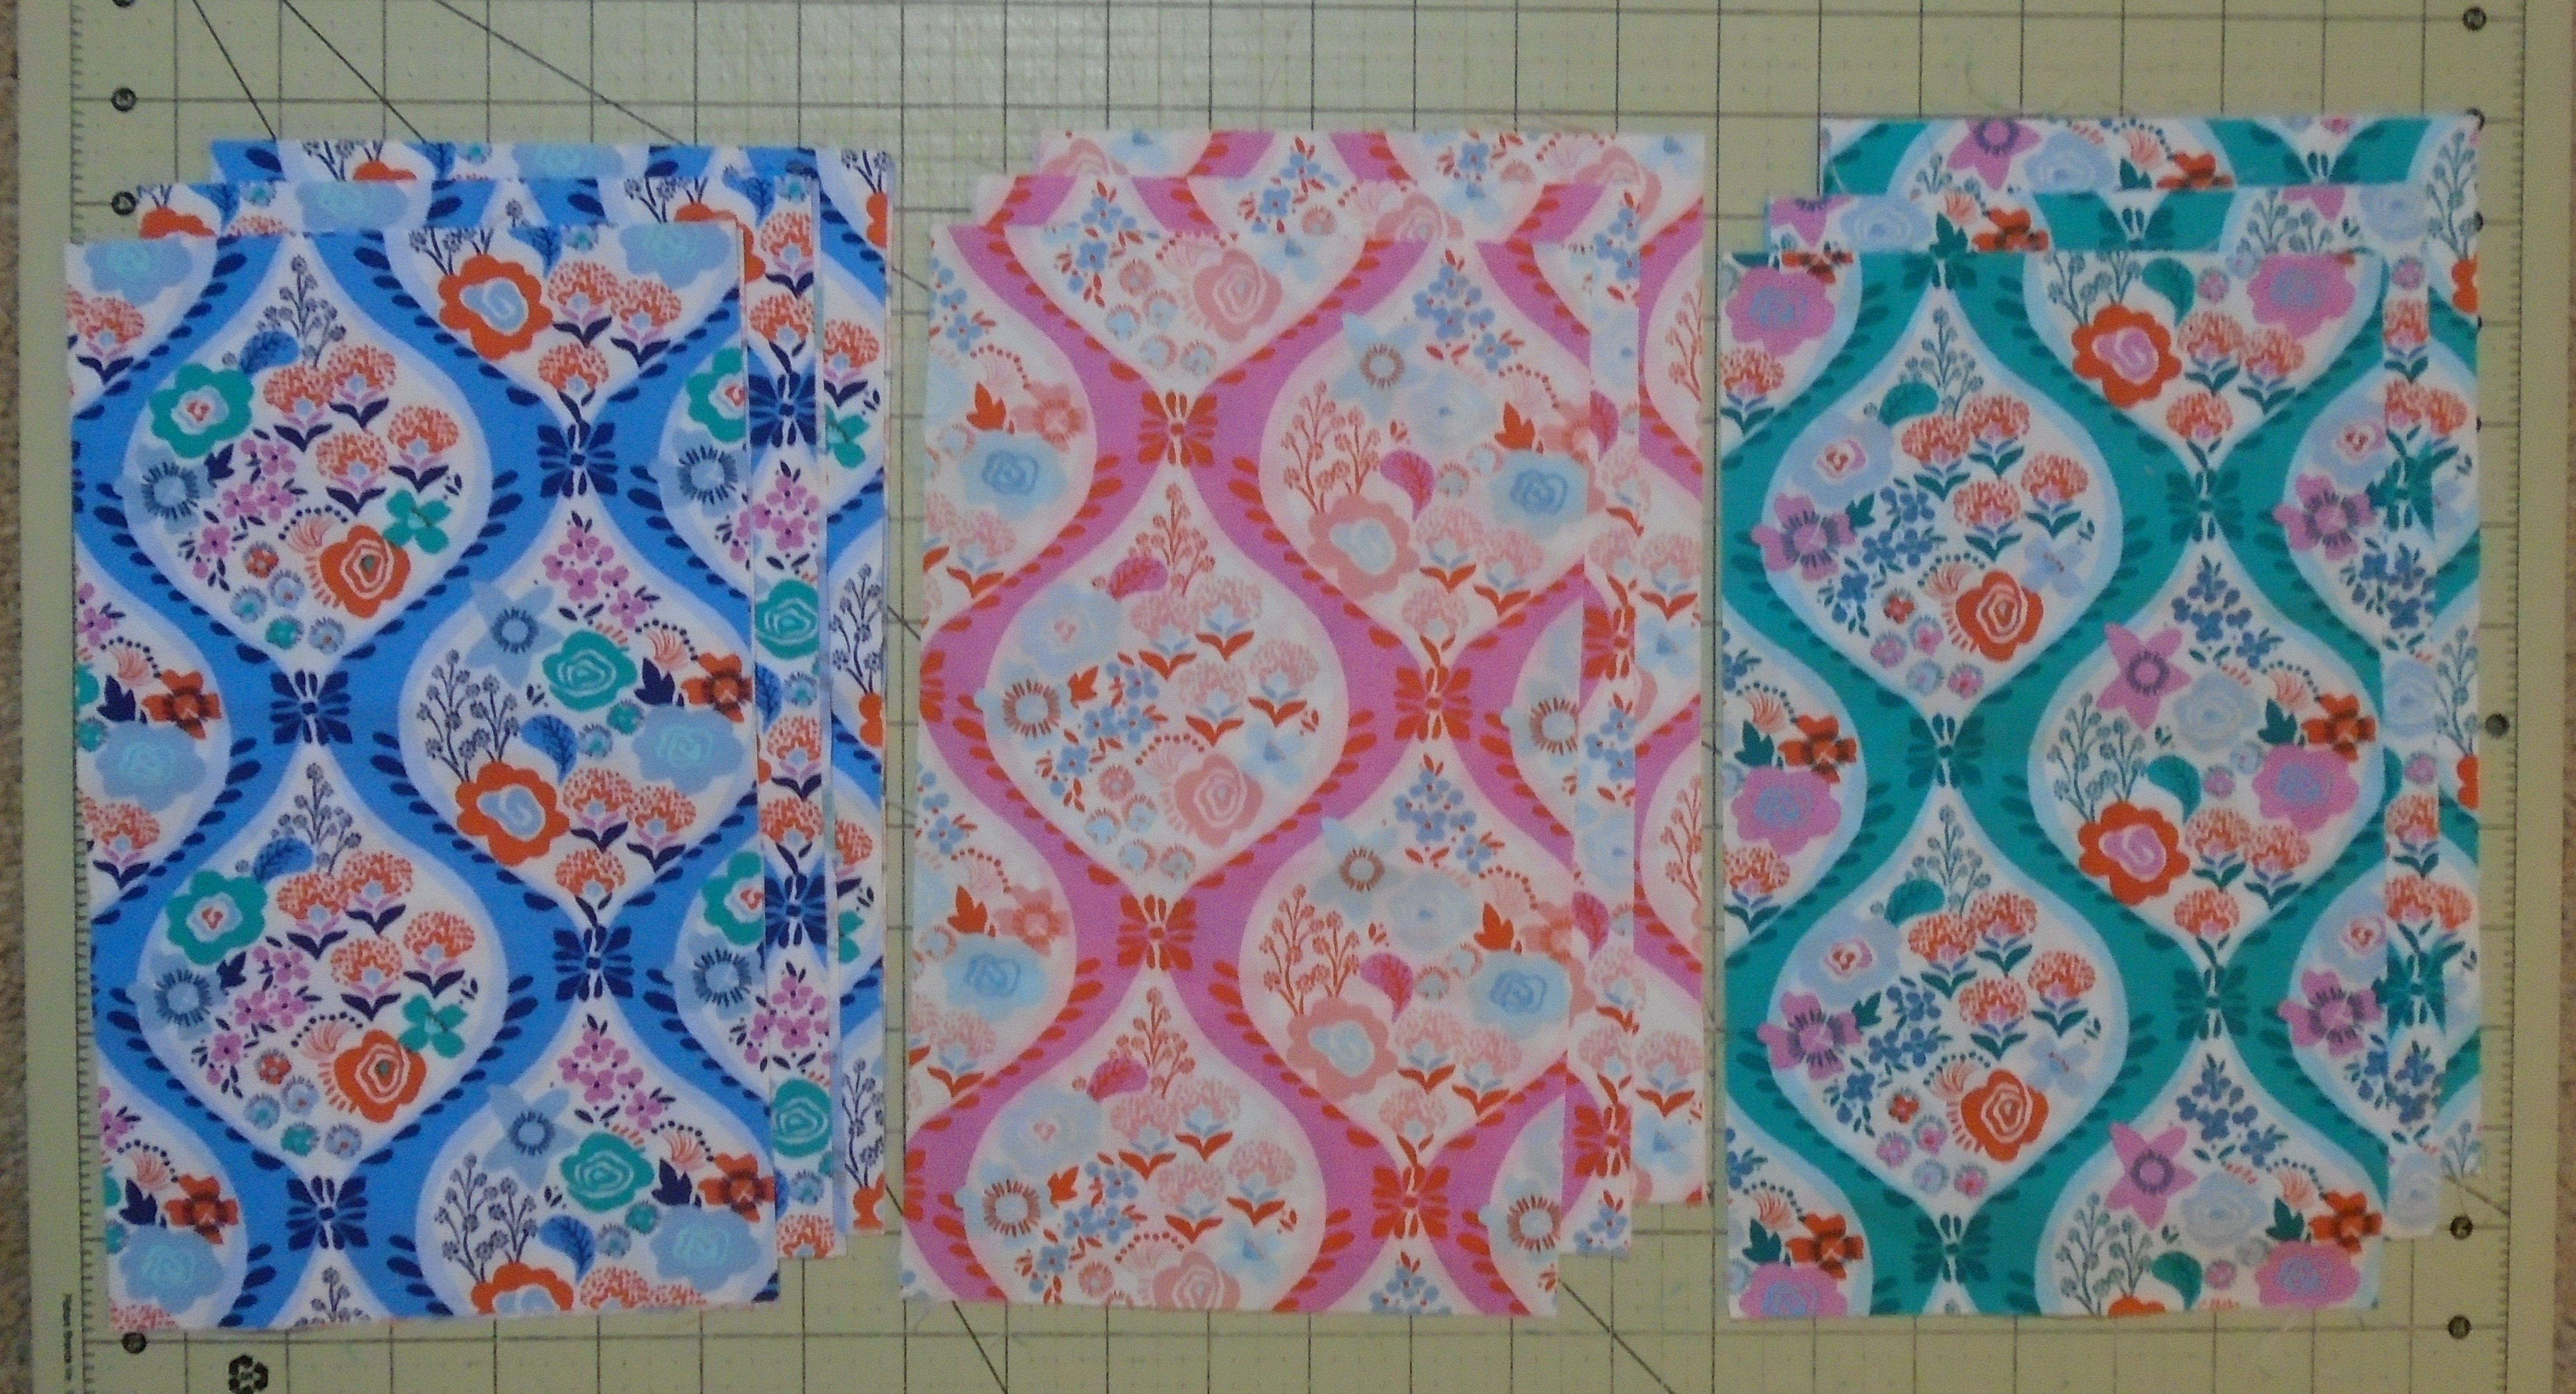
Pair together 16 strips - you will need two jelly roll strips for each block. If your jelly roll has a significant number of repeat fabrics, you can use the same fabric for both strips needed for each. Voyage precuts only have a few repeats so I chose to pair two fabrics with similar colorings but different prints, as shown below.

From each pair cut the following:
From strip A: cut two 14.5" x 2.5" rectangles and four 2.5" squares.
From strip B: cut two 10.5" x 2.5" rectangles and six 2.5" squares.

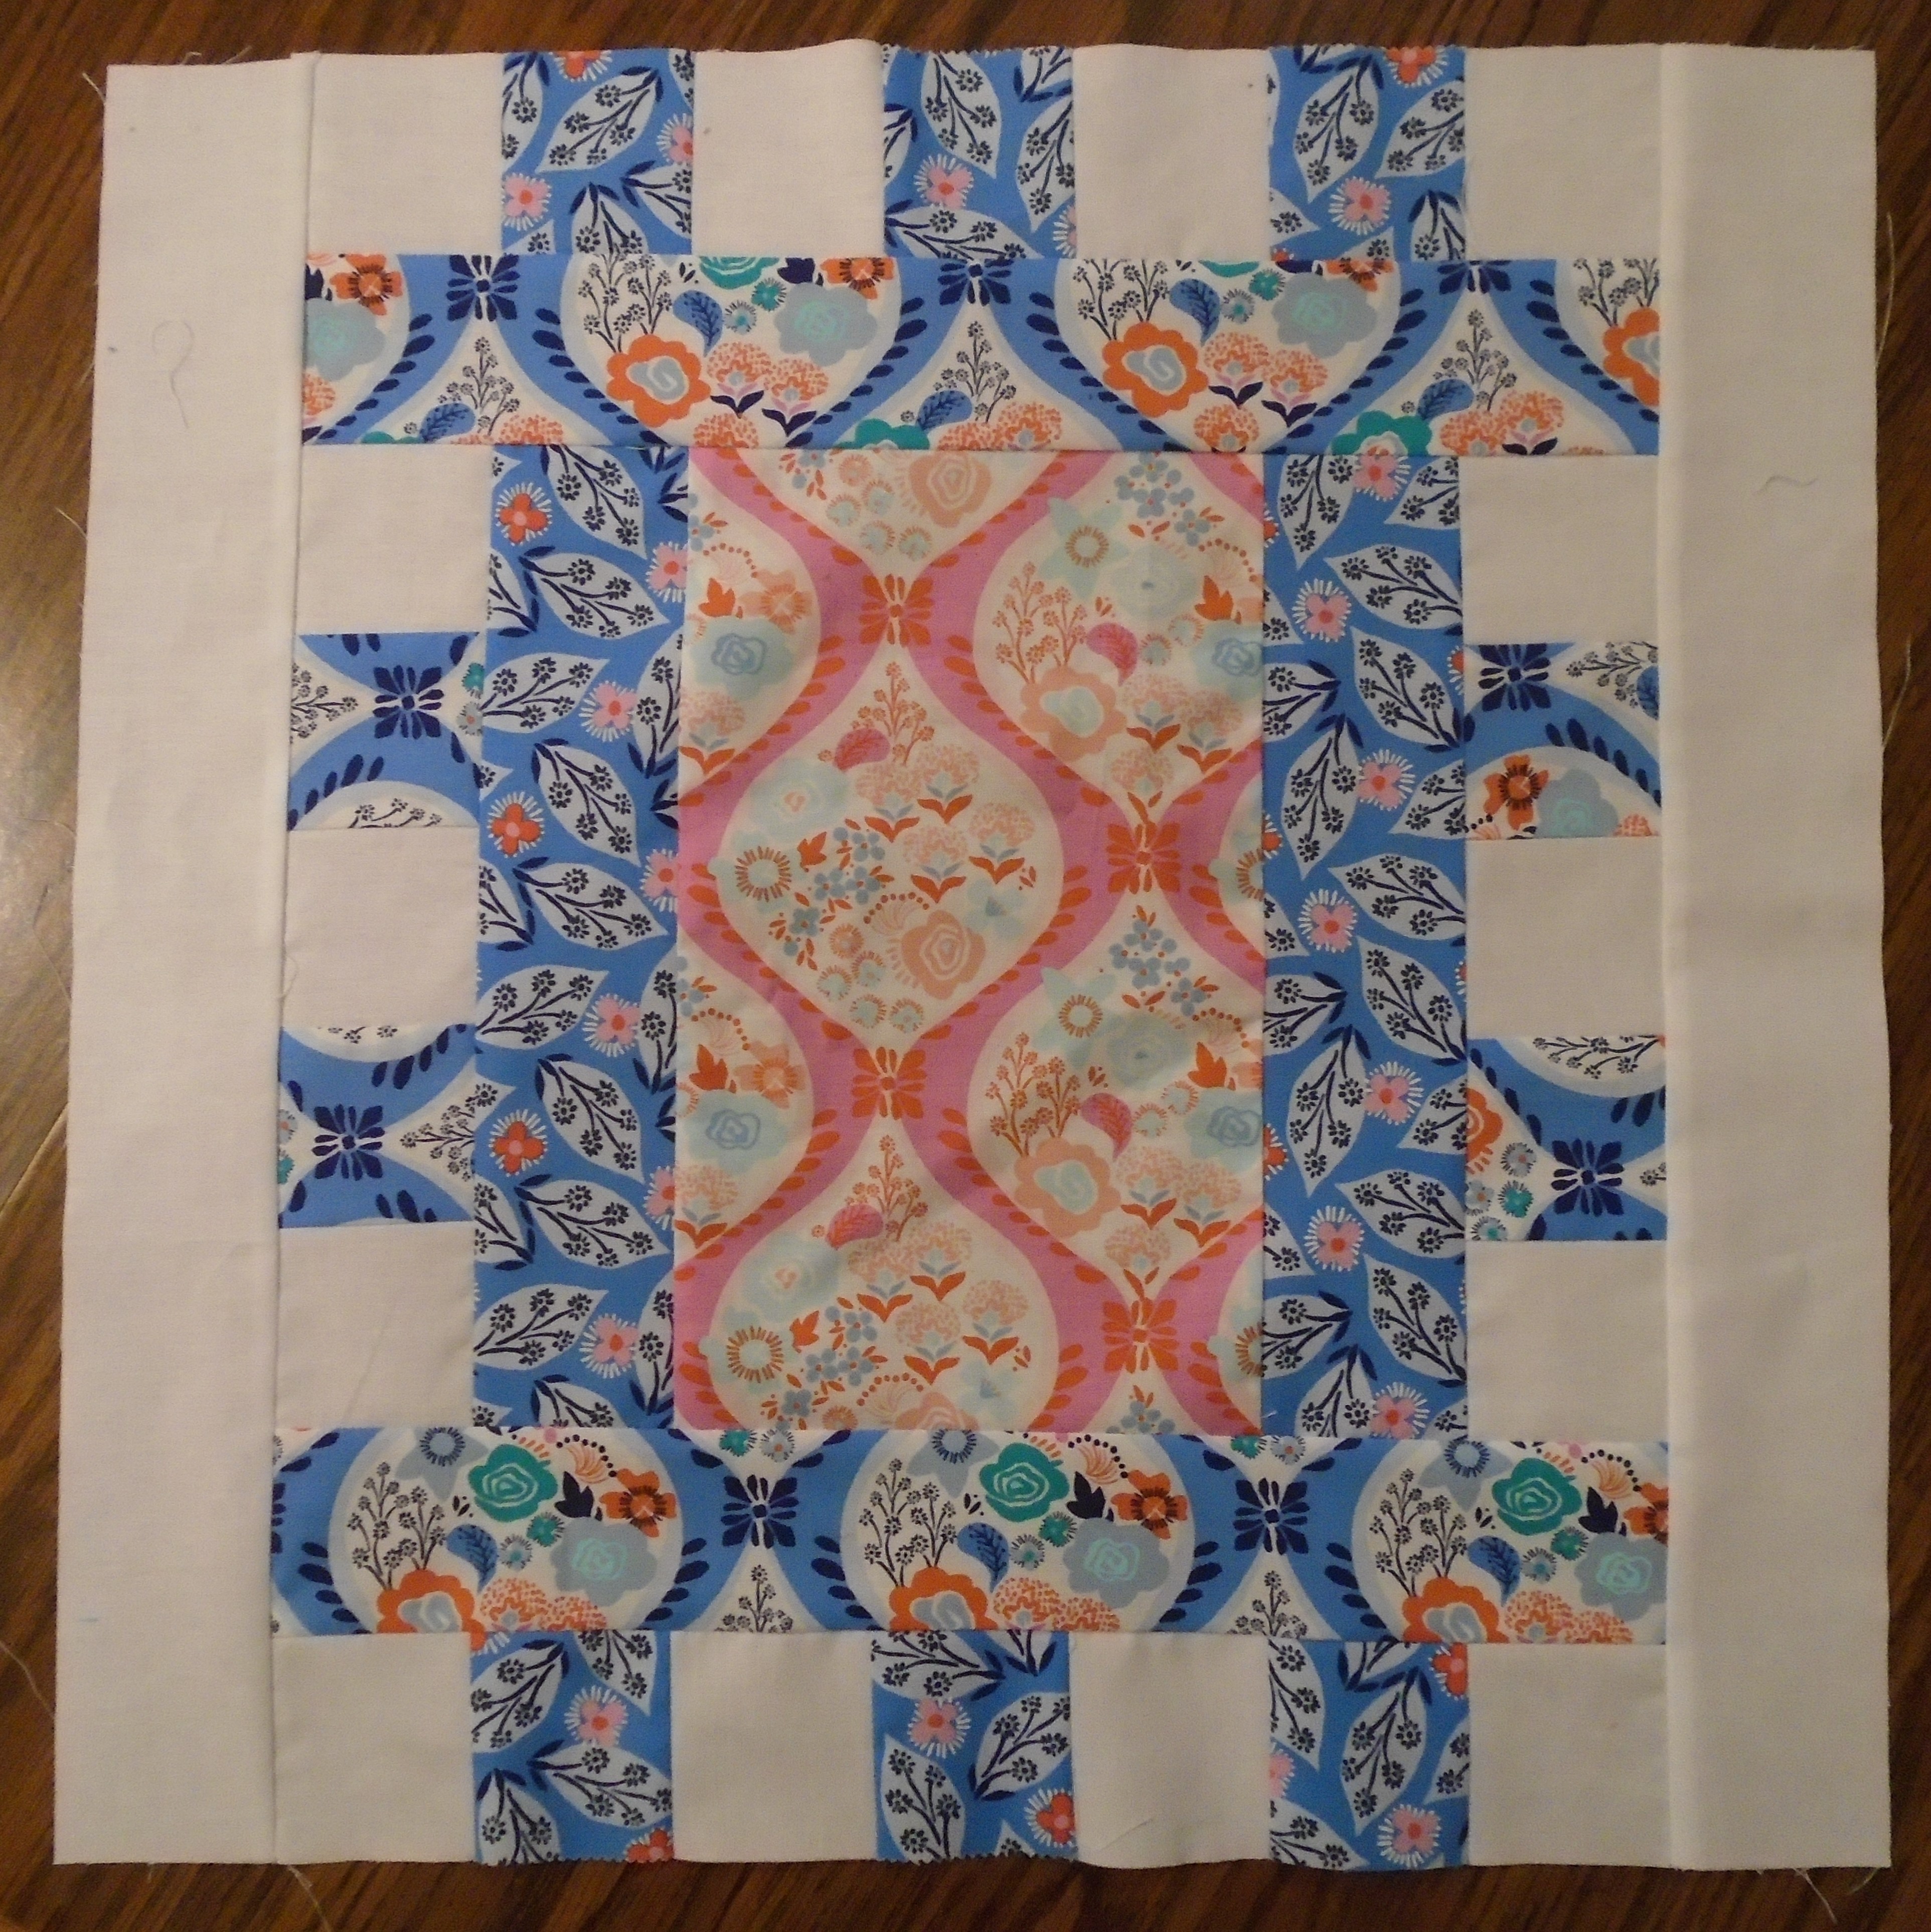
Lay out your block as shown below, combining with 14 2.5" background squares. Start by sewing together your sets of 2.5 inch squares.


Next sew your strips of squares to the 2.5 inch strips of the same length.

Your shorter strip sets (with two colored 2.5 inch squares used) will measure 10.5 inches. Sew these two sets to the 10.5 inch sides of your focal rectangle. Your longer strip sets (with three colored 2.5 inch squares used) will measure 14.5 inches. Sew these two sets to the top and bottom of your block unit. Your block will now measure 18.5 inches long and 14.5 inches wide.

To each side of your block, sew a 18.5" x 2.5" background rectangle. Your block will now measure 18.5" square. Repeat for a total of 16 blocks.
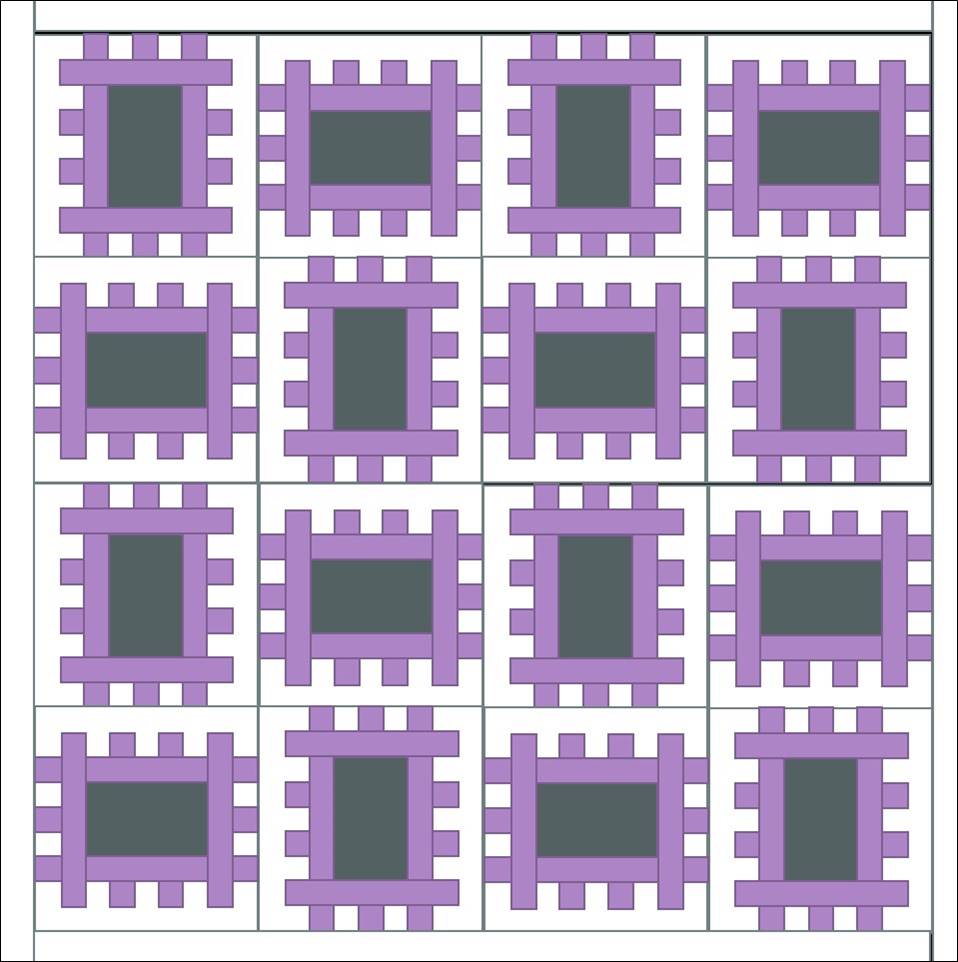
Lay out your 16 blocks as shown in the diagram below. Note that you want your blocks to alternate which direction the background rectangles are oriented -- side to side then the next block should be up and down, and so forth. This means that the only matching required is matching the intersections of the blocks themselves -- there's no matching of the seams within the block to the seams of its neighbor! Hooray! Sew together your 2.5" x WOF background fabric strips in pairs end to end to make 4 border strips ~80 inches long. Sew one border strip to each side and trim excess.
Layer with backing and batting and quilt as desired. Use remaining pink fabric for binding. I quilted my quilt with a flowered meander -- one of my favorite motifs!
![]()
This quilt finishes at 76" square!


As always, don't hesitate to contact me with questions about this or any of my other Moda Bake Shop patterns! I love sewing with all of you bakers, and I enjoy hearing all about your own adventures with precuts!
Alison Vermilya
{Little Bunny Quilts}
![]()
Posted in:
Comments