Welcome to Moda Fabrics!
What If? Quilt
What If? Quilt
Published:
Jul 31 2016 - 23:00

Thrilled to be back at the Moda Bake Shop! This is a fat quarter friendly project, a simple block that can be set in a variety of ways! Play a bit of What if? with this one! Plus, with the way this block is made a bonus block and quilt can be made of the cuttings!
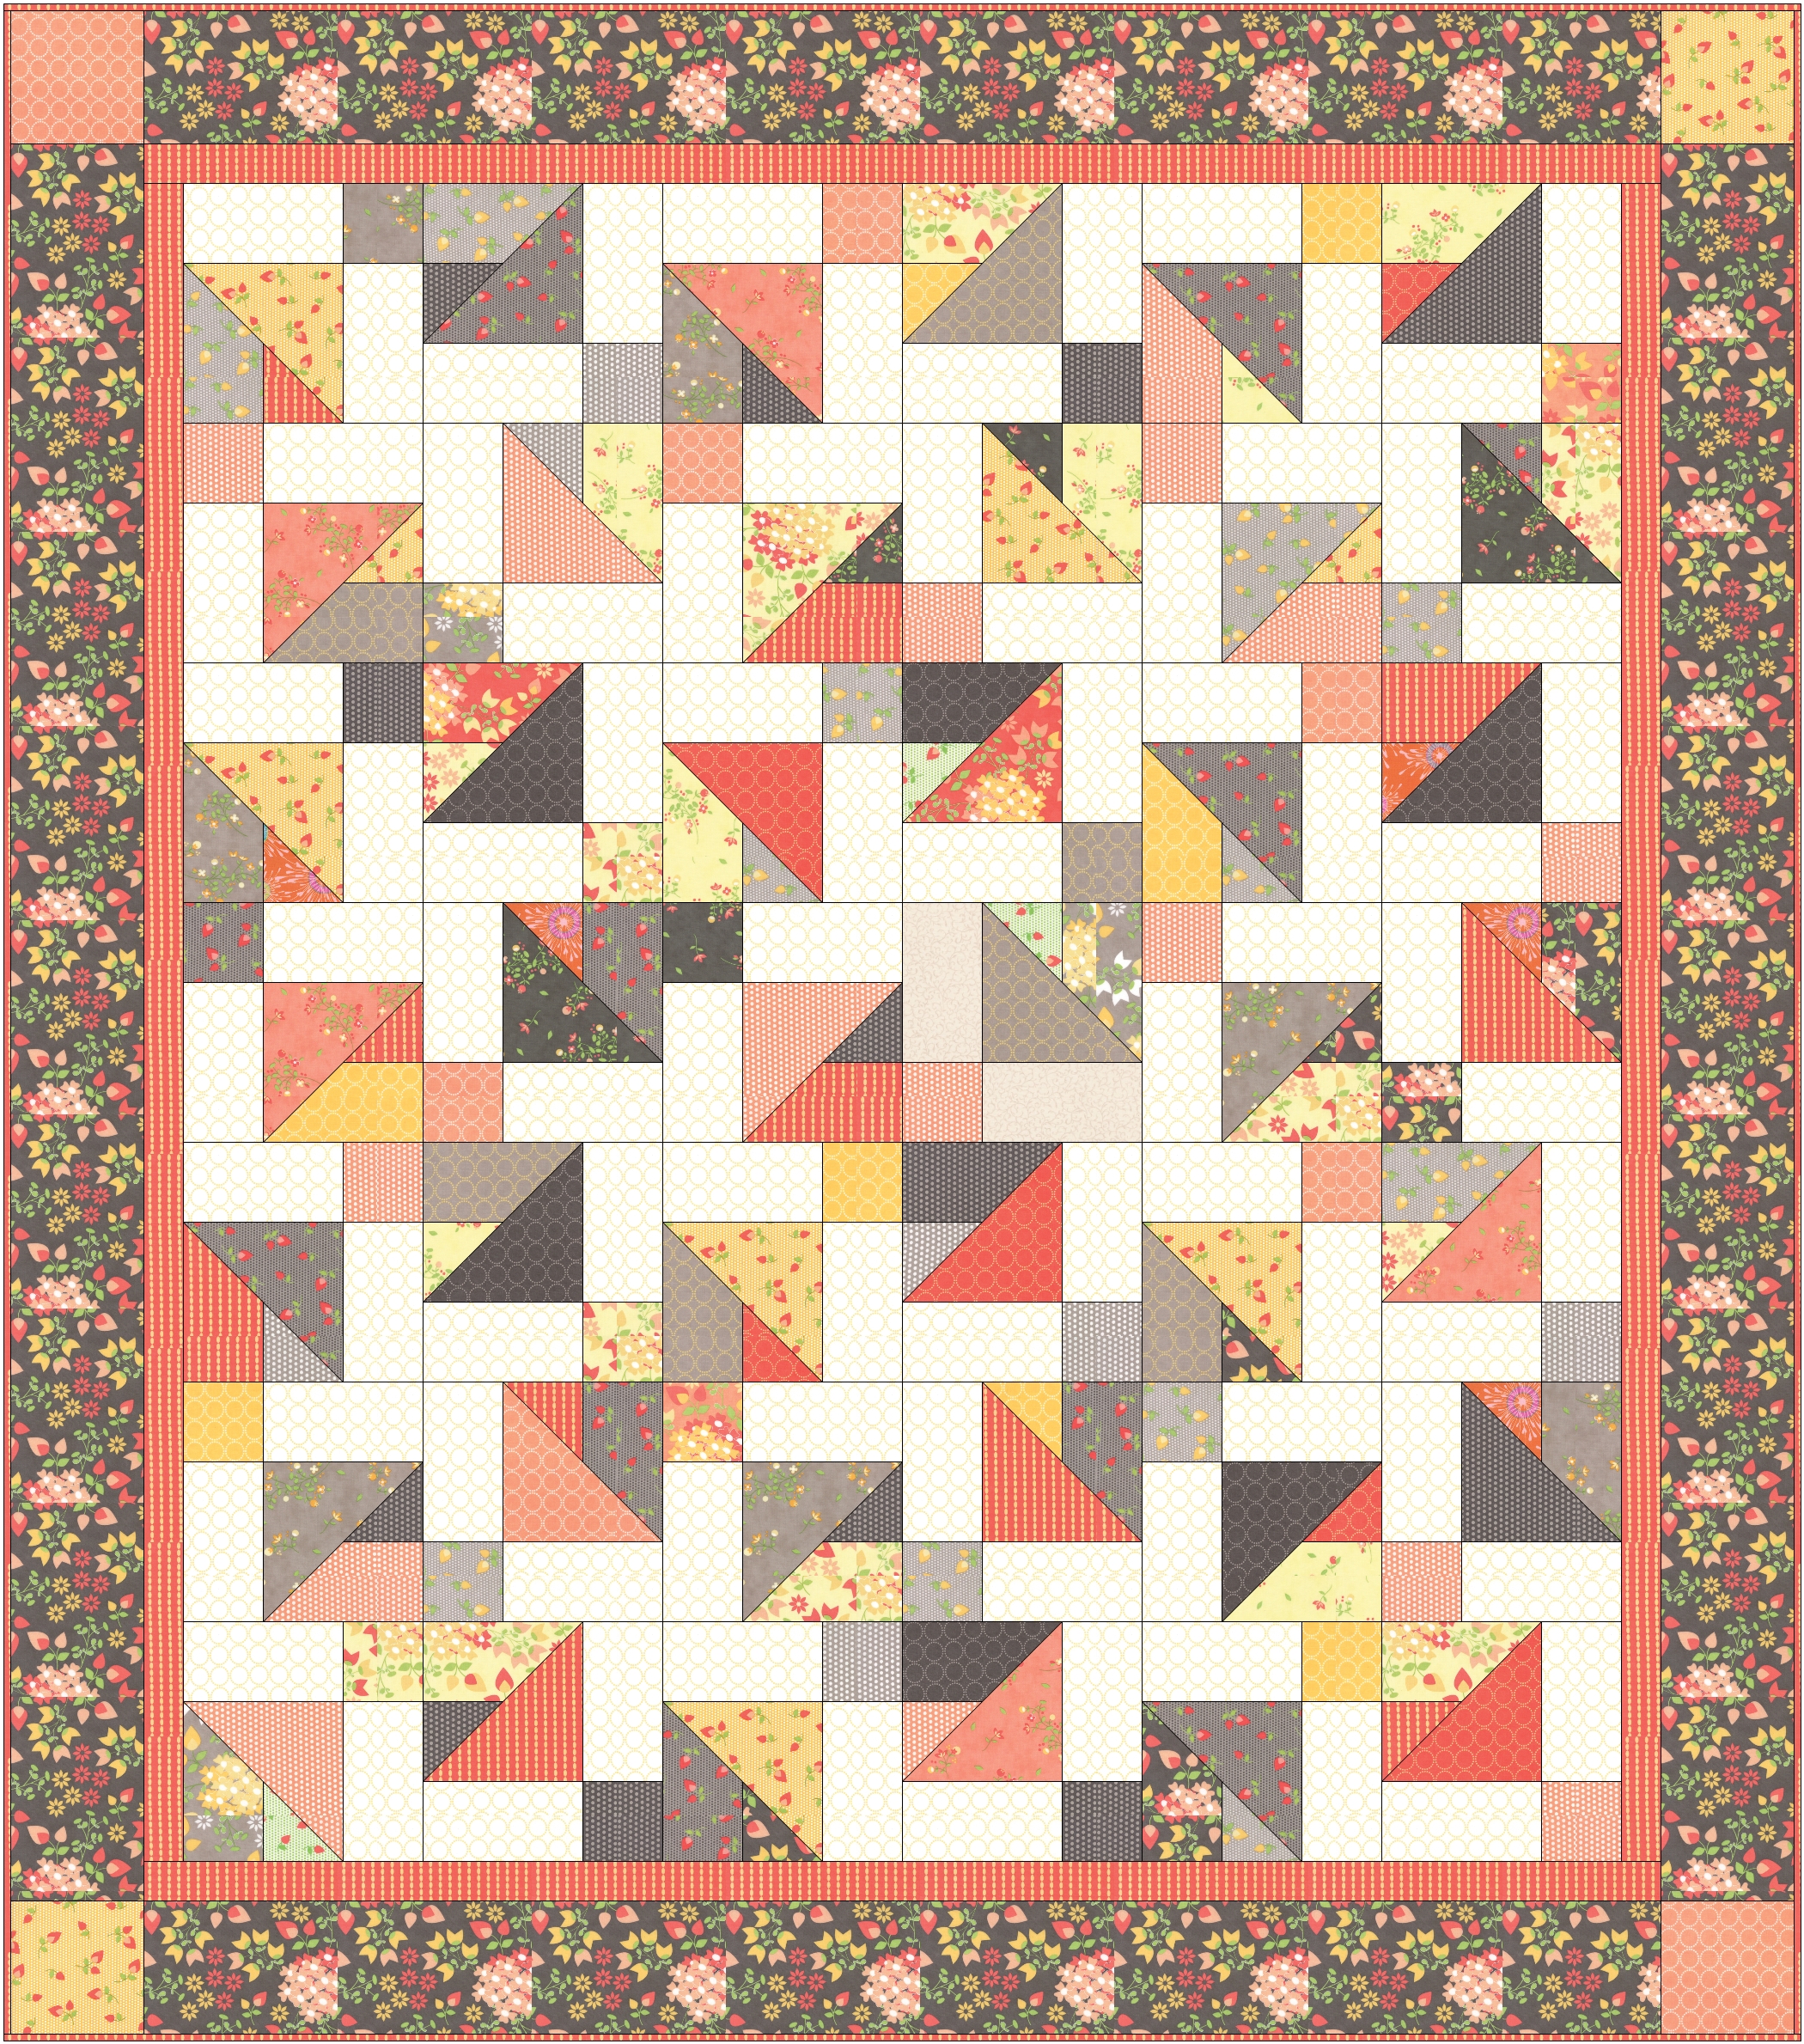
This quilt finishes at 68" x 76". Blocks are 9".
![]()

21 Fat quarters from the Sundrop collection or 1 FQ bundle #29010 AB
2.25 yards for background # 29014-12
2 yards outer Border # 29010-15
4 yards Backing # 29012025
1 yards for inner border and binding # 29015-27
Sundrops
 she used bits of sunshine to make beautiful things......
![]()
Cutting Instructions for (1) 9" block. I made a total of 42 scrappy blocks. Each block will contain 4 different print fabrics plus the background fabric.
Fabric A is the background fabric. Cut 14 strips 3 1/2 x WOF (3 1/2" x 21") Subcut into (84) 3 1/2" x 6 1/2" rectangles.
These instructions are for one block. Because this is so scrappy, you will adjust your numbers according to how many fat quarters you are using. I used 21, but you can use more or less.
Fabric B: Cut (1) 3 1/2" square. (You will need a total of 42..so if you are using 21 fat quarters, cut (2) from each fat quarter)
Fabric C: Cut (1) 6 1/2" x 3 1/2" rectangle. (You will need a total of 42, so if you are using 21 fat quarters, cut (2) from each fat quarter.
Fabric D: Cut (1) 6 1/2" x 3 1/2" rectangle. (You will need a total of 42, so if you are using 21 fat quarters, cut (2) from each fat quarter.
Fabric E: Cut (1) 6 1/2" square. (You will need a total of 42...so if you are using 21 fat quarters, cut (2) from each fat quarter.)
First Border: Cut 6 strips 2" x WOF.
Outer Border: Cut (4) 5 1/2" squares for the corner blocks. These can be all the same or different fabrics.
Cut (2) strips 5 1/2" x 66 1/2" (or your own personal measurement) x LOF (length of fabric)
Cut (2) strips 5 1/2" x 57 1/2" (or your own PM) x LOF
Binding: Cut (7) strips 2 1/2" x WOF.
Construction:
Unit one
Sew a 6 1/2" x 3 1/2" C rectangle to a 6 1/2" x 3 1/2" rectangle. Press seams open. Unit should measure 6 1/2" x 6 1/2"
Diagram 1

Unit 2: Draw a diagonal line on the back of a 6 1/2" Fabric E square.
Diagram 2

Right sides together , place a square on the unit one pieced square. Sew on the drawn line. As you make each block, pay attention to the how you have the bar unit laid out in relation to the square with the diagonal line. Make sure each block lays out the same before you sew and cut. I laid mine out as shown. The main idea is to make them all the same.

Trim 1/4" away from the sewn line...and always trim the same side of the triangle. Save these for a bonus project!
Corner Units and Block
Sew a 3 1/2" x 6 1/2" background (A) to the side of unit one.
Sew a 3 1/2" square B to a 3 1/2" x 6 1/2" background (A) rectangle.
Press toward the background fabric. Sew the block together as shown in the photo. Pay attention to the layout of your block. Make 42 blocks.
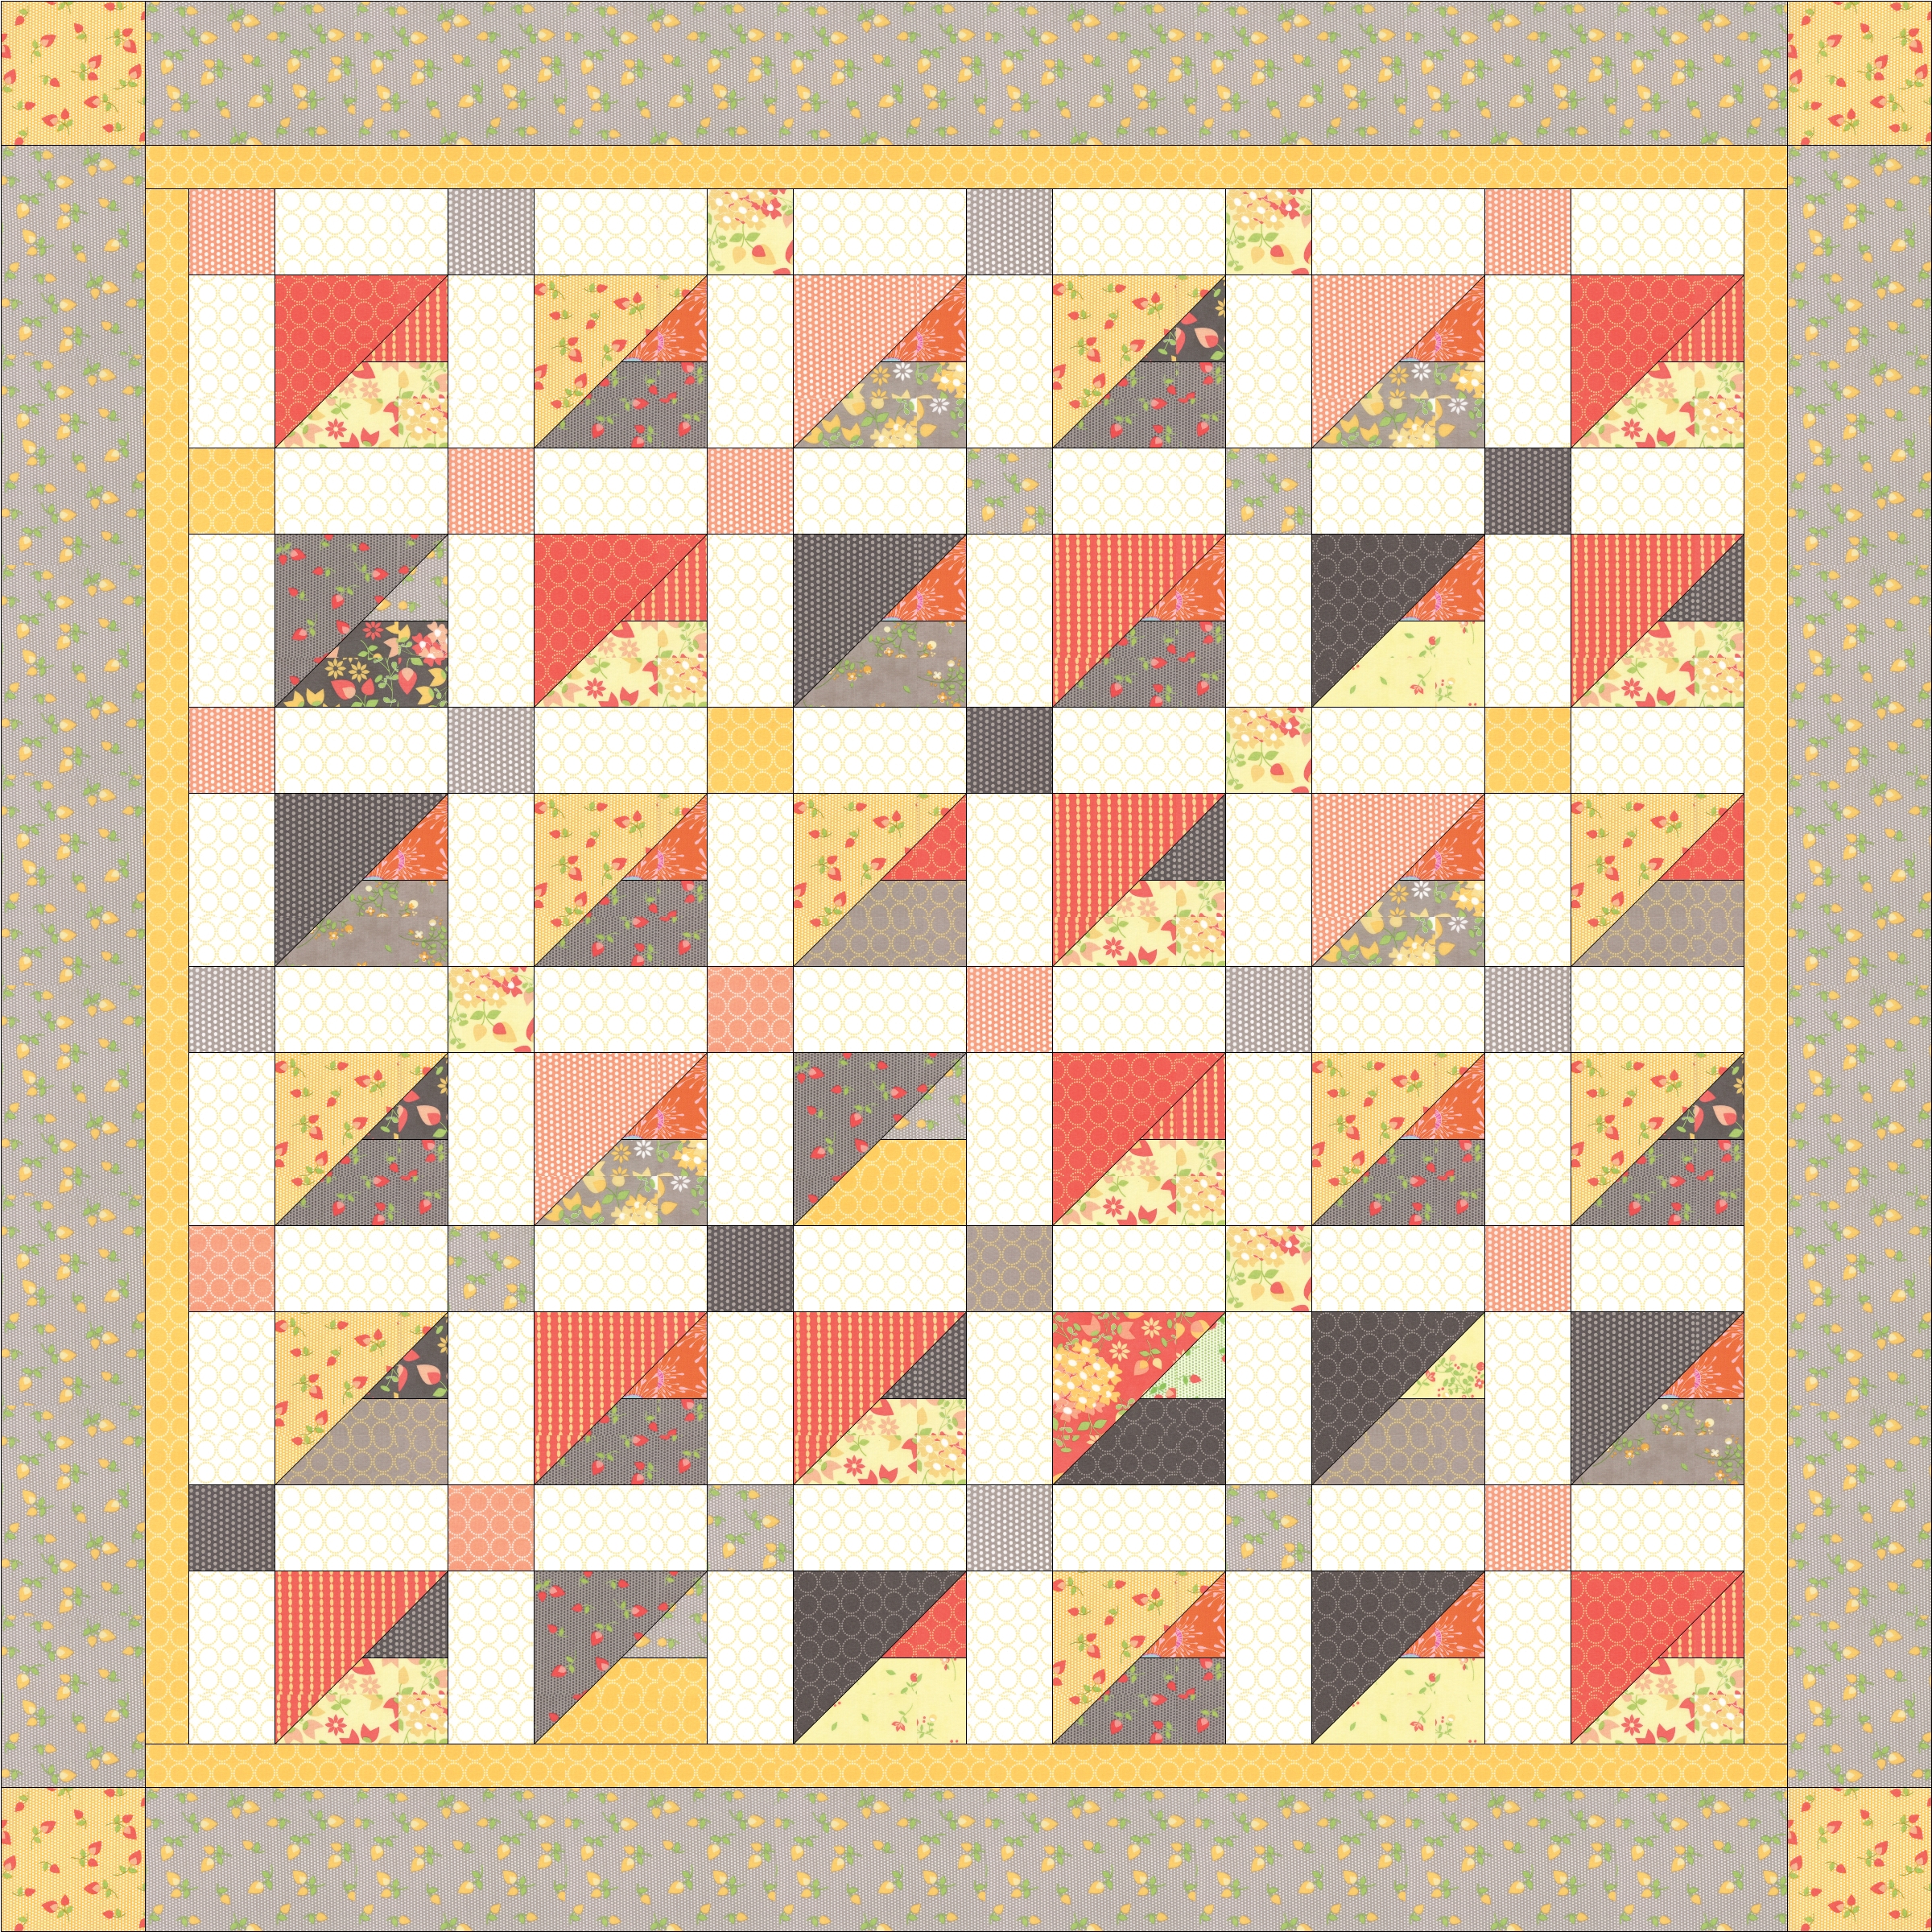
Now comes the fun part...playing What if? This block can be set together in your quilt in a variety of ways. I went to my design wall and played! I set the blocks together in rows of 6 blocks per row, 7 rows total. Here is the diagram for the finished quilt, and I will share other possible settings with you at the end.
Borders
Piece together the inner border strips to make (2) 2" x 57 1/2". Sew to the top and bottom of the quilt.
Piece together the inner border strips to make (2) 2" x 63". Sew to the sides of the quilt.
Outer border:
Sew the 5 1/2" blocks to each end of the 57 1/2 x 5 1/2" outer border strips.
Sew the borders on as shown in diagram.
Now for some more ideas...and I know you will play and come up with more! Just have fun with it!

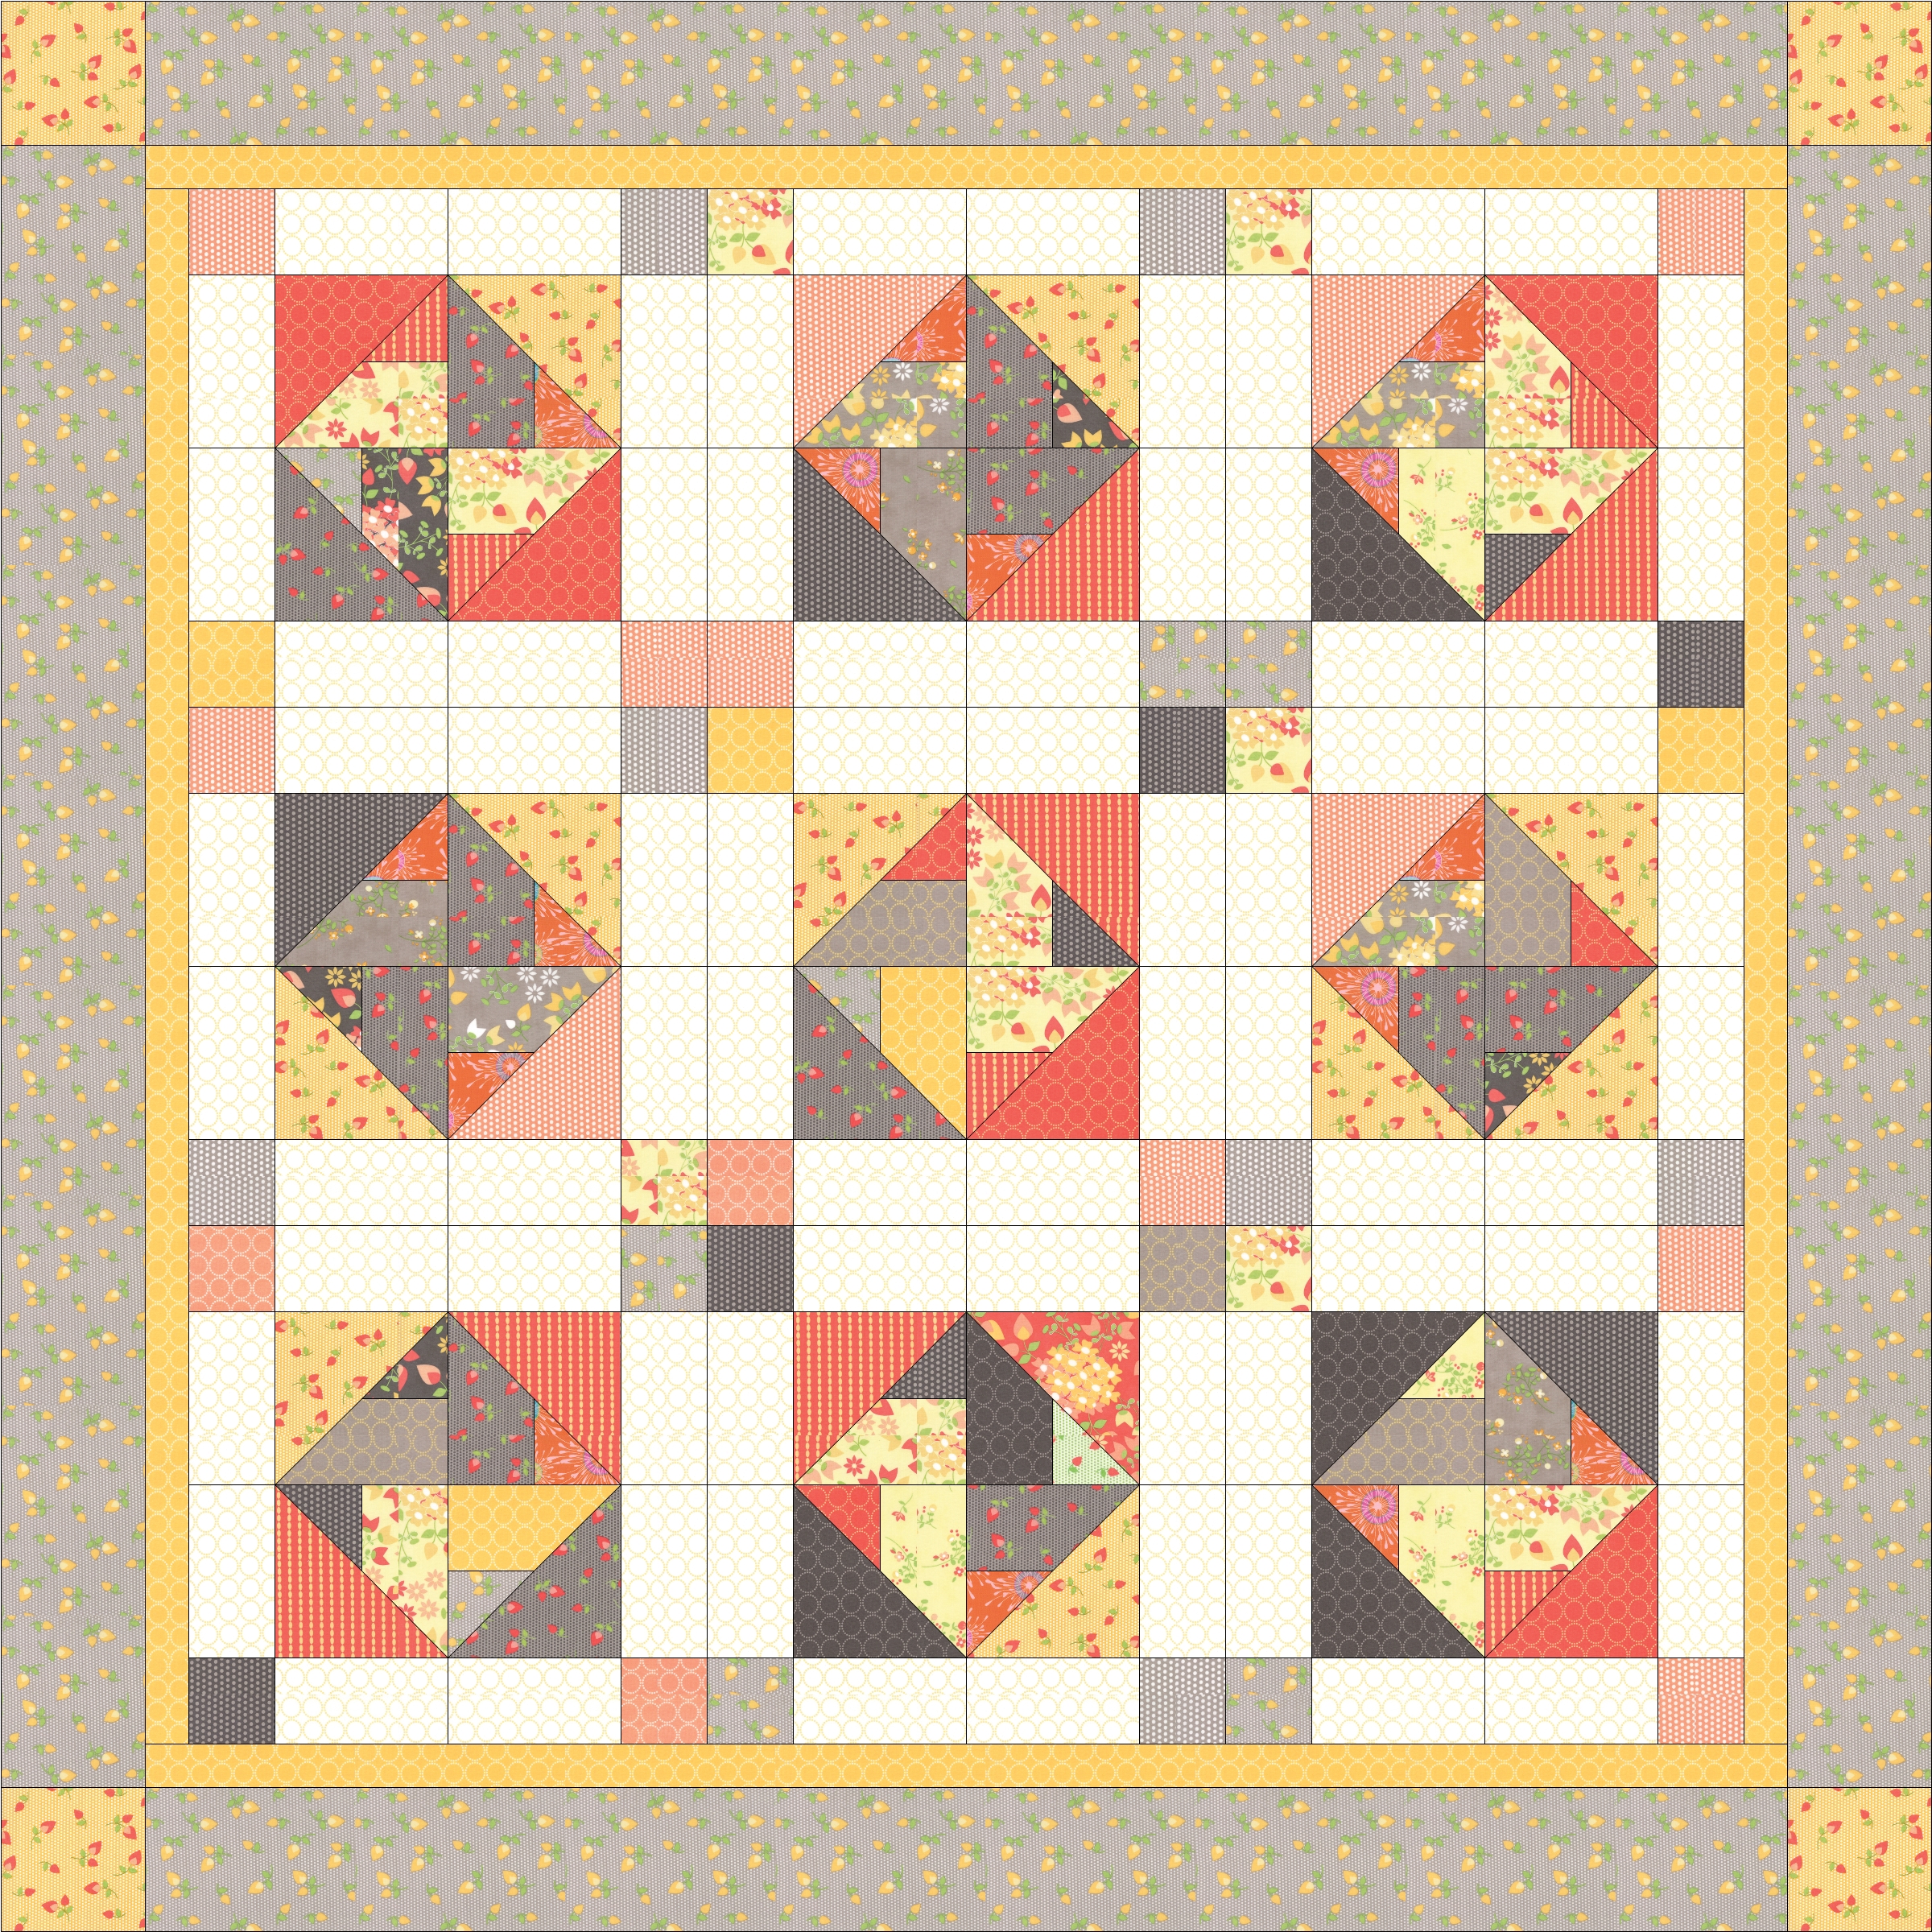
What I did with the cut aways!
I sewed the triangles together with a 1/4" seam, pressed and trimmed all my blocks to 5 1/2". For the outer corners, I cut my rectangles 1 1/2" x 5 1/2" and the corner squares are 1 1/2" . This will give you a 6" finished block. You could use any of the above quilt settings, or come up with your own!
![]()
This quilt finishes at 68" x 76".
I hope you have fun making this quilt! Please come for a visit to my blog. I would love to see what you come up with as well. You can find me on Instagram @punkydoodle53. See you soon!
Sharon Denney Parcel
{ www.yellowcatquiltdesigns.com}
![]()
Posted in: