Welcome to Moda Fabrics!
Tropical Punch Quilt
Tropical Punch Quilt
Published:
Aug 11 2015 - 23:00


Hi! I'm Corinne and I blog over at www.mustlovequilts.com. This quilt is inspired by vintage chimney sweep quilts. I wanted a simplified version that I could whip up quickly with jelly rolls. I was thrilled to use the gorgeous Meadowbloom collection by April Rosenthal. The colors just remind me of summer and a tropical getaway. I decided to make my blocks “scrappy” by mixing up the prints by color, but you could also stick with one print for each block in order to achieve a more streamlined look. The possibilities are endless!
This quilt finishes at 94" x 104".
![]()
2 White Jelly Rolls
1 Meadowbloom Jelly Roll
9 7/8 yards Meadowbloom print for backing
5/8 yards Meadowbloom print for binding

Note: These instructions are for a scrappy large queen/small king size quilt specifically made with Meadowbloom and you will use every single strip. If you choose to do one print per block versus mixing them up like I did, you might need extra print strips for a queen size quilt.
![]()
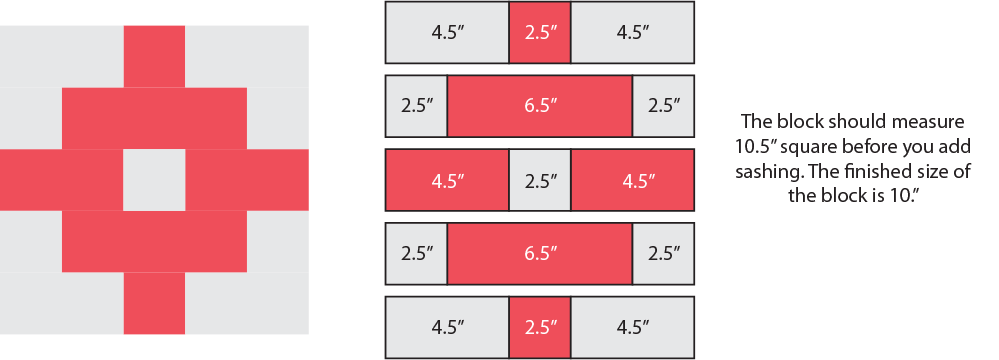
Before we start cutting our jelly rolls, let’s take a quick look at how the quilt block is constructed.
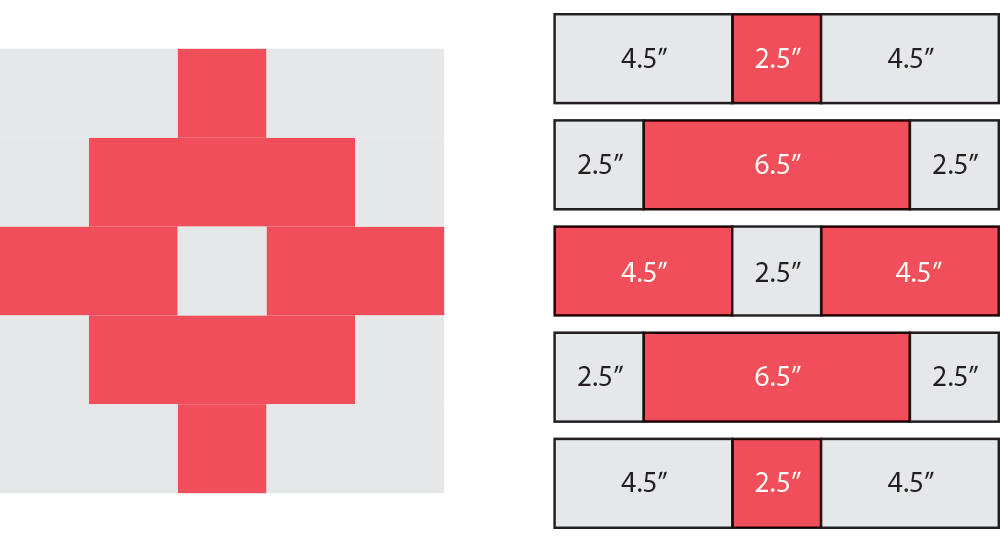
Each block consists of the following pieces:
White Pieces
(4) 4.5” x 2.5”
(5) 2.5” x 2.5”
Print Pieces
(2) 6.5” x 2.5”
(2) 4.5” x 2.5”
(2) 2.5” x 2.5”
To make a queen size quilt, you will need 56 of the blocks above. You will end up with 7 rows of 8 blocks.
Total Pieces needed for blocks:
White Pieces
(224) 4.5” x 2.5”
(280) 2.5” x 2.5”
Print Pieces
(112) 6.5” x 2.5”
(112) 4.5” x 2.5”
(112) 2.5” x 2.5”
For the sashing you will need the following:
White Pieces
(97) 10.5” x 2.5”
Prints
(42) 2.5” x 2.5”
CUTTING INSTRUCTIONS
White Jelly Rolls
Each jelly roll has 40 strips. You will need (68) strips for this quilt, so you will need 2 white jelly rolls.
1) You can get (16) 2.5” squares from one jelly roll strip. So, you will need (18) strips that will be subcut into (280) 2.5” squares.
2) You can get (9) 4.5” x 2.5” units from one jelly roll strip. So, you will need (25) strips that will be subcut to (224) 4.5” x 2.5” units.
3) You can get (4) 10.5” x 2.5” sashing strips from one jelly roll strip. So, you will need (25) strips that will be subcut into (97) 10.5” x 2.5” sashing strips.
Meadowbloom Jelly Roll
We are going to use almost every last bit of the jelly roll, so pay close attention!
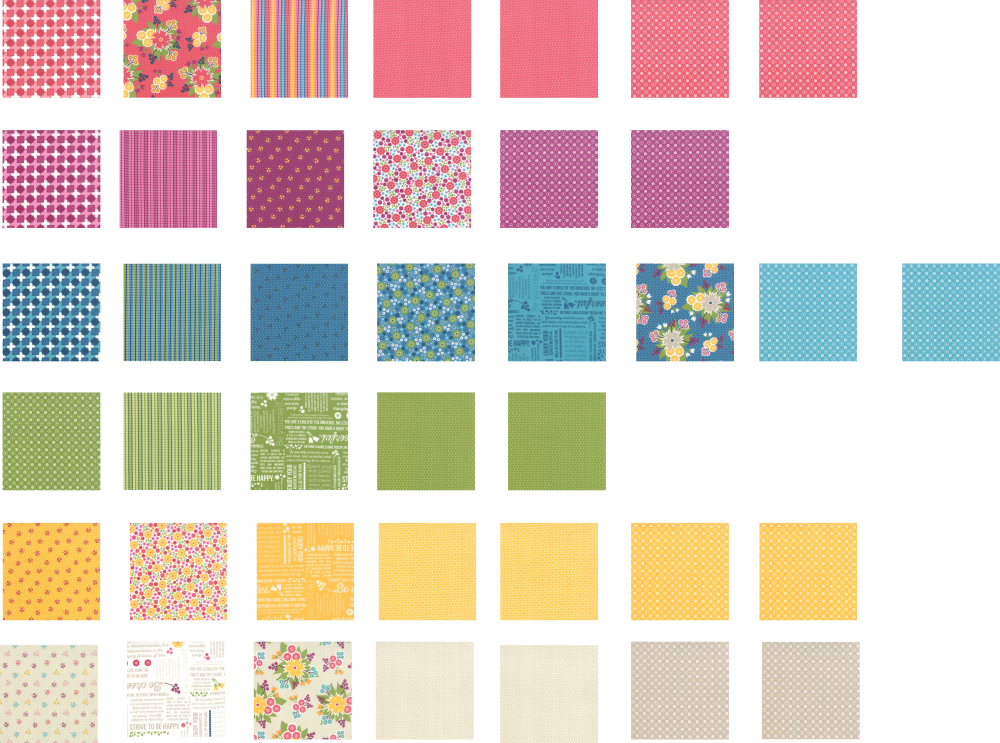
1) First separate your jelly roll by the main color in the strip. I did mine like the following picture (there are duplicates of certain prints)
2) From each of your strips cut (2) of each of the following and set the remaining strips aside for our next step.
(2) 6.5” x 2.5”
(2) 4.5” x 2.5”
(2) 2.5” x 2.5”
Each remaining strip should be about 16.”
![]()
You should now have (80) of each piece, which is enough to make (40) of our (56) blocks. This means you need (32) more of each piece, which will produce our remaining (16) blocks. We will also cut our sashing (42) 2.5” sashing squares.
3) First take all (40) of your remaining strips and cut (1) 2.5” square from each strip. Choose (2) of the (40) strips and cut the remaining (2) 2.5” squares. You should now have (42) 2.5” squares for the sashing. Set them aside.
4) From your remaining strips you still need (32) of each of the following:
6.5” x 2.5”
4.5” x 2.5”
2.5” x 2.5”
Since we are making this scrappy according to color, once again its important to separate the strips by color. It takes approximately (2) strips per color to produce (1) block. I went ahead and cut my remaining pieces by color one block at a time to make sure I was getting the right pieces in the right colors.
For instance, I would take my remaining 7 pink strips and cut:
(2) 6.5” x 2.5”
(2) 4.5” x 2.5”
(2) 2.5” x 2.5”
Once those were cut I knew I had (6) of my (32) pieces, which equals (1) more block. I then repeated this with my pink strips until I didn’t have enough of that jelly roll color to produce another full block. I then repeated the process for each color until I ended up with all of my pieces.
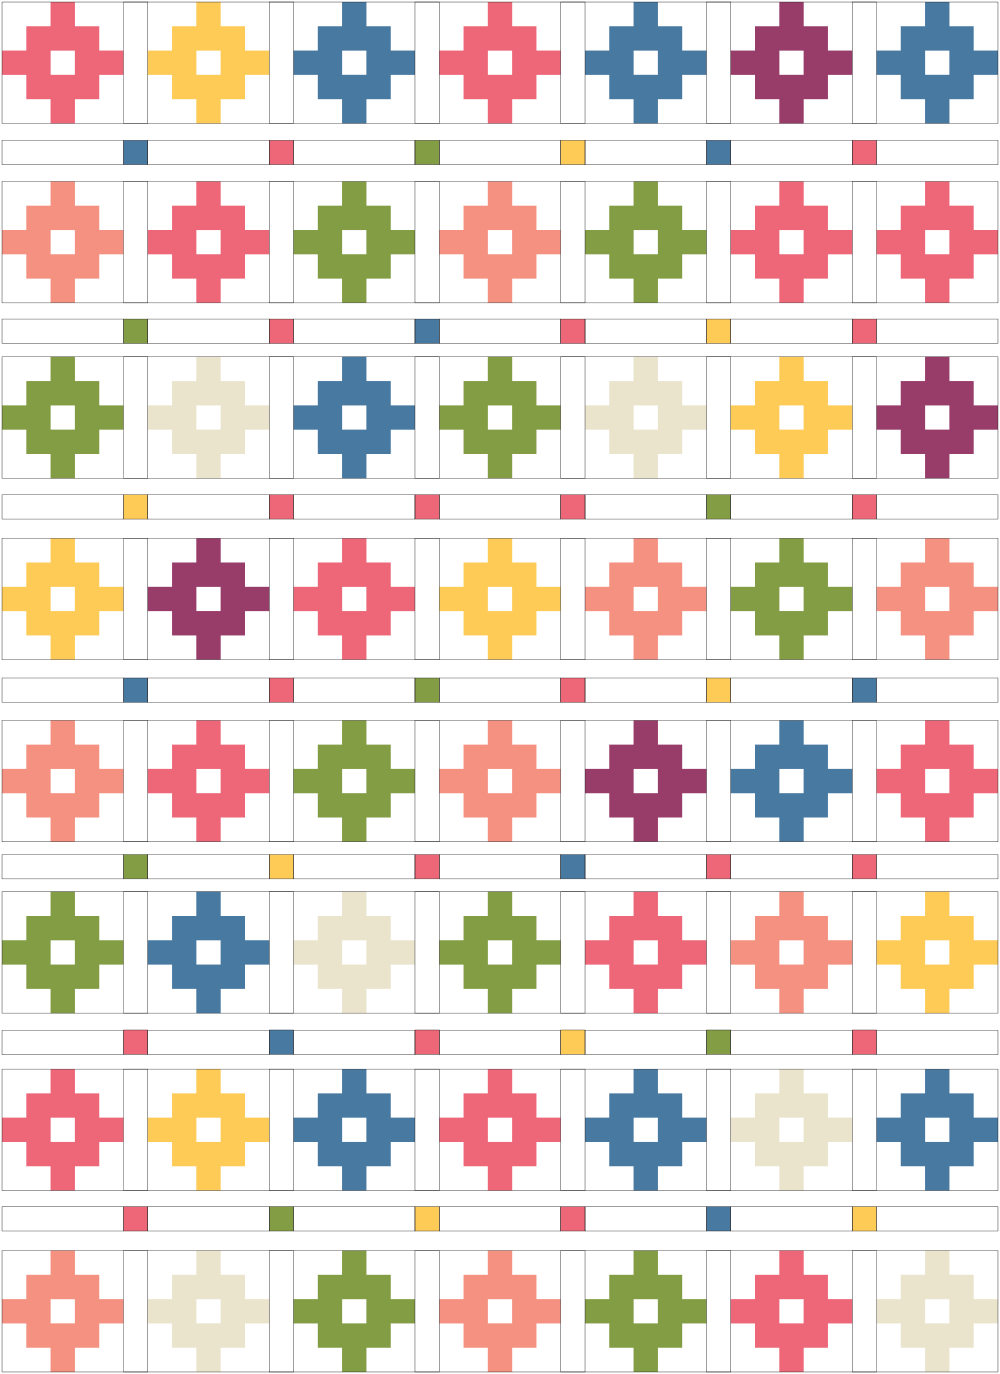
ASSEMBLY
1) Assemble via the diagram below, pressing your seams toward the color.
2) Assemble your sashing
(1) Row of sashing requires (7) 10.5” strips and (6) 2.5” squares
You will make (7) rows
![]()
3) Take the remaining (48) 10.5” strips of sashing and sew your blocks together.

4) Assemble rows and you’ve got a Queen Size Quilt that is sure to brighten anyone’s day!
Hop on over to my blog for a blank coloring sheet featuring this quilt pattern so you can play with color placement. I also have a mocked up version of a lap size throw quilt using Bella Solids. Thanks for checking out my quilt, I hope you enjoy making it as much as I did!
![]()
1 Queen Size Quilt, 94" x 104"
Corinne Sovey
{www.mustlovequilts.com}
![]()
Posted in: