Welcome to Moda Fabrics!
Stained Glass Quilt
Stained Glass Quilt
Published:
May 16 2015 - 22:43


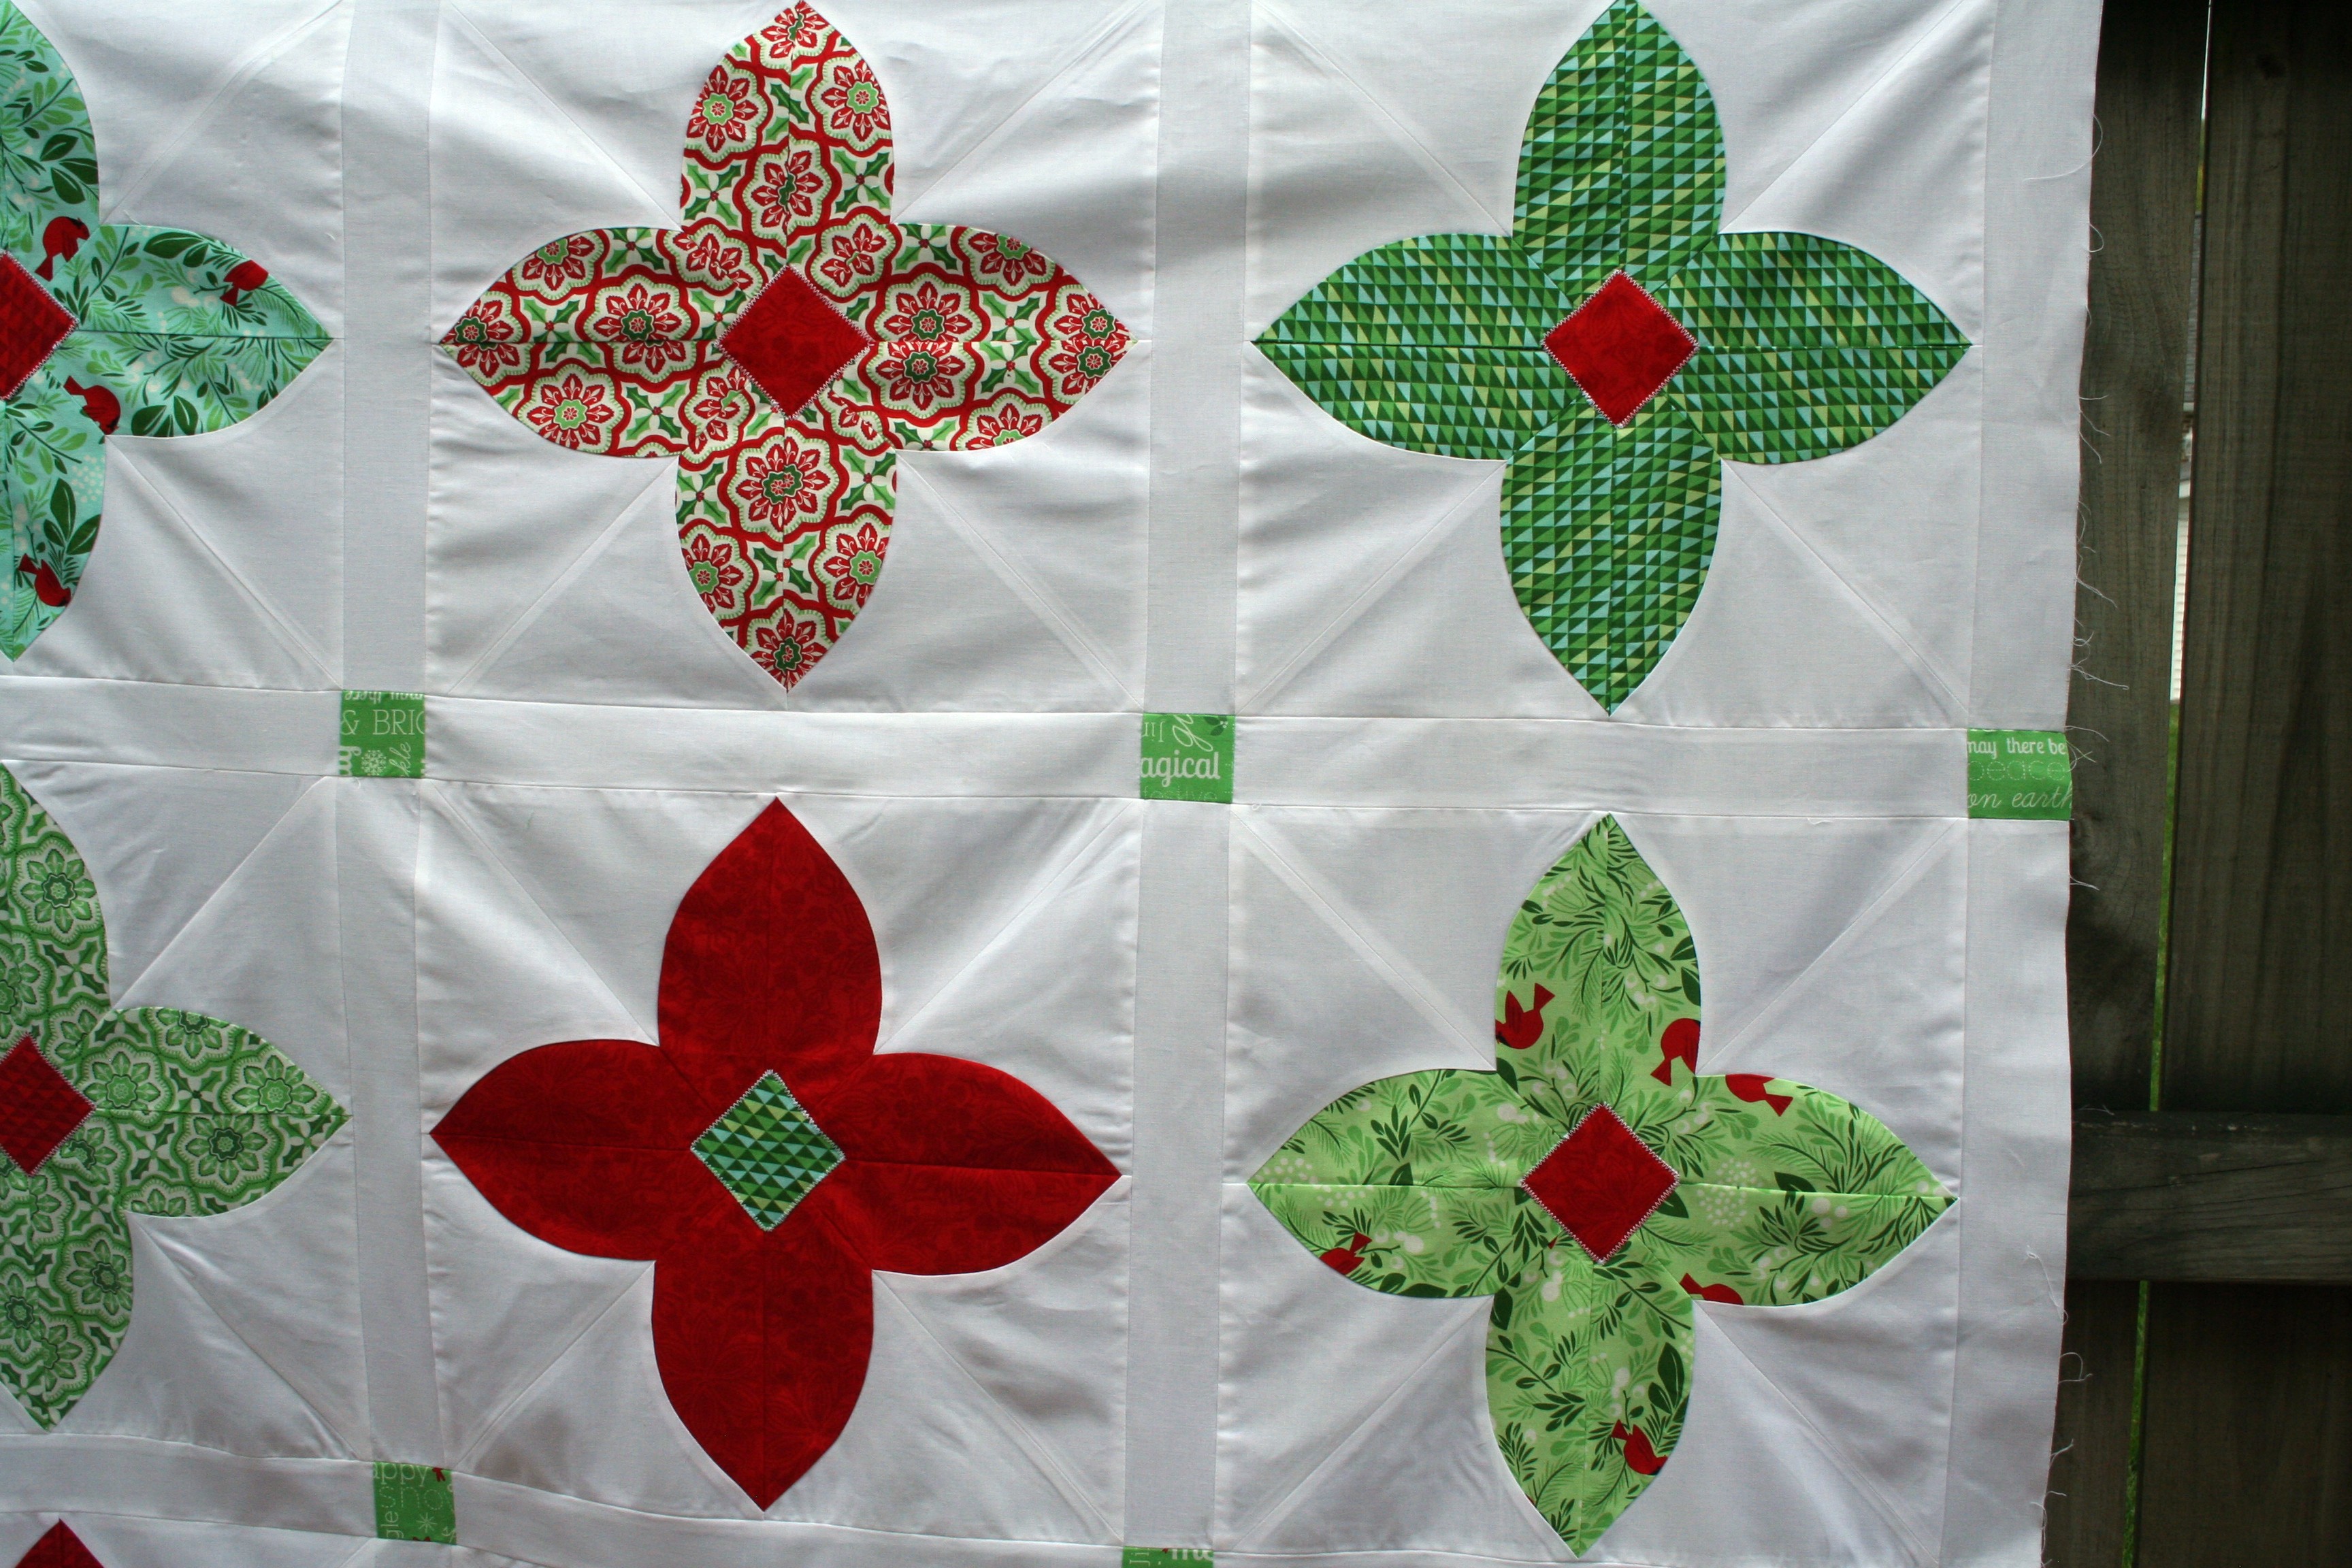
Hi, I'm Lauren from {flyawayquilts.com} and wanted to share a Christmas quilt. I'm from the Northeast so we can say Merry Christmas as long as I don't have to look at actual snow for another 7 months.
Just a note about this tutorial - this is designed for someone who wants to tackle some curved piecing for the first time. I would highly recommend putting together one block before you commit to an entire quilt (you'll need 4 neutral 10 inch squares and 1 fat quarter in order to try a sample block). I found that when piecing with curves - you have to allow for more fidgeting and fussing with your fabric. I'm used the fabric doing exactly what its told - and if this project hadn't had a deadline, I'm sure it would've sat on my sewing table for a while. That being said, I love the result so lets get started!
![]()
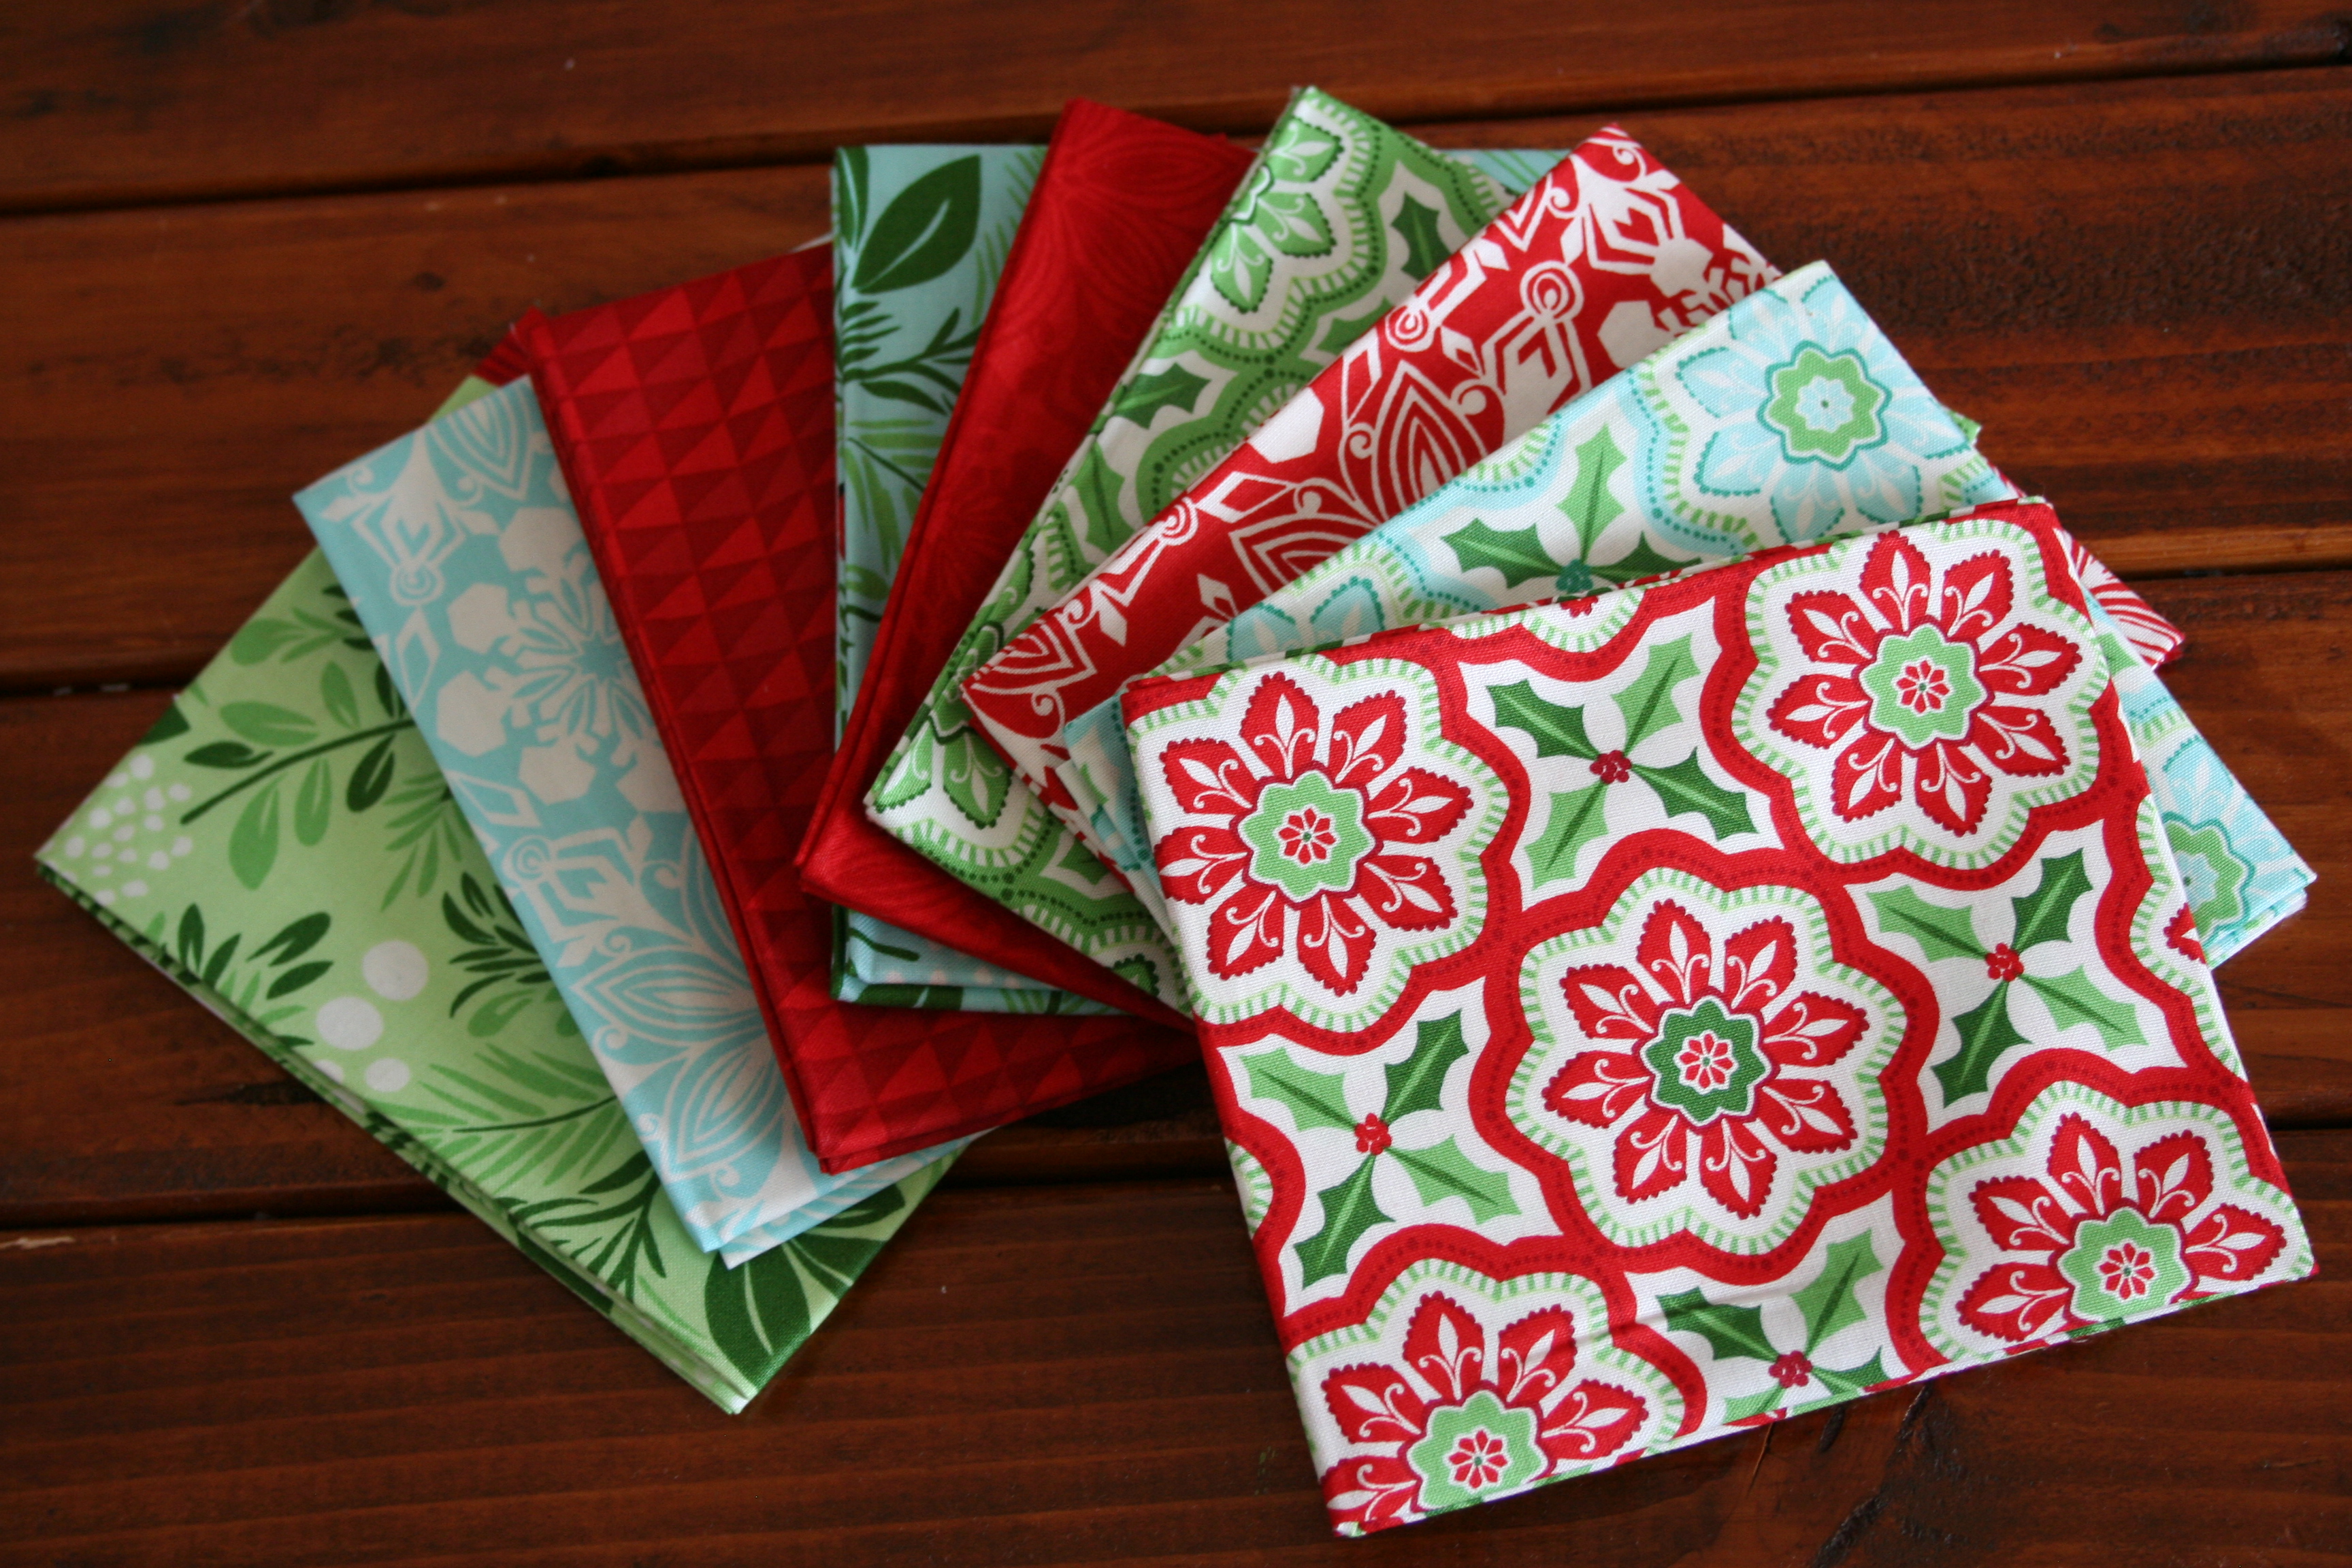
For this quilt you'll need:
- 1 white layer cake
- 10 fat quarters of your choice (I recommend ones with bold colors and a non-directional pattern.)
- 1 yard for sashing
- 3/4 yard binding fabric
- Optional: 1 yard border fabric (like on this quilt. I didn't do it - but you could).

![]()
I'm going to walk you through the cutting instructions step by step before we start sewing. Note: there is a template for cutting the neutral fabric, and a different one (that is slightly smaller) for cutting the patterned fabric. Be sure not to mix them up.
Neutral cutting template Be sure to print at 100%, do not select "fit to page." The long side should be just 10 inches. Cut the template on the inside of the lines.
Petal Template This template can be printed with the "fit to page" option selected since it is smaller and won't be automatically cropped.
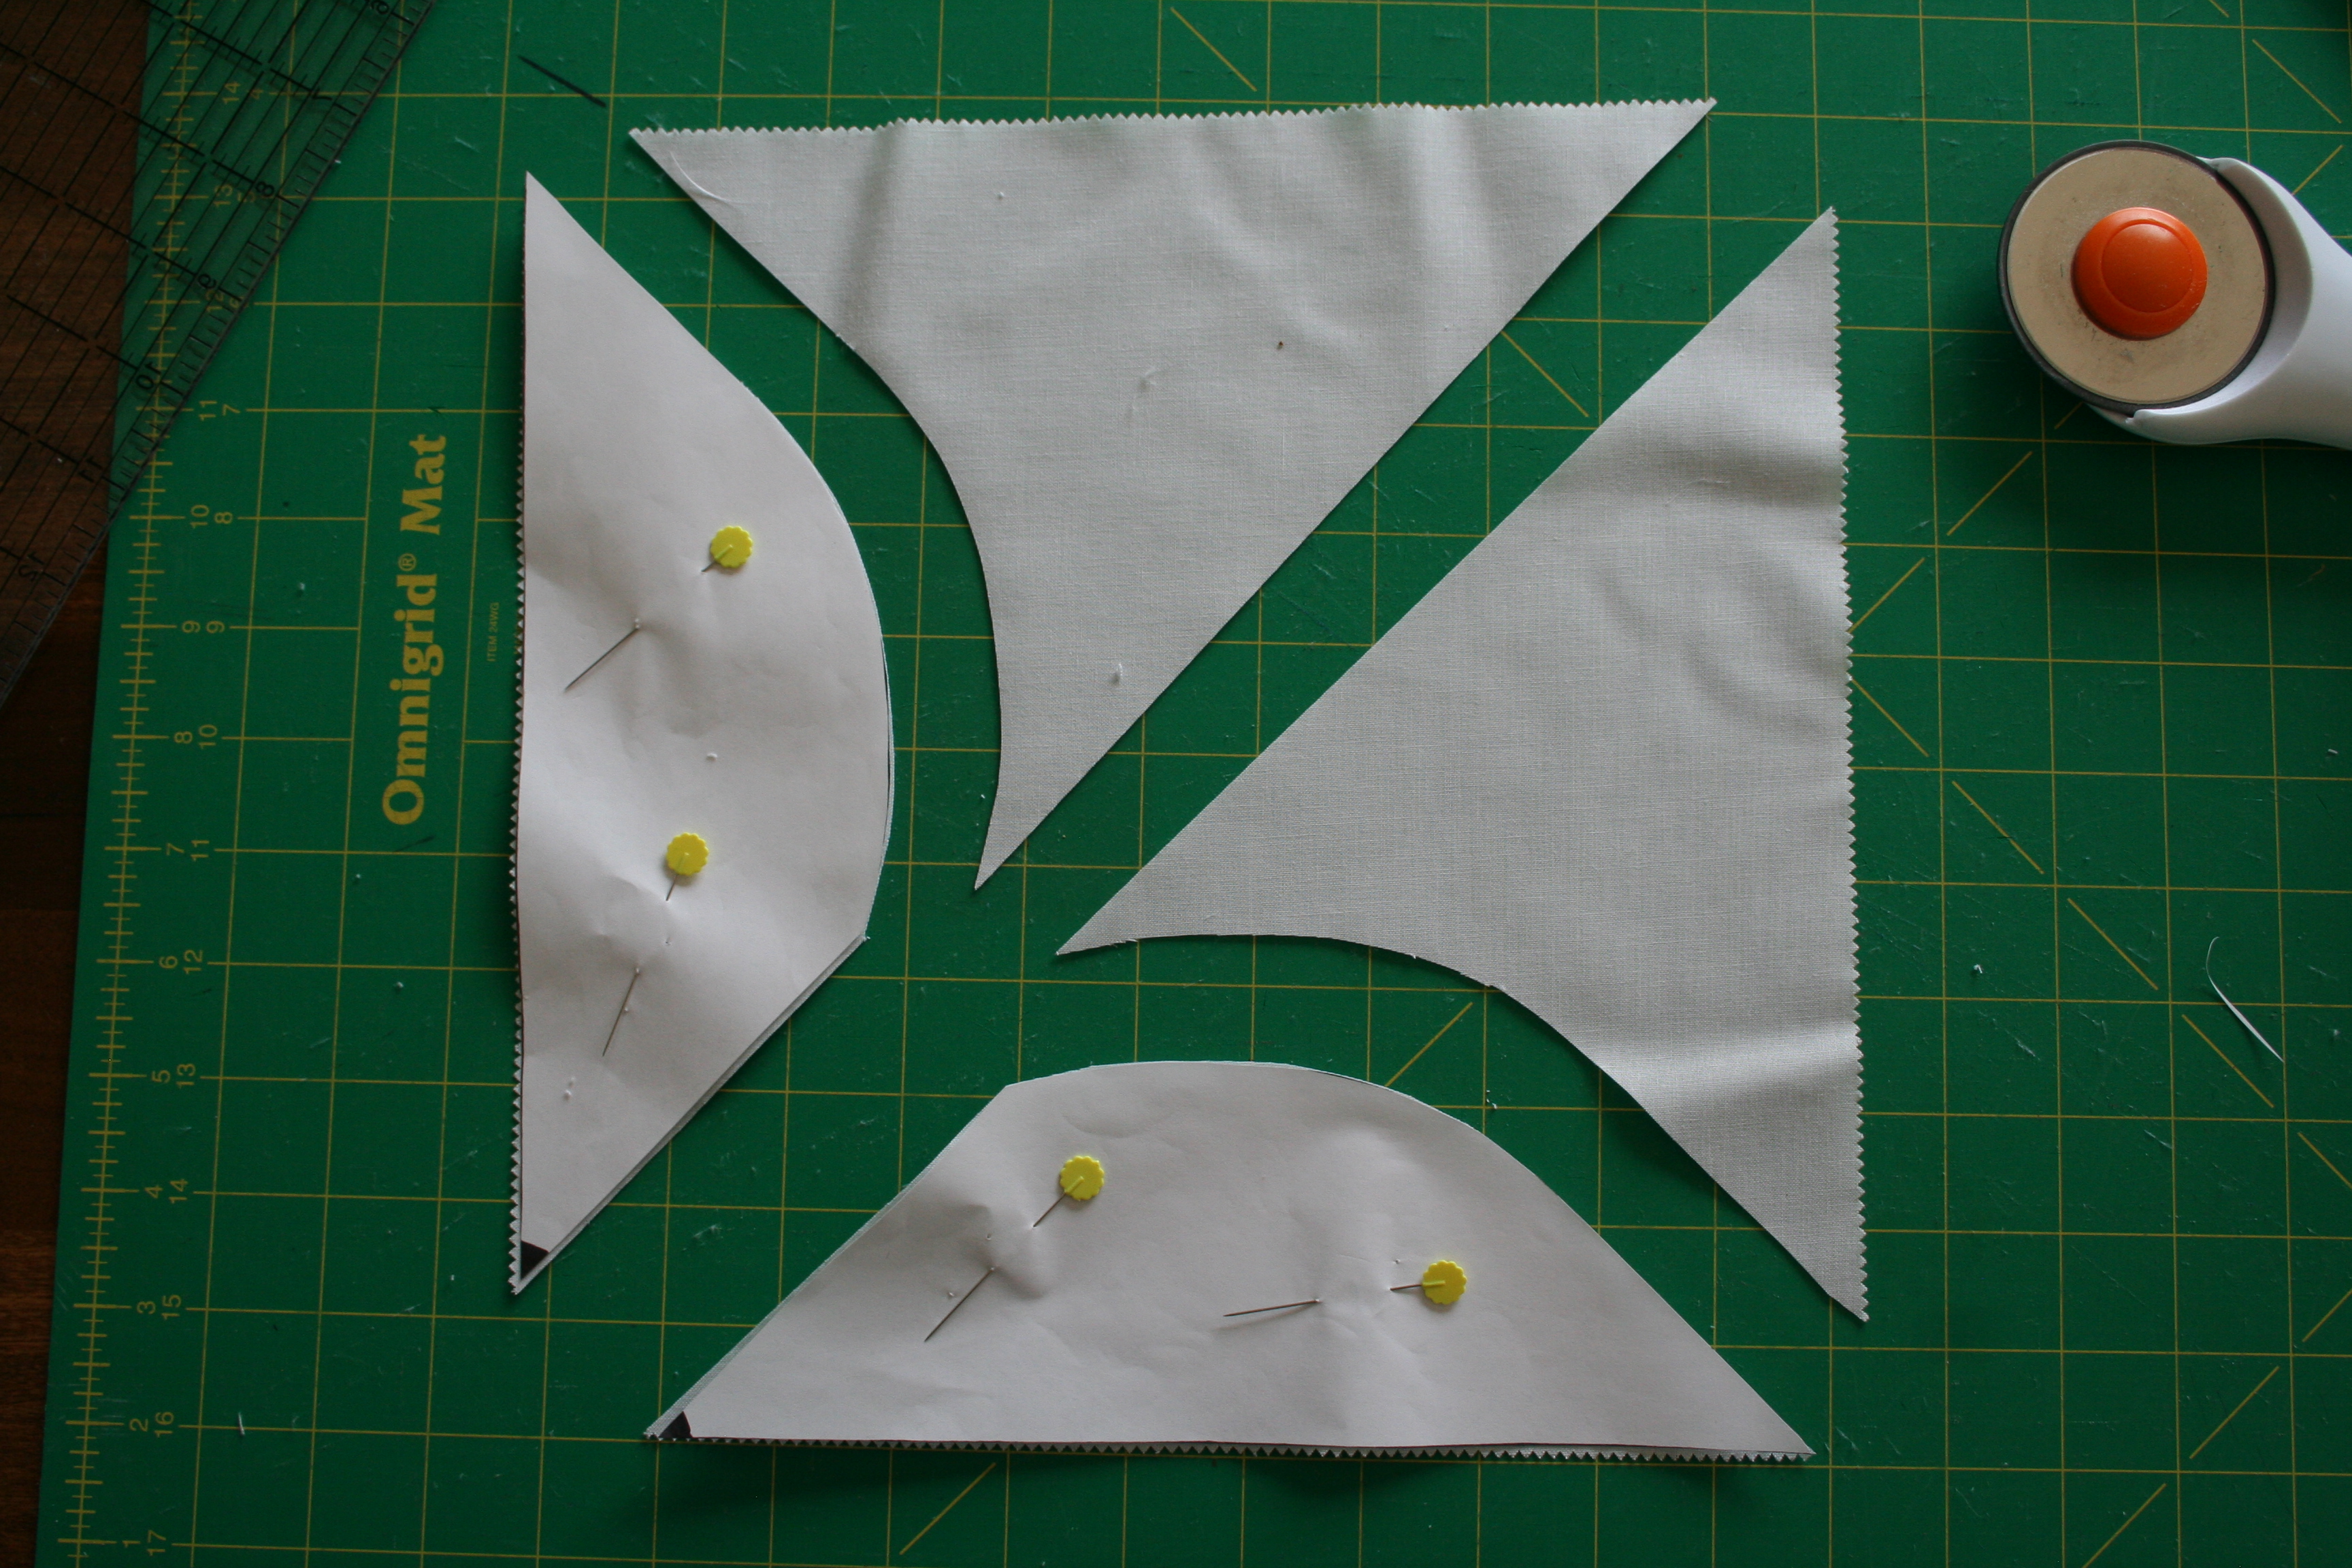
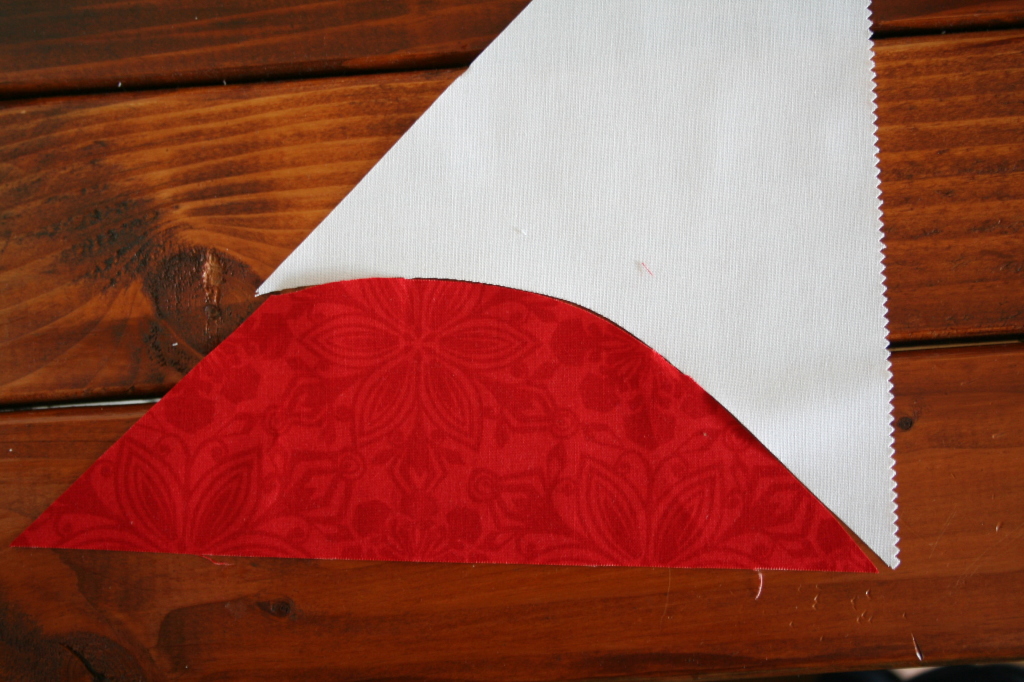
Take 36 of your layer cake squares (10 x 10 inches). Cut a diagonal line in each square from the top right to the bottom left.
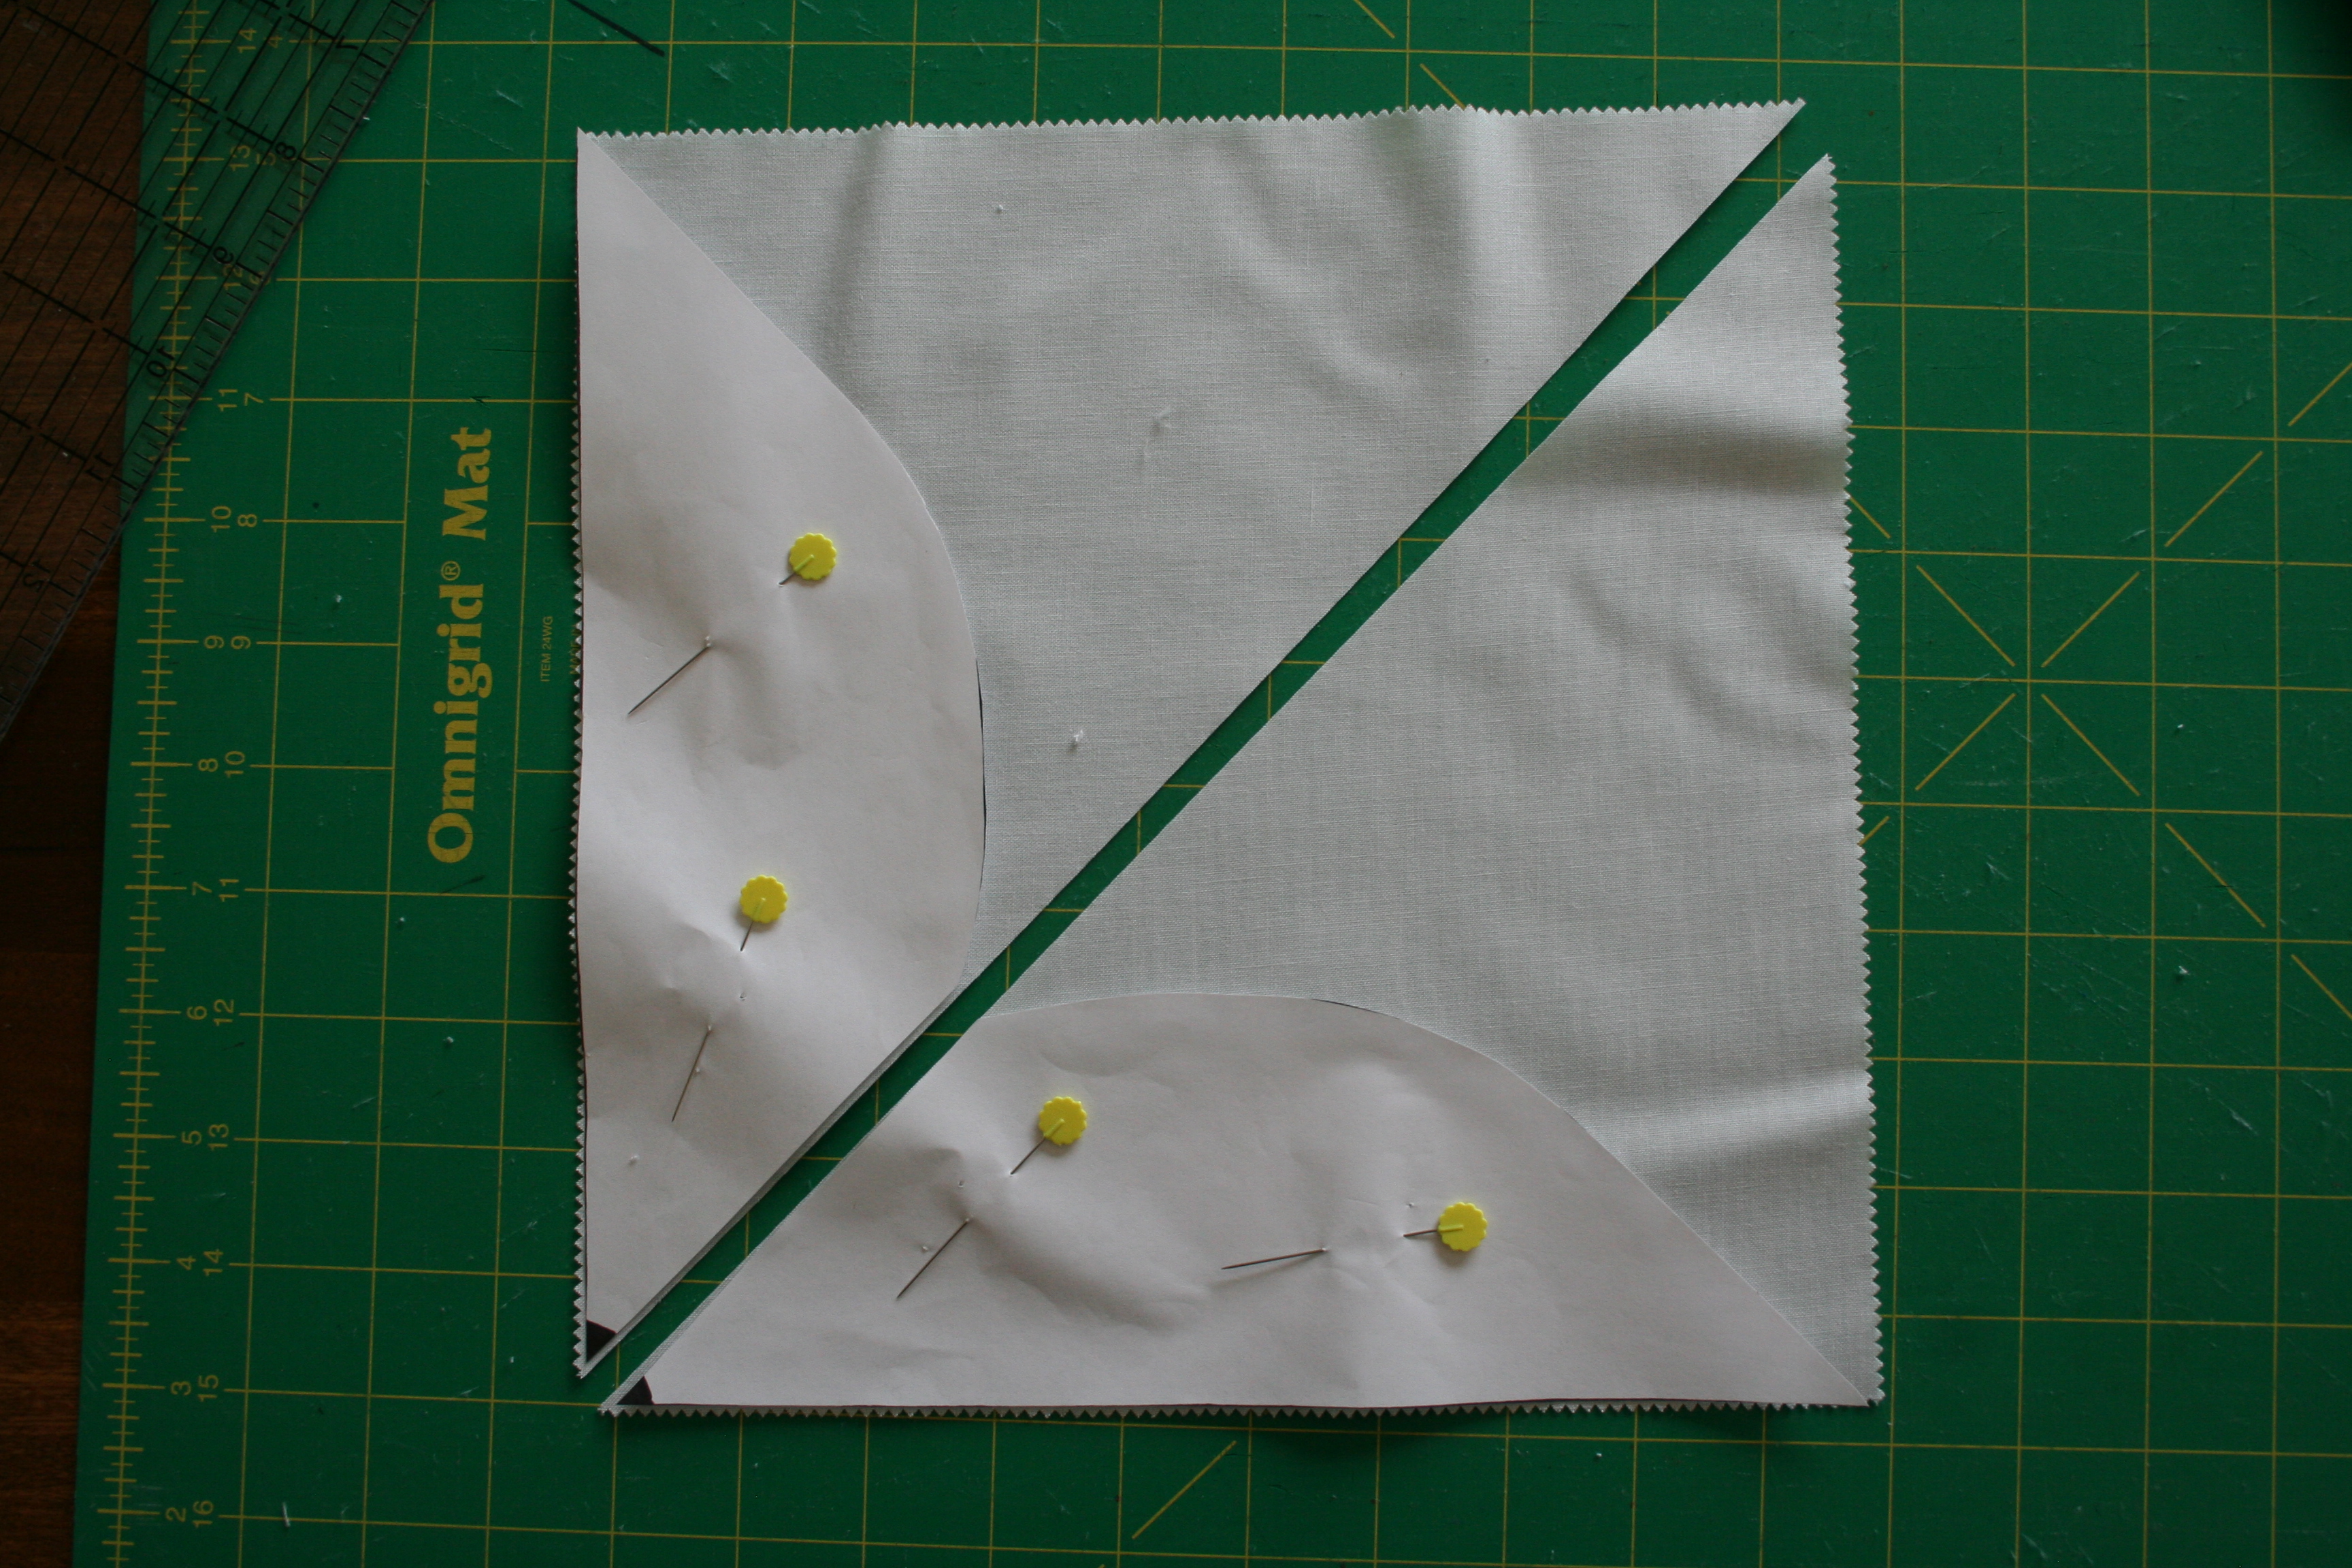
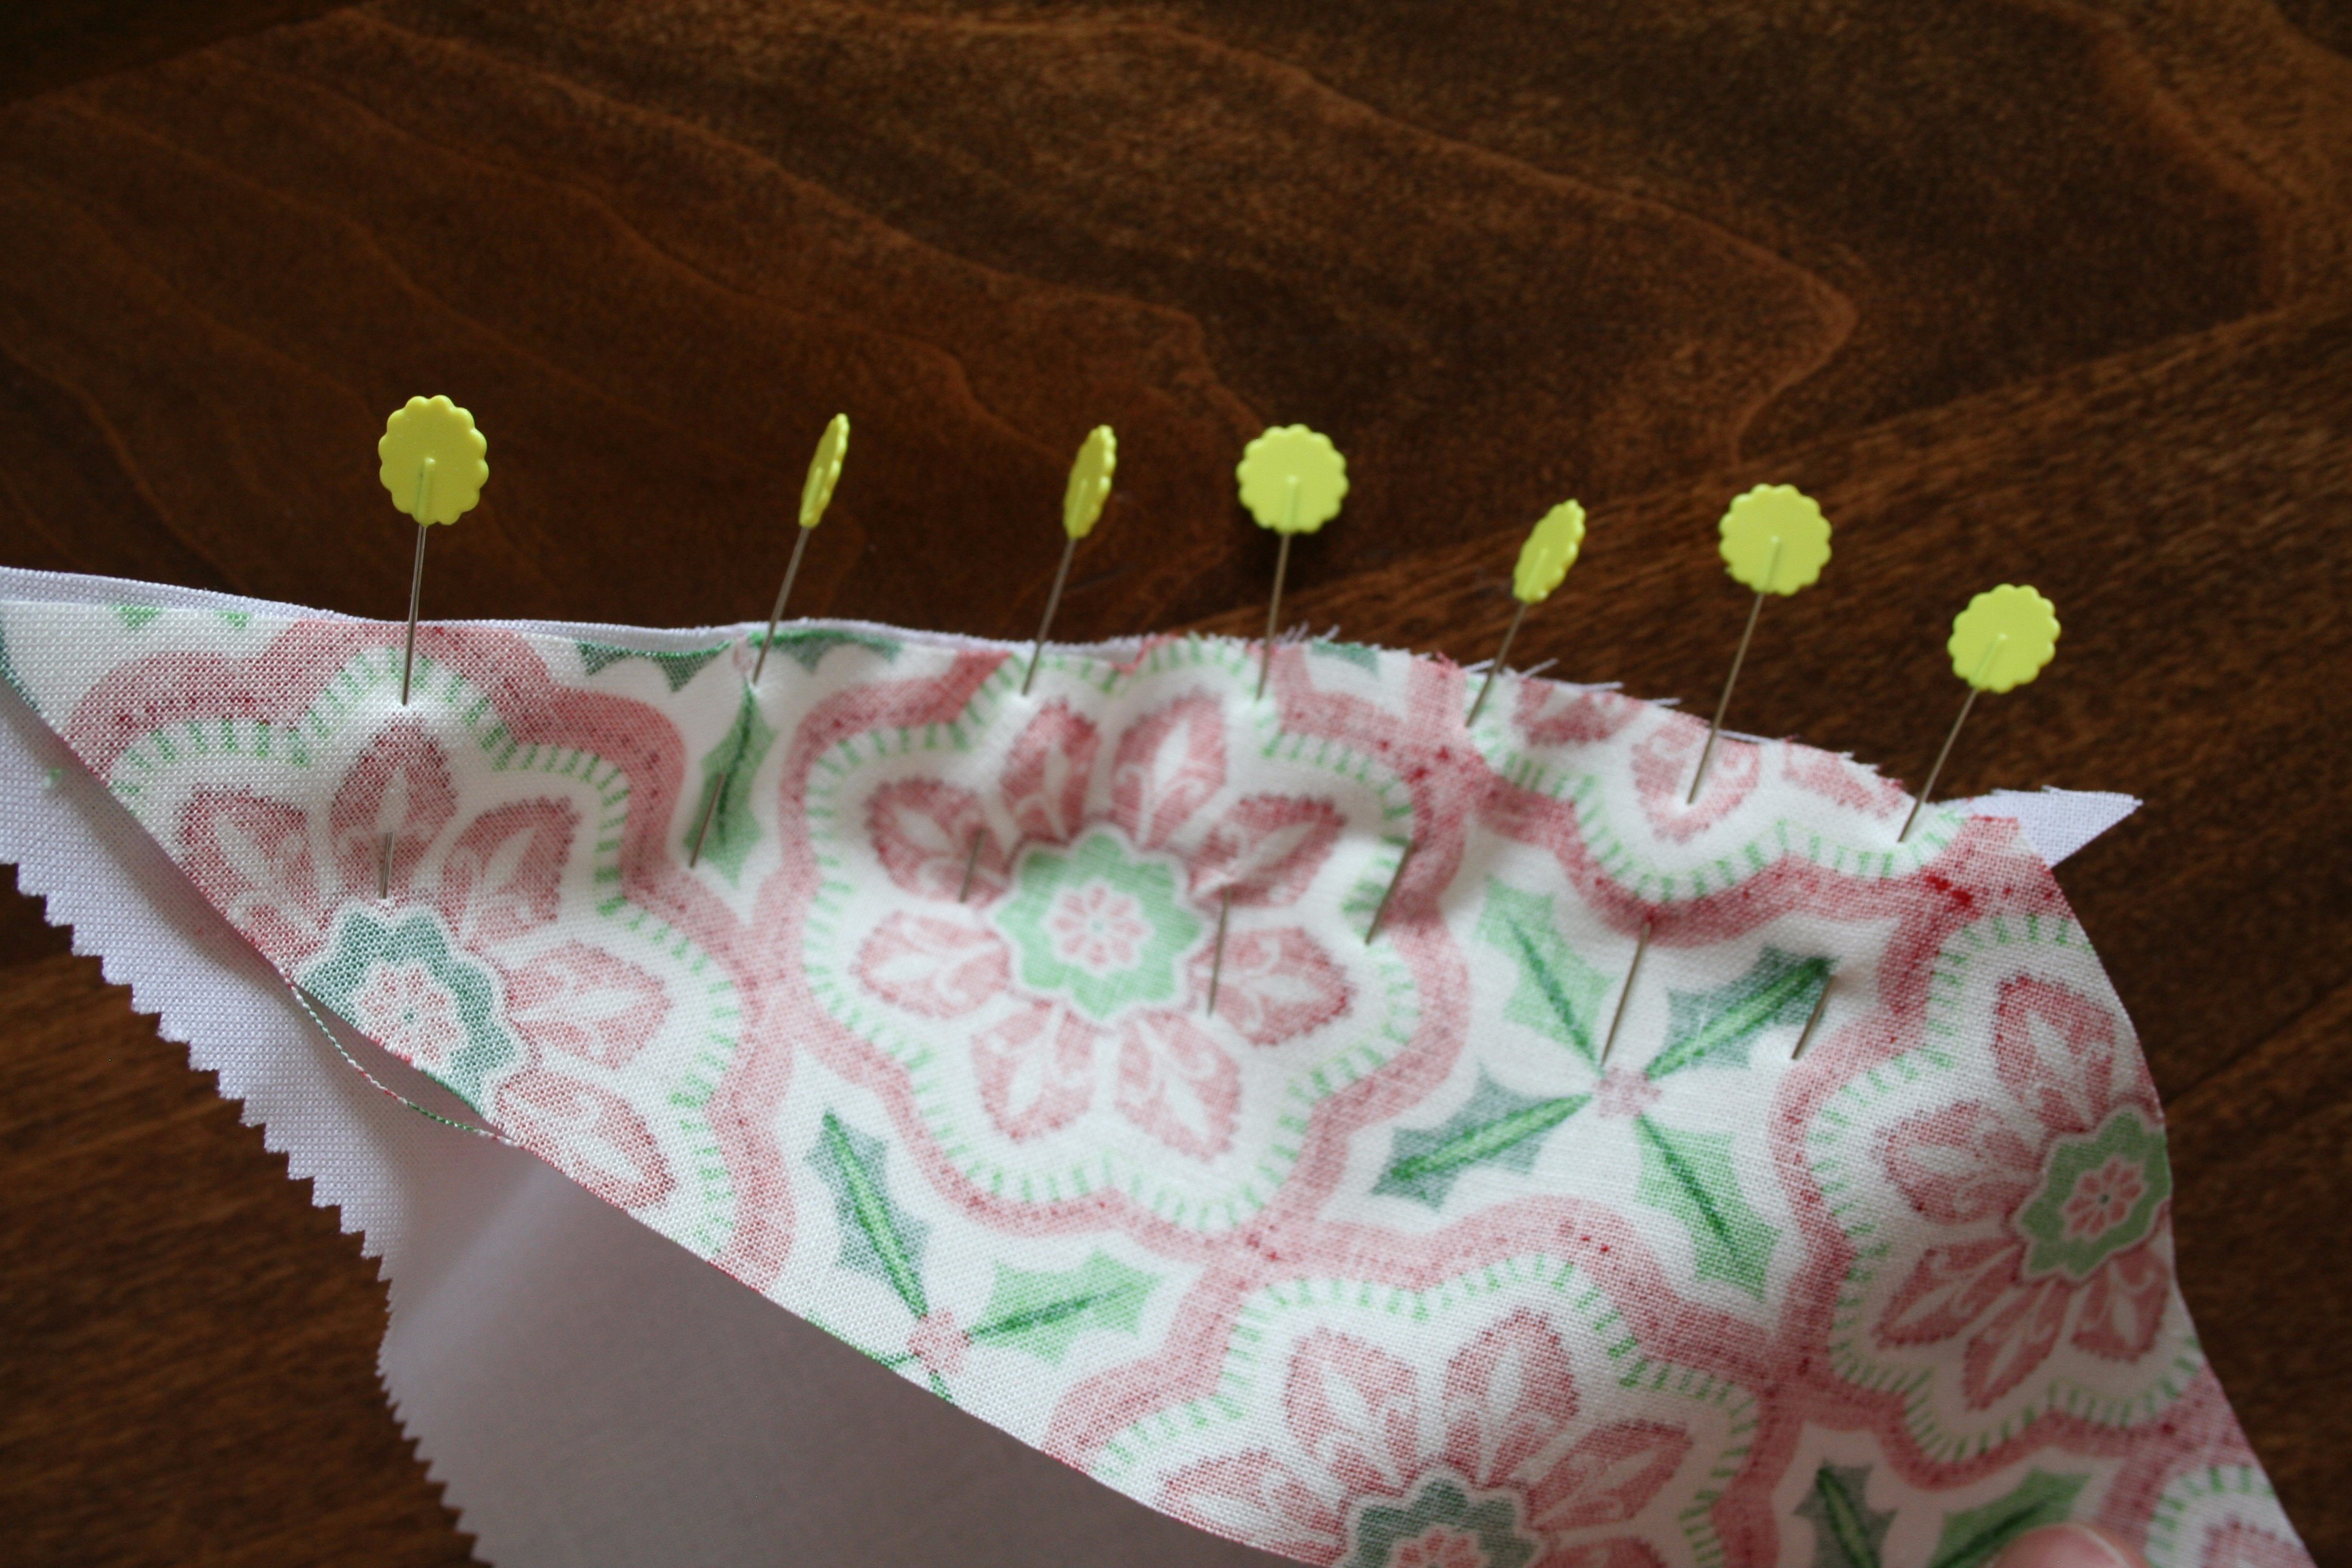
Now take your neutral template and place the little black triangles in the bottom left corner - then pin. Make sure to use the picture below to help you know you've oriented the template in the right way.

Using scissors or a rotary cutter, cut along the upper edge of the template. You can set aside the white petals to make a quilt with neutral petals on a patterned background, or just save them as scraps for another project. Continue cutting until you have 36 left side triangles and 36 right side triangles, with 72 all together. Note that the right side and left side triangles are different shapes, so be sure to keep them separate.
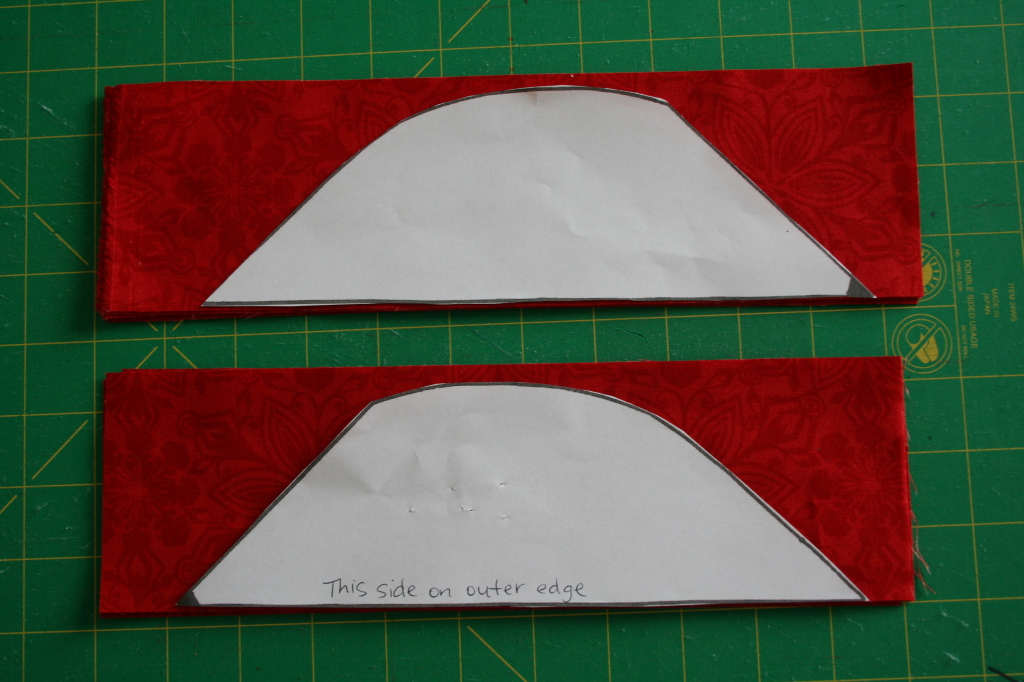
To cut your petals, iron each fat quarter, then cut 8 strips that are 3 1/4" x 10" as pictured below (or 3.25" x 10") 
Stack the strips 2 or 4 high (whatever you're more comfortable with) and lay the petal templates on each stack. The petals face different ways, so make sure yours look just like this before you start cutting. You don't want to have all just left sided, or all just right sided petals. Pin and cut with scissors.
Now cut 9 squares measuring 2.5" to use for the appliqued center diamonds along with 9 squares of sew-in interfacing (the non-sticky kind).
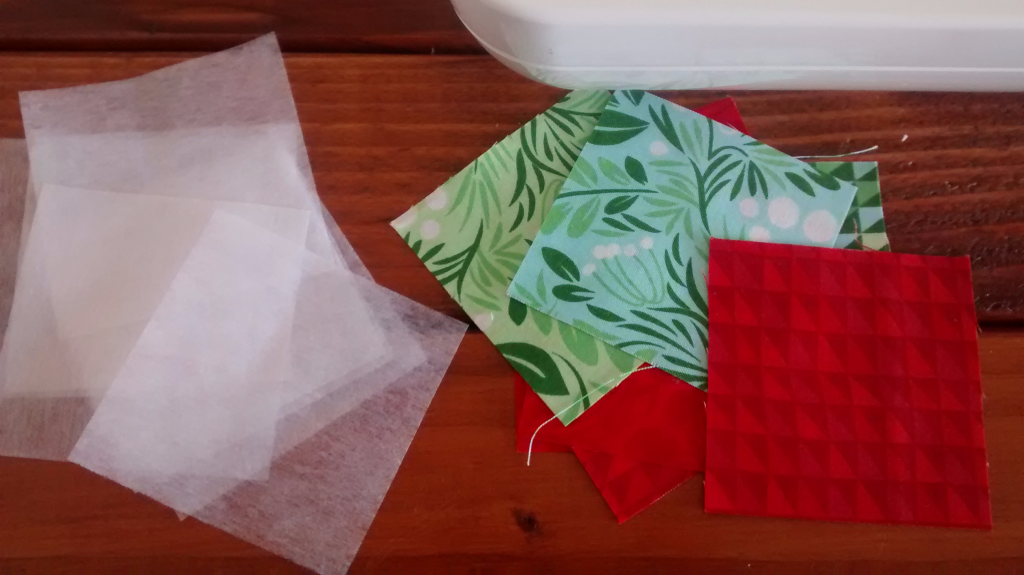
Last, you'll need the strips for and corner stones for sashing. From one fat quarter cut 16 corner stones measuring 2.5" square. (You could also make scrappy corner stones with your extra fat quarter fabric). Also, cut 24 strips for sashing measuring 2.5" x 16 inches. Now we're ready to start sewing.

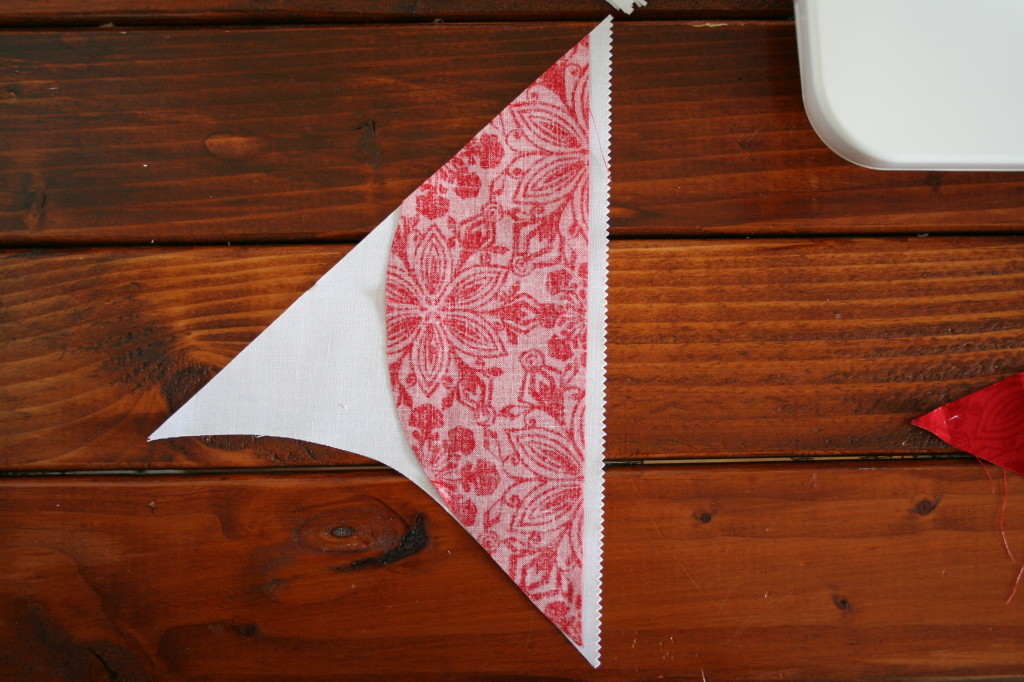
Lay our your right side petal and right side neutral triangle as pictured.
Now take the piece, and lay it right sides together, with the 10 inch sides 1/4 inch apart, as pictured. (Staggering the petal 1/4 inch from the side is important to create the points of your flower. If you were to lay the petal flush with the neutral triangle, you won't have pointed ends on your flower).
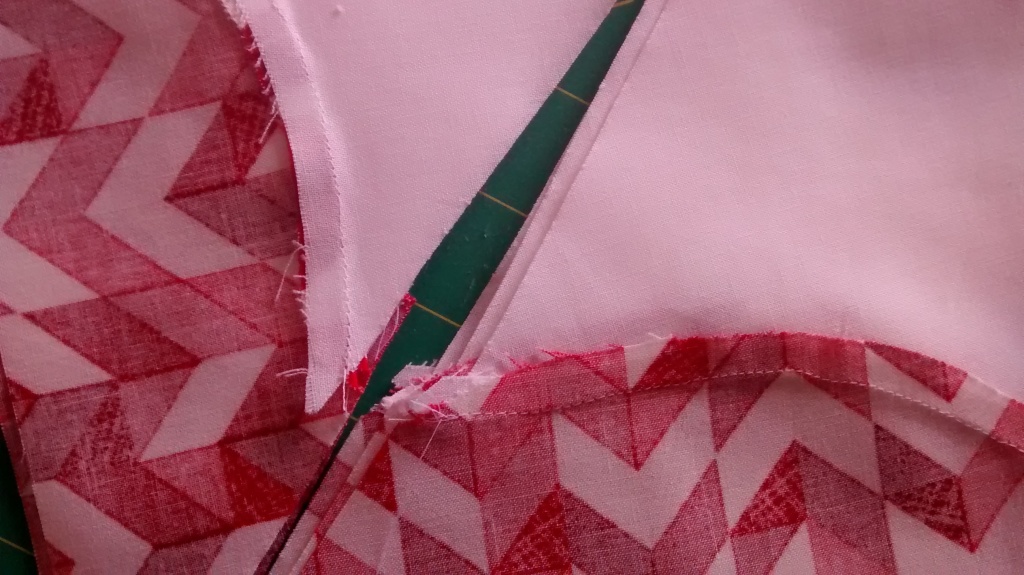
Remember that we're sewing the curved sides together, which is the dotted line in the picture below. You can start sewing on the bottom right where its easy, and then move the red petal fabric and work with it around the curve. I prefer to not pin and just go slowly easing the fabric around the curve.
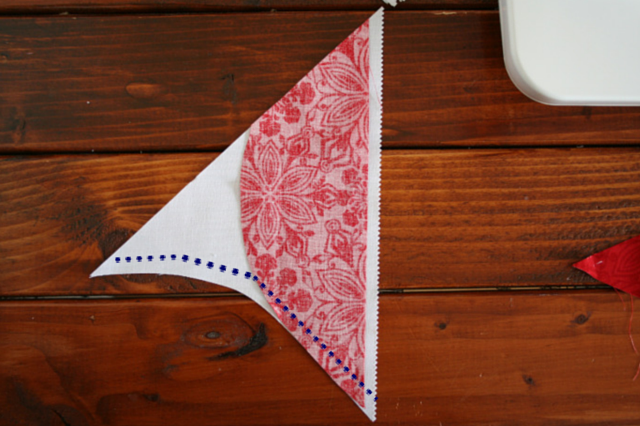
If easing it around the curve and going slowly isn't working for you, you can try pinning it to death. Here is the front view...

And the back view. Do this with all 72 petals and neutral pieces, being sure to keep right and left sides separate, so that your petals fit in like puzzle pieces.
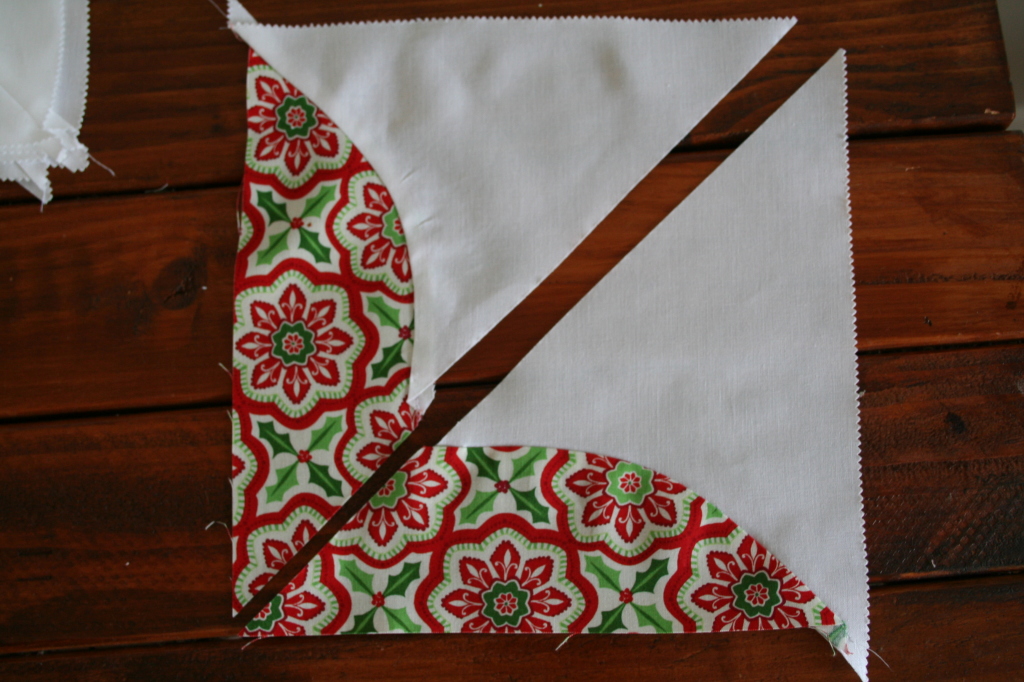
Iron one side of the petal toward the neutral fabric, and one towards the patterned fabric to prepare for nesting.
Lay these two pieces together, and pin where the seams nest. Sew triangles together to make a square.
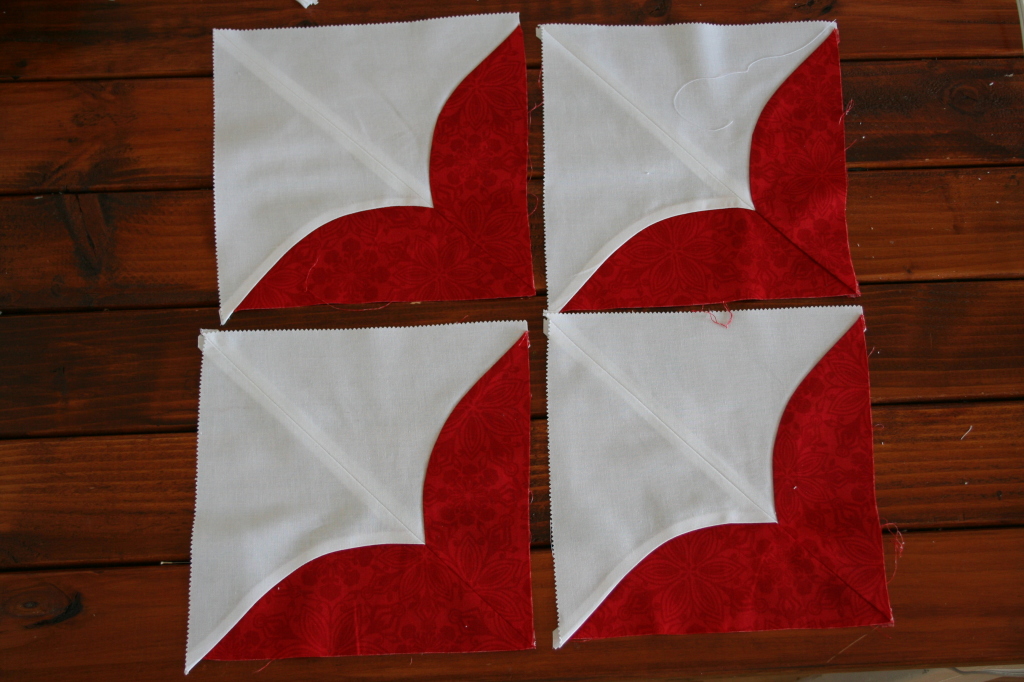
Next, be sure to square up your blocks. Each fat quarter should yield four squares as pictured below.
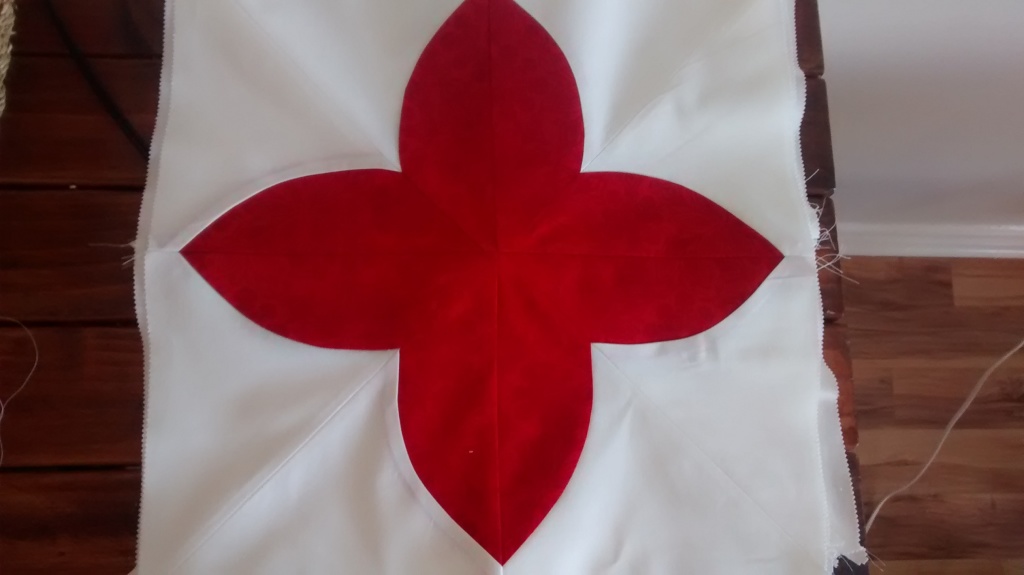
Arrange your blocks like this, and then sew the top two together. Then the bottom two, and join the strips down the middle. Now your first block should look like this:
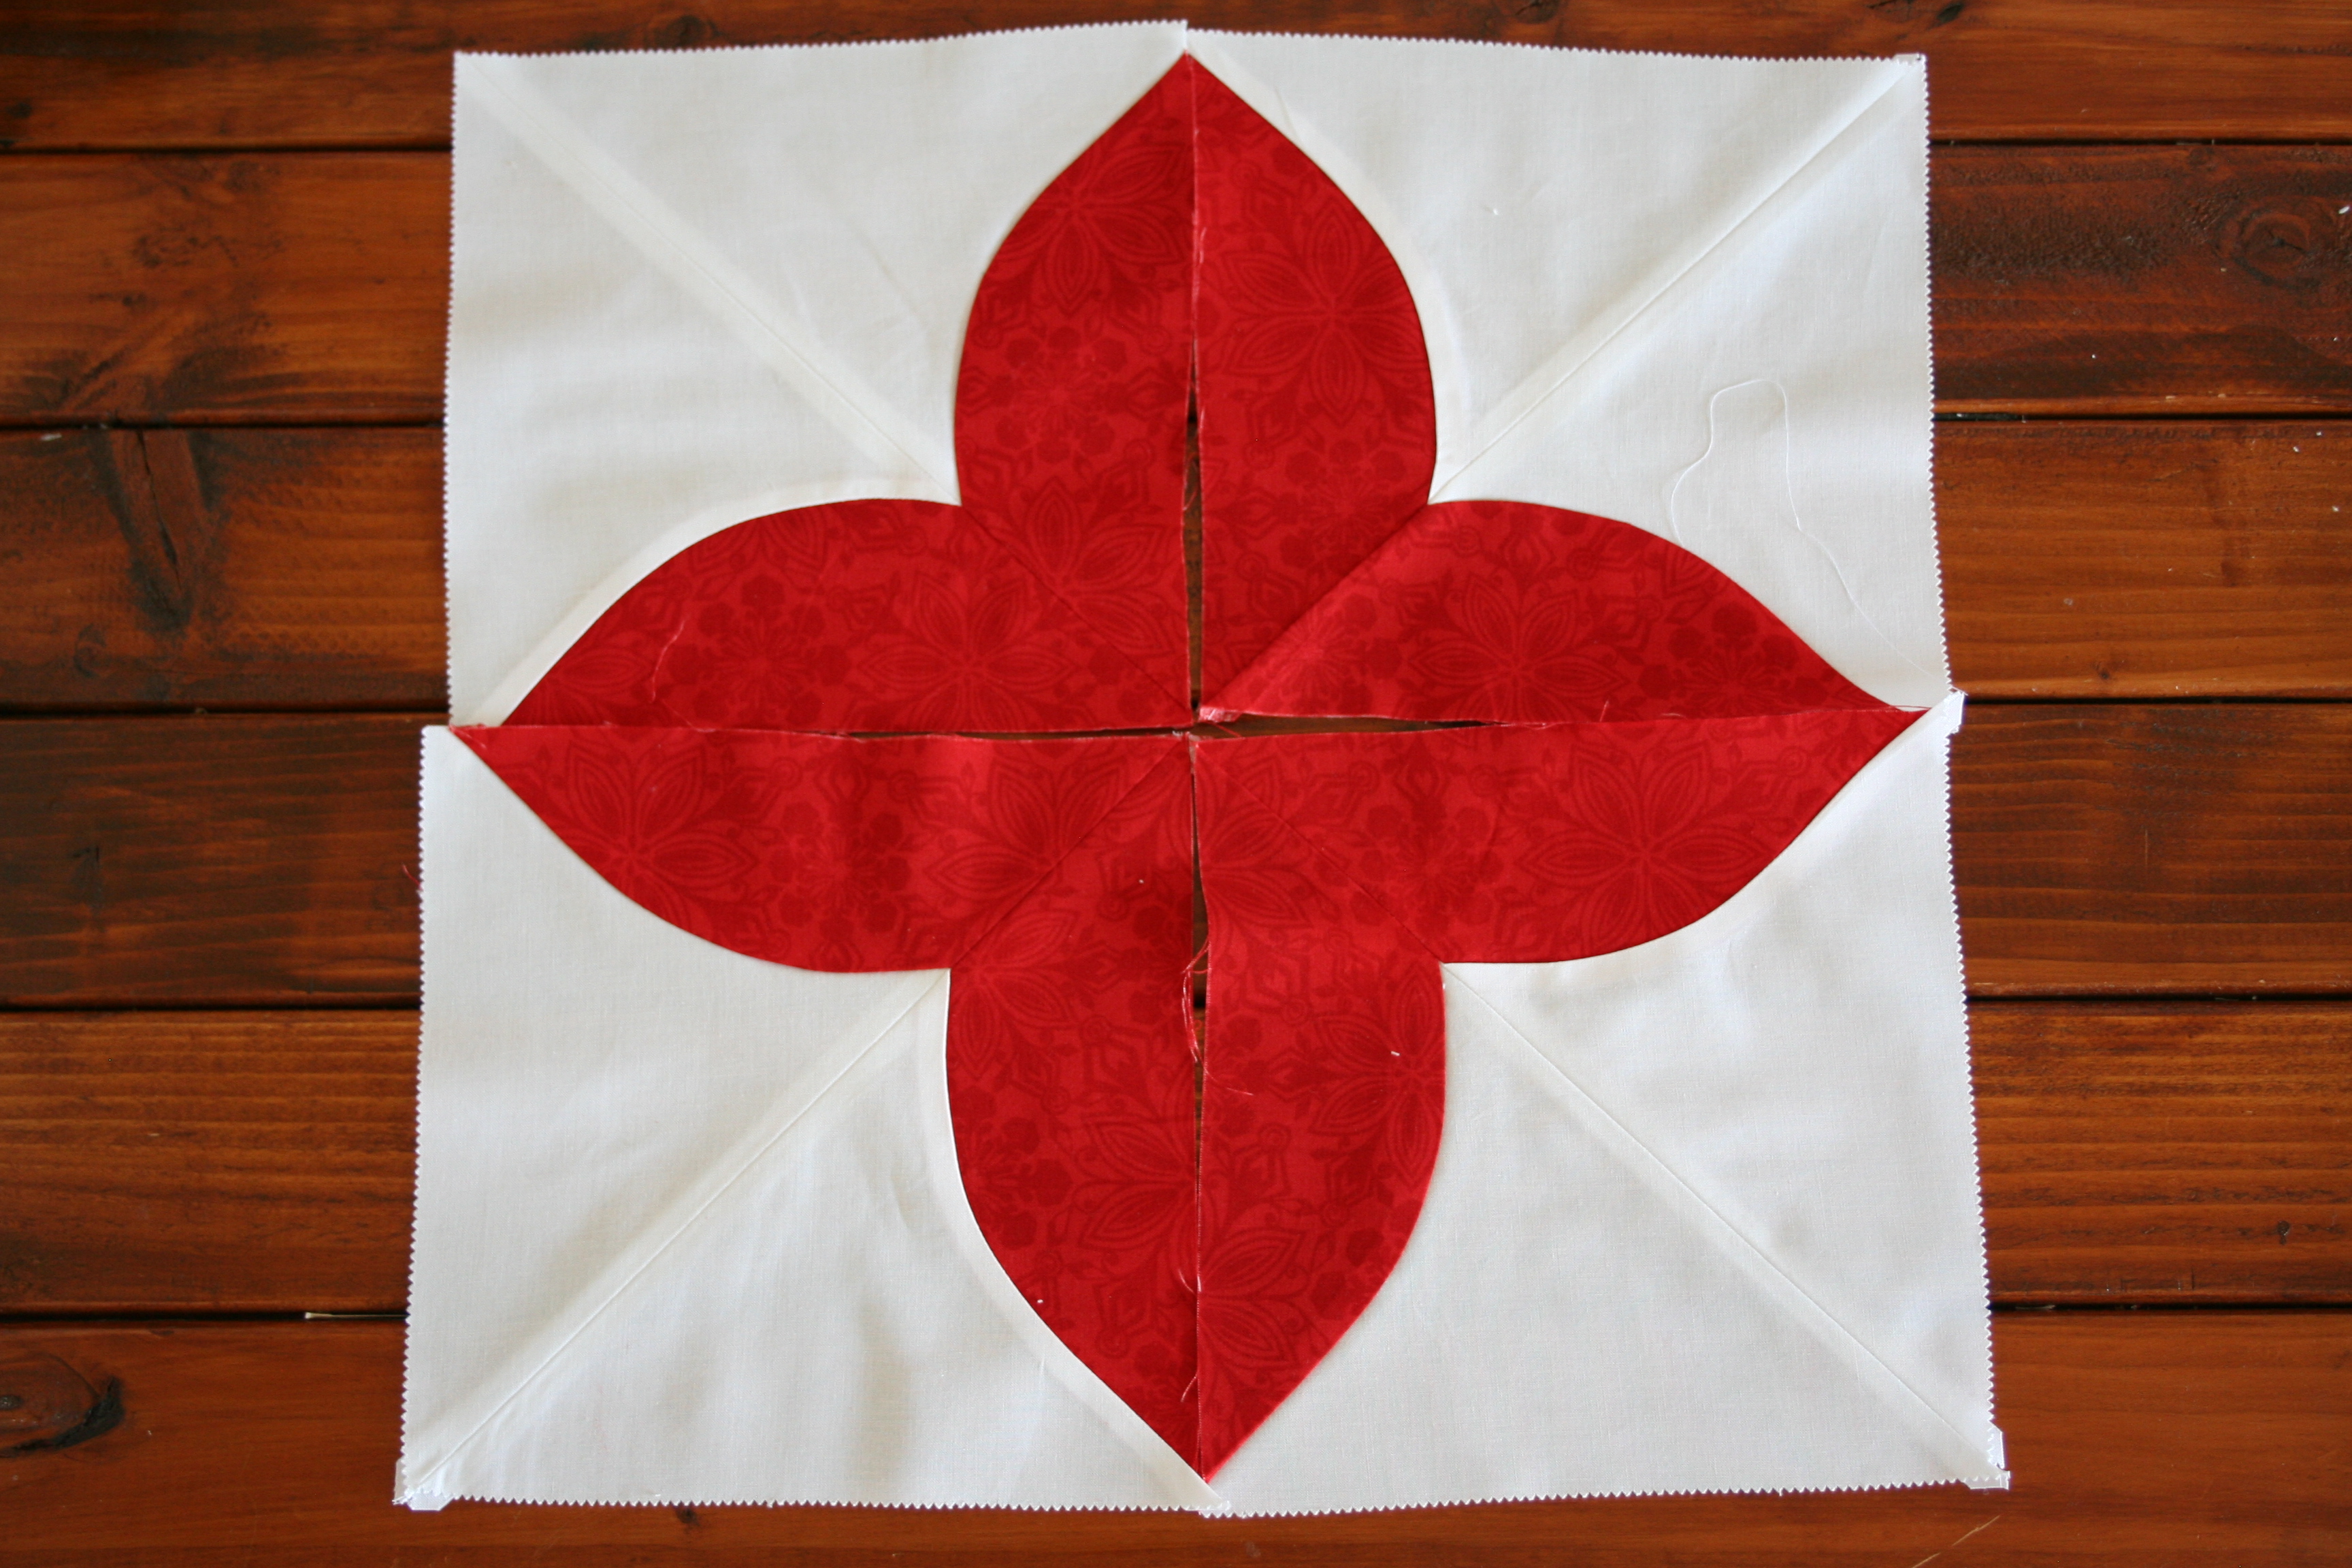
Repeat until you have 9 blocks to this stage. Note: Most of my blocks took a little more ironing than usual to help them lay flat. I found that with one block, I had to bring it back to the sewing machine and increase the seam allowance in a couple places to get the piece to lay flat. If this happens to you - don't be too hard on yourself. With the curves, there is more variability then with straight seams.
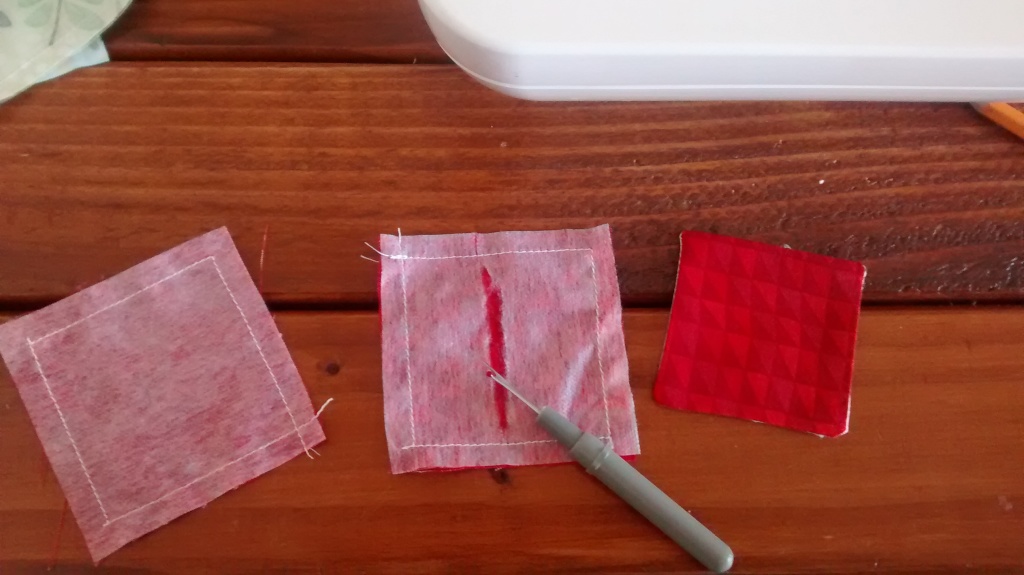
Now we'll make the diamonds to applique into the middle of your flower/star. I used sew-in interfacing for this step. This is an interfacing that you do not iron to make one side sticky. Its essentially just a really thin fabric. You'll need 9 squares (measuring 2.5") of the interfacing and the fabric.
Take one 2.5" square of the interfacing and one 2.5" square you cut from earlier. Sew a 1/4 inch seam around the entire edge. Carefully cut through the interfacing and turn it right sides out, and then push out the corners and iron it flat.
Use your preferred method of applique to sew the diamond in the center of your block. I just did a zig zag stitch around my little square. Now onto sashing!

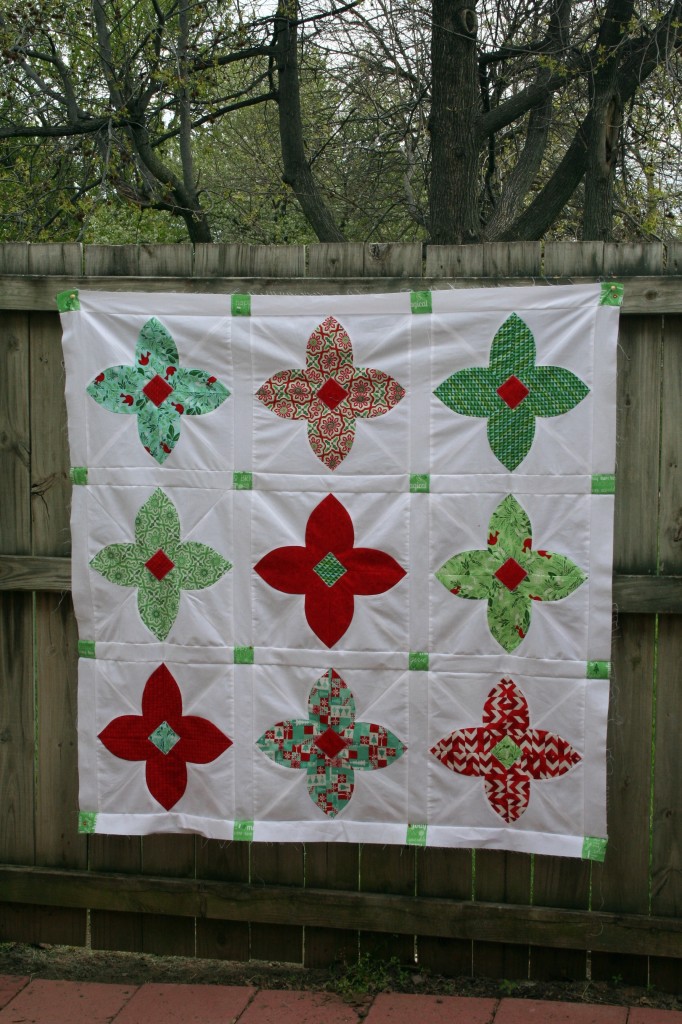
First, cut all your blocks down to 16 inches square (or as close as you can get them). Lay out your blocks on a design wall (or the kitchen floor...) Take you strips (2.5" x 16") and sew one to the right hand of each finished block, then sew them into rows of three. Add one more strip on the left hand side of each row.

Next take your corner stones and strips and sew four units that look like this:
Now sew one unit to the top of each row. Sew the rows together, and add one unit to the bottom of your quilt. It should now look like this:
If you need more help with sashing, this post and this video helped me with my first sashing projects. Now baste, quilt, and bind as desired.
![]()


Hope you enjoyed this tutorial. My quilt measures 53" square, but if you added a border, it could easily be 60" square. Let me know if you have any questions!
Lauren Terry
![]()
Posted in: