Welcome to Moda Fabrics!
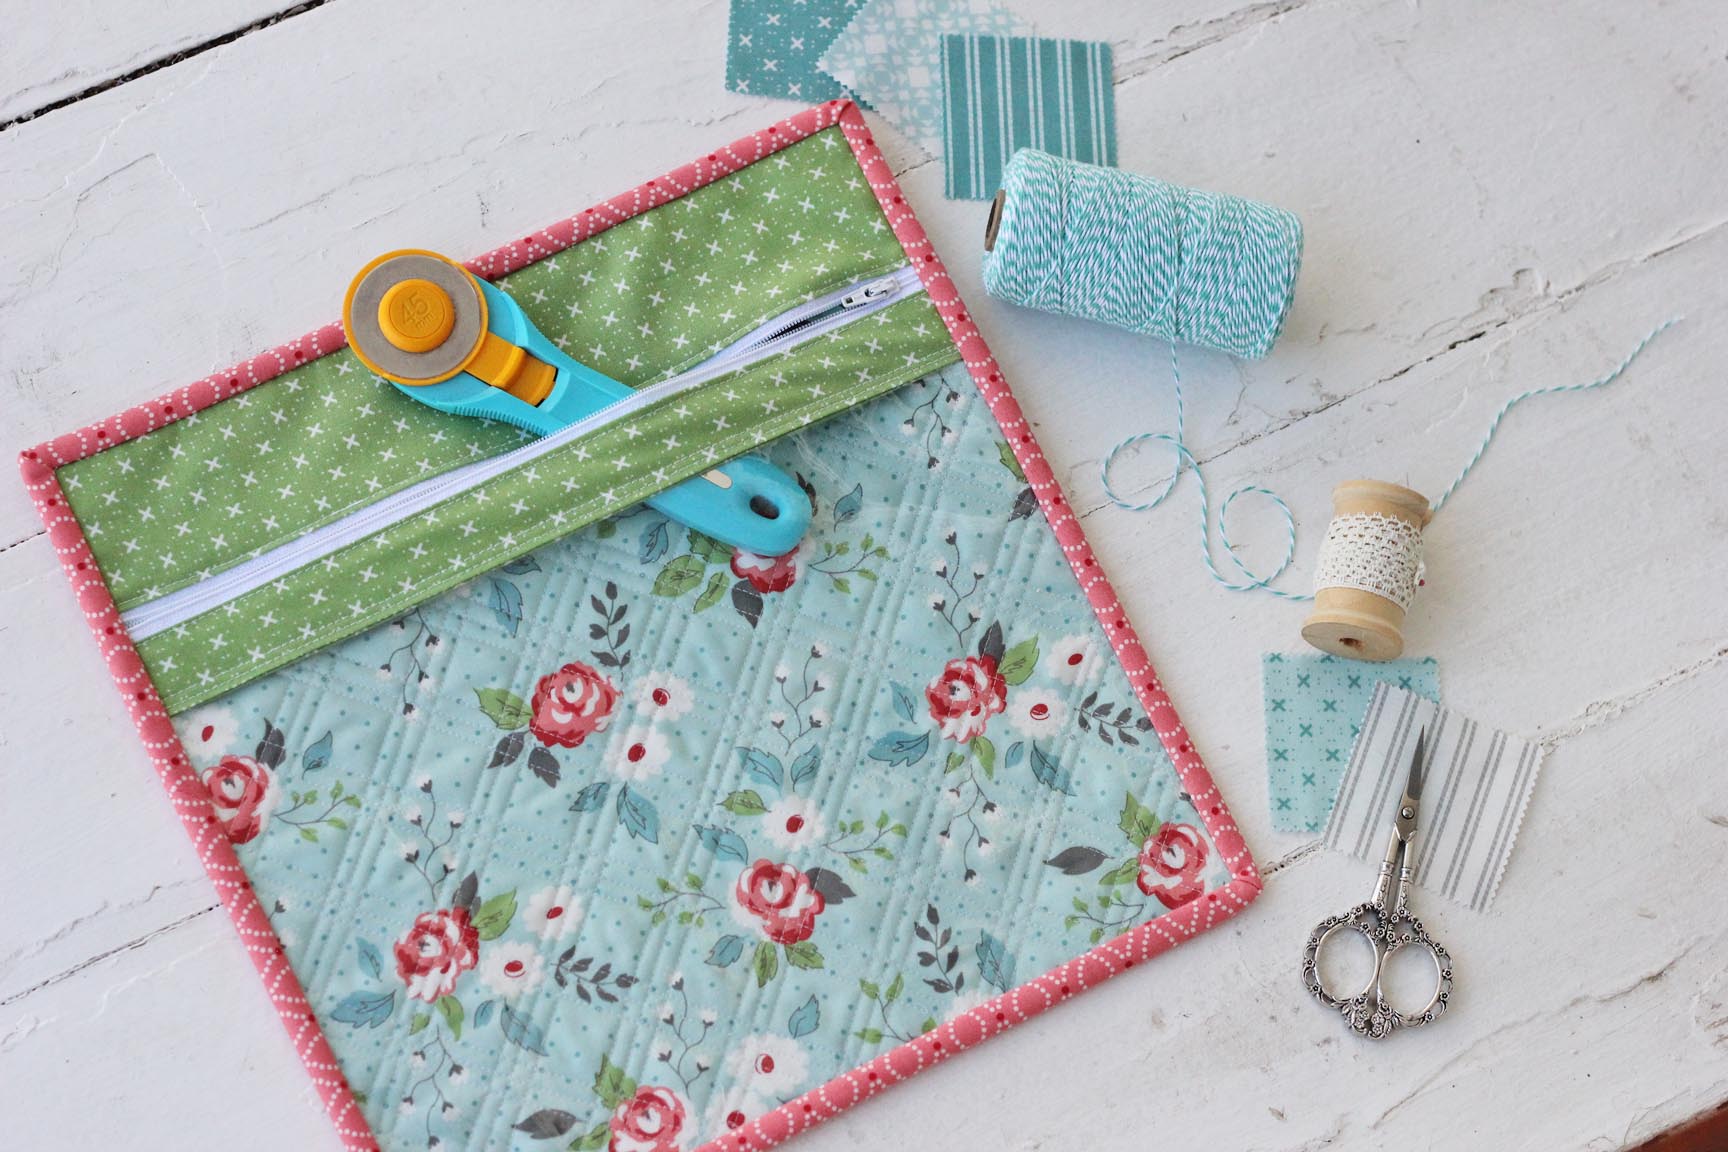
Vinyl Project Pouch
Vinyl Project Pouch
Published:
Mar 10 2018 - 23:00

![]()
Hi! It's Kristina from Center Street Quilts and today I'm sharing a fun way to use those darling mini charm packs we all love to collect. The Vinyl Project Pouch is a quick make that you'll love storing quilting accessories or projects in. If you've never sewn a zipper or with vinyl before, please don't get scared off! I've given step-by-step photos that will guide you through it all.
The Vinyl Project Pouch finishes at 12" x 12".
![]()
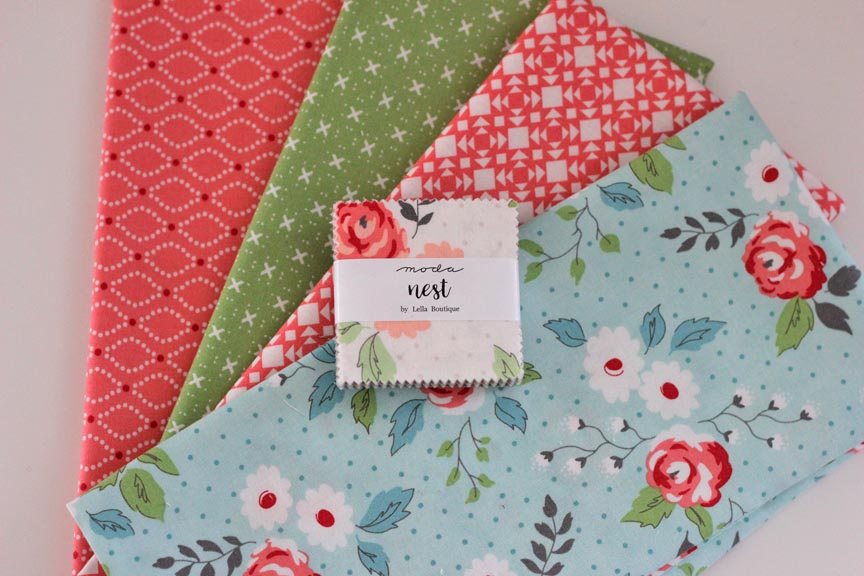
1 Mini Charm Pack {Nest by Lella Boutique}
2 Fat quarters of coordinating fabric (each a different print)
1/4 yard binding fabric
![]()
14" x 14" piece of batting
14" x 9" piece of heavy vinyl
14" or longer zipper
![]()
Before you begin:
- Read through the entire tutorial
- All seam allowances are 1/4"
Cutting Instructions:
- From one of the fat quarters, cut a 15" x 15" piece.
- From the other fat quarter, cut a 14" x 6" piece and a 14" x 4" piece.
- From the binding fabric, cut (2) 2.5" x width of fabric pieces.
Assembly Instructions:
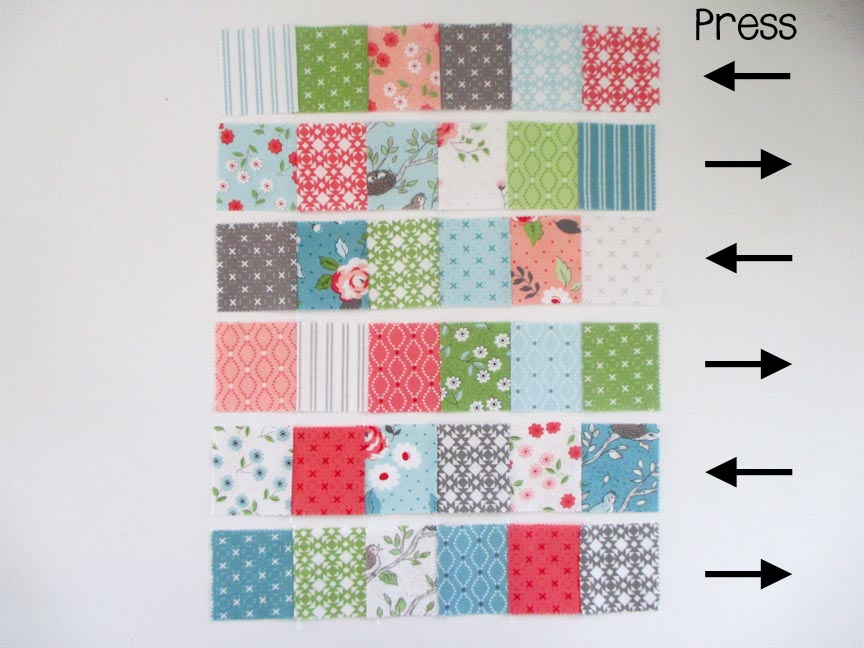
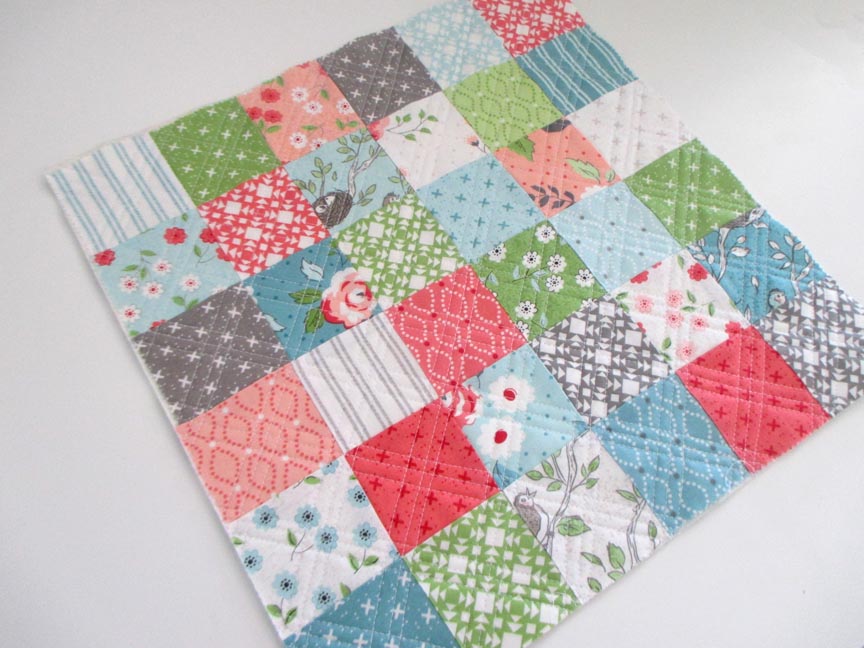
Choose 36 of the mini charm squares (2.5" x 2.5" squares) from your mini charm pack and organize them into a 6 x 6 grid.

Assemble each row and alternate the direction you press each row, as shown in the image below.
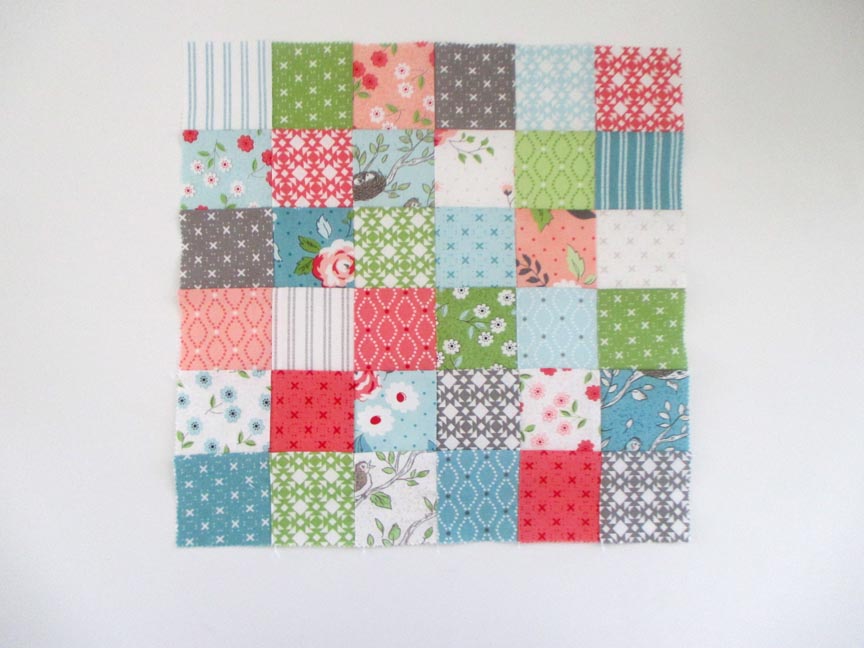
Sew the six rows together and press all the seams down. The patchwork mini charm piece should measure 12.5" x 12.5", but with all the seams involved, it's not uncommon to have it measure a little bigger or smaller. It's not a problem at all if yours is off by a little.
Layer the patchwork mini charm piece into a quilt sandwich with the 15" x 15" fat quarter piece as the "backing" and the 14" x 14" batting in between. Make sure the "backing" fabric is facing right side out.
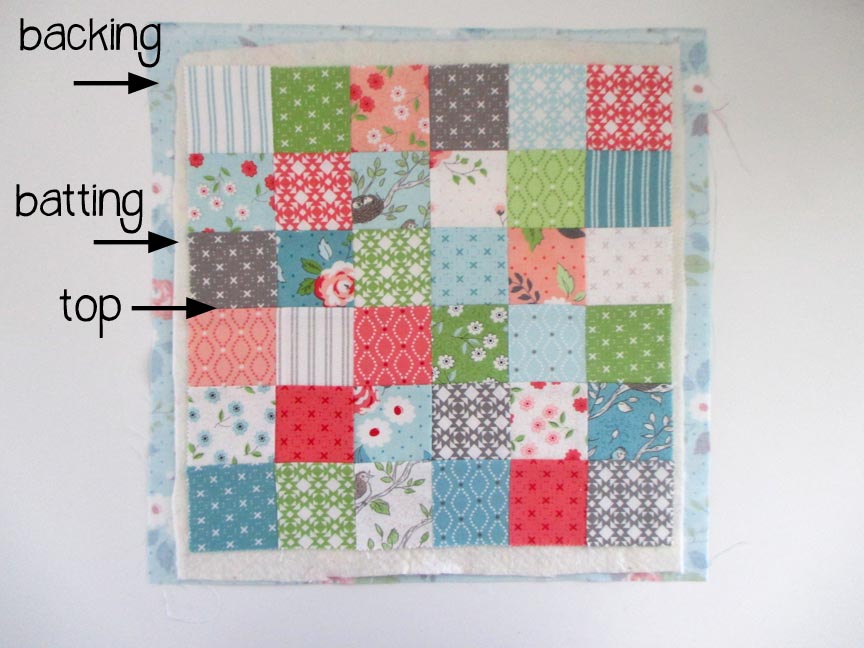
Quilt as desired then trim the backing and batting to match the width and height of the mini charms patchwork piece.

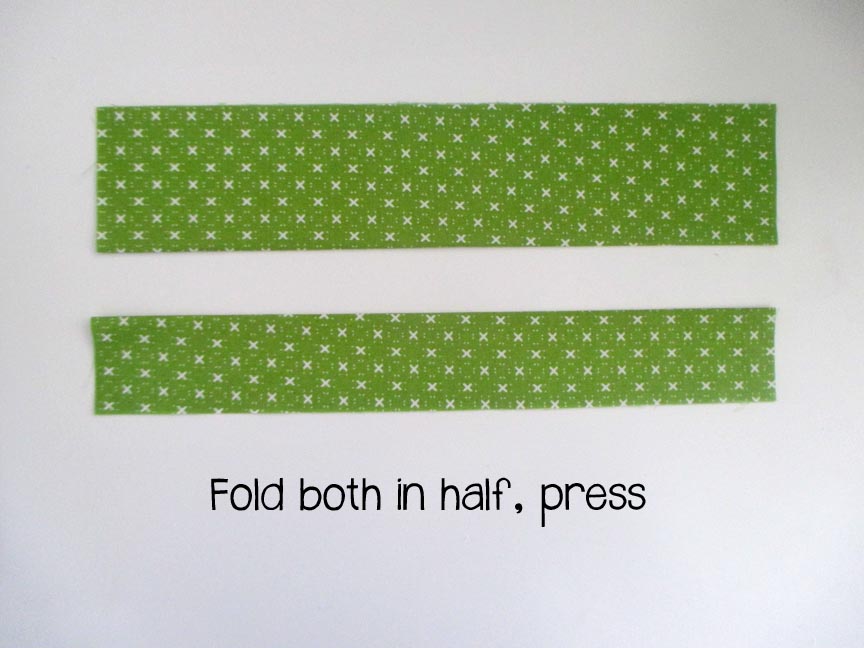
Gather the 14" x 6" and 14" x 4" pieces.

Fold both of them in half the long way and press.
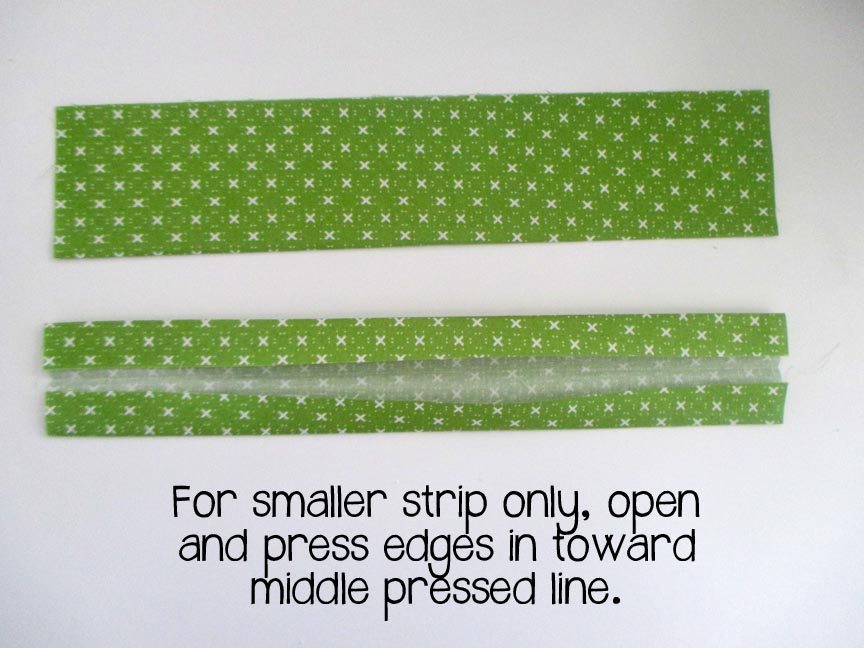
Leave the larger strip as is. For the smaller strip, open it back up, fold both of the raw edges in so they are almost touching the middle line pressed above and press the two new folds.
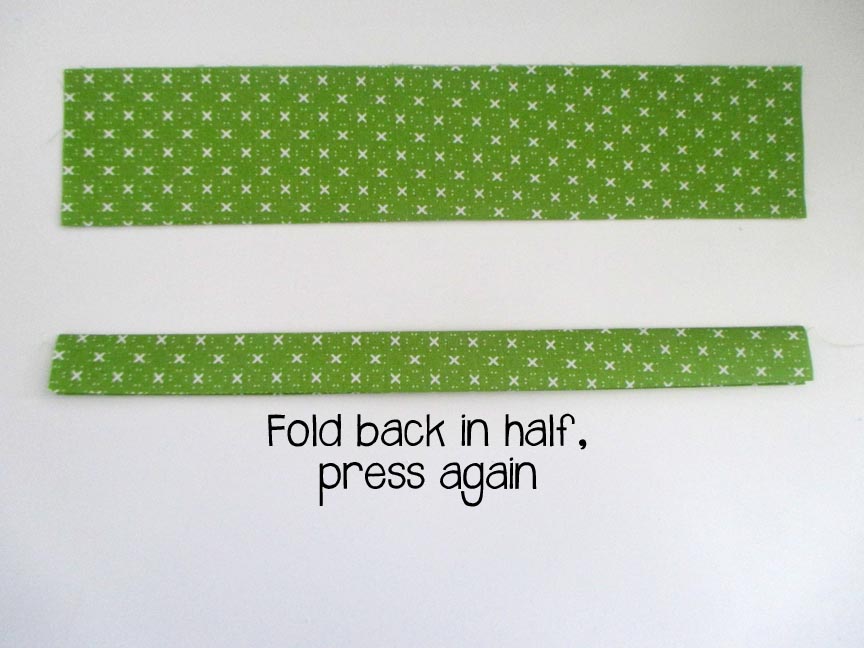
Fold the strip back in half at the original pressed line, with the raw edges tucked inside, and press again.
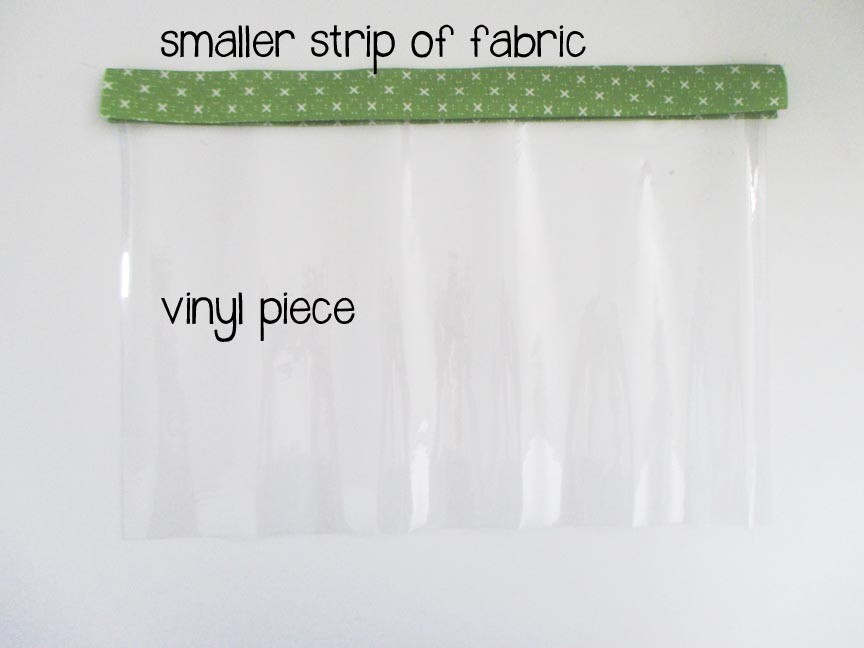
Gather the 14" x 9" vinyl piece and slip it in between the two layers of the fabric piece.
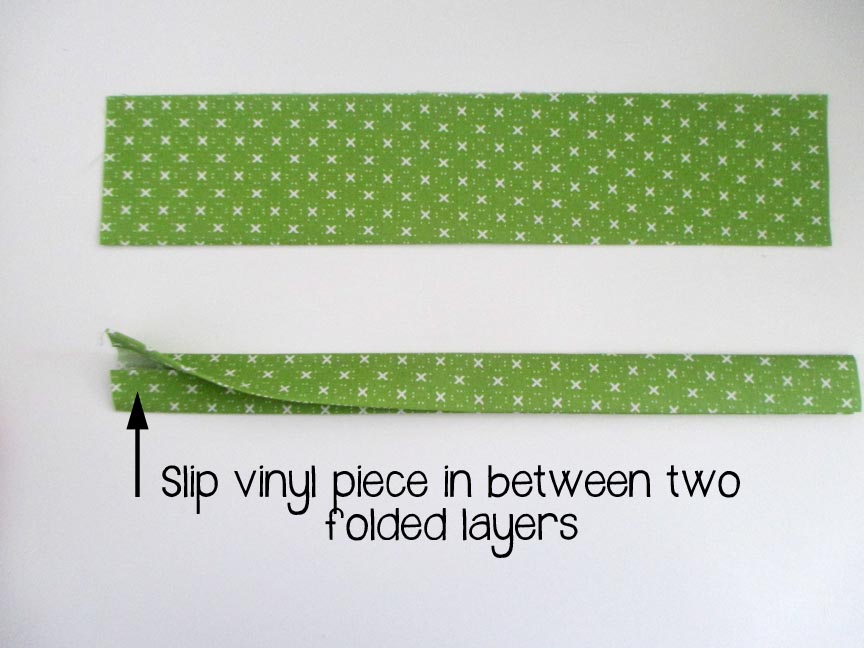
Below, you can see the vinyl piece inserted into the strip of fabric. Insert it all the way into the fabric strip, so the edge of the vinyl is up against the middle pressed seam.
Slowly stitch a line about 1/4" away from the edge of the fabric to secure the vinyl in place. Note: When working with vinyl, I stitch slowly and try to keep the vinyl from touching the presser foot and feed dogs if at all possible. Below, I stitched the first line just far enough away from the vinyl so the presser foot wasn't sliding/catching on the vinyl at all. Once everything was stitched in place, I went back and sewed another stitched line closer to the fabric edge to make sure that folded fabric edge was secure and wouldn't flap around.

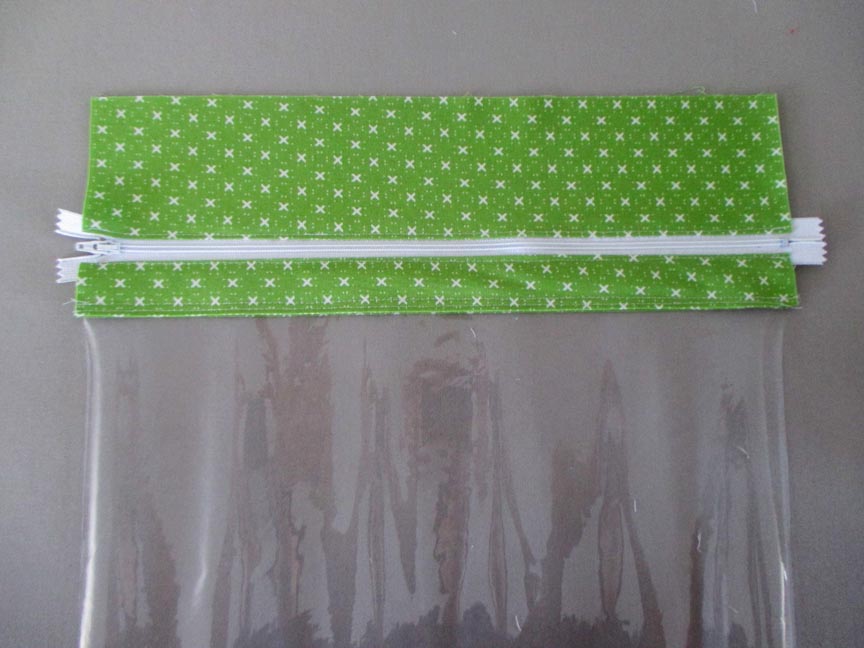
Gather the zipper and place the two fabric strips so they are centered on top of the zipper. The top fabric strip should have the folded/pressed edge by the zipper and the raw edges at the top. The zipper needs to be longer than the fabric strips--it can be just barely longer (as shown), or much longer if that's what you have on hand.

Sew the top fabric strip right to the zipper tape. Again, the folded edge of the fabric strip should be the edge you are sewing to the zipper. I like to leave a little room between the fabric and the teeth of the zipper and then sew the stitch line about 1/8" away from the edge of the fabric.
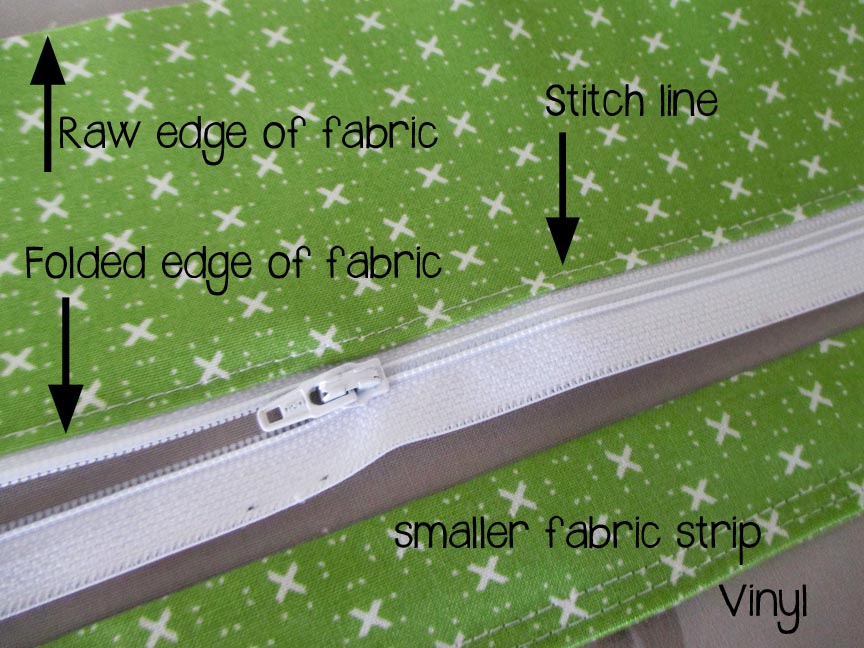
Repeat with the smaller fabric strip that is attached to the vinyl. Sew it directly on top of the zipper tape, making sure that the fabric is centered on the zipper.
Gather the patchwork mini charms quilted piece and lay it with the mini charms facing down. Layer the zipper and vinyl piece on top of the quilted piece so their top edges align and the zipper pull is facing up. There will be some of the fabric, zipper, and vinyl hanging over the left, right, and bottom edges of the quilted piece. Move the zipper pull to the middle of the fabric strips. This step is very (!!) important so the zipper pull doesn't get cut off with the rest of the overhanging materials.

Keeping the top edges aligned, flip the entire piece over and trim off any of the excess fabric, zipper, and vinyl from the bottom layer. I like to use a ruler and an old rotary cutter blade to get an even edge.

Turn the piece back over and make sure all of the edges are lined up. Place some pins in the top fabric/zipper section to secure everything in place. You can put pins in the bottom corners to secure the vinyl to the bottom layer also, but make sure they are only 1/8" away from the edges so any holes in the vinyl made by the pins will be covered by the binding.

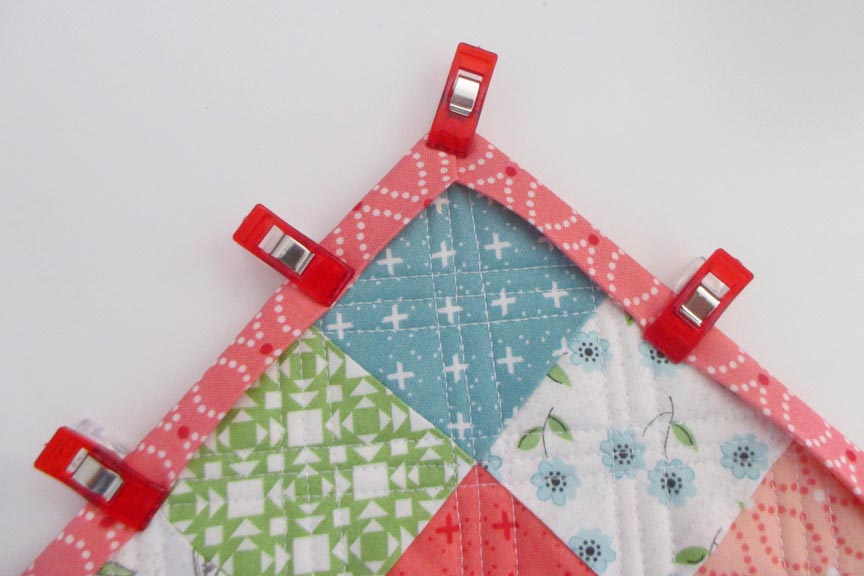
Sew the two binding strips together to make one long 2.5" strip. Fold the strip in half so it is 1.25" wide and press it. Attach the binding onto the zipper/vinyl side as you would with a quilt, stitching slowly and removing the pins as you go.

Below shows the binding attached.
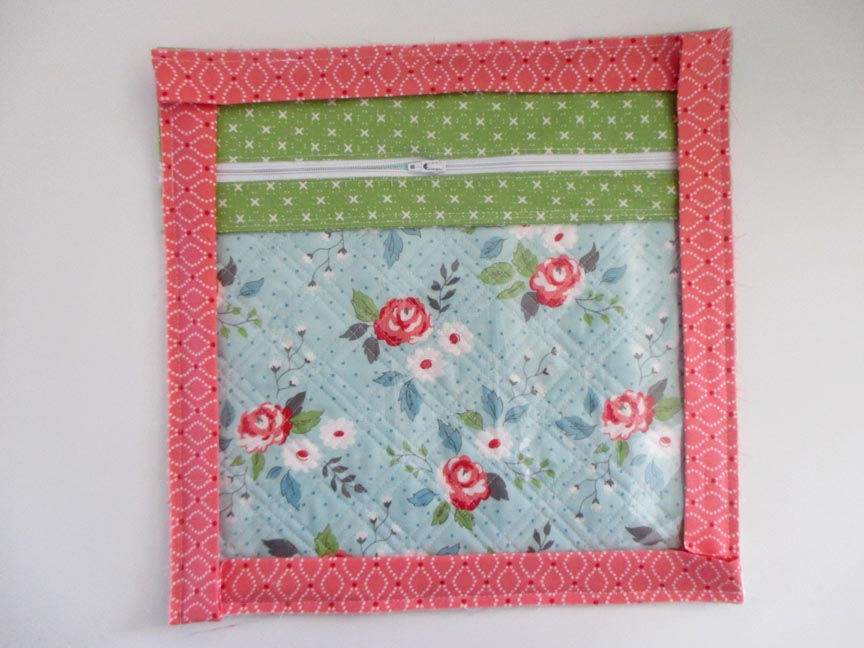
Turn the edges of the binding over to the patchwork mini charms side and handstitch into place. I like to use binding clips to hold the binding in place as I'm stitching it.
![]()
The Vinyl Project Pouch finishes at 12" x 12".
And it looks just as cute from the back as it does from the front! :)

Thanks for following along with my Vinyl Project Pouch tutorial! The hardest part will be stopping after making just one. ;) If you make your own Vinyl Project Pouch, please share with me on social media by using the hashtags #centerstreetquilts and #vinylprojectpouch, as I would love to see your creations! You can also follow along with more of my quilting adventures on my Center Street Quilts blog HERE, instagram HERE, or facebook HERE. Thanks and happy sewing!
Kristina Brinkerhoff
{Center Street Quilts}
![]()
Posted in:
Comments